0002 Django工程创建
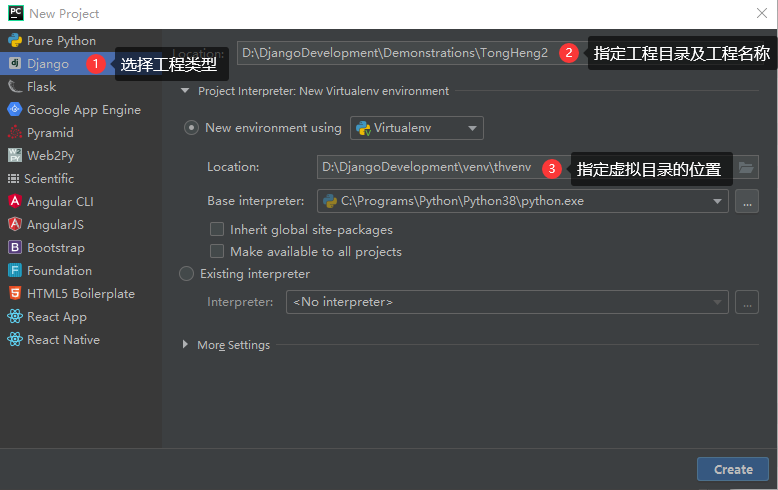
1 创建一个目录,用于专门存放Django工程的虚拟环境
PyCharm默认虚拟环境在工程内,从而导致打包的时候,会把虚拟环境一起打包。
同时,虚拟环境中的插件较多,一个工程创建了一个虚拟环境,以后,其它的工程可以共享这个虚拟环境。
2 打开PyCharm,选择创建Django工程。
3 安装pip
pip在开发环境中已安装,但在虚拟环境中PyCharm只安装了开发环境中的相应版本的Django,而没有安装pip,故虚拟环境中需要重新安装。
安装方法同样是在pypi.org上下载一个pip-20.0.2包,用7Zip解压后,进入目录执行:python setup.py install
4 安装工程插件
开源软件官方网站几乎都在国外,速度慢,为了提交效率,一般用国内镜像源安装。
国内镜像源很多,以下使用清华镜像源。地址为:https://pypi.tuna.tsinghua.edu.cn/simple
4.01 安装DRF框架(即djangorestframework框架)
DRF框架是基于Django框架之上的一个框架。
pip install -i https://pypi.tuna.tsinghua.edu.cn/simple djangorestframework
4.02 python3 安装操作mysql数据库的包
pip install -i https://pypi.tuna.tsinghua.edu.cn/simple --upgrade mysqlclient
4.03 添加django-fitlter扩展来增强支持
pip install -i https://pypi.tuna.tsinghua.edu.cn/simple django-filter
4.04 自动生成接口文档
pip install -i https://pypi.tuna.tsinghua.edu.cn/simple coreapi
4.05 安装Markdown插件
Markdown插件主要用于把文本渲染成HTML格式。此处主要用于对coreapi中注释文本换行。
pip install -i https://pypi.tuna.tsinghua.edu.cn/simple Markdown
4.06 安装图像处理库
pip install -i https://pypi.tuna.tsinghua.edu.cn/simple Pillow
4.07 安装Redis工具包
pip install -i https://pypi.tuna.tsinghua.edu.cn/simple redis
4.08 安装redis缓存工具包
pip install -i https://pypi.tuna.tsinghua.edu.cn/simple django-redis
4.09 安装异步处理工具包
pip install -i https://pypi.tuna.tsinghua.edu.cn/simple celery
4.10 win10下面启动celery需要安装eventlet包:
pip install -i https://pypi.tuna.tsinghua.edu.cn/simple eventlet
4.11 安装跨域CORS
pip install -i https://pypi.tuna.tsinghua.edu.cn/simple django-cors-headers
4.12 安装Json Web Token认证
pip install -i https://pypi.tuna.tsinghua.edu.cn/simple djangorestframework-jwt
4.13 安装itsdangerous生成凭据access_token
pip install -i https://pypi.tuna.tsinghua.edu.cn/simple itsdangerous
4.14 安装缓存扩展
pip install -i https://pypi.tuna.tsinghua.edu.cn/simple drf-extensions
4.15 安装xmltodict工具包
pip install -i https://pypi.tuna.tsinghua.edu.cn/simple xmltodict
4.16 安装xadmin包
pip install -i https://pypi.tuna.tsinghua.edu.cn/simple future

pip install -i https://pypi.tuna.tsinghua.edu.cn/simple six

pip install -i https://pypi.tuna.tsinghua.edu.cn/simple httplib2

pip install -i https://pypi.tuna.tsinghua.edu.cn/simple django-import-export
4.17 安装微信插件
pip install -i https://pypi.tuna.tsinghua.edu.cn/simple wechatpy

pip install -i https://pypi.tuna.tsinghua.edu.cn/simple cryptography
4.18 让django restfull支持xml解析
pip install -i https://pypi.tuna.tsinghua.edu.cn/simple djangorestframework-xml
4.19 安装腾讯云短信SDK
pip install qcloudsms_py
4.20 安装fastDFS插件
pip install -i https://pypi.tuna.tsinghua.edu.cn/simple py3Fdfs
pip install -i https://pypi.tuna.tsinghua.edu.cn/simple djangorestframework

pip install -i https://pypi.tuna.tsinghua.edu.cn/simple django-filter

pip install -i https://pypi.tuna.tsinghua.edu.cn/simple coreapi

pip install -i https://pypi.tuna.tsinghua.edu.cn/simple Markdown

pip install -i https://pypi.tuna.tsinghua.edu.cn/simple Pillow

pip install -i https://pypi.tuna.tsinghua.edu.cn/simple redis

pip install -i https://pypi.tuna.tsinghua.edu.cn/simple django-redis

pip install -i https://pypi.tuna.tsinghua.edu.cn/simple celery

pip install -i https://pypi.tuna.tsinghua.edu.cn/simple django-celery-results

pip install -i https://pypi.tuna.tsinghua.edu.cn/simple django-celery-beat

pip install -i https://pypi.tuna.tsinghua.edu.cn/simple django-cors-headers

pip install -i https://pypi.tuna.tsinghua.edu.cn/simple djangorestframework-jwt

pip install -i https://pypi.tuna.tsinghua.edu.cn/simple itsdangerous

pip install -i https://pypi.tuna.tsinghua.edu.cn/simple drf-extensions

pip install -i https://pypi.tuna.tsinghua.edu.cn/simple xmltodict

pip install -i https://pypi.tuna.tsinghua.edu.cn/simple wechatpy

pip install -i https://pypi.tuna.tsinghua.edu.cn/simple cryptography

pip install -i https://pypi.tuna.tsinghua.edu.cn/simple djangorestframework-xml

pip install -i https://pypi.tuna.tsinghua.edu.cn/simple qcloudsms_py

pip install -i https://pypi.tuna.tsinghua.edu.cn/simple requests

pip install -i https://pypi.tuna.tsinghua.edu.cn/simple py3Fdfs

pip install -i https://pypi.tuna.tsinghua.edu.cn/simple future

pip install -i https://pypi.tuna.tsinghua.edu.cn/simple six

pip install -i https://pypi.tuna.tsinghua.edu.cn/simple httplib2

pip install -i https://pypi.tuna.tsinghua.edu.cn/simple django-import-export

pip install -i https://pypi.tuna.tsinghua.edu.cn/simple --upgrade mysqlclient
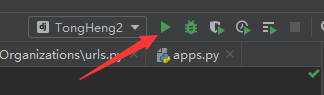
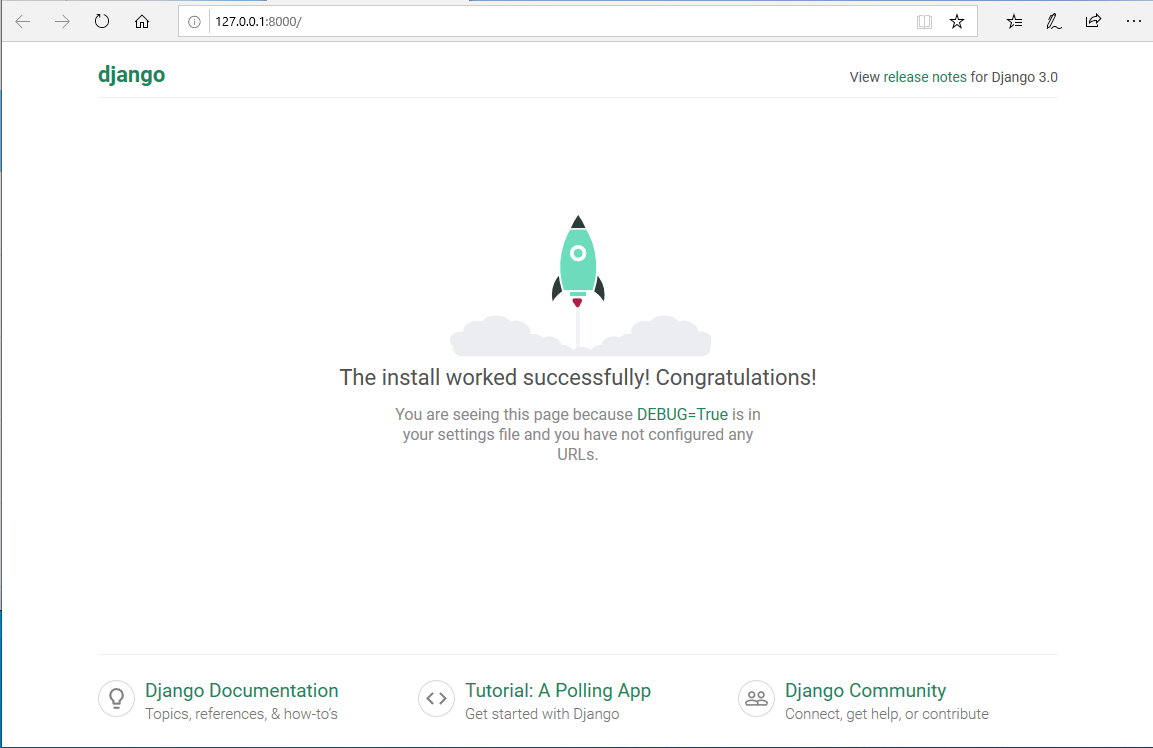
5 运行工程
看到以下欢迎页面,表示工程创建成功!
0002 Django工程创建的更多相关文章
- python web框架 django 工程 创建 目录介绍
# 创建Django工程django-admin startproject [工程名称] 默认创建django 项目都会自带这些东西 django setting 配置文件 django可以配置缓存 ...
- Django工程创建
方法一: 1.win+r进入cmd命令窗口: 2.找到Django的安装地址: 3.cmd窗口中利用cd 进入相应的文件夹,再输入命令如下: django-admin.exe startproject ...
- Django—工程创建以及models数据库易错点
Python的WEB框架有Django.Tornado.Flask 等多种,Django相较与其他WEB框架其优势为:大而全,框架本身集成了ORM.模型绑定.模板引擎.缓存.Session等诸多功能. ...
- Django工程
一.Django工程创建 1.Django安装: pip3 install django 安装成功后,会在python的安装目录下“Scripts"中生成”django-admin.exe& ...
- Django后台创建
1.首先创建Django工程 创建Django有两种方法我用的是pycharm的创建 2.查看url.py 如下 from django.contrib import admin from djang ...
- Django初探——工程创建以及models数据库相关配置
Python的WEB框架有Django.Tornado.Flask 等多种,Django相较与其他WEB框架其优势为:大而全,框架本身集成了ORM.模型绑定.模板引擎.缓存.Session等诸多功能. ...
- 第1天:Django框架简介与工程创建
Django简介 Django特点 环境搭建 创建工程 启动服务 使用pycharm打开工程 创建子应用 Django简介 Django,是用Python语言写的开源web开发框架,并遵循MVC设计. ...
- django学习笔记【001】django版本的确定&创建一个django工程
2.3 查看当前的django版本 python3. -m django --version 2.3.1 创建一个django工程 django-admin startproject mysite 在 ...
- Django基于Pycharm开发之一【创建django工程】
Django的工程结构,可以通过pycharm里面,选择创建django工程来直接创建,也可以通过命令行通过pip来安装. 一.通过命令行安装的步骤 Install Python. Install a ...
随机推荐
- 在React中使用WebUploader实现大文件分片上传的踩坑日记!
前段时间公司项目有个大文件分片上传的需求,项目是用React写的,大文件分片上传这个功能使用了WebUploader这个组件. 具体交互是: 1. 点击上传文件button后出现弹窗,弹窗内有选择文件 ...
- TChart-图表的滚动与翻译
界面代码: object Form1: TForm1 Left = Top = Width = Height = Caption = 'Form1' Color = clBtnFace Font.Ch ...
- 解决React路由URL中hash(#)部分的显示 、browserHistory打包后浏览器刷新页面出现404的问题
摘要 在React项目中,我们需要采用它的路由库React-Router来进行页面跳转,React会根据路由URL来判断是哪个页面.常见的的URL有两种显示方式,一种是hashHistory的形式,形 ...
- centos7下查看mysql配置文件适用顺序
mysql --help|grep 'my.cnf' [root@izm5e2q95pbpe1hh0kkwoiz ~]# mysql --help|grep 'my.cnf' order of pre ...
- JavaScript对象模型概念
1.对象的概念 JavaScript只有函数对象才有类的概念,因此创建一个对象,必须使用函数对象.(ES6中可以直接声明一个class,实质上也是一个函数对象). 函数对象的内部有[[Construc ...
- SQL中的事务ACID
概述: 事务是由一系列语句构成的逻辑工作单元.事务和存储过程等批处理有一定程度上的相似之处, 通常都是为了完成一定业务逻辑而将一条或者多条语句“封装”起来,使它们与其他语句之间出现一个逻辑上的边界,并 ...
- 剑指offer-面试题62-圆圈中最后剩下的数字-约瑟夫环-解法2
/* 题目: 约瑟夫环问题. 思路: 数学规律 f(n)=0(n=1),[f(n-1,m)+m]%n(n>1) */ #include<iostream> #include<l ...
- node中 package.json 文件说明
1.概述 每个项目的根目录下面,一般都有一个package.json文件,定义了这个项目所需要的各种模块,以及项目的配置信息(比如名称.版本.许可证等元数据).npm install命令根据这个配置文 ...
- Java操作RocketMQ
第一步:导入依赖 <dependency> <groupId>com.alibaba.rocketmq</groupId> <artifactId>ro ...
- mysql 行级锁问题
线上碰到存储过程死锁问题了,开始以为非主键查询 for update 会导致表锁,后来经过测试 innodb下for update索引生效的情况下 根据索引字段查询是行级锁,会将整个结果集进行上锁,直 ...