centos6安装lamp
1、安装Apache
- [root@localhost ~]# yum -y install httpd
设置开启自启动
- [root@localhost ~]# chkconfig httpd on
启动httpd服务
- [root@localhost ~]# service httpd start
- Starting httpd: httpd: Could not reliably determine the server's fully qualified domain name, using ::1 for ServerName
- [ OK ]
测试:如果是远程访问的话,需要在服务器上放行80端口
2.安装Mysql
- [root@localhost ~]# yum -y install mysql mysql-server mysql-devel
#开机自启动
- [root@localhost ~]# chkconfig mysqld on
#启动mysqld服务
- [root@localhost ~]# service mysqld start
- [root@localhost ~]# service mysqld status
- mysqld (pid ) is running...
设置密码:
- [root@localhost ~]# /usr/bin/mysql_secure_installation
Set root password? [Y/n] Y- New password:
- Re-enter new password:
- Password updated successfully!
- Reloading privilege tables..
- ... Success!
- By default, a MySQL installation has an anonymous user, allowing anyone
- to log into MySQL without having to have a user account created for
- them. This is intended only for testing, and to make the installation
- go a bit smoother. You should remove them before moving into a
- production environment.
- Remove anonymous users? [Y/n] Y
- ... Success!
- Normally, root should only be allowed to connect from 'localhost'. This
- ensures that someone cannot guess at the root password from the network.
- Disallow root login remotely? [Y/n] Y
- ... Success!
- By default, MySQL comes with a database named 'test' that anyone can
- access. This is also intended only for testing, and should be removed
- before moving into a production environment.
- Remove test database and access to it? [Y/n] Y
- - Dropping test database...
- ... Success!
- - Removing privileges on test database...
- ... Success!
- Reloading the privilege tables will ensure that all changes made so far
- will take effect immediately.
- Reload privilege tables now? [Y/n] Y
- ... Success!
- Cleaning up...
- All done! If you've completed all of the above steps, your MySQL
- installation should now be secure.
查看监听的端口
- [root@localhost ~]# netstat -tulpn | grep -i mysql
- tcp 0.0.0.0: 0.0.0.0:* LISTEN /mysqld
可以看到mysqld已经启动,监听在3306端口上
3、安装php
安装相关模块:为了让PHP支持MySQL,我们可以安装php-mysql软件包;也可使用以下命令搜索可用的php模块
- [root@localhost ~]# yum -y install php php-mysql
# 安装php常用扩展
- [root@localhost ~]# yum search php #东西太多,就不显示出来了
[root@localhost ~]# yum -y install gd php-gd gd-devel php-xml php-common php-mbstring php-ldap php-pear php-xmlrpc php-imap
### 重启httpd服务,这一步很重要
- [root@localhost ~]# service httpd restart
- Stopping httpd: [ OK ]
- Starting httpd: httpd: Could not reliably determine the server's fully qualified domain name, using ::1 for ServerName
- [ OK ]
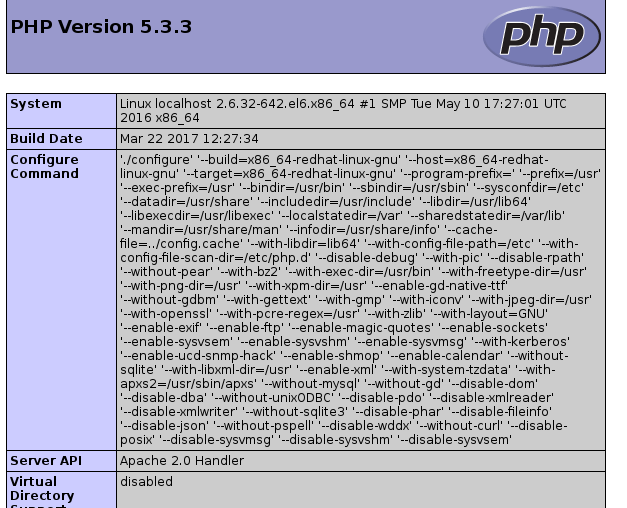
测试php
- root@localhost ~]# cd /var/www/html/
- [root@localhost html]# vim index.php
- <?php
- phpinfo();
- ?>
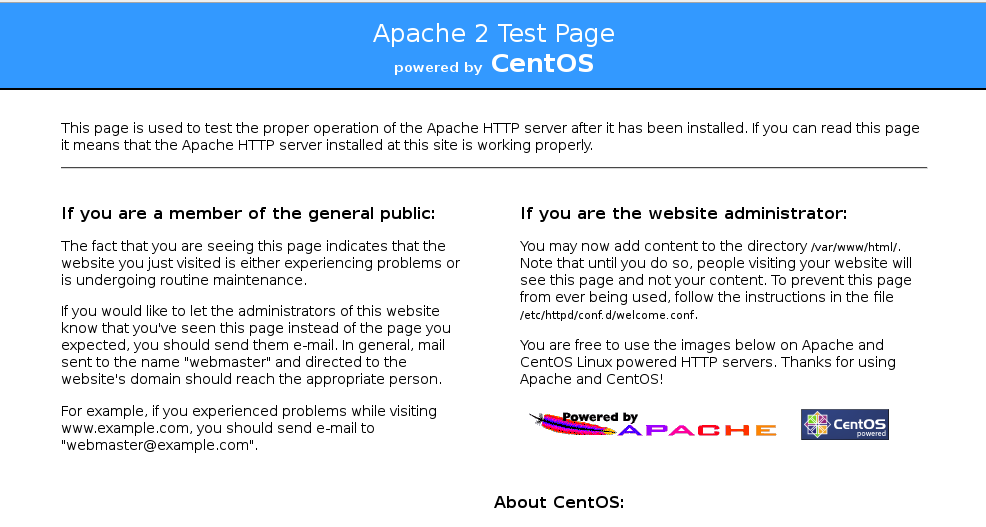
然后,我们再次在浏览器键入http://localhost 或 http://本机IP ,应该会看到如下页面
查看版本:
php版本:
- [root@localhost html]# php -v
- PHP 5.3. (cli) (built: Mar ::)
- Copyright (c) - The PHP Group
- Zend Engine v2.3.0, Copyright (c) - Zend Technologies
mysql版本
- [root@localhost html]# mysql -V
- mysql Ver 14.14 Distrib 5.1., for redhat-linux-gnu (x86_64) using readline 5.1
apache版本:
- [root@localhost html]# apachectl -v
- Server version: Apache/2.2. (Unix)
- Server built: Oct ::38
- 或者:
[root@localhost html]# httpd -v
Server version: Apache/2.2.15 (Unix)
Server built: Oct 19 2017 16:43:38
http://www.linuxidc.com/Linux/2014-07/104563.htm
centos6安装lamp的更多相关文章
- centos6 安装 lamp
首先更新一下yum -y update 安装Apache yum install httpd httpd-devel 安装完成后,用/etc/init.d/httpd start 启动apache 设 ...
- Ubuntu --- 【转】安装lamp(php7.0)
本篇转自:http://www.laozuo.org/8303.html.以防丢失,再次记录 PHP7已经出来有一段时间,根据网友的实践测试比之前的版本效率会高不少,而且应用到网站中打开速度会有明显的 ...
- CentOS6.3 编译安装LAMP(1):准备工作
卸载yum或rpm安装的amp软件 #在编译安装lamp之前,首先先卸载已存在的rpm包. rpm -e httpd rpm -e mysql rpm -e php yum -y remove htt ...
- CentOS6.3 编译安装LAMP(2):编译安装 Apache2.2.25
所需源码包: /usr/local/src/Apache-2.2.25/httpd-2.2.25.tar.gz 编译安装 Apache2.2.25 #切换到源码目录 cd /usr/local/src ...
- CentOS6.3 编译安装LAMP(2):编译安装 Apache2.4.6
Apache官方说: 与Apache 2.2.x相比,Apache 2.4.x提供了很多性能方面的提升,包括支持更大流量.更好地支持云计算.利用更少的内存处理更多的并发等.除此之外,还包括性能提升.内 ...
- CentOS6.3 编译安装LAMP(3):编译安装 MySQL5.5.25
所需源码包: /usr/local/src/MySQL-5.5.25/cmake-2.8.8.tar.gz /usr/local/src/MySQL-5.5.25/mysql-5.5.25.tar.g ...
- CentOS6.3 编译安装LAMP(4):编译安装 PHP5.2.17
所需源码包: /usr/local/src/PHP-5.2.17/libmcrypt-2.5.8.tar.gz /usr/local/src/PHP-5.2.17/mhash-0.9.9.9.tar. ...
- CentOS6.3 编译安装LAMP(4):编译安装 PHP5.3.27
所需源码包: /usr/local/src/PHP-5.3.27/libmcrypt-2.5.8.tar.gz /usr/local/src/PHP-5.3.27/mhash-0.9.9.9.tar. ...
- CentOS6.5下编译安装LAMP环境
LAMP(Linux-Apache-MySQL-PHP)网站架构是目前国际流行的Web框架.该框架能够满足大流量.大并发量的网站需求:当然.也可以直接使用高性能的服务器.高性能的负载均衡硬件以及CDN ...
随机推荐
- SSM三大框架整合思路
1.Dao层: Mybatis的配置文件:SqlMapConfig.xml 不需要配置任何内容,需要有文件头.文件必须存在. applicationContext-dao.xml: mybatis整合 ...
- 菜鸟学习Fabric源码学习 — 背书节点和链码容器交互
Fabric 1.4 源码分析 背书节点和链码容器交互 本文档主要介绍背书节点和链码容器交互流程,在Endorser背书节点章节中,无论是deploy.upgrade或者调用链码,最后都会调用Chai ...
- tomcat 介绍及环境搭建
一.tomcat介绍 Tomcat 服务器是一个免费的开放源代码的 Web 应用服务器,属于轻量级应用服务器,在中小型 系统和并发访问用户不是很多的场合下被普遍使用,是开发和调试 JSP 程序的首选. ...
- Linux磁盘管理之LVM逻辑卷快照
一.快照的工作原理 所谓快照就是将当时的系统数据记录下来,在未来若有数据变动,则会将变更前的数据放入快照区进行保存.我们可理解为快照就是给系统拍了一张照片,记录当时系统在拍快照的状态.只不过现实生活中 ...
- vue实现网络图片瀑布流 + 下拉刷新 + 上拉加载更多
一.思路分析和效果图 用vue来实现一个瀑布流效果,加载网络图片,同时有下拉刷新和上拉加载更多功能效果.然后针对这几个效果的实现,捋下思路: 根据加载数据的顺序,依次追加标签展示效果: 选择哪种方式实 ...
- floj 2264
2.公路建设(highway.c/cpp/pas) 在滨海市一共有n 个城市,编号依次为1到n,它们之间计划修建m条双向道路,其中修建第i条道路的费用为ci. 海霸王作为滨海市公路建设项目的总工程师, ...
- linux下解压缩文件中文乱码问题的解决
在windows上压缩的文件,是以系统默认编码中文来压缩文件.由于zip文件中没有声明其编码,所以linux上的unzip一般以默认编码解压,中文文件名会出现乱码. 虽然2005年就有人把这报告为bu ...
- c++ 快读快输模板
快读 inline int read() { ; ; char ch=getchar(); ; ch=getchar();} )+(X<<)+ch-'; ch=getchar();} if ...
- cogs 619. [金陵中学2007] 传话 Tarjan强连通分量
619. [金陵中学2007] 传话 ★★ 输入文件:messagez.in 输出文件:messagez.out 简单对比时间限制:1 s 内存限制:128 MB [问题描述] 兴趣小 ...
- 树dp 统计异或值
链接:https://ac.nowcoder.com/acm/contest/272/B来源:牛客网 题目描述 给定一棵n个点的树,每个点有权值.定义表示 到 的最短路径上,所有点的点权异或和. ...