Spring structs2 hibernate 整合(ssh)
ssh项目jar包


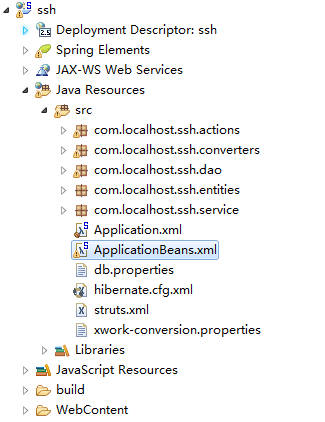
项目内容:
1. 加入 Spring
1). 加入 jar 包
2). 配置 web.xml 文件
3). 加入 Spring 的配置文件.(application.xml)
2. 加入 Hibernate
1). 同时建立持久化类, 和其对应的 .hbm.xml 文件, 生成对应的数据表
2). Spring 整合 Hibernate (application.xml)
3). 步骤:
①. 加入 jar 包
②. 在类路径下加入 hibernate.cfg.xml 文件, 在其中配置 hibernate 的基本属性
③. 建立持久化类, 和其对应的 .hbm.xml 文件

④. 和 Spring 进行整合
i. 加入 c3p0 和 MySQL 的驱动
ii. 在 Spring 的配置文件中配置: 数据源, SessionFactory, 声明式事务
⑤. 启动项目, 会看到生成对应的数据表
3. 加入 Struts2
1). 加入 jar 包: 若有重复的 jar 包, 则需要删除版本较低的. javassist-3.11.0.GA.jar
2). 在 web.xml 文件中配置 Struts2 的 Filter
3). 加入 Struts2 的配置文件
4). 整合 Spring(Application-bean.xml)
①. 加入 Struts2 的 Spring 插件的 jar 包
②. 在 Spring 的配置文件中正常配置 Action, 注意 Action 的 scope 为 prototype
③. 在 Struts2 的配置文件中配置 Action 时, class 属性指向该 Action 在 IOC 中的 id
1.web.xml
<?xml version="1.0" encoding="UTF-8"?>
<web-app xmlns:xsi="http://www.w3.org/2001/XMLSchema-instance" xmlns="http://java.sun.com/xml/ns/javaee" xsi:schemaLocation="http://java.sun.com/xml/ns/javaee http://java.sun.com/xml/ns/javaee/web-app_2_5.xsd" id="WebApp_ID" version="2.5">
<display-name>ssh</display-name>
<welcome-file-list>
<welcome-file>index.html</welcome-file>
<welcome-file>index.htm</welcome-file>
<welcome-file>index.jsp</welcome-file>
<welcome-file>default.html</welcome-file>
<welcome-file>default.htm</welcome-file>
<welcome-file>default.jsp</welcome-file>
</welcome-file-list>
<context-param>
<param-name>contextConfigLocation</param-name>
<param-value>classpath:Application*.xml</param-value>
</context-param>
<!-- 启动 IOC 容器的 ServletContextListener -->
<listener>
<listener-class>org.springframework.web.context.ContextLoaderListener</listener-class>
</listener>
<!-- 配置 Struts2 的 Filter -->
<filter>
<filter-name>struts2</filter-name>
<filter-class>org.apache.struts2.dispatcher.ng.filter.StrutsPrepareAndExecuteFilter</filter-class>
</filter>
<filter-mapping>
<filter-name>struts2</filter-name>
<url-pattern>/*</url-pattern>
</filter-mapping>
</web-app>
2.application.xml
<?xml version="1.0" encoding="UTF-8"?>
<beans xmlns="http://www.springframework.org/schema/beans"
xmlns:xsi="http://www.w3.org/2001/XMLSchema-instance"
xmlns:aop="http://www.springframework.org/schema/aop"
xmlns:context="http://www.springframework.org/schema/context"
xmlns:tx="http://www.springframework.org/schema/tx"
xsi:schemaLocation="http://www.springframework.org/schema/beans http://www.springframework.org/schema/beans/spring-beans.xsd
http://www.springframework.org/schema/aop http://www.springframework.org/schema/aop/spring-aop-4.0.xsd
http://www.springframework.org/schema/context http://www.springframework.org/schema/context/spring-context-4.0.xsd
http://www.springframework.org/schema/tx http://www.springframework.org/schema/tx/spring-tx-4.0.xsd">
<!-- 导入资源文件 -->
<context:property-placeholder location="classpath:db.properties"/>
<!-- 配置 C3P0 数据源 -->
<bean id="dataSource" class="com.mchange.v2.c3p0.ComboPooledDataSource">
<property name="user" value="${jdbc.user}"></property>
<property name="password" value="${jdbc.password}"></property>
<property name="driverClass" value="${jdbc.driverClass}"></property>
<property name="jdbcUrl" value="${jdbc.jdbcUrl}"></property>
<property name="initialPoolSize" value="${jdbc.initPoolSize}"></property>
<property name="maxPoolSize" value="${jdbc.maxPoolSize}"></property>
</bean>
<!-- 配置 SessionFactory -->
<bean id="sessionFactory" class="org.springframework.orm.hibernate4.LocalSessionFactoryBean">
<property name="dataSource" ref="dataSource"></property>
<property name="configLocation" value="classpath:hibernate.cfg.xml"></property>
<property name="mappingLocations" value="classpath:com/atguigu/ssh/entities/*.hbm.xml"></property>
</bean>
<!-- 配置 Spring 的声明式事务 -->
<!-- 1. 配置 hibernate 的事务管理器 -->
<bean id="transactionManager" class="org.springframework.orm.hibernate4.HibernateTransactionManager">
<property name="sessionFactory" ref="sessionFactory"></property>
</bean>
<!-- 2. 配置事务属性 -->
<tx:advice id="txAdvice" transaction-manager="transactionManager">
<tx:attributes>
<tx:method name="get*" read-only="true"/>
<tx:method name="lastNameIsValid" read-only="true"/>
<tx:method name="*"/>
</tx:attributes>
</tx:advice>
<!-- 3. 配置事务切入点, 再把事务属性和事务切入点关联起来 -->
<aop:config>
<aop:pointcut expression="execution(* com.atguigu.ssh.service.*.*(..))" id="txPointcut"/>
<aop:advisor advice-ref="txAdvice" pointcut-ref="txPointcut"/>
</aop:config>
</beans>
3.application-bean.xml
<?xml version="1.0" encoding="UTF-8"?>
<beans xmlns="http://www.springframework.org/schema/beans"
xmlns:xsi="http://www.w3.org/2001/XMLSchema-instance"
xsi:schemaLocation="http://www.springframework.org/schema/beans http://www.springframework.org/schema/beans/spring-beans.xsd">
<bean id="employeeDao" class="com.atguigu.ssh.dao.EmployeeDao">
<property name="sessionFactory" ref="sessionFactory"></property>
</bean>
<bean id="departmentDao" class="com.atguigu.ssh.dao.DepartmentDao">
<property name="sessionFactory" ref="sessionFactory"></property>
</bean>
<bean id="employeeService" class="com.atguigu.ssh.service.EmployeeService">
<property name="employeeDao" ref="employeeDao"></property>
</bean>
<bean id="departmentService" class="com.atguigu.ssh.service.DepartmentService">
<property name="departmentDao" ref="departmentDao"></property>
</bean>
<bean id="employeeAction" class="com.atguigu.ssh.actions.EmployeeAction"
scope="prototype">
<property name="employeeService" ref="employeeService"></property>
<property name="departmentService" ref="departmentService"></property>
</bean>
</beans>
4.hibernate.cfg.xml
<?xml version="1.0" encoding="UTF-8"?>
<!DOCTYPE hibernate-configuration PUBLIC
"-//Hibernate/Hibernate Configuration DTD 3.0//EN"
"http://hibernate.sourceforge.net/hibernate-configuration-3.0.dtd">
<hibernate-configuration>
<session-factory>
<!-- 配置 hibernate 的基本属性 -->
<!-- 方言 -->
<property name="hibernate.dialect">org.hibernate.dialect.MySQL5InnoDBDialect</property>
<!-- 是否显示及格式化 SQL -->
<property name="hibernate.show_sql">true</property>
<property name="hibernate.format_sql">true</property>
<!-- 生成数据表的策略 -->
<property name="hibernate.hbm2ddl.auto">update</property>
<!-- 二级缓存相关 -->
</session-factory>
</hibernate-configuration>
5.strcts.xml
<?xml version="1.0" encoding="UTF-8" ?>
<!DOCTYPE struts PUBLIC
"-//Apache Software Foundation//DTD Struts Configuration 2.3//EN"
"http://struts.apache.org/dtds/struts-2.3.dtd">
<struts>
<constant name="struts.enable.DynamicMethodInvocation" value="false" />
<constant name="struts.devMode" value="true" />
<package name="default" namespace="/" extends="struts-default">
<!-- 定义新的拦截器栈, 配置 prepare 拦截器栈的 alwaysInvokePrepare 参数值为 false -->
<interceptors>
<interceptor-stack name="sshStack">
<interceptor-ref name="paramsPrepareParamsStack">
<param name="prepare.alwaysInvokePrepare">false</param>
</interceptor-ref>
</interceptor-stack>
</interceptors>
<!-- 使用新的拦截器栈 -->
<default-interceptor-ref name="sshStack"></default-interceptor-ref>
<action name="emp-*" class="employeeAction"
method="{1}">
<result name="list">/WEB-INF/views/emp-list.jsp</result>
<result type="stream" name="ajax-success">
<param name="contentType">text/html</param>
<param name="inputName">inputStream</param>
</result>
<result name="input">/WEB-INF/views/emp-input.jsp</result>
<result name="success" type="redirect">/emp-list</result>
</action>
</package>
</struts>
Spring structs2 hibernate 整合(ssh)的更多相关文章
- 轻量级Java EE企业应用实战(第4版):Struts 2+Spring 4+Hibernate整合开发(含CD光盘1张)
轻量级Java EE企业应用实战(第4版):Struts 2+Spring 4+Hibernate整合开发(含CD光盘1张)(国家级奖项获奖作品升级版,四版累计印刷27次发行量超10万册的轻量级Jav ...
- 框架篇:Spring+SpringMVC+hibernate整合开发
前言: 最近闲的蛋疼,搭个框架写成博客记录下来,拉通一下之前所学知识,顺带装一下逼. 话不多说,我们直接步入正题. 准备工作: 1/ IntelliJIDEA的安装配置:jdk/tomcat等..(本 ...
- spring+springmvc+hibernate整合遇到的问题
spring+springmvc+hibernate整合遇到的问题2016年10月20日 23:24:03 守望dfdfdf 阅读数:702 标签: ssh学习经历的异常exception异常框架更多 ...
- Spring与Hibernate整合,实现Hibernate事务管理
1.所需的jar包 连接池/数据库驱动包 Hibernate相关jar Spring 核心包(5个) Spring aop 包(4个) spring-orm-3.2.5.RELEASE.jar ...
- Spring与Hibernate整合中,使用OpenSessionInViewFilter后出现sessionFactory未注入问题
近期在知乎看到一句话,保持学习的有一种是你看到了很多其它的牛人,不甘心,真的不甘心. Spring和hibernate整合的时候,jsp页面做展现,发现展现属性出现: org.apache.jaspe ...
- Spring第九篇【Spring与Hibernate整合】
前言 前面已经学习了如何使用Spring与Struts2进行整合,本博文主要讲解如何使用Spring对Hibernate进行整合 Spring和Hibernate整合的关键点: SessionFact ...
- spring+springmvc+hibernate 整合
三大框架反反复复搭了很多次,虽然每次都能搭起来,但是效率不高.最近重新搭了一次,理顺了思路,整理了需要注意的地方,分享出来. 工具:Eclipse(jdk 1.7) spring和hibernate版 ...
- spring和hibernate整合,事务管理
一.spring和hibernate整合开发步骤 1 引入jar文件,用户libarary列表如下 //spring_core spring3..9core\commons-logging-1.2.j ...
- spring和hibernate整合时报sessionFactory无法获取默认Bean Validation factory
Hibernate 3.6以上版本在用junit测试时会提示错误: Unable to get the default Bean Validation factory spring和hibernate ...
随机推荐
- qt qchart缩放后坐标轴间隔取整
使用qt的qchart显示数据曲线,坐标轴QValueAxis可以设置刻度间隔数量,但每个刻度的数值是根据坐标的极值除以间隔数量得到的,不一定是整数,导致曲线控件的显示刻度不适合观察. 如图: 纵坐标 ...
- 接口_requests_基于python
HTTP request python官方文档:http://cn.python-requests.org/zh_CN/latest/ 1. 环境 基于环境,需要安装requests 模块,安装方法 ...
- BZOJ 1503 郁闷的出纳员(平衡树)(NOI 2004)
题目链接:http://www.lydsy.com/JudgeOnline/problem.php?id=1503 Description OIER公司是一家大型专业化软件公司,有着数以万计的员工.作 ...
- BluetoothClass详解
一. BluetoothClass简介 1. 继承关系 public final class BluetoothClass extends Object implements Parcelable 该 ...
- 如何:调试 .NET Framework 源代码
文章标题:如何:调试 .NET Framework 源代码 文章地址:https://technet.microsoft.com/zh-cn/cc667410.aspx
- wine update错误 "the cache has no package" error when wine update is available
网址:https://bugs.launchpad.net/pipelight/+bug/1318321/
- cacti 添加tomcat监控
监控主机 192.168.24.69 ,以下用A表示 被监控主机 192.168.24.79,以下用B标识 一.A主机cacti中 1.导入TomcatStat中的xml模版 2.将TomcatSta ...
- pyHeatMap生成热力图
库链接:https://pypi.org/project/pyheatmap/ 现在的linux系统默认都是安装好的py环境,直接用pip进行热力库安装 pip install pyheatmap 或 ...
- InnoDB高并发原理
一.并发控制 为啥要进行并发控制? 并发的任务对同一个临界资源进行操作,如果不采取措施,可能导致不一致,故必须进行并发控制(Concurrency Control). 技术上,通常如何进行并发控制? ...
- linux 安装 bitnamid-redmine
Unix 和 Linux 安装 Perl Unix/Linux 系统上 Perl 安装步骤如下: 通过浏览器打开 http://www.perl.org/get.html. 下载适用于 Unix/Li ...