Nginx安装部署!
安装Nginx方法一:利用u盘导入Nginx软件包
二nginx -t 用于检测配置文件语法
如下报错1:配置文件43行出现错误
[root@www ~]# nginx -t
nginx: [emerg] "location" directive is not allowed here in /usr/local/nginx/conf/nginx.conf:43
nginx: configuration file /usr/local/nginx/conf/nginx.conf test failed
如下错误2:worker里面工作区出现问题
[root@www ~]# nginx -t
nginx: the configuration file /usr/local/nginx/conf/nginx.conf syntax is ok
nginx: [warn] 10240 worker_connections exceed open file resource limit: 1024
nginx: configuration file /usr/local/nginx/conf/nginx.conf test is successful
解决办法:
[root@www ~]# ulimit -n 10240

main(全局设置)、server(主机设置)、upstream(负载均衡服务器设置)和 location(URL匹配特定位置的设置)。

    main块设置的指令将影响其他所有设置;

    server块的指令主要用于指定主机和端口;

    upstream指令主要用于负载均衡,设置一系列的后端服务器;

    location块用于匹配网页位置。
=============================================================
创建单个基于域名的虚拟主机并测试
[root@localhost ~]# rpm -q httpd //有httpd软件必须删除
未安装软件包 httpd
安装支持软件
[root@localhost ~]# rpm -q gcc gcc-c++ zlib-devel pcre-devel make
[root@localhost ~]# yum -y install gcc gcc-c++ zlib-devel pcre-devel make
完毕!
创建运行用户、组
[root@localhost ~]# useradd -M -s /sbin/nologin nginx
[root@localhost ~]# tail -l /etc/passwd ;tail -l /etc/group
导入nginx软件包
[root@localhost ~]# rz -E
rz waiting to receive.
[root@localhost ~]# ls
anaconda-ks.cfg initial-setup-ks.cfg nginx-1.16.0.tar.gz original-ks.cfg
[root@localhost ~]# tar xf nginx-1.16.0.tar.gz -C /usr/src
[root@localhost ~]# cd /usr/src/nginx-1.16.0/
编译安装 Nginx
[root@localhost nginx-1.16.0]# ./configure --prefix=/usr/local/nginx --user=nginx --group=nginx --with-http_stub_status_module --with-stream --with-http_gzip_static_module && make && make install
--prefix 设定Nginx的安装目录
--user和--group 指定Nginx运行用户和组
--with-http_stub_status_module 启用http_stub_status_module模块以支持状态统计
--with-http_ssl_module 启用SSL模块
--with-http_flv_module 启用FLV模块,提供寻求内存使用基于时间的偏移量文件
--with-stream 用于做七层,四层负载的模块
[root@localhost nginx-1.16.0]# cd
为主程序 nginx 创建链接文件
[root@localhost ~]# ls /usr/local/nginx/
conf html logs sbin
[root@localhost ~]#ln -sf /usr/local/nginx/sbin/nginx /usr/local/sbin/
[root@localhost ~]# ll /usr/local/sbin/nginx
lrwxrwxrwx. 1 root root 27 9月 10 17:12 /usr/local/sbin/nginx -> /usr/local/nginx/sbin/nginx
Nginx 的运行控制方法
手动方法控制 Nginx:
nginx -t 检测配置文件语法
执行 nginx 主程序启动 Nginx
编写 nginx 服务脚本
[root@localhost ~]# vim /etc/init.d/nginx
#!/bin/bash
# chkconfig: 2345 99 20
# description: Nginx Server Control Scripts shell
PROG="/usr/local/nginx/sbin/nginx"
PIDF="/usr/local/nginx/logs/nginx.pid"
case "$1" in
start)
$PROG
;;
stop)
kill -s QUIT $(cat $PIDF)
;;
restart)
$0 stop
$0 start
;;
reload)
kill -s HUP $(cat $PIDF)
;;
*)
echo "Usage: $0 {start|stop|restart|reload}"
exit 1
esac
exit 0
[root@localhost ~]# chmod +x /etc/init.d/nginx
Nginx 修改主配置文件
[root@localhost ~]# cd /usr/local/nginx/conf/
[root@localhost conf]# cp nginx.conf nginx.conf.origin
[root@localhost conf]# vim nginx.conf
user  nginx nginx;                           //nginx的程序账户及程序组

worker_processes  ;                         //指定进程数一般与cpu数量一致

worker_cpu_affinity  ;       //为每个进程分配核心数

error_log  logs/error.log  info;             //全局错误日志文件位置

pid        logs/nginx.pid;                   //PID文件的位置

events {

   use epoll;                                //使用epoll模型

    worker_connections  ;               //每个进程允许的最多的连接数默认为1024一般10000以下

}

http {

    include       mime.types;

    default_type  application/octet-stream;

    log_format  main  '$remote_addr - $remote_user [$time_local] "$request" '

                      '$status $body_bytes_sent "$http_referer" '

                      '"$http_user_agent" "$http_x_forwarded_for"';

    access_log  logs/access.log  main;        //访问日志位

    sendfile        on;                       //支持文件发送超时

    keepalive_timeout  ;

server {                                      //web服务的监听配置

        listen       ;                      //监听地址及端口(IP:PORT)
        server_name  localhost;     //网站名称(FQDN)
       charset utf-; //网页的默认字符集
       access_log  logs/localhost.access.log  main;

location / {                                //根目录配置
         root   html;             //网站根目录的位置安装位置的html中
         index  index.html index.htm;       //默认首页
 }
error_page 500 502 503 504 /50x.html; //内部错误的反馈页面
location =/50x.html { //错误页面配置
root html;
}
}
}
[root@localhost ~]# nginx -t //检测语法错误
nginx: the configuration file /usr/local/nginx/conf/nginx.conf syntax is ok
nginx: configuration file /usr/local/nginx/conf/nginx.conf test is successful
[root@localhost ~]# nginx //启动nginx服务
[root@localhost ~]# killall -HUP nginx
[root@localhost ~]# netstat -anpt | grep nginx
tcp 0 0 0.0.0.0:80 0.0.0.0:* LISTEN 64726/nginx: master
[root@localhost ~]# systemctl stop firewalld
[root@localhost ~]# iptables -F
[root@localhost ~]# setenforce 0
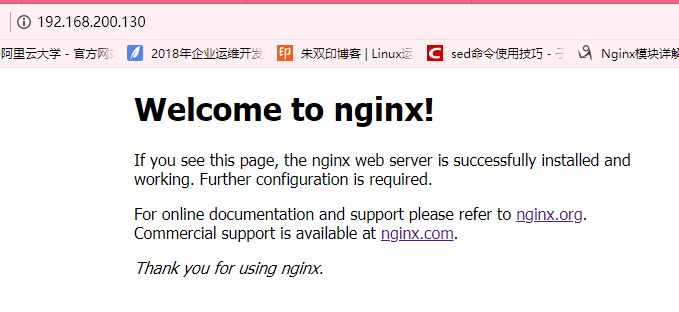
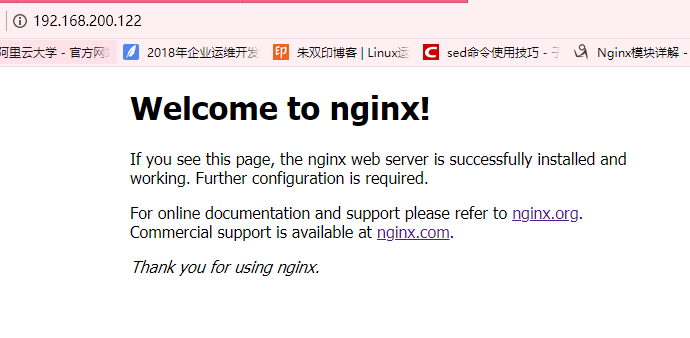
nginx安装完成
安装Nginx方法二:
从官网下载相应的源码包:
Nginx下载地址:http://nginx.org/en/download.html
[root@localhost ~]#wget http:;//nginx.org/download/nginx-1.14.2.tar.gz
[root@localhost ~]#tar xf nginx-1.14.2.tar.gz -C /usr/src
[root@localhost ~]#cd /usr/src/nginx-1.14.2
[root@localhost nginx-1.14.2]#yum install gcc gcc-c++ make zlib-devel pcre-devel -y
[root@localhost nginx-1.16.0]#./configure --prefix=/usr/local/nginx --user=nginx --group=nginx --with-http_stub_status_module
&& make && make install
[root@localhost nginx-1.17.4]# cd /usr/share/vim/vimfiles/ //拷入相应的语法
[root@localhost ~]# cd /usr/local/nginx/conf/
[root@localhost conf]# vim nginx.conf
user  nginx nginx;                           //nginx的程序账户及程序组

worker_processes  ;                         //指定进程数一般与cpu数量一致

worker_cpu_affinity  ;       //为每个进程分配核心数

error_log  logs/error.log  info;             //全局错误日志文件位置

pid        logs/nginx.pid;                   //PID文件的位置

events {

   use epoll;                                //使用epoll模型

    worker_connections  ;               //每个进程允许的最多的连接数默认为1024一般10000以下

}

http {

    include       mime.types;

    default_type  application/octet-stream;

    log_format  main  '$remote_addr - $remote_user [$time_local] "$request" '

                      '$status $body_bytes_sent "$http_referer" '

                      '"$http_user_agent" "$http_x_forwarded_for"';

    access_log  logs/access.log  main;        //访问日志位

    sendfile        on;                       //支持文件发送超时

    keepalive_timeout  ;

server {                                      //web服务的监听配置

        listen       ;                      //监听地址及端口(IP:PORT)

        server_name  localhost;     //网站名称(FQDN)

       charset utf-; //网页的默认字符集

       access_log  logs/localhost.access.log  main;

location / {                                //根目录配置

         root   html;             //网站根目录的位置安装位置的html中

         index  index.html index.htm;       //默认首页

 }

     error_page     /50x.html;       //内部错误的反馈页面

       location =/50x.html {                     //错误页面配置

           root html;

        }

    }

}
Nginx安装部署!的更多相关文章
- Nginx安装部署与测试
场景:项目需要部署在生产环境中,这些新的工具都需要在生产环境中去实践练习.有时间再部署一套ELK的日志分析系统,这样的系统才算具有一定的应用价值. 1 Nginx安装 用root用户安装,采用源代码编 ...
- nginx安装部署(支持https)
1 安装环境准备 1.1 准备环境清单 以下是基本环境清单列表: 软件名称 版本号 说明信息 Linux CentOS 6.7 部署机器只需为Linux系统即可,无严格要求 1.2 ...
- 云服务器内,nginx安装部署,Xshell,Xftp安装
nginx部署 三丰云云服务器,安装nginx nginx部署 在宝塔面板,添加Nginx安装,一般进来会默认推荐安装几款软件,mysql等,暂时可以后面再装,先把nginx装上去,去感受将前端页面放 ...
- Nginx安装部署
Nginx ("engine x") 是一个高性能的 HTTP 和 反向代理 服务器,也是一个 IMAP/POP3/SMTP 代理服务器. Nginx 是由 Igor Sysoev ...
- Nginx安装部署以及配置文件解析
Nginx 中的 Location 指令 是NginxHttpCoreModule中重要指令.Location 指令,是用来为匹配的 URI 进行配置,URI 即语法中的”/uri/”,可以是字符串或 ...
- linux centos7 nginx 安装部署和配置
1/什么是NginxNginx("enginex")是一个高性能的HTTP和反向代理服务器,也是一个IMAP/POP3/SMTP代理服务器,在高连接并发的情况下Nginx是Apac ...
- Linux中Nginx安装部署
前言 Nginx ("engine x") 是一个高性能的 HTTP 和 反向代理 服务器,也是一个 IMAP/POP3/SMTP 代理服务器. Nginx 是由 Igor Sys ...
- Centos 6.5 下Nginx安装部署https服务器
一般我们都需要先装pcre, zlib,前者为了重写rewrite,后者为了gzip压缩.1.选定源码目录选定目录 /usr/local/cd /usr/local/2.安装PCRE库cd /usr/ ...
- nginx安装部署+增加媒体播放模块
nginx安装很简单,但是有的时候是已经安装的nginx ,升级增加nginx 模块功能. 最近公司要nginx增加一个可以播放 MP4的模块,安装还算顺利,不说废话上命令. 1 安装依赖 yum i ...
随机推荐
- 2019 ICPC 徐州网络赛 B.so easy (并查集)
计蒜客链接:https://nanti.jisuanke.com/t/41384 题目大意:给定n个数,从1到n排列,其中有q次操作,操作(1) 删除一个数字 // 操作(2)求这个数字之后第一个没有 ...
- hdu 1532 Drainage Ditches(网络流)
题目链接:http://acm.hdu.edu.cn/showproblem.php?pid=1532 题目大意是:农夫约翰要把多个小池塘的水通过池塘间连接的水渠排出去,从池塘1到池塘M最多可以排多少 ...
- arcgis计算X坐标值、Y坐标值
arcgis计算X坐标值.Y坐标值 要计算的字段上点击右键,选择计算几何,弹出计算几何对话框.可以设置属性.坐标系.单位等.
- Gym-TORCS安装
系统为Ubuntu16.04来安装Gym-TORCS 安装pip: sudo apt-get install python-pip sudo pip install --upgrade pip 安装p ...
- List 数据分批入库
直接贴代码,主要运用 List<E> subList(int fromIndex, int toIndex); 把 List 分割 /** * 保存批价结果 * * @param pric ...
- 插入数据:insert,replace
*insert高级用法* 1.语法:insert into tbname(字段列表) values 值列表; 1.1可以不将所有的字段都插入数据.如果说需要完成部分字段的插入,需要必须存在字段列表. ...
- 2017年陕西省网络空间安全技术大赛——一维码——Writeup
<!doctype html> 2017年陕西省网络空间安全技术大赛——一维码——Writeup 先判断下载的文件flag.png确实是png格式的图片后(binwalk, file命令均 ...
- Ubuntu 16.04执行 sudo apt-get update非常慢解决方案
ubuntu在执行更新apt包索引 sudo apt-get update 可能遇到更新非常慢或者部分包都忽略或错误 我们应该进入到系统设置>软件与更新 选择其他站点 选择最佳服务器 然后点击关 ...
- 理解Javascript的原型和原型链
前言 本文2088字,阅读大约需要13分钟. 总括: 结合实例阐述了原型和原型链的概念并总结了几种创建对象的方法,扩展原型链的方法. 参考文章:The Secret Life of Objects,继 ...
- 吴裕雄 python 机器学习——模型选择数据集切分
import numpy as np from sklearn.model_selection import train_test_split,KFold,StratifiedKFold,LeaveO ...