SpringBoot2.x入门:引入web模块
前提
这篇文章是《SpringBoot2.x入门》专辑的第3篇文章,使用的SpringBoot版本为2.3.1.RELEASE,JDK版本为1.8。
主要介绍SpringBoot的web模块引入,会相对详细地分析不同的Servlet容器(如Tomcat、Jetty等)的切换,以及该模块提供的SpringMVC相关功能的使用。
依赖引入
笔者新建了一个多模块的Maven项目,这次的示例是子模块ch1-web-module。
SpringBoot的web模块实际上就是spring-boot-starter-web组件(下称web模块),前面的文章介绍过使用BOM全局管理版本,可以在(父)POM文件中添加dependencyManagement元素:
<properties>

    <spring.boot.version>2.3.1.RELEASE</spring.boot.version>

</properties>

<dependencyManagement>

    <dependencies>

        <dependency>

            <groupId>org.springframework.boot</groupId>

            <artifactId>spring-boot-dependencies</artifactId>

            <version>${spring.boot.version}</version>

            <scope>import</scope>

            <type>pom</type>

        </dependency>

    </dependencies>

</dependencyManagement>
接来下在(子)POM文件中的dependencies元素引入spring-boot-starter-web的依赖:
<dependencies>

    <dependency>

    <groupId>org.springframework.boot</groupId>

    <artifactId>spring-boot-starter-web</artifactId>

    </dependency>

</dependencies>
项目的子POM大致如下:
<?xml version="1.0" encoding="UTF-8"?>

<project xmlns="http://maven.apache.org/POM/4.0.0" xmlns:xsi="http://www.w3.org/2001/XMLSchema-instance"

         xsi:schemaLocation="http://maven.apache.org/POM/4.0.0 http://maven.apache.org/xsd/maven-4.0.0.xsd">

    <modelVersion>4.0.0</modelVersion>

    <parent>

        <groupId>club.throwable</groupId>

        <artifactId>spring-boot-guide</artifactId>

        <version>1.0-SNAPSHOT</version>

    </parent>

    <artifactId>ch1-web-module</artifactId>

    <version>1.0-SNAPSHOT</version>

    <packaging>jar</packaging>

    <name>ch1-web-module</name>

    <dependencies>

        <dependency>

            <groupId>org.springframework.boot</groupId>

            <artifactId>spring-boot-starter-web</artifactId>

        </dependency>

    </dependencies>

    <build>

        <finalName>ch1-web-module</finalName>

        <!-- 引入spring-boot-maven-plugin以便项目打包 -->

        <plugins>

            <plugin>

                <groupId>org.springframework.boot</groupId>

                <artifactId>spring-boot-maven-plugin</artifactId>

                <version>${spring.boot.version}</version>

                <executions>

                    <execution>

                        <goals>

                            <goal>repackage</goal>

                        </goals>

                    </execution>

                </executions>

            </plugin>

        </plugins>

    </build>

</project>
spring-boot-starter-web模块中默认使用的Servlet容器是嵌入式(Embedded)Tomcat,配合打包成一个Jar包以便可以直接使用java -jar xxx.jar命令启动。
SpringMVC的常用注解
web模块集成和扩展了SpringMVC的功能,移除但兼容相对臃肿的XML配置,这里简单列举几个常用的Spring或者SpringMVC提供的注解,简单描述各个注解的功能:
组件注解:
@Component:标记一个类为Spring组件,扫描阶段注册到IOC容器。@Repository:标记一个类为Repository(仓库)组件,它的元注解为@Component,一般用于DAO层。@Service:标记一个类为Service(服务)组件,它的元注解为@Component。@Controller:标记一个类为Controller(控制器)组件,它的元注解为@Component,一般控制器是访问的入口,衍生注解@RestController,简单理解为@Controller标记的控制器内所有方法都加上下面提到的@ResponseBody。
参数注解:
@RequestMapping:设置映射参数,包括请求方法、请求的路径、接收或者响应的内容类型等等,衍生注解为GetMapping、PostMapping、PutMapping、DeleteMapping、PatchMapping。@RequestParam:声明一个方法参数绑定到一个请求参数。@RequestBody:声明一个方法参数绑定到请求体,常用于内容类型为application/json的请求体接收。@ResponseBody:声明一个方法返回值绑定到响应体。@PathVariable:声明一个方法参数绑定到一个URI模板变量,用于提取当前请求URI中的部分到方法参数中。
编写控制器和启动类
在项目中编写一个控制器club.throwable.ch1.controller.HelloController如下:
import lombok.extern.slf4j.Slf4j;

import org.springframework.http.ResponseEntity;

import org.springframework.stereotype.Controller;

import org.springframework.web.bind.annotation.RequestMapping;

import org.springframework.web.bind.annotation.RequestParam;

import java.util.Optional;

@Slf4j

@Controller

@RequestMapping(path = "/ch1")

public class HelloController {

    @RequestMapping(path = "/hello")

    public ResponseEntity<String> hello(@RequestParam(name = "name") String name) {

        String value = String.format("[%s] say hello", name);

        log.info("调用[/hello]接口,参数:{},响应结果:{}", name, value);

        return ResponseEntity.of(Optional.of(value));

    }

}
HelloController只提供了一个接收GET请求且请求的路径为/ch1/hello的方法,它接收一个名称为name的参数(参数必传),然后返回简单的文本:${name} say hello。可以使用衍生注解简化如下:
import lombok.extern.slf4j.Slf4j;

import org.springframework.http.ResponseEntity;

import org.springframework.web.bind.annotation.GetMapping;

import org.springframework.web.bind.annotation.RequestMapping;

import org.springframework.web.bind.annotation.RequestParam;

import org.springframework.web.bind.annotation.RestController;

import java.util.Optional;

@Slf4j

@RestController

@RequestMapping(path = "/ch1")

public class HelloController {

    @GetMapping(path = "/hello")

    public ResponseEntity<String> hello(@RequestParam(name = "name") String name) {

        String value = String.format("[%s] say hello", name);

        log.info("调用[/hello]接口,参数:{},响应结果:{}", name, value);

        return ResponseEntity.of(Optional.of(value));

    }

}
接着编写一个启动类club.throwable.ch1.Ch1Application,启动类是SpringBoot应用程序的入口,需要提供一个main方法:
package club.throwable.ch1;

import org.springframework.boot.SpringApplication;

import org.springframework.boot.autoconfigure.SpringBootApplication;

@SpringBootApplication

public class Ch1Application {

    public static void main(String[] args) {

        SpringApplication.run(Ch1Application.class, args);

    }

}
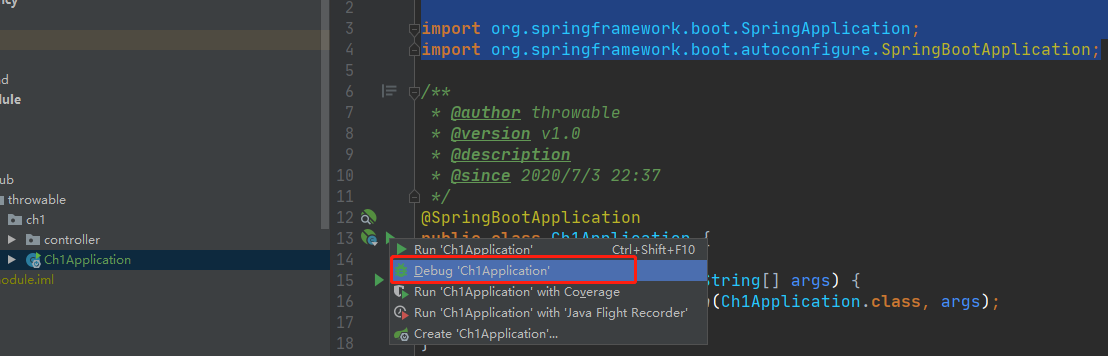
然后以DEBUG模式启动一下:
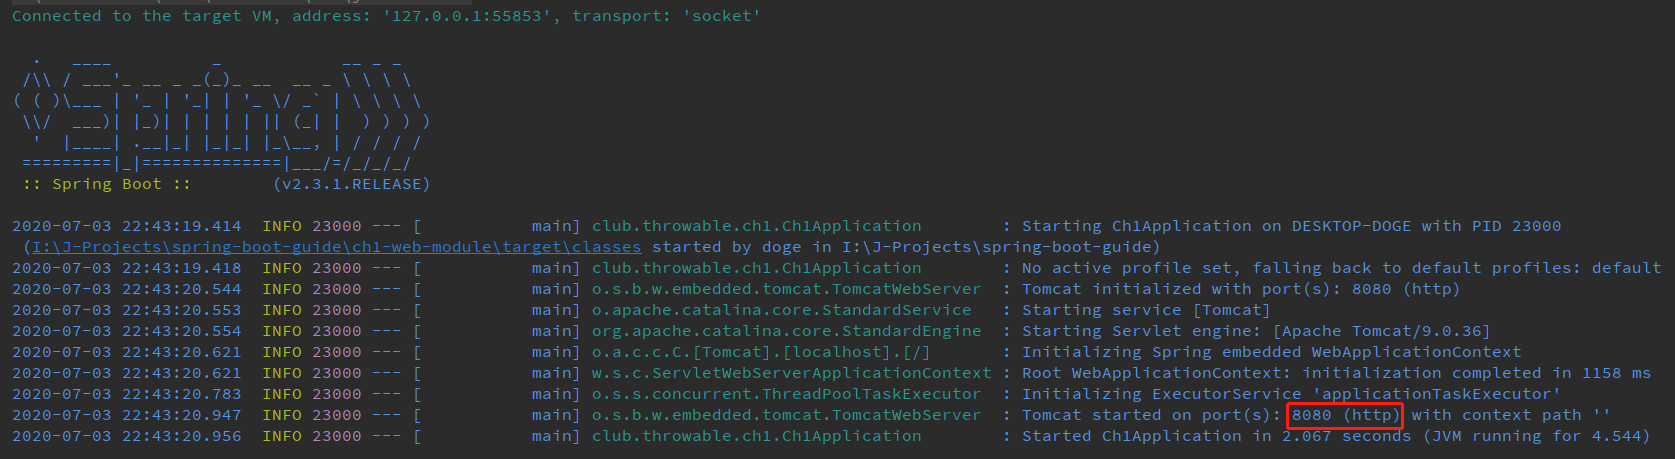
Tomcat默认的启动端口是8080,启动完毕后见日志如下:
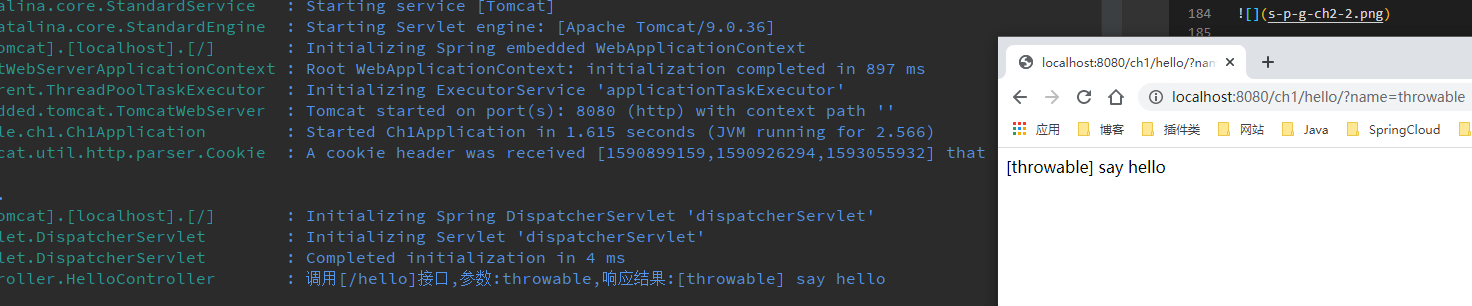
用用浏览器访问http://localhost:8080/ch1/hello?name=thrwoable可见输出如下:
至此,一个简单的基于spring-boot-starter-web开发的web应用已经完成。
切换Servlet容器
有些时候由于项目需要、运维规范或者个人喜好,并不一定强制要求使用Tomcat作为Servlet容器,常见的其他选择有Jetty、Undertow,甚至Netty等。以Jetty和Undertow为例,切换为其他嵌入式Servlet容器需要从spring-boot-starter-web中排除Tomcat的依赖,然后引入对应的Servlet容器封装好的starter。
切换为Jetty,修改POM文件中的dependencies元素:
<dependency>

    <groupId>org.springframework.boot</groupId>

    <artifactId>spring-boot-starter-web</artifactId>

    <exclusions>

        <exclusion>

            <groupId>org.springframework.boot</groupId>

            <artifactId>spring-boot-starter-tomcat</artifactId>

        </exclusion>

    </exclusions>

</dependency>

<dependency>

    <groupId>org.springframework.boot</groupId>

    <artifactId>spring‐boot‐starter‐jetty</artifactId>

</dependency>

切换为Undertow,修改POM文件中的dependencies元素:
<dependency>

    <groupId>org.springframework.boot</groupId>

    <artifactId>spring-boot-starter-web</artifactId>

    <exclusions>

        <exclusion>

            <groupId>org.springframework.boot</groupId>

            <artifactId>spring-boot-starter-tomcat</artifactId>

        </exclusion>

    </exclusions>

</dependency>

<dependency>

    <groupId>org.springframework.boot</groupId>

    <artifactId>spring‐boot‐starter‐undertow</artifactId>

</dependency>

小结
这篇文章主要分析了如何基于SpringBoot搭建一个入门的web服务,还简单介绍了一些常用的SpringMVC注解的功能,最后讲解如何基于spring-boot-starter-web切换底层的Servlet容器。学会搭建MVC应用后,就可以着手尝试不同的请求方法或者参数,尝试常用注解的功能。
代码仓库
这里给出本文搭建的web模块的SpringBoot应用的仓库地址(持续更新):
(本文完 c-2-d e-a-20200703 23:09 PM)
技术公众号《Throwable文摘》(id:throwable-doge),不定期推送笔者原创技术文章(绝不抄袭或者转载):
![]()
SpringBoot2.x入门:引入web模块的更多相关文章
- 一、基础项目构建,引入web模块,完成一个简单的RESTful API
一.Spring Boot的主要优点: 为所有Spring开发者更快的入门 开箱即用,提供各种默认配置来简化项目配置 内嵌式容器简化Web项目 没有冗余代码生成和XML配置的要求 二.使用maven构 ...
- 基础项目构建,引入web模块,完成一个简单的RESTful API 转载来自翟永超
简介 在您第一次接触和学习Spring框架的时候,是否因为其繁杂的配置而退却了?在你第n次使用Spring框架的时候,是否觉得一堆反复粘贴的配置有一些厌烦?那么您就不妨来试试使用Spring Boot ...
- SpringBoot2.x入门教程:引入jdbc模块与JdbcTemplate简单使用
这是公众号<Throwable文摘>发布的第23篇原创文章,收录于专辑<SpringBoot2.x入门>. 前提 这篇文章是<SpringBoot2.x入门>专辑的 ...
- SpringBoot2.x入门:快速创建一个SpringBoot应用
前提 这篇文章是<SpringBoot2.x入门>专辑的第2篇文章,使用的SpringBoot版本为2.3.1.RELEASE,JDK版本为1.8. 常规的套路会建议使用Spring官方提 ...
- SpringBoot2.x入门教程:理解配置文件
前提 这篇文章是<SpringBoot2.x入门>专辑的第4篇文章,使用的SpringBoot版本为2.3.1.RELEASE,JDK版本为1.8. 主要介绍SpringBoot配置文件一 ...
- SpringBoot2.x入门:应用打包与启动
前提 这篇文章是<SpringBoot2.x入门>专辑的第5篇文章,使用的SpringBoot版本为2.3.1.RELEASE,JDK版本为1.8. 这篇文章分析一个偏向于运维方面的内容: ...
- SpringBoot2.x入门:使用MyBatis
这是公众号<Throwable文摘>发布的第25篇原创文章,收录于专辑<SpringBoot2.x入门>. 前提 这篇文章是<SpringBoot2.x入门>专辑的 ...
- 转:OSGi 入门篇:模块层
OSGi 入门篇:模块层 1 什么是模块化 模块层是OSGi框架中最基础的一部分,其中Java的模块化特性在这一层得到了很好的实现.但是这种实现与Java本身现有的一些模块化特性又有明显的不同. 本文 ...
- Node.js Web 模块
什么是 Web 服务器? Web服务器一般指网站服务器,是指驻留于因特网上某种类型计算机的程序,Web服务器的基本功能就是提供Web信息浏览服务.它只需支持HTTP协议.HTML文档格式及URL,与客 ...
随机推荐
- java实现第四届蓝桥杯猜灯谜
猜灯谜 题目描述 A 村的元宵节灯会上有一迷题: 请猜谜 * 请猜谜 = 请边赏灯边猜 小明想,一定是每个汉字代表一个数字,不同的汉字代表不同的数字. 请你用计算机按小明的思路算一下,然后提交&quo ...
- docker-compose mysql和node连接认证mongo问题
前言 最近,想部署一个自己的项目,鉴于自己的服务器是VPS(虚拟主机),配置也不够,就想到了用 docker 直接部署好了,这样既方便部署也方便不用的时候卸载或更新 然后本地搭建了环境,踩了一些坑,在 ...
- 数据结构之链表(Linked list)
说明:如果仔细阅读完全文后,可能感觉有些不统一,这里先说明下原因. 链表尾引用不统一:在介绍单链表时,只有一个链表首部的引用(head) 指向第一个节点.你看到后面关于双链表及循环列表时,除了指向第一 ...
- Go语言json编码驼峰转下划线、下划线转驼峰
目录 一.需求 二.实现 三.使用 JsonSnakeCase统一转下划线json JsonSnakeCase统一转驼峰json 一.需求 golang默认的结构体json转码出来,都是大写驼峰的,并 ...
- 关于thinkhphp3.1中废弃 preg_replace /e 修饰符
警告:preg_replace(): The /e modifier is deprecated, use preg_replace_callback instead 网上查了下 发现 php5.5版 ...
- redis 深入理解redis 主从复制原理
redis 主从复制 master 节点提供数据,也就是写.slave 节点负责读. 不是说master 分支不能读数据,也能只是我们希望将读写进行分离. slave 是不能写数据的,只能处理读请求 ...
- [转] 理解TCP序列号(Sequence Number)和确认号(Acknowledgment Number)
点击阅读原译文 原文见:http://packetlife.net/blog/2010/jun/7/understanding-tcp-sequence-acknowledgment-numbers/ ...
- (七)Maven Profile 和 Filtering
每个项目都会有多套运行环境(开发,测试,正式等等),不同的环境配置也不尽相同(如jdbc.url),借助Jenkins和自动部署提供的便利,我们可以把不同环境的配置文件单独抽离出来,打完包后用对应环境 ...
- conda 管理包
查看当前环境已经安装的包 conda list 查看指定环境中的安装包 conda list -n python27 在Anaconda 库中搜索包 conda search numpy #模糊搜索 ...
- ida 动态调试apk
1,启动 android_x86_server 2 adb forward tcp:23946 tcp:23946 调试应用命令:adb shell am start -D -n com.droidh ...