【mysql】mysq8.0新特性
一.MySQL8.0简介
mysql8.0现在已经发布,2016-09-12第一个DM(development milestone)版本8.0.0发布。新的版本带来很多新功能和新特性,对性能也得到了很大对提升。官方表示 MySQL 8 比之前mysql版本有很大提升,它的速度是 MySQL 5.7 2 倍,如下图对比所示

mysql8.0官方文档: https://dev.mysql.com/doc/refman/8.0/en/
二.MySQL8.0新增的特性
mysql8.0新增的特性主要有以下几个方面:
1.账户与安全
1)用户创建和授权是分开的,并修改了默认的认证插件。
2)增加了密码重用策略,支持修改密码时要求用户输入当前密码。
3)支持角色功能。
提高了用户和密码管理的安全性,方便了权限的管理。
2.优化器索引
三种新的索引方式
1)支持隐藏索引,方便索引的维护和性能调试。
2)支持降序索引,提高了特定场景的查询性能。
3)支持函数索引,扩展了索引支持的数据类型,可以对更多的数据类型进行索引。
3.通用表表达式(Common Table Expressions:CTE)
1)非递归CTE,提高查询的性能和代码的可读性。
2)递归CTE,支持通过对数据遍历和递归的实现完成SQL实现强大复杂的功能。
4.窗口函数(Window Functions)
是一种新的查询方式。窗口函数有两类,一类上传统的聚合函数作为窗口函数使用,另一类是专用的窗口函数。可以实现复杂的数据分析能力。
5.InnoDB存储引擎增强
1)新的数据字典可以对元数据统一的管理,同时也提高了更好的查询性能和可靠性。
2)原子DDL的操作,提供了更加可靠的管理。
3)自增列的持久化,解决了长久以来自增列重复值的bug。
4)死锁检查控制,可以选择在高并发的场景中关闭,提高对高并发场景的性能。
5)锁定语句选项,可以根据不同业务需求来选择锁定语句级别。
6.JSON增强
新的运算符及JSON相关函数。
mysql8.0新特性更多可以查看这篇:https://mysqlserverteam.com/whats-new-in-mysql-8-0-generally-available/
二.本机操作环境
先看下本机mysql环境和状态
mysql> show variables like '%%version%';
+--------------------------+------------------------------+

| Variable_name            | Value                        |

+--------------------------+------------------------------+

| immediate_server_version | 999999                       |

| innodb_version           | 8.0.16                       |

| original_server_version  | 999999                       |

| protocol_version         | 10                           |

| slave_type_conversions   |                              |

| tls_version              | TLSv1,TLSv1.1,TLSv1.2        |

| version                  | 8.0.16                       |

| version_comment          | MySQL Community Server - GPL |

| version_compile_machine  | x86_64                       |

| version_compile_os       | Linux                        |

| version_compile_zlib     | 1.2.11                       |

+--------------------------+------------------------------+
查看状态
mysql80>status

--------------

mysql  Ver 14.14 Distrib 5.7., for Linux (x86_64) using  EditLine wrapper

Connection id:

Current database:

Current user:        root@localhost

SSL:            Not in use

Current pager:        stdout

Using outfile:        ''

Using delimiter:    ;

Server version:        5.7. MySQL Community Server (GPL)

Protocol version:

Connection:        Localhost via UNIX socket

Server characterset:    latin1

Db     characterset:    latin1

Client characterset:    latin1

Conn.  characterset:    latin1

UNIX socket:        /var/run/mysqld/mysqld.sock

Uptime:             min  sec
三.MySQL8.0新特性
账户与安全变更:增加新的安全策略,增加角色功能。
1.创建用户和用户授权的命令是分开执行。
先看下mysql5.7是如何创建用户和授权的。
mysql5.7中查询默认用户,以下是mysql5.7中的默认的三个用户。
mysql5.7> select user,host from mysql.user;

+---------------+-----------+

| user          | host      |

+---------------+-----------+

| mysql.session | localhost |

| mysql.sys     | localhost |

| root          | localhost |

+---------------+-----------+
mysq5.7grant可以完成用户创建和授权同时操作。
mysql> grant all privileges on *.* to 'song'@'%' identified by 'song@2019';    #创建新的用户并赋予在所有主机登陆及密码

mysql> select user,host from mysql.user;

+---------------+-----------+

| user          | host      |

+---------------+-----------+

| root          | %         |

| song          | %         |

| mysql.session | localhost |

| mysql.sys     | localhost |

| root          | localhost |

+---------------+-----------+
mysql8.0创建用户和授权命令如下,分两步进行。
create user 'song'@'%' identified by 'Song@2019';    //创建用户

grant  all privileges on *.* to 'song'@'%';          //授权
mysql8.0
mysql> select host,user from mysql.user;

+-----------+------------------+

| host      | user             |

+-----------+------------------+

| localhost | mysql.infoschema |

| localhost | mysql.session    |

| localhost | mysql.sys        |

| localhost | root             |

+-----------+------------------+
创建用户
mysql> create user 'song'@'%' identified by 'song@2019';

mysql> select host,user from mysql.user;

+-----------+------------------+

| host      | user             |

+-----------+------------------+

| %         | song             |

| localhost | mysql.infoschema |

| localhost | mysql.session    |

| localhost | mysql.sys        |

| localhost | root             |
授权
mysql> grant all privileges on *.* to 'song'@'%';
这样分两次的好处是语句的语义更加清晰点。
2.认证的插件更新
mysql8.0中默认的身份认证插件是caching_sha2_password,替代了之前的mysql_navtive_password,这个新的认证会更加安全。
通过系统变量查询,下面这是mysql5.7的,发现mysql5.7还是使用mysql_native_password这个插件。
mysql> show variables like 'default_authentication%';

+-------------------------------+-----------------------+

| Variable_name                 | Value                 |

+-------------------------------+-----------------------+

| default_authentication_plugin | mysql_native_password |

+-------------------------------+-----------------------+
看下mysq8.0
mysql> show variables like 'default_authentication%';

+-------------------------------+-----------------------+

| Variable_name                 | Value                 |

+-------------------------------+-----------------------+

| default_authentication_plugin | caching_sha2_password |

+-------------------------------+-----------------------+
也可以通过用户表user查看plugin这一列。
mysql> select user,host,plugin from mysql.user;

+------------------+-----------+-----------------------+

| user             | host      | plugin                |

+------------------+-----------+-----------------------+

| root             | %         | caching_sha2_password |

| mysql.infoschema | localhost | caching_sha2_password |

| mysql.session    | localhost | caching_sha2_password |

| mysql.sys        | localhost | caching_sha2_password |

| root             | localhost | caching_sha2_password |

+------------------+-----------+-----------------------+
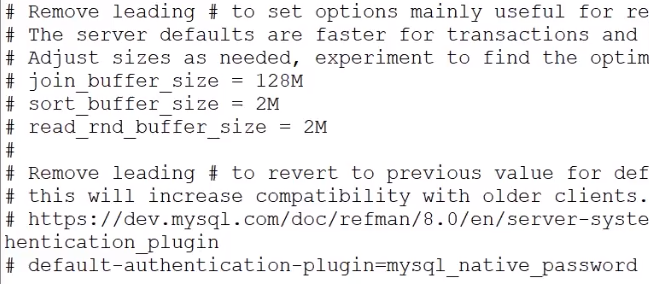
不过如果连接客户端比较老旧没有升级,在连接mysql8.0时候可能会认证错误。如果想要使用之前老的认证方式可以在配置文件里将default-authentication-plugin这段开启,然后重启数据库。
如果想对某个用户使用老的认证方式,可以使用下面语句
alter user 'song'@'%' identified with mysql_native_password by 'Songpasswd';
with后面可以跟新的认证插件也可以是老的认证插件。
3.密码管理策略增强
mysql8.0开始允许限制重复使用以前的密码。也就是说在修改密码的时候不能改为以前使用过的密码。
mysql8.0中有几个系统变量来实现控制密码修改策略。
1)password_history:该参数数值用于设置历史密码可以再次使用之前需要进行密码修改的次数。比如password_history = 3 就是代表新密码不能和最近使用过3次的密码相同。设置为0则不会对历史密码是否可以重用进行限制。
2)password_reuse_interval:按照日期指定来限制,比如 password_reuse_interval = 60 表示新密码不能和60天之内的密码相同,默认值为0,设置为0则不会对历史密码重用进行时间间隔设置。
3)password_require_current:默认值是OFF,当值为ON时候用户修改密码时候是否需要提供当前密码。
查看变量,都是以password开头的。
mysql> show variables like 'password%';

+--------------------------+-------+

| Variable_name            | Value |

+--------------------------+-------+

| password_history         | 0     |

| password_require_current | OFF   |

| password_reuse_interval  | 0     |

+--------------------------+-------+
默认情况下password_history和password_reuse_interval的值是0,表示不做限制,而password_require_current的值是off,也就是说默认情况下这些值都是没有启用的。
设置方式,在之前mysql版本中如果给运行中mysql修改参数只能在当前mysql进程中设置,但是mysql重启后就会失效,二如果写入配置文件my.cnf里则需要重启服务,这两种方法都不太方便,而在mysql8.0增加了新特性就是在线修改系统变量,并将修改后的持久化到磁盘,重启服务依然有效。它在mysql目录下增加了一个配置文件mysqld-auto.cnf。
mysql> set persist password_history=6;

mysql> show variables like 'password%';

+--------------------------+-------+

| Variable_name            | Value |

+--------------------------+-------+

| password_history         | 6     |

| password_require_current | OFF   |

| password_reuse_interval  | 0     |

+--------------------------+-------+
查看mysqld-auto.cnf,这是一个json格式的配置文件。mysql服务器在重启的时候就会读取这个文件。
root@f488b1c2586a:/# cat /var/lib/mysql/mysqld-auto.cnf

{ "Version" :  , "mysql_server" : { "password_history" : { "Value" : "" , "Metadata" : { "Timestamp" :  , "User" : "root" , "Host" : "localhost" } } } }
对于的修改也可以针对用户去修改。
mysql> select user,host,Password_reuse_history from mysql.user;   #先查看

+------------------+-----------+------------------------+

| user             | host      | Password_reuse_history |

+------------------+-----------+------------------------+

| root             | %         |                   NULL |

| song             | %         |                   NULL |

| mysql.infoschema | localhost |                   NULL |

| mysql.session    | localhost |                   NULL |

| mysql.sys        | localhost |                   NULL |

| root             | localhost |                   NULL |

+------------------+-----------+------------------------+

mysql> alter user 'song'@'%' password history 10;                 #设置10

mysql> select user,host,Password_reuse_history from mysql.user;   #查看设置成功

+------------------+-----------+------------------------+

| user             | host      | Password_reuse_history |

+------------------+-----------+------------------------+

| root             | %         |                   NULL |

| song             | %         |                     10 |

| mysql.infoschema | localhost |                   NULL |

| mysql.session    | localhost |                   NULL |

| mysql.sys        | localhost |                   NULL |

| root             | localhost |                   NULL |

+------------------+-----------+------------------------+
设置成功可以测试下,发现密码不可修改并报错。
mysql> alter user 'song'@'%' identified by 'song_passwd';

ERROR 3689 (HY000): Cannot use these credentials for 'song'@'%' because they contradict the password history policy
4.角色管理
mysql8.0提供了角色管理新功能,角色是一组权限的集合。
在之前的mysql版本中,要给某些用户分配权限需要一个个分配。如果用户比较多,角色也比较多,手动分配管理起来就比较麻烦。
新的版本有了角色功能之后,在权限和用户之间加了一层角色。可以将一组定义好的权限赋予某个角色,可以在将角色分配给需要的用户。这样可以简化用户权限的管理。
步骤:
1.先创建角色
2.给这个角色赋予事先定义好的权限。
3.给角色授权给某个用户。
操作流程:
| 操作步骤 | 说明 |
| mysql> create database roleDB ; | 创建一个数据库 |
| create table roleDB.table_auth(id int); | 创建一张表 |
| create role 'write_role'; | 创建一个角色 |
| mysql> select host,user,authentication_string from mysql.user; +-----------+------------------+------------------------------------------------------------------------+ | host | user | authentication_string | +-----------+------------------+------------------------------------------------------------------------+ | % | root | $A$005$OI6M7iPSa8RTaSQ4NXvRjLWQ2Qf3JUMlS1NrQTPdvhEUh/bfIIdBj. | | % | song | $A$005$GAy/g`mMyQa.gojqBMnFSqaTpD6DZFZPExMVjFmxVDU45RkiAvsH4qFb9Y9 | | % | write_role | | | localhost | mysql.infoschema | $A$005$THISISACOMBINATIONOFINVALIDSALTANDPASSWORDTHATMUSTNEVERBRBEUSED | | localhost | mysql.session | $A$005$THISISACOMBINATIONOFINVALIDSALTANDPASSWORDTHATMUSTNEVERBRBEUSED | | localhost | mysql.sys | $A$005$THISISACOMBINATIONOFINVALIDSALTANDPASSWORDTHATMUSTNEVERBRBEUSED | | localhost | root | $A$005$rX oqug@ ~HH%H XLsY.hAnb2p8G5JXazsp/2qDxaSLEZpDVVfRnSKrre6 | +-----------+------------------+------------------------------------------------------------------------+ |
查看用户信息表, 这里write_role是一个没有密码的用户, 可以看出mysql里的角色其实是一个用户。 是用用户来模拟角色的效果。 |
| mysql> grant select,insert,update,delete on roleDB.* to 'write_role'; Query OK, 0 rows affected (0.01 sec) |
授权,授予roleDB库上的增删改查权限, 这里对角色和用户的授权语法都是 一样的。 |
| mysql> create user 'yonhu_role1' identified by 'password123'; Query OK, 0 rows affected (0.01 sec) |
创建用户并赋予密码 |
| mysql> grant 'write_role' to 'yonhu_role1'; Query OK, 0 rows affected (0.00 sec) |
将角色授予用户 |
| mysql> show grants for 'yonhu_role1'; +---------------------------------------------+ | Grants for yonhu_role1@% | +---------------------------------------------+ | GRANT USAGE ON *.* TO `yonhu_role1`@`%` | | GRANT `write_role`@`%` TO `yonhu_role1`@`%` | +---------------------------------------------+ |
显示用户的权限 第一条是默认使用权限 第二条就是刚刚赋予的角色 |
| mysql> show grants for 'yonhu_role1' using 'write_role'; +-----------------------------------------------------------------+ | Grants for yonhu_role1@% | +-----------------------------------------------------------------+ | GRANT USAGE ON *.* TO `yonhu_role1`@`%` | | GRANT SELECT,INSERT, UPDATE, DELETE ON `roleDB`.* TO `yonhu_role1`@`%` | | GRANT `write_role`@`%` TO `yonhu_role1`@`%` | +-----------------------------------------------------------------+ |
具体查看用户角色拥有的权限 |
| exit |
退出 |
|
root@f488b1c2586a:/# mysql -uyonhu_role1 -p mysql> select user(); |
用yonhu_role1用户登陆 |
|
mysql> select * from roleDB.table_auth; |
实际table_auth表上存在的,也 拥有权限去查询。 |
|
mysql> select current_role(); |
查看当前角色,默认没有激活 这就是没法查询原因。 |
|
mysql> set role 'write_role'; mysql> select current_role(); mysql> select * from roleDB.table_auth; |
设置角色,再次查询就可以 |
|
root@f488b1c2586a:/# mysql -uroot -p mysql> set default role 'write_role' to 'yonhu_role1'; |
为每个用户设置默认角色 |
|
mysql> select * from mysql.default_roles; mysql> select * from mysql.role_edges; |
查看用户角色信息,这个是mysql8 新增加的表。 下面是用户锁设计到角色的信息。 |
也可以撤销角色
mysql> revoke insert,update,delete on roleDB.* from 'write_role';

mysql> show grants for 'write_role';

+------------------------------------------------+

| Grants for write_role@%                        |

+------------------------------------------------+

| GRANT USAGE ON *.* TO `write_role`@`%`         |

| GRANT SELECT ON `roleDB`.* TO `write_role`@`%` |

+------------------------------------------------+

2 rows in set (0.00 sec)

mysql> show grants for yonhu_role1;

+---------------------------------------------+

| Grants for yonhu_role1@%                    |

+---------------------------------------------+

| GRANT USAGE ON *.* TO `yonhu_role1`@`%`     |

| GRANT `write_role`@`%` TO `yonhu_role1`@`%` |
优化器索引
mysq8.0增加了三种新的索引方式,降序索引,影藏索引,函数索引。
1.隐藏索引(invisiable index):也叫做不可见索引,它不会被优化器使用,也就是对优化器不可见,但是但仍然需要维护。
应用场景:
1)软删除:可以先隐藏索引,查询优化器不会使用该索引,但是索引还是在维护,当最终确认删除后系统不受影响,就可以彻底删除索引)。
2)灰度发布:测试一些索引功能,在线上测试,查询不会影响,确认索引有效,某些功能受能用到的,在将索引可见)。
3)新索引替换老索引。
mysql> create table user(i int,j int);

mysql> create index i_index on user(i);

mysql> create index j_index on user(j) invisible;
显示索引信息
mysql> show index from user\G;

*************************** 1. row ***************************

        Table: user

   Non_unique: 1

     Key_name: i_index

 Seq_in_index: 1

  Column_name: i

    Collation: A

  Cardinality: 0

     Sub_part: NULL

       Packed: NULL

         Null: YES

   Index_type: BTREE

      Comment:

Index_comment:

      Visible: YES

   Expression: NULL

*************************** 2. row ***************************

        Table: user

   Non_unique: 1

     Key_name: j_index

 Seq_in_index: 1

  Column_name: j

    Collation: A

  Cardinality: 0

     Sub_part: NULL

       Packed: NULL

         Null: YES

   Index_type: BTREE

      Comment:

Index_comment:

      Visible: NO

   Expression: NULL

2 rows in set (0.06 sec)
查看执行计划任务
mysql> explain select * from user where i=1;

+----+-------------+-------+------------+------+---------------+------------+---------+-------+------+----------+-------+

| id | select_type | table | partitions | type | possible_keys | key        | key_len | ref   | rows | filtered | Extra |

+----+-------------+-------+------------+------+---------------+------------+---------+-------+------+----------+-------+

|  1 | SIMPLE      | user  | NULL       | ref  | user_index    | i_index | 5       | const |    1 |   100.00 | NULL  |

+----+-------------+-------+------------+------+---------------+------------+---------+-------+------+----------+-------+

mysql> explain select * from user where j=1;

+----+-------------+-------+------------+------+---------------+------+---------+------+------+----------+-------------+

| id | select_type | table | partitions | type | possible_keys | key  | key_len | ref  | rows | filtered | Extra       |

+----+-------------+-------+------------+------+---------------+------+---------+------+------+----------+-------------+

|  1 | SIMPLE      | user  | NULL       | ALL  | NULL          | NULL | NULL    | NULL |    1 |   100.00 | Using where |

+----+-------------+-------+------------+------+---------------+------+---------+------+------+----------+-------------+
查看查询优化器开关
mysql> select @@optimizer_switch\G;

*************************** 1. row ***************************

@@optimizer_switch: index_merge=on,index_merge_union=on,index_merge_sort_union=on,index_merge_intersection=on,
engine_condition_pushdown=on,index_condition_pushdown=on,mrr=on,mrr_cost_based=on,block_nested_loop=on,batched_key_access=off,
materialization=on,semijoin=on,loosescan=on,firstmatch=on,duplicateweedout=on,subquery_materialization_cost_based=on,
use_index_extensions=on,condition_fanout_filter=on,derived_merge=on,use_invisible_indexes=off,skip_scan=on

1 row in set (0.00 sec)
在会话级别打开它
mysql> set session optimizer_switch="use_invisible_indexes=on";

mysql> select @@optimizer_switch\G;

*************************** 1. row ***************************

@@optimizer_switch: index_merge=on,index_merge_union=on,index_merge_sort_union=on,index_merge_intersection=on,
engine_condition_pushdown=on,index_condition_pushdown=on,mrr=on,mrr_cost_based=on,block_nested_loop=on,batched_key_access=off,
materialization=on,semijoin=on,loosescan=on,firstmatch=on,duplicateweedout=on,subquery_materialization_cost_based=on,
use_index_extensions=on,condition_fanout_filter=on,derived_merge=on,use_invisible_indexes=on,skip_scan=on
设置成功,查询发现已经打开.
在此查看,可以使用不可见索引
mysql> explain select * from user where j=1;

+----+-------------+-------+------------+------+---------------+---------+---------+-------+------+----------+-------+

| id | select_type | table | partitions | type | possible_keys | key     | key_len | ref   | rows | filtered | Extra |

+----+-------------+-------+------------+------+---------------+---------+---------+-------+------+----------+-------+

|  1 | SIMPLE      | user  | NULL       | ref  | j_index       | j_index | 5       | const |    1 |   100.00 | NULL  |

+----+-------------+-------+------------+------+---------------+---------+---------+-------+------+----------+-------+
我们可以在某个特定的会话中,打开开关测试语句。
修改可见/不可见属性
mysql> alter table user alter index i_index visible;
注意:
主键不可以设置不可见。因为也没啥意义。
2.降序索引(descending index)
1)mysql8.0开始真正支持降序索引,在之前的mysql版本中也支持这种降序(DESC)索语法定义,但实际上mysql server会忽略这个定义,创建的还是升序索引(ASC)。
我们通常使用下面的语句来创建一个索引:
create index idx_t1_bcd on t1(b,c,d);
上面sql的意思是在t1表中,针对b,c,d三个字段创建一个联合索引。
但是大家不知道的是,上面这个sql实际上和下面的这个sql是等价的:
create index idx_t1_bcd on t1(b asc,c asc,d asc);
2)目前只有innodb存储引擎支持降序索引,只支持BTREE降序索引。
3)由于降序索引引入,mysql8.0不再对group by 操作进行隐式排序,如果需要进行order by指明处理。
4)降序索引带来了性能的改进。
mysql5.7中
mysql> create table tablename1 (a int , b int, index idx1 (a asc,b desc));

Query OK, 0 rows affected (0.02 sec)

mysql> show create table tablename1;

+------------+----------------------------------------------------+

| Table      | Create Table                                       |

+------------+----------------------------------------------------+

| tablename1 | CREATE TABLE `tablename1` (

  `a` int(11) DEFAULT NULL,

  `b` int(11) DEFAULT NULL,

  KEY `idx1` (`a`,`b`)                        #虽然在语句中指定来a升序,b字段降序,但是这里都是默认升序

) ENGINE=InnoDB DEFAULT CHARSET=latin1 |

+------------+----------------------------------------------------+

1 row in set (0.00 sec)
mysql8.0
mysql8> create table user2(a1 int,a2 int,index(a1 asc,a2 desc));

mysql> show create table user2\G;

*************************** 1. row ***************************

       Table: user2

Create Table: CREATE TABLE `user2` (

  `a1` int(11) DEFAULT NULL,

  `a2` int(11) DEFAULT NULL,

  KEY `a1` (`a1`,`a2` DESC)                 #a2 后面有个desc 是真正的降序

) ENGINE=InnoDB DEFAULT CHARSET=utf8mb4 COLLATE=utf8mb4_0900_ai_ci

1 row in set (0.00 sec)
插入一些数据
mysql8> insert into user2(a1,a2) values(1,100),(2,200),(3,150),(4,50);

Query OK, 4 rows affected (0.02 sec)

Records: 4  Duplicates: 0  Warnings: 0

mysql> select * from user2;

+------+------+

| a1   | a2   |

+------+------+

|    1 |  100 |

|    2 |  200 |

|    3 |  150 |

|    4 |   50 |

+------+------+
执行优化器,查询使用a1升序,a2降序,查看索引使用情况。
mysql8> explain select * from user2 order by a1,a2 desc;

+----+-------------+-------+------------+-------+---------------+------+---------+------+------+----------+-------------+

| id | select_type | table | partitions | type  | possible_keys | key  | key_len | ref  | rows | filtered | Extra       |

+----+-------------+-------+------------+-------+---------------+------+---------+------+------+----------+-------------+

|  1 | SIMPLE      | user2 | NULL       | index | NULL          | a1   | 10      | NULL |    4 |   100.00 | Using index |    组合排序仍然可以使用到索引a1

+----+-------------+-------+------------+-------+---------------+------+---------+------+------+----------+-------------+
可以使用到索引
mysql5.7
mysql> explain select * from user2 order by a1,a2 desc;

+----+-------------+-------+------------+-------+---------------+------+---------+------+------+----------+-----------------------------+

| id | select_type | table | partitions | type  | possible_keys | key  | key_len | ref  | rows | filtered | Extra                       |

+----+-------------+-------+------------+-------+---------------+------+---------+------+------+----------+-----------------------------+

|  1 | SIMPLE      | user2 | NULL       | index | NULL          | a1   | 10      | NULL |    4 |   100.00 | Using index; Using filesort |

+----+-------------+-------+------------+-------+---------------+------+---------+------+------+----------+-----------------------------+

1 row in set, 1 warning (0.00 sec)
mysql5.7中虽然使用到了索引,但是还需要额外的排序操作,不能直接通过索引来得到我们锁需要的顺序。
当在mysql8.0执行相反查询的时候。
mysql> explain select * from user2 order by a1 desc ,a2 ;

+----+-------------+-------+------------+-------+---------------+------+---------+------+------+----------+----------------------------------+

| id | select_type | table | partitions | type  | possible_keys | key  | key_len | ref  | rows | filtered | Extra                            |

+----+-------------+-------+------------+-------+---------------+------+---------+------+------+----------+----------------------------------+

|  1 | SIMPLE      | user2 | NULL       | index | NULL          | a1   | 10      | NULL |    4 |   100.00 | Backward index scan; Using index | #从大到小的扫描

+----+-------------+-------+------------+-------+---------------+------+---------+------+------+----------+----------------------------------+
不仅用到了索引,还用到反向索引扫描。
上面就是新的降序索引带来的性能的改进。
另外对group by不会默认的排序。随机返回。
mysql8> select count(*) , a2 from user2 group by a2;

+----------+------+

| count(*) | a2   |

+----------+------+

|        1 |  100 |

|        1 |  200 |

|        1 |  150 |

|        1 |   50 |

+----------+------+

4 rows in set (0.00 sec)
mysql8增加order by才有排序效果
mysql5.7默认增加order by排序
mysql5.7> select count(*) , a2 from user2 group by a2;

+----------+------+

| count(*) | a2   |

+----------+------+

|        1 |   50 |

|        1 |  100 |

|        1 |  150 |

|        1 |  200 |

+----------+------+
mysql8 增加order by 就和mysql5.7一样,有排序的效果。
mysql8> select count(*) , a2 from user2 group by a2 order by a2;

+----------+------+

| count(*) | a2   |

+----------+------+

|        1 |   50 |

|        1 |  100 |

|        1 |  150 |

|        1 |  200 |

+----------+------+
3.函数索引
mysql8.0.13开始支持在索引中使用函数(表达式)的值,之前是使用列值,现在可以使用函数表达式的值使用索引,同时也支持降序索引,json数据的索引。之前版本的数据库是没法对json里各个节点的数据索引,函数索引是基于虚拟计算列功能来实现的。可以方便对json格式数据的查询。
mysql> create table user3(c1 varchar(10),c2 varchar(10));

mysql> create index index1 on user3(c1);

mysql> create index func_index on user3( (UPPER(c2)) );   #函数索引用大括号包起来
查看索引情况
mysql> show index from user3\G;

*************************** 1. row ***************************

        Table: user3

   Non_unique: 1

     Key_name: index1

 Seq_in_index: 1

  Column_name: c1

    Collation: A

  Cardinality: 0

     Sub_part: NULL

       Packed: NULL

         Null: YES

   Index_type: BTREE

      Comment:

Index_comment:

      Visible: YES

   Expression: NULL

*************************** 2. row ***************************

        Table: user3

   Non_unique: 1

     Key_name: func_index

 Seq_in_index: 1

  Column_name: NULL

    Collation: A

  Cardinality: 0

     Sub_part: NULL

       Packed: NULL

         Null: YES

   Index_type: BTREE

      Comment:

Index_comment:

      Visible: YES

   Expression: upper(`c2`)

2 rows in set (0.11 sec)
mysql> explain select * from user3 where upper(c1)='ABC';

+----+-------------+-------+------------+------+---------------+------+---------+------+------+----------+-------------+

| id | select_type | table | partitions | type | possible_keys | key  | key_len | ref  | rows | filtered | Extra       |

+----+-------------+-------+------------+------+---------------+------+---------+------+------+----------+-------------+

|  1 | SIMPLE      | user3 | NULL       | ALL  | NULL          | NULL | NULL    | NULL |    1 |   100.00 | Using where |

+----+-------------+-------+------------+------+---------------+------+---------+------+------+----------+-------------+

mysql> explain select * from user3 where upper(c2)='ABC';

+----+-------------+-------+------------+------+---------------+------------+---------+-------+------+----------+-------+

| id | select_type | table | partitions | type | possible_keys | key        | key_len | ref   | rows | filtered | Extra |

+----+-------------+-------+------------+------+---------------+------------+---------+-------+------+----------+-------+

|  1 | SIMPLE      | user3 | NULL       | ref  | func_index    | func_index | 43      | const |    1 |   100.00 | NULL  |

+----+-------------+-------+------------+------+---------------+------------+---------+-------+------+----------+-------+
分析:虽然有c1索引,但是还是全表扫描
针对json节点的索引
mysql> create table table_json (data json , index ((CAST(data->>'$.name' as char(30)) )));

mysql> show index from table_json;

+------------+------------+------------------+--------------+-------------+-----------+-------------+----------+--------+------+------------+---------+---------------+---------+---------------------------------------------------------------------------------------+

| Table      | Non_unique | Key_name         | Seq_in_index | Column_name | Collation | Cardinality | Sub_part | Packed | Null | Index_type | Comment | Index_comment | Visible | Expression                                                                            |

+------------+------------+------------------+--------------+-------------+-----------+-------------+----------+--------+------+------------+---------+---------------+---------+---------------------------------------------------------------------------------------+

| table_json |          1 | functional_index |            1 | NULL        | A         |           0 |     NULL |   NULL | YES  | BTREE      |         |               | YES     | cast(json_unquote(json_extract(`data`,_latin1\'$.name\')) as char(30) charset latin1) |

+------------+------------+------------------+--------------+-------------+-----------+-------------+----------+--------+------+------------+---------+---------------+---------+---------------------------------------------------------------------------------------+
cast函数作为类型转换 成char(30) ->>是新的json运算符,就是去name的值
mysql> explain select * from table_json where CAST(data->>'$.name' as char(30)) = 'aaa';

+----+-------------+------------+------------+------+------------------+------------------+---------+-------+------+----------+-------+

| id | select_type | table      | partitions | type | possible_keys    | key              | key_len | ref   | rows | filtered | Extra |

+----+-------------+------------+------------+------+------------------+------------------+---------+-------+------+----------+-------+

|  1 | SIMPLE      | table_json | NULL       | ref  | functional_index | functional_index | 33      | const |    1 |   100.00 | NULL  |

+----+-------------+------------+------------+------+------------------+------------------+---------+-------+------+----------+-------+
函数计算列
mysql> create table user3 (a1 varchar(10),a2 varchar(10));

mysql> desc user3;

+-------+-------------+------+-----+---------+-------+

| Field | Type        | Null | Key | Default | Extra |

+-------+-------------+------+-----+---------+-------+

| a1    | varchar(10) | YES  |     | NULL    |       |

| a2    | varchar(10) | YES  |     | NULL    |       |

+-------+-------------+------+-----+---------+-------+
添加数据
mysql> alter table user3 add column a3 varchar(10) generated always as (upper(a1));

Query OK, 0 rows affected (0.03 sec)

Records: 0  Duplicates: 0  Warnings: 0

mysql> insert into user3(a1,a2) values ('abc','abc');

Query OK, 1 row affected (0.01 sec)

mysql> select * from user3;

+------+------+------+

| a1   | a2   | a3   |

+------+------+------+

| abc  | abc  | ABC  |

+------+------+------+
c3列是基于c1列大写的形式计算出来的。
mysql> create index idx3 on user3(a3);

Query OK, 0 rows affected (0.04 sec)

Records: 0  Duplicates: 0  Warnings: 0

mysql> explain select * from user3 where upper(a1) = 'ABC';

+----+-------------+-------+------------+------+---------------+------+---------+------+------+----------+-------------+

| id | select_type | table | partitions | type | possible_keys | key  | key_len | ref  | rows | filtered | Extra       |

+----+-------------+-------+------------+------+---------------+------+---------+------+------+----------+-------------+

|  1 | SIMPLE      | user3 | NULL       | ref  | idx3          | idx3 |       | const |    1 |   100.00 | NULL       |

+----+-------------+-------+------------+------+---------------+------+---------+------+------+----------+-------------+
达到了与函数索引一样的效果
通用表表达式(CTE):
即with子句,是sql语句的增强,通用表达式在sql2003标准(https://en.wikipedia.org/wiki/SQL:2003)中就引入了,很多主流数据库都有该功能,mysql8.0也是拥有了该功能。
1.非递归CTE
派生表:select * from (select 1) as dt;
通用表表达式:with cte as (select 1)select * from cte;就相当于一个变量,在后面语句中使用。
mysql> select * from (select 1) as dt;

+---+

| 1 |

+---+

| 1 |

+---+

mysql> with dt as (select 1)

    -> select * from dt;

+---+

| 1 |

+---+

| 1 |

+---+
写法更加清晰
mysql> with cte1(id) as (select 1),

    -> cte2(id) as (select id+1 from cte1)

    -> select * from cte1 join cte2;

+----+----+

| id | id |

+----+----+

|  1 |  2 |

+----+----+
2.递归CTE
在查询中引用自己的定义,使用RECURSIVE表示。和编程语言中的递归函数调用差不多。生成一些模拟数据也比较方便
mysql> with recursive cte (n) as

    -> (

    -> select 1

    -> union all

    -> select n + 1 from cte where n <10

    -> )

    -> select * from cte;

+------+

| n    |

+------+

|    1 |

|    2 |

|    3 |

|    4 |

|    5 |

|    6 |

|    7 |

|    8 |

|    9 |

|   10 |

+------+
无限级分类表
mysql> create table employee (id int,name varchar(20),manager_id int);

mysql> insert into employee values(29,'song',198),(72,'lucy',29),(123,'adil',692),(198,'join',333),(333,'yaml',NULL),(692,'cady',333),(700,'sarac',29);

mysql> select * from employee;

+------+-------+------------+

| id   | name  | manager_id |

+------+-------+------------+

|   29 | song  |        198 |

|   72 | lucy  |         29 |

|  123 | adil  |        692 |

|  198 | join  |        333 |

|  333 | yaml  |       NULL |

|  692 | cady  |        333 |

|  700 | sarac |         29 |

+------+-------+------------+
实例
mysql> with recursive employee_paths(id,name,path) as

    -> (

    -> select id,name,cast(id as char(200))

    -> from employee

    -> where manager_id is null

    -> union all

    -> select e.id,e.name,concat(ep.path,',',e.id)

    -> from employee_paths as ep join employee as e

    -> on ep.id = e.manager_id

    -> )

    -> select * from employee_paths order by path;

+------+-------+----------------+

| id   | name  | path           |

+------+-------+----------------+

|  333 | yaml  | 333            |

|  198 | join  | 333,198        |

|   29 | song  | 333,198,29     |

|  700 | sarac | 333,198,29,700 |

|   72 | lucy  | 333,198,29,72  |

|  692 | cady  | 333,692        |

|  123 | adil  | 333,692,123    |

+------+-------+----------------+
递归cte注意次数限制,递归表达式要包含一个终止递归的条件,避免死循环。
mysql8.0提供了参数cte_max_recursion_depth:最大递归深度, max_execution_time:sql语句最大执行时间。
mysql> with recursive cte(n) as

    -> (

    -> select 1

    -> union all

    -> select n+1 from cte

    -> )

    -> select * from cte;

ERROR 3636 (HY000): Recursive query aborted after 1001 iterations. Try increasing @@cte_max_recursion_depth to a larger value.
在第1001次阻断
mysql> show variables like 'cte_max%';

+-------------------------+-------+

| Variable_name           | Value |

+-------------------------+-------+

| cte_max_recursion_depth | 1000  |

+-------------------------+-------+

mysql> set session cte_max_recursion_depth=10;

0表示无限制 1000毫秒=1秒
通用表表达式和派生表很类似,就像语句级别的临时表和试图,用派生表的地方就可以用通用表表达式,语意更加清晰点。
cte可以在查询中多次引用,也可以引用其他的cte
cte支持select/insert/update/delete等语句
比如使用递归CTE生成斐波那契数列。
窗口函数(window function)
也称呼为分析函数,为sql语句提供强大的数据分析功能,可以通过sql语句做一些数据分析。
窗口函数与分组聚合函数类似,但是每一行数据都生成一个结果,就是主要对数据进行分组group by操作,然后对每一个组聚合产生一个结果,比如组内的平均数,组内的组合等等。窗口函数与之相似也可以分组,不同的地方在于,针对分组内的每一个行都会生成相应的一个结果,所以结果和行数上相同的。
窗口函数定义
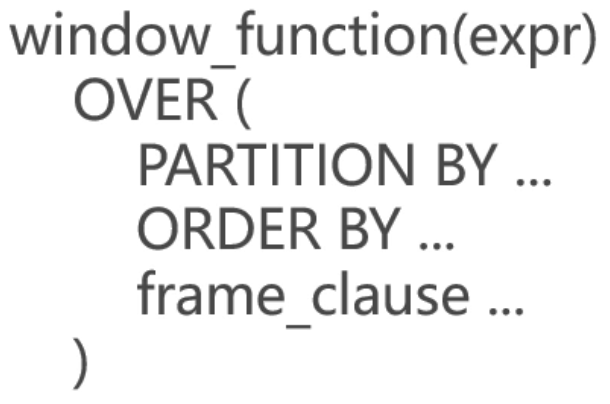
over是关键字,用来指定函数执行的窗口范围,内部可以指定三个选项,第一个是先对数据进行分组,第二个是对分组的数据进行排序,第三个进一步操作。
常见聚合窗口函数:SUM / AVG / COUNT / MAX / MIN 等等。
mysql> insert into sales values (2000,'Finland','Computer',1500),(2001,'USA','Phone',1200),(2001,'Finland','Phone',10),(2000,'India','Calculator',75),
(2001,'USA','TV',150),(2000,'India','Computer',1200),(2000,'USA','Calculator',5),(2000,'USA','Computer',1500),(2000,'Finland','Phone',100),
(2001,'USA','Calculator',50),(2001,'USA ',' TV',100);

mysql> select * from sales;

+------+---------+------------+--------+

| year | country | product    | profit |

+------+---------+------------+--------+

| 2000 | Finland | Computer   |   1500 |

| 2001 | USA     | Phone      |   1200 |

| 2001 | Finland | Phone      |     10 |

| 2000 | India   | Calculator |     75 |

| 2001 | USA     | TV         |    150 |

| 2000 | India   | Computer   |   1200 |

| 2000 | USA     | Calculator |      5 |

| 2000 | USA     | Computer   |   1500 |

| 2000 | Finland | Phone      |    100 |

| 2001 | USA     | Calculator |     50 |

| 2001 | USA     | Computer   |   1500 |

| 2000 | India   | Calculator |     75 |

| 2001 | USA     | TV         |    100 |

+------+---------+------------+--------+
mysql> select country,sum(profit) as country_profit

    -> from sales

    -> group by country

    -> order by country;

+---------+----------------+

| country | country_profit |

+---------+----------------+

| Finland |           1610 |

| India   |           1350 |

| USA     |           4505 |
mysql> select year,country,product,profit,

    -> sum(profit) OVER (partition by country) as country_profit

    -> from sales

    -> order by country,year,product,profit;

+------+---------+------------+--------+----------------+

| year | country | product    | profit | country_profit |

+------+---------+------------+--------+----------------+

| 2000 | Finland | Computer   |   1500 |           1610 |

| 2000 | Finland | Phone      |    100 |           1610 |

| 2001 | Finland | Phone      |     10 |           1610 |

| 2000 | India   | Calculator |     75 |           1350 |

| 2000 | India   | Calculator |     75 |           1350 |

| 2000 | India   | Computer   |   1200 |           1350 |

| 2000 | USA     | Calculator |      5 |           4505 |

| 2000 | USA     | Computer   |   1500 |           4505 |

| 2001 | USA     | Calculator |     50 |           4505 |

| 2001 | USA     | Computer   |   1500 |           4505 |

| 2001 | USA     | Phone      |   1200 |           4505 |

| 2001 | USA     | TV         |    100 |           4505 |

| 2001 | USA     | TV         |    150 |           4505 |

+------+---------+------------+--------+----------------+
使用窗口函数,每一行都出现,保留了原来的数据结构,在原来基础上增加一些分析出来结果列,而不像分组聚合函数那样。分析数据可以使用
前四列是原始数据
窗口函数不需要在加group by了。
专用窗口函数
获取排名函数
ROW_NUMBER() / RANK() /DENSE_RANK() / PERCENT_RANK()
FIRST_VALUE() / LAST_VALUE() / LEAD() / LAG()
CUME_DIST() / NTH_VALUE() / NTILE()
mysql> insert into numbers values (1),(1),(2),(3),(3),(3),(3),(4),(4),(5);

Query OK, 10 rows affected (0.01 sec)

Records: 10  Duplicates: 0  Warnings: 0

mysql> select * from numbers;

+------+

| nums |

+------+

|    1 |

|    1 |

|    2 |

|    3 |

|    3 |

|    3 |

|    3 |

|    4 |

|    4 |

|    5 |

+------+
排名
mysql> select nums , row_number() OVER (order by nums) as 'row_number' from numbers;

+------+------------+

| nums | row_number |

+------+------------+

|    1 |          1 |

|    1 |          2 |

|    2 |          3 |

|    3 |          4 |

|    3 |          5 |

|    3 |          6 |

|    3 |          7 |

|    4 |          8 |

|    4 |          9 |

|    5 |         10 |

+------+------------+
mysql> select nums,

    -> first_value(nums) over (order by nums) as 'first',

    -> lead(nums,1) over (order by nums) as 'lead'

    -> from numbers;

+------+-------+------+

| nums | first | lead |

+------+-------+------+

|    1 |     1 |    1 |

|    1 |     1 |    2 |

|    2 |     1 |    3 |

|    3 |     1 |    3 |

|    3 |     1 |    3 |

|    3 |     1 |    3 |

|    3 |     1 |    4 |

|    4 |     1 |    4 |

|    4 |     1 |    5 |

|    5 |     1 | NULL |

+------+-------+------+
Innodb存储引擎改进
Innodb存储引擎成为mysql默认存储引擎后,功能一直在改进,mysql8.0中innodb的功能也得到增强。
1.集成数据字典
mysql8.0重新重构了数据字典
1)删除了之前元数据文件关于数据库等信息,例如.frm .opt等基于文件等数据库信息。
mysql5.7
root@4a68d9279589:/# cd /var/lib/mysql

root@4a68d9279589:/var/lib/mysql# ls

auto.cnf    client-cert.pem  ib_logfile0  ibtmp1          private_key.pem  server-key.pem

ca-key.pem  client-key.pem   ib_logfile1  mysql              public_key.pem   sys

ca.pem        ib_buffer_pool   ibdata1      performance_schema  server-cert.pem  testDB

root@4a68d9279589:/var/lib/mysql# ls mysql

columns_priv.MYD   gtid_executed.ibd       proc.MYI             slow_log.CSV

columns_priv.MYI   help_category.frm       proc.frm             slow_log.frm

columns_priv.frm   help_category.ibd       procs_priv.MYD         tables_priv.MYD

db.MYD           help_keyword.frm       procs_priv.MYI         tables_priv.MYI

db.MYI           help_keyword.ibd       procs_priv.frm         tables_priv.frm

db.frm           help_relation.frm       proxies_priv.MYD         time_zone.frm

db.opt           help_relation.ibd       proxies_priv.MYI         time_zone.ibd

engine_cost.frm    help_topic.frm       proxies_priv.frm         time_zone_leap_second.frm

engine_cost.ibd    help_topic.ibd       server_cost.frm         time_zone_leap_second.ibd

event.MYD       innodb_index_stats.frm  server_cost.ibd         time_zone_name.frm

event.MYI       innodb_index_stats.ibd  servers.frm             time_zone_name.ibd

event.frm       innodb_table_stats.frm  servers.ibd             time_zone_transition.frm

func.MYD       innodb_table_stats.ibd  slave_master_info.frm     time_zone_transition.ibd

func.MYI       ndb_binlog_index.MYD    slave_master_info.ibd     time_zone_transition_type.frm

func.frm       ndb_binlog_index.MYI    slave_relay_log_info.frm  time_zone_transition_type.ibd

general_log.CSM    ndb_binlog_index.frm    slave_relay_log_info.ibd  user.MYD

general_log.CSV    plugin.frm           slave_worker_info.frm     user.MYI

general_log.frm    plugin.ibd           slave_worker_info.ibd     user.frm

gtid_executed.frm  proc.MYD           slow_log.CSM
mysql8.0
root@8de6e5139f7d:/# cd /var/lib/mysql/

root@8de6e5139f7d:/var/lib/mysql# ls mysql

general_log.CSM  general_log.CSV  general_log_197.sdi  slow_log.CSM  slow_log.CSV  slow_log_198.sdi

root@8de6e5139f7d:/var/lib/mysql# ls -l mysql

total 28

-rw-r----- 1 mysql mysql    35 Jul 15 11:19 general_log.CSM

-rw-r----- 1 mysql mysql     0 Jul 15 11:19 general_log.CSV

-rw-r----- 1 mysql mysql  5561 Jul 15 11:19 general_log_197.sdi

-rw-r----- 1 mysql mysql    35 Jul 15 11:19 slow_log.CSM

-rw-r----- 1 mysql mysql     0 Jul 15 11:19 slow_log.CSV

-rw-r----- 1 mysql mysql 11786 Jul 15 11:19 slow_log_198.sdi
mysql8.0主要存放在这个目录下
root@8de6e5139f7d:/var/lib/mysql# ls

#innodb_temp   binlog.000003  ca-key.pem       ib_buffer_pool  ibtmp1              private_key.pem  sys

auto.cnf       binlog.000004  ca.pem           ib_logfile0     mysql               public_key.pem   testDB

binlog.000001  binlog.000005  client-cert.pem  ib_logfile1     mysql.ibd           server-cert.pem  undo_001

binlog.000002  binlog.index   client-key.pem   ibdata1         performance_schema  server-key.pem   undo_002

root@8de6e5139f7d:/var/lib/mysql# ls -l mysql.ibd

-rw-r----- 1 mysql mysql 31457280 Jul 15 12:50 mysql.ibd
mysql8将系统表(mysql)和数据字典全部改为innodb。
2.原子ddl操作,基于innodb事务特性。
由于采用了新的数据字典, MySQL 8.0 现在支持原子数据定义语句 (Atomic DDLs)。 这意味着执行 DDL 时,数据字典更新,存储引擎操作以及二进制日志文件中的写入操作会合并到单个原子事务中,该事务要么完全执行,要么根本不执行。这提高了 DDL 的稳定性保证未完成的 DDL 不会留下任何不完整的数据。
mysql8.0开始支持原子DDL操作,原子DDL操作又很多种,但其中与表相关的原子DDL只支持Innodb存储引擎,比如创建表,删除表。一个原子DDL操作包括:更新数据字典,存储引擎层的操作,在binlog二进制日志中记录DDL操作,
支持与表相关的DDL:数据库,表空间,表,索引的create,alter,drop以及truncate table。
支持的其他DDL:存储过程,触发器,视图,UDF(用户定义函数)的create,drop以及alter语句。
支持账户管理相关DDL:用户和角色的create,alter,drop以及适用的rename,以及GRANT(授权)和REVOKE(撤销授权)语句。
mysql> show tables;

+------------------+

| Tables_in_testDB |

+------------------+

| table1           |

+------------------+

1 row in set (0.00 sec)

mysql> drop table table1,table2;

ERROR 1051 (42S02): Unknown table 'testDB.table2'

mysql> show tables;

Empty set (0.00 sec)
虽然错误,但是t1表已经被删除了,所以这个操作不具有原子性。
在mysql8.0进行相同操作
mysql> show tables;

+------------------+

| Tables_in_testDB |

+------------------+

| employee         |

| user             |

| user2            |

| user3            |

+------------------+

4 rows in set (0.00 sec)

mysql> drop table user3,user4;

ERROR 1051 (42S02): Unknown table 'testDB.user4'

mysql> show tables;

+------------------+

| Tables_in_testDB |

+------------------+

| employee         |

| user             |

| user2            |

| user3            |   表user3依然存在

+------------------+
新版本功能对复制的影响:
主从复制时候,主节点上mysql5.7,从节点上mysql8.0,由于实现原理不一样,主节点drop语句有可能成功一部分,而mysql8.0会全部失败,可以通过判断drop if exists t1,t2。
3.自增列持久化
mysql5.7及早期版本,Innodb自增列计数器(AUTH_INCREMENT)的只值存储在内存中,它值的更新只会在内存中更新,当系统出现故障或者重启,它需要重新去扫描表中的自增列,找到当前最大列,然后基于这个值在自增,在某些情况下它这个值有可能是之前使用过的值,也就是说会出现重复的值,对于主键来说是不允许有重复的值。
基于以上原因mysql8.0做了修改,mysql8.0每次变化时将自增计数器的最大值写入redo log,同时每次在检查点将其写入引擎私有的系统表。系统在下次重启或者恢复时候可以找到曾经使用过的最大值,避免新生成的值和以前的值重复的情况。
mysql57> create table table1(id int auto_increment primary key, name varchar(10));

Query OK, 0 rows affected (0.02 sec)

mysql57> insert into table1(name) values('tom'),('lucy'),('make');

Query OK, 3 rows affected (0.02 sec)

Records: 3  Duplicates: 0  Warnings: 0

mysql57> select * from table1;

+----+------+

| id | name |

+----+------+

|  1 | tom  |

|  2 | lucy |

|  3 | make |

+----+------+

3 rows in set (0.00 sec)

mysql57> delete from table1 where id=3;

Query OK, 1 row affected (0.02 sec)

mysql57> select * from table1;

+----+------+

| id | name |

+----+------+

|  1 | tom  |

|  2 | lucy |

+----+------+

2 rows in set (0.01 sec)
删除并重启
songguojundeMBP:~ songguojun$ docker stop song-mysql57

song-mysql57

songguojundeMBP:~ songguojun$ docker start song-mysql57

song-mysql57

songguojundeMBP:~ songguojun$ docker exec -it song-mysql57 /bin/bash
mysql> select * from table1;

+----+------+

| id | name |

+----+------+

|  1 | tom  |

|  2 | lucy |

+----+------+

2 rows in set (0.00 sec)

mysql> insert into table1(name) values('salary');

Query OK, 1 row affected (0.00 sec)

mysql> select * from table1;

+----+--------+

| id | name   |

+----+--------+

|  1 | tom    |

|  2 | lucy   |

|  3 | salary |

+----+--------+

3 rows in set (0.00 sec)

mysql> update table1 set id=5 where name = 'tom';

Query OK, 1 row affected (0.01 sec)

Rows matched: 1  Changed: 1  Warnings: 0

mysql> select * from table1;

+----+--------+

| id | name   |

+----+--------+

|  2 | lucy   |

|  3 | salary |

|  5 | tom    |

+----+--------+

3 rows in set (0.00 sec)

mysql> insert into table1(name) values ('song');

Query OK, 1 row affected (0.01 sec)

mysql> select * from table1;

+----+--------+

| id | name   |

+----+--------+

|  2 | lucy   |

|  3 | salary |

|  4 | song   |

|  5 | tom    |

+----+--------+

4 rows in set (0.00 sec)

mysql> insert into table1(name) values ('song2');

ERROR 1062 (23000): Duplicate entry '' for key 'PRIMARY'
接下来看mysql8.0是如何解决这个问题的
按照上面的步骤操作即可
mysql> show variables like 'innodb_autoinc%';

+--------------------------+-------+

| Variable_name            | Value |

+--------------------------+-------+

| innodb_autoinc_lock_mode | 2     |

+--------------------------+-------+
参数解释:
mysql8.0这个值默认是2 mysql5.7这个默认值是1, 2是交叉模式,这个锁是交叉生成的,1表示连续模式,这两个值差别在于复制的时候,比如说之前 复制说基于语句的复制,比如一条语句生成10条记录,在这条语句中生成的记录都是顺序的,如果从主节点复制到从节点也要保证说顺序的话就要使用这个值为1,可以保证语句级别的增长都是连续的,最新的复制模式改为行的复制模式,意味着将行的实际数据值复制,所以不关心自增列是怎么生成的,也不能保证生成的id一致性,因为不像之前版本加上锁,这样的好处可以支持更高的并发和扩展。如果还想要之前那样基于语句就要注意这个参数设置下。
4.死锁检查控制
死锁:有两个事务都需要对数据进行修改,修改的过程中都需要等待对方释放资源,由于互相没有感知,在没有外界的介入下它们会一直等待下去,就形成了死锁。mysql后台有个死锁检测程序,在后台发现了会让一个事务失败,让另一个事务进行下去,当然死锁检测需要一定的代价,需要占用一定的系统资源。
mysql8.0及mysql5.7.15增加了一个新的动态变量,用于控制系统是否执行Innodb的死锁检测。
innodb_deadlock_detect 默认情况说打开的,会进行死锁检测。
对于高并发的系统,死锁检测会占用系统资源,所以禁用死锁检测可能会带来性能的提高。
mysql8> show variables like 'innodb_deadlock_detect';

+------------------------+-------+

| Variable_name          | Value |

+------------------------+-------+

| innodb_deadlock_detect | ON    |

+------------------------+-------+
下面开启两个事务,然后在两个事务之间互相锁定各自的资源,来等待对方的锁。
先创建一张表
mysql> create table table_t1 (i int);

Query OK, 0 rows affected (0.03 sec)

mysql> insert into table_t1(i) values(1);

Query OK, 1 row affected (0.00 sec)
| 事务1 | 说明 | 事务2 | 说明 |
| mysql> start transaction; Query OK, 0 rows affected (0.01 sec) mysql> select * from table_t1 where i=1 for share; |
for share获取记录上的一个共享锁 | mysql> start transaction; Query OK, 0 rows affected (0.00 sec) mysql> delete from table_t1 where i=1; |
删除需要排它锁 ,由于前面一个会话已经占用了一个共享锁,这时候在等待资源的释放。 |
| mysql> delete from table_t1 where i=1; Query OK, 1 row affected (0.01 sec) |
第二个窗口 删除时候也需要排它锁,这个时候它也需要第二个会话事务释放锁才能进行下去,发现了死锁 。 因为系统发现了死锁并解除死锁,这里可以进行下去。 |
mysql> delete from table_t1 where i=1; ERROR 1213 (40001): Deadlock found when trying to get lock; try restarting transaction |
死锁被发现,系统将它会滚掉,让第一个事务进行下去 |
| mysql> select * from table_t1; Empty set (0.00 sec) |
数据被删除 |
以上是innodb_deadlock_detect默认打开情况下掉行为。
那么我们将这个参数关闭测试看看如何处理死锁的
mysql> set global innodb_deadlock_detect = off;    #关闭死锁检测

Query OK, 0 rows affected (0.00 sec)

mysql> show variables like 'innodb_deadlock_detect';

+------------------------+-------+

| Variable_name          | Value |

+------------------------+-------+

| innodb_deadlock_detect | OFF   |

+------------------------+-------+
还有一个参数 锁等待超时 这个参数会影响实验
mysql> show variables like 'innodb_lock_wait%';

+--------------------------+-------+

| Variable_name            | Value |

+--------------------------+-------+

| innodb_lock_wait_timeout | 50    |     #默认是50秒

+--------------------------+-------+

1 row in set (0.00 sec)

mysql> set global innodb_lock_wait_timeout=5;

Query OK, 0 rows affected (0.00 sec)
50秒设置为5秒
| 事务1 | 说明 | 事务2 | 说明 |
| mysql> start transaction; Query OK, 0 rows affected (0.01 sec) mysql> select * from table_t1 where i=1 for share; |
mysql> start transaction; |
||
|
mysql> delete from table_t1 where i=1; |
执行删除操作,在等待中 | ||
| mysql> delete from table_t1 where i=1; Query OK, 1 row affected (31.99 sec) |
这个事务也在等待中, 如果死锁检测打开,就会提示死锁错误信息,但是这里没有提示 |
||
| ERROR 1205 (HY000): Lock wait timeout exceeded; try restarting transaction | 通过超时来回滚事务,让事务二失败 |
注意:
1.死锁检测关闭的前提是我们系统不会发生死锁的情况,所以在我们写代码写sql语句要注意点死锁的发生。
2.锁等待超时时间不要设置太长,防止对系统的影响。
5.锁定语句选项
mysql里面有两种为查询语句加锁的语句
1. select....... for update
2. select ....... for share
这两个语句分别是为我们查询出来的语句加上共享锁和排它锁,如果查出来的数据在其他事物中以及占用了相应的锁,那么我们的语句需要进行相应的等待直到响应的事务释放锁直到超时。
mysql8.0为这两个语句增加了两个新的选项。
1) NOWAIT:如果请求的行被其他事物锁定,语句立即返回,不等待。
2)SKIP LOCKED:从返回的结果中移除锁定的行,只返回没有被锁定的行。应用场景,比如在线票务系统,有很多并发请求,如果票被其他线程占用,这时候可以选择不等待,返回可以使用的票。
mysql> create table table6 (i int ,primary key(i));

mysql> insert into table6 values (1),(2),(3);
| 事务1 | 说明 | 事务2 | 说明 |
| mysql> start transaction; Query OK, 0 rows affected (0.00 sec) mysql> update table6 set i=0 where i=2; |
加上排它锁,不进行提交 | ||
|
start transaction; select * from table6 where i=2 for update; ERROR 1205 (HY000): Lock wait timeout exceeded; try restarting transaction |
由于前面会话占用了锁,会一直等待直到语句超时 | ||
| mysql> start transaction; Query OK, 0 rows affected (0.00 sec) mysql> select * from table6 where i=2 for update nowait; |
如果加上nowait选项选择不等待锁会返回一个错误,相应数据被占用,直接返回错误。 | ||
| mysql> select * from table6 for update skip locked; +---+ | i | +---+ | 1 | | 3 | +---+ 2 rows in set (0.00 sec) |
加上skip locked选项选择跳过锁定的数据,返回别的没被锁定的数据。 |
注意:
1.这两个参数锁针对行级锁。
2.这两个锁针对行级锁,对每一条行记录起作用。
主从复制,主从当时运行环境情况的各不一样,导致数据的不确定性,对于语句级别会带来不一致性问题。
3.简化了INFORMATION_SCHEMA的实现,提高了访问性能。
4.针对innodb存储引擎提供了序列化字典信息(SDL)的支持,以及ibd2sdi工具。SDI是一个文本文件,存储了数据字典信息。ibd2sdi工具可以将innodb相关表信息导出成文本信息。
root@f488b1c2586a:/# cd /var/lib/mysql/

root@f488b1c2586a:/var/lib/mysql# ls

#innodb_temp   ca.pem        ibdata1            private_key.pem  undo_001

auto.cnf       client-cert.pem    ibtmp1            public_key.pem   undo_002

binlog.  client-key.pem    mysql            server-cert.pem

binlog.  ib_buffer_pool    mysql.ibd        server-key.pem

binlog.index   ib_logfile0    mysqld-auto.cnf     sys

ca-key.pem     ib_logfile1    performance_schema  testDB

root@f488b1c2586a:/var/lib/mysql# cd testDB/

root@f488b1c2586a:/var/lib/mysql/testDB# ls

numbers.ibd  sales.ibd    table_json.ibd    user2.ibd  user3.ibd
root@f488b1c2586a:/var/lib/mysql/testDB# ibd2sdi table_json.ibd > sales.ibd

root@f488b1c2586a:/var/lib/mysql/testDB# ls

numbers.ibd  sales.ibd    table_json.ibd    user2.ibd  user3.ibd

root@f488b1c2586a:/var/lib/mysql/testDB# cat sales.ibd

["ibd2sdi"

,

{

    "type": ,

    "id": ,

    "object":

        {

    "mysqld_version_id": ,

    "dd_version": ,

    "sdi_version": ,

    "dd_object_type": "Table",

    "dd_object": {

        "name": "table_json",

        "mysql_version_id": ,

        "created": ,

        "last_altered": ,

        "hidden": ,

        "options": "avg_row_length=0;encrypt_type=N;key_block_size=0;keys_disabled=0;pack_record=1;stats_auto_recalc=0;stats_sample_pages=0;",

        "columns": [

            {

                "name": "data",

                "type": ,

                "is_nullable": true,

                "is_zerofill": false,

                "is_unsigned": false,

                "is_auto_increment": false,

                "is_virtual": false,

                "hidden": ,

                "ordinal_position": ,

                "char_length": ,

                "numeric_precision": ,

                "numeric_scale": ,

                "numeric_scale_null": true,

                "datetime_precision": ,

                "datetime_precision_null": ,

                "has_no_default": false,

                "default_value_null": true,

                "srs_id_null": true,

                "srs_id": ,

                "default_value": "",

                "default_value_utf8_null": true,

                "default_value_utf8": "",

                "default_option": "",

                "update_option": "",

                "comment": "",

                "generation_expression": "",

                "generation_expression_utf8": "",

                "options": "interval_count=0;",

                "se_private_data": "table_id=1066;",

                "column_key": ,

                "column_type_utf8": "json",

                "elements": [],

                "collation_id": ,

                "is_explicit_collation": true

            },
比如当数据表损坏的时候可以用这些文本信息恢复。
由于新的数据字典的引入,会导致之前使用上的差异,例如innodb_read_only影响所有所有的存储引擎。数据字典不可见,不能直接修改和查询。
6.索引跳跃扫描(index skip scan)
新的优化可以避免全量索引扫描,而是根据每个col1上的值+col2上的条件,启动多次range scan。每次range scan根据构建的key值直接在索引上定位,直接忽略了那些不满足条件的记录。
mysql> CREATE TABLE table_scan (i1 int, i2 int , PRIMARY KEY(i1, i2));

mysql> INSERT INTO table_scan VALUES (1,1), (1,2), (1,3), (1,4), (1,5),(2,1), (2,2), (2,3), (2,4), (2,5);

mysql> INSERT INTO table_scan SELECT i1, i2 + 5 FROM table_scan;

mysql> INSERT INTO table_scan SELECT i1, i2 + 10 FROM table_scan;

mysql> INSERT INTO table_scan SELECT i1, i2 + 20 FROM table_scan;

mysql> INSERT INTO table_scan SELECT i1, i2 + 40 FROM table_scan;

mysql> EXPLAIN SELECT i1, i2 FROM table_scan WHERE i2 > 40;

+----+-------------+------------+------------+-------+---------------+---------+---------+------+------+----------+--------------------------+

| id | select_type | table      | partitions | type  | possible_keys | key     | key_len | ref  | rows | filtered | Extra                    |

+----+-------------+------------+------------+-------+---------------+---------+---------+------+------+----------+--------------------------+

|  1 | SIMPLE      | table_scan | NULL       | index | PRIMARY       | PRIMARY | 8       | NULL |  160 |    33.33 | Using where; Using index |

+----+-------------+------------+------------+-------+---------------+---------+---------+------+------+----------+--------------------------+mysql> ANALYZE TABLE table_scan;

+-------------------+---------+----------+----------+

| Table             | Op      | Msg_type | Msg_text |

+-------------------+---------+----------+----------+

| testDB.table_scan | analyze | status   | OK       |

+-------------------+---------+----------+----------+

mysql> EXPLAIN SELECT i1, i2 FROM table_scan WHERE i2 > 40;

+----+-------------+------------+------------+-------+---------------+---------+---------+------+------+----------+----------------------------------------+

| id | select_type | table      | partitions | type  | possible_keys | key     | key_len | ref  | rows | filtered | Extra                                  |

+----+-------------+------------+------------+-------+---------------+---------+---------+------+------+----------+----------------------------------------+

|  1 | SIMPLE      | table_scan | NULL       | range | PRIMARY       | PRIMARY | 8       | NULL |   53 |   100.00 | Using where; Using index for skip scan |

+----+-------------+------------+------------+-------+---------------+---------+---------+------+------+----------+----------------------------------------+
mysql> show variables like 'optimizer_trace%';

+------------------------------+----------------------------------------------------------------------------+

| Variable_name                | Value                                                                      |

+------------------------------+----------------------------------------------------------------------------+

| optimizer_trace              | enabled=off,one_line=off                                                   |

| optimizer_trace_features     | greedy_search=on,range_optimizer=on,dynamic_range=on,repeated_subselect=on |

| optimizer_trace_limit        | 1                                                                          |

| optimizer_trace_max_mem_size | 1048576                                                                    |

| optimizer_trace_offset       | -1                                                                         |

+------------------------------+----------------------------------------------------------------------------+
开启 optimizer_trace
SET optimizer_trace='enabled=on';
执行需要执行的 sql
SELECT i1, i2 FROM table_scan WHERE i2 > 40;
可以从optimizer trace里看到如何选择的skip scan
mysql> select trace from `information_schema`.`optimizer_trace`\G;

*************************** 1. row ***************************

trace: {

  "steps": [

    {

      "join_preparation": {

        "select#": 1,

        "steps": [

          {

            "expanded_query": "/* select#1 */ select `table_scan`.`i1` AS `i1`,`table_scan`.`i2` AS `i2` from `table_scan` where (`table_scan`.`i2` > 40)"

          }

        ]

      }

    },

    {
    #此处省略.....

                  "group_index_range": {

                    "chosen": false,

                    "cause": "not_group_by_or_distinct"

                  },

                  "skip_scan_range": {

                    "potential_skip_scan_indexes": [

                      {

                        "index": "PRIMARY",

                        "tree_travel_cost": 0.4,

                        "num_groups": 3,

                        "rows": 53,

                        "cost": 10.625

                      }

                    ]

                  },

                  "best_skip_scan_summary": {

                    "type": "skip_scan",

                    "index": "PRIMARY",

                    "key_parts_used_for_access": [

                      "i1",

                      "i2"

                    ],

                    "range": [

                      "40 < i2"

                    ],

                    "chosen": true

                  },

                    "rows_for_plan": 53,

                    "cost_for_plan": 10.625,

                    "chosen": true

                  }

                }

              }

            ]
#此处省略.....

      }

    },

    {

      "join_execution": {

        "select#": 1,

        "steps": [

        ]

      }

    }

  ]

}

1 row in set (0.00 sec)
mysql> show variables like 'optimizer_switch%';

+------------------+---------------------------------------------------------------------------------------------------------------------------------------------------------------------------------------------------------------------------------------------------------------------------------------------------------------------------------------------------------------------------------------------------------------------------------------------------------+

| Variable_name    | Value                                                                                                                                                                                                                                                                                                                                                                                                                                                   |

+------------------+---------------------------------------------------------------------------------------------------------------------------------------------------------------------------------------------------------------------------------------------------------------------------------------------------------------------------------------------------------------------------------------------------------------------------------------------------------+

| optimizer_switch | index_merge=on,index_merge_union=on,index_merge_sort_union=on,index_merge_intersection=on,engine_condition_pushdown=on,
index_condition_pushdown=on,mrr=on,mrr_cost_based=on,block_nested_loop=on,batched_key_access=off,materialization=on,semijoin=on,loosescan=on,
firstmatch=on,duplicateweedout=on,subquery_materialization_cost_based=on,use_index_extensions=on,condition_fanout_filter=on,derived_merge=on,
use_invisible_indexes=off,skip_scan=on |

+------------------+------------------------------------------------------------------------------------------------------------------------------------------------------------------------------------------------------------
innodb其他的改进
1)支持部门快速DDL alter table .......ALGORITHM=INSTANT
比如快速增加某一列,可以使用INSTANT这种算法。就是修改相应数据字典的信息,而不是像以前重新创建一张表进行数据复制,这个比以前快很多,尤其线上系统非常实用。(这个功能锁腾讯开发合并到主分支上)
2)innodb临时表使用的共享临时表空间ibtmp1,改变之前使用分散的表空间的问题,存储在ibtmp1。临时表使用完就删除了,现在统一放在ibtmp1,统一的维护。
3)新增静态变量innodb_dedicated_server,如果有一台服务器是专门用于mysql数据库的,可以打开这个配置变量,系统会自动配置innodb相关等内存配置参数, 自动配置Innodb内存参数:innodb_buffer_pool_size/innodb_log_file_size等,尽量合理占用系统资源来提高系统等利用率。
4)新增表INFORMATION_SCHEMA.INNODB_CACHED_INDEXES显示每个索引缓存在innodb缓冲池中的索引页数,通过这个参数也可以了解索引缓存使用情况。
5)新增视图INFORMATION_SCHEMA.INNODB_TABLESPACES_BRIEF,为innodb表空间提供相关元数据信息。
6)mysql8.0默认创建2个undo表空间,不再使用系统表空间。以前undo表空间会占用系统表空间资源,单独存储会是系统表空间独立点。
7)支持alter tablespace......rename to重命名通用表空间。
8)支持使用innodb_directories选项在服务器停止时将表空间文件移动到新的位置。这个参数是表空间文件所在的路径,通过修改参数
9)innodb表空间加密特性支持重做日志和撤销日志,innodb_undo_log_encrypt和innodb_undo_log_encrypt参数。加密会更加安全。
JSON增强
json数据格式和关系型数据库的数据格式是不一样的,它是一个结构不固定的数据结构方式,也算是属于nosql范畴,mysql针对json不断的增强。mysql8.0关于json有了一些增强,主要是增加了一些内置的运算符和数据处理函数。
1.内联路径操作符
主要用于获取json对象在某一些节点或者某些路径上的数据。
内联操作符的表达式:
column->>path 等价于JSON_UNQUOTE( column -> path) JSON_UNQUOTE(JSON_EXTRACT(column,path))
示例演示
mysql> with doc(data) as

    -> ( select json_object('id','','name','tom'))      #创建一个json对象 有两个字段 id  name

    -> select json_unquote(data->'$.name') from doc;   #获得节点name的值

+------------------------------+

| json_unquote(data->'$.name') |

+------------------------------+

| tom                          |

+------------------------------+
还有一种方式也是之前版本支持的,这里实用另外一个函数json_extract
mysql> with doc(data) as
  -> ( select json_object('id','','name','tom'))
  -> select json_unquote(json_extract(data,'$.name')) from doc;

+-------------------------------------------+

| json_unquote(json_extract(data,'$.name')) |

+-------------------------------------------+

| tom                                       |

+-------------------------------------------+
以上是mysql8之前写法
下面看mysql8.0内联路径操作符的写法
mysql> with doc(data) as  ( select json_object('id','','name','tom')) select data->>'$.name' from doc;

+-----------------+

| data->>'$.name' |

+-----------------+

| tom             |

+-----------------+
mysql8.0还扩展了这个路径表达式的语法,可以支持范围的操作。
mysql> select json_extract('["a","b","c"]','$[1]');

+--------------------------------------+

| json_extract('["a","b","c"]','$[1]') |

+--------------------------------------+

| "b"                                  |

+--------------------------------------+

mysql> select json_extract('["a","b","c"]','$[1 to 3]');   #这个是新版本写法 支持范围查找

+-------------------------------------------+

| json_extract('["a","b","c"]','$[1 to 3]') |

+-------------------------------------------+

| ["b", "c"]                                |

+-------------------------------------------+
2.json聚合函数
可以将表中列的数据聚合成对应的json数组或者json对象。
mysql8.0增加了两个聚合函数,mysql5.7.22也增加了相同的函数。
1)JSON_ARRAYAGG() ,用于将多行数据组合生成JSON数组。
2) JSON_OBJECTAGG(),用于生成json对象。
示例演示
mysql> create table jsontable(i int,attribute varchar(100),value varchar(100));

mysql> insert into jsontable values(2,'color','red'),(2,'fabric','silk'),(3,'color','green'),(3,'shape','square');
json聚合函数和普通聚合函数是一样的。
先看数组聚合函数
mysql> select i,json_arrayagg(attribute) as attributes  from jsontable group by i;

+------+---------------------+

| i    | attributes          |

+------+---------------------+

|    2 | ["color", "fabric"] |

|    3 | ["color", "shape"]  |

+------+---------------------+
json_objectagg支持多个列
mysql> select i,json_objectagg(attribute,value) as attributes  from jsontable group by i;

+------+---------------------------------------+

| i    | attributes                            |

+------+---------------------------------------+

|    2 | {"color": "red", "fabric": "silk"}    |

|    3 | {"color": "green", "shape": "square"} |

+------+---------------------------------------+
如果存在重复值是如何处理的
mysql> insert into jsontable values(3,'color','yellow');

mysql> select * from jsontable;

+------+-----------+--------+

| i    | attribute | value  |

+------+-----------+--------+

|    2 | color     | red    |

|    2 | fabric    | silk   |

|    3 | color     | green  |

|    3 | shape     | square |

|    3 | color     | yellow |

+------+-----------+--------+

mysql> select i,json_objectagg(attribute,value) as attributes  from jsontable group by i;

+------+----------------------------------------+

| i    | attributes                             |

+------+----------------------------------------+

|    2 | {"color": "red", "fabric": "silk"}     |

|    3 | {"color": "yellow", "shape": "square"} |       #最后面的值覆盖前面的值

+------+----------------------------------------+
3.json实用函数
用于对json对象的输出或者获取json所占用的存储空间。
mysql8.0 (mysql5.7.22)增加了JSON_PRETTY()。这个函数用于在输出json对象内容的时候进行格式化或者美化的输出。
mysql8.0 (mysql5.7.22)增加了JSON_STORAGE_SIZE(),返回json数据所占用的空间大小。
JSON_STORAGE_FREE(),用于更新某些json列之后,相应的一些字段它可能释放的存储空间。
mysql> select json_object('id','','name','jack');       #先构造一个json对象

+-------------------------------------+

| json_object('id','','name','jack') |

+-------------------------------------+

| {"id": "1", "name": "jack"}         |

+-------------------------------------+

1 row in set (0.00 sec)

mysql> select json_pretty(json_object('id','','name','jack'));    #内容一样,格式被处理了

+--------------------------------------------------+

| json_pretty(json_object('id','','name','jack')) |

+--------------------------------------------------+

| {

  "id": "1",

  "name": "jack"

}                |
mysql> create table json_table2 (j_field varchar(200));

mysql> insert into json_table2 values('{"a":1000,"b":"aaa","c":"[1,2,3,4,5,6]"}');

mysql> select * from json_table2;

+------------------------------------------+

| j_field                                  |

+------------------------------------------+

| {"a":1000,"b":"aaa","c":"[1,2,3,4,5,6]"} |

+------------------------------------------+

1 row in set (0.00 sec)

mysql> select j_field , json_storage_size(j_field) from json_table2;         #查看空间大小

+------------------------------------------+----------------------------+

| j_field                                  | json_storage_size(j_field) |

+------------------------------------------+----------------------------+

| {"a":1000,"b":"aaa","c":"[1,2,3,4,5,6]"} |                         47 |   #47个字节

+------------------------------------------+----------------------------+
mysql> select j_field , json_storage_free(j_field) from json_table2;

+------------------------------------------+----------------------------+

| j_field                                  | json_storage_free(j_field) |

+------------------------------------------+----------------------------+

| {"a":1000,"b":"aaa","c":"[1,2,3,4,5,6]"} |                          0 |    #默认上面表数据没有更新 所以这里数据显示释放的空间为0

+------------------------------------------+----------------------------+
mysql> update json_table2 set j_field = json_set(j_field,"$.a",10,"$.b","bb","$.c",1);
4.json合并函数
主要是将两个json对象合并成一个。
5.json表函数
和json聚合函数执行相反的操作。将这种json对象扩展成关系型数据表行和列组织的数据形式。
四.mysql8.0其它的新的特性
1. 默认字符集由latin1变为utf8mb4。
2. 统计直方图,是一种统计信息,统计表中字段各值的分布情况。由于有时候查询优化器会走不到最优的执行计划,所以利用统计直方图,用户可以对一张表的一列做数据分布的统计,尤其是针对没有索引的字段。这可以帮助查询优化器找到更优的执行计划。统计直方图的主要使用场景是用来计算字段选择性。
3.新增mysql-auto.cnf文件,比my.cnf具有更高优先权。
五.mysql8.0去掉的特性
有增加的新特性,也会有去掉不适用老的功能
1.取消 Query Cache
现在性能审计中第一件事就是禁用 Query Cache ,因为他给数据库设计带来很多麻烦。 MySQL QC 造成的问题比他解决问题要多得多。 因此我们决定在 MySQL 8.0 中取消他,因为大家就不应该使用它。 如果你工作中需要使用 Query Cache,你应该用 ProxySQL as Query Cache 替代 Query Cache。
但是大多数情况下我会建议你不要使用查询缓存,为什么呢?因为查询缓存往往弊大于利。
查询缓存的失效非常频繁,只要有对一个表的更新,这个表上所有的查询缓存都会被清空。因此很可能你费劲地把结果存起来,还没使用呢,就被一个更新全清空了。对于更新压力大的数据库来说,查询缓存的命中率会非常低。除非你的业务就是有一张静态表,很长时间才会更新一次。比如,一个系统配置表,那这张表上的查询才适合使用查询缓存。
好在MySQL也提供了这种“按需使用”的方式。你可以将参数query_cache_type设置成DEMAND,这样对于默认的SQL语句都不使用查询缓存。而对于你确定要使用查询缓存的语句,可以用SQL_CACHE显式指定,像下面这个语句一样:
mysql> select SQL_CACHE * from T where ID=10;
需要注意的是,MySQL 8.0版本直接将查询缓存的整块功能删掉了,也就是说8.0开始彻底没有这个功能了。
mysql5.7 mysql8都是默认关闭的
mysql> show variables like '%query_cache%' ;

+------------------+-------+

| Variable_name    | Value |

+------------------+-------+

| have_query_cache | NO    |

+------------------+-------+
2.取消默认MyISAM系统表:并发程度低,资源利用率低。
3.移除PASSWORD()函数,无法再用SET PASSWORD=PASSWORD(密码)去加密。
【mysql】mysq8.0新特性的更多相关文章
- Mysql 8.0 新特性测试
Mysql 8.0 新特性测试 Role MySQL8.0版本添加了role特性,role是一种逻辑概念是权限的集合,可以将一个或以上的权限赋予给role,再将role赋给user.Oracle,Po ...
- MySQL 8.0 新特性梳理汇总
一 历史版本发布回顾 从上图可以看出,基本遵循 5+3+3 模式 5---GA发布后,5年 就停止通用常规的更新了(功能不再更新了): 3---企业版的,+3年功能不再更新了: 3 ---完全停止更新 ...
- 干货 | 解读MySQL 8.0新特性:Skip Scan Range
MySQL从8.0.13版本开始支持一种新的range scan方式,称为Loose Skip Scan.该特性由Facebook贡献.我们知道在之前的版本中,如果要使用到索引进行扫描,条件必须满足索 ...
- MySQL 8.0新特性之原子DDL
文章来源:爱可生云数据库 简介 MySQL8.0 开始支持原⼦ DDL(atomic DDL),数据字典的更新,存储引擎操作,写⼆进制日志结合成了一个事务.在没有原⼦DDL之前,DROP TABLE ...
- Mysql 8.0 新特性
转载:https://www.jianshu.com/p/be29467c2b0c
- Django 2.0 新特性 抢先看!
一.Python兼容性 Django 2.0支持Python3.4.3.5和3.6.Django官方强烈推荐每个系列的最新版本. 最重要的是Django 2.0不再支持Python2! Django ...
- Java基础加强-(注解,动态代理,类加载器,servlet3.0新特性)
1. Annotation注解 1.1. Annotation概述 Annotation是JDK 5.0以后提供对元数据的支持,可以在编译.加载和运行时被读取,并执行相应的处理.所谓Annota ...
- [转帖 ]MySQL 5.7 新特性 JSON
MySQL 5.7 新特性 JSON 的创建,插入,查询,更新 作者: 我不是鱼 (2016-08-31 16:13)分类: MySQL 标签: MySQL JSON MySQL JSON 应用 ...
- 跨时代的MySQL8.0新特性解读
目录 MySQL发展历程 MySQL8.0新特性 秒级加列 性能提升 文档数据库 SQL增强 共用表表达式(CTEs) 不可见索引(Invisible Indexes) 降序索引(Descending ...
随机推荐
- 「NOIP2018」赛道修建
传送门 Luogu 解题思路 一眼先二分(上界树的直径,下界最小边权),然后再考虑 \(\text{DP}\). 对于当前节点 \(u\),在它的所有儿子中分别返回一条匹配不完的长度最大的路径 \(M ...
- Spring Security教程之session管理
1.1 检测session超时 1.2 concurrency-control 1.3 session 固定攻击保护 Spring Security通过http元素下的子元素s ...
- Vue CLI 3搭建vue+vuex 最全分析
一.介绍 Vue CLI 是一个基于 Vue.js 进行快速开发的完整系统.有三个组件: CLI:@vue/cli 全局安装的 npm 包,提供了终端里的vue命令(如:vue create .vue ...
- zabbix邮件脚本报警
#启动邮箱服务 systemctl start postfix.service #配置用户的邮箱发送邮件 vim /etc/mail.rc set from="xxx@xxx.com&quo ...
- Spring Boot 使用 CXF 调用 WebService 服务
上一张我们讲到 Spring Boot 开发 WebService 服务,本章研究基于 CXF 调用 WebService.另外本来想写一篇 xfire 作为 client 端来调用 webservi ...
- 13. 为什么我们会需要 Pod?
13. 为什么我们会需要 Pod? 13.1 docker容器的本质 """ docker容器的本质 是进程. 主要通过 Namespace 做隔离,Cgroups 做限 ...
- vscode vue js 开发插件配置
安装 vetur { // 自动补全触发范围---双引号内的字符串也可以触发补全 "editor.quickSuggestions": { "other": t ...
- vue.js ②
1.Vue实例的生命周期钩子 每个 Vue 实例在被创建时都要经过一系列的初始化过程——例如,需要设置数据监听.编译模板.将实例挂载到 DOM 并在数据变化时更新 DOM 等.同时在这个过程中也会运行 ...
- redis几种数据导出导入方式
一.redis-dump方式 1.安装redis-dump工具 [root@172.20.0.3 ~]# yum install ruby rubygems ruby-devel -y 更改gem源 ...
- php 算法知识 冒泡排序
function bubble_order($arr){ //得到长度 $count_num=count($arr); for($k=1;$k<$count_num;$k++){ //对长度越来 ...