1.6 安全认证与授权(springboot与安全)
引言:以下文档是学习尚硅谷关于springboot教学视频后整理而来!
一、安全
认证(Authentication):证明你是谁?
授权(Authorization):你能干什么?
参考资料:
Spring Boot+Spring Security+Thymeleaf 简单教程
Spring Security 参考手册 (中文api)
Spring Security (英语api)
Spring Security是针对Spring项目的安全框架,也是Spring Boot底层安全模块默认的技术选型。他可以实现强大的web安全控制。
对于安全控制,我们仅需引入spring-boot-starter-security模块,进行少量的配置,即可实现强大的安全管理。几个类:
WebSecurityConfigurerAdapter:自定义Security策略
AuthenticationManagerBuilder:自定义认证策略
@EnableWebSecurity:开启WebSecurity模式
二、Web&安全
1、登陆/注销
HttpSecurity配置登陆、注销功能
2、Thymeleaf提供的SpringSecurity标签支持
需要引入thymeleaf-extras-springsecurity4 (thymeleaf与springsecurity的整合模块)
sec:authentication=“name”获得当前用户的用户名
sec:authorize=“hasRole(‘ADMIN’)”当前用户必须拥有ADMIN权限时才会显示标签内容
3、remember me
表单添加remember-me的checkbox
配置启用remember-me功能
4、CSRF(Cross-site request forgery)跨站请求伪造
HttpSecurity启用csrf功能,会为表单添加_csrf的值,提交携带来预防CSRF;
使用步骤:
/**
 * 1、引入SpringSecurity;
 * 2、编写SpringSecurity的配置类;
 *         @EnableWebSecurity   extends WebSecurityConfigurerAdapter
 * 3、控制请求的访问权限:
 *         configure(HttpSecurity http) {
 *              http.authorizeRequests().antMatchers("/").permitAll()
 *                  .antMatchers("/level1/**").hasRole("VIP1")
 *         }
 * 4、定义认证规则:
 *         configure(AuthenticationManagerBuilder auth){
 *              auth.inMemoryAuthentication()
 *                  .withUser("zhangsan").password("123456").roles("VIP1","VIP2")
 *         }
 * 5、开启自动配置的登陆功能:
 *         configure(HttpSecurity http){
 *              http.formLogin();
 *         }
 * 6、注销:http.logout();
 * 7、记住我:Remeberme();
 */
1、pom.xml架包
<?xml version="1.0" encoding="UTF-8"?>
<project xmlns="http://maven.apache.org/POM/4.0.0" xmlns:xsi="http://www.w3.org/2001/XMLSchema-instance"
    xsi:schemaLocation="http://maven.apache.org/POM/4.0.0 http://maven.apache.org/xsd/maven-4.0.0.xsd">
    <modelVersion>4.0.0</modelVersion>

    <groupId>com.atguigu</groupId>
    <artifactId>springboot-05-security</artifactId>
    <version>0.0.1-SNAPSHOT</version>
    <packaging>jar</packaging>

    <name>springboot-05-security</name>
    <description>Demo project for Spring Boot</description>

    <parent>
        <groupId>org.springframework.boot</groupId>
        <artifactId>spring-boot-starter-parent</artifactId>
        <version>1.5.12.RELEASE</version>
        <relativePath/> <!-- lookup parent from repository -->
    </parent>

    <properties>
        <project.build.sourceEncoding>UTF-8</project.build.sourceEncoding>
        <project.reporting.outputEncoding>UTF-8</project.reporting.outputEncoding>
        <java.version>1.8</java.version>
        <thymeleaf.version>3.0.9.RELEASE</thymeleaf.version>
        <thymeleaf-layout-dialect.version>2.3.0</thymeleaf-layout-dialect.version>
        <thymeleaf-extras-springsecurity4.version>3.0.2.RELEASE</thymeleaf-extras-springsecurity4.version>
    </properties>

    <dependencies>
        <!-- https://mvnrepository.com/artifact/org.thymeleaf.extras/thymeleaf-extras-springsecurity4 -->
        <!--thymeleaf与springsecurity4的整合包-->
        <dependency>
            <groupId>org.thymeleaf.extras</groupId>
            <artifactId>thymeleaf-extras-springsecurity4</artifactId>
        </dependency>
        <dependency>
            <groupId>org.springframework.boot</groupId>
            <artifactId>spring-boot-starter-thymeleaf</artifactId>
        </dependency>
        <!--SpringSecurity包-->
        <dependency>
            <groupId>org.springframework.boot</groupId>
            <artifactId>spring-boot-starter-security</artifactId>
        </dependency>
        <dependency>
            <groupId>org.springframework.boot</groupId>
            <artifactId>spring-boot-starter-web</artifactId>
        </dependency>

        <dependency>
            <groupId>org.springframework.boot</groupId>
            <artifactId>spring-boot-starter-test</artifactId>
            <scope>test</scope>
        </dependency>
    </dependencies>

    <build>
        <plugins>
            <plugin>
                <groupId>org.springframework.boot</groupId>
                <artifactId>spring-boot-maven-plugin</artifactId>
            </plugin>
        </plugins>
    </build>

</project>
2、编写springsecurity配置类
package com.atguigu.security.config;

import org.springframework.security.config.annotation.authentication.builders.AuthenticationManagerBuilder;
import org.springframework.security.config.annotation.web.builders.HttpSecurity;
import org.springframework.security.config.annotation.web.configuration.EnableWebSecurity;
import org.springframework.security.config.annotation.web.configuration.WebSecurityConfigurerAdapter;

@EnableWebSecurity
public class MySecurityConfig extends WebSecurityConfigurerAdapter {

    /**
     * 定义授权规则
     * @param http
     * @throws Exception
     */
    @Override
    protected void configure(HttpSecurity http) throws Exception {
        //super.configure(http);
        //定制请求的授权规则
        http.authorizeRequests().antMatchers("/").permitAll() //所有人都能访问
                .antMatchers("/level1/**").hasRole("VIP1") //只有角色为VIP1的用户才能访问,才能访问路径/level1/**下的所有资源
                .antMatchers("/level2/**").hasRole("VIP2")
                .antMatchers("/level3/**").hasRole("VIP3");

        //开启自动配置的登陆功能,效果,如果没有登陆,没有权限就会来到登陆页面
        //1、/login来到登陆页
        //2、重定向到/login?error表示登陆失败
        //3、更多详细规定
        //4、默认post形式的 /login代表处理登陆
        //5、一但定制loginPage;那么 loginPage的post请求就是登陆
        http.formLogin().usernameParameter("user").passwordParameter("pwd")
                .loginPage("/userlogin");

        //开启自动配置的注销功能。
        //1、访问 /logout 表示用户注销,清空session
        //2、注销成功会返回 /login?logout 页面;
        http.logout().logoutSuccessUrl("/");//注销成功以后来到首页

        //开启记住我功能
        //登陆成功以后,将cookie发给浏览器保存,以后访问页面带上这个cookie,只要通过检查就可以免登录
        //点击注销会删除cookie
        http.rememberMe().rememberMeParameter("remeber");
    }

    /**
     * 定义认证规则
     */
    @Override
    protected void configure(AuthenticationManagerBuilder auth) throws Exception {
        //super.configure(auth);
        auth.inMemoryAuthentication() //在内存里面查用户
                .withUser("zhangsan").password("123456").roles("VIP1","VIP2")
                .and()
                .withUser("lisi").password("123456").roles("VIP2","VIP3")
                .and()
                .withUser("wangwu").password("123456").roles("VIP1","VIP3");

    }
}
controller层:(不是主要的)
package com.atguigu.security.controller;

import org.springframework.stereotype.Controller;
import org.springframework.web.bind.annotation.GetMapping;
import org.springframework.web.bind.annotation.PathVariable;

@Controller
public class KungfuController {
    private final String PREFIX = "pages/";
    /**
     * 欢迎页
     * @return
     */
    @GetMapping("/")
    public String index() {
        return "welcome";
    }

    /**
     * 登陆页
     * @return
     */
    @GetMapping("/userlogin")
    public String loginPage() {
        return PREFIX+"login";
    }

    /**
     * level1页面映射
     * @param path
     * @return
     */
    @GetMapping("/level1/{path}")
    public String level1(@PathVariable("path")String path) {
        return PREFIX+"level1/"+path;
    }

    /**
     * level2页面映射
     * @param path
     * @return
     */
    @GetMapping("/level2/{path}")
    public String level2(@PathVariable("path")String path) {
        return PREFIX+"level2/"+path;
    }

    /**
     * level3页面映射
     * @param path
     * @return
     */
    @GetMapping("/level3/{path}")
    public String level3(@PathVariable("path")String path) {
        return PREFIX+"level3/"+path;
    }

}
thymeleaf模板:
<!DOCTYPE html>
<html xmlns:th="http://www.thymeleaf.org"
xmlns:sec="http://www.thymeleaf.org/thymeleaf-extras-springsecurity4">
<head>
<meta http-equiv="Content-Type" content="text/html; charset=UTF-8">
<title>Insert title here</title>
</head>
<body>
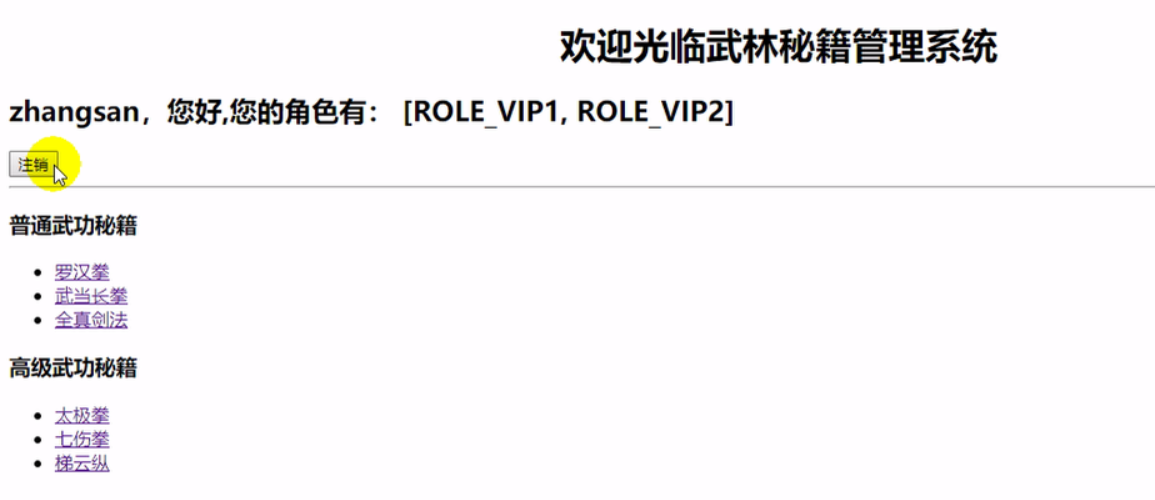
<h1 align="center">欢迎光临武林秘籍管理系统</h1>
<!--如果没有被认证这显示以下div-->
<div sec:authorize="!isAuthenticated()">
<h2 align="center">游客您好,如果想查看武林秘籍 <a th:href="@{/userlogin}">请登录</a></h2>
</div>
<!--如果用户已经被认证-->
<div sec:authorize="isAuthenticated()">
<!--用户的名字-->
<h2><span sec:authentication="name"></span>,您好,您的角色有:
<!--用户所拥有的角色-->
<span sec:authentication="principal.authorities"></span></h2>
<form th:action="@{/logout}" method="post">
<input type="submit" value="注销"/>
</form>
</div>
<hr>
<div sec:authorize="hasRole('VIP1')">
<h3>普通武功秘籍</h3>
<ul>
<li><a th:href="@{/level1/1}">罗汉拳</a></li>
<li><a th:href="@{/level1/2}">武当长拳</a></li>
<li><a th:href="@{/level1/3}">全真剑法</a></li>
</ul>
</div>
<div sec:authorize="hasRole('VIP2')">
<h3>高级武功秘籍</h3>
<ul>
<li><a th:href="@{/level2/1}">太极拳</a></li>
<li><a th:href="@{/level2/2}">七伤拳</a></li>
<li><a th:href="@{/level2/3}">梯云纵</a></li>
</ul>
</div>
<div sec:authorize="hasRole('VIP3')">
<h3>绝世武功秘籍</h3>
<ul>
<li><a th:href="@{/level3/1}">葵花宝典</a></li>
<li><a th:href="@{/level3/2}">龟派气功</a></li>
<li><a th:href="@{/level3/3}">独孤九剑</a></li>
</ul>
</div>
</body>
</html>
页面效果:
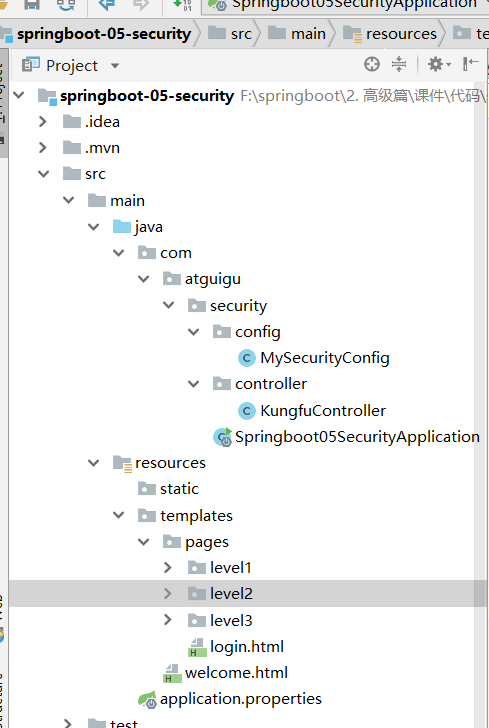
项目结构:
1.6 安全认证与授权(springboot与安全)的更多相关文章
- Shiro集成web环境[Springboot]-认证与授权
Shiro集成web环境[Springboot]--认证与授权 在登录页面提交登陆数据后,发起请求也被ShiroFilter拦截,状态码为302 <form action="${pag ...
- 使用Shiro实现认证和授权(基于SpringBoot)
Apache Shiro是一个功能强大且易于使用的Java安全框架,它为开发人员提供了一种直观,全面的身份验证,授权,加密和会话管理解决方案.下面是在SpringBoot中使用Shiro进行认证和授权 ...
- SpringBoot + SpringSecurity + Mybatis-Plus + JWT实现分布式系统认证和授权
1. 简介 Spring Security是一个功能强大且易于扩展的安全框架,主要用于为Java程序提供用户认证(Authentication)和用户授权(Authorization)功能. ...
- SpringBoot + SpringSecurity + Mybatis-Plus + JWT + Redis 实现分布式系统认证和授权(刷新Token和Token黑名单)
1. 前提 本文在基于SpringBoot整合SpringSecurity实现JWT的前提中添加刷新Token以及添加Token黑名单.在浏览之前,请查看博客: SpringBoot + Sp ...
- Shiro+springboot+mybatis+EhCache(md5+salt+散列)认证与授权-03
从上文:Shiro+springboot+mybatis(md5+salt+散列)认证与授权-02 当每次进行刷新时,都会从数据库重新查询数据进行授权操作,这样无疑给数据库造成很大的压力,所以需要引入 ...
- Shiro+springboot+mybatis(md5+salt+散列)认证与授权-02
代码延续地址:Shiro+springboot+mybatis(md5+salt+散列)认证与授权-01 1.创建t_role角色表(比如管理员admin,普通用户user等),创建t_pers权限表 ...
- Shiro+springboot+mybatis(md5+salt+散列)认证与授权-01
这个小项目包含了注册与登录,使用了springboot+mybatis+shiro的技术栈:当用户在浏览器登录时发起请求时,首先这一系列的请求会被拦截器进行拦截(ShiroFilter),然后拦截器根 ...
- SpringBoot日记——Spring的安全配置-登录认证与授权
安全是每个项目开发中都需要考虑的,比如权限控制,安全认证,防止漏洞攻击等. 比较常见的安全框架有:Apache的shiro.Spring Security等等,相信用shiro的用户群体更多,而sec ...
- 基于SpringSecurity和JWT的用户访问认证和授权
发布时间:2018-12-03 技术:springsecurity+jwt+java+jpa+mysql+mysql workBench 概述 基于SpringSecurity和JWT的用户访 ...
随机推荐
- 如何在vscode中调试python scrapy爬虫
本文环境为 Win10 64bit+VS Code+Python3.6,步骤简单罗列下,此方法可以不用单独建一个Py入口来调用命令行 安装Python,从官网下载,过程略,这里主要注意将python目 ...
- Changing Ethernet Media Speed for AIX
ITS UNIX Systems Changing Ethernet Media Speed for AIX First you need to find out the device name of ...
- python------接口(get请求、post请求), 图片、歌曲下载,网页返回,上传文件
接口(get请求.post请求 --json), 图片.歌曲下载(context),网页返回(text),上传文件 import requests######################### ...
- PrimeNG之TreeTable
--treetable用于显示分层数据表格的格式 Import import {TreeTableModule,TreeNode,SharedModule} from 'primeng/primeng ...
- python摸爬滚打之day17----类与类之间的关系
1.类与类之间的联系 1.1 依赖关系 类A中使用了类B, 类B作为参数传进类A的方法中被使用. 这种关系中类与类之间的联系是最轻的. class Elephant: def open(self,e ...
- Manjaro 玩机记录
需求: 物理机使用linux个人版本系统,最好支持 微软office QQ/Tim 等通讯软件, 软件易安装, 图形界面可修改, 具有多个多个开发环境如:python2 python3 gcc nod ...
- vue:不同环境配置不同打包命令
修改prod.env.js 'use strict'const target = process.env.npm_lifecycle_event;if (target == 'build') { // ...
- 点击图片img提交form表单
<!DOCTYPE HTML PUBLIC "-//W3C//DTD HTML 4.01//EN" "http://www.w3.org/TR/html4/stri ...
- 004-mac下Java6与Java8 安装
一.Java6安装 官方下载下载地址:http://www.oracle.com/technetwork/java/javasebusiness/downloads/java-archive-down ...
- Windows平台搭建Kafka
1. 安装JDK 1.1 安装文件:http://www.oracle.com/technetwork/java/javase/downloads/jre8-downloads-2133155.htm ...