java使用配置skywalking
一 、elasticsearch 和elasticsearch-head
1、下载 elasticsearch-6.3.1 ,下载地址 :https://pan.baidu.com/s/1ymxyUMe5Bxv1dYlCNW5HKA
來源:http://t.zoukankan.com/feng-jjy-p-11905467.html
2、解压,修改config/elasticsearch.yml ,
设置 cluster.name: esapp ,注意:这里跟后面的skywalking中的 storage.elasticsearch.namespace 一致 , 以及设置允许跨域
# ======================== Elasticsearch Configuration =========================

#

# NOTE: Elasticsearch comes with reasonable defaults for most settings.

#       Before you set out to tweak and tune the configuration, make sure you

#       understand what are you trying to accomplish and the consequences.

#

# The primary way of configuring a node is via this file. This template lists

# the most important settings you may want to configure for a production cluster.

#

# Please consult the documentation for further information on configuration options:

# https://www.elastic.co/guide/en/elasticsearch/reference/index.html

#

# ---------------------------------- Cluster -----------------------------------

#

# Use a descriptive name for your cluster:

#

cluster.name: esapp

#

# ------------------------------------ Node ------------------------------------

#

# Use a descriptive name for the node:

#

node.name: node-1

#

# Add custom attributes to the node:

#

#node.attr.rack: r1

#

# ----------------------------------- Paths ------------------------------------

#

# Path to directory where to store the data (separate multiple locations by comma):

#

#path.data: /path/to/data

#

# Path to log files:

#

#path.logs: /path/to/logs

#

# ----------------------------------- Memory -----------------------------------

#

# Lock the memory on startup:

#

#bootstrap.memory_lock: true

#

# Make sure that the heap size is set to about half the memory available

# on the system and that the owner of the process is allowed to use this

# limit.

#

# Elasticsearch performs poorly when the system is swapping the memory.

#

# ---------------------------------- Network -----------------------------------

#

# Set the bind address to a specific IP (IPv4 or IPv6):

#

network.host: 0.0.0.0

#

# Set a custom port for HTTP:

#

http.port: 9200

#

# For more information, consult the network module documentation.

#

# --------------------------------- Discovery ----------------------------------

#

# Pass an initial list of hosts to perform discovery when new node is started:

# The default list of hosts is ["127.0.0.1", "[::1]"]

#

#discovery.zen.ping.unicast.hosts: ["host1", "host2"]

#

# Prevent the "split brain" by configuring the majority of nodes (total number of master-eligible nodes / 2 + 1):

#

#discovery.zen.minimum_master_nodes:

#

# For more information, consult the zen discovery module documentation.

#

# ---------------------------------- Gateway -----------------------------------

#

# Block initial recovery after a full cluster restart until N nodes are started:

#

#gateway.recover_after_nodes: 3

#

# For more information, consult the gateway module documentation.

#

# ---------------------------------- Various -----------------------------------

#

# Require explicit names when deleting indices:

#

#action.destructive_requires_name: true

# 是否支持跨域

http.cors.enabled: true

# *表示支持所有域名

http.cors.allow-origin: "*"

http.cors.allow-headers: Authorization,X-Requested-With,Content-Length,Content-Type
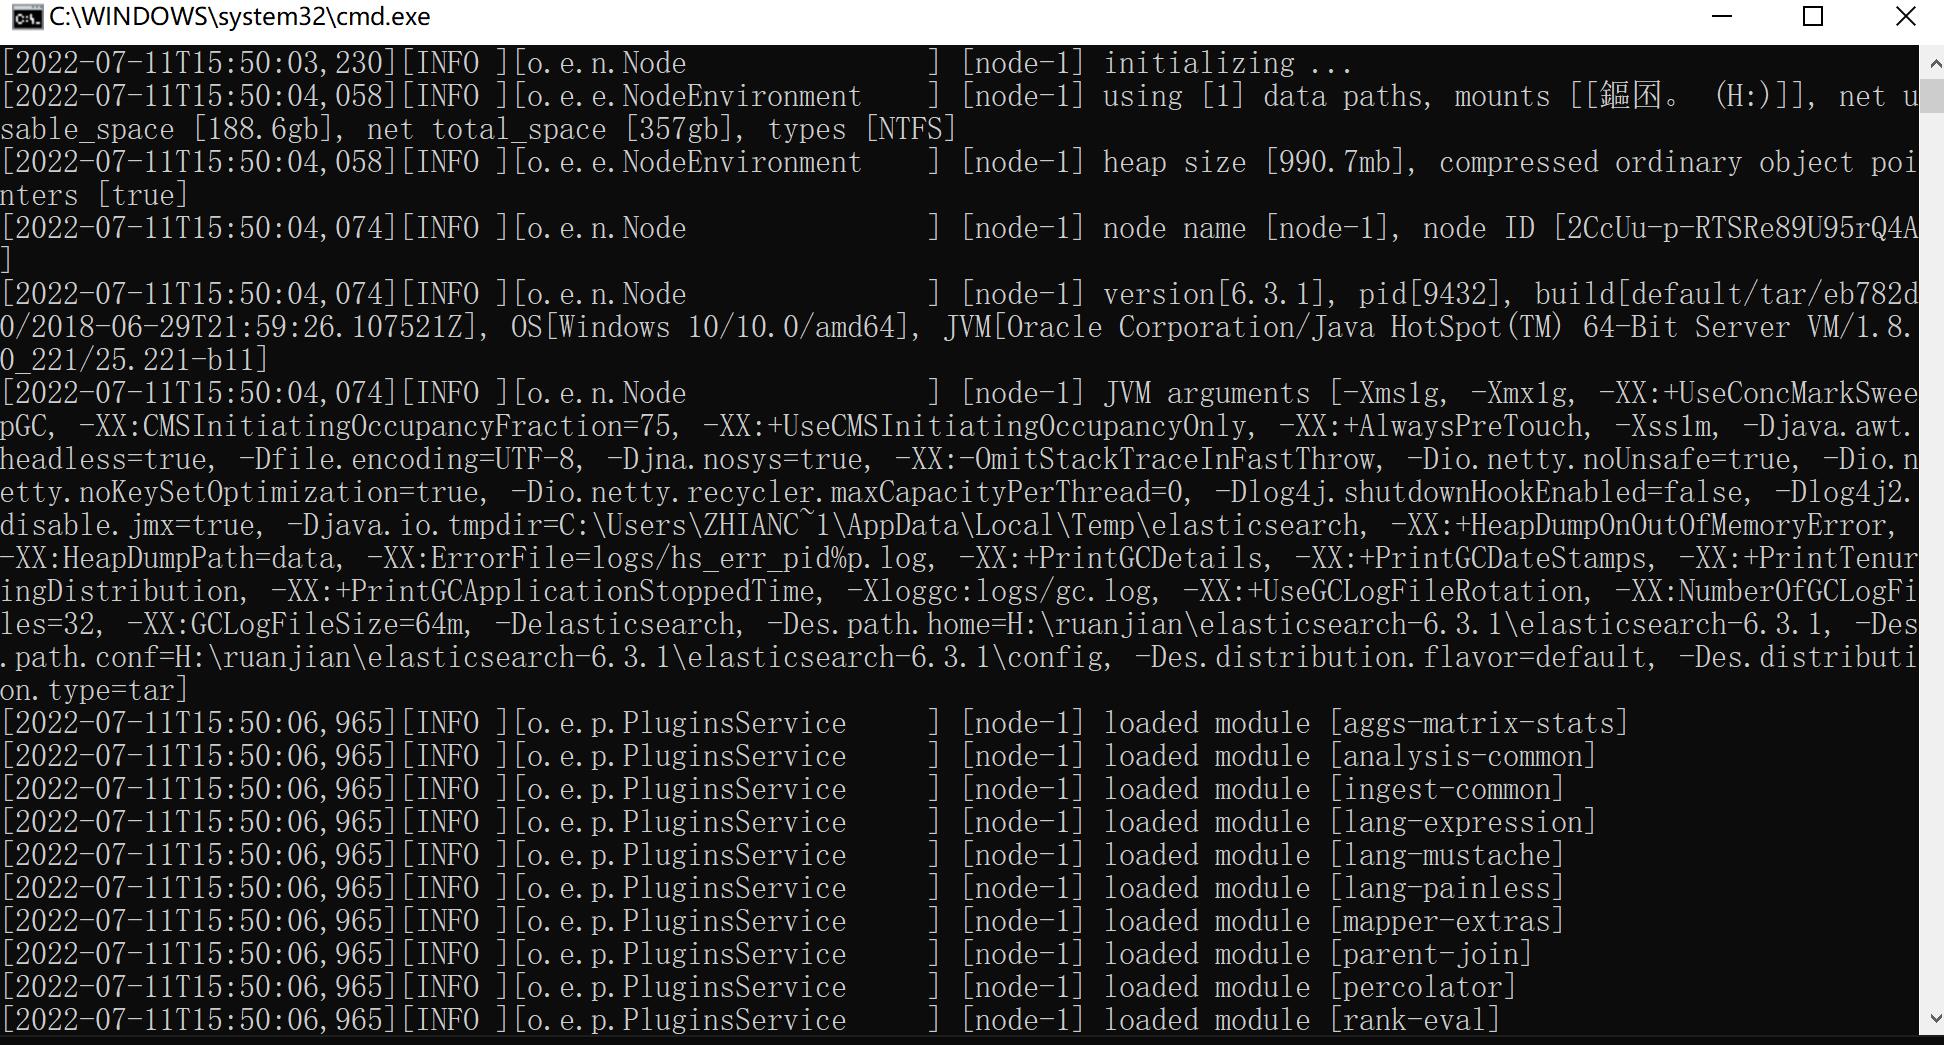
3、 启动elasticsearch,若windows 的话,可以用bin/elasticsearch.bat 启动,可以看cmd的执行记录,可到logs 目录下查看启动的日志

若修改配置skywalking和elasticsearch 相互关联的配置的话,或者需要删除记录的话,删除data目录下的目录文件和数据,注意data目录要保留
4、下载 elasticsearch-head , https://codeload.github.com/mobz/elasticsearch-head/zip/master
解压,放到chromer中(此步骤百度)
打开chrome浏览器

二、 zookeeper
若你skywalking的集群存储不是在zookeeper上,可以略过这步
1、下载 https://downloads.apache.org/zookeeper/zookeeper-3.6.3/apache-zookeeper-3.6.3-bin.tar.gz
2、解压,修改conf/zoo.cfg ,若单机版 无需修改

4、若要新增zookeeper 集群或者删除skywalking的集群记录的话,可以zoo.cfg 配置的dataDir的目录中的数据,比如配置的/tmp/zookeeper ,那就删除这个目录下面的目录和数据

三、apache-skywalking-apm ,这个是服务器端的工具,以及UI
1、下载apache-skywalking-apm
在 https://skywalking.apache.org/downloads/中选择版本,我下载的是apache-skywalking-apm-8.8.1 版本,下载地址是 https://archive.apache.org/dist/skywalking/8.8.1/apache-skywalking-apm-8.8.1.tar.gz ,注意:不是下载source的源码,是Distribution哦
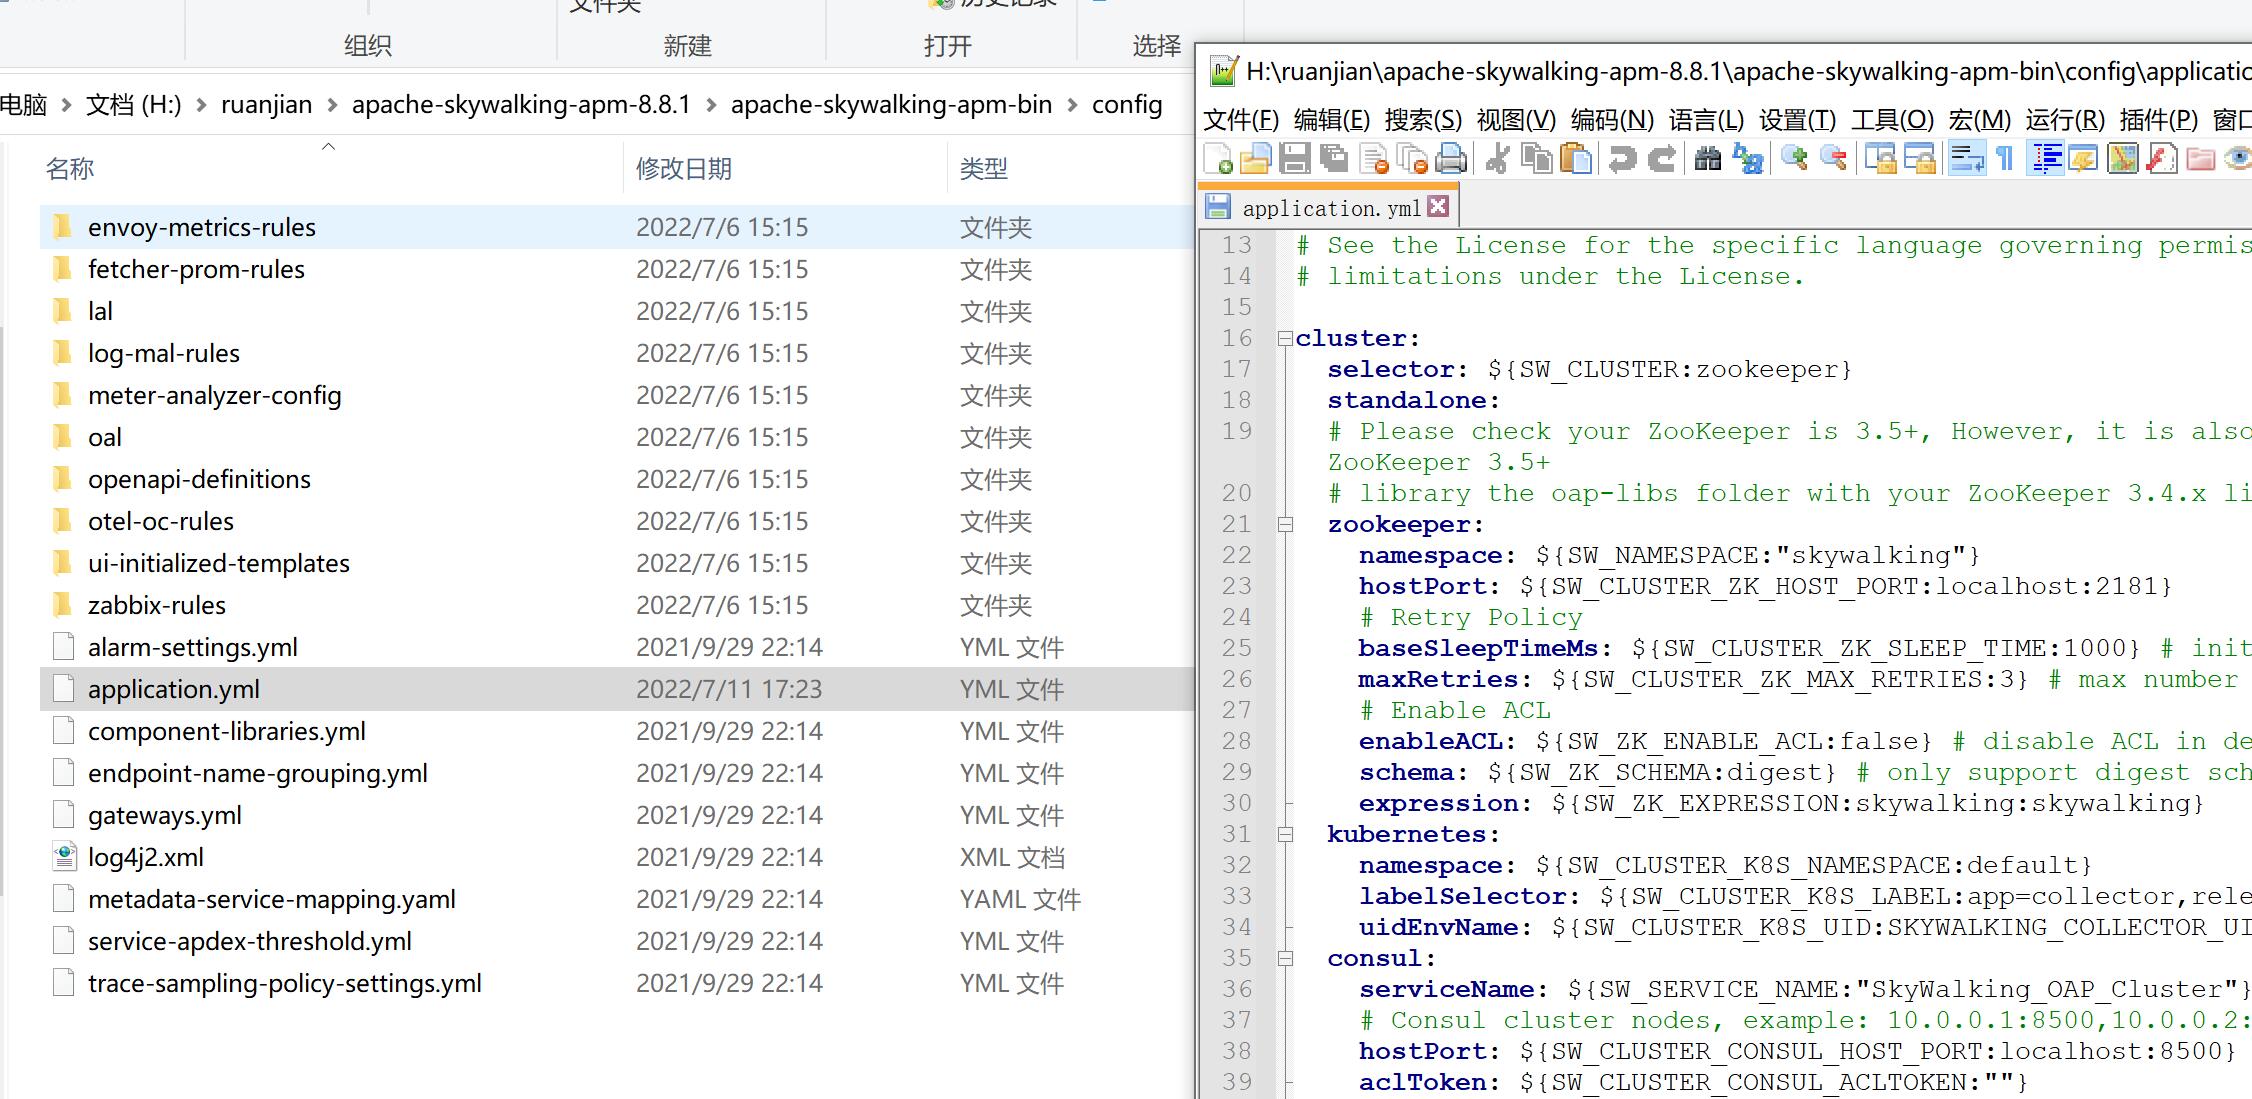
2、解压打开config/application.yml ,
2.1、修改cluster.selector 的配置, 因为要是用的是zookeeper,所以设置为zookeeper,也可以使用 kubernetes 、consul、etcd、nacos,注意:这里请使用ZooKeeper 3.5+ 的版本
2.2、设置 zookeeper的配置,因为要跟其他程序的namespace 区分开,所以设置成skywalking, 另外也可以hostPort 的值,因为我的本机模拟所以没做修改,如果是集群的话可以设置类似hostPort: ${SW_CLUSTER_ZK_HOST_PORT:192.168.1.2:2181,192.168.1.3:2181,192.168.1.4:2181}
cluster:

  selector: ${SW_CLUSTER:zookeeper}

  standalone:

  # Please check your ZooKeeper is 3.5+, However, it is also compatible with ZooKeeper 3.4.x. Replace the ZooKeeper 3.5+

  # library the oap-libs folder with your ZooKeeper 3.4.x library.

  zookeeper:

    namespace: ${SW_NAMESPACE:"skywalking"}

    hostPort: ${SW_CLUSTER_ZK_HOST_PORT:localhost:2181}

    # Retry Policy

    baseSleepTimeMs: ${SW_CLUSTER_ZK_SLEEP_TIME:1000} # initial amount of time to wait between retries

    maxRetries: ${SW_CLUSTER_ZK_MAX_RETRIES:3} # max number of times to retry

    # Enable ACL

    enableACL: ${SW_ZK_ENABLE_ACL:false} # disable ACL in default

    schema: ${SW_ZK_SCHEMA:digest} # only support digest schema

    expression: ${SW_ZK_EXPRESSION:skywalking:skywalking}
2.3、设置storage.selector 为elasticsearch ,若之前设置是elasticsearch 7的版本的话,这设置也要设置elasticsearch7才行
2.4、 设置 storage.elasticsearch.namespace (注意:这里跟后面的zookeeper的config目录下的elasticsearch.yml中cluster.name的配置节点 一致) ,以及设置 storage.elasticsearch.clusterNodes
storage:

  selector: ${SW_STORAGE:elasticsearch}

  elasticsearch:

    namespace: ${SW_NAMESPACE:"esapp"}

    clusterNodes: ${SW_STORAGE_ES_CLUSTER_NODES:localhost:9200}

    protocol: ${SW_STORAGE_ES_HTTP_PROTOCOL:"http"}

    connectTimeout: ${SW_STORAGE_ES_CONNECT_TIMEOUT:500}

    socketTimeout: ${SW_STORAGE_ES_SOCKET_TIMEOUT:30000}

    numHttpClientThread: ${SW_STORAGE_ES_NUM_HTTP_CLIENT_THREAD:0}

    user: ${SW_ES_USER:""}

    password: ${SW_ES_PASSWORD:""}

    trustStorePath: ${SW_STORAGE_ES_SSL_JKS_PATH:""}

    trustStorePass: ${SW_STORAGE_ES_SSL_JKS_PASS:""}

    secretsManagementFile: ${SW_ES_SECRETS_MANAGEMENT_FILE:""} # Secrets management file in the properties format includes the username, password, which are managed by 3rd party tool.

    dayStep: ${SW_STORAGE_DAY_STEP:1} # Represent the number of days in the one minute/hour/day index.

    indexShardsNumber: ${SW_STORAGE_ES_INDEX_SHARDS_NUMBER:1} # Shard number of new indexes

    indexReplicasNumber: ${SW_STORAGE_ES_INDEX_REPLICAS_NUMBER:1} # Replicas number of new indexes

    # Super data set has been defined in the codes, such as trace segments.The following 3 config would be improve es performance when storage super size data in es.

    superDatasetDayStep: ${SW_SUPERDATASET_STORAGE_DAY_STEP:-1} # Represent the number of days in the super size dataset record index, the default value is the same as dayStep when the value is less than 0

    superDatasetIndexShardsFactor: ${SW_STORAGE_ES_SUPER_DATASET_INDEX_SHARDS_FACTOR:5} #  This factor provides more shards for the super data set, shards number = indexShardsNumber * superDatasetIndexShardsFactor. Also, this factor effects Zipkin and Jaeger traces.

    superDatasetIndexReplicasNumber: ${SW_STORAGE_ES_SUPER_DATASET_INDEX_REPLICAS_NUMBER:0} # Represent the replicas number in the super size dataset record index, the default value is 0.

    indexTemplateOrder: ${SW_STORAGE_ES_INDEX_TEMPLATE_ORDER:0} # the order of index template

    bulkActions: ${SW_STORAGE_ES_BULK_ACTIONS:5000} # Execute the async bulk record data every ${SW_STORAGE_ES_BULK_ACTIONS} requests

    # flush the bulk every 10 seconds whatever the number of requests

    # INT(flushInterval * 2/3) would be used for index refresh period.

    flushInterval: ${SW_STORAGE_ES_FLUSH_INTERVAL:15}

    concurrentRequests: ${SW_STORAGE_ES_CONCURRENT_REQUESTS:2} # the number of concurrent requests

    resultWindowMaxSize: ${SW_STORAGE_ES_QUERY_MAX_WINDOW_SIZE:10000}

    metadataQueryMaxSize: ${SW_STORAGE_ES_QUERY_MAX_SIZE:5000}

    segmentQueryMaxSize: ${SW_STORAGE_ES_QUERY_SEGMENT_SIZE:200}

    profileTaskQueryMaxSize: ${SW_STORAGE_ES_QUERY_PROFILE_TASK_SIZE:200}

    oapAnalyzer: ${SW_STORAGE_ES_OAP_ANALYZER:"{\"analyzer\":{\"oap_analyzer\":{\"type\":\"stop\"}}}"} # the oap analyzer.

    oapLogAnalyzer: ${SW_STORAGE_ES_OAP_LOG_ANALYZER:"{\"analyzer\":{\"oap_log_analyzer\":{\"type\":\"standard\"}}}"} # the oap log analyzer. It could be customized by the ES analyzer configuration to support more language log formats, such as Chinese log, Japanese log and etc.

    advanced: ${SW_STORAGE_ES_ADVANCED:""}

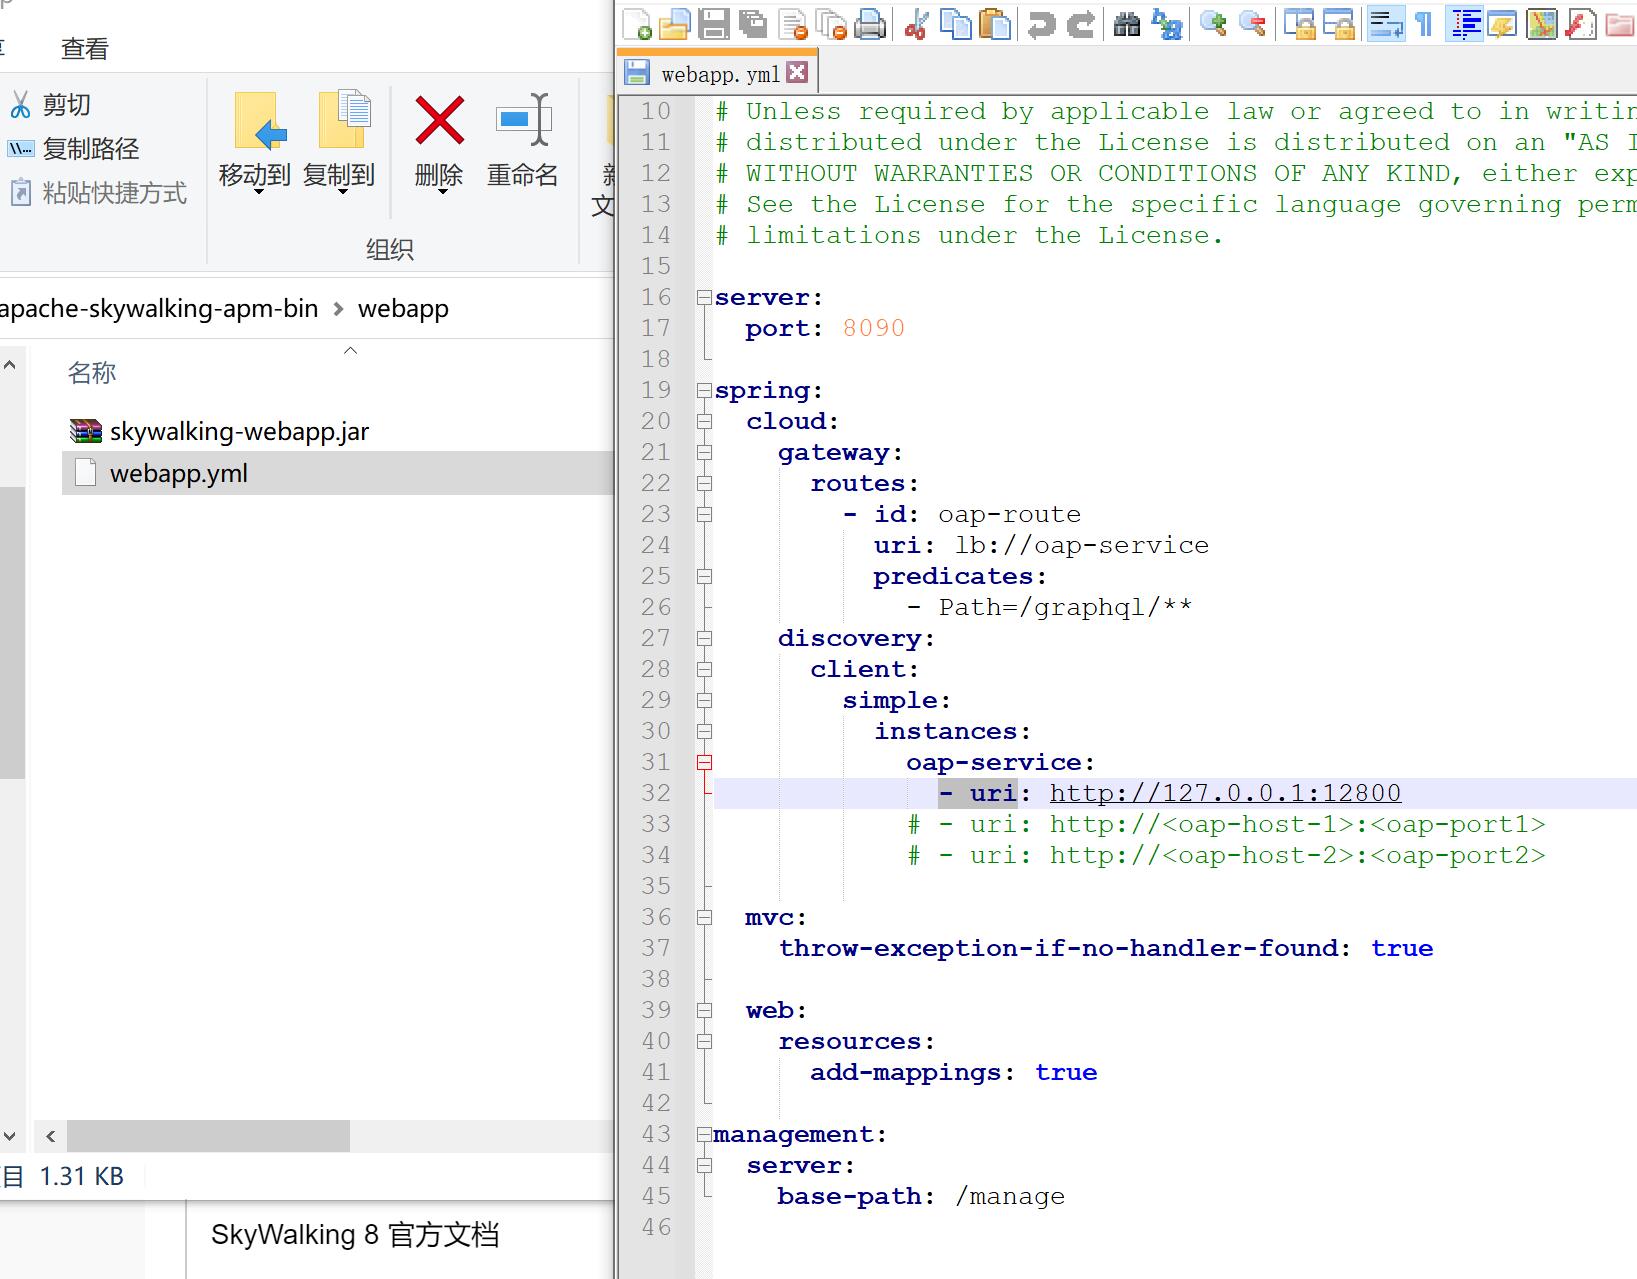
3、修改webapp/webapp.yml
因为的8080端口被占用了,所以 修改server.port 的端口 ,这个是UI前端展示,若电脑有多个ip的话也可以修改
spring.cloud.discovery.client.simple.instances.oap-service 的uri 配置
4、启动服务,在bin/startup 可以启动 ,启动完成后可以到logs/skywalking-oap-server.log 查看日志,有可能启动失败 或者连接不是zookeeper 等原因,下面截图这个是之前没启动zookeeper造成的失败问题
2022-07-11 15:55:43,239 - org.apache.zookeeper.ClientCnxn - 1244 [main-SendThread(localhost:2181)] INFO  [] - Socket error occurred: localhost/0:0:0:0:0:0:0:1:2181: Connection refused: no further information

2022-07-11 15:55:44,360 - org.apache.zookeeper.ClientCnxn - 1112 [main-SendThread(localhost:2181)] INFO  [] - Opening socket connection to server localhost/127.0.0.1:2181. Will not attempt to authenticate using SASL (unknown error)

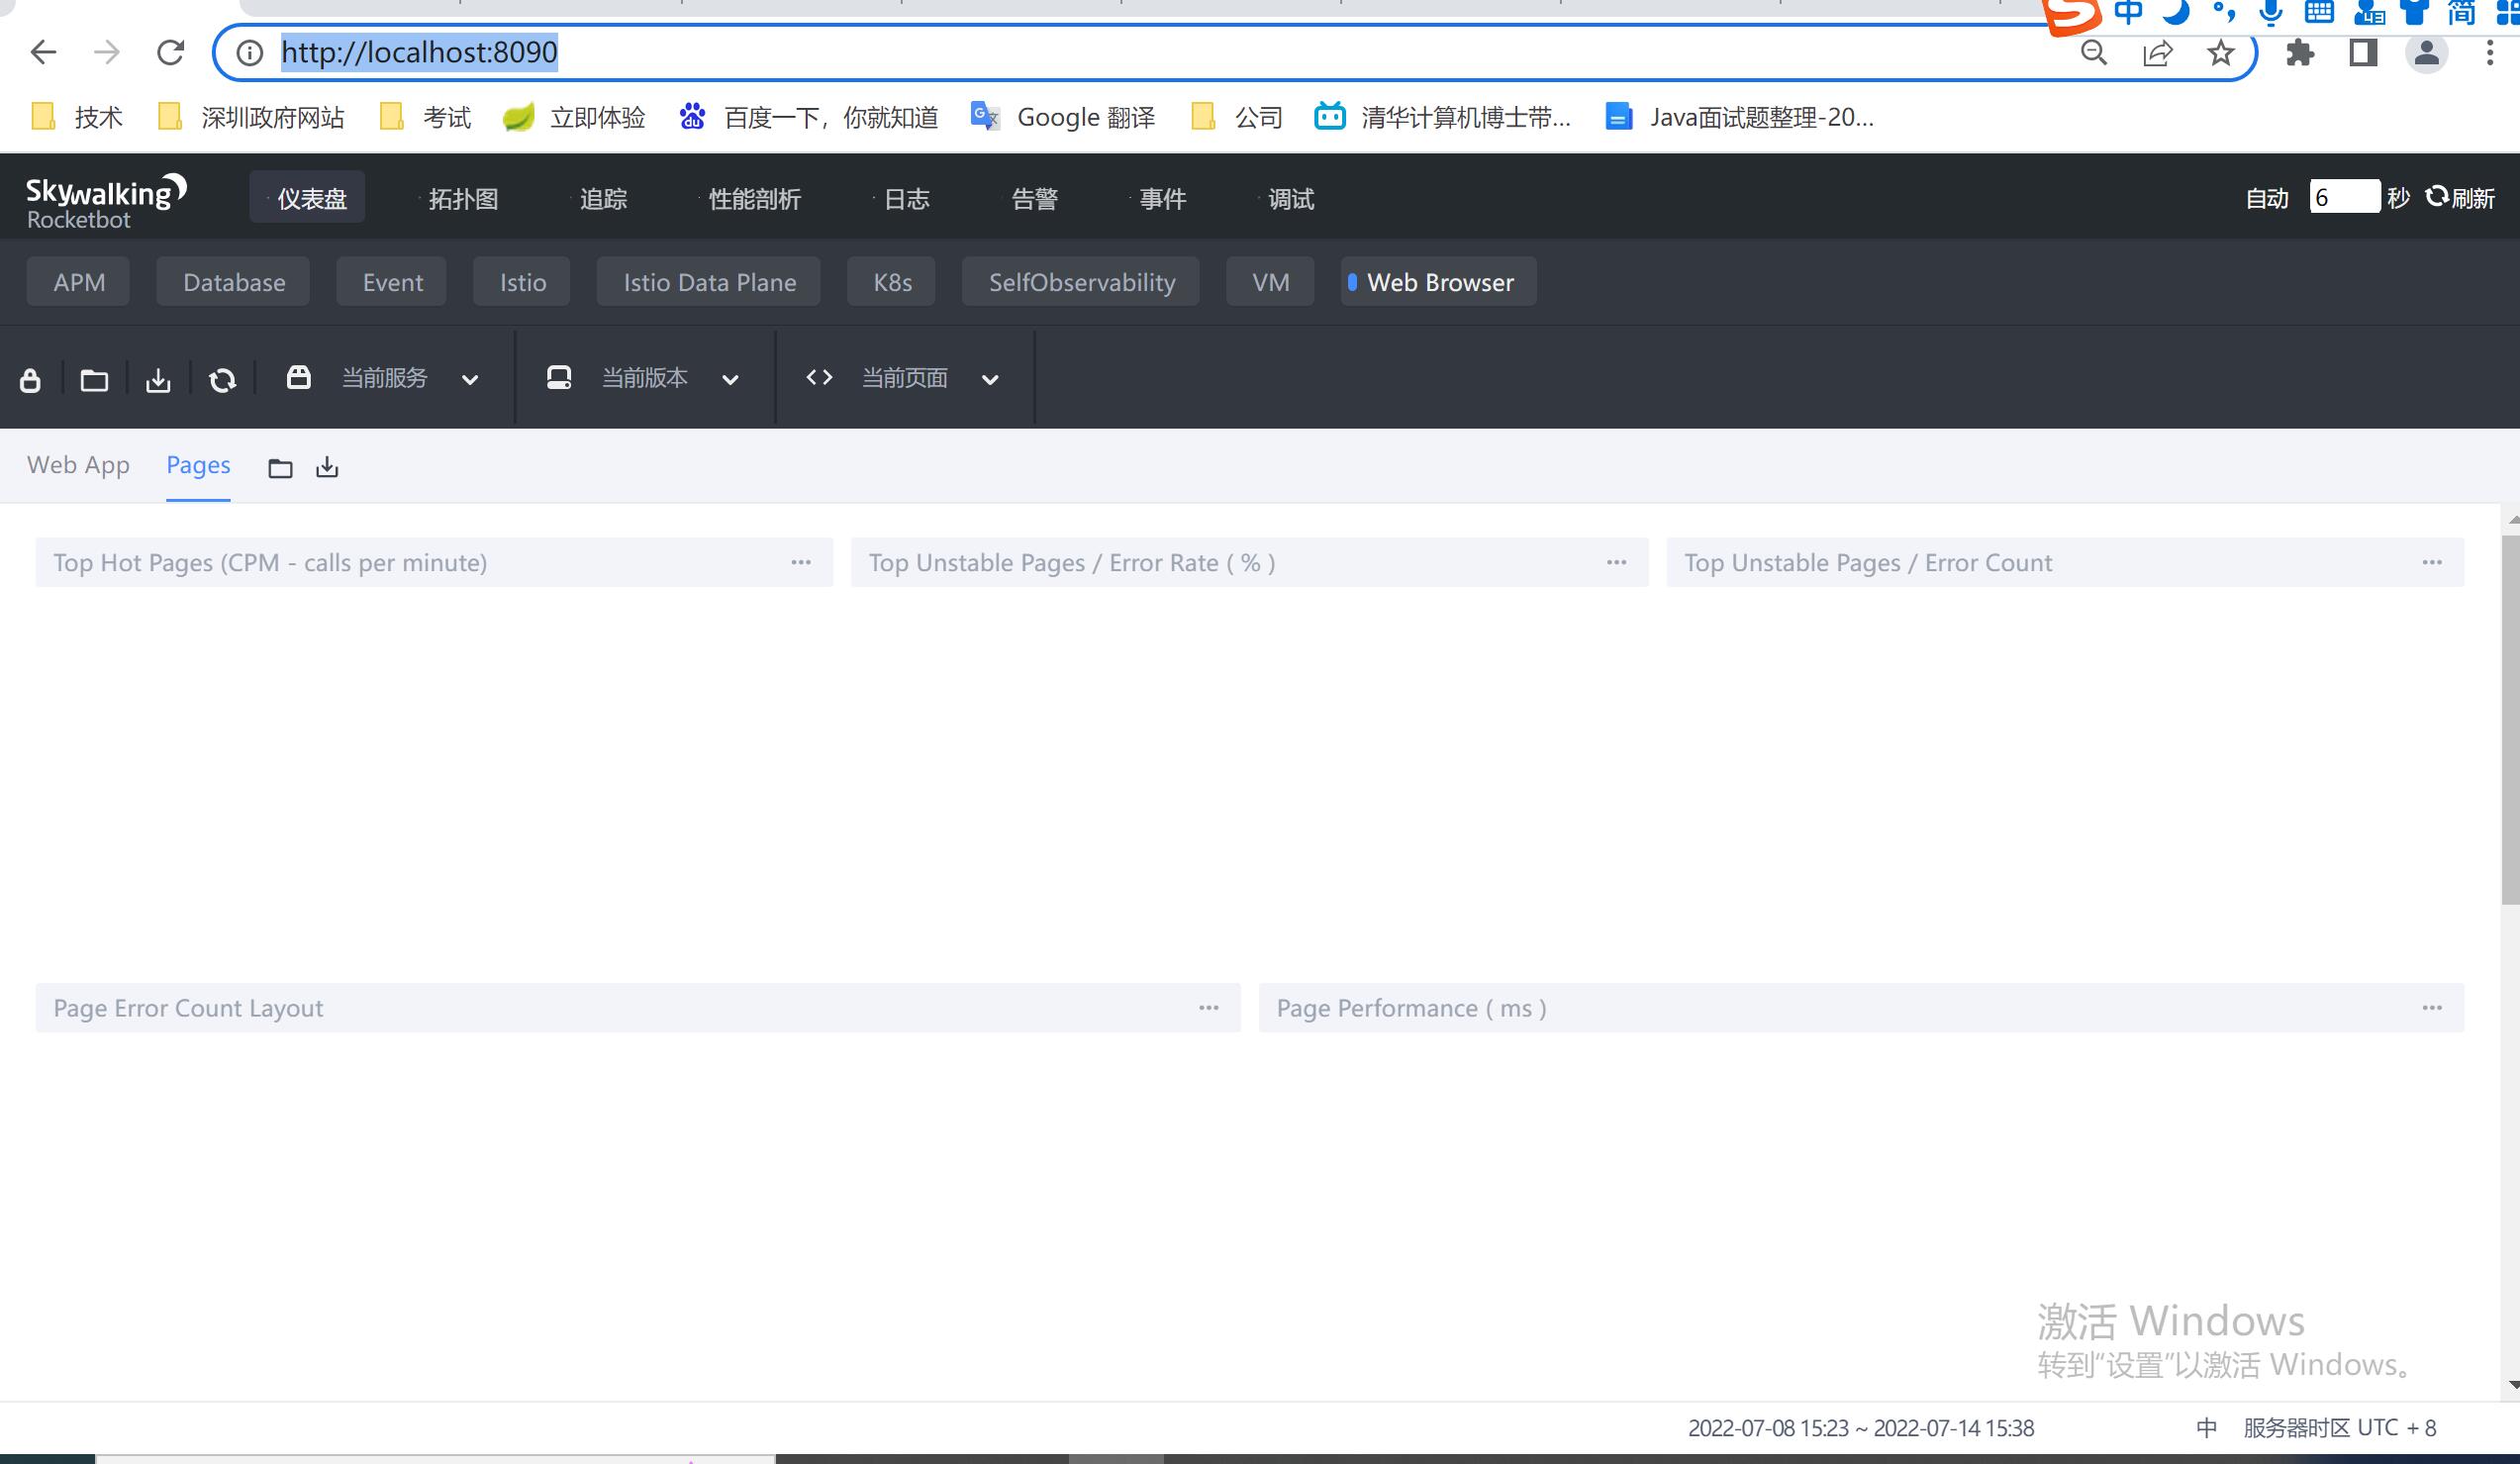
56、打开浏览器进行查看,因为上面设置的端口是8090,则输入 http://localhost:8090/
五、apache-skywalking-java-agent
这个可以放到idea中到agent代理用
1、下载的是apache-skywalking-java-agent-8.8.0 ,下载地址 :https://archive.apache.org/dist/skywalking/java-agent/8.8.0/apache-skywalking-java-agent-8.8.0.tgz ,其它版本https://archive.apache.org/dist/skywalking/java-agent/8.9.0/apache-skywalking-java-agent-8.9.0.tgz
2、解压
六 、新增一个测试maven项目
1、 新建项目、
<dependencies>

<!--        <dependency>-->

<!--            <groupId>org.apache.skywalking</groupId>-->

<!--            <artifactId>apm-toolkit-logback-1.x</artifactId>-->

<!--            <version>8.4.0</version>-->

<!--        </dependency>-->

        <dependency>

            <groupId>org.projectlombok</groupId>

            <artifactId>lombok</artifactId>

            <version>${lombok.version}</version>

        </dependency>

        <!--fastjson-->

        <dependency>

            <groupId>com.alibaba</groupId>

            <artifactId>fastjson</artifactId>

            <version>${fastjson.version}</version>

        </dependency>

        <dependency>

            <groupId>org.mybatis.spring.boot</groupId>

            <artifactId>mybatis-spring-boot-starter</artifactId>

            <version>${mybatis.version}</version>

        </dependency>

        <dependency>

        <groupId>org.springframework.boot</groupId>

        <artifactId>spring-boot-starter-web</artifactId>

    </dependency>

    <dependency>

        <groupId>org.springframework.boot</groupId>

        <artifactId>spring-boot-starter-test</artifactId>

        <scope>test</scope>

    </dependency>

    <dependency>

        <groupId>org.springframework.boot</groupId>

        <artifactId>spring-boot-starter-aop</artifactId>

    </dependency>

    </dependencies>

    <build>

        <finalName>${project.artifactId}</finalName>

        <plugins>

            <plugin>

                <groupId>org.springframework.boot</groupId>

                <artifactId>spring-boot-maven-plugin</artifactId>

                <version>1.5.11.RELEASE</version>

                <executions>

                    <execution>

                        <goals>

                            <goal>repackage</goal>

                        </goals>

                    </execution>

                </executions>

            </plugin>

        </plugins>

    </build>
package com.zhianchen.skywalking;

import javafx.application.Application;

import lombok.extern.slf4j.Slf4j;

import org.springframework.boot.SpringApplication;

import org.springframework.boot.autoconfigure.SpringBootApplication;

import org.springframework.boot.autoconfigure.jdbc.DataSourceAutoConfiguration;

/*

 *

 *@Description TODO

 *@Author chenzhian

 *@Date 2022/7/8 16:41

 */

@SpringBootApplication(scanBasePackages = {"com.zhianchen.skywalking"},exclude = DataSourceAutoConfiguration.class)  //

@Slf4j

public class SkyWalkingApplication {

    public static void main(String[] args) {

        SpringApplication.run(SkyWalkingApplication.class);

    }

}
package com.zhianchen.skywalking.controller;

import org.springframework.stereotype.Controller;

import org.springframework.web.bind.annotation.RequestMapping;

import org.springframework.web.bind.annotation.RequestMethod;

import org.springframework.web.bind.annotation.RestController;

import java.util.Date;

/*

 *

 *@Description TODO

 *@Author chenzhian

 *@Date 2022/7/8 17:06

 */

@RestController

public class TestController {

    @RequestMapping(value = "/index",method = RequestMethod.GET)

    public String index(Object obj) {

        return new Date().toString();

    }

}
2、 配置VM options启动参数
-javaagent:目录\apache-skywalking-java-agent-8.8.0\skywalking-agent\skywalking-agent.jar

-Dskywalking.agent.service_name=Your_ApplicationName

-Dskywalking.collector.backend_service=127.0.0.1:11800

3、允许application

打开浏览器进行浏览(我配置的端口是9012)
http://localhost:9012/index

打开skywalking的UI前端进行查看是否有访问日志,有的话则算成功了

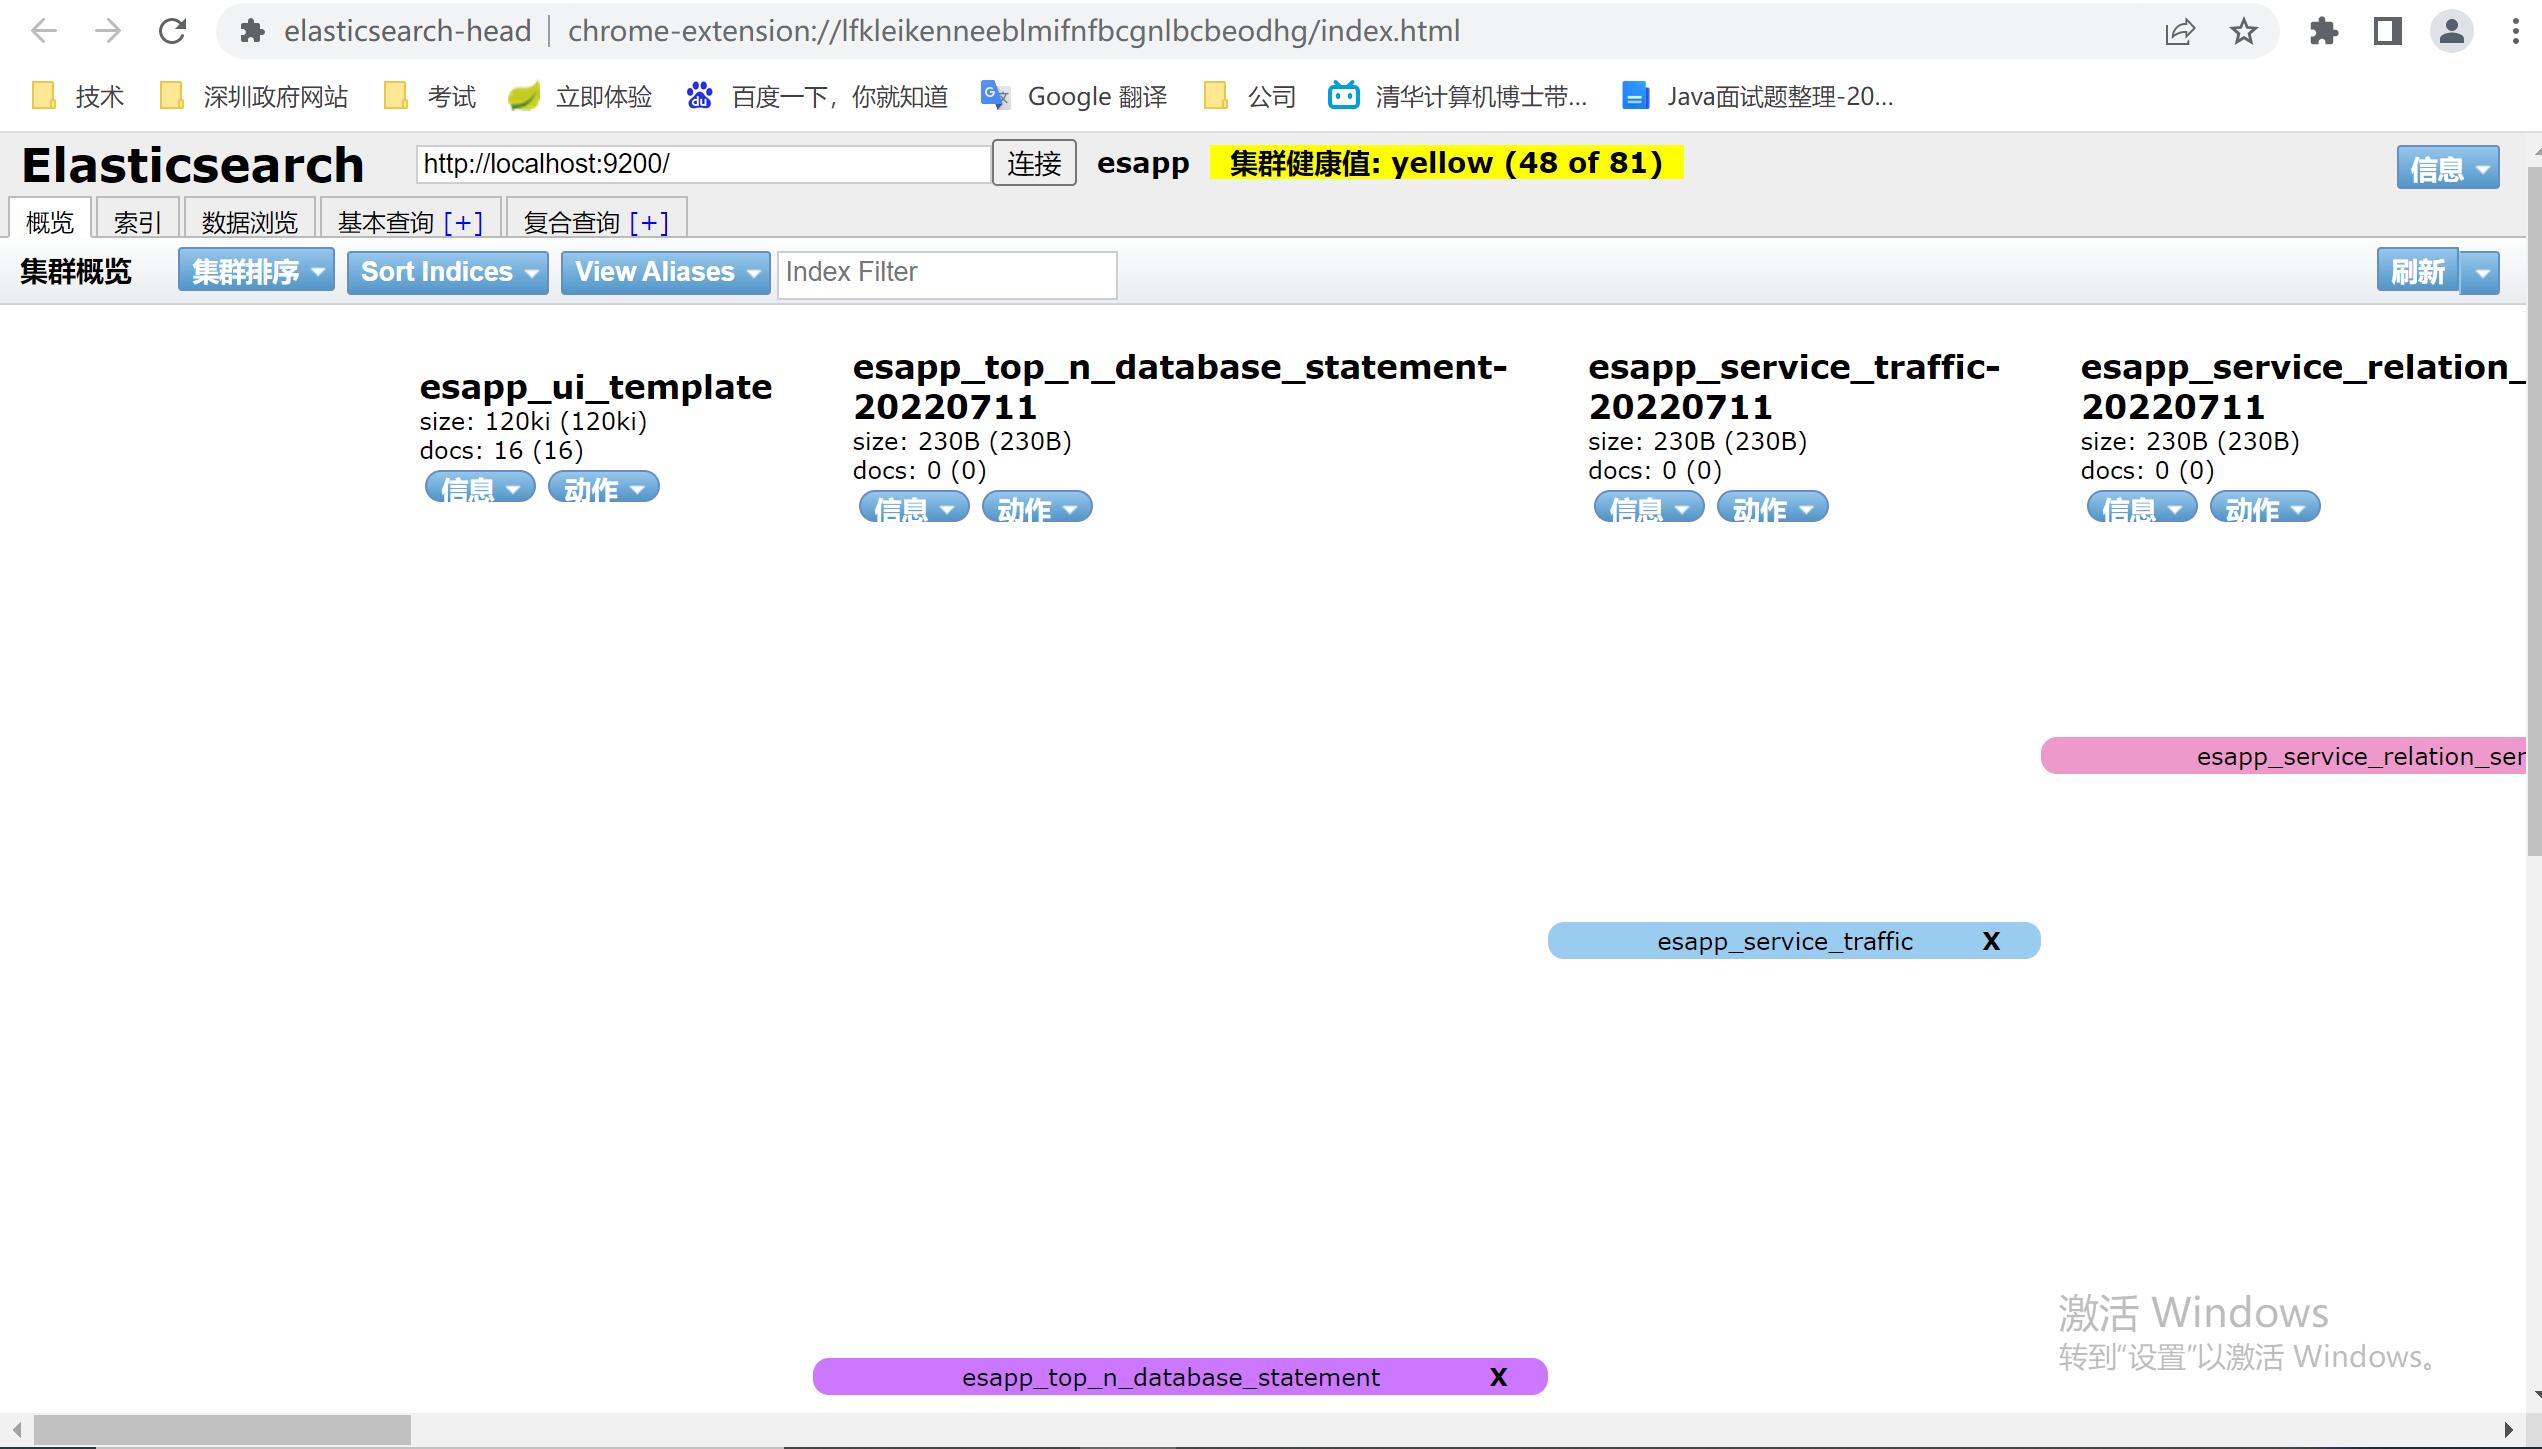
最终也可以到elasticsearch-head 查看存储记录

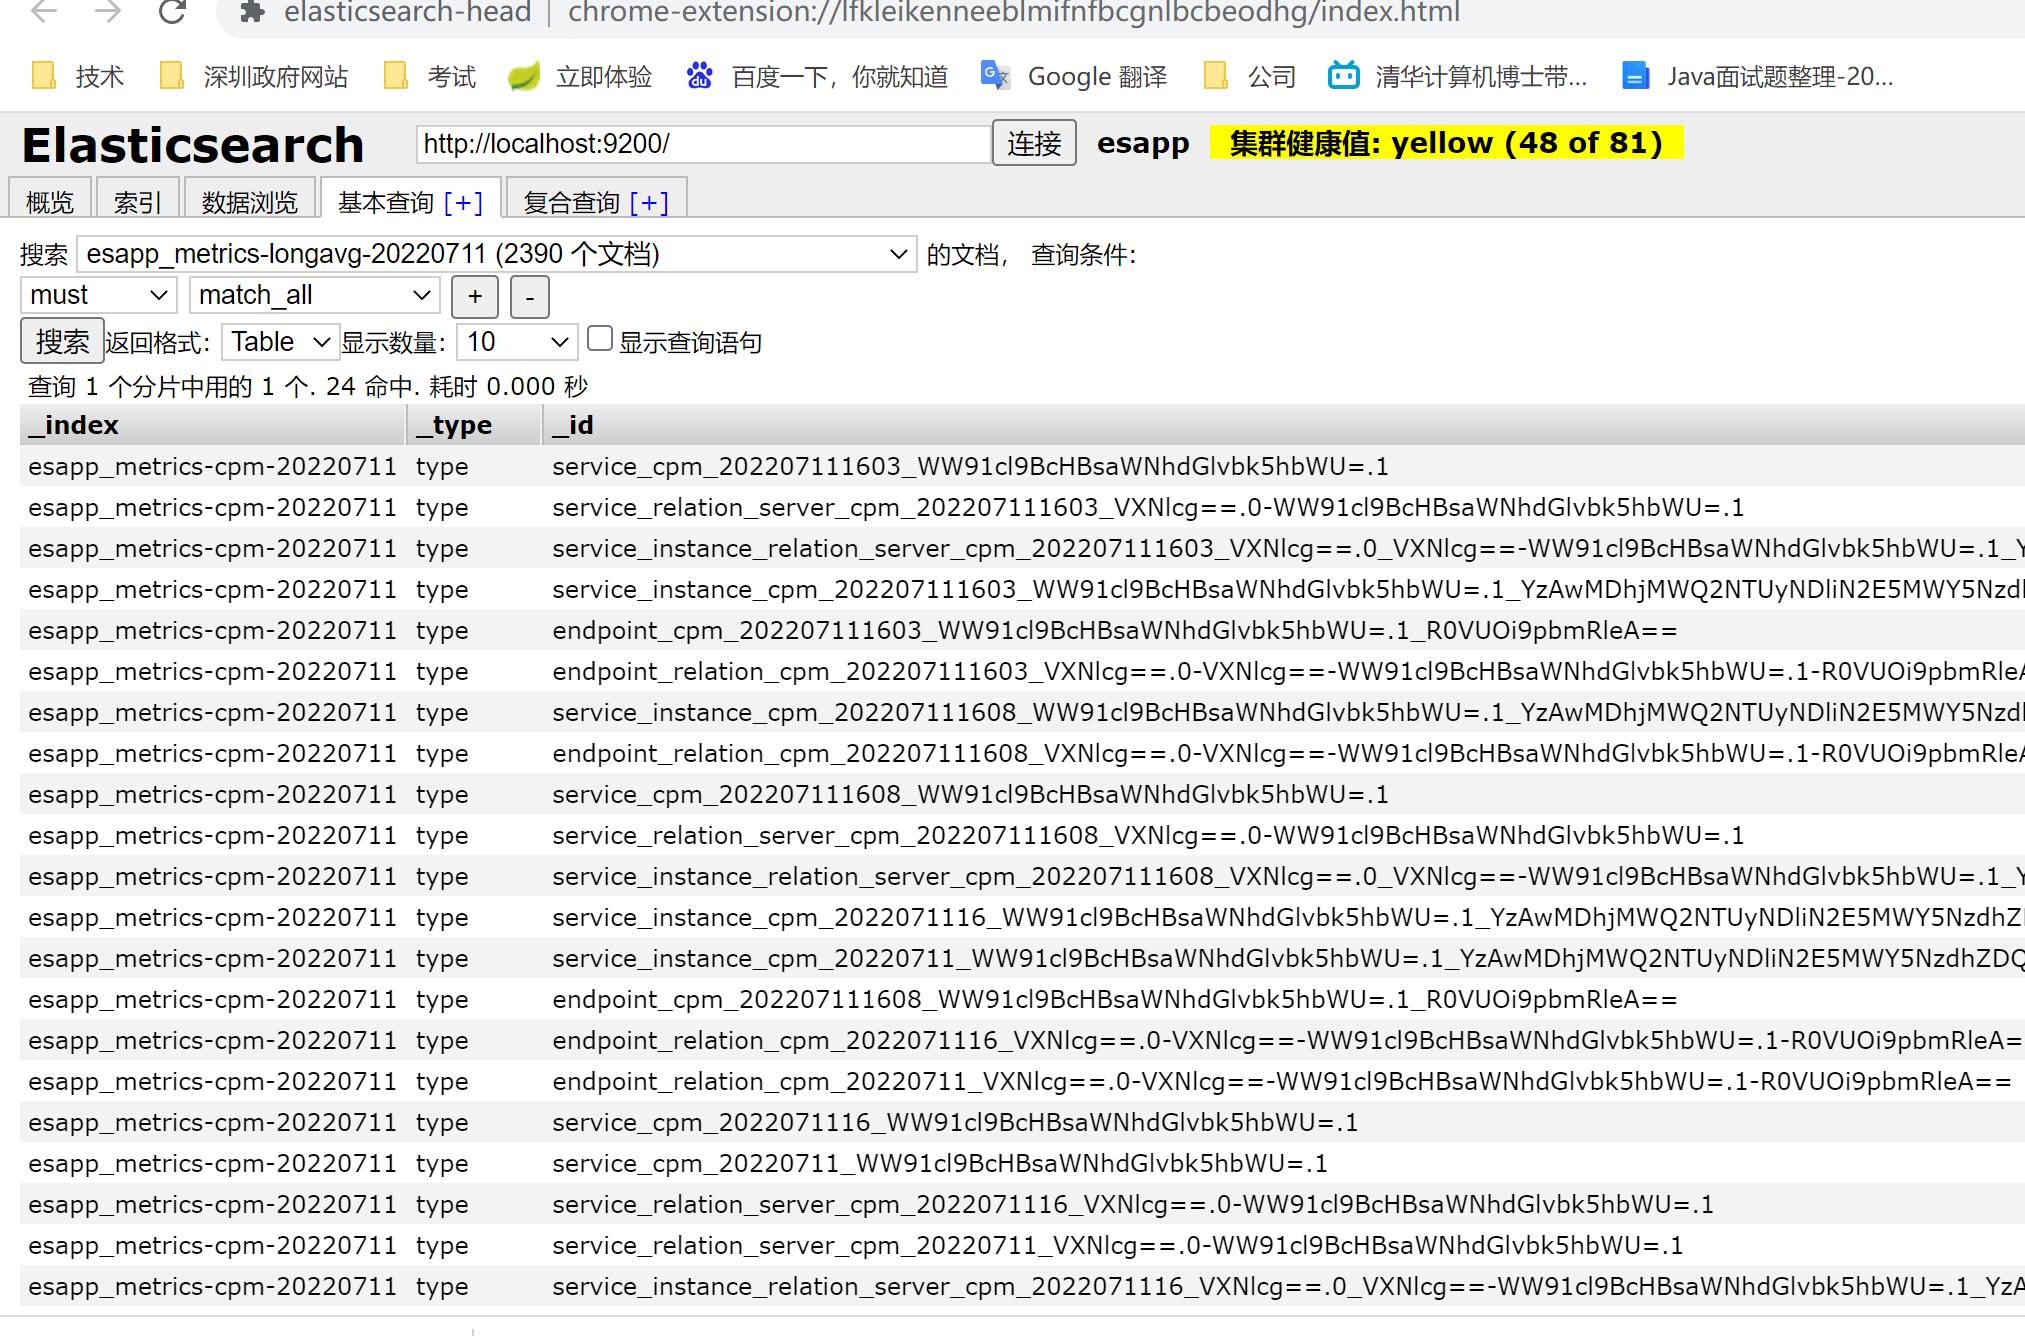
也可以查看之前的访问记录
SkyWalking 8 官方文档
https://skyapm.github.io/document-cn-translation-of-skywalking/zh/8.0.0/
java使用配置skywalking的更多相关文章
- java环境配置笔记
1.使用Eclipse,要安装jdk,jdk现在可用1.7版本 2.打开Eclipse,配置maven,打开window-preferencess,在maven-user settings处,设置ma ...
- Java环境配置原理
Java环境配置原理详解 1.Jdk安装目录文件说明: 一般jdk安装目录及路径 \Java\jdk1.7.0_79\lib,里面主要包含以下文件夹. bin:主要存放的是java工具中常用命令如:j ...
- Spring IOC之基于JAVA的配置
基础内容:@Bean 和 @Configuration 在Spring中新的支持java配置的核心组件是 @Configuration注解的类和@Bean注解的方法. @Bean注解被用于表明一个方法 ...
- java环境配置,试用和基本数据结构
一.java环境配置 1.打开我的电脑--属性--高级--环境变量 2.新建系统变量JAVA_HOME 和CLASSPATH 变量名:JAVA_HOME 变量值:jdk文件所在的路经变量名:CLASS ...
- (4.1)Spring MVC执行原理和基于Java的配置过程
一.Spring MVC执行原理和基于Java配置的配置过程 (一)Spring MVC执行过程,大致为7步. 所有的请求都会经过Spring的一个单例的DispacherServlet. Dispa ...
- Java编程配置思路详解
Java编程配置思路详解 SpringBoot虽然提供了很多优秀的starter帮助我们快速开发,可实际生产环境的特殊性,我们依然需要对默认整合配置做自定义操作,提高程序的可控性,虽然你配的不一定比官 ...
- Java 环境配置 与 碰到的问题
小白记录,希望各位指点,长期整理修改 不定期更新,碰到的与之相关的会添加,做个小笔记,再次碰到可以更好的解决. JDK 下载:Oracle 配置方法:菜鸟教程 - Java 开发环境配置 作用 JAV ...
- Selenium Java环境配置
Selenium Java环境配置 上次配置的是C#的环境,今天主要来配置一下Java环境. 首先,对于java环境配置最基础的JDK和JRE 先前我做过配置,这里就不重述了,网上的教程超级多.在基础 ...
- java环境配置及原理详解
java环境配置及原理详解 1.java跨平台的本质 我们谈到java,总是提到跨平台这个词.那么java语言是怎么实现跨平台的呢? 我们编写的java代码不是直接让windows系统读取解析,而是在 ...
随机推荐
- 深入理解mmap--内核代码分析及驱动demo示例
mmap是一个很常用的系统调用,无论是分配内存.读写大文件.链接动态库文件,还是多进程间共享内存,都可以看到其身影.本文首先介绍了进程地址空间和mmap,然后分析了内核代码以了解其实现,最后通过一个简 ...
- 在centos 7 中 conda 环境和Python2.7 中安装远程jupyter
折腾了半天,为了能够方便学习TensorFlow,搞了远程的jupyter,方便在本地使用它,今天填了不少坑. 装完后截图: 下面是一些步骤: 检查 Python 环境 CentOS 7.2 中默认集 ...
- Flask01 第一个flask项目
参考地址:https://github.com/miguelgrinberg/microblog/tree/v0.1 flask环境[苹果M1] 添加虚拟环境 python3 -m venv venv ...
- C语言函数调用栈
C语言函数调用栈 栈溢出(stack overflow)是最常见的二进制漏洞,在介绍栈溢出之前,我们首先需要了解函数调用栈. 函数调用栈是一块连续的用来保存函数运行状态的内存区域,调用函数(calle ...
- arts-week14
Algorithm 923. 3Sum With Multiplicity - LeetCode Review Building a network attached storage device w ...
- 个人冲刺(四)——体温上报app(二阶段)
冲刺任务:完成用户注册功能和数据库类 RegisterActivity.java package com.example.helloworld; import android.content.Inte ...
- 详解SQL操作的窗口函数
摘要:窗口函数是聚集函数的延伸,是更高级的SQL语言操作,主要用于AP场景下对数据进行一些分析.汇总.排序的功能. 本文分享自华为云社区<GaussDB(DWS) SQL进阶之SQL操作之窗口函 ...
- 【freertos】010-消息队列概念及其实现细节
目录 前言 10.1 消息队列概念 10.2 消息队列的数据传输机制 10.3 消息队列的阻塞访问机制 10.4 消息队列使用场景 10.5 消息队列控制块 10.5.1 队列控制块源码 10.5.2 ...
- XtraBackup 搭建从库的一般步骤及 XtraBackup 8.0 的注意事项
搭建从库,本质上需要的只是一个一致性备份集及这个备份集对应的位置点信息.之前介绍的几个备份工具(MySQL中如何选择合适的备份策略和备份工具)均可满足. 这里,我们重点看看如何基于 XtraBacku ...
- Groovy基础语法
Groovy 基础语法 变量定义 1.支持动态类型,使用def关键字定义变量 // Java中定义变量的方式 int age = 18; String name = "张三"; / ...