Flume的四个使用案例
一、Flume监听端口
1,在linux机器上下载telnet工具
yum search telnet
yumm install telnet.x86_64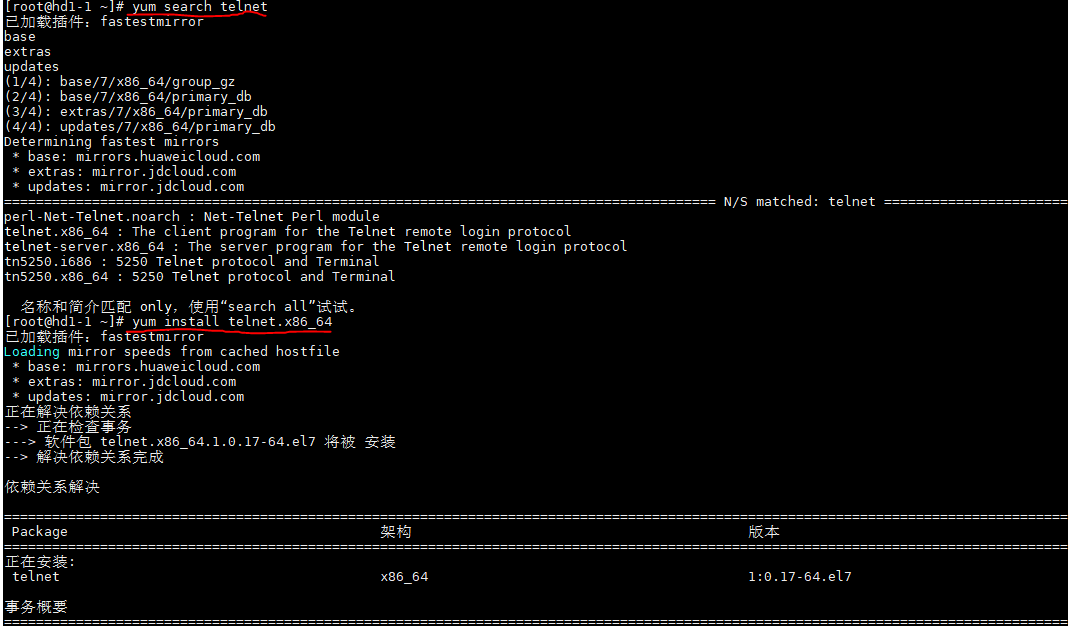
2.编写flume的配置文件,并将文件复制到flume/conf文件夹下
#.agent

a1.sources = r1

a1.sinks = k1

a1.channels = c1

#.source netcat表示监视端口、localhost监视本机(也可以写本机名如hd1-)

#44444端口号(随便写,注意不要与常用的端口号重复即可)

a1.sources.r1.type = netcat

a1.sources.r1.bind = localhost

a1.sources.r1.port =

#.sinks Describe the sink 输出日志文件

a1.sinks.k1.type = logger

#. 使用内存、总容量1000、每次传输100

a1.channels.c1.type = memory

a1.channels.c1.capacity =

a1.channels.c1.transactionCapacity =

#.Bind the source and sink to the channel 一个source可以绑定多个channel

# 一个sinks可以只能绑定一个channel  使用的是图二的模型

a1.sources.r1.channels = c1

a1.sinks.k1.channel = c1
3.启动配置文件
bin/flume-ng agent --conf conf/ --name a1 --conf-file conf/flumejob_telnet.conf -Dflume.root.logger==INFO,console
4.新建一个Linux本机,输入下面命令连接本机
telnet localhost 44444
5.发送数据查看
二、实施采集数据到hdfs(监控文件)
这里有一个无限产生数据的jar包,其产生的数据存放在/opt/jars/calllog.csv下
1.写配置文件 flumejob_hdfs.conf
# .agent

a1.sources = r1

a1.sinks = k1

a1.channels = c1

# .sources

# exec 执行一个命令的方式去查看文件 tail -F 实时查看

a1.sources.r1.type = exec

# 要执行的脚本command tail -F 默认10行 man tail  查看帮助

a1.sources.r1.command = tail -F /opt/jars/calllog.csv

# 执行这个command使用的是哪个脚本 -c 指定使用什么命令

# bash: /usr/bin/bash /usr/share/man/man1/bash..gz

a1.sources.r1.shell = /usr/bin/bash -c

# .sinks

a1.sinks.k1.type = hdfs

a1.sinks.k1.hdfs.path = hdfs://hd1-1:9000/flume/calllog

#上传文件的前缀

a1.sinks.k1.hdfs.filePrefix = logs-

#是否按照时间滚动文件夹

a1.sinks.k1.hdfs.round = true

#多少时间单位创建一个新的文件夹  秒 (默认30s)

a1.sinks.k1.hdfs.roundValue =

#重新定义时间单位(每小时滚动一个文件夹)

a1.sinks.k1.hdfs.roundUnit = minute

#是否使用本地时间戳

a1.sinks.k1.hdfs.useLocalTimeStamp = true

#积攒多少个 Event 才 flush 到 HDFS 一次

a1.sinks.k1.hdfs.batchSize =

#设置文件类型,可支持压缩

a1.sinks.k1.hdfs.fileType = DataStream

#多久生成一个新的文件 秒

a1.sinks.k1.hdfs.rollInterval =

#设置每个文件的滚动大小 字节(最好128M)

a1.sinks.k1.hdfs.rollSize =

#文件的滚动与 Event 数量无关

a1.sinks.k1.hdfs.rollCount =

#最小冗余数(备份数 生成滚动功能则生效roll hadoop本身有此功能 无需配置) 1份 不冗余

a1.sinks.k1.hdfs.minBlockReplicas =

# Use a channel which buffers events in memory

a1.channels.c1.type = memory

a1.channels.c1.capacity =

a1.channels.c1.transactionCapacity =

# Bind the source and sink to the channel

a1.sources.r1.channels = c1

a1.sinks.k1.channel = c1
2.启动hdfs、yarn,并在hdfs上建立文件中的生成文件目录
hdfs dfs -mkdir -p /flume/calllog
3.启动命令
bin/flume-ng agent --conf conf/ --name a1 --conf-file conf/flumejob_hdfs.conf
4.启动jar包,然后查看hdfs上calllog文件夹下的变化
三、监控文件目录
1.写配置文件 flumejob_dir.conf
# .agent

a1.sources = r1

a1.sinks = k1

a1.channels = c1

# .sources

a1.sources.r1.type = spooldir

# 监控的文件夹

a1.sources.r1.spoolDir = /root/spooldir

# 上传成功后显示后缀名

a1.sources.r1.fileSuffix = .COMPLETED

# 如论如何 加绝对路径的文件名 默认false

a1.sources.r1.fileHeader = true

#忽略所有以.tmp 结尾的文件(正在被写入),不上传

# ^以任何开头 出现无限次 以.tmp结尾的

a1.sources.r1.ignorePattern = ([^ ]*\.tmp)

# .sinks

a1.sinks.k1.type = hdfs

a1.sinks.k1.hdfs.path = hdfs://hd09-01:9000/flume/spooldir/%Y%m%d/%H

#上传文件的前缀

a1.sinks.k1.hdfs.filePrefix = spooldir-

#是否按照时间滚动文件夹

a1.sinks.k1.hdfs.round = true

#多少时间单位创建一个新的文件夹

a1.sinks.k1.hdfs.roundValue =

#重新定义时间单位

a1.sinks.k1.hdfs.roundUnit = hour

#是否使用本地时间戳

a1.sinks.k1.hdfs.useLocalTimeStamp = true

#积攒多少个 Event 才 flush 到 HDFS 一次

a1.sinks.k1.hdfs.batchSize =

#设置文件类型,可支持压缩

a1.sinks.k1.hdfs.fileType = DataStream

#多久生成一个新的文件

a1.sinks.k1.hdfs.rollInterval =

#设置每个文件的滚动大小大概是 128M

a1.sinks.k1.hdfs.rollSize =

#文件的滚动与 Event 数量无关

a1.sinks.k1.hdfs.rollCount =

#最小副本数

a1.sinks.k1.hdfs.minBlockReplicas =

# .channels

a1.channels.c1.type = memory

a1.channels.c1.capacity =

a1.channels.c1.transactionCapacity =

# .bink

a1.sources.r1.channels = c1

a1.sinks.k1.channel = c1
2.启动hdfs、yarn,注意,不需要在hdfs上创建
3.启动命令
bin/flume-ng agent --conf conf\ --name a1 --conf-file conf/flumejob_dir.conf
4.将任意文件复制到spool文件目录中,在hdfs中可看到生成日志文件
四、Flume监听一个文件,然后使用两个channel,一个channle对应的sink存储到hdfs,另一个channel对应的sink存储到本地。
思路:这时应需要三个agent,
第一个agent用来监听文件并将数据源复制为两份发送到其他两个agent,
第二个agent将数据传输到hdfs存储,第三个agent将数据存储在本地。
1.编写三个conf文件(flumejob1.conf、flumejob2.conf、flumejob3.conf)
# name the components on this agent

a1.sources = r1

a1.sinks = k1 k2

a1.channels = c1 c2

# 将数据流复制给多个 channel

a1.sources.r1.selector.type = replicating

# Describe/configure the source

a1.sources.r1.type = exec

a1.sources.r1.command = tail -F /tmp/root/hive.log

a1.sources.r1.shell = /bin/bash -c

# Describe the sink

# 分两个端口发送数据

a1.sinks.k1.type = avro

a1.sinks.k1.hostname = hd09-

a1.sinks.k1.port =

a1.sinks.k2.type = avro

a1.sinks.k2.hostname = hd09-

a1.sinks.k2.port =

# Describe the channel

a1.channels.c1.type = memory

a1.channels.c1.capacity =

a1.channels.c1.transactionCapacity =

a1.channels.c2.type = memory

a1.channels.c2.capacity =

a1.channels.c2.transactionCapacity =

# Bind the source and sink to the channel

a1.sources.r1.channels = c1 c2

a1.sinks.k1.channel = c1

a1.sinks.k2.channel = c2
# Name the components on this agent

a2.sources = r1

a2.sinks = k1

a2.channels = c1

# Describe/configure the source

a2.sources.r1.type = avro

# 端口抓取数据

a2.sources.r1.bind = hd09-

a2.sources.r1.port =

# Describe the sink

a2.sinks.k1.type = hdfs

a2.sinks.k1.hdfs.path = hdfs://hd09-01:9000/flume2/%Y%m%d/%H

#上传文件的前缀

a2.sinks.k1.hdfs.filePrefix = flume2-

#是否按照时间滚动文件夹

a2.sinks.k1.hdfs.round = true

#多少时间单位创建一个新的文件夹

a2.sinks.k1.hdfs.roundValue =

#重新定义时间单位

a2.sinks.k1.hdfs.roundUnit = hour

#是否使用本地时间戳

a2.sinks.k1.hdfs.useLocalTimeStamp = true

#积攒多少个 Event 才 flush 到 HDFS 一次

a2.sinks.k1.hdfs.batchSize =

#设置文件类型,可支持压缩

a2.sinks.k1.hdfs.fileType = DataStream

#多久生成一个新的文件

a2.sinks.k1.hdfs.rollInterval =

#设置每个文件的滚动大小大概是 128M

a2.sinks.k1.hdfs.rollSize =

#文件的滚动与 Event 数量无关

a2.sinks.k1.hdfs.rollCount =

#最小副本数

# Describe the channel

a2.channels.c1.type = memory

a2.channels.c1.capacity =

a2.channels.c1.transactionCapacity =

# Bind the source and sink to the channel

a2.sources.r1.channels = c1

a2.sinks.k1.channel = c1
# Name the components on this agent

a3.sources = r1

a3.sinks = k1

a3.channels = c1

# Describe/configure the source

a3.sources.r1.type = avro

a3.sources.r1.bind = hd09-

a3.sources.r1.port =

# Describe the sink

a3.sinks.k1.type = file_roll

a3.sinks.k1.sink.directory = /root/flume2

# Describe the channel

a3.channels.c1.type = memory

a3.channels.c1.capacity =

a3.channels.c1.transactionCapacity =

# Bind the source and sink to the channel

a3.sources.r1.channels = c1

a3.sinks.k1.channel = c1
2.在本地创建文件中本地存放的文件夹,本地不会自动创建,而hdfs会
mkdir /root/flume2
3.打开jar包测试。
Flume的四个使用案例的更多相关文章
- Pandas系列(十四)- 实战案例
一.series import pandas as pd import string #创建Series的两种方式 #方式一 t = pd.Series([1,2,3,4,43],index=list ...
- Flume原理分析与使用案例
1.flume的特点: flume是一个分布式.可靠.和高可用的海量日志采集.聚合和传输的系统.支持在日志系统中定制各类数据发送方,用于收集数据:同时,Flume提供对数据进行简单处理,并写到各种数据 ...
- java基础之多线程四:简单案例
多线程案例: 有一个包包的数量为100个,分别从实体店和官网进行售卖.使用多线程的方式,分别打印实体店和官网卖出包包的信息.分别统计官网和实体店各卖出了多少个包包 第一种方法 继承Thread类: p ...
- 05_ Flume多级Agent之间串联案例
多级agent之间串联: 从tail命令获取数据发送到avro端口,另一个节点可配置一个avro源来获取数据,发送外部存储 启动两个Agent节点: 使用scp命令拷贝flume安装包到另一台虚拟机; ...
- 04_ Flume采集文件到HDFS案例
采集需求:比如业务系统使用log4j生成的日志,日志内容不断增加,需要把追加到日志文件中的数据实时采集到hdfs 根据需求,首先定义以下3大要素 采集源,即source——监控文件内容更新 : ex ...
- maven第四章背景案例
4.3简要设计 4.3.1接口设计 4.3.2模块结构 思想 先定义出核心接口,一个接口可以认为是一个功能,根据接口划分功能 设计模式就是一种思想,外观模式和代理模式,适配者模式三者的区别 http: ...
- 《数据结构与算法(C语言版)》严蔚敏 | 第四章课本案例
//二叉树的顺序存储表示 #define MAXTSIZE 100 typedef TElemtype SqBiTree[MAXTSIZE]; SqBiTree bt; //二叉树的二叉链表存储表示 ...
- Flume具体应用(多案例)
日志采集 对于flume的原理其实很容易理解,我们更应该掌握flume的具体使用方法,flume提供了大量内置的Source.Channel和Sink类型.而且不同类型的Source.Channel和 ...
- (升级版)Spark从入门到精通(Scala编程、案例实战、高级特性、Spark内核源码剖析、Hadoop高端)
本课程主要讲解目前大数据领域最热门.最火爆.最有前景的技术——Spark.在本课程中,会从浅入深,基于大量案例实战,深度剖析和讲解Spark,并且会包含完全从企业真实复杂业务需求中抽取出的案例实战.课 ...
随机推荐
- Confluence 6 配置默认语言界面
Confluence 6 配置默认语言使用的界面. https://www.cwiki.us/display/CONFLUENCEWIKI/Choosing+a+Default+Language
- canvas 保存bitmap到本地
File f = new File("/sdcard/DCIM/Camera/0.png"); FileOutputStream fos = null; try { fos = n ...
- pytorch:修改预训练模型
torchvision中提供了很多训练好的模型,这些模型是在1000类,224*224的imagenet中训练得到的,很多时候不适合我们自己的数据,可以根据需要进行修改. 1.类别不同 # codin ...
- JPA整合Spring案例
目录 Spring-SpringMVC-JPA整合案例 三种整合方式 Spring整合JPA步骤 解决JPA懒加载问题 Spring-SpringMVC-JPA整合案例 author :SimpleW ...
- Kali linux Nessus &Cracking Password
1 .Nessus漏洞网站测试(真正体会到什么是专业版和社区版的区别,要技术就不光要勤恳的态度,严谨的思维.还有矢志不渝的志气,还必须要求砸钱,所以狠狠的赚钱才是硬道理),我的半个社区版的很多扫描模块 ...
- lightoj1234 打表技巧:分块打表
/* 打不了那么大的表,所以只记录分块的信息即可 */ #include<bits/stdc++.h> using namespace std; #define maxn 1000005 ...
- js中onload和jQuery中的ready区别
window.onload必须等到页面内包括图片的所有元素加载完毕后才能执行. ------>不能写多个(如果有多个,只会执行一个) $(document).ready()是DOM结构绘制完毕后 ...
- OrCAD Capture CIS 为库里的元器件添加新属性
1.进入元器件编辑界面 2.菜单:Options > Part Properties... 3.在窗口User Properties中,点击按钮New... 4.在弹出的子窗口NewProper ...
- Jmeter中通过beanshell写入CSV的脚本
import com.csvreader.CsvWriter; String NewDataPath=bsh.args[0]; NewDataPath=NewDataPath.replaceAll(& ...
- 存储区域网络(Storage Area Network,简称SAN)
存储区域网络(Storage Area Network,简称SAN)采用网状通道(Fibre Channel ,简称FC,区别与Fiber Channel光纤通道)技术,通过FC交换机连接存储阵列和服 ...