爬虫--requests模块高级(代理和cookie操作)
一.基于requests模块的cookie操作
引言:有些时候,我们在使用爬虫程序去爬取一些用户相关信息的数据(爬取张三“人人网”个人主页数据)时,如果使用之前requests模块常规操作时,往往达不到我们想要的目的,例如:
cookie会话跟踪技术,服务端产生发给客户端保存,再次访问服务器,浏览器就携带这个cookie,让服务器识别客户端浏览器
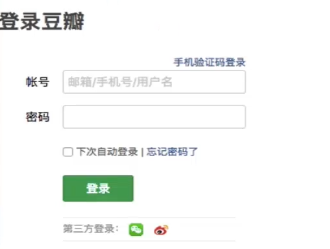
爬取张三用户的豆瓣网的个人主页页面数据--没有测试成功
- cookie:基于用户的用户数据
- 需求:爬取张三用户的豆瓣网的个人主页页面数据
- cookie作用:服务器使用cookie来记录客户端的状态信息
实现流程:
1.执行登录操作(获取cookie)
2.发起个人主页请求时,需要将cookie携带到该请求中
注意:session对象

import requests session = requests.session()
# 1.发起登录请求:将cookie获取,切换存储到session对象中
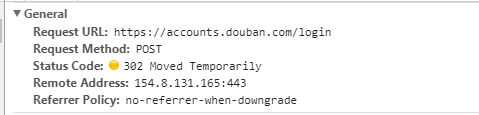
login_url = 'https://accounts.douban.com/login'
# post 请求 ---data参数
data = {
'source':'movie',
'redir':'https://movie.douban.com/',
'form_email':'',
'form_password':'',
'login':'登录',
} headers = {'User-Agent':'Mozilla/5.0 (Windows NT 6.1; WOW64) AppleWebKit/537.36 (KHTML, like Gecko) Chrome/63.0.3239.132 Safari/537.36'}
# 使用session发起请求
login_response = session.post(url=login_url,data=data,headers=headers) # 2.发起个人主页请求(session(cookie)),获取响应页面数据
url = 'https://www.douban.com/people/188197188/'
response = session.get(url=url,headers=headers)
page_text = response.text
with open('./douban110.html','w',encoding='utf-8')as f:
f.write(page_text)
代理操作
- 1.代理:第三方代理本体执行相关的事务。生活:代购
- 2.为什么要使用代理
- 反爬操作,非正常访问的ip禁止
- 反反爬手段--设置爬虫的代理ip
- 3.分类:
- 正向代理:代替客户端获取数据--爬虫客户端程序-正向代理
- 反向代理:代理服务器端提供数据
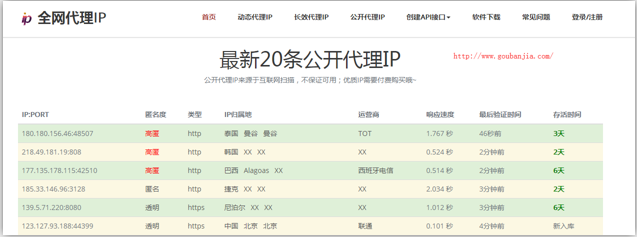
- 4.免费代理ip的网站提供商
- www.goubanjia.com 推荐
- 快代理
- 西祠代理
- 5.代码
http://www.goubanjia.com/
---------------------------------------------------------------------------------------------
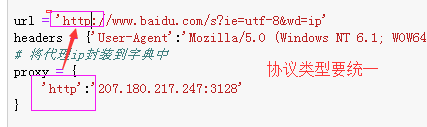
import requests url = 'http://www.baidu.com/s?ie=utf-8&wd=ip'
headers = {'User-Agent':'Mozilla/5.0 (Windows NT 6.1; WOW64) AppleWebKit/537.36 (KHTML, like Gecko) Chrome/63.0.3239.132 Safari/537.36'}
# 将代理ip封装到字典中
proxy = {
'http':'112.25.6.26:80'
} # 更换网络ip,发起请求之前
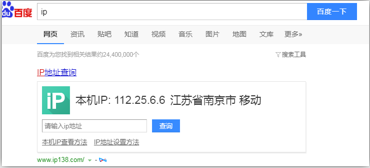
response = requests.get( url=url,proxies=proxy,headers=headers)
with open('./daili.html','w',encoding='utf-8')as f:
f.write(response.text) 执行后结果:

验证处理--打码平台
登陆的次数过多就会出现验证码
验证码处理:
- 1.手动识别验证码

- 2.云打码平台自动识别验证码
云打码平台处理验证码的实现流程:
- 1.对携带验证码的页面数据进行抓取
- 2.可以将页面数据中验证码进行解析,验证码图片下载到本地
- 3.可以将验证码图片提交给三方平台进行识别,返回验证码图片上的数据值
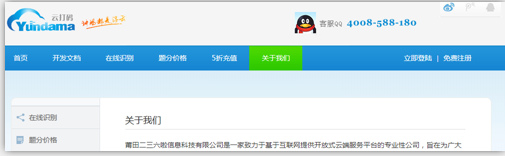
- 云打码平台:
- 1.在官网中进行注册(普通用户和开发者用户)
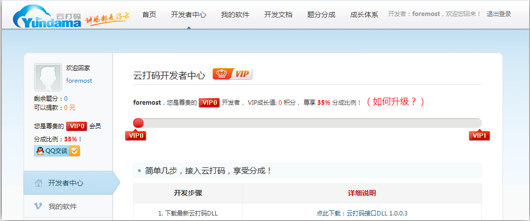
- 2.登录开发者用户:
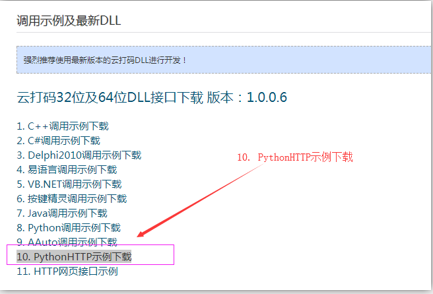
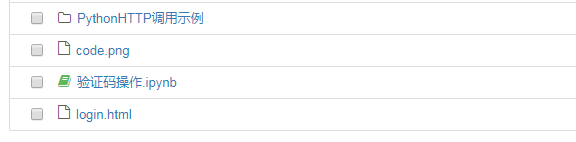
- 1.实例代码的下载(开发文档-》调用实例及最新的DLL-》PythonHTTP实例下载)
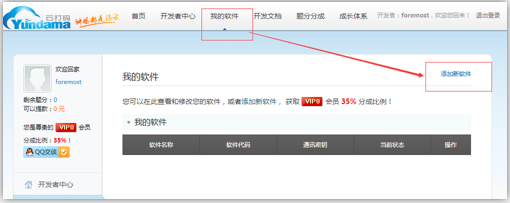
- 2.创建一个软件:我的软件-》添加新的软件
-3.使用示例代码中的源码文件中的代码进行修改,让其识别验证码图片中的数据值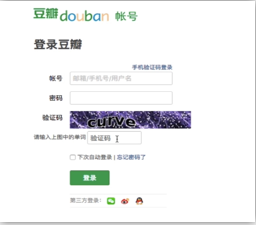
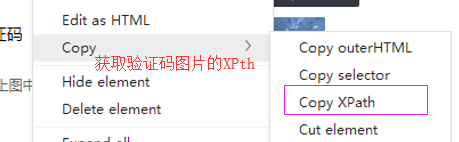
如何获取验证码图片上的数据值


1.到官网进行注册(普通用户和开发者用户)
- 2.登录开发者用户:
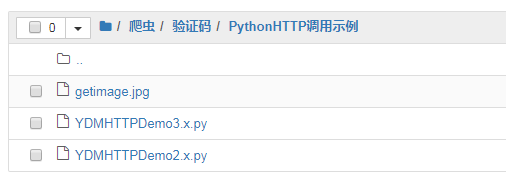
下载后解压放在jupyter notebook相应目录下
2.创建一个软件:点击我的软件---》添加新的 软件
3.使用示例代码中的源码文件中的代码进行修改,让其识别验证码图片中的数据值

识别成功:

进行登录操作:
抓包:


import requests
from lxml import etree
import json,time,re
url = 'https://www.douban.com/accounts/login?source=movie' headers = {'User-Agent':'Mozilla/5.0 (Windows NT 6.1; WOW64) AppleWebKit/537.36 (KHTML, like Gecko) Chrome/63.0.3239.132 Safari/537.36'} page_text = requests.get(url=url,headers=headers).text
# 2.可以将页面数据中验证码进行解析,验证码图片下载到本地
tree = etree.HTML(page_text)
# 验证码图片xpath 的值: //*[@id="captcha_image"]
codeImg_url = tree.xpath('//*[@id="captcha_image"]/@src')[0]
# 获取了验证码图片的二进制数据值
code_img = requests.get(url=codeImg_url,headers=headers).content # 获取captcha-id # 正则解析
# 使用re.S参数以后,正则表达式会将这个字符串作为一个整体,将“\n”当做一个普通的字符加入到这个字符串中,在整体中进行匹配。 # <img id="captcha_image" src="https://www.douban.com/misc/captcha?id=O1pMk4XJ7wuKuLz8DYhVZpw3:en&size=s" alt="captcha" class="captcha_image">
c_id = re.findall('<img id="captcha_image".*?id=(.*?)&.*?>',page_text,re.S)[0] with open('./code.png','wb')as f:
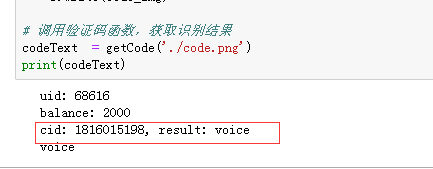
f.write(code_img) # 调用验证码函数,获取识别结果
codeText = getCode('./code.png')
print(codeText) # 进行登录操作 post = 'https://accounts.douban.com/login' data = {
'source':'movie',
'redir':'https://movie.douban.com/',
'form_email':'836342406@qq.com',
'form_password':'xl836342406,.',
'captcha-solution':codeText,
'captcha-id':c_id,
'login':'登录',
} print(c_id)
login_text = requests.post(url=post,data=data,headers=headers).text
with open('./login.html','w',encoding='utf-8')as f:
f.write(login_text)
---
# 该函数调用了打码平台的相关接口对指定的验证码识别,返回识别结果

def getCode(codeImg):

    # 普通云打码用户名

    username    = 'foremost'

    # 密码

    password    = 'ydm(qq)'

    # 软件ID,开发者分成必要参数。登录开发者后台【我的软件】获得!

    appid       = 6322

    # 软件密钥,开发者分成必要参数。登录开发者后台【我的软件】获得!

    appkey      = '4b936b7eb8060d3b7667b8098dd85233'

    # 验证码图片文件

    filename    = codeImg

    # 验证码类型,# 例:1004表示4位字母数字,不同类型收费不同。请准确填写,否则影响识别率。在此查询所有类型 http://www.yundama.com/price.html

    codetype    = 3000

    # 超时时间,秒

    timeout     = 20

    # 检查

    if (username == 'username'):

        print('请设置好相关参数再测试')

    else:

        # 初始化

        yundama = YDMHttp(username, password, appid, appkey)

        # 登陆云打码

        uid = yundama.login();

        print('uid: %s' % uid)

        # 查询余额

        balance = yundama.balance();

        print('balance: %s' % balance)

        # 开始识别,图片路径,验证码类型ID,超时时间(秒),识别结果

        cid, result = yundama.decode(filename, codetype, timeout);

        print('cid: %s, result: %s' % (cid, result))

        # ---自己加

        return result
----
class YDMHttp:

    apiurl = 'http://api.yundama.com/api.php'

    username = ''

    password = ''

    appid = ''

    appkey = ''

    def __init__(self, username, password, appid, appkey):

        self.username = username

        self.password = password

        self.appid = str(appid)

        self.appkey = appkey

    def request(self, fields, files=[]):

        response = self.post_url(self.apiurl, fields, files)

        response = json.loads(response)

        return response

    def balance(self):

        data = {'method': 'balance', 'username': self.username, 'password': self.password, 'appid': self.appid, 'appkey': self.appkey}

        response = self.request(data)

        if (response):

            if (response['ret'] and response['ret'] < 0):

                return response['ret']

            else:

                return response['balance']

        else:

            return -9001

    def login(self):

        data = {'method': 'login', 'username': self.username, 'password': self.password, 'appid': self.appid, 'appkey': self.appkey}

        response = self.request(data)

        if (response):

            if (response['ret'] and response['ret'] < 0):

                return response['ret']

            else:

                return response['uid']

        else:

            return -9001

    def upload(self, filename, codetype, timeout):

        data = {'method': 'upload', 'username': self.username, 'password': self.password, 'appid': self.appid, 'appkey': self.appkey, 'codetype': str(codetype), 'timeout': str(timeout)}

        file = {'file': filename}

        response = self.request(data, file)

        if (response):

            if (response['ret'] and response['ret'] < 0):

                return response['ret']

            else:

                return response['cid']

        else:

            return -9001

    def result(self, cid):

        data = {'method': 'result', 'username': self.username, 'password': self.password, 'appid': self.appid, 'appkey': self.appkey, 'cid': str(cid)}

        response = self.request(data)

        return response and response['text'] or ''

    def decode(self, filename, codetype, timeout):

        cid = self.upload(filename, codetype, timeout)

        if (cid > 0):

            for i in range(0, timeout):

                result = self.result(cid)

                if (result != ''):

                    return cid, result

                else:

                    time.sleep(1)

            return -3003, ''

        else:

            return cid, ''

    def report(self, cid):

        data = {'method': 'report', 'username': self.username, 'password': self.password, 'appid': self.appid, 'appkey': self.appkey, 'cid': str(cid), 'flag': ''}

        response = self.request(data)

        if (response):

            return response['ret']

        else:

            return -9001

    def post_url(self, url, fields, files=[]):

        for key in files:

            files[key] = open(files[key], 'rb');

        res = requests.post(url, files=files, data=fields)

        return res.text
----
结果:
爬虫--requests模块高级(代理和cookie操作)的更多相关文章
- 爬虫 requests模块高级用法
一 介绍 #介绍:使用requests可以模拟浏览器的请求,比起之前用到的urllib,requests模块的api更加便捷(本质就是封装了urllib3) #注意:requests库发送请求将网页内 ...
- requests模块 高级应用
目录 requests模块 高级应用 HttpConnectinPool 问题解决 IP代理 简单使用代理 代理池 cookie的处理 页面中验证码识别 使用 multiprocessing.dumm ...
- Scrapy框架--代理和cookie
如何发起post请求? 代理和cookie: cookie:豆瓣网个人登录,获取该用户个人主页这个二级页面的页面数据. 如何发起post请求? 一定要对start_requests方法进行重写. 1. ...
- requests模块高级
requests模块高级 cookie cookie: 基于用户的用户数据 -需求:爬取用户的豆瓣网的个人页面数据 cookie作用:服务器端使用cookie来记录客户端的状态信息 实现流程: 1.执 ...
- 爬虫 requests模块的其他用法 抽屉网线程池回调爬取+保存实例,gihub登陆实例
requests模块的其他用法 #通常我们在发送请求时都需要带上请求头,请求头是将自身伪装成浏览器的关键,常见的有用的请求头如下 Host Referer #大型网站通常都会根据该参数判断请求的来源 ...
- 爬虫 requests 模块
requests 模块 介绍 使用requests可以模拟浏览器的请求, 比起之前用到的urllib,requests模块的api更加便捷(本质就是封装了urllib3) ps: requests库发 ...
- 爬虫----requests模块
一.介绍 #介绍:使用requests可以模拟浏览器的请求,比起之前用到的urllib,requests模块的api更加便捷(本质就是封装了urllib3) #注意:requests库发送请求将网页内 ...
- 爬虫--requests模块学习
requests模块 - 基于如下5点展开requests模块的学习 什么是requests模块 requests模块是python中原生的基于网络请求的模块,其主要作用是用来模拟浏览器发起请求.功能 ...
- Python网络爬虫-requests模块(II)
有些时候,我们在使用爬虫程序去爬取一些用户相关信息的数据(爬取张三“人人网”个人主页数据)时,如果使用之前requests模块常规操作时,往往达不到我们想要的目的,例如: #!/usr/bin/env ...
随机推荐
- 服务容错保护断路器Hystrix之三:断路器监控(Hystrix Dashboard)-单体监控
turbine:英 [ˈtɜ:baɪn] 美 [ˈtɜ:rbaɪn] n.汽轮机;涡轮机;透平机 一.Hystrix Dashboard简介 在微服务架构中为了保证程序的可用性,防止程序出错导致网络阻 ...
- event.currentTarget指向事件所绑定的元素,而event.target始终指向事件发生时的元素
event.currentTarget指向事件所绑定的元素,而event.target始终指向事件发生时的元素
- [UE4]Overlay
Overlay容器的子控件叠加,没有z-order属性设置,只能在编辑器中调整前后层级,也不能设置位置.可以理解是Canvas Panel的简化控件
- Socket拆包和解包
对于基于TCP开发的通讯程序,有个很重要的问题需要解决,就是封包和拆包.下面就针对这个问题谈谈我的想法,抛砖引玉.若有不对,不妥之处,恳求大家指正.在此先谢过大家了. 一.为什么基于TCP的通讯程序需 ...
- PTA2016天梯赛决赛3小时训练赛
7-2 I Love GPLT (5 分) 这道超级简单的题目没有任何输入. 你只需要把这句很重要的话 —— I Love GPLT ——竖着输出就可以了. 所谓“竖着输出”,是指每个字符占一行(包括 ...
- python的json模块介绍
转载:https://blog.csdn.net/xsj_blog/article/details/51921664 对于数据传递方面,XML是一种选择,还有一种选择是JSON,它是一种轻量级的数据交 ...
- JSP基础解析
EL表达式 https://www.cnblogs.com/zhouguanglin/p/8117406.html EL(Expression Language) 是为了使JSP写起来更加简单 ...
- RecyclerView.Adapter封装,最简单实用的BaseRecyclerViewAdapter;只需重写一个方法,设置数据链式调用;
之前对ListView的BaseAdapter进行过封装,只需重写一个getView方法: 现在慢慢的RecyclerView成为主流,下面是RecyclerView.Adapter的封装: Base ...
- mysql存储过程的编写
1.MySQL 新增存储过程,因为mysql默认以:为分隔符,该分隔符会使mysql自动执行sql语句,故需要将分隔符修改下,下面通过DELIMITER设为$$,然后编写SQL,编写完成再将:设为分隔 ...
- spring boot使用配置文件内容
配置文件如下所示: server: port: 8081 context-path: /demo tag: 12 user: name1: mist-dev password: 123 然后可以通过以 ...