五万字长文带你学会Spring
Sping

Spring概念介绍
spring是啥呢,你在斗地主的时候把别人打爆了那叫spring,

你成功的追到了你爱慕已久的女神,人生中的春天来了,那也叫sping


好了别看我老婆了,咱来讲讲啥是Spring
Sping:Spring是分层的javaEE/SE应用full-stack轻量级开源框架,他以AOP( 面向切面编程 aspect oriented programming)和IOC(控制反转 invers of control)为内核,这个框架之所以叫spring是因为他给软件行业的发展带来的春天,看吧和你的春天一样,不过这个是程序员的春天,这个框架的到来极大的方便的程序的开发
Spring 体系结构介绍
Spring体系结构图
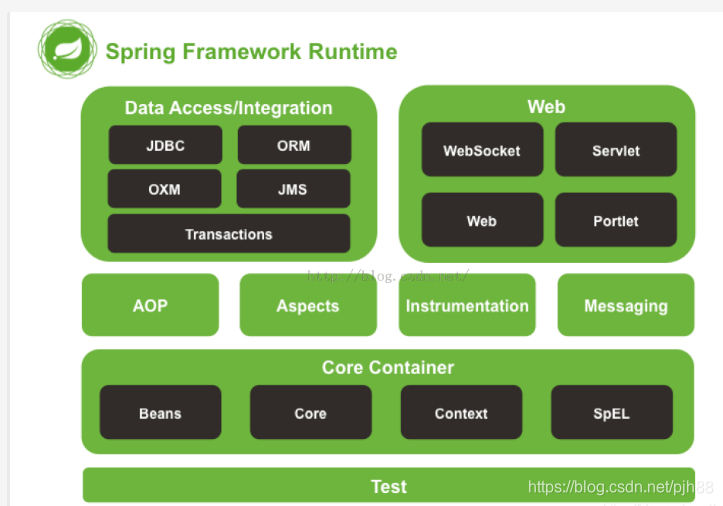
Spring四大模块简介
Core核心模块。负责管理组件的Bean对象
spring-beans-4.0.0.RELEASE.jar
spring-context-4.0.0.RELEASE.jar
spring-core-4.0.0.RELEASE.jar
spring-expression-4.0.0.RELEASE.jar
面向切面编程
spring-aop-4.0.0.RELEASE.jar
spring-aspects-4.0.0.RELEASE.jar
数据库操作
spring-jdbc-4.0.0.RELEASE.jar
spring-orm-4.0.0.RELEASE.jar
spring-oxm-4.0.0.RELEASE.jar
spring-tx-4.0.0.RELEASE.jar
spring-jms-4.0.0.RELEASE.jar
Web模块
spring-web-4.0.0.RELEASE.jar
spring-webmvc-4.0.0.RELEASE.jar
spring-websocket-4.0.0.RELEASE.jar
spring-webmvc-portlet-4.0.0.RELEASE.jar
Spring的优势
以下优势我都将在下文一一介绍
- 方便解耦,简化开发
- AOP 编程的支持
- 声明式事务的支持
- 方便程序的测试
- 方便集成各种优秀框架
- 降低 JavaEE API 的使用难度
- Java 源码是经典学习范例
下面我们来介绍介绍Spring的两个核心IOC与AOP
IOC(控制反转 invers of control)
基本概念
IOC -Inversion of Control ,即控制反转,这不一种具体的技术,而是一种设计思想,以前我们的java开发都是自己的new一个对象,这样十分麻烦,而且每new一个对象,就会占用一个内存空间,消耗资源。而IOC技术就是为了解决这个问题,把,这个思想的本质就是将你设计好的对象交给容器控制,而不是传统的在你的对象内部直接控制。
你现在是不是还是一脸懵逼,下面我们再来理解理解两个思想,即
1.谁控制谁控制了什么
2.为何是反转,那方面反转了
1.谁控制谁控制了什么
传统JAVA SE 程序设计,是我们直接在对象内部通过new 来创建对象,也即程序主动的去创建依赖对象,而IOC有一个专门的控制容器来创建对象,即对象的管理权全交给了IOC容器,即由IOC控制对象,这里不仅仅是对象,还有一些外部资源的获取,比如文件等等
2.为何是反转,那方面反转了
在讲反转之前我们先来讲讲什么是正转,传统对象中是我们自己在对象中主动控制去获取依赖对象,这就是正转,而反转则是由IOC容器去控制依赖注入,因为由容器帮我们查找及注入依赖对象,对象只是被动的接受依赖对象,所以是反转;哪些方面反转了?依赖对象的获取被反转了。
IOC的优点以及他可以做什么
IOC不是一种技术,只是一种思想,一个重要的面向对象编程设计的发则,它能指导我们如何设计出松耦合,更优良的程序,传统应用程序都是我们在类的内部主动的去创建依赖对象,导致 了类与类之间的高度融合,很难测试,有了IOC容器之后,把创建和查找依赖对象的控制器交给了容器,由容器进行注入组合对象,对象和对象之间的松散耦合的,这样方便测试也利于重复利用,使整个程序的体系结构变的十分灵活,其实IoC对编程带来的最大改变不是从代码上,而是从思想上,发生了“主从换位”的变化。应用程序原本是老大,要获取什么资源都是主动出击,但是在IoC/DI思想中,应用程序就变成被动的了,被动的等待IoC容器来创建并注入它所需要的资源了。
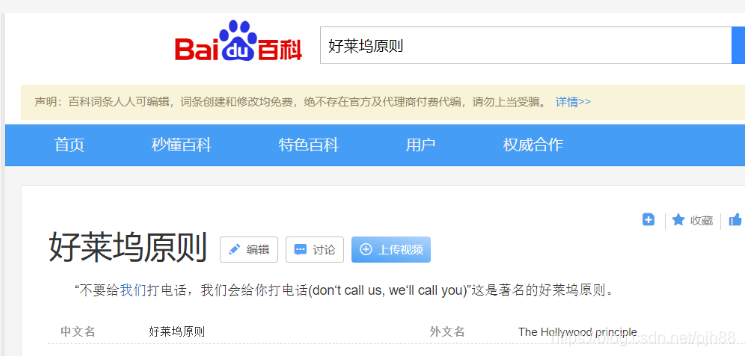
IOC很好的体现了面向对象设计法则之一—— 好莱坞法则:“别找我们,我们找你”;即由IOC容器帮对象找相应的依赖对象并注入,而不是由对象主动去找。
IOC和DI(控制反转和依赖注入)
DI—Dependency Injection,即“依赖注入”:是组件之间依赖关系由容器在运行期决定,形象的说,即由容器动态的将某个依赖关系注入到组件之中。依赖注入的目的并非为软件系统带来更多功能,而是为了提升组件重用的频率,并为系统搭建一个灵活、可扩展的平台。通过依赖注入机制,我们只需要通过简单的配置,而无需任何代码就可指定目标需要的资源,完成自身的业务逻辑,而不需要关心具体的资源来自何处,由谁实现。
理解DI的关键是:“谁依赖谁,为什么需要依赖,谁注入谁,注入了什么”,那我们来深入分析一下:
●谁依赖于谁:当然是应用程序依赖于IOC容器;
●为什么需要依赖:应用程序需要IoC容器来提供对象需要的外部资源;
●谁注入谁:很明显是IoC容器注入应用程序某个对象,应用程序依赖的对象;
●注入了什么:就是注入某个对象所需要的外部资源(包括对象、资源、常量数据)。
IoC和DI由什么关系呢?其实它们是同一个概念的不同角度描述,由于控制反转概念比较含糊(可能只是理解为容器控制对象这一个层面,很难让人想到谁来维护对象关系),所以2004年大师级人物Martin Fowler又给出了一个新的名字:“依赖注入”,相对IoC 而言,“依赖注入”明确描述了“被注入对象依赖IoC容器配置依赖对象”。
**
怎么在spring中实现依赖注入我后面再来讲解,这里大家先理解理解这个概念
**
注:如果想要更加深入的了解IOC和DI,请参考大师级人物Martin Fowler的一篇经典文章《Inversion of Control Containers and the Dependency Injection pattern》,原文地址:http://www.martinfowler.com/articles/injection.html。
AOP思想介绍(面向切面编程aspect oriented programming)
AOP概念
AOP为Aspect Oriented Programming 的缩写,意为面向切面编程,通过预处理和运行期动态代理的方式实现程序功能的统一和维护的一种技术
AOP是OOP(Object Oriented Programmin 面向对象编程)的延续,是软件开发的一个热点,又是框架中的一个重要内容,是函数式编程的一种衍生范型,利用AOP可以对业务逻辑中的各个部分进行隔离,使业务逻辑之间的耦合度降低,提高程序的可重用性,同时提高了程序的开发效率
一个案例带你理解切面

切面:
把一块蛋糕切成两块,这个切口就是切面,;炒饭的时候,锅和锅铲就是切面;web层级设计中,web层->网关层->服务层->数据层,每一层之间也是一个切面。编程中,对与对象之间,方法与方法之间,模块与模块之间都是一个个切面。
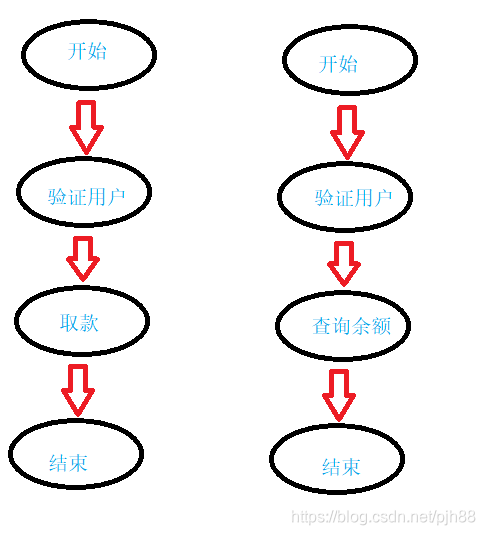
以一个银行案例为例:
**
如图银行的取款业务和查询余额业务有交叉的业务逻辑(所谓交叉业务逻辑是与主业务无关的代码,比如安全检查,事务,日志等等),这里指的是验证用户的业务。这会导致代码纠缠,交叉业务逻辑与主业务逻辑混合在一起,这会导致业务逻辑的混合不清,这时候就要用到AOP
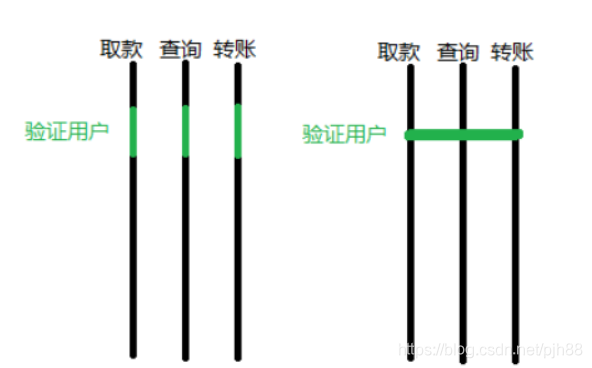
使用AOP可以帮助我们简化代码,我们在写代码的时候可不写这个验证用户的业务,可以在另一个地方写好验证用户的代码,然后告诉Spring那几个地方需要这些代码,让Spring加过去即可,如果有多个控制流的话,会大大的减少时间,而AOP不会把代码加入到源文件中但是他会正确的影响最后的机器代码
上面那个 验证用户 的方框,我们可以把它当成一块板子,在这块板子上插入一些控制流程,这块板子就可以当成是 AOP 中的一个切面。所以 AOP 的本质是在一系列的纵向的控制流程中,把那些相同的子流程提取成一个横向的面,把纵向流程画成一条直线,而 AOP 相当于把相同的地方连起来了(这幅图是真的形象,好好体会一下应该不难),这个验证用户的子流程 就成了一条直线,也可以理解成一个切面,这里只插了三个流程,如果其他流程也需要这个子流程,也可以插到其他地方去。
AOP的优势与作用
**
作用:在不修改源码的情况下对方法进行增强
优势:提高代码的可复用性,提高开发效率,便于维护
Spring中AOP思想的实现我在后面就有讲解,不在这里讲是因为讲Spring在AOP中的实现要有一定的基础,会的的同学可以点击链接跳转:链接
构建一个简单的案例
创建Spring工程的方法我放在附录2了:点击这里跳转
在写Spring的案例之前我们再来理理使用Spring与不使用Spring的区别
没有spring之前:
在没有spring之前,一个对象调用另一个对象的方法,需要通过之间new一个对象的方式来实现,比如对象A调用对象BImp,需要在对象A内部new一个对象B,再来调用B的方法Methdo,其中BImp实现自接口B
在使用了Spring之后:
在有了Spring之后直接向Spring要就好了,不需要再自己来创建
**
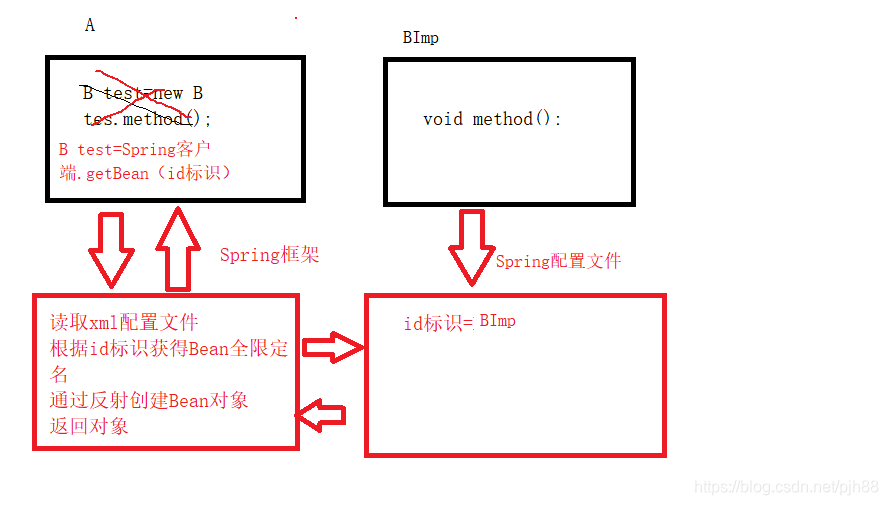
从这两个图就可以看出Spring 的一个优点,即实现了解耦操作,
比如将来你想用另一个对象来代替Bimp,直接更改配置文件即可而不用修改文件源码,配置文件是不会被编译的,而且因为BImp实现了接口B,其他实现自接口B的类就可以替换BImp,继承也是一样的道理
进入案例
步骤
1.导入相关的jar包
2.编写Dao接口与实现类
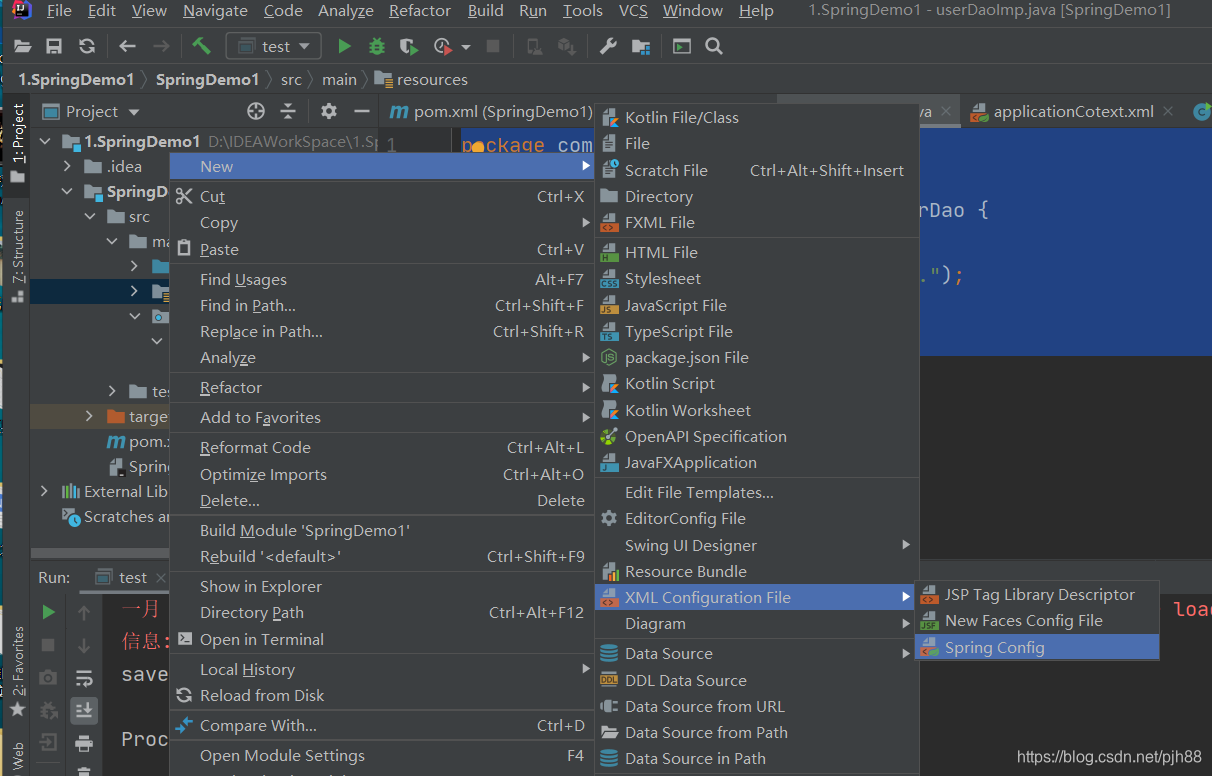
3.创建Spring核心配置文件
4.在Spring配置文件中配置UserDaoImp
5.使用Spring的API获取Bean实例
**
**
1.导入相关的jar包
<dependencies>

        <dependency>

            <groupId>org.springframework</groupId>

            <artifactId>spring-context</artifactId>

            <version>5.0.5.RELEASE</version>

        </dependency>

    </dependencies>
2.编写Dao接口与实现类
接口
package com.pjh.Dao;

public  interface  userDao {

    void save();

}
实现类
package com.pjh.Dao.Imp;

import com.pjh.Dao.userDao;

public class userDaoImp implements userDao {

    public void save() {

        System.out.println("save.......");

    }

}
3.创建Spring核心配置文件
**
4.在Spring配置文件中配置UserDaoImp
<?xml version="1.0" encoding="UTF-8"?>

<beans xmlns="http://www.springframework.org/schema/beans"

       xmlns:xsi="http://www.w3.org/2001/XMLSchema-instance"

       xsi:schemaLocation="http://www.springframework.org/schema/beans http://www.springframework.org/schema/beans/spring-beans.xsd">

<bean id="userDao" class="com.pjh.Dao.Imp.userDaoImp"/>

</beans>
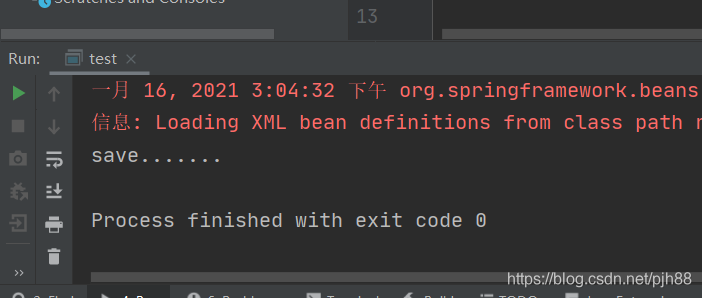
5.使用Spring的API获取Bean实例
package com.pjh.Test;

import com.pjh.Dao.userDao;

import org.springframework.context.support.ClassPathXmlApplicationContext;

public class test {

    public static void main(String[] args) {

        ClassPathXmlApplicationContext classPathXmlApplicationContext = new ClassPathXmlApplicationContext("applicationCotext.xml");

        userDao userDao =(com.pjh.Dao.userDao) classPathXmlApplicationContext.getBean("userDao");

        userDao.save();

    }

}
运行结果
Spring配置文件基本属性介绍(ID Class Scope)
基本概述
id:
Bean实例在Spring容器中的唯一标识,不允许重复
class:
Bean的全限定名称,即这个类存在的路径
scope:
这个Bean对象的作用范围
1.singleton:默认值,单例
2.prototpye:多例的
3.request: WEB 项目中,Spring 创建一个 Bean 的对象,将对象存入到 request 域中 4.session:WEB 项目中,Spring 创建一个 Bean 的对象,将对象存入到 session 域中 5.global session: WEB 项目中,应用在 Portlet 环境,如果没有Portlet境那 globalSession相当于 session
singleton和prototype的区别
**1)当scope的取值为singleton时 **
Bean的实例化个数:1个
Bean的实例化时机:当Spring核心文件被加载时,实例化配置的Bean实例
Bean的生命周期:
对象创建:当应用加载,创建容器时,对象就被创建了
对象运行:只要容器在,对象一直活着
对象销毁:当应用卸载,销毁容器时,对象就被销毁了
2)当scope的取值为prototype时
Bean的实例化个数:多个
Bean的实例化时机:当调用getBean()方法时实例化 Bean
对象创建:当使用对象时,创建新的对象实例
对象运行:只要对象在使用中,就一直活着
对象销毁:当对象长时间不用时,被 Java 的垃圾回收器回收了
证明步骤我放在附录2里了:点击这里跳转
bean的初始化构造方法与消耗方法配置
init-method:指定类中的初始化方法名称 ,即在构造方法执行完毕后自动执行的方法
destroy-method:指定类中销毁方法名称 ,在对象销毁之前执行的方法
applicationContesxt.xml中配置文件的配置
**格式: **init-method="所指定的类中的初始化方法名"
destroy-method="所指定的类中的销毁化方法名"
<?xml version="1.0" encoding="UTF-8"?>

<beans xmlns="http://www.springframework.org/schema/beans"

       xmlns:xsi="http://www.w3.org/2001/XMLSchema-instance"

       xsi:schemaLocation="http://www.springframework.org/schema/beans http://www.springframework.org/schema/beans/spring-beans.xsd">

<bean id="userDao" class="com.pjh.Dao.Imp.userDaoImp" scope="prototype"

    init-method="initmethod" destroy-method="destroymethod"/>

</beans>
Bean实例化的三种方式
1.无参构造方法实例化(重点掌握,使用最多)
2.工厂静态方法实例化
3.工厂动态方法实例化
1.无参构造方法实例化(重点掌握,使用最多)
即直接通过类的无参构造方法来创建对象
applicationContext配置文件中所需的配置 ,默认使用无参构造的方式
<?xml version="1.0" encoding="UTF-8"?>

<beans xmlns="http://www.springframework.org/schema/beans"

       xmlns:xsi="http://www.w3.org/2001/XMLSchema-instance"

       xsi:schemaLocation="http://www.springframework.org/schema/beans http://www.springframework.org/schema/beans/spring-beans.xsd">

<bean id="userDao" class="com.pjh.Dao.Imp.userDaoImp" "/>

</beans>
2.工厂静态方法实例化
静态工厂类中的代码
package com.pjh.Factory;

import com.pjh.Dao.Imp.userDaoImp;

import com.pjh.Dao.userDao;

public class staticFactory {

    public static userDao getUserDao(){

        return  new userDaoImp();

    }

}
applicationContext中的代码
<?xml version="1.0" encoding="UTF-8"?>

<beans xmlns="http://www.springframework.org/schema/beans"

       xmlns:xsi="http://www.w3.org/2001/XMLSchema-instance"

       xsi:schemaLocation="http://www.springframework.org/schema/beans http://www.springframework.org/schema/beans/spring-beans.xsd">

    <bean id="userDao" class="com.pjh.Factory.staticFactory" factory-method="getUserDao"/>

</beans>
3.工厂动态方法实例化
动态工厂类中的代码
package com.pjh.Factory;

import com.pjh.Dao.Imp.userDaoImp;

import com.pjh.Dao.userDao;

public class dynamicFactory {

    public userDao getUserDao(){

        return new userDaoImp();

    }

}
applicationContext中的配置文件代码
<?xml version="1.0" encoding="UTF-8"?>

<beans xmlns="http://www.springframework.org/schema/beans"

       xmlns:xsi="http://www.w3.org/2001/XMLSchema-instance"

       xsi:schemaLocation="http://www.springframework.org/schema/beans http://www.springframework.org/schema/beans/spring-beans.xsd">

<bean id="dynamicFactory" class="com.pjh.Factory.dynamicFactory"></bean>

<bean id="userDao" factory-bean="dynamicFactory" factory-method="getUserDao"/>

</beans>
以上三种只有着重掌握前面两种即可
Spring中依赖注入的实现
因为前面已经讲过什么是IOC(控制反转)和ID(依赖注入)了,这里就不在叙述了,如果不懂,可以点击链接到前面看看:链接
注入对象
Spring中依赖注入的实现:
比如有两个类,类A和类B,类A中需要引用类B中的某个方法,故需要将类B注入到类A中,类A才可以调用类B中的方法。故因该将类A和类B都交给spring容器来创建Bean对象,再让spring容器将类B的bean对象注入到类A的bean对象内部。实现注入需要在类B中设置一个setB()的方法来实现注入。
光说不练假把式
下面来实现以下,这里以一个userDaoImp类的Bean注入userServiceImp类的Bea为例
userDaoImp类继承自userDao类,userServiceImp类继承自userService类。这里对应接口的代码就不写了,直接写对应实现类的代码。
userDaoImp类代码
package com.pjh.Dao.Imp;

import com.pjh.Dao.userDao;

public class userDaoImp implements userDao {

    public userDaoImp(){

        System.out.println("这是无参构造..");

    }

    public void save() {

        System.out.println("save.......");

    }

}
**
userService类代码
**
package com.pjh.Service.Imp;

import com.pjh.Service.userService;

public class userServiceImp implements userService {

    private com.pjh.Dao.userDao userDao;

    public void setUserDao(com.pjh.Dao.userDao userDao) {

        this.userDao = userDao;

    }

    public void save(){

        userDao.save();

    }

}
applicationContext配置文件代码
方法1普通注入方式
<?xml version="1.0" encoding="UTF-8"?>

<beans xmlns="http://www.springframework.org/schema/beans"

       xmlns:xsi="http://www.w3.org/2001/XMLSchema-instance"

       xsi:schemaLocation="http://www.springframework.org/schema/beans http://www.springframework.org/schema/beans/spring-beans.xsd">

<bean id="userDao" class="com.pjh.Dao.Imp.userDaoImp"/>

    <bean id="userService" class="com.pjh.Service.Imp.userServiceImp">

        <property name="userDao" ref="userDao"/>

    </bean>

</beans>
方法2使用P命名空间简化注入
1.引入p命名空间 :
**
xmlns:p="http://www.springframework.org/schema/p"
2.修改注入方式
**
<bean id="userService" class="com.itheima.service.impl.UserServiceImpl" p:userDao-ref="userDao"/>
<?xml version="1.0" encoding="UTF-8"?>

<beans xmlns="http://www.springframework.org/schema/beans"

       xmlns:xsi="http://www.w3.org/2001/XMLSchema-instance"

       xmlns:p="http://www.springframework.org/schema/p"

       xsi:schemaLocation="http://www.springframework.org/schema/beans http://www.springframework.org/schema/beans/spring-beans.xsd">

<bean id="userDao" class="com.pjh.Dao.Imp.userDaoImp"/>

    <bean id="userService" class="com.pjh.Service.Imp.userServiceImp" p:userDao-ref="userDao"/>

</beans>
**
使用有参构造的方式注入UserDaoImp对象
1.userServiceImp中需要增加有参构造方法
package com.pjh.Service.Imp;

import com.pjh.Dao.userDao;

import com.pjh.Service.userService;

public class userServiceImp implements userService {

    private com.pjh.Dao.userDao userDao;

    public userServiceImp(com.pjh.Dao.userDao userDao) {

        this.userDao = userDao;

    }

    public void save(){

        userDao.save();

    }

}
2.spring配置文件中的配置
<?xml version="1.0" encoding="UTF-8"?>

<beans xmlns="http://www.springframework.org/schema/beans"

       xmlns:xsi="http://www.w3.org/2001/XMLSchema-instance"

       xmlns:p="http://www.springframework.org/schema/p"

       xsi:schemaLocation="http://www.springframework.org/schema/beans http://www.springframework.org/schema/beans/spring-beans.xsd">

<bean id="userDao" class="com.pjh.Dao.Imp.userDaoImp"/>

   <bean id="userService" class="com.pjh.Service.Imp.userServiceImp">

       <constructor-arg name="userDao" ref="userDao"/>

   </bean>

</beans>
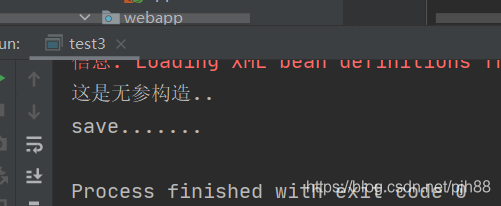
测试类
**
package com.pjh.Test;

import com.pjh.Service.userService;

import org.springframework.context.support.ClassPathXmlApplicationContext;

public class test3 {

    public static void main(String[] args) {

        ClassPathXmlApplicationContext app = new ClassPathXmlApplicationContext("applicationCotext.xml");

        userService userService = (com.pjh.Service.userService)app.getBean("userService");

        userService.save();

    }

}
控制台输出
注入普通数据类型
比如一个user类要注入一个age和一个name
user类代码
package com.pjh.Dao;

public class user {

    private int age;

    private  String name;

    public void setAge(int age) {

        this.age = age;

    }

    public void setName(String name) {

        this.name = name;

    }

}
applicationContext.xml中的配置代码
<?xml version="1.0" encoding="UTF-8"?>

<beans xmlns="http://www.springframework.org/schema/beans"

       xmlns:xsi="http://www.w3.org/2001/XMLSchema-instance"

       xmlns:p="http://www.springframework.org/schema/p"

       xsi:schemaLocation="http://www.springframework.org/schema/beans http://www.springframework.org/schema/beans/spring-beans.xsd">

<bean id="user" class="com.pjh.Dao.user">

    <property name="age" value="18"/>

    <property name="name" value="zhangsan"/>

 </bean>

</beans>
**
这下面的我就不演示了操作和上面一样
集合数据类型(List)的注入
**集合数据类型( Map<String,User> )的注入 **
集合数据类型(Properties)的注入
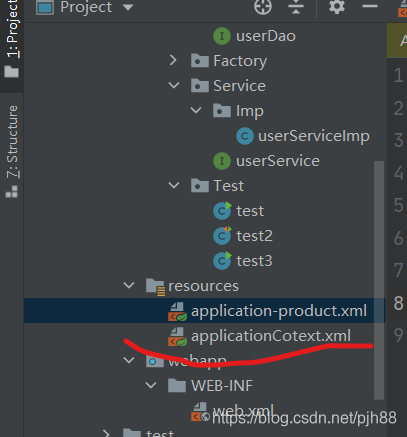
配置多个Spring配置文件解决项目庞大的问题
在实际的开发中Spring的配置内容非常多,这导致Spring配置很繁杂且体积很大,所以,可以将一个项目拆分为若干个模块,将不同模块的配置文件写到不同的配置文件中,在一个主Spring配置文件中通过import标签进行加载
如图有两个配置文件,applicationContext为主配置文件,application-product是拆分出的配置文件,被applicationContext配置文件使用import引入
applicationContext中的配置文件代码
<?xml version="1.0" encoding="UTF-8"?>

<beans xmlns="http://www.springframework.org/schema/beans"

       xmlns:xsi="http://www.w3.org/2001/XMLSchema-instance"

       xmlns:p="http://www.springframework.org/schema/p"

       xsi:schemaLocation="http://www.springframework.org/schema/beans http://www.springframework.org/schema/beans/spring-beans.xsd">

    <import resource="application-product.xml"/>

</beans>
**
application-product.xml中的配置文件代码
<?xml version="1.0" encoding="UTF-8"?>

<beans xmlns="http://www.springframework.org/schema/beans"

       xmlns:xsi="http://www.w3.org/2001/XMLSchema-instance"

       xsi:schemaLocation="http://www.springframework.org/schema/beans http://www.springframework.org/schema/beans/spring-beans.xsd">

    <bean id="userDao" class="com.pjh.Dao.Imp.userDaoImp"/>

    <bean id="userService" class="com.pjh.Service.Imp.userServiceImp">

        <constructor-arg name="userDao" ref="userDao"/>

    </bean>

</beans>
测试类测试
**
package com.pjh.Test;

import com.pjh.Service.userService;

import org.springframework.context.support.ClassPathXmlApplicationContext;

public class test3 {

    public static void main(String[] args) {

        ClassPathXmlApplicationContext app = new ClassPathXmlApplicationContext("applicationCotext.xml");

        userService userService = (com.pjh.Service.userService)app.getBean("userService");

        userService.save();

    }

}
控制台输出
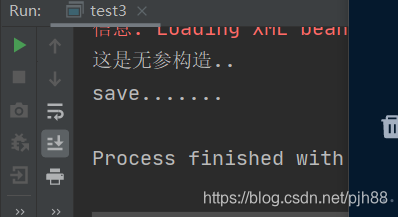
说明配置文件配置成功,成功注入并在bean容器中获取对象
Spring相应的API
applicationContext:
接口类型,代表应用上下文,可以通过其实例获得 Spring 容器中的 Bean 对象 ApplicationContext的实现类:
1)ClassPathXmlApplicationContext
它是从类的根路径下加载配置文件 推荐使用这种
2)FileSystemXmlApplicationContext **
它是从磁盘路径上加载配置文件,配置文件可以在磁盘的任意位置。
** 3)AnnotationConfigApplicationContext
当使用注解配置容器对象时,需要使用此类来创建 spring 容器。它用来读取注解
getBean()方法使用
1.使用对应的id属性值来从spring容器中获取对象
这个我就不叙述了,因为上面用的就是这种
2.使用对应的class字节码文件来获取对应对象
从spring容器中获取对应对象的代码
package com.pjh.Test;

import com.pjh.Service.userService;

import org.springframework.context.support.ClassPathXmlApplicationContext;

public class test3 {

    public static void main(String[] args) {

        ClassPathXmlApplicationContext app = new ClassPathXmlApplicationContext("applicationCotext.xml");

        userService userService = app.getBean(com.pjh.Service.userService.class);

        userService.save();

    }

}
**
使用这种方式获取代码,要注意当spring容器中配置了两个相同类的bean对象的时候,使用这种方式会报错,因为spring容器不知道你要获取的是哪个对象
Spring配置数据源
数据源介绍以及数据源,连接池,数据库三者的区别
连接池:这个应该都学习过,比如c3p0,druid等等,连接池的作用是为了提高程序的效率,因为频繁的去创建,关闭数据库连接,会对性能有很大的消耗,所以就有了连接池,连接池顾名思义是存储多个连接的池子,池子中的连接都是创建好的,我们只要拿来使用即可,不用的时候就归还给连接池,这就大大减少了关闭创建连接的时间,提高了效率
数据库:存储数据的地方
数据源:数据源顾名思义是数据的来源,存储了连接数据库所需要的信息,也可以说是用于管理数据库连接池,并不存储真正的数据,仅仅记录了连接哪个数据库,怎么连接。如果把数据库比作一个文件的话,那么数据源存储的就是文件的名称,可以通过文件名称来找到对应的文件,算是一个抽象的映射,一个数据库对应一个数据源,数据源可能是一个连接,也可能是一个连接池。在J2EE里,数据源是代表物理数据存储系统的实际Java对象。通过这些对象,J2EE应用可以获取到数据库的JDBC连接。
如果你是玫瑰,他就是牛粪

呸呸呸,说错了
如果数据是水,数据库就是水库,数据源就是管道,终端用户看到的数据集是管道里流出来的水。

当然啦,Spring功能这么强大,怎么可能少的了数据源呢
Spring配置数据源的步骤
**
1.所需的jar包
junit
<dependency>

        <groupId>junit</groupId>

        <artifactId>junit</artifactId>

        <version>4.13</version>

        <scope>test</scope>

    </dependency>
druid
<dependency>

    <groupId>com.alibaba</groupId>

    <artifactId>druid</artifactId>

    <version>1.0.9</version>

</dependency>
c3p0
<dependency>

    <groupId>c3p0</groupId>

    <artifactId>c3p0</artifactId>

    <version>0.9.1.2</version>

</dependency>
spring—context
<dependency>

    <groupId>org.springframework</groupId>

    <artifactId>spring-context</artifactId>

    <version>5.0.3.RELEASE</version>

</dependency>
mysql
<dependency>

        <groupId>mysql</groupId>

        <artifactId>mysql-connector-java</artifactId>

        <version>5.1.32</version>

    </dependency>
**
2.我先手动配置一下数据园,等一下再用Spring容器经行配置,大家就能看到二者的巨大差别了
手动配置数据源
配置druid
 public void druid() throws SQLException {

        //创建数据源

        DruidDataSource druidDataSource = new DruidDataSource();

        //设置连接参数

        druidDataSource.setDriverClassName("com.mysql.jdbc.Driver");

        druidDataSource.setPassword("1234");

        druidDataSource.setUsername("root");

        druidDataSource.setUrl("jdbc:mysql://localhost:3309/one");

        //获取连接

        DruidPooledConnection connection = druidDataSource.getConnection();

        System.out.println(connection);

    }
配置c3p0数据源
 public void getc3p0() throws PropertyVetoException, SQLException {

        //创建连接池

        ComboPooledDataSource comboPooledDataSource = new ComboPooledDataSource();

        //设置参数

        comboPooledDataSource.setDriverClass("com.mysql.jdbc.Driver");

        comboPooledDataSource.setPassword("1234");

        comboPooledDataSource.setUser("root");

        comboPooledDataSource.setJdbcUrl("jdbc:mysql://localhost:3309/one");

        //获取连接

        Connection connection = comboPooledDataSource.getConnection();

        System.out.println(connection);

    }
为了降低代码的耦合度,我们可以使用读取配置文件的方式来获取需要设置的参数
这里我也演示一下
在resource下新建文件jdbc.properties
jdbc.properties中的配置如下
jdbc.driver=com.mysql.jdbc.Driver

jdbc.url=jdbc:mysql://localhost:3309/one

jdbc.username=root

jdbc.password=1234
测试方法如下
public void getProperties() throws PropertyVetoException, SQLException {

        ResourceBundle jdbc = ResourceBundle.getBundle("jdbc");

        ComboPooledDataSource comboPooledDataSource = new ComboPooledDataSource();

        comboPooledDataSource.setJdbcUrl(jdbc.getString("jdbc.url"));

        comboPooledDataSource.setUser(jdbc.getString("jdbc.username"));

        comboPooledDataSource.setPassword(jdbc.getString("jdbc.password"));

        comboPooledDataSource.setDriverClass(jdbc.getString("jdbc.driver"));

        Connection connection = comboPooledDataSource.getConnection();

        System.out.println(connection);

    }
使用Spring容器来创建数据源
1.步骤1
在前面导入相关数据库jar包的基础上再导入springcontext包
<dependency>

            <groupId>org.springframework</groupId>

            <artifactId>spring-context</artifactId>

            <version>5.0.5.RELEASE</version>

        </dependency>
2.创建spring配置文件,并在其中配置如下配置
 <?xml version="1.0" encoding="UTF-8"?>

<beans xmlns="http://www.springframework.org/schema/beans"

       xmlns:xsi="http://www.w3.org/2001/XMLSchema-instance"

       xsi:schemaLocation="http://www.springframework.org/schema/beans http://www.springframework.org/schema/beans/spring-beans.xsd">

    <bean id="dataSource" class="com.mchange.v2.c3p0.ComboPooledDataSource">

        <property name="driverClass" value="com.mysql.jdbc.Driver"/>

        <property name="jdbcUrl" value="jdbc:mysql://localhost:3309/one"/>

        <property name="user" value="root"/>

        <property name="password" value="1234"/>

    </bean>

</beans>
配置测试函数
 @Test

    public void getProperties() throws PropertyVetoException, SQLException {

        ResourceBundle jdbc = ResourceBundle.getBundle("jdbc");

        ComboPooledDataSource comboPooledDataSource = new ComboPooledDataSource();

        comboPooledDataSource.setJdbcUrl(jdbc.getString("jdbc.url"));

        comboPooledDataSource.setUser(jdbc.getString("jdbc.username"));

        comboPooledDataSource.setPassword(jdbc.getString("jdbc.password"));

        comboPooledDataSource.setDriverClass(jdbc.getString("jdbc.driver"));

        Connection connection = comboPooledDataSource.getConnection();

        System.out.println(connection);

    }

    public void two() throws SQLException {

        ClassPathXmlApplicationContext classPathXmlApplicationContext = new       ClassPathXmlApplicationContext("applicationcontext.xml");

        DataSource datasource = (DataSource)classPathXmlApplicationContext.getBean("datasource");

        Connection connection = datasource.getConnection();

        System.out.println(connection);

    }
使用上述的代码虽然已经完成了解耦合的操作,但是在日常开发中通常还是将数据源的相关配置参数抽取为一个jdbc.properties配置,步骤如下
**
1.在application.contex配置文件中引入相关的命名空间和相关的约束路径
命名空间:
xmlns:context="http://www.springframework.org/schema/context"
约束路径:
http://www.springframework.org/schema/context http://www.springframework.org/schema/context/spring-context.xsd
修改后的applicationContext配置文件如下
<?xml version="1.0" encoding="UTF-8"?>

<beans xmlns="http://www.springframework.org/schema/beans"

       xmlns:xsi="http://www.w3.org/2001/XMLSchema-instance"

       xmlns:context="http://www.springframework.org/schema/context"

       xsi:schemaLocation="http://www.springframework.org/schema/beans http://www.springframework.org/schema/beans/spring-beans.xsd

http://www.springframework.org/schema/context http://www.springframework.org/schema/context/spring-context.xsd

">

    <context:property-placeholder location="jdbc.properties"/>

    <bean id="dataSource" class="com.mchange.v2.c3p0.ComboPooledDataSource">

        <property name="driverClass" value="${jdbc.driver}"/>

        <property name="jdbcUrl" value="${jdbc.url}"/>

        <property name="user" value="${jdbc.username}"/>

        <property name="password" value="${jdbc.password}"/>

    </bean>

</beans>
测试函数如下
public void two() throws SQLException {

        ClassPathXmlApplicationContext classPathXmlApplicationContext = new       ClassPathXmlApplicationContext("applicationcontext.xml");

        DataSource datasource = (DataSource)classPathXmlApplicationContext.getBean("datasource");

        Connection connection = datasource.getConnection();

        System.out.println(connection);

    }
Spring注解开发
为什么使用注解开发
Spring是重代码轻配置的框架,配置比较繁重,影响开发效率,所以注解开发是一种趋势,注解代替xml配置文件可以简化配置,提高开发效率。

Spring原始注解
原始注解主要是为了简化Bean的配置
| 注解 | 说明 |
|---|---|
| @Component | 使用在类上用于实例化Bean |
| @Controller | 使用在web层类上用于实例化Bean |
| @Service | 使用在service层类上用于实例化Bean |
| @Repository | 使用在dao层类上用于实例化Bean |
| @Autowired | 使用在字段上用于根据类型依赖注入 |
| @Qualifier | 结合@Autowired一起使用用于根据名称进行依赖注入 |
| @Resource | 相当于@Autowired+@Qualifier,按照名称进行注入 |
| @Value | 注入普通属性 |
| @Scope | 标注Bean的作用范围 |
| @PostConstruct | 使用在方法上标注该方法是Bean的初始化方法 |
| @PreDestroy | 使用在方法上标注该方法是Bean的销毁方法 |
@Component
@Controller
@Service
@Repository
这四个主要是为了在语义上区分在各个层中配置的类,这样我们在配置的时候也更为方便。
**
注解 1
@Component
@Controller
@Service
@Repository
配置一个userDao到Spring容器中
在xml中配置的原始语句
<?xml version="1.0" encoding="UTF-8"?>

<beans xmlns="http://www.springframework.org/schema/beans"

       xmlns:xsi="http://www.w3.org/2001/XMLSchema-instance"

       xsi:schemaLocation="http://www.springframework.org/schema/beans http://www.springframework.org/schema/beans/spring-beans.xsd">

    <bean id="userDao" class="com.pjh.Dao.Imp.userDaoImp"/>

</beans>
使用注解配置的语句
package com.pjh.Dao.Imp;

import com.pjh.Dao.userDao;

import org.springframework.stereotype.Repository;

@Repository("userDao")

public class userDaoImp implements userDao {

    public userDaoImp(){

        System.out.println("这是无参构造..");

    }

    public void save() {

        System.out.println("save.......");

    }

}
我们使用了注解自然要告诉Spring我们使用 了注解不然Spring怎么知道呢,所以我们要引入context命名空间和约束路径,进行包扫描,在applictionContext中的配置如下
加入命名空间与约束路径
命名空间:
xmlns:context="http://www.springframework.org/schema/context"
约束路径
http://www.springframework.org/schema/context http://www.springframework.org/schema/context/spring-context.xsd
最终的配置
**
<?xml version="1.0" encoding="UTF-8"?>

<beans xmlns="http://www.springframework.org/schema/beans"

       xmlns:context="http://www.springframework.org/schema/context"

       xmlns:xsi="http://www.w3.org/2001/XMLSchema-instance"

       xsi:schemaLocation="http://www.springframework.org/schema/beans http://www.springframework.org/schema/beans/spring-beans.xsd

http://www.springframework.org/schema/context http://www.springframework.org/schema/context/spring-context.xsd

">

    <context:component-scan base-package="com.pjh"/>

    <bean id="userDao" class="com.pjh.Dao.Imp.userDaoImp"/>

</beans>
这样子Spring容器才会扫描到对应的注解并在容器中创建对应的Bean对象
注解2
@Scope
配置bena对象的作用范围,以及他是多例的还是单例的,具体我前面已经将过了
有不懂的回去看看或者点击链接跳转:链接
在xml中我们配置scope的时候是在配置bean的时候同时在bean标签内配置一个scope属性,如下我们对一个userDao类的bean对象配置一个scope属性
**
<?xml version="1.0" encoding="UTF-8"?>

<beans xmlns="http://www.springframework.org/schema/beans"

       xmlns:context="http://www.springframework.org/schema/context"

       xmlns:xsi="http://www.w3.org/2001/XMLSchema-instance"

       xsi:schemaLocation="http://www.springframework.org/schema/beans http://www.springframework.org/schema/beans/spring-beans.xsd

http://www.springframework.org/schema/context http://www.springframework.org/schema/context/spring-context.xsd

">

    <context:component-scan base-package="com.pjh"/>

    <bean id="userDao" class="com.pjh.Dao.Imp.userDaoImp" scope="prototype"/>

</beans>
使用注解配置Scope
**
package com.pjh.Dao.Imp;

import com.pjh.Dao.userDao;

import org.springframework.context.annotation.Scope;

import org.springframework.stereotype.Repository;

@Repository("userDao")

@Scope

public class userDaoImp implements userDao {

    public userDaoImp(){

        System.out.println("这是无参构造..");

    }

    public void save() {

        System.out.println("save.......");

    }

}
注解3
@Autowired
使用在字段上用于根据类型依赖注入
@Qualifier
必须结合@Autowired一起使用用于根据名称进行依赖注入,
@Resource=@Qualifier+@Autowired
相对与上面二者的合体
在配置文件中我们将一个Bean注入到另一个Bean的时候具体配置如下,以向userService中注入一个userDao为例
<?xml version="1.0" encoding="UTF-8"?>

<beans xmlns="http://www.springframework.org/schema/beans"

       xmlns:context="http://www.springframework.org/schema/context"

       xmlns:xsi="http://www.w3.org/2001/XMLSchema-instance"

       xsi:schemaLocation="http://www.springframework.org/schema/beans http://www.springframework.org/schema/beans/spring-beans.xsd

http://www.springframework.org/schema/context http://www.springframework.org/schema/context/spring-context.xsd

">

    <context:component-scan base-package="com.pjh"/>

    <bean id="userDao" class="com.pjh.Dao.Imp.userDaoImp" scope="prototype"/>

    <bean id="userService" class="com.pjh.Service.Imp.userServiceImp">

        <constructor-arg name="userDao" ref="userDao"/>

    </bean>

</beans>
使用注解配置
userDao中的配置
**
package com.pjh.Dao.Imp;

import com.pjh.Dao.userDao;

import org.springframework.context.annotation.Scope;

import org.springframework.stereotype.Repository;

@Repository("userDao")

public class userDaoImp implements userDao {

    public userDaoImp(){

        System.out.println("这是无参构造..");

    }

    public void save() {

        System.out.println("save.......");

    }

}
userService中的配置
**
使用@Qualifier+@Autowired,如果spring容器中只有一个对应类的Bean可以省略@Qualifier
package com.pjh.Service.Imp;

import com.pjh.Dao.userDao;

import com.pjh.Service.userService;

import org.springframework.beans.factory.annotation.Autowired;

import org.springframework.beans.factory.annotation.Qualifier;

import org.springframework.stereotype.Service;

@Service("userService")//指定对应的ID

public class userServiceImp implements userService {

    @Autowired

    @Qualifier("userDao")//指定注入的具体bean的名称

    private userDao userDao;

    public void save(){

        userDao.save();

    }

}
使用@Resource
**
package com.pjh.Service.Imp;

import com.pjh.Dao.userDao;

import com.pjh.Service.userService;

import org.springframework.stereotype.Service;

import javax.annotation.Resource;

@Service("userService")//指定对应的ID

public class userServiceImp implements userService {

    @Resource(name = "userDao")//指定注入的具体bean的名称

    private userDao userDao;

    public void save(){

        userDao.save();

    }

}
注解4
注入普通属性
package com.pjh.Domain;

import org.springframework.beans.factory.annotation.Value;

import org.springframework.stereotype.Component;

@Component("user")

public class User {

    @Value("18")

    private int age;

    @Value("Jack")

    private String name;

    public  void  output(){

        System.out.println("姓名:"+name);

        System.out.println("年龄:"+age);

    }

}
是不是觉得这样没有什么意思,还不如直接赋值,但是如果我们使用读取配置文件的方式,这几实现了解耦合,下面来演示一下,以一个user类注入一个age和name属性为例
**
Spring配置文件配置
<?xml version="1.0" encoding="UTF-8"?>

<beans xmlns="http://www.springframework.org/schema/beans"

       xmlns:context="http://www.springframework.org/schema/context"

       xmlns:xsi="http://www.w3.org/2001/XMLSchema-instance"

       xsi:schemaLocation="http://www.springframework.org/schema/beans http://www.springframework.org/schema/beans/spring-beans.xsd

http://www.springframework.org/schema/context http://www.springframework.org/schema/context/spring-context.xsd

">

    <context:component-scan base-package="com.pjh"/>

    <context:property-placeholder location="information.properties"/>

</beans>
配置文件数据
people.name=Jack

people.age=18
uers类配置
package com.pjh.Domain;

import org.springframework.beans.factory.annotation.Value;

import org.springframework.stereotype.Component;

@Component("user")

public class User {

    @Value("${people.age}")

    private int age;

    @Value("${people.name}")

    private String name;

    public  void  output(){

        System.out.println("姓名:"+name);

        System.out.println("年龄:"+age);

    }

}
Spring新注解
| 注解 | 说明 |
|---|---|
| @Configuration | 用于指定当前类是一个 Spring 配置类,当创建容器时会从该类上加载注解 |
| @ComponentScan | 用于指定 Spring 在初始化容器时要扫描的包。
作用和在 Spring 的 xml 配置文件中的
<context:component-scan base-package="com.itheima"/>一样 |
| @Bean | 使用在方法上,标注将该方法的返回值存储到 Spring 容器中 |
| @PropertySource | 用于加载.properties 文件中的配置 |
| @Import | 用于导入其他配置类 |
注解1
@Configuration
@ComponentScan
@Import
package com.pjh.Config;

import org.springframework.context.annotation.ComponentScan;

import org.springframework.context.annotation.Configuration;

import org.springframework.context.annotation.Import;

@Configuration//指定这是一个配置类

@ComponentScan("com.pjh")//指定扫描的包的范围

@Import(DataSourceConfigueration.class)//引入其他配置类

public class SpringConfiguration {

}
注解2
@Propertysource
package com.pjh.Domain;

import org.springframework.beans.factory.annotation.Value;

import org.springframework.context.annotation.PropertySource;

import org.springframework.stereotype.Component;

@Component("user")

@PropertySource("classpath:information.properties")//加载对应的配置文件

public class User {

    @Value("${people.age}")

    private int age;

    @Value("${people.name}")

    private String name;

    public  void  output(){

        System.out.println("姓名:"+name);

        System.out.println("年龄:"+age);

    }

}
注解3
用于配置非自定义的Bean,比如配置一个数据源
@Bean
 @Bean(name="dataSource")//spring会将该函数返回的对象加入容器中

    public DataSource getDataSource() throws PropertyVetoException {

        ComboPooledDataSource dataSource = new ComboPooledDataSource();          dataSource.setDriverClass(driver);

        dataSource.setJdbcUrl(url);

        dataSource.setUser(username);

        dataSource.setPassword(password);

        return dataSource;

    }
Spring集成Junit
为什么要集成junit
自然是为了方便我们测试,在测试类中,每个测试方法都有以下两行代码:
 ApplicationContext ac = new ClassPathXmlApplicationContext("bean.xml");

    IAccountService as = ac.getBean("accountService",IAccountService.class);
这两行代码的作用是获取容器,如果不写的话,直接会提示空指针异常。所以又不能轻易删掉。
解决方案
让SpringJunit负责创建Spring容器,但是需要将配置文件的名称告诉它 将需要进行测试Bean直接在测试类中进行注入
Spring集成Juint步骤
1.导入spring集成Junit的坐标
2.使用@Runwith注解替换原来的运行期
3.使用@ContextConfiguration指定配置文件或配置类
4.使用@Autowired注入需要测试的对象 创建测试方法进行测试
1.导入spring集成Junit的坐标
<!--此处需要注意的是,spring5 及以上版本要求 junit 的版本必须是 4.12 及以上-->

<dependency>

            <groupId>junit</groupId>

            <artifactId>junit</artifactId>

            <version>4.13</version>

        </dependency>

        <dependency>

            <groupId>org.springframework</groupId>

            <artifactId>spring-test</artifactId>

            <version>5.0.5.RELEASE</version>

        </dependency>
2.使用@Runwith注解替换原来的运行期
package com.pjh.Test;

import org.junit.runner.RunWith;

import org.springframework.test.context.junit4.SpringJUnit4ClassRunner;

@RunWith(SpringJUnit4ClassRunner.class)

public class test4 {

}
3.使用@ContextConfiguration指定配置文件或配置类
package com.pjh.Test;

import org.junit.runner.RunWith;

import org.springframework.test.context.ContextConfiguration;

import org.springframework.test.context.junit4.SpringJUnit4ClassRunner;

@RunWith(SpringJUnit4ClassRunner.class)

//加载spring核心配置文件

 @ContextConfiguration(value = {"classpath:applicationCotext.xml"})

// 加载spring核心配置类

//@ContextConfiguration(classes = {SpringConfiguration.class})

public class test4 {

}
4.使用@Autowired注入需要测试的对象 创建测试方法进行测试
package com.pjh.Test;

import com.pjh.Dao.userDao;

import org.junit.Test;

import org.junit.runner.RunWith;

import org.springframework.beans.factory.annotation.Autowired;

import org.springframework.test.context.ContextConfiguration;

import org.springframework.test.context.junit4.SpringJUnit4ClassRunner;

@RunWith(SpringJUnit4ClassRunner.class)

//加载spring核心配置文件

 @ContextConfiguration(value = {"classpath:applicationCotext.xml"})

// 加载spring核心配置类

//@ContextConfiguration(classes = {SpringConfiguration.class})

public class test4 {

    @Autowired

    private userDao userDao;

    @Test

    public void testUserDao(){

        userDao.save();

    }

}
Spring中AOP的实现
写在前面
什么是AOP我已经在前面叙述过了,不懂的点击链接跳转到前面看看这里主要讲Spring中AOP的实现:链接
这里复习一下AOP的优点
作用:在程序运行期间,在不修改源码的情况下对方法进行功能增强
优势:减少重复代码,提高开发效率,并且便于维护
我们后续也将围绕这两点展开对AOP的叙述
动态代理
AOP的底层是通过Spring动态代理技术实现的,在运行期间通过动态代理,获取代理对象,代理方法执行时增强功能介入,在去调用目标对象的方法,从而完成功能增强。
动态代理的优点:
静态代理:了解设计模式中的代理模式的童鞋应该都知道,如果想要生成代理类,需要让代理类和被代理类实现同一个接口,并且在代理类中添加被代理类的引用,代理类方法实现中添加代理逻辑,并决定是否调用被代理类方法,这种通过硬编码的方式指定代理类与被代理类的方式,叫静态代理。可以明显看出,静态代理类与被代理类是耦合的,如果要代理100个类,你就得写100个代理类
动态代理:其实动态代理与静态代理的本质一样,最终程序运行时都需要生成一个代理对象实例,通过它来完成相关增强以及业务逻辑,只不过静态代理需要硬编码的方式指定,而动态代理则是以动态方式生成代理(有编译时操作字节码生成的方式、以及运行时通过反射、字节码生成的方式)。动态生成的好处很明显,代理逻辑与业务逻辑是互相独立的,没有耦合,代理1个类100个类没有任何区别
说到耦合,必须把AOP拿来说道说道:传统面向对象思想中,如果想要实现功能复用,要么继承、要么引用,无论哪种方式,对代码都有一定的侵入性,耦合无可避免,侵入性啥意思?简单来说:如果你想要用它增强你程序的功能,你必须改动你的程序代码,那它就具有侵入性。如果只有一点两点需要增强还好说,如果大量的功能点需要被增强,工作量就会很大,代码也不太优雅。想象一下,如果你对外公开了一系列的接口,现在领导说了,接口要加权限控制。在哪加?最笨的当然就是写个程序验证的逻辑,然后每个接口都拿来调用一遍。这也正是面向对象思想的短板,在要为程序新增一些通用功能时,只能通过耦合的方式才能进行。AOP正是为此而生,AOP旨在通过一种无耦合的方式来为程序带来增强。而动态代理,就是AOP实现方式中的一种****
我举两个例子,说明下用动态代理实现功能增强,要怎么做,怎么就解耦了,哪里就方便了:
springAOP大家一定耳熟能详,它借鉴了AOP的思想,通过动态代理实现功能的无耦合增强,企业级应用开发时,当需要为程序添加通用功能时,springAOP应该是你的首选之一,比如现在要给系统对外的一系列接口添加一个权限验证功能,只需要两步即可
编写切面类,如下:
1. @Aspect

2. @Component

3. public class AuthAspect{

4.      @Around(value="pointCut()")

5.           public Object doAround(ProceedingJoinPoint pjp) throws Throwable{

6.                if(!havePermission()) return "没有权限...";

7.                return pjp.proceed(pjp.getArgs());

8.           }

9. }
可以看到,代理逻辑是独立的,没有也不需要任何与被代理相关的内容,是为解耦,有了代理逻辑后,我们只要按照spring的规则配置好要代理的范围就好了(也就是代理哪些类的哪些方法),spring会为这些目标类生成动态代理对象,功能增强就是如此简单
RPC框架大家应该也都接触过,客户端可以像调用本地对象的方法一样调用远程方法,这里的本地对象其实就是个动态代理对象,在rpc中,这类代理对象有个专业的名字,叫做stub(桩),stub对象的创建方式大概是这样的:
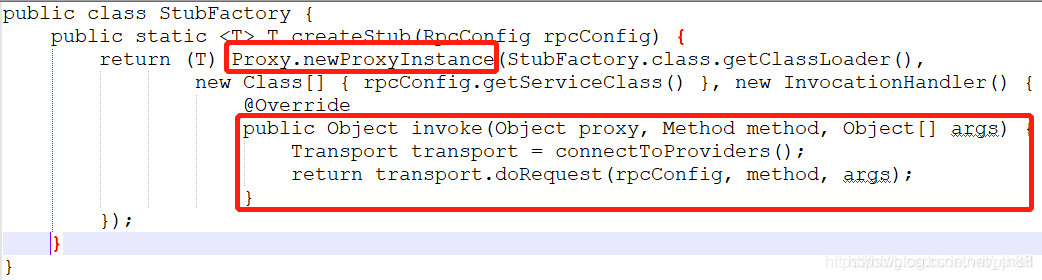
为了方便理解,我将其简化了下,这里使用了jdk自带的代理对象生成方法,Proxy.newProxyInstance,需要在InvocationHandler的invoke方法中实现代理逻辑,在rpc框架中,代理逻辑可以简单理解为连接服务提供端,发送请求,获取返回。有了这个createStub方法,就可以很方便的生成任意我们想要调用的服务的代理对象了,还是非常方便的;这就是解耦的好处..
总结一下:代理分为静态代理和动态代理,静态代理将代理类和被代理类耦合在一起,实现增强时非常不便,需要大量编码;
AOP的宗旨是实现无耦合的增强,动态代理就是AOP思想的实现方式之一,无耦合的方式对代码没有侵入性,可以很方便的实现功能增强,如果你需要给你的代码添加一些通用的增强功能,你应该第一时间想到动态代理
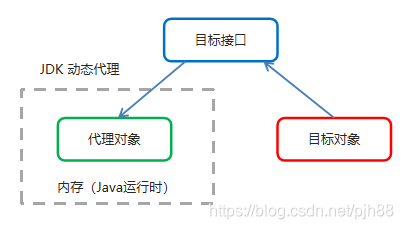
jdk代理
jdk代理:基于接口的动态代理技术
代理对象与目标对象是兄弟关系,不是继承
cglib代理
cglib代理:基于父类的动态代理技术,代理对象与目标对象是父子关系

我们来逐一讲解这两个代理方式的差别
jdk代理
demo内容:user类实现一个userImp接口,对user类进行动态代理
user类代码
package com.pjh.user;

public interface user {

    public void save();

}
userImp代码
package com.pjh.user.Imp;

import com.pjh.user.user;

public class userImp implements user {

    public void save() {

        System.out.println("save run....");

    }

}
对save方法进行增强
这里使用两种方式
方式一匿名内部类:即InvocationHandler直接使用匿名内部类的方式来创建
package com.pjh.test;
import com.pjh.user.Imp.userImp;
import com.pjh.user.user;
import java.lang.reflect.InvocationHandler;
import java.lang.reflect.Method;
import java.lang.reflect.Proxy;
public class main {
public static void main(String[] args) {
//创建目标对象
final userImp userImp=new userImp();
//调用proxy类的静态方法来创建代理对象
//Proxy.newProxyInstance(类加载器,获取目标对象的接口,实现动态代理接口)
user userproxy = (user)Proxy.newProxyInstance(userImp.class.getClassLoader(),userImp.getClass().getInterfaces(), new InvocationHandler() {
//invoke(代理类,被代理的方法,参数)
public Object invoke(Object proxy, Method method, Object[] args) throws Throwable {
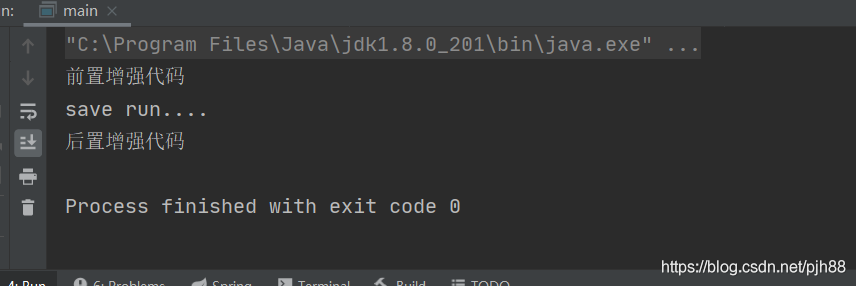
System.out.println("前置增强代码");
//当代理对象调用真实对象的方法时,其会自动的跳转到代理对象关联的handler对象的invoke方法来进行调用
Object invoke = method.invoke(userImp);
System.out.println("后置增强代码");
return invoke;
}
});
userproxy.save();
}
}
运行结果
成功对方法进行了增强
方法二使用一个类继承自InvocationHandler来实现
编写InvocationHandler实现类
package com.pjh.proxy;
import java.lang.reflect.InvocationHandler;
import java.lang.reflect.Method;
public class InvocationHandlerImp implements InvocationHandler {
//所有类均继承自object类
private Object object;
//写一个带参构造的方法,来引入目标对象
public InvocationHandlerImp(Object object) {
this.object = object;
}
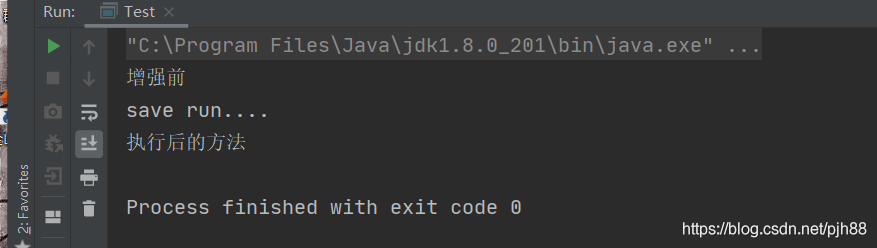
public Object invoke(Object proxy, Method method, Object[] args) throws Throwable {
System.out.println("增强前");
Object invoke = method.invoke(object, args);
System.out.println("执行后的方法");
return invoke;
}
}
编写测试类
package com.pjh.test;

import com.pjh.proxy.InvocationHandlerImp;

import com.pjh.user.Imp.userImp;

import com.pjh.user.user;

import java.lang.reflect.InvocationHandler;

import java.lang.reflect.Proxy;

public class Test {

    public static void main(String[] args) {

        //创建目标对象,即代理的真实对象

        userImp person = new userImp();

        //获取处理器实现类InvocationHandlerImp

        InvocationHandlerImp invocationHandlerImp = new InvocationHandlerImp(person);

        //获取代理对象

       user o = (user)Proxy.newProxyInstance(userImp.class.getClassLoader(),

               person.getClass().getInterfaces(),

                invocationHandlerImp);

       //调用方法

       o.save();

    }

}
运行结果
Cglib的动态代理
这里就简单的讲一下流程
目标类
这里仅仅是一个类没有实现任何接口
package com.pjh.user;

public class person {

    public void save(){

        System.out.println("save");

    }

}
主函数
package com.pjh.test;

import com.pjh.user.person;

import org.springframework.cglib.proxy.Enhancer;

import org.springframework.cglib.proxy.MethodInterceptor;

import org.springframework.cglib.proxy.MethodProxy;

import java.lang.reflect.Method;

public class test2 {

    public static void main(String[] args) {

        //设置目标对象

        final person one = new person();

        //创建增强器

        Enhancer enhancer = new Enhancer();

        //设置父类

        enhancer.setSuperclass(person.class);

        //设置回调

        enhancer.setCallback(new MethodInterceptor() {

            public Object intercept(Object o, Method method, Object[] objects, MethodProxy methodProxy) throws Throwable {

                System.out.println("前置增强代码");

                Object invoke = method.invoke(one, objects);

                System.out.println("后置增强");

                return invoke;

            }

        });

        //获取代理对象

        person oneproxy = (person)enhancer.create();

        //调用增强后的方法

        oneproxy.save();

    }

}
Spring中AOP相关概念
String 的AOP实现底层就是对上面的动态代理进行了封装,封装后我们只需要对关注的部分进行代码进行编写,并通过配置的方式完成对指定目标的方法增强
AOP的部分术语
Target(目标对象):代理的目标对象
Proxy(代理):一个类被AOP织入增强后,就产生一个结果代理类
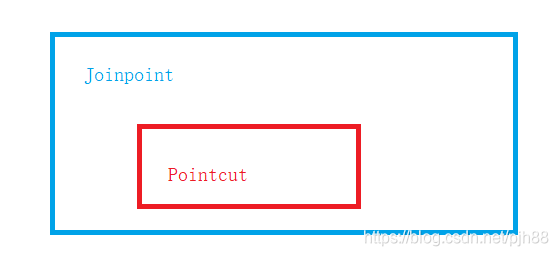
Joinpoint(连接点):所谓连接点指那些被拦截到的点,在spring中这些点指的是方法,因为spring是只支持方法类型的连接点
Pointcut(切入点):所谓切入点是指我们要对哪些Joinpoint进行拦截的定义,即被增强的方法
Jointpoint不一定是Pointcut但是Pointcut一定是Joinpoint
Advice(通知/增强):拦截到jointpoint之后要做的事情就是通知,封装增强业务逻辑的方法
Aspect(切面):是切入点和通知的结合
Weaving(织入):是指把增强应用到目标对象来创建新的代理对象的过程,spring采用动态织入代理,而Aspect采用编译织入和类装载期织入,切点与通知结合的过程
**
AOP的实现内容
Spring框架监控切入点方法的执行,只要检测到切入点被执行,就会使用代理机制,创建代理对象,根据通知类别,在代理对象的对应位置,将通知对应的功能织入,完成完整的代码逻辑运行
AOP底层使用什么代理机制
在spring中,框架会根据是否实现了接口来选择使用那种动态代理方式
基于XML的AOP开发
快速入门
1.导入AOP的相关配置坐标
2.创建目标接口和目标类(内有切入点)
3.创建切面类(内部有增强方法)
4.将目标类和切面类的对象创建权交给spring
5.在applicationContext.xml中配置织入关系
6.测试代码
1.导入AOP的相关坐标
<dependencies>

    <dependency>

        <groupId>org.springframework</groupId>

        <artifactId>spring-test</artifactId>

        <version>5.0.2.RELEASE</version>

    </dependency>

    <dependency>

        <groupId>org.springframework</groupId>

        <artifactId>spring-context</artifactId>

        <version>5.0.3.RELEASE</version>

    </dependency>

    <dependency>

        <groupId>org.aspectj</groupId>

        <artifactId>aspectjweaver</artifactId>

        <version>1.8.13</version>

    </dependency>

</dependencies>
创建接口与实现类
接口
package com.pjh.user;

public interface userInterface {

    public void save();

}
实现类
package com.pjh.user;

public class user implements userInterface{

    public void save() {

        System.out.println("save run...");

    }

}
创建切面类
package com.pjh.enhance;
public class enhance {
public void enhance(){
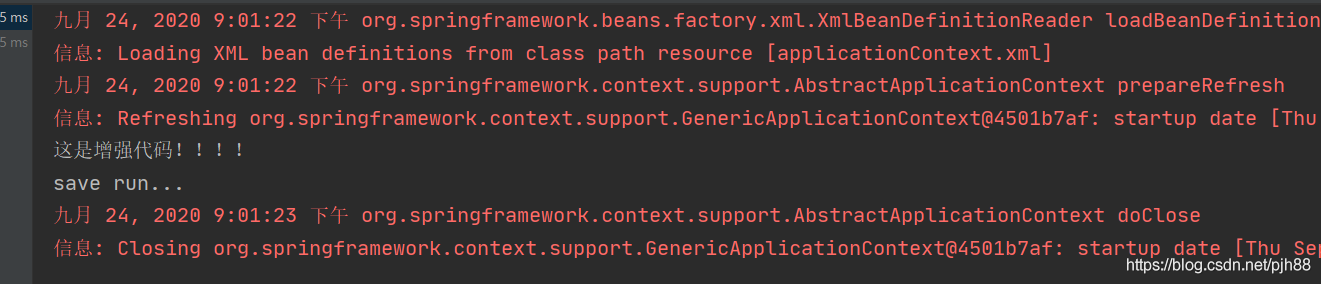
System.out.println("这是增强代码!!!!");
}
}
将目标类和切面类的对象创建权交给spring
<bean id="daoImp" class="com.pjh.dao.Imp.daoImp"/>

    <bean id="aspect" class="com.pjh.aspect.aspect"/>
引入命名空间与约束路径
<?xml version="1.0" encoding="UTF-8"?>

<beans xmlns="http://www.springframework.org/schema/beans"

       xmlns:xsi="http://www.w3.org/2001/XMLSchema-instance"

       xmlns:aop="http://www.springframework.org/schema/aop"

       xsi:schemaLocation="http://www.springframework.org/schema/beans http://www.springframework.org/schema/beans/spring-beans.xsd

http://www.springframework.org/schema/aop http://www.springframework.org/schema/aop/spring-aop.xsd">

</beans
配置切点表达式和前置增强之间的关系
切点表达式的配置语法
excution(【修饰符】返回值类型 包名.类名.方法名(参数))
通知的配置语法
<aop:通知类型 method=“切面类中方法名” pointcut=“切点表达式"></aop:通知类型>
这里先写个简单的格式后面再给大家深入讲
<aop:config >

       <!--说明这是一个切面类-->

       <aop:aspect ref="enhance">

           <!--切入后的增强方法-->

           <!--这是一个前置增强-->

           <!--method切入后的增强方法-->

           <!--pointcut对什么类方法执行的时候进行增强-->

           <aop:before

                   method="enhance" pointcut="execution(public void com.pjh.user.user.save())"></aop:before>

       </aop:aspect>

   </aop:config>
测试代码类
import com.pjh.user.userInterface;

import org.junit.Test;

import org.junit.runner.RunWith;

import org.springframework.beans.factory.annotation.Autowired;

import org.springframework.test.context.ContextConfiguration;

import org.springframework.test.context.junit4.SpringJUnit4ClassRunner;

@RunWith(SpringJUnit4ClassRunner.class)

@ContextConfiguration("classpath:applicationContext.xml")

public class test {

    /*如果是继承自接口的一定要使用接口进行定义否则会报错*/

@Autowired

private userInterface user;

    @Test

    public  void test1(){

         user.save();

    }

}
结果
切点表达式的花样写法

表达式语法
excution(【修饰符】 返回值类型 包名.类名.方法名(参数))
返回值的修饰符可省略
返回值的类名,包名,方法名可以使用“ * ”星号代表任意
包名与类名之间的一个点" . "代表当前包下的所有类,两个点“ …”代表当前包及其子包下的所有类
参数列表可以使用两个点 " . . " 表示任意个数,任意类型的参数列表
//user类下的save方法增强

execution(public void com.pjh.one.user.save())

//对user类下的所有放回值为void的方法进行增强

execution(public void com.pjh.one.user.*(..))

//one包下所有类的所有方法进行增强

execution(* com.pjh.*.*.*(..))

//one包包括其子包下所有类的所有方法进行增强

execution(*  com.pjh..*.*.*(..))

//任何包任何类任何方法

execution(*  *.*..*.*. * (..))
切点表达式的抽取
当多个增强切点表达式相同时,可以将切点表达式进行抽取。在增强中使用pointcut-ref属性替代pointcut属性来引用切点表达式
<aop:config >

       <aop:aspect ref="enhance">

           <aop:pointcut id="myPointcut" expression="execution(public void com.pjh.user.user.save())"/>

           <aop:before

                   method="enhance" pointcut-ref="myPointcut"></aop:before>

       </aop:aspect>

   </aop:config>
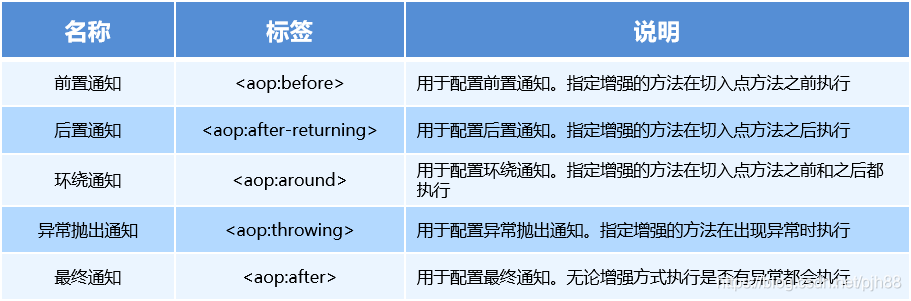
通知的类型
通知的配置语法
<aop:通知的类型 method=“切面中的方法名” pointcut=“切点表达式”/>
简单的小总结
<aop:config >

       <aop:aspect ref="切入类的名称>

           <aop:before

                   method="切入方法的名称e" pointcut="切点表达式"></aop:before>

       </aop:aspect>

   </aop:config>
通知的类型:前置通知、后置通知、环绕通知、异常抛出通知、最终通知
切点表达式的写法:
excution(【修饰符】返回值类型 包名.类名.方法名(参数))
下面我们再来讲讲更加简单的方法,即使用注解的方式
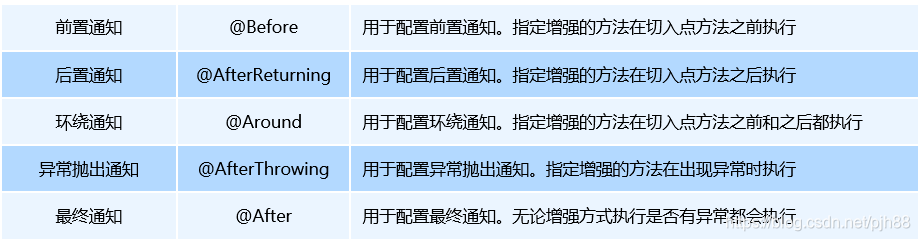
基于注解的AOP开发
注解aop的开发步骤
1.使用@Aspect标注切面类
2.使用@通知注解标注通知方法
3.在配置文件中配置aop自动代理<aop:aspectj-autoproxy>
标注为一个切面类@Aspect
@Aspect

public class enhance {

}
使用注解来抽取切点表达式
@Pointcut(”注解表达式“)
切点表达式方法的抽取,抽取方法是在切点内定义方法,
在方法内使用 @Pointcut注解切点表达式,然后在增强注解中进行引用
@Pointcut("execution(public void com.pjh.user.user.save())")

    public void mypoint(){

    }
Spring之JDBCTemplate
啥是jdncTemplate?
t他是spring框架中提供的一个对象,是对原始的jdbcAPI对象的简单封装,spring框架为我们提供了很多操作,模板类,比如操作关系型数据库的jdbcTemplate,操作nosql数据库的Redis Template,操作消息队列的jmsTemplate等等
JdbcTemplate开发步骤
1.导入sprign-jdbc和spring-tx坐标
2.创建数据库表和实体
3.创建JdbcTemplate对象
4.执行数据库操作
1.导入sprign-jdbc和spring-tx坐标
<dependencies>

    <dependency>

        <groupId>org.springframework</groupId>

        <artifactId>spring-test</artifactId>

        <version>5.0.2.RELEASE</version>

    </dependency>

    <dependency>

        <groupId>org.springframework</groupId>

        <artifactId>spring-jdbc</artifactId>

        <version>5.0.3.RELEASE</version>

    </dependency>

    <dependency>

        <groupId>org.springframework</groupId>

        <artifactId>spring-tx</artifactId>

        <version>5.0.3.RELEASE</version>

    </dependency>

    <dependency>

        <groupId>mysql</groupId>

        <artifactId>mysql-connector-java</artifactId>

        <version>5.1.32</version>

    </dependency>

    <dependency>

        <groupId>junit</groupId>

        <artifactId>junit</artifactId>

        <version>4.12</version>

    </dependency>

    <dependency>

        <groupId>c3p0</groupId>

        <artifactId>c3p0</artifactId>

        <version>0.9.1.2</version>

    </dependency>

    <dependency>

        <groupId>com.alibaba</groupId>

        <artifactId>druid</artifactId>

        <version>1.0.9</version>

    </dependency>

</dependencies>
2.创建数据库表和实体
使用sqlyog创建一个表
语句
CREATE TABLE test1(

id INT,

NAME VARCHAR(10)

 );
创建实体
package com.pjh;

public class user {

    private Integer id;

    private String name;

    public Integer getId() {

        return id;

    }

    public void setId(Integer id) {

        this.id = id;

    }

    public String getName() {

        return name;

    }

    public void setName(String name) {

        this.name = name;

    }

    @Override

    public String toString() {

        return "user{" +

                "id=" + id +

                ", name='" + name + '\'' +

                '}';

    }

}
**
JbdcTemplate快速入门,不使用spring框架的时候
_
@Test
public void test1() throws PropertyVetoException {
ComboPooledDataSource comboPooledDataSource = new ComboPooledDataSource();
comboPooledDataSource.setDriverClass("com.mysql.jdbc.Driver");
comboPooledDataSource.setJdbcUrl("jdbc:mysql://localhost:3309/one");
comboPooledDataSource.setUser("root");
comboPooledDataSource.setPassword("1234");
//创建jdbcTemplate对象
JdbcTemplate jdbcTemplate = new JdbcTemplate();
jdbcTemplate.setDataSource(comboPooledDataSource);
//执行语句
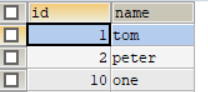
jdbcTemplate.update("insert into test1 values(?,?)",10,"one");
}
结果
抽取配置文件
配置文件代码:
jdbc.driver=com.mysql.jdbc.Driver

jdbc.url=jdbc:mysql://localhost:3309/one

jdbc.name=root

jdbc.password=1234
测试函数操作
@Test

public void test3() throws PropertyVetoException {

    //读取配置文件

    ResourceBundle jdbc = ResourceBundle.getBundle("jdbc");

    //获取连接池

    ComboPooledDataSource comboPooledDataSource = new ComboPooledDataSource();

    //设置参数

    comboPooledDataSource.setDriverClass(jdbc.getString("jdbc.driver"));

    comboPooledDataSource.setJdbcUrl(jdbc.getString("jdbc.url"));

    comboPooledDataSource.setUser(jdbc.getString("jdbc.name"));

    comboPooledDataSource.setPassword(jdbc.getString("jdbc.password"));

    //创建jdbcTemplate对象

    JdbcTemplate jdbcTemplate = new JdbcTemplate();

    jdbcTemplate.setDataSource(comboPooledDataSource);

    jdbcTemplate.update("insert into test1 values(?,?)",13,"three");

}
使用spring创建JdbcTemplate对象
将数据源DataSource与JdbcTemplate的创建权交给Spring并在Spring容器内进行依赖注入
配置代码:
<bean id="datasource" class="com.mchange.v2.c3p0.ComboPooledDataSource">

    <property name="driverClass" value="com.mysql.jdbc.Driver"/>

    <property name="jdbcUrl" value="jdbc:mysql://localhost:3309/one"/>

    <property name="user" value="root"/>

    <property name="password" value="1234"/>

</bean>

    <bean id="jdbcTemplate" class="org.springframework.jdbc.core.JdbcTemplate">

        <property name="dataSource" ref="datasource"/>

    </bean>
测试函数
@Test

    public void test2(){

    ClassPathXmlApplicationContext classPathXmlApplicationContext =

            new ClassPathXmlApplicationContext("applicationContext.xml");

    JdbcTemplate jdbcTemplate =(JdbcTemplate) classPathXmlApplicationContext.getBean("jdbcTemplate");

    jdbcTemplate.update("insert into test1 values(?,?)",11,"two");

}
结果
成功插入

这个也可以使用读取配置文件的方式
我们首先要导入context的约束路径与命名空间
命名空间: xmlns:context=“http://www.springframework.org/schema/context”
约束路径:http://www.springframework.org/schema/context http://www.springframework.org/schema/context/spring-context.xsd
配置文件修改
<?xml version="1.0" encoding="UTF-8"?>

<beans xmlns="http://www.springframework.org/schema/beans"

       xmlns:context="http://www.springframework.org/schema/context"

       xmlns:xsi="http://www.w3.org/2001/XMLSchema-instance"

       xsi:schemaLocation="http://www.springframework.org/schema/beans http://www.springframework.org/schema/beans/spring-beans.xsd

http://www.springframework.org/schema/context http://www.springframework.org/schema/context/spring-context.xsd">

<bean id="datasource" class="com.mchange.v2.c3p0.ComboPooledDataSource">

    <property name="driverClass" value="${jdbc.driver}"/>

    <property name="jdbcUrl" value="${jdbc.url}"/>

    <property name="user" value="${jdbc.name}"/>

    <property name="password" value="${jdbc.password}"/>

</bean>

    <bean id="jdbcTemplate" class="org.springframework.jdbc.core.JdbcTemplate">

        <property name="dataSource" ref="datasource"/>

    </bean>

   <context:property-placeholder location="classpath:jdbc.properties"/>

</beans>
测试代码
@Test

    public void test4(){

        ClassPathXmlApplicationContext classPathXmlApplicationContext =

                new ClassPathXmlApplicationContext("applicationContext.xml");

        JdbcTemplate jdbcTemplate =(JdbcTemplate) classPathXmlApplicationContext.getBean("jdbcTemplate");

        jdbcTemplate.update("insert into test1 values(?,?)",100,"pjh");

    }
结果
成功插入

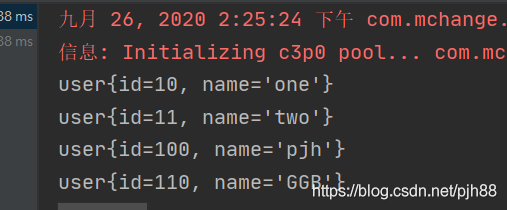
通过注解的方式来得到JdbcTemplate
使用框架
@RunWith(SpringJUnit4ClassRunner.class)

@ContextConfiguration("classpath:applicationContext.xml")

public class test {

@Autowired

private  JdbcTemplate jdbcTemplate;

    @Test

    public void test7(){

        jdbcTemplate.update("insert into test1 values(?,?)",110,"GGB");

    }
不使用框架
public void test1() throws PropertyVetoException {

    ComboPooledDataSource comboPooledDataSource = new ComboPooledDataSource();

    comboPooledDataSource.setDriverClass("com.mysql.jdbc.Driver");

    comboPooledDataSource.setJdbcUrl("jdbc:mysql://localhost:3309/one");

    comboPooledDataSource.setUser("root");

    comboPooledDataSource.setPassword("1234");

    //创建jdbcTemplate对象

    JdbcTemplate jdbcTemplate = new JdbcTemplate();

    jdbcTemplate.setDataSource(comboPooledDataSource);

    //执行语句

    jdbcTemplate.update("insert into test1 values(?,?)",10,"one");

}
由二者对比即可看出框架的巨大好处,上面那么长的代码现在只要几行即可解决

JDBCTemplate的常用操作
查询语句
查询数据库中的所有内容
@RunWith(SpringJUnit4ClassRunner.class)

@ContextConfiguration("classpath:applicationContext.xml")

public class test {

@Autowired

private  JdbcTemplate jdbcTemplate;

   @Test

public void test8(){

    String sql="select * from test1 where name=?";

    List<user> query = jdbcTemplate.query(sql, new BeanPropertyRowMapper<user>(user.class));

    for (user user : query) {

        System.out.println(user);

    }

}
结果
查询数据库中的某条内容
@RunWith(SpringJUnit4ClassRunner.class)

@ContextConfiguration("classpath:applicationContext.xml")

public class test {

@Autowired

private  JdbcTemplate jdbcTemplate;

   @Test

 @Test

    public void test9(){

        String sql="select * from test1 where id=?";

        List<user> query = jdbcTemplate.query(sql, new BeanPropertyRowMapper<user>(user.class), 10);

        for (user user : query) {

            System.out.println(user);

        }

    }

}
查询数据库记录的数量
@RunWith(SpringJUnit4ClassRunner.class)

@ContextConfiguration("classpath:applicationContext.xml")

public class test {

@Autowired

private  JdbcTemplate jdbcTemplate;

@Test

public void test90(){

    String sql="select count(*) from test1";

    Long aLong = jdbcTemplate.queryForObject(sql, Long.class);

    System.out.println("记录条数:"+aLong);

}

}
删除指定记录
@RunWith(SpringJUnit4ClassRunner.class)

@ContextConfiguration("classpath:applicationContext.xml")

public class test {

@Autowired

private  JdbcTemplate jdbcTemplate;

@Test

public void test11(){

    String sql="delete from test1 where id=11";

    jdbcTemplate.update(sql);

}

}
Spring系列之事务的控制 注解实现+xml实现
**
对事务不了解的点击链接跳转到附录附录我有介绍:事务
**
编程式事务控制对象
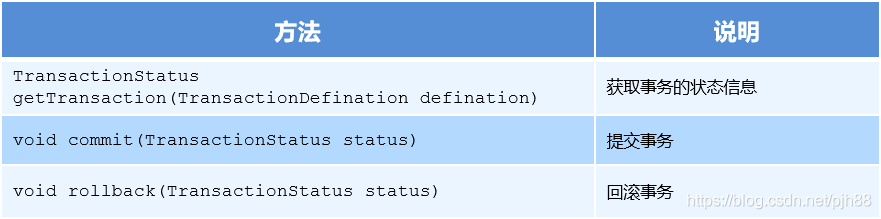
事务管理器:PlatformTransactionManager
PlatformTransactionManager是事务的管理器,他提供了我们常用的事务操作方法
为什么PlatformTransactionManager是接口类型?
因为不同的dao层技术有不同的实现类
Dao层是jdbc时:org.springframework.jdbc.datasource.DataSourceTransactionManager
Dao层是mybatis时:org.springframework.orm.hibernate5.HibernateTransactionManager
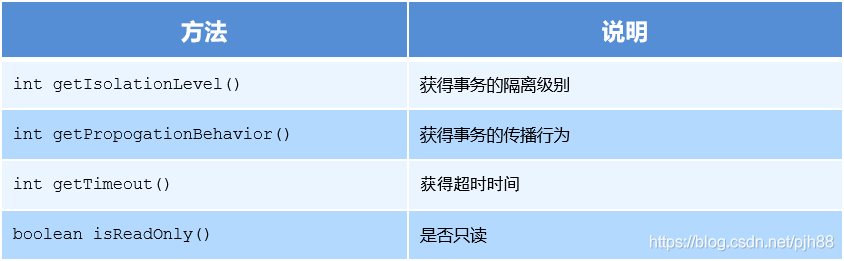
事务的定义信息对象:TransactionDefinition
TransactionDefinition
里面的方法
事务的隔离级别
ISOLATION_READ_UNCOMMITTED(读未提交)
实质:一个事务读取另一个事务未提交的数据
例子:老板要给程序员发工资,程序员的工资是3.6万/月。但是发工资时老板不小心按错了数字,按成3.9万/月,该钱已经打到程序员的户口,但是事务还没有提交,就在这时,程序员去查看自己这个月的工资,发现比往常多了3千元,以为涨工资了非常高兴。但是老板及时发现了不对,马上回滚差点就提交了的事务,将数字改成3.6万再提交。
分析:实际程序员这个月的工资还是3.6万,但是程序员看到的是3.9万。他看到的是老板还没提交事务时的数据。这就是脏读。
ISOLATION_READ_COMMITTED(读已提交)
实质:一个用户读取另一个用户已提交的数据
事例:程序员拿着信用卡去享受生活(卡里当然是只有3.6万),当他埋单时(程序员事务开启),收费系统事先检测到他的卡里有3.6万,就在这个时候!!程序员的妻子要把钱全部转出充当家用,并提交。当收费系统准备扣款时,再检测卡里的金额,发现已经没钱了(第二次检测金额当然要等待妻子转出金额事务提交完)。程序员就会很郁闷,明明卡里是有钱的…
分析:这就是读提交,若有事务对数据进行更新(UPDATE)操作时,读操作事务要等待这个更新操作事务提交后才能读取数据,可以解决脏读问题。但在这个事例中,出现了一个事务范围内两个相同的查询却返回了不同数据,这就是不可重复读。
ISOLATION_REPEATABLE_READ(重复读)
实质:一个事务在读取数据时,其他事务不允许进行修改操作
事例:程序员拿着信用卡去享受生活(卡里当然是只有3.6万),当他埋单时(事务开启,不允许其他事务的UPDATE修改操作),收费系统事先检测到他的卡里有3.6万。这个时候他的妻子不能转出金额了。接下来收费系统就可以扣款了。
分析:重复读可以解决不可重复读问题。写到这里,应该明白的一点就是,不可重复读对应的是修改,即UPDATE操作。但是可能还会有幻读问题。因为幻读问题对应的是插入INSERT操作,而不是UPDATE操作。
ISOLATION_SERIALIZABLE(幻读)
事例:程序员某一天去消费,花了2千元,然后他的妻子去查看他今天的消费记录(全表扫描FTS,妻子事务开启),看到确实是花了2千元,就在这个时候,程序员花了1万买了一部电脑,即新增INSERT了一条消费记录,并提交。当妻子打印程序员的消费记录清单时(妻子事务提交),发现花了1.2万元,似乎出现了幻觉,这就是幻读。
事务的传播行为
什么是事务的传播行为:
解决业务方法调用业务方法的时候,事务统一性的问题,比如A业务方法调用B业务方法,而A业务方法B业务方法事先都开启了事务,这就会出现事务统一的问题
REQUIRED:如果当前没有事务,就新建一个事务,如果已经存在一个事务中,加入到这个事务中。一般的选择(默认值)
案例解析:A业务方法调用B业务方法,B业务方法看A业务方法有没有事务,如果A业务方法有事务就加入A的事务,如果A业务方法没有事务,则B业务方法创建一个事务
SUPPORTS:支持当前事务,如果当前没有事务,就以非事务方式执行(没有事务)
案例解析:A业务方法调用B业务方法,B业务方法看A业务方法有没有事务,如果A业务方法有事务就加入A的事务,如果A业务方法没有事务,则B业务方法就以非事务方式运行
MANDATORY:使用当前的事务,如果当前没有事务,就抛出异常
案例解析:A业务方法调用B业务方法,B业务方法看A业务方法有没有事务,如果A业务方法有事务就加入A的事务,如果A业务方法没有事务,则B业务方法就抛出异常,表示老子不干了

REQUERS_NEW:新建事务,如果当前在事务中,把当前事务挂起。
NOT_SUPPORTED:以非事务方式执行操作,如果当前存在事务,就把当前事务挂起
NEVER:以非事务方式运行,如果当前存在事务,抛出异常
NESTED:如果当前存在事务,则在嵌套事务内执行。如果当前没有事务,则执行 REQUIRED 类似的操作
超时时间:默认值是-1,没有超时限制。如果有,以秒为单位进行设置
是否只读:建议查询时设置为只读
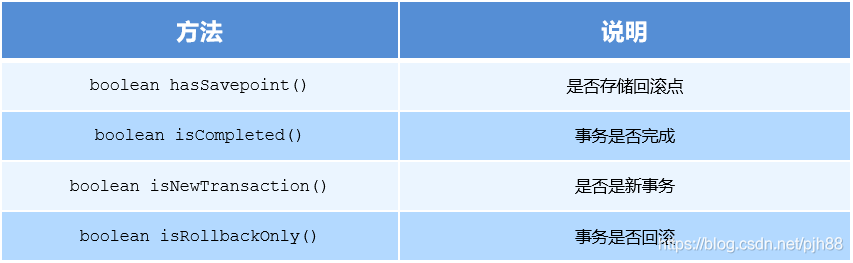
TransactionStatus:事务的具体运行状态
不需配置
TransactionStatus接口提供的是事务具体的运行状态,方法如下
**
编程式事务控制的三大对象
**
PlatformTransactionManager
TransactionDefinition
TransactionStatus
基于XML的声明式事务控制
Spring的声明式事务控制顾名思义就是使用声明的方式来处理事务,这里的声明指的是在配置文件中声明,Spring配置文件中的声明式处理来代替代码式的事务处理
声明式事务处理的作用
事务处理是不侵入开发的组件,具体来说,业务逻辑对象不会意识带正在处于事务处理之中,事实上也应该如此,因为事务管理是出于系统层面的职务,而不是业务逻辑处理的一部分,如果要改变事务管理策划的话,也只需要在定义文件中重新配置即可
在不需要事务管理的时候,只要在设定的文件上修改一下,即可移除事务管理服务,不需要改变代码重新编译,这样维护起来更加方便
Spring事务控制的底层就是AOP
声明式事务控制的实现
切点:需要被事务管理的方法,即业务方法
通知/增强:事务增强
切面:二者结合
下面通过一个银行业务转账的案例来方便大家理解
1.创建数据库和实体
表名:account
字段名:moey–钱,Name–客户名
CREATE TABLE account(

NAME VARCHAR(10),

money DOUBLE

);
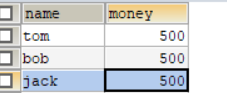
插入三个字段值
INSERT INTO account VALUE('tom',1),('bob',2),('jack',3);
2.需要导入的坐标
<?xml version="1.0" encoding="UTF-8"?>

<project xmlns="http://maven.apache.org/POM/4.0.0"

         xmlns:xsi="http://www.w3.org/2001/XMLSchema-instance"

         xsi:schemaLocation="http://maven.apache.org/POM/4.0.0 http://maven.apache.org/xsd/maven-4.0.0.xsd">

    <modelVersion>4.0.0</modelVersion>

    <groupId>org.example</groupId>

    <artifactId>spring-mysql</artifactId>

    <version>1.0-SNAPSHOT</version>

<dependencies>

    <dependency>

        <groupId>mysql</groupId>

        <artifactId>mysql-connector-java</artifactId>

        <version>5.1.32</version>

    </dependency>

    <dependency>

        <groupId>com.alibaba</groupId>

        <artifactId>druid</artifactId>

        <version>1.1.10</version>

    </dependency>

    <dependency>

        <groupId>c3p0</groupId>

        <artifactId>c3p0</artifactId>

        <version>0.9.1.2</version>

    </dependency>

    <dependency>

        <groupId>org.springframework</groupId>

        <artifactId>spring-context</artifactId>

        <version>5.0.5.RELEASE</version>

    </dependency>

    <dependency>

        <groupId>org.springframework</groupId>

        <artifactId>spring-tx</artifactId>

        <version>5.0.3.RELEASE</version>

    </dependency>

    <dependency>

        <groupId>org.springframework</groupId>

        <artifactId>spring-jdbc</artifactId>

        <version>5.0.3.RELEASE</version>

    </dependency>

    <dependency>

        <groupId>org.springframework</groupId>

        <artifactId>spring-test</artifactId>

        <version>5.0.5.RELEASE</version>

    </dependency>

    <dependency>

        <groupId>junit</groupId>

        <artifactId>junit</artifactId>

        <version>4.13</version>

    </dependency>

    <dependency>

        <groupId>org.aspectj</groupId>

        <artifactId>aspectjweaver</artifactId>

        <version>1.8.13</version>

    </dependency>

    <dependency>

        <groupId>org.junit.jupiter</groupId>

        <artifactId>junit-jupiter</artifactId>

        <version>RELEASE</version>

        <scope>compile</scope>

    </dependency>

</dependencies>

</project>
3.创建实体类
package com.pjh.account;

public class account {

    private  double money;

    private  String name;

    @Override

    public String toString() {

        return "account{" +

                "money=" + money +

                ", name='" + name + '\'' +

                '}';

    }

    public double getMoney() {

        return money;

    }

    public void setMoney(double money) {

        this.money = money;

    }

    public String getName() {

        return name;

    }

    public void setName(String name) {

        this.name = name;

    }

}
4.dao层(执行语句,与数据库交互)
接口
package com.pjh.dao;

public interface ServiceDao {

    public void inman(String inName,double money);

    public void outman(String outName,double money);

}
实现类
package com.pjh.dao.imp;

import com.pjh.dao.ServiceDao;

import org.springframework.jdbc.core.JdbcTemplate;

public class ServiceDaoImp implements ServiceDao {

    private JdbcTemplate jdbcTemplate;

    public void setJdbcTemplate(JdbcTemplate jdbcTemplate) {

        this.jdbcTemplate = jdbcTemplate;

    }

    public void inman(String inName, double money) {

        jdbcTemplate.update("update account set money=money-? where name =?",money,inName);

    }

    public void outman(String outName, double money) {

          jdbcTemplate.update("update account set money=money+? where name =?",money,outName);

    }

}
5.service层
接口
package com.pjh.service;

public interface service {

    public void trasfer(String inName,String outName,double money);

}
实现类
package com.pjh.service.Imp;

import com.pjh.dao.imp.ServiceDaoImp;

import com.pjh.service.service;

import org.springframework.beans.factory.annotation.Autowired;

public class serviceImp implements service {

    private ServiceDaoImp serviceDaoImp;

    public void setServiceDaoImp(ServiceDaoImp serviceDaoImp) {

        this.serviceDaoImp = serviceDaoImp;

    }

    public void trasfer(String inName, String outName, double money) {

        serviceDaoImp.inman(inName,money);

        serviceDaoImp.outman(outName,money);

    }

}
6.applicationContext配置文件
<?xml version="1.0" encoding="UTF-8"?>

<beans xmlns="http://www.springframework.org/schema/beans"

       xmlns:context="http://www.springframework.org/schema/context"

       xmlns:aop="http://www.springframework.org/schema/aop"

       xmlns:tx="http://www.springframework.org/schema/tx"

       xmlns:xsi="http://www.w3.org/2001/XMLSchema-instance"

       xsi:schemaLocation="http://www.springframework.org/schema/beans http://www.springframework.org/schema/beans/spring-beans.xsd

       http://www.springframework.org/schema/context http://www.springframework.org/schema/context/spring-context.xsd

       http://www.springframework.org/schema/aop http://www.springframework.org/schema/aop/spring-aop.xsd

       http://www.springframework.org/schema/tx http://www.springframework.org/schema/tx/spring-tx.xsd">

<bean id="dataSource" class="com.mchange.v2.c3p0.ComboPooledDataSource">

    <property name="password" value="${jdbc.password}"/>

    <property name="user" value="${jdbc.name}"/>

    <property name="driverClass" value="${jdbc.driver}"/>

    <property name="jdbcUrl" value="${jdbc.url}"/>

</bean>

    <bean id="jdbcTemplate" class="org.springframework.jdbc.core.JdbcTemplate">

        <property name="dataSource" ref="dataSource"></property>

    </bean>

   <bean id="serviceDaoImp" class="com.pjh.dao.imp.ServiceDaoImp">

       <property name="jdbcTemplate" ref="jdbcTemplate"/>

    </bean>

    <!--目标对象 内部方法就是切点-->

    <bean id="serviceImp" class="com.pjh.service.Imp.serviceImp">

        <property name="serviceDaoImp" ref="serviceDaoImp"></property>

    </bean>

    <!--配置平台事务管理器-->

    <bean id="transactionManager" class="org.springframework.jdbc.datasource.DataSourceTransactionManager">

        <property name="dataSource" ref="dataSource"/>

    </bean>

    <!--通知 事务的增强-->

   <tx:advice id="txAdvice" transaction-manager="transactionManager">

       <tx:attributes>

           <tx:method name="*"/>

       </tx:attributes>

   </tx:advice>

    <!--配置事务的织入-->

  <aop:config proxy-target-class="true">

      <aop:pointcut id="txPointcut" expression="execution(* com.pjh.service.Imp.serviceImp.*(..))"/>

      <aop:advisor advice-ref="txAdvice" pointcut-ref="txPointcut"/>

  </aop:config>

    <context:property-placeholder location="classpath:jdbc.properties"/>

    <context:component-scan base-package="com.pjh"/>

</beans>
7.主函数
package com.pjh.control;
import com.pjh.service.Imp.serviceImp;
import com.pjh.service.service;
import org.springframework.context.support.ClassPathXmlApplicationContext;
public class control2 {
public static void main(String[] args) {
ClassPathXmlApplicationContext classPathXmlApplicationContext = new ClassPathXmlApplicationContext("applicationContext.xml");
service bean1 =(service) classPathXmlApplicationContext.getBean(service.class);
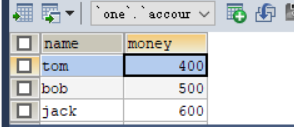
bean1.trasfer("tom","jack",100);
}
}
结果
成功转账
下面我们重点来讲讲切点方法的事务配置
<tx:advice id="txAdvice" transaction-manager="transactionManager">

       <tx:attributes>

           <tx:method name="*"/>

       </tx:attributes>

   </tx:advice>
<tx:method >:代表事务参数方法的配置
这个部分一定要重点掌握这是核心
<tx:method name="transfer" isolation="REPEATABLE_READ" propagation="REQUIRED" timeout="-1" read-only="false"/>

name:切点方法名称

isolation:事务的隔离级别

propogation:事务的传播行为

timeout:超时时间

read-only:是否只读
使用注解的方式进行事务的配置
1.dao层
package com.pjh.dao.imp;

import com.pjh.dao.ServiceDao;

import org.springframework.beans.factory.annotation.Autowired;

import org.springframework.jdbc.core.JdbcTemplate;

import org.springframework.stereotype.Repository;

@Repository("ServiceDaoImp")

public class ServiceDaoImp implements ServiceDao {

    @Autowired

    private JdbcTemplate jdbcTemplate;

    public void inman(String inName, double money) {

        jdbcTemplate.update("update account set money=money-? where name =?",money,inName);

    }

    public void outman(String outName, double money) {

          jdbcTemplate.update("update account set money=money+? where name =?",money,outName);

    }

}
2.service层
package com.pjh.service.Imp;

import com.pjh.dao.imp.ServiceDaoImp;

import com.pjh.service.service;

import org.springframework.beans.factory.annotation.Autowired;

import org.springframework.stereotype.Service;

import org.springframework.transaction.annotation.Transactional;

@Service("serviceImp")

@Transactional

public class serviceImp implements service {

    @Autowired

    private ServiceDaoImp serviceDaoImp;

 public void trasfer(String inName, String outName, double money) {

        serviceDaoImp.inman(inName,money);

        //int a=1/0;

        serviceDaoImp.outman(outName,money);

    }

}
3.编写applicationContext的内容
<!--组件扫描-->

<context:component-scan base-package="com.pjh"/>

<!--事务的注解驱动-->

<tx:annotation-driven transaction-manager="transactionManager"/>
小总结
1.使用 @Transactional 在需要进行事务控制的类或是方法上修饰,注解可用的属性同 xml 配置方式,例如隔离级别、传播行为等。
注解使用在类上,那么该类下的所有方法都使用同一套注解参数配置。
使用在方法上,不同的方法可以采用不同的事务参数配置。
2.Xml配置文件中要开启事务的注解驱动<tx:annotation-driven />
五万字长文带你学会Spring的更多相关文章
- [Redis] 万字长文带你总结Redis,助你面试升级打怪
文章目录 Redis的介绍.优缺点.使用场景 Linux中的安装 常用命令 Redis各个数据类型及其使用场景 Redis字符串(String) Redis哈希(Hash) Redis列表(List) ...
- 万字长文带你入门Zookeeper!!!
导读 文章首发于微信公众号[码猿技术专栏],原创不易,谢谢支持. Zookeeper 相信大家都听说过,最典型的使用就是作为服务注册中心.今天陈某带大家从零基础入门 Zookeeper,看了本文,你将 ...
- 又长又细,万字长文带你解读Redisson分布式锁的源码
前言 上一篇文章写了Redis分布式锁的原理和缺陷,觉得有些不过瘾,只是简单的介绍了下Redisson这个框架,具体的原理什么的还没说过呢.趁年前项目忙的差不多了,反正闲着也是闲着,不如把Rediss ...
- 万字长文带你掌握Java数组与排序,代码实现原理都帮你搞明白!
查找元素索引位置 基本查找 根据数组元素找出该元素第一次在数组中出现的索引 public class TestArray1 { public static void main(String[] arg ...
- 性能追击:万字长文30+图揭秘8大主流服务器程序线程模型 | Node.js,Apache,Nginx,Netty,Redis,Tomcat,MySQL,Zuul
本文为<高性能网络编程游记>的第六篇"性能追击:万字长文30+图揭秘8大主流服务器程序线程模型". 最近拍的照片比较少,不知道配什么图好,于是自己画了一个,凑合着用,让 ...
- C#编程总结(五)多线程带给我们的一些思考
C#编程总结(五)多线程带给我们的一些思考 如有不妥之处,欢迎批评指正. 1.什么时候使用多线程? 这个问题,对于系统架构师.设计者.程序员,都是首先要面对的一个问题. 在什么时候使用多线程技术? 在 ...
- SQL Server 2014新特性:五个关键点带你了解Excel下的Data Explorer
SQL Server 2014新特性:五个关键点带你了解Excel下的Data Explorer Data Explorer是即将发布的SQL Server 2014里的一个新特性,借助这个特性讲使企 ...
- 40 篇原创干货,带你进入 Spring Boot 殿堂!
两个月前,松哥总结过一次已经完成的 Spring Boot 教程,当时感受到了小伙伴们巨大的热情. 两个月过去了,松哥的 Spring Boot 教程又更新了不少,为了方便小伙伴们查找,这里再给大家做 ...
- Jmeter Web 性能测试入门 (四):一个小实例带你学会 Jmeter 脚本编写
测试场景: 模拟并发100个user,在TesterHome 站内搜索VV00CC 添加线程组 添加HTTP信息头管理器 添加HTTP Sampler 填写HTTP Sampler中的信息 添加监听器 ...
随机推荐
- FaaS,未来的后端服务开发之道
说 FaaS 先要说说 PaaS 平台即服务(Platform as a Service)是一种云计算服务,提供运算平台与解决方案堆栈即服务.在云计算的典型层级中,平台即服务层介于软件即服务与基础设施 ...
- ATM管理系统
一.题目要求 编写一个ATM管理系统,语言不限,要求应包括以下主要功能: (1)开户,销户 (2)查询账户余额 (3)存款 (4)取款 (5)转账(一个账户转到另一个账户)等 二.代码提交 开户 pu ...
- Python & Matplotlib: Monte Carlos Method
Hey! 这里是Lindy:) Hope you guys are doing well! 今天想记录的概念叫做 蒙特·卡罗 方法,是今年在cs课上老师做的扩展延伸.其实我在初次接触这个概念时觉得很新 ...
- 庐山真面目之十微服务架构 Net Core 基于 Docker 容器部署 Nginx 集群
庐山真面目之十微服务架构 Net Core 基于 Docker 容器部署 Nginx 集群 一.简介 前面的两篇文章,我们已经介绍了Net Core项目基于Docker容器部署在Linux服 ...
- 重温Java JDK安装,希望帮助更多的学习在路上的小白
JDK卸载和安装 现在JDK已经升级到JDK11版本了,但是JDK1.8(JDK8)仍然有很多小伙伴在使用,这里也记录一下jdk1.8的下载及安装过程,对于刚学习java的小伙伴可以参考,熟手可忽略, ...
- 架构设计哲学【三种方式:支持DevOps的原则】
三种方式:支持DevOps的原则 2012年8月22日作者Gene Kim 45条评论 这篇文章是杨波老师分享的一篇文章:这几年对他架构影响最深的一篇文章.主要描述是关于DevOps的,但对系统架构同 ...
- reactor模式:主从式reactor
前面两篇文章提到 reactor模式:单线程的reactor模式 reactor模式:多线程的reactor模式 NIO的server模式只有5个阶段,但是,NIO的selectionkey里确实有个 ...
- PHP 打水印功能
/** * @param $str 需要打水印的文字 * @param int $size 文字大小 * @param int $red 文字的颜色 rgb r * @param int $gree ...
- 非root用户安装centos的jdk
1. 下载linux的jdk到自定义目录(以下简称安装目录),解压. 2. 在安装目录下新建文件局部环境变量文件:bash_profile 内容为:(注意修改JAVA_HOME目录) export J ...
- 【Docker】Docker概述、理解docker的集装箱、标准化、隔离的思想、 docker出现解决了什么问题
整理一下 慕课网 第一个docker化的java应用 Docker环境下的前后端分离项目部署与运维 课程时所做的笔记 Docker概述 docker - https://www.docker.com/ ...