Tomcat之如何自己做一个tomcat
来源:《How Tomcat Works》
Servlet容器的工作原理:
1、创建一个request对象并填充那些有可能被所引用的servlet使用的信息,比如参数、头部、cookies、查询字符串、URL等。而一个request对象是javax.servlet.ServletRequest或javax.servlet.http.ServletRequest接口的一个实例对象。
2、创建一个response对象,所引用的servlet使用它给客户端发送响应。一个response对象javax.servlet.ServletResponse或javax.servlet.http.ServletResponse接口的一个实例。
3、调用servlet的service方法,并传入request和response对象,而servlet会从request对象中取值,给response对象写值。
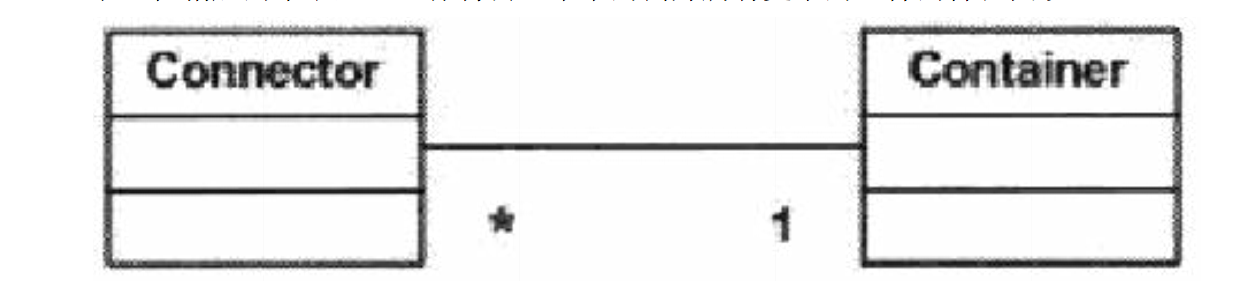
Catalina:是tomcat所使用的Servlet的容器。由两个主要模块组成,连接器(connector)和容器(container),连接器用来连接容器里面的请求,工作是接收到每一个http请求,构造一个resquest对象和response对象。然后传递给容器。容器接收到对象之后,调用servlet的service方法用于响应。
一个简单的web服务器:超文本传输协议服务器(http),一个基于java的web服务器使用的是两个基本的类,java.net.Socket和java.net.ServerSOcket.
Http协议:在Http中,始终是客户端通过建立连接和发送一个http请求从而开启一个事务。web服务器不需要联系客户端或者对客户端做一个回调连接。无论客户端或者服务器都可以提前终止连接。
Socket类:在计算机网络中,socket是网络连接的端点,使得一个应用可以从网络中读取和写入数据。放在两个不同计算机上的应用可以通过连接发送和接收字节流。在java中,套接字是一个类。
- new Socket("ip地址",port);
Socket类是一个客户端类,创建了socket类之后,可以使用它来向服务器发送和接收字节流。首先要调用Socket类中的getOutputStream方法来获取java.io.OutputStream对象。要发送的对象是文本,需要构造一个printWrite对象。而要想从远程端接收对象,可以使用Socket类中的getInputStream,来返回对象。
本质上来说,socket发送的是OutputStream对象,接收的是InputStream。
- package test;
- import java.io.*;
- import java.net.Socket;
- public class MySocket {
- public static void main(String[] args) {
- try{
- //向本机的4700端口发出客户请求
- Socket socket=new Socket("127.0.0.1",4700);
- //由系统标准输入设备构造BufferedReader对象
- BufferedReader sin=new BufferedReader(new InputStreamReader(System.in));
- //由Socket对象得到输出流,并构造PrintWriter对象
- PrintWriter os=new PrintWriter(socket.getOutputStream());
- //由Socket对象得到输入流,并构造相应的BufferedReader对象
- BufferedReader is=new BufferedReader(new InputStreamReader(socket.getInputStream()));
- String readline;
- readline=sin.readLine(); //从系统标准输入读入一字符串
- //若从标准输入读入的字符串为 "bye"则停止循环
- while(!readline.equals("bye")){
- //将从系统标准输入读入的字符串输出到Server
- os.println(readline);
- //刷新输出流,使Server马上收到该字符串
- os.flush();
- //在系统标准输出上打印读入的字符串
- System.out.println("Client:"+readline);
- //从Server读入一字符串,并打印到标准输出上
- System.out.println("Server:"+is.readLine());
- readline=sin.readLine(); //从系统标准输入读入一字符串
- }
- os.close(); //关闭Socket输出流
- is.close(); //关闭Socket输入流
- socket.close(); //关闭Socket
- }catch(Exception e){
- e.printStackTrace();//出错,打印出错信息
- }
- }
- }
ServerSocket类:是一个服务器类,绑定了端口号,等待连接,其中accept方法可以接收一个socket对象,然后和客户端交互。
- package test;
- import java.io.*;
- import java.net.ServerSocket;
- import java.net.Socket;
- public class MyServerSocket {
- public static void main(String args[]) {
- try{
- ServerSocket server=null;
- try{
- //创建一个ServerSocket在端口4700监听客户请求
- server=new ServerSocket(4700);
- }catch(Exception e){
- e.printStackTrace();//出错,打印出错信息
- }
- Socket socket=null;
- try{
- //使用accept()阻塞等待客户请求,有客户
- socket=server.accept();//请求到来则产生一个Socket对象,并继续执行
- }catch(Exception e){
- e.printStackTrace();//出错,打印出错信息
- }
- String line;
- //由Socket对象得到输入流,并构造相应的BufferedReader对象
- BufferedReader is=new BufferedReader(new InputStreamReader(socket.getInputStream()));
- //由Socket对象得到输出流,并构造PrintWriter对象
- PrintWriter os=new PrintWriter(socket.getOutputStream());
- //由系统标准输入设备构造BufferedReader对象
- BufferedReader sin=new BufferedReader(new InputStreamReader(System.in));
- //在标准输出上打印从客户端读入的字符串
- System.out.println("Client:"+is.readLine());
- //从标准输入读入一字符串
- line=sin.readLine();
- //如果该字符串为 "bye",则停止循环
- while(!line.equals("bye")){
- //向客户端输出该字符串
- os.println(line);
- //刷新输出流,使Client马上收到该字符串
- os.flush();
- //在系统标准输出上打印读入的字符串
- System.out.println("Server:"+line);
- //从Client读入一字符串,并打印到标准输出上
- System.out.println("Client:"+is.readLine());
- //从系统标准输入读入一字符串
- line=sin.readLine();
- }
- os.close(); //关闭Socket输出流
- is.close(); //关闭Socket输入流
- socket.close(); //关闭Socket
- server.close(); //关闭ServerSocket
- }catch(Exception e){
- e.printStackTrace();//出错,打印出错信息
- }
- }
- }
下面定义一个应用程序,定义一个web服务器。来处理http请求。即HttpServer。
一个HttpServer类代表着一个web服务器。
这里实现一个简易的从服务器申请静态资源的服务器。
- package test.pyrmont;
- import java.net.Socket;
- import java.net.ServerSocket;
- import java.net.InetAddress;
- import java.io.InputStream;
- import java.io.OutputStream;
- import java.io.IOException;
- import java.io.File;
- public class HttpServer {
- /** WEB_ROOT is the directory where our HTML and other files reside.
- * For this package, WEB_ROOT is the "webroot" directory under the working
- * directory.
- * The working directory is the location in the file system
- * from where the java command was invoked.
- */
- public static final String WEB_ROOT =
- System.getProperty("user.dir") + File.separator + "webroot";
- // shutdown command
- private static final String SHUTDOWN_COMMAND = "/SHUTDOWN";
- // the shutdown command received
- private boolean shutdown = false;
- public static void main(String[] args) {
- HttpServer server = new HttpServer();
- server.await();
- }
- public void await() {
- ServerSocket serverSocket = null;
- int port = 8080;
- try {
- serverSocket = new ServerSocket(port, 1, InetAddress.getByName("127.0.0.1"));
- }
- catch (IOException e) {
- e.printStackTrace();
- System.exit(1);
- }
- // Loop waiting for a request
- while (!shutdown) {
- Socket socket = null;
- InputStream input = null;
- OutputStream output = null;
- try {
- socket = serverSocket.accept();
- input = socket.getInputStream();
- output = socket.getOutputStream();
- // create Request object and parse
- Request request = new Request(input);
- request.parse();
- // create Response object
- Response response = new Response(output);
- response.setRequest(request);
- response.sendStaticResource();
- // Close the socket
- socket.close();
- //check if the previous URI is a shutdown command
- shutdown = request.getUri().equals(SHUTDOWN_COMMAND);
- System.out.println(request.getUri());
- }
- catch (Exception e) {
- e.printStackTrace();
- continue;
- }
- }
- }
- }
HttpServer
该服务器提供了一个静态的final变量WEB_ROOT所在的目录和它下面所有的子目录的静态资源。其目录是当前服务器的目录路径下的webroot目录。在该目录下的静态资源均可以被访问到。
同时定义了一个停止服务器的命令行,使用uri来停止服务器(这是比较危险的操作)。
创建一个ServerSocket,然后绑定端口,并使用accept来接收浏览器传来的input。使用request对象的函数对input进行解析,其实就是从浏览器的地址栏里拼接出静态资源的访问地址。然后,将request传给reponse,response根据传过来的地址,去寻找静态资源。找到后,利用socket的output,将文件响应给浏览器(这里chrome浏览器无法解析字节bytes数组,需要使用其他浏览器)
- package test.pyrmont;
- import java.io.InputStream;
- import java.io.IOException;
- public class Request {
- private InputStream input;
- private String uri;
- public Request(InputStream input) {
- this.input = input;
- }
- public void parse() {
- // Read a set of characters from the socket
- StringBuffer request = new StringBuffer(2048);
- int i;
- byte[] buffer = new byte[2048];
- try {
- i = input.read(buffer);
- }
- catch (IOException e) {
- e.printStackTrace();
- i = -1;
- }
- for (int j=0; j<i; j++) {
- request.append((char) buffer[j]);
- }
- uri = parseUri(request.toString());
- }
- private String parseUri(String requestString) {
- int index1, index2;
- index1 = requestString.indexOf(' ');
- if (index1 != -1) {
- index2 = requestString.indexOf(' ', index1 + 1);
- if (index2 > index1)
- return requestString.substring(index1 + 1, index2);
- }
- return null;
- }
- public String getUri() {
- return uri;
- }
- }
Request
- package test.pyrmont;
- import com.sun.org.apache.xpath.internal.SourceTree;
- import java.io.OutputStream;
- import java.io.IOException;
- import java.io.FileInputStream;
- import java.io.File;
- import java.util.Arrays;
- /*
- HTTP Response = Status-Line
- *(( general-header | response-header | entity-header ) CRLF)
- CRLF
- [ message-body ]
- Status-Line = HTTP-Version SP Status-Code SP Reason-Phrase CRLF
- */
- public class Response {
- private static final int BUFFER_SIZE = 1024;
- Request request;
- OutputStream output;
- public Response(OutputStream output) {
- this.output = output;
- }
- public void setRequest(Request request) {
- this.request = request;
- }
- public void sendStaticResource() throws IOException {
- byte[] bytes = new byte[BUFFER_SIZE];
- FileInputStream fis = null;
- try {
- File file = new File(HttpServer.WEB_ROOT, request.getUri());
- if (file.exists()) {
- fis = new FileInputStream(file);
- int ch = fis.read(bytes, 0, BUFFER_SIZE);
- while (ch!=-1) {
- output.write(bytes, 0, ch);
- ch = fis.read(bytes, 0, BUFFER_SIZE);
- }
- }
- else {
- // file not found
- String errorMessage = "HTTP/1.1 404 File Not Found\r\n" +
- "Content-Type: text/html\r\n" +
- "Content-Length: 23\r\n" +
- "\r\n" +
- "<h1>File Not Found</h1>";
- output.write(errorMessage.getBytes());
- }
- }
- catch (Exception e) {
- // thrown if cannot instantiate a File object
- System.out.println(e.toString() );
- }
- finally {
- if (fis!=null)
- fis.close();
- }
- }
- }
Response
以上我们就实现了一个建议的web服务器,其功能是根据uri来请求服务器上的静态资源。
一个简单的Servlet容器
Servlet接口:
- void init(ServletConfig var1) throws ServletException;
- ServletConfig getServletConfig();
- void service(ServletRequest var1, ServletResponse var2) throws ServletException, IOException;
- String getServletInfo();
- void destroy();
- }
其中init()、service()、destroy()三个方法是servlet的生命周期方法。
在servlet类被初始化之后,init()方法被servlet所调用,且只调用一次,表明,servlet已经被加载进服务了。因此,init方法必须在servlet可以接受任何请求之前成功运行完毕。程序员可以在init方法里覆盖的写一些只运行一次的代码。或者留空。
servlet容器调用service方法来处理servlet请求。servlet容器会传递一个javax.servlet.ServletRequest对象和javax.servlet.ServletResponse对象。Request对象包括客户端的HTTP请求信息,而response对象封装servlet的响应。service方法会被调用很多次。
servlet容器调用destroy方法来移除一个servlet实例。如果servlet容器正在被关闭或者servlet容器需要空闲内存,当所有servlet线程的service方法退出了,该函数才会被调用。
实现一个简易的servlet类
- package test.servlet;
- import javax.servlet.*;
- import java.io.IOException;
- import java.io.PrintWriter;
- public class PrimitiveServlet implements Servlet {
- public void init(ServletConfig servletConfig) throws ServletException {
- System.out.println("init");
- }
- public ServletConfig getServletConfig() {
- return null;
- }
- public void service(ServletRequest servletRequest, ServletResponse servletResponse) throws ServletException, IOException {
- System.out.println("from service");
- PrintWriter out = servletResponse.getWriter();
- out.println("Hello. Roses are red.");
- out.print("Violets are blue.");
- }
- public String getServletInfo() {
- return null;
- }
- public void destroy() {
- System.out.println("destroy");
- }
- }
PrimitiveServlet
这是一个很简单的servlet的实现类,其中service方法只向浏览器输出一句话。
然后实现一个简单的servlet容器。HttpServer1
- package test.servlet;
- import java.net.Socket;
- import java.net.ServerSocket;
- import java.net.InetAddress;
- import java.io.InputStream;
- import java.io.OutputStream;
- import java.io.IOException;
- public class HttpServer1 {
- /** WEB_ROOT is the directory where our HTML and other files reside.
- * For this package, WEB_ROOT is the "webroot" directory under the working
- * directory.
- * The working directory is the location in the file system
- * from where the java command was invoked.
- */
- // shutdown command
- private static final String SHUTDOWN_COMMAND = "/SHUTDOWN";
- // the shutdown command received
- private boolean shutdown = false;
- public static void main(String[] args) {
- HttpServer1 server = new HttpServer1();
- server.await();
- }
- public void await() {
- ServerSocket serverSocket = null;
- int port = 8080;
- try {
- serverSocket = new ServerSocket(port, 1, InetAddress.getByName("127.0.0.1"));
- }
- catch (IOException e) {
- e.printStackTrace();
- System.exit(1);
- }
- // Loop waiting for a request
- while (!shutdown) {
- Socket socket = null;
- InputStream input = null;
- OutputStream output = null;
- try {
- socket = serverSocket.accept();
- input = socket.getInputStream();
- output = socket.getOutputStream();
- // create Request object and parse
- Request request = new Request(input);
- request.parse();
- // create Response object
- Response response = new Response(output);
- response.setRequest(request);
- // check if this is a request for a servlet or a static resource
- // a request for a servlet begins with "/servlet/"
- if (request.getUri().startsWith("/servlet/")) {
- ServletProcessor1 processor = new ServletProcessor1();
- processor.process(request, response);
- }
- else {
- StaticResourceProcessor processor = new StaticResourceProcessor();
- processor.process(request, response);
- }
- // Close the socket
- socket.close();
- //check if the previous URI is a shutdown command
- shutdown = request.getUri().equals(SHUTDOWN_COMMAND);
- }
- catch (Exception e) {
- e.printStackTrace();
- System.exit(1);
- }
- }
- }
- }
HttpServer1
和之前写的服务器代码一样,之前写的服务器可以申请静态资源,而该服务器可以申请servlet资源。
- if (request.getUri().startsWith("/servlet/")) {
- ServletProcessor1 processor = new ServletProcessor1();
- processor.process(request, response);
- }
- else {
- StaticResourceProcessor processor = new StaticResourceProcessor();
- processor.process(request, response);
- }
上面的代码就是,当申请地址有servlet目录的时候,我们需要申请一个servlet资源,如果没有,就申请静态资源。
- package test.servlet;
- import java.io.File;
- import java.io.IOException;
- import java.net.URL;
- import java.net.URLClassLoader;
- import java.net.URLStreamHandler;
- import javax.servlet.Servlet;
- import javax.servlet.ServletRequest;
- import javax.servlet.ServletResponse;
- public class ServletProcessor1 {
- public void process(Request request, Response response) {
- String uri = request.getUri();
- String servletName = uri.substring(uri.lastIndexOf("/") + 1);
- URLClassLoader loader = null;
- try {
- // create a URLClassLoader
- URL[] urls = new URL[1];
- URLStreamHandler streamHandler = null;
- File classPath = new File(Constants.WEB_ROOT);
- // the forming of repository is taken from the createClassLoader method in
- // org.apache.catalina.startup.ClassLoaderFactory
- String repository = (new URL("file", null, classPath.getCanonicalPath() + File.separator))
- .toString();
- // the code for forming the URL is taken from the addRepository method in
- // org.apache.catalina.loader.StandardClassLoader class.
- urls[0] = new URL(null, repository, streamHandler);
- loader = new URLClassLoader(urls);
- } catch (IOException e) {
- System.out.println(e.toString());
- }
- Class myClass = null;
- try {
- myClass = loader.loadClass(servletName);
- } catch (ClassNotFoundException e) {
- System.out.println(e.toString());
- }
- Servlet servlet = null;
- try {
- servlet = (Servlet) myClass.newInstance();
- servlet.service((ServletRequest) request, (ServletResponse) response);
- } catch (Exception e) {
- System.out.println(e.toString());
- } catch (Throwable e) {
- System.out.println(e.toString());
- }
- }
- }
ServletProcessor1
上面代码是封装了一个servlet资源申请的类,首先需要得到请求的地址,以及servlet的名称。然后创建一个类加载器,类加载器里面需要一个URL对象的数组,URL对象指向了加载类时的查找位置。而URL被认为是一个要被下载的jar包。
而URL的构建,需要一个表示资源的字符串,最后,调用类加载器的loadClass方法来得到该Servlet类,然后使用newInstance方法新建一个Servlet对象,然后调用其service方法。
但上面的ServletProcessor1中有一个问题,我们传request和response对象的时候,可以将Servletrequest对象往下转成Request对象,这样,在处理servlet的类中也可以处理访问静态资源的方法,会造成一定的危害。因此,我们可以创建额外的RequestFacade对象和ResponseFacade对象,然后继承servlet来处理servlet。
- package test.servlet2;
- import java.io.IOException;
- import java.io.BufferedReader;
- import java.io.UnsupportedEncodingException;
- import java.util.Enumeration;
- import java.util.Locale;
- import java.util.Map;
- import javax.servlet.RequestDispatcher;
- import javax.servlet.ServletInputStream;
- import javax.servlet.ServletRequest;
- public class RequestFacade implements ServletRequest {
- private ServletRequest request = null;
- public RequestFacade(Request request) {
- this.request = request;
- }
- /* implementation of the ServletRequest*/
- public Object getAttribute(String attribute) {
- return request.getAttribute(attribute);
- }
- public Enumeration getAttributeNames() {
- return request.getAttributeNames();
- }
- public String getRealPath(String path) {
- return request.getRealPath(path);
- }
- public int getRemotePort() {
- return request.getRemotePort();
- }
- public String getLocalName() {
- return request.getLocalName();
- }
- public String getLocalAddr() {
- return request.getLocalAddr();
- }
- public int getLocalPort() {
- return request.getLocalPort();
- }
- public RequestDispatcher getRequestDispatcher(String path) {
- return request.getRequestDispatcher(path);
- }
- public boolean isSecure() {
- return request.isSecure();
- }
- public String getCharacterEncoding() {
- return request.getCharacterEncoding();
- }
- public int getContentLength() {
- return request.getContentLength();
- }
- public String getContentType() {
- return request.getContentType();
- }
- public ServletInputStream getInputStream() throws IOException {
- return request.getInputStream();
- }
- public Locale getLocale() {
- return request.getLocale();
- }
- public Enumeration getLocales() {
- return request.getLocales();
- }
- public String getParameter(String name) {
- return request.getParameter(name);
- }
- public Map getParameterMap() {
- return request.getParameterMap();
- }
- public Enumeration getParameterNames() {
- return request.getParameterNames();
- }
- public String[] getParameterValues(String parameter) {
- return request.getParameterValues(parameter);
- }
- public String getProtocol() {
- return request.getProtocol();
- }
- public BufferedReader getReader() throws IOException {
- return request.getReader();
- }
- public String getRemoteAddr() {
- return request.getRemoteAddr();
- }
- public String getRemoteHost() {
- return request.getRemoteHost();
- }
- public String getScheme() {
- return request.getScheme();
- }
- public String getServerName() {
- return request.getServerName();
- }
- public int getServerPort() {
- return request.getServerPort();
- }
- public void removeAttribute(String attribute) {
- request.removeAttribute(attribute);
- }
- public void setAttribute(String key, Object value) {
- request.setAttribute(key, value);
- }
- public void setCharacterEncoding(String encoding)
- throws UnsupportedEncodingException {
- request.setCharacterEncoding(encoding);
- }
- }
RequestFacade
- package test.servlet2;
- import java.io.IOException;
- import java.io.PrintWriter;
- import java.util.Locale;
- import javax.servlet.ServletOutputStream;
- import javax.servlet.ServletResponse;
- public class ResponseFacade implements ServletResponse {
- private ServletResponse response;
- public ResponseFacade(Response response) {
- this.response = response;
- }
- public void flushBuffer() throws IOException {
- response.flushBuffer();
- }
- public int getBufferSize() {
- return response.getBufferSize();
- }
- public String getCharacterEncoding() {
- return response.getCharacterEncoding();
- }
- public String getContentType() {
- return response.getContentType();
- }
- public Locale getLocale() {
- return response.getLocale();
- }
- public ServletOutputStream getOutputStream() throws IOException {
- return response.getOutputStream();
- }
- public PrintWriter getWriter() throws IOException {
- return response.getWriter();
- }
- public void setCharacterEncoding(String s) {
- }
- public boolean isCommitted() {
- return response.isCommitted();
- }
- public void reset() {
- response.reset();
- }
- public void resetBuffer() {
- response.resetBuffer();
- }
- public void setBufferSize(int size) {
- response.setBufferSize(size);
- }
- public void setContentLength(int length) {
- response.setContentLength(length);
- }
- public void setContentType(String type) {
- response.setContentType(type);
- }
- public void setLocale(Locale locale) {
- response.setLocale(locale);
- }
- }
ResponseFacade
- package test.servlet2;
- import java.io.File;
- import java.io.IOException;
- import java.net.URL;
- import java.net.URLClassLoader;
- import java.net.URLStreamHandler;
- import javax.servlet.Servlet;
- import javax.servlet.ServletRequest;
- import javax.servlet.ServletResponse;
- public class ServletProcessor2 {
- public void process(Request request, Response response) {
- String uri = request.getUri();
- String servletName = uri.substring(uri.lastIndexOf("/") + 1);
- URLClassLoader loader = null;
- try {
- // create a URLClassLoader
- URL[] urls = new URL[1];
- URLStreamHandler streamHandler = null;
- File classPath = new File(Constants.WEB_ROOT);
- // the forming of repository is taken from the createClassLoader method in
- // org.apache.catalina.startup.ClassLoaderFactory
- String repository = (new URL("file", null, classPath.getCanonicalPath() + File.separator))
- .toString();
- // the code for forming the URL is taken from the addRepository method in
- // org.apache.catalina.loader.StandardClassLoader class.
- urls[0] = new URL(null, repository, streamHandler);
- loader = new URLClassLoader(urls);
- } catch (IOException e) {
- System.out.println(e.toString());
- }
- Class myClass = null;
- try {
- myClass = loader.loadClass(servletName);
- } catch (ClassNotFoundException e) {
- System.out.println(e.toString());
- }
- Servlet servlet = null;
- RequestFacade requestFacade = new RequestFacade(request);
- ResponseFacade responseFacade = new ResponseFacade(response);
- try {
- servlet = (Servlet) myClass.newInstance();
- servlet.service((ServletRequest) requestFacade, (ServletResponse) responseFacade);
- } catch (Exception e) {
- System.out.println(e.toString());
- } catch (Throwable e) {
- System.out.println(e.toString());
- }
- }
- }
ServletProcessor2
到目前为止,可以总结一下:一个简单的Web服务器,需要有申请静态资源和动态资源的功能,我们在浏览器上发出请求,然后服务器响应。服务器响应主要用到ServerSocket,通过接收intput,响应output来处理数据。我们通过封装request和response对象,将input和out封装起来,最后响应回去。对于request来说,它接收到了浏览器传过来的input字节流,需要将字节流转换为字节数组,然后转换为字符串。得到请求的地址。然后我们根据这个地址字符串来判断该请求是请求静态资源还是servlet,如果请求静态资源,那么直接调用response的发送资源函数即可,该函数将通过地址来寻找文件,找到后将其转换为out字节流传回浏览器,浏览器会自行渲染。如果请求的是servlet,那么服务器会得到该servlet的地址以及名字,然后创建一个类加载器,根据地址来寻找该servlet的字节码文件,找到后加载为一个类,然后根据newInstance方法来创建一个servlet对象,该servlet对象的类型是我们自己定义的servlet类的对象,然后调用servlet对象的service方法来执行。
连接器:
三个模块:
startup模块,Bootstrap,用来启动应用。
connector模块:连接器和其支撑类(HttpConnector和HttpProcessor)、指代HTTP请求的类(HttpRequest)和它的辅助类、指代HTTP响应的类(HttpResponse)和它的辅助类、Facade类(HttpRequestFacade和HttpResponseFacade)、
Constant类
core模块:ServletProcessor和StaticResourceProcessor。
将HttpServer类分为HttpConnector和HttpProcessor。其中HttpConnector类用来等待http请求,而HttpProcessor用来创建请求和响应对象。
而且Http请求对象实现了javax.servlet.http.HttpServletRequest接口。一个HttpRequest对象会被转换为HttpServletRequest实例,然后传递给被调用的servlet的service方法。HttpRequest对象,包括URI,查询字符串,参数,cookies和其他
的头部等等。连接器不会先去解析request的所有字段,而是等servlet需要的时候才会去解析。
启动应用程序:Bootstrap类。其实就是开启连接器,因为连接器等待http请求。
- package test.servlet3.startup;
- import test.servlet3.connector.http.HttpConnector;
- public final class Bootstrap {
- public static void main(String[] args) {
- HttpConnector connector = new HttpConnector();
- connector.start();
- }
- }
这个启动类很简单,HttpConnector继承了Runnable接口,然后自己开了一个线程,启动类开启此线程即可。
接下来看 HttpConnector类,此类负责等待客户端请求,拿到socket。
- package test.servlet3.connector.http;
- import java.io.IOException;
- import java.net.InetAddress;
- import java.net.ServerSocket;
- import java.net.Socket;
- public class HttpConnector implements Runnable {
- boolean stopped;
- private String scheme = "http";
- public void run() {
- ServerSocket serverSocket = null;
- int port = 8080;
- try {
- serverSocket = new ServerSocket(port, 1, InetAddress.getByName("127.0.0.1"));
- }
- catch (IOException e) {
- e.printStackTrace();
- System.exit(1);
- }
- while (!stopped) {
- // Accept the next incoming connection from the server socket
- Socket socket = null;
- try {
- socket = serverSocket.accept();
- }
- catch (Exception e) {
- continue;
- }
- //这里实际上就是将服务器接收到的套接字交给配套的函数,让其去创建request和response对象。
- HttpProcessor processor = new HttpProcessor(this);
- processor.process(socket);
- }
- }
- public void start() {
- Thread thread = new Thread(this);
- thread.start();
- }
- }
HttpConnector
其中重要的是
- HttpProcessor processor = new HttpProcessor(this);
- processor.process(socket);
这个一个处理类,将socket传过去去处理,主要是创建Request对象和Response对象。
- package test.servlet3.connector.http;
- import org.apache.catalina.util.RequestUtil;
- import org.apache.catalina.util.StringManager;
- import javax.servlet.ServletException;
- import javax.servlet.http.Cookie;
- import java.io.IOException;
- import java.io.OutputStream;
- import java.net.Socket;
- /* this class used to be called HttpServer */
- public class HttpProcessor {
- public HttpProcessor(HttpConnector connector) {
- this.connector = connector;
- }
- /**
- * The HttpConnector with which this processor is associated.
- */
- private HttpConnector connector = null;
- private HttpRequest request;
- private HttpRequestLine requestLine = new HttpRequestLine(); //请求行使用默认
- private HttpResponse response;
- protected String method = null;
- protected String queryString = null;
- /**
- * The string manager for this package.
- */
- protected StringManager sm =
- StringManager.getManager("test.servlet3.connector.http");
- public void process(Socket socket) {
- SocketInputStream input = null; //自己定义了一个继承InputStream的流处理类
- OutputStream output = null;
- try {
- input = new SocketInputStream(socket.getInputStream(), 2048); //初始化input,得到请求传过来的数据。
- output = socket.getOutputStream();//为响应做准备
- // create HttpRequest object and parse
- request = new HttpRequest(input); //根据input来创建一个request对象。
- // create HttpResponse object
- response = new HttpResponse(output);//根据output来创建一个response对象。
- //设置response对象。
- response.setRequest(request); //将请求传入
- response.setHeader("Server", "Pyrmont Servlet Container"); //设置响应头
- //响应里面很多都留空。
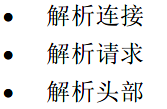
- parseRequest(input, output); //解析请求
- parseHeaders(input);
- //check if this is a request for a servlet or a static resource
- //a request for a servlet begins with "/servlet/"
- if (request.getRequestURI().startsWith("/servlet/")) {
- ServletProcessor processor = new ServletProcessor();
- processor.process(request, response);
- }
- else {
- StaticResourceProcessor processor = new StaticResourceProcessor();
- processor.process(request, response);
- }
- // Close the socket
- socket.close();
- // no shutdown for this application
- }
- catch (Exception e) {
- e.printStackTrace();
- }
- }
- /**
- * This method is the simplified version of the similar method in
- * org.apache.catalina.connector.http.HttpProcessor.
- * However, this method only parses some "easy" headers, such as
- * "cookie", "content-length", and "content-type", and ignore other headers.
- * @param input The input stream connected to our socket
- *
- * @exception IOException if an input/output error occurs
- * @exception ServletException if a parsing error occurs
- */
- private void parseHeaders(SocketInputStream input)
- throws IOException, ServletException {
- while (true) {
- HttpHeader header = new HttpHeader();;
- // Read the next header
- input.readHeader(header);
- if (header.nameEnd == 0) {
- if (header.valueEnd == 0) {
- return;
- }
- else {
- throw new ServletException
- (sm.getString("httpProcessor.parseHeaders.colon"));
- }
- }
- String name = new String(header.name, 0, header.nameEnd);
- String value = new String(header.value, 0, header.valueEnd);
- request.addHeader(name, value);
- // do something for some headers, ignore others.
- if (name.equals("cookie")) {
- Cookie cookies[] = RequestUtil.parseCookieHeader(value);
- for (int i = 0; i < cookies.length; i++) {
- if (cookies[i].getName().equals("jsessionid")) {
- // Override anything requested in the URL
- if (!request.isRequestedSessionIdFromCookie()) {
- // Accept only the first session id cookie
- request.setRequestedSessionId(cookies[i].getValue());
- request.setRequestedSessionCookie(true);
- request.setRequestedSessionURL(false);
- }
- }
- request.addCookie(cookies[i]);
- }
- }
- else if (name.equals("content-length")) {
- int n = -1;
- try {
- n = Integer.parseInt(value);
- }
- catch (Exception e) {
- throw new ServletException(sm.getString("httpProcessor.parseHeaders.contentLength"));
- }
- request.setContentLength(n);
- }
- else if (name.equals("content-type")) {
- request.setContentType(value);
- }
- } //end while
- }
- //解析请求
- private void parseRequest(SocketInputStream input, OutputStream output)
- throws IOException, ServletException {
- // Parse the incoming request line
- input.readRequestLine(requestLine); //阅读请求行
- String method =
- new String(requestLine.method, 0, requestLine.methodEnd); //得到请求行的方法,get还是post
- String uri = null;
- String protocol = new String(requestLine.protocol, 0, requestLine.protocolEnd);//得到请求行的协议。
- // Validate the incoming request line
- if (method.length() < 1) {
- throw new ServletException("Missing HTTP request method");
- }
- else if (requestLine.uriEnd < 1) {
- throw new ServletException("Missing HTTP request URI");
- }
- // Parse any query parameters out of the request URI
- int question = requestLine.indexOf("?");
- if (question >= 0) {
- request.setQueryString(new String(requestLine.uri, question + 1,
- requestLine.uriEnd - question - 1)); //给request设置查询字符串。
- uri = new String(requestLine.uri, 0, question); //得到uri
- }
- else {
- request.setQueryString(null);
- uri = new String(requestLine.uri, 0, requestLine.uriEnd);
- }
- // Checking for an absolute URI (with the HTTP protocol) 查看是不是一个绝对路径
- if (!uri.startsWith("/")) {
- int pos = uri.indexOf("://");
- // Parsing out protocol and host name
- if (pos != -1) {
- pos = uri.indexOf('/', pos + 3);
- if (pos == -1) {
- uri = "";
- }
- else {
- uri = uri.substring(pos);
- }
- }
- }
- // Parse any requested session ID out of the request URI 从uri中解析会话id
- String match = ";jsessionid=";
- int semicolon = uri.indexOf(match);
- if (semicolon >= 0) {
- String rest = uri.substring(semicolon + match.length());
- int semicolon2 = rest.indexOf(';');
- if (semicolon2 >= 0) {
- request.setRequestedSessionId(rest.substring(0, semicolon2));
- rest = rest.substring(semicolon2);
- }
- else {
- request.setRequestedSessionId(rest);
- rest = "";
- }
- request.setRequestedSessionURL(true);
- uri = uri.substring(0, semicolon) + rest;
- }
- else {
- request.setRequestedSessionId(null);
- request.setRequestedSessionURL(false); //最终给request设置了一个会话id
- }
- // Normalize URI (using String operations at the moment)
- String normalizedUri = normalize(uri);
- // Set the corresponding request properties
- ((HttpRequest) request).setMethod(method);
- request.setProtocol(protocol); //给request设置method和协议。
- if (normalizedUri != null) {
- ((HttpRequest) request).setRequestURI(normalizedUri);
- }
- else {
- ((HttpRequest) request).setRequestURI(uri);//给request设置uri
- }
- if (normalizedUri == null) {
- throw new ServletException("Invalid URI: " + uri + "'");
- }
- }
- /**
- * Return a context-relative path, beginning with a "/", that represents
- * the canonical version of the specified path after ".." and "." elements
- * are resolved out. If the specified path attempts to go outside the
- * boundaries of the current context (i.e. too many ".." path elements
- * are present), return <code>null</code> instead.
- *
- * @param path Path to be normalized
- */
- protected String normalize(String path) {
- if (path == null)
- return null;
- // Create a place for the normalized path
- String normalized = path;
- // Normalize "/%7E" and "/%7e" at the beginning to "/~"
- if (normalized.startsWith("/%7E") || normalized.startsWith("/%7e"))
- normalized = "/~" + normalized.substring(4);
- // Prevent encoding '%', '/', '.' and '\', which are special reserved
- // characters
- if ((normalized.indexOf("%25") >= 0)
- || (normalized.indexOf("%2F") >= 0)
- || (normalized.indexOf("%2E") >= 0)
- || (normalized.indexOf("%5C") >= 0)
- || (normalized.indexOf("%2f") >= 0)
- || (normalized.indexOf("%2e") >= 0)
- || (normalized.indexOf("%5c") >= 0)) {
- return null;
- }
- if (normalized.equals("/."))
- return "/";
- // Normalize the slashes and add leading slash if necessary
- if (normalized.indexOf('\\') >= 0)
- normalized = normalized.replace('\\', '/');
- if (!normalized.startsWith("/"))
- normalized = "/" + normalized;
- // Resolve occurrences of "//" in the normalized path
- while (true) {
- int index = normalized.indexOf("//");
- if (index < 0)
- break;
- normalized = normalized.substring(0, index) +
- normalized.substring(index + 1);
- }
- // Resolve occurrences of "/./" in the normalized path
- while (true) {
- int index = normalized.indexOf("/./");
- if (index < 0)
- break;
- normalized = normalized.substring(0, index) +
- normalized.substring(index + 2);
- }
- // Resolve occurrences of "/../" in the normalized path
- while (true) {
- int index = normalized.indexOf("/../");
- if (index < 0)
- break;
- if (index == 0)
- return (null); // Trying to go outside our context
- int index2 = normalized.lastIndexOf('/', index - 1);
- normalized = normalized.substring(0, index2) +
- normalized.substring(index + 3);
- }
- // Declare occurrences of "/..." (three or more dots) to be invalid
- // (on some Windows platforms this walks the directory tree!!!)
- if (normalized.indexOf("/...") >= 0)
- return (null);
- // Return the normalized path that we have completed
- return (normalized);
- }
- }
HttpProcessor
这个类比较复杂,主要就是创建Request对象和Response对象,在实现上,使用了process方法。可以依次解释:
首先,这个类需要字段,毋庸置疑,有Request对象和Response对象,其他不是很重要。
可以先来看Request对象:
- package test.servlet3.connector.http;
- import org.apache.catalina.util.Enumerator;
- import org.apache.catalina.util.ParameterMap;
- import org.apache.catalina.util.RequestUtil;
- import javax.servlet.RequestDispatcher;
- import javax.servlet.ServletInputStream;
- import javax.servlet.http.Cookie;
- import javax.servlet.http.HttpServletRequest;
- import javax.servlet.http.HttpSession;
- import java.io.*;
- import java.net.InetAddress;
- import java.net.Socket;
- import java.security.Principal;
- import java.text.SimpleDateFormat;
- import java.util.*;
- public class HttpRequest implements HttpServletRequest {
- private String contentType;
- private int contentLength;
- private InetAddress inetAddress;
- private InputStream input;
- private String method;
- private String protocol;
- private String queryString;
- private String requestURI;
- private String serverName;
- private int serverPort;
- private Socket socket;
- private boolean requestedSessionCookie;
- private String requestedSessionId;
- private boolean requestedSessionURL;
- /**
- * The request attributes for this request.
- */
- protected HashMap attributes = new HashMap();
- /**
- * The authorization credentials sent with this Request.
- */
- protected String authorization = null;
- /**
- * The context path for this request.
- */
- protected String contextPath = "";
- /**
- * The set of cookies associated with this Request.
- */
- protected ArrayList cookies = new ArrayList();
- /**
- * An empty collection to use for returning empty Enumerations. Do not
- * add any elements to this collection!
- */
- protected static ArrayList empty = new ArrayList();
- /**
- * The set of SimpleDateFormat formats to use in getDateHeader().
- */
- protected SimpleDateFormat formats[] = {
- new SimpleDateFormat("EEE, dd MMM yyyy HH:mm:ss zzz", Locale.US),
- new SimpleDateFormat("EEEEEE, dd-MMM-yy HH:mm:ss zzz", Locale.US),
- new SimpleDateFormat("EEE MMMM d HH:mm:ss yyyy", Locale.US)
- };
- /**
- * The HTTP headers associated with this Request, keyed by name. The
- * values are ArrayLists of the corresponding header values.
- */
- protected HashMap headers = new HashMap();
- /**
- * The parsed parameters for this request. This is populated only if
- * parameter information is requested via one of the
- * <code>getParameter()</code> family of method calls. The key is the
- * parameter name, while the value is a String array of values for this
- * parameter.
- * <p>
- * <strong>IMPLEMENTATION NOTE</strong> - Once the parameters for a
- * particular request are parsed and stored here, they are not modified.
- * Therefore, application level access to the parameters need not be
- * synchronized.
- */
- protected ParameterMap parameters = null;
- /**
- * Have the parameters for this request been parsed yet?
- */
- protected boolean parsed = false;
- protected String pathInfo = null;
- /**
- * The reader that has been returned by <code>getReader</code>, if any.
- */
- protected BufferedReader reader = null;
- /**
- * The ServletInputStream that has been returned by
- * <code>getInputStream()</code>, if any.
- */
- protected ServletInputStream stream = null;
- public HttpRequest(InputStream input) {
- this.input = input;
- }
- public void addHeader(String name, String value) {
- name = name.toLowerCase();
- synchronized (headers) {
- ArrayList values = (ArrayList) headers.get(name);
- if (values == null) {
- values = new ArrayList();
- headers.put(name, values);
- }
- values.add(value);
- }
- }
- /**
- * Parse the parameters of this request, if it has not already occurred.
- * If parameters are present in both the query string and the request
- * content, they are merged.
- */
- protected void parseParameters() {
- if (parsed)
- return;
- ParameterMap results = parameters;
- if (results == null)
- results = new ParameterMap();
- results.setLocked(false);
- String encoding = getCharacterEncoding();
- if (encoding == null)
- encoding = "ISO-8859-1";
- // Parse any parameters specified in the query string
- String queryString = getQueryString();
- try {
- RequestUtil.parseParameters(results, queryString, encoding);
- }
- catch (UnsupportedEncodingException e) {
- ;
- }
- // Parse any parameters specified in the input stream
- String contentType = getContentType();
- if (contentType == null)
- contentType = "";
- int semicolon = contentType.indexOf(';');
- if (semicolon >= 0) {
- contentType = contentType.substring(0, semicolon).trim();
- }
- else {
- contentType = contentType.trim();
- }
- if ("POST".equals(getMethod()) && (getContentLength() > 0)
- && "application/x-www-form-urlencoded".equals(contentType)) {
- try {
- int max = getContentLength();
- int len = 0;
- byte buf[] = new byte[getContentLength()];
- ServletInputStream is = getInputStream();
- while (len < max) {
- int next = is.read(buf, len, max - len);
- if (next < 0 ) {
- break;
- }
- len += next;
- }
- is.close();
- if (len < max) {
- throw new RuntimeException("Content length mismatch");
- }
- RequestUtil.parseParameters(results, buf, encoding);
- }
- catch (UnsupportedEncodingException ue) {
- ;
- }
- catch (IOException e) {
- throw new RuntimeException("Content read fail");
- }
- }
- // Store the final results
- results.setLocked(true);
- parsed = true;
- parameters = results;
- }
- public void addCookie(Cookie cookie) {
- synchronized (cookies) {
- cookies.add(cookie);
- }
- }
- /**
- * Create and return a ServletInputStream to read the content
- * associated with this Request. The default implementation creates an
- * instance of RequestStream associated with this request, but this can
- * be overridden if necessary.
- *
- * @exception IOException if an input/output error occurs
- */
- public ServletInputStream createInputStream() throws IOException {
- return (new RequestStream(this));
- }
- public InputStream getStream() {
- return input;
- }
- public void setContentLength(int length) {
- this.contentLength = length;
- }
- public void setContentType(String type) {
- this.contentType = type;
- }
- public void setInet(InetAddress inetAddress) {
- this.inetAddress = inetAddress;
- }
- public void setContextPath(String path) {
- if (path == null)
- this.contextPath = "";
- else
- this.contextPath = path;
- }
- public void setMethod(String method) {
- this.method = method;
- }
- public void setPathInfo(String path) {
- this.pathInfo = path;
- }
- public void setProtocol(String protocol) {
- this.protocol = protocol;
- }
- public void setQueryString(String queryString) {
- this.queryString = queryString;
- }
- public void setRequestURI(String requestURI) {
- this.requestURI = requestURI;
- }
- /**
- * Set the name of the server (virtual host) to process this request.
- *
- * @param name The server name
- */
- public void setServerName(String name) {
- this.serverName = name;
- }
- /**
- * Set the port number of the server to process this request.
- *
- * @param port The server port
- */
- public void setServerPort(int port) {
- this.serverPort = port;
- }
- public void setSocket(Socket socket) {
- this.socket = socket;
- }
- /**
- * Set a flag indicating whether or not the requested session ID for this
- * request came in through a cookie. This is normally called by the
- * HTTP Connector, when it parses the request headers.
- *
- * @param flag The new flag
- */
- public void setRequestedSessionCookie(boolean flag) {
- this.requestedSessionCookie = flag;
- }
- public void setRequestedSessionId(String requestedSessionId) {
- this.requestedSessionId = requestedSessionId;
- }
- public void setRequestedSessionURL(boolean flag) {
- requestedSessionURL = flag;
- }
- /* implementation of the HttpServletRequest*/
- public Object getAttribute(String name) {
- synchronized (attributes) {
- return (attributes.get(name));
- }
- }
- public Enumeration getAttributeNames() {
- synchronized (attributes) {
- return (new Enumerator(attributes.keySet()));
- }
- }
- public String getAuthType() {
- return null;
- }
- public String getCharacterEncoding() {
- return null;
- }
- public int getContentLength() {
- return contentLength ;
- }
- public String getContentType() {
- return contentType;
- }
- public String getContextPath() {
- return contextPath;
- }
- public Cookie[] getCookies() {
- synchronized (cookies) {
- if (cookies.size() < 1)
- return (null);
- Cookie results[] = new Cookie[cookies.size()];
- return ((Cookie[]) cookies.toArray(results));
- }
- }
- public long getDateHeader(String name) {
- String value = getHeader(name);
- if (value == null)
- return (-1L);
- // Work around a bug in SimpleDateFormat in pre-JDK1.2b4
- // (Bug Parade bug #4106807)
- value += " ";
- // Attempt to convert the date header in a variety of formats
- for (int i = 0; i < formats.length; i++) {
- try {
- Date date = formats[i].parse(value);
- return (date.getTime());
- }
- catch (ParseException e) {
- ;
- }
- }
- throw new IllegalArgumentException(value);
- }
- public String getHeader(String name) {
- name = name.toLowerCase();
- synchronized (headers) {
- ArrayList values = (ArrayList) headers.get(name);
- if (values != null)
- return ((String) values.get(0));
- else
- return null;
- }
- }
- public Enumeration getHeaderNames() {
- synchronized (headers) {
- return (new Enumerator(headers.keySet()));
- }
- }
- public Enumeration getHeaders(String name) {
- name = name.toLowerCase();
- synchronized (headers) {
- ArrayList values = (ArrayList) headers.get(name);
- if (values != null)
- return (new Enumerator(values));
- else
- return (new Enumerator(empty));
- }
- }
- public ServletInputStream getInputStream() throws IOException {
- if (reader != null)
- throw new IllegalStateException("getInputStream has been called");
- if (stream == null)
- stream = createInputStream();
- return (stream);
- }
- public int getIntHeader(String name) {
- String value = getHeader(name);
- if (value == null)
- return (-1);
- else
- return (Integer.parseInt(value));
- }
- public Locale getLocale() {
- return null;
- }
- public Enumeration getLocales() {
- return null;
- }
- public String getMethod() {
- return method;
- }
- public String getParameter(String name) {
- parseParameters();
- String values[] = (String[]) parameters.get(name);
- if (values != null)
- return (values[0]);
- else
- return (null);
- }
- public Map getParameterMap() {
- parseParameters();
- return (this.parameters);
- }
- public Enumeration getParameterNames() {
- parseParameters();
- return (new Enumerator(parameters.keySet()));
- }
- public String[] getParameterValues(String name) {
- parseParameters();
- String values[] = (String[]) parameters.get(name);
- if (values != null)
- return (values);
- else
- return null;
- }
- public String getPathInfo() {
- return pathInfo;
- }
- public String getPathTranslated() {
- return null;
- }
- public String getProtocol() {
- return protocol;
- }
- public String getQueryString() {
- return queryString;
- }
- public BufferedReader getReader() throws IOException {
- if (stream != null)
- throw new IllegalStateException("getInputStream has been called.");
- if (reader == null) {
- String encoding = getCharacterEncoding();
- if (encoding == null)
- encoding = "ISO-8859-1";
- InputStreamReader isr =
- new InputStreamReader(createInputStream(), encoding);
- reader = new BufferedReader(isr);
- }
- return (reader);
- }
- public String getRealPath(String path) {
- return null;
- }
- public int getRemotePort() {
- return 0;
- }
- public String getLocalName() {
- return null;
- }
- public String getLocalAddr() {
- return null;
- }
- public int getLocalPort() {
- return 0;
- }
- public String getRemoteAddr() {
- return null;
- }
- public String getRemoteHost() {
- return null;
- }
- public String getRemoteUser() {
- return null;
- }
- public RequestDispatcher getRequestDispatcher(String path) {
- return null;
- }
- public String getScheme() {
- return null;
- }
- public String getServerName() {
- return null;
- }
- public int getServerPort() {
- return 0;
- }
- public String getRequestedSessionId() {
- return null;
- }
- public String getRequestURI() {
- return requestURI;
- }
- public StringBuffer getRequestURL() {
- return null;
- }
- public HttpSession getSession() {
- return null;
- }
- public HttpSession getSession(boolean create) {
- return null;
- }
- public String getServletPath() {
- return null;
- }
- public Principal getUserPrincipal() {
- return null;
- }
- public boolean isRequestedSessionIdFromCookie() {
- return false;
- }
- public boolean isRequestedSessionIdFromUrl() {
- return isRequestedSessionIdFromURL();
- }
- public boolean isRequestedSessionIdFromURL() {
- return false;
- }
- public boolean isRequestedSessionIdValid() {
- return false;
- }
- public boolean isSecure() {
- return false;
- }
- public boolean isUserInRole(String role) {
- return false;
- }
- public void removeAttribute(String attribute) {
- }
- public void setAttribute(String key, Object value) {
- }
- /**
- * Set the authorization credentials sent with this request.
- *
- * @param authorization The new authorization credentials
- */
- public void setAuthorization(String authorization) {
- this.authorization = authorization;
- }
- public void setCharacterEncoding(String encoding) throws UnsupportedEncodingException {
- }
- }
HttpRequest
这个类也比较复杂,主要来说,它存储了被解析好的各种字段,
- private String contentType;
- private int contentLength;
- private InetAddress inetAddress;
- private InputStream input;
- private String method;
- private String protocol;
- private String queryString;
- private String requestURI;
通过get/set函数,我们能得到这些字段。
回到HttpProcessor类,继续往下看,此类是如何创建并封装Request类和Response类的。
- response.setRequest(request); //将请求传入
- response.setHeader("Server", "Pyrmont Servlet Container"); //设置响应头
- //响应里面很多都留空。
- parseRequest(input, output); //解析请求
- parseHeaders(input);
关键是parseRequest方法和parseHeaders方法。
parseRequest:作用是解析请求,然后封装Request。
封装好request和response对象之后,可以去申请静态资源和servlet资源。此处不讲了。
Tomcat的默认连接器
一个Tomcat连接器必须满以下条件:

Connector接口:重要的三个方法,getContainer,setContainer, createRequest和createResponse。

HttpConnector类:是Connector接口的一个实现。在tomcat后面版本中此实现已经不存在了。
在默认连接器中,HttpConnector拥有一个HttpProcessor对象池,每个HttpProcessor实例拥有一个独立线程。因此,HttpConnector可以同时处理多个HTTP请求。HttpConnector维护一个HttpProcessor的实例池,从而避免每次创建HttpProcessor实例。这些HttpProcessor实例是存放在一个叫processors的java.io.Stack中:
- private Stack processors = new Stack();
每个HttpProcessor实例负责解析HTTP请求行和头部,并填充请求对象。因此,每个实例关联着一个请求对象和响应对象。类HttpProcessor 的构造方法包括了类HttpConnector 的createRequest和createResponse方法的调用。
HttpConnector类 为Http请求服务,
- while (!stopped) {
- Socket socket = null;
- try {
- socket = serverSocket.accept();
- ...
对于每一个前来的http请求,会通过createProcessor方法来获取一个HttpProcessor实例。这里大多数情况HttpProcessor实例并不是创建一个新的实例,而是从池子里面获取。如果已经达到池子的最大数量,没有实例可取,那么套接字就会简单关闭,前来的请求不会被处理。
- if (processor == null) {
- try {
- log(sm.getString("httpConnector.noProcessor"));
- socket.close();
- }
- ...
- continue;
而得到的HttpProcessor实例实例用于读取套接字的输入流,解析http请求的工作。
- processor.assign(socket);
assign方法不会等到HttpProcessor完成解析工作,而是必须马上返回,以便下一个前来的HTTP请求可以被处理。每个HttpProcessor实例有自己的线程用于解析。
HttpProcessor类让assign方法异步化,HttpProcessor 类实现了java.lang.Runnable 接口,并且每个HttpProcessor 实例运行在称作处理器线程(processor thread)的自身线程上,对HttpConnector 创建的每个HttpProcessor 实例,它的start 方法将被调用,有效的启动了HttpProcessor实例的处理线程。
- public void run() { // Process requests until we receive a shutdown signal
- while (!stopped) { // Wait for the next socket to be assigned
- Socket socket = await();
- if (socket == null)
- continue; // Process the request from this socket
- try { process(socket);
- }
- catch (Throwable t) {
- log("process.invoke", t); } // Finish up this request
- connector.recycle(this); } // Tell threadStop() we have shut ourselves down successfully
- synchronized (threadSync) {
- threadSync.notifyAll();
- }
- }
run方法中的while循环,先去获取一个套接字,处理它,然后调用连接器的recycle方法把当前的HttpProcessor实例退回栈中,
- void recycle(HttpProcessor processor) {
- processors.push(processor);
- }
此处,run方法中while循环在await方法中结束。await方法持有处理线程的控制流,直到从HttpConnector中获取到一个新的套接字。而await方法和assign方法运行在不同的线程上。assign方法从HttpConnector的run方法中调用。我们就说这个线程是HttpConnector实例的run方法运行的处理线程。assign方法是如何通知已经被调用的await方法的?就是通过一个布尔变量available并且使用java.lang.Object的wait和notifyAll方法。
请求对象:
默认连接器哩变得HTTP请求对象指代org.apache.catalina.Request接口。这个接口被类RequestBase直接实现了,也是HttpRequest的父接口。最终的实现是继承于HttpRequest的HttpRequestImpl。
处理请求:在HttpProcessor类的run方法中调用的。process方法会做下面这些工作:
容器:容器是一个处理用户servlet请求并返回对象给web用户的模块,org.apache.catalina.Container接口定义了容器的形式。有四种容器:Engine(引擎), Host(主机), Context(上下文), 和Wrapper(包装器)
容器接口:org.apache.catalina.Container。
容器分类:
Engine:表示整个Catalina的servlet引擎
Host:表示一个拥有数个上下文的虚拟主机
Context:表示一个Web应用,一个context包含一个或多个wrapper
Wrapper:表示一个独立的servlet
每一个概念之上是用org.apache.catalina包来表示的。Engine、Host、Context和Wrapper接口都实现了Container即可。它们的标准实现是StandardEngine,StandardHost, StandardContext, and StandardWrapper,它们都是org.apache.catalina.core包的一部分。
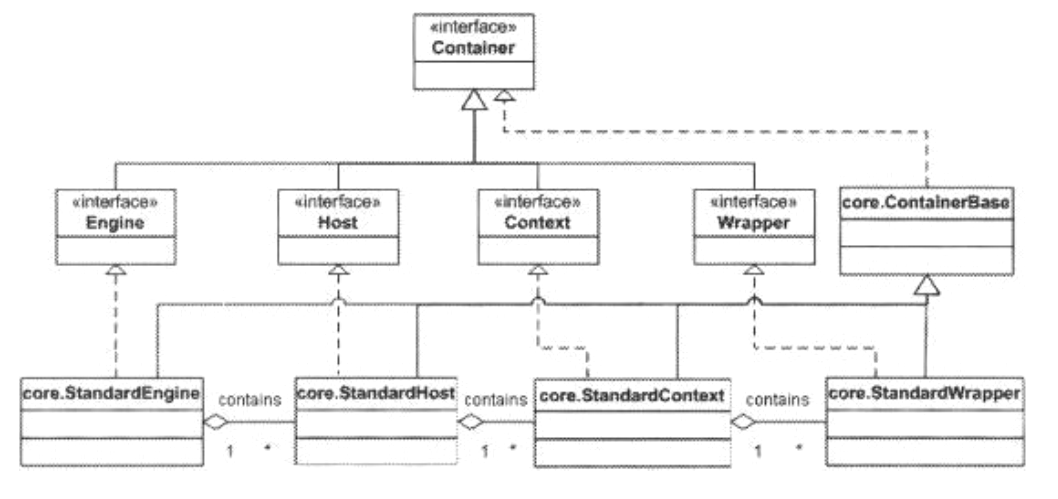
所有的类都扩展自抽象类ContainerBase。
一个容器可以有一个或多个低层次上的子容器。例如,一个Context有一个或多
个wrapper,而wrapper作为容器层次中的最底层,不能包含子容器。一个容器添加到另一容器中可以使用在Container接口中定义的addChild()方法。
- public void addChild(Container child);
删除一个容器可以使用Container接口中定义的removeChild()方法。
- public void removeChild(Container child);
另外容器接口支持子接口查找和获得所有子接口集合的方法findChild和findChildren方法。
- public Container findChild(String name);
- public Container[] findChildren();
一个容器还包含一系列的部分如Lodder、Loggee、Manager、Realm和Resources。
connector调用容器的Invoke方法后做的工作
Pipelining Tasks(流水线任务):一个pipeline包含了改容器要唤醒的所有任务。每一个阀门表示了一个特定的任务。一个容器的流水线有一个基本的阀门,但是你可以添加任意你想要添加的阀门。阀门的数目定义为添加的阀门的个数(不包括基本阀门)。有趣的是,阀门可以痛苦编辑Tomcat的配置文件server.xml来动态的添加。
一个流水线就像一个过滤链,每一个阀门像一个过滤器。跟过滤器一样,一个阀门可以操作传递给它的request和response方法。让一个阀门完成了处理,则进一步处理流水线中的下一个阀门,基本阀门总是在最后才被调用。
当连接器调用容器的invoke()方法后,容器中要执行的任务并没有硬编码在invoke()方法中,而是容器会调用pipeline中的invoke()方法。管道必须保证添加到其中的所有阀及基础阀都必须被调用一次。通过创建一个ValveContext接口实例来实现的。其中ValveContext重要的方法是invokeNext(),这样管道会遍历所有的阀。

阀是实现了Valve接口的实例。用来处理收到的请求,该接口有两个方法,invoke()方法和getInfo()方法。getInfo方法返回阀的实现信息。
Wrapper接口:
Wrapper级容器的servlet容器表示独立servlet定义。其接口的实现类要负责管理其基础servlet类的servlet生命周期。即调用servlet的init()、service()、destroy()等方法。由于Wrapper已经是最低级的servlet容器,因此不能往里添加子容器。若Wrapper的addChild()方法被调用,则抛异常。
Wrapper接口中比较重要的方法是load()和allocate()方法。allocate()方法会分配一个已经初始化的servlet实例。load方法加载并初始化servlet类。
Context接口:
Context接口的实例表示一个Web应用程序。一个Context实例可以有一个或者多个Wrapper实例作为其子容器。
Context接口中比较重要的方法是addWrapper()和createWrapper()。
Wrapper应用程序:
展示如何编写一个最小的servlet容器。其核心是实现了Wrapper接口的SimpleWrapper类。SimpleWrapper类包含一个Pipeline实例(SimplePipeline),并使用一个Loader实例(SimpleLoader)来载入servlet类。Pipeline实例包含了一个基础阀和两个额外的阀。
SimpleLoader类:在servlet容器中载入相关servlet类的工作由Loader接口的实例完成。它知道servlet类的位置,通过调用其getClassLoader方法可以返回一个ClassLoader实例。可用来搜索servlet类的位置。
- public SimpleLoader() {
- try {
- URL[] urls = new URL[1];
- URLStreamHandler streamHandler = null;
- File classPath = new File(WEB_ROOT);
- String repository = (new URL("file", null, classPath.getCanonicalPath() + File.separator)).toString() ;
- urls[0] = new URL(null, repository, streamHandler);
- classLoader = new URLClassLoader(urls);
- }
- catch (IOException e) {
- System.out.println(e.toString() );
- }
- }
构造函数中的代码会初始化一个类加载器,其中的变量container指向了与该servlet容器相关联的类加载器。
SimplePipeline类:其中最重要的方法invoke()方法。该方法包含一个内部类SimplePipelineValveContext,实现了ValveContext接口。其中一个重要的方法是:invokeNext()。遍历整个pipeline。
SimpleWrapper类:实现了Wrapper接口,提供了allocate方法和load方法的实现。声明了两个变量:loader和parent。load而变量指明了载入servlet类要使用的载入器,parent指明了该Wrapper实例的父容器。
- private Loader loader;
- protected Container parent = null;
- public Loader getLoader() {
- if (loader != null)
- return (loader);
- if (parent != null)
- return (parent.getLoader());
- return (null);
- }
SimpleWrapper类有一个Pipeline实例,并为该Pipeline实例设置了基础阀,
- public SimpleWrapper() {
- pipeline.setBasic(new SimpleWrapperValve());
- }
SimpleWrapperValve类:是一个基础阀,专门用于处理对SimpleWrapper类的请求。实现了Valve, Contained接口。其中最主要的方法是invoke()方法。
- public void invoke(Request request, Response response, ValveContext valveContext)
- throws IOException, ServletException {
- SimpleWrapper wrapper = (SimpleWrapper) getContainer();
- ServletRequest sreq = request.getRequest();
- ServletResponse sres = response.getResponse();
- Servlet servlet = null;
- HttpServletRequest hreq = null;
- if (sreq instanceof HttpServletRequest)
- hreq = (HttpServletRequest) sreq;
- HttpServletResponse hres = null;
- if (sres instanceof HttpServletResponse)
- hres = (HttpServletResponse) sres;
- // Allocate a servlet instance to process this request
- try {
- servlet = wrapper.allocate();
- if (hres!=null && hreq!=null) {
- servlet.service(hreq, hres);
- }
- else {
- servlet.service(sreq, sres);
- }
- }
- catch (ServletException e) {
- }
- }
该方法直接调用wrapper实例的allocate(),获取servlet,然后直接调用service。
另外两个阀是ClientIPLoggerValve和HeaderLoggerValve。
其中ClientIPLoggerValve类所表示的阀用来将客户端的IP地址输出到控制台上。其中也是调用invoke()。invoke()方法中使用invokeNext()方法来调用管道的下一个阀。
其中HeaderLoggerValve类把请求头信息输出到控制台。其中也是调用invoke()。invoke()方法中使用invokeNext()方法来调用管道的下一个阀。
- HttpConnector connector = new HttpConnector();
- Wrapper wrapper = new SimpleWrapper();
- wrapper.setServletClass("ModernServlet");
- Loader loader = new SimpleLoader();
- Valve valve1 = new HeaderLoggerValve();
- Valve valve2 = new ClientIPLoggerValve();
- wrapper.setLoader(loader);
- ((Pipeline) wrapper).addValve(valve1);
- ((Pipeline) wrapper).addValve(valve2);
- connector.setContainer(wrapper);
- try {
- connector.initialize();
- connector.start();
- // make the application wait until we press a key.
- System.in.read();
- }
- catch (Exception e) {
- e.printStackTrace();
- }
整体来介绍一下该应用:
首先是Bootstrap1类,在该类中创建一个Wrapper实例(SimpleWrapper())。将字符串"Modernservlet"赋值给SimpleWrapper类的setservletClass()方法。告诉Wrapper实例要载入的servlet类的名称。
然后创建了一个载入器和两个阀。并将载入器设置到Wrapper实例中。再将创建的两个阀添加到Wrapper实例的管道中。
最后将Wrapper实例设置为连接器的servlet容器。初始化并启动连接器。
Context应用程序:对于大部分web应用来说,是需要多个servlet合作的,这类应用程序需要的是Context容器。
接下来,展示包含了两个Wrapper实例的Context实例来构建Web应用程序,当应用程序中有多个Wrapper实例的时候,需要使用一个映射器,映射器是组件,帮助servlet容器选择一个子容器来处理某个指定的请求。
SimpleContextMapper类是实现了Mapper接口的映射器。servlet容器可以使用多个映射器来支持不同的协议。在此处,一个映射器支持一个请求协议。例如servlet容器中可以使用一个映射器对HTTP协议的请求进行映射,使用另一个对HTTPS协议的请求进行映射。
Mapper接口的getContainer()方法返回与该映射器相关联的servlet容器的实例。而setContainer()方法则用来将某个servlet容器与该映射器相关联。getProtocol()方法返回该映射器负责处理的协议。setProtocol()方法可以指定该映射器负责处理哪种协议。map()方法返回要处理某个特定请求的子容器的实例。
Context容器是一个SimpleContext类的实例。SimpleContext类使用SimpleContextMapper类的实例作为其映射器,将SimpleContextValve的实例作为其基础阀。Context容器中额外添加两个阀。HeaderLoggerValve和ClientIPLoggerValve。并包含两个Wrapper实例作为其子容器。
- HttpConnector connector = new HttpConnector();
- Wrapper wrapper1 = new SimpleWrapper();
- wrapper1.setName("Primitive");
- wrapper1.setServletClass("PrimitiveServlet");
- Wrapper wrapper2 = new SimpleWrapper();
- wrapper2.setName("Modern");
- wrapper2.setServletClass("ModernServlet");
- Context context = new SimpleContext();
- context.addChild(wrapper1);
- context.addChild(wrapper2);
- Valve valve1 = new HeaderLoggerValve();
- Valve valve2 = new ClientIPLoggerValve();
- ((Pipeline) context).addValve(valve1);
- ((Pipeline) context).addValve(valve2);
- Mapper mapper = new SimpleContextMapper();
- mapper.setProtocol("http");
- context.addMapper(mapper);
- Loader loader = new SimpleLoader();
- context.setLoader(loader);
- // context.addServletMapping(pattern, name);
- context.addServletMapping("/Primitive", "Primitive");
- context.addServletMapping("/Modern", "Modern");
- connector.setContainer(context);
- try {
- connector.initialize();
- connector.start();
- // make the application wait until we press a key.
- System.in.read();
- }
- catch (Exception e) {
- e.printStackTrace();
- }
可以看到,启动类创建了一个连接器HttpConnector,然后创建两个 Wrapper实例,并设置servlet名称;然后创建一个Context实例,将两个Wrapper实例添加到Context里面。然后创建两个阀,也添加到这两个容器里面。然后创建一个映射器,将其加到Context容器里面,创建一个Loader 类,将其加到Context容器里面。
SimpleContext类的invoke()方法调用管道的invoke()方法。
- public void invoke(Request request, Response response)
- throws IOException, ServletException {
- pipeline.invoke(request, response);
- }
来看一下SimplePipeline类的invoke()方法:
- public void invoke(Request request, Response response)
- throws IOException, ServletException {
- // Invoke the first Valve in this pipeline for this request
- (new SimplePipelineValveContext()).invokeNext(request, response);
- }
来看一下SimplePipelineValveContext的invokeNext()方法。
- public void invokeNext(Request request, Response response)
- throws IOException, ServletException {
- int subscript = stage;
- stage = stage + 1;
- // Invoke the requested Valve for the current request thread
- if (subscript < valves.length) {
- valves[subscript].invoke(request, response, this);
- }
- else if ((subscript == valves.length) && (basic != null)) {
- basic.invoke(request, response, this);
- }
- else {
- throw new ServletException("No valve");
- }
- }
以上就是Context容器的实现。
生命周期:
Catalina包含很多组件,当Catalina启动时,组件也会一起启动,当Catalina关闭的时候,组件也会一起关闭。例如:当Servlet容器关闭的时候,它必须调用所有已经载入到容器中的servlet类中的destroy()方法,而Session管理器必须将Session对象保存到辅助存储器中。通过实现Lifecycle接口,可以达到统一启动/关闭这些组件的效果。
实现了Lifecycle接口的组件可以触发一个或者多个下面的事件:
- String INIT_EVENT = "init";
- String START_EVENT = "start";
- String BEFORE_START_EVENT = "before_start";
- String AFTER_START_EVENT = "after_start";
- String STOP_EVENT = "stop";
- String BEFORE_STOP_EVENT = "before_stop";
- String AFTER_STOP_EVENT = "after_stop";
- String DESTROY_EVENT = "destroy";
- String PERIODIC_EVENT = "periodic";
当组件启动时,正常会触发3个事件(start、before_start、after_start)。当组件关闭的时候,会触发后3个事件(before_stop、stop、after_stop)。但需要编写相应的事件监听器对这些事件进行响应,事件监听器是LifecycleListener接口。因此生命周期会有三个类型:Lifecycle、LifecycleEvent和LifecycleListener。
Lifecycle接口:Catalina在设计上允许一个组件包含其他组件。servlet容器可以包含载入器、管理器等。父组件负责启动/关闭它的子组件。Catalina的设计使所有的组件都置于其父组件的监护之下,而Catalina的启动类只需要启动一个组件就可以将全部的应用的组件都启动起来了。这种单一启动/关闭机制是通过Lifecycle接口实现的。
Lifecycle接口中最重要的方法是start方法和stop方法。组件必须提供这两个方法的实现,供父组件调用,实现对其的启动和关闭。其他的addLifecycleListener、findLifecycleListeners、removeLifecycleListener三个方法都与该组件上的事件监听器有关。
LifecycleEvent是一个实例,被final修饰。其中三个字段:
- private Object data;
- private Lifecycle lifecycle;
- private String type;
LifecycleListener接口:只有一个lifecycleEvent方法,当事件监听器监听到相关事件发生,就会调用该方法。
LifecycleSupport类:一个事件监听类的管理类,LifecycleSupport类将所有的生命周期监听器存储在一个名为listeners的数组中,并初始化为一个没有元素的数组对象。当调用addLifecycleListener方法时,会创建一个新数组,大小为原来数组的长度+1,然后将原来的所有元素复制在新数组中,并将新的事件监听器添加在新数组中。removeLifecycleListener方法的过程正好相反。fireLifecycleEvent方法会触发一个生命周期事件,首先它会复制监听器的数组,然后调用数组中的每个成员的lifecycleEvent方法,并传入要触发的事件。
建立在Lifecycle接口基础上的应用程序:
SimpleContext类与之前的相比实现了 Lifecycle接口,SimpleContext类引用LifecycleSupport实例,
- protected LifecycleSupport lifecycle = new LifecycleSupport(this);
然后去实现Lifecycle接口的方法:
- public void addLifecycleListener(LifecycleListener listener) {
- lifecycle.addLifecycleListener(listener);
- }
- public void removeLifecycleListener(LifecycleListener listener) {
- lifecycle.removeLifecycleListener(listener);
- }
start()
- public synchronized void start() throws LifecycleException {
- if (started)
- throw new LifecycleException("SimpleContext has already started");
- // Notify our interested LifecycleListeners
- lifecycle.fireLifecycleEvent(BEFORE_START_EVENT, null);
- started = true;
- try {
- // Start our subordinate components, if any
- if ((loader != null) && (loader instanceof Lifecycle))
- ((Lifecycle) loader).start();
- // Start our child containers, if any
- Container children[] = findChildren();
- for (int i = 0; i < children.length; i++) {
- if (children[i] instanceof Lifecycle)
- ((Lifecycle) children[i]).start();
- }
- // Start the Valves in our pipeline (including the basic),
- // if any
- if (pipeline instanceof Lifecycle)
- ((Lifecycle) pipeline).start();
- // Notify our interested LifecycleListeners
- lifecycle.fireLifecycleEvent(START_EVENT, null);
- }
- catch (Exception e) {
- e.printStackTrace();
- }
- // Notify our interested LifecycleListeners
- lifecycle.fireLifecycleEvent(AFTER_START_EVENT, null);
- }
start()方法会检查组件是否已经启动过了,如果是,则抛出异常。 如果没有,则去触发事件:
- lifecycle.fireLifecycleEvent(BEFORE_START_EVENT, null);
这样SimpleContext实例中对该事件进行监听的所有监听器都会收到通知。接下来,start方法将started的布尔值设置为true,表明组件已经启动。
然后继续去启动SimpleContext实例的组件,Loader组件、pipeline组件、以及Wrapper子容器都实现了Lifecycle接口,都可以运行其start方法去启动。当所有组件都启动完毕,start方法会触发两个事件,
- lifecycle.fireLifecycleEvent(START_EVENT, null);
- lifecycle.fireLifecycleEvent(AFTER_START_EVENT, null);
而stop方法的实现与start逻辑相同。
SimpleContextLifecycleListener类实现了LifecycleListener接口,实现了lifecycleEvent方法,
- public void lifecycleEvent(LifecycleEvent event) {
- Lifecycle lifecycle = event.getLifecycle();
- System.out.println("SimpleContextLifecycleListener's event " +
- event.getType().toString());
- if (Lifecycle.START_EVENT.equals(event.getType())) {
- System.out.println("Starting context.");
- }
- else if (Lifecycle.STOP_EVENT.equals(event.getType())) {
- System.out.println("Stopping context.");
- }
- }
输出已触发事件的类型。
日志记录器:用来记录消息的组件。
Logger接口:Tomcat的日志记录器都必须实现该接口。暂时不说,此接口已不存在
载入器:一个标准的web应用程序的载入器。servlet容器需要实现一个自定义的载入器,而不能简单的使用系统的载入器。因为servlet容器不应该完全信任它正在运行的servlet类,如果使用一个系统类的载入器载入某个servlet类所使用的全部类,那么servlet就能访问所有的类,包括当前运行的java虚拟机中环境变量指明的路径下的所有类和库。而servlet只允许载入WEB-INF/classes目录下及其子目录下的类或者WEB-INF/lib下的类。tomcat需要实现自定义载入器的另一个原因是,为了提高自动重载的功能。当WEB-INF/classes目录和WEB-INF/lib目录下的类发生变化的时候,web应用程序会重新载入这些类。
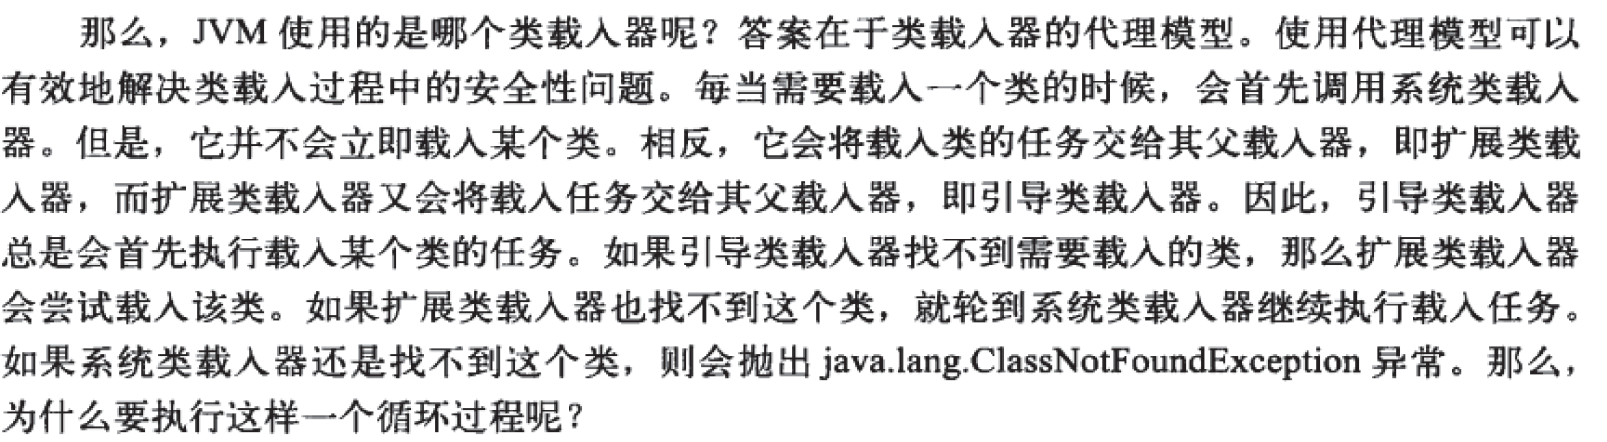
先介绍java的类载入器:每次创建java实例的时候,都必须将类载入到内存去,jvm使用类载入器来载入需要的类,一般情况下,类载入器会在java核心库里面和classpath中指明的目录中搜索相关类。如果找不到这些类,它会抛出类找不到异常。
jvm使用了3中类载入器:引导类载入器(bootstrap class loader)、扩展类载入器(extension class loader)、系统类载入器(system class loader)。3个类载入器之间是父子继承关系。其中引导类在最上层。系统类在最下层。


Tomcat要使用自定义载入器的原因:
在载入web应用程序中需要的servlet类及其相关类时需要遵守一些明确的规则,应用程序中的servlet类只能引用部署在WEB_INF/calsses目录下的类。但是servelt不能访问其他路径的类,即使这些类在包含运行tomcat的jvm的环境变量下,而servlet类只能访问WEB-INF/lib目录下的库。
Loader接口:
Tomcat中的载入器指的是web应用程序的载入器,而不仅仅是指类载入器。载入器必须实现Loader接口。在实现中,会使用一个自定义的类载入器。是WebappClassLoader类的实例,可以使用Loader接口的getclassloader方法来获取web载入器中classLoader类的实例。
Loader接口还定义了一些方法来对仓库的集合进行操作,web程序的WEB-INF/classes目录下及其子目录下的类或者WEB-INF/lib目录是作为仓库添加到类载入器的,使用Loader接口的addRepository方法来添加一个新仓库,而findRepositories方法所有已添加仓库的数组对象。
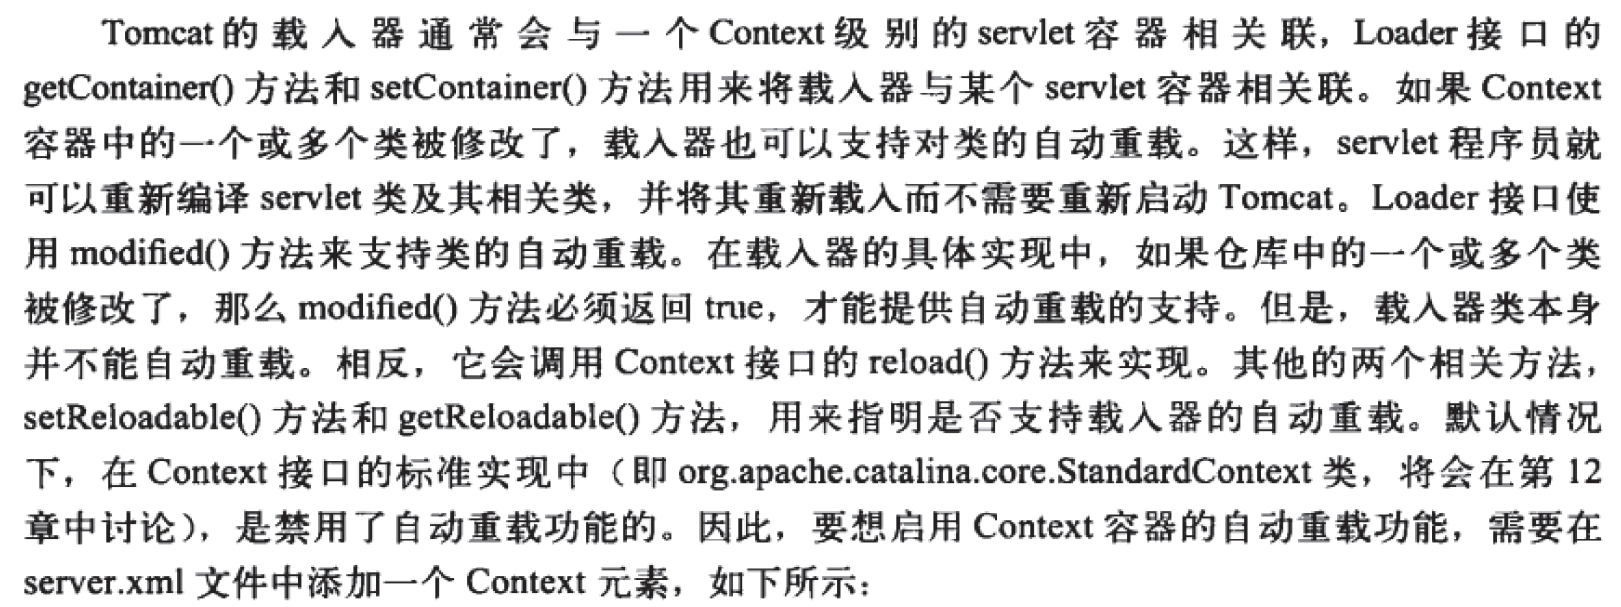
Catalina提供了WebappLoader类作为Loader接口的实现,其中WebappLoader对象中使用了WebappClassLoader类的实例作为其类载入器,该类继承于URLclassLoader类。
ReLoader接口:支持类的自动重载功能。

WebappLoader类:
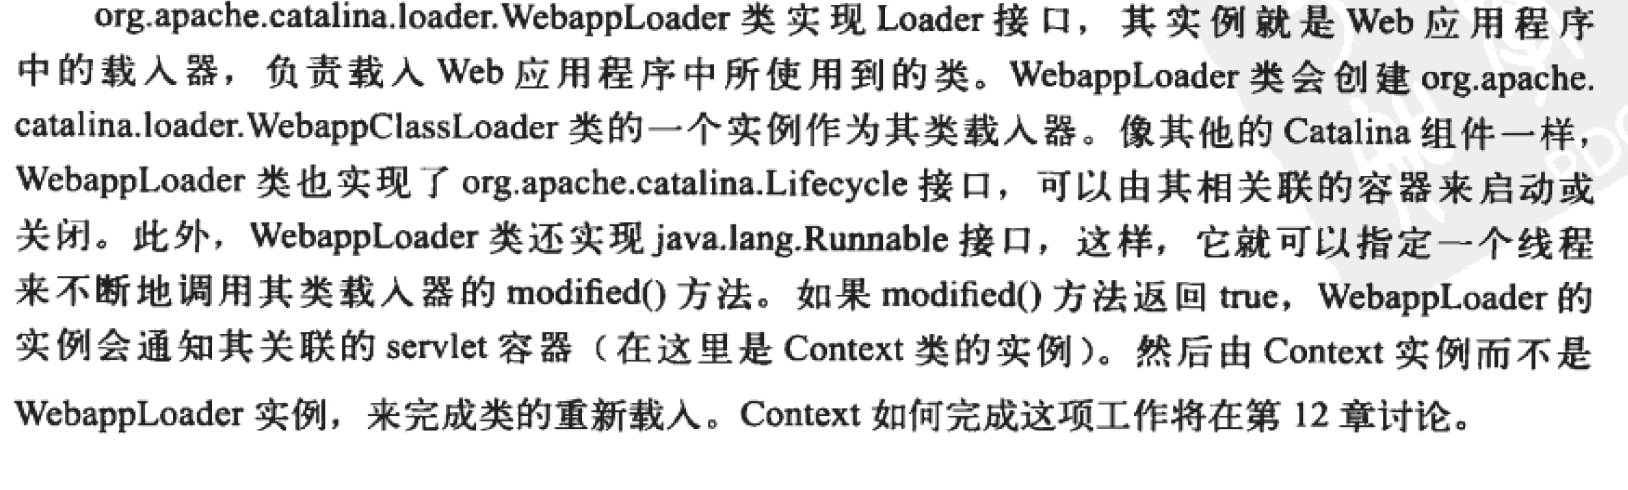
当调用WebappLoader类的start方法时,
1.创建一个类载入器
2.设置仓库
3.设置类路径
4.设置访问权限
5.启动一个新线程来支持自动重载。


WebappClassLoader类,是负责载入类的类加载器,继承于URLClassLoader类。

Session管理:Catalina通过session管理器的组件来管理建立的session对象。该组件由Manager接口表示。Session管理器需要与一个Context容器相关联。Session管理器负责创建、更新、销毁session对象,当有请求到来时,要返回一个有效的session对象。


Session对象:
Session接口:作为catalina内部的Facade类使用
Tomcat之如何自己做一个tomcat的更多相关文章
- 【tomcat ecplise】新下载一个tomcat,无法成功启动,或者启动了无法访问localhost:8080页面/ecplise无法添加新的tomcat/ecplise启动tomcat启动不起来
今天转头使用ecplise,于是新下载一个tomcat7来作为服务器使用 但是问题来了: [问题1:全新的tomcat启动即消耗了不可思议的时间,并且启动了之前其他tomcat中的很多项目] [注意: ...
- tomcat 7 用mod_jk做 负载均衡
在Win7中使用apache为tomcat做负载均衡,各组件及版本如下: 两个tomcat v 7.0.57 一个apache v 2.2.14 一个mod_jk v 1.2.33(for windo ...
- 一个tomcat部署多个应用实例总结
项目组有好几个项目需要运行,之前项目少,一个tomcat对应一个项目还能应付,但现在项目多了,要是再一个tomcat对应一个项目的话,一方面看起来很业余,一方面也加大服务器的维护难度.所以现在需要对t ...
- 构建Logstash+tomcat镜像(让logstash收集tomcat日志)
1.首先pull logstash镜像作为父镜像(logstash的Dockerfile在最下面): 2.构建my-logstash镜像,使其在docker镜像实例化时,可以使用自定义的logstas ...
- 做一个有产品思维的研发:部署(Tomcat配置,Nginx配置,JDK配置)
每天10分钟,解决一个研发问题. 如果你想了解我在做什么,请看<做一个有产品思维的研发:课程大纲>传送门:https://www.cnblogs.com/hunttown/p/104909 ...
- 一个Tomcat及一个ip,绑定不同的域名,各个域名访问各自不同应用程序的配置方法
http://nickandmiles.blog.163.com/blog/static/23422123201110151492166/ 条件是:这样一种实际情况是,就一台服务器,当公网的IP地址也 ...
- 通过一个tomcat端口访问多个tomcat项目 tomcat转发
需求是这样的,有一个tomcat,是80端口,现在我要通过这个tomcat转发到服务器其他tomcat,其他tomcat的端口不是80.这样做就可以避免这样www.baidu.com:8081的情况. ...
- Docker实战之创建一个tomcat容器
一.Docker与虚拟机的区别 二.Docker学习步骤 2.1:安装宿主操作系统 在VMVare中安装了Ubuntu 16.04.2 LTS (GNU/Linux 4.4.0-62-generic ...
- 一个Tomcat配置参数引发的血案
转载:https://mp.weixin.qq.com/s/3IuTcDCTB3yIovp6o_vuKA 一.现象 有用户反馈访问PC首页偶尔会出现白页情况,也偶尔会收到听云的报警短信 二.监控(听云 ...
随机推荐
- 用Python来搞副业?这届大学生到底有多野……
最近,我在知乎上偶然发现一个有意思的问题: 「大学生实习被当作廉价劳动力,你怎么看?」 很多人学习python,不知道从何学起.很多人学习python,掌握了基本语法过后,不知道在哪里寻找案例上手.很 ...
- Linux学习笔记之ubuntu安装与配置
1.打开虚拟机,点击新建虚拟机 2.安装向导 选择自定义安装 点击包含一个空白的硬盘 选择linux操作系统,版本是ubuntu 设置虚拟机的名称,可以自己写,还有保存的位置也可自选 根据自己电脑性能 ...
- 2020-05-26:TCP四次挥手过程?
福哥答案2020-05-26:
- Android 开发学习进程0.16 layout_weight属性 R文件关联XML Module
layout_weight属性 layout_weight属性我们常常用到,但有时候会发现它还有一些奇怪的属性,比如大多数使用时会把宽度设置成0,但要是宽度不设置成0会有什么效果? layout_we ...
- 调试备忘录-RS485 MODBUS RTU协议简述
目录--点击可快速直达 目录 写在前面 先简单说下什么是MODBUS? 参考文章 写在前面 最近在做和物联网有关的小项目,有一个传感器通讯用到了RS485 MODBUS RTU协议,所以就写个随笔记录 ...
- 使用Axure设计基于中继器的左侧导航菜单
实现效果: 使用组件: 设计详解: 一.设计外层菜单 1.拖一个矩形,在属性栏中命名cd1,设置宽高为200*45,背景色#393D49,双击设置按钮名称为“默认展开”,字体大小16,字体颜色#C2C ...
- 走正确的路 - IT业没有护城河 - 机器翻译新锐Deepl
最近发生了一件很令我震惊的事情:新的一个机器翻译网站出现了 - www.deepl.com (DeepL 或许会成为你今年首选的翻译工具) 机器翻译早就是红海市场了.我就不从1954年IBM发布俄翻英 ...
- 关于MapReduce默认分区策略
MapReduce默认分区策略 mapreduce 默认的分区方式是hashPartition,在这种分区方式下,KV对根据key的hashcode值与reduceTask个数进行取模,决定该键值对该 ...
- Java 泛型(参数化类型)
Java 泛型 Java 泛型(generics)是 JDK 5 中引入的一个新特性, 泛型提供了编译时类型安全检测机制,该机制允许程序员在编译时检测到非法的类型. 泛型的本质是参数化类型,也就是说所 ...
- JavaScript学习系列博客_20_JavaScript 作用域
作用域 - 作用域指一个变量的作用的范围 - 在JS中一共有两种作用域 1.全局作用域 - 直接编写在script标签中的JS代码,都在全局作用域- 全局作用域在页面打开时创建,在页面关闭时销毁 - ...