CentOS上部署Apache、MySQL和PHP
centos上yum安装很方便,下面介绍编译安装的方式。
第一步要在CentOS上安装gcc、g++等开发工具
可以从系统光盘上安装,或者
#yum groupinstall "Development tools"
第二步 Apache安装
Apache是Apache HTTP Server的简称,是世界使用排名第一的web服务器软件。官网是http://www.apache.org/。
首先检查系统已安装的httpd。
rpm -qa | grep httpd
如果已安装旧版本的httpd,卸载命令如下:
rpm -e httpd-version.el5.centos --nodeps
如果不带“--nodeps”,系统会提示有依赖关系,不能卸载。加上“--nodeps”后,不会检查依赖关系,只是卸载httpd,跟它有依赖关系的其它软件是不会被删除的。如果使用"yum -y remove httpd",会将与httpd有依赖关系的其它软件也删除。
接下来进行相关软件的安装,包括:
apr: http://apr.apache.org/download.cgi
apr-util: http://apr.apache.org/download.cgi
pcre: http://pcre.org/、 http://sourceforge.net/projects/pcre/
如果不安装,会提示
checking for APR... no

configure: error: APR not found. Please read the documentation.
先选择下载apr,编译安装:
tar zxvf apr-version.tar.gz

cd apr-version

./configure --prefix=/usr/local/apr

make

make install
接着安装apr-util和pcre
tar zxvf apr-util-version.tar.gz

cd apt-util-version

./configure --prefix=/usr/local/apr-util --with-apr=/usr/local/apr

make

make install

tar zxvf pcre-version.tar.gz

cd pcre-version

./configure --prefix=/usr/local/pcre

make

make install
然后安装httpd。
tar zxvf httpd-version.tar.gz

cd httpd-version

./configure --prefix=/usr/local/apache2 --with-ssl=/usr/local/openssl --enable-ssl --enable-so --enable-dav --enable-dav-fs --enable-dav-lock --enable-rewrite --with-apr=/usr/local/apr --with-apr-util=/usr/local/apr-util --with-pcre=/usr/local/pcre

make

make install
注:
1、如果想要启用所有模块:--enable-mods-shared=all
2、一定要加--enable-so,核心才能够装载DSO
3、--enable-dav是安装mod_dav_svn.so跟mod_authz_svn.so这两个模块
4、如果要编译一个多线程版本的Apache,可以在configure时添加--with-mpm=worker
5、如果在安装过程中出现这些错误
make[]: *** [mod_ssl.la] 错误

make[]: Leaving directory `/root/httpd-2.4./modules/ssl'

make[]: *** [shared-build-recursive] 错误

make[]: Leaving directory `/root/httpd-2.4./modules/ssl'

make[]: *** [shared-build-recursive] 错误

make[]: Leaving directory `/root/httpd-2.4./modules'

make[]: *** [shared-build-recursive] 错误

make[]: Leaving directory `/root/httpd-2.4.'

make: *** [all-recursive] 错误
这是因为openssl的版本过低,不需要卸载,可以直接安装新版的openssl。源码安装openssl时,configure是这样的
./config --prefix=/usr/local/openssl/ -fPIC
Position Independent Code is necessary for a module like mod_ssl which may get placed anywhere in memory at runtime. It is not necessary for the standalone OpenSSL test program, which is why make test worked OK without -fPIC.
然后在安装apache时configure参数中加上
--with-ssl=/usr/local/openssl
最后,将apache设为开机启动(两种方法):
一是在/etc/rc.d/rc.local文件中加入一行
/usr/local/apache2/bin/apachectl start
二是将apache安装位系统服务
cp /usr/local/apache2/bin/apachectl /etc/rc.d/init.d/httpd

vim /etc/rc.d/init.d/httpd

#在(#! /bin/sh)下面添加

chkconfig:   90
description:Activates/Deactivates Apache Web Server
最后,运行chkconfig把apache添加到系统的启动服务组里面:
chkconfig --add httpd

chkconfig httpd on
第三步 安装MySql
可以直接用yum安装mysql-client、mysql-server、mysql-devel。
或者下载源码安装。其它博文里说的很清楚了,这里不再赘述,只是介绍一下在CentOS下用yum安装。
首先在http://dev.mysql.com/downloads/repo/页面选择下载你所需要的yum repository。然后,
对基于el6的系统,命令如下
sudo yum localinstall mysql-community-release-el6-{version-number}.noarch.rpm
对Fedora19,命令如下
sudo yum localinstall mysql-community-release-fc19-{version-number}.noarch.rpm
第四步 安装PHP
在PHP官网下载源代码安装。
安装过程中,因为PHP依赖很多包,所以总是回不断报错,安装时要耐心。
tar zxvf php-version.tar.gz

cd php-version

./configure --prefix=/usr/local/php --with-mysql --with-mysqli --with-apxs2=/usr/local/apache2/bin/apxs --with-zlib --with-bz2  --with-gd --enable-gd-native-ttf --enable-gd-jis-conv  --enable-mbstring --with-iconv --with-curl --enable-static --enable-zend-multibyte --enable-inline-optimization --enable-zend-multibyte --enable-sockets --enable-soap --with-openssl=/usr/local/openssl --with-gettext --enable-ftp

make

make test

make install
下面是我在安装PHP过程中碰到的错误以及解决方法。
xml2-config not found. Please check your libxml2 installation.

yum install libxml2-devel -y
configure: error: Please reinstall the BZip2 distribution

yum install bzip2 bzip2-devel
configure: error: Please reinstall the libcurl distribution -easy.h should be in <curl-dir>/include/curl/

 yum install libcurl-devel
configure: error: png.h not found.

yum install libpng-devel
configure: error: Cannot find MySQL header files under /usr/local/mysql.

yum install mysql-devel
可以看出,很多错误是因为依赖开发版的软件。目前各种Linux套件在发行时,都会将软件的内容分为一般使用和开发使用(development)两大类。而默认情况下,开发使用的都不会安装,因此我们在安装一些软件时,不得不去安装开发版的依赖软件包(真不明白,使用Linux的大部分不都是苦逼的程序员吗,自己人何必要为难自己人)。
最后是整合apache和php。
编辑httpd.conf文件以调用PHP模块。LoadModule达式右边的路径必须指向系统中的PHP模块,make install命令可能已经完成了这些,但最好检查一下。
在httpd.conf中找到下面这一行
#LoadModule rewrite_module modules/mod_rewrite.so
去掉左侧的“#”,改为
LoadModule php5_module modules/libphp5.so
同时要告知Apache将特定的扩展名解析成PHP,例如,让Apache将扩展名.php解析成PHP。为了避免潜在的危险,例如上传或者创建类似exploit.php.jpg的文件并被当作PHP执行,这里不再使用Apache的AddType指令来设置。参考下面的例子,可以简单的将需要的扩展名解释为PHP。
<FilesMatch \.php$>

    SetHandler application/x-httpd-php

</FilesMatch>
如果想将.php,.php2,.php3,.php4,.php5,.php6,以及.phtml文件都当作PHP来运行,无需额外的设置,只需将上面的那段改为
<FilesMatch "\.ph(p[2-6]?|tml)$">

        SetHandler application/x-httpd-php

</FilesMatch>
或者想要将.phps文件由PHP源码过滤器处理,使得其在显示时可以高亮代码,可以增加下面的设置
<FilesMatch "\.phps$">

        SetHandler application/x-httpd-php-source

</FilesMatch>
mod_rewrite也有助于将那些不需要运行的.php文件的源码高亮显示,而并不需要将他们更名为.phps文件
RewriteEngine on

RewriteRule (.*\.php)s$ $ [H=application/x-httpd-php-source]
不要在正式生产运营的系统上启动 PHP 源码过滤器,因为这可能泄露系统机密或者嵌入的代码中的敏感信息。
之后重启Apache服务:
/usr/local/apache2/bin/apachectl restart
或者
service httpd restart
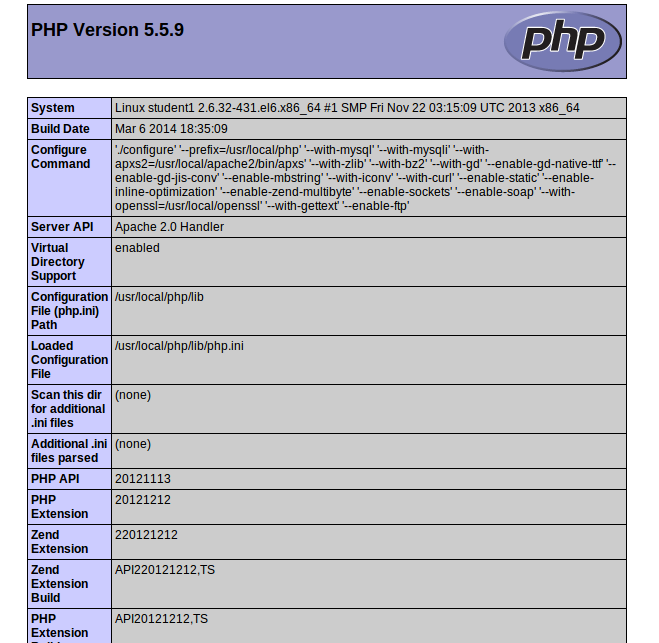
第五步 测试
在htdocs/下,
vim test.php
输入
<?php echo phpinfo();?>
然后浏览器中查看test.php。会显示PHP的配置参数等,如下图
CentOS上部署Apache、MySQL和PHP的更多相关文章
- 阿里云服务器建站——centos7部署apache+mysql+php
自己也是忙活了半天,才完成了阿里云服务器的建站,这里就来分享一下. 首先如果是要自己搭建一个网站的话,除了服务器以外还要购买域名,并且要去备案,一般在哪买的域名都有备案的系统,备案的话一般要两到三个星 ...
- WTM asp.net core应用程序在Ubuntu上和CentOS上部署
wtm在Ubuntu上和CentOS上部署 项目发布 在Visual Studio中右击Web项目,选择发布,如下图: Ubuntu安装.net core运行时 Ubuntu我是用的Vmware虚拟机 ...
- Centos 上部署 tomcat7
在 Centos 上部署 tomcat7 搜索tomcat,选下面红色框框的官网 选箭头指着的版本7, 选 tar.gz 格式, 下载完压缩包,使用 ftpx 工具,放在 centos 的 /opt ...
- 在Docker Swarm上部署Apache Storm:第2部分
[编者按]本文来自 Baqend Tech Blog,描述了如何在 Docker Swarm,而不是在虚拟机上部署和调配Apache Storm集群.文章系国内 ITOM 管理平台 OneAPM 编译 ...
- 【docker】centOS7上部署的mysql和spring boot服务,要求,mysql的时间、java程序服务的时间和宿主机的时间完全保持一致【修改mysql时区,临时和永久】【修改spring boot配置文件时区】【修改docker启动spring boot实例程序时区】
要求:centOS7上部署的mysql和spring boot服务,要求,mysql的时间.java程序服务的时间和宿主机的时间完全保持一致: ============================ ...
- CentOS上部署Django+Nginx+Uwsgi环境
在CentOS上部署Django+Nginx+Uwsgi环境 奇谭 2016-09-01 评论 Linux python django nginx uwsgi VirtualEnv的作用:创建隔 ...
- 定期从Docker上部署的MySQL备份数据
前段时间公司停电,正巧赶上周一领导要开会要过一遍项目,然而项目所依赖的MySQL数据库是直接部署在宿主机,且因为各人部署方式不同的原因,花了很久才在开会前启动起来.于是开完会后,我第一件事就是把原先依 ...
- 在CentOS上部署kubernetes1.9.0集群
原文链接: https://jimmysong.io/kubernetes-handbook/cloud-native/play-with-kubernetes.html (在CentOS上部署kub ...
- 容器化 | 在 K8s 上部署 RadonDB MySQL Operator 和集群
作者:程润科 数据库研发工程师 编辑:张莉梅 高级文档工程师 视频:钱芬 高级测试工程师 本文将演示在 Kubernetes 上部署 RadonDB MySQL Kubernetes 2.X(Oper ...
随机推荐
- SQL Server 内存泄露(memory leak)——游标导致的内存问题
原文:SQL Server 内存泄露(memory leak)--游标导致的内存问题 转自:http://blogs.msdn.com/b/apgcdsd/archive/2011/07/01/sql ...
- css3 3d旋转动画
<!doctype html> <html> <head> <meta charset="utf-8"> <title> ...
- MVC 分离Controllers-Views
将MVC中的Controllers.Model和View分别放到单独的项目中 Model: 新建-项目-Windows-类库 MVCTest.Model Controller:新建-项目-Window ...
- 苹果(APPLE)开发人员账号说明及注冊流程(99美元公司版/个人版及299美元企业版)
APPLE的政策是,要公布到APP STORE必须用99美元的个人版或公司版Apple Developer Programs,要在非商店外下载仅仅能使用299美元的企业版iOS Developer E ...
- ubuntu12.04 残疾人游客
为了防止陌生人登录你的ubuntu系统.例如,下面的方法,可以采用禁用 游客登录. sudo vi /etc/lightdm/lightdm.conf 在 lightdm.conf 文件末尾加入上 a ...
- Android特效 五种Toast具体解释
Toast是Android中用来显示显示信息的一种机制,和Dialog不一样的是,Toast是没有焦点的,并且Toast显示的时间有限,过一定的时间就会自己主动消失. 1.默认效果: 代码: Toas ...
- Windows下一个MySQL有些错误的解决方法
1.无论是什么提示.我们有一个直接看错误日志.由于它描述了最具体描述错误日志. 于MySQL安装文件夹中找到 my.ini简介 看日志保存路径 2. 我的错误是[ERROR] Fatal error: ...
- ORACLE 动态注册和静态注册的区别(转)
1, oracle 10g 用netca方式建立的都默认为动态注册方式2,如果想改为静态注册的方式则在listener.ora 中加入如下内容即可 SID_LIST_LISTENER = (SID_L ...
- springMVC项目异步错误处理请求Async support must be enabled on a servlet and for all filters involved in async
离github在down下一个项目,springMVC-chat.总体上有标注.这就是零配置. 这可苦了我,费尽周折,最后整合到项目现在看起来有点.出来以下的错误.红色部分.解决方法为,在web.xm ...
- CSDN下载频道2014年11月4日本-5日常维护公告
尊敬的用户: CSDN于2005年推出了下载服务.经过数年的发展.下载频道的用户已经为无数用户提供了帮助,分享500万的技术资源. CSDN下载频道将于2014年11月4日23点至11月5日8点进行积 ...