DELPHI XE Android 开发笔记
现在Delphi XE7增加了Splash Image显示功能了。
步骤:
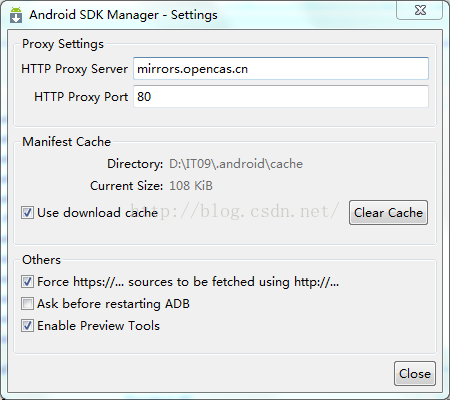
1.鼠标右键点击工程,选择Options,
2.进入Application分页
3.勾选Include Splash Image
4.选择您的Splash Image文件
5.设置Splash Tile mode和Splash Gravity
Splash Tile Mode
disabled -按图片尺寸大小显示,显示位置有Splash Gravity设置
clamp - 图形边框适应屏幕大小
repeat - 屏幕水平,竖立方向重复填充满Splash Image
mirror - 跟repeat差不多,图片是镜像的。
Gravity 设置比屏幕小的图片在屏幕中的位置,只有当Splash Title Mode为Disable时有效,
参数大家一看便知道什么意思了,我就不提了。
菜单 project ->deployment->然后点击增加按钮,选择中sqlite数据 test.s3db,
remote path 填写 assets\internal\
应用显示中文名(工程不能为中文否则会编译出错)
菜单 project ->Option->Version Info->label
FMX.Consts汉化(需要更改单元)

  { Dialog Strings }

//  SMsgDlgWarning = 'Warning';

//  SMsgDlgError = 'Error';

//  SMsgDlgInformation = 'Information';

//  SMsgDlgConfirm = 'Confirm';

//  SMsgDlgYes = 'Yes';

//  SMsgDlgNo = 'No';

//  SMsgDlgOK = 'OK';

//  SMsgDlgCancel = 'Cancel';

//  SMsgDlgHelp = 'Help';

//  SMsgDlgHelpNone = 'No help available';

//  SMsgDlgHelpHelp = 'Help';

//  SMsgDlgAbort = 'Abort';

//  SMsgDlgRetry = 'Retry';

//  SMsgDlgIgnore = 'Ignore';

//  SMsgDlgAll = 'All';

//  SMsgDlgNoToAll = 'No to All';

//  SMsgDlgYesToAll = 'Yes to &All';

//  SMsgDlgClose = 'Close';

//

//  SWindowsVistaRequired = '%s requires Windows Vista or later';

//

//  SUsername = '&Username';

//  SPassword = '&Password';

//  SDomain = '&Domain';

//  SLogin = 'Login';

  SMsgDlgWarning = '警告';

  SMsgDlgError = '错误';

  SMsgDlgInformation = '信息';

  SMsgDlgConfirm = '确认';

  SMsgDlgYes = '是的';

  SMsgDlgNo = '不是';

  SMsgDlgOK = '确定';

  SMsgDlgCancel = '取消';

  SMsgDlgHelp = '帮助';

  SMsgDlgHelpNone = '没有提供帮助';

  SMsgDlgHelpHelp = '帮助';

  SMsgDlgAbort = '放弃';

  SMsgDlgRetry = '重试';

  SMsgDlgIgnore = '忽略';

  SMsgDlgAll = '全部';

  SMsgDlgNoToAll = '全选“不是”';

  SMsgDlgYesToAll = '全选“是”';

  SMsgDlgClose = '关闭';

  SWindowsVistaRequired = '%s 需要 Windows Vista 或以上操作系统';

  SUsername = '&用户名';

  SPassword = '&密码';

  SDomain = '&域名';

  SLogin = '登录';

临时文件路径(支持安卓、IOS)

function GeFileName(const AFileName: string): string;

begin

{$IFDEF ANDROID}

  Result := TPath.GetTempPath + '/' + AFileName;

{$ELSE}

  {$IFDEF IOS}

    Result := TPath.GetHomePath + '/Documents/' + AFileName;

  {$ELSE}

    Result := AFileName;

  {$ENDIF}

{$ENDIF}

end;

IOUtils文件说明

路径类

TPath.GetTempPath; {获取临时文件夹路径}

TPath.GetTempFileName; {获取一个临时文件名}

TPath.GetPathRoot(); {提取盘符, 如: c:\}

TPath.GetDirectoryName(); {提取路径}

TPath.GetFileName(); {提取文件名}

TPath.GetExtension(); {提取扩展名}

TPath.GetFileNameWithoutExtension(); {提取无扩展名的文件名}

TPath.ChangeExtension(); {更换扩展名}

TPath.DriveExists(); {检查路径中的驱动器是否存在}

TPath.GetFullPath(); {根据相对路径给出全路径}

TPath.HasExtension(); {判断是否有扩展名}

TPath.IsPathRooted(); {判断是否是绝对路径}

TPath.Combine(); {结合路径}

TPath.GetRandomFileName; {产生一个随机文件名}

TPath.GetGUIDFileName(); {用于产生一个唯一的文件名, 布尔参数 决定名称中是否包含 -}

TPath.IsValidPathChar(); {判断给定的字符是否能用于路径名}

TPath.IsValidFileNameChar(); {判断给定的字符是否能用于文件名}

TPath.AltDirectorySeparatorChar; {Windows 下是 "\"}

TPath.AltDirectorySeparatorChar; {Windows 下是 "/"}

TPath.ExtensionSeparatorChar; {Windows 下是 "."}

TPath.PathSeparator; {Windows 下是 ";"}

TPath.VolumeSeparatorChar; {Windows 下是 ":"}

//目录类

TDirectory.CreateDirectory(); {建立新目录}

TDirectory.Exists(); {判断文件夹是否存在}

TDirectory.IsEmpty(); {判断文件夹是否为空}

TDirectory.Copy(); {复制文件夹}

TDirectory.Move(); {移动文件夹}

TDirectory.Delete(); {删除文件夹, 第二个参数为 True 可删除 非空文件夹}

TDirectory.GetDirectoryRoot(); {获取目录的根盘符, 如: C:\}

TDirectory.GetCurrentDirectory; {获取当前目录}

TDirectory.SetCurrentDirectory(); {设置当前目录}

TDirectory.GetLogicalDrives; {获取驱动器列表; 下有举例}

TDirectory.GetAttributes(); {获取文件夹属性, 譬如只读、存档等; 下有举例}

TDirectory.SetAttributes(); {设置文件夹属性; 下有举例}

//文件类

TFile.Exists();//判断指定的文件是否存在

TFile.Copy();//复制文件

TFile.Move();//移动文件

TFile.Delete();//删除文件

TFile.Replace();//替换文件

MotionSensor1: TMotionSensor; 加速传感器

MotionSensor1.Sensor(AngleAccelX、AngleAccelY、AngleAccelZ)加速度

procedure TAccelerometerForm.Timer1Timer(Sender: TObject);

var

  LProp: TCustomMotionSensor.TProperty;

begin

  for LProp in MotionSensor1.Sensor.AvailableProperties do

  begin

    { get the data from the sensor }

    case LProp of

      TCustomMotionSensor.TProperty.AccelerationX:

      begin

        lbAccelerationX.Visible := True;

        lbAccelerationX.Text := Format('Acceleration X: %6.2f', [MotionSensor1.Sensor.AccelerationX]);

      end;

   end;

end;

OrientationSensor1: TOrientationSensor;方位传感器

OrientationSensor1.Sensor(TiltX,TiltY,TiltZ)

procedure TOrientationSensorForm.Timer1Timer(Sender: TObject);

begin

  { get the data from the sensor }

  lbTiltX.Text := Format('Tilt X: %f', [OrientationSensor1.Sensor.TiltX]);

  lbTiltY.Text := Format('Tilt Y: %f', [OrientationSensor1.Sensor.TiltY]);

  lbTiltZ.Text := Format('Tilt Z: %f', [OrientationSensor1.Sensor.TiltZ]);

  lbHeadingX.Text := Format('Heading X: %f', [OrientationSensor1.Sensor.HeadingX]);

  lbHeadingY.Text := Format('Heading Y: %f', [OrientationSensor1.Sensor.HeadingY]);

  lbHeadingZ.Text := Format('Heading Z: %f', [OrientationSensor1.Sensor.HeadingZ]);

end;

TSensorManager传感器管理器(包含上述两种传感器,Samples\Object Pascal\Mobile Samples\Device Sensors and Services\SensorInfo)

TSensorCategory = (Location, Environmental, Motion, Orientation, Mechanical, Electrical, Biometric, Light, Scanner);

位置传感器,环境传感器,运动传感器,方向传感器,机械传感器,电传感器,生物传感器,光繁传感器,扫描仪传感器

TActionList组件可以添加标准事件(New Standard Action)

TakePhotoFromCameraAction1: TTakePhotoFromCameraAction; // 通过手机摄像头获取图片

TakePhotoFromLibraryAction1: TTakePhotoFromLibraryAction; //获取手机已存在图片

ShowShareSheetAction1: TShowShareSheetAction;//用其它程序分享图片(Bitmap.Assign();)

获取麦克风设置   FMX.Media

FMicrophone: TAudioCaptureDevice;

FMicrophone := TCaptureDeviceManager.Current.DefaultAudioCaptureDevice;

FMicrophone.FileName 设置路径

FMicrophone.State = TCaptureDeviceState.Capturing 设备状态

FMicrophone.StartCapture; //开始录音

FMicrophone.StopCapture; // 结束录音

MediaPlayer: TMediaPlayer; 媒体播放器

MediaPlayer.FileName 设置路径

MediaPlayer.Play; // 开始播放

MediaPlayer.Stop; // 结束播放

获取手机摄像头

Camera: TCameraComponent;

Camera.Active := True; //打开

Camera.Active := False; //停止

Camera.SampleBufferToBitmap(imgCameraView.Bitmap, True); //保存图片

TThread.Synchronize(TThread.CurrentThread, GetImage); //线程保存图片

Camera.Quality 图像质量

Camera.HasFlash 是否有闪光灯

Camera.TorchMode := TTorchMode.ModeOn; //打开闪光灯 Camera.FlashMode := FMX.Media.TFlashMode.fmFlashOff;

Camera.TorchMode := TTorchMode.ModeOff;//关闭闪光灯 Camera.FlashMode := FMX.Media.TFlashMode.fmFlashOn;

Camera.Kind := FMX.Media.TCameraKind.ckFrontCamera;//前置摄像头

Camera.Kind := FMX.Media.TCameraKind.ckBackCamera;//后置摄像头

获取设备信息

lbDeviceType.Text := Format('Device Type: %s', [JStringToString(TJBuild.JavaClass.MODEL)]);

lbOSName.Text := Format('OS Name: %s', [GetCodename(JStringToString(TJBuild_VERSION.JavaClass.RELEASE))]);

lbOSVersion.Text := Format('OS Version: %s', [JStringToString(TJBuild_VERSION.JavaClass.RELEASE)]);

GestureManager1: TGestureManager; 手势识别组件(igiRotate|旋转、igiZoom|缩放、igiLongTap|长按)

组件关联GestureManager1(Touch.GestureManager,Getures.Standard可以直接添加事件)

procedure TPinchZoom.FormGesture(Sender: TObject;   const EventInfo: TGestureEventInfo; var Handled: Boolean);

var

  LObj: IControl;

  LImage: TImage;

  LImageCenter: TPointF;

begin

  if EventInfo.GestureID = igiZoom then

  begin

    LObj := Self.ObjectAtPoint(ClientToScreen(EventInfo.Location));

    if LObj is TImage then

    begin

      if (not(TInteractiveGestureFlag.gfBegin in EventInfo.Flags)) and

        (not(TInteractiveGestureFlag.gfEnd in EventInfo.Flags)) then

      begin

        { zoom the image }

        LImage := TImage(LObj.GetObject);

        LImageCenter := LImage.Position.Point + PointF(LImage.Width / ,

          LImage.Height / );

        LImage.Width := LImage.Width + (EventInfo.Distance - FLastDistance);

        LImage.Height := LImage.Height + (EventInfo.Distance - FLastDistance);

        LImage.Position.X := LImageCenter.X - LImage.Width / ;

        LImage.Position.Y := LImageCenter.Y - LImage.Height / ;

      end;

      FLastDistance := EventInfo.Distance;

    end;

  end;

end;

获取地理信息

LocationSensor1: TLocationSensor;//定位

LocationSensor1.Active := swLocationSensorActive.IsChecked; //开始

NewLocation.Latitude //经度

NewLocation.Longitude //纬度

FGeocoder: TGeocoder;//地理编码

procedure TLocationForm.LocationSensor1LocationChanged(Sender: TObject;

  const OldLocation, NewLocation: TLocationCoord2D);

const

  LGoogleMapsURL: String = 'https://maps.google.com/maps?q=%s,%s';

var

  ENUSLat, ENUSLong: String; // holders for URL strings

begin

  ENUSLat := NewLocation.Latitude.ToString(ffGeneral, , , TFormatSettings.Create('en-US'));

  ENUSLong := NewLocation.Longitude.ToString(ffGeneral, , , TFormatSettings.Create('en-US'));

  { convert the location to latitude and longitude }

  lbLatitude.Text := 'Latitude: ' + ENUSLat;

  lbLongitude.Text := 'Longitude: ' + ENUSLong;

  { and track the location via Google Maps }

  WebBrowser1.Navigate(Format(LGoogleMapsURL, [ENUSLat, ENUSLong]));

  // Setup an instance of TGeocoder

  try

    if not Assigned(FGeocoder) then

    begin

      if Assigned(TGeocoder.Current) then

        FGeocoder := TGeocoder.Current.Create;

      if Assigned(FGeocoder) then

        FGeocoder.OnGeocodeReverse := OnGeocodeReverseEvent;

    end;

  except

    ListBoxGroupHeader1.Text := 'Geocoder service error.';

  end;

  // Translate location to address

  if Assigned(FGeocoder) and not FGeocoder.Geocoding then

    FGeocoder.GeocodeReverse(NewLocation);

end;

//地理信息

procedure TLocationForm.OnGeocodeReverseEvent(const Address: TCivicAddress);

begin

  ListBoxItemAdminArea.ItemData.Detail       := Address.AdminArea; //省份

  ListBoxItemCountryCode.ItemData.Detail     := Address.CountryCode; //国家编码 CN

  ListBoxItemCountryName.ItemData.Detail     := Address.CountryName; //国家

  ListBoxItemFeatureName.ItemData.Detail     := Address.FeatureName; //镇

  ListBoxItemLocality.ItemData.Detail        := Address.Locality; //市

  ListBoxItemPostalCode.ItemData.Detail      := Address.PostalCode; //邮政编码

  ListBoxItemSubAdminArea.ItemData.Detail    := Address.SubAdminArea;//子级省

  ListBoxItemSubLocality.ItemData.Detail     := Address.SubLocality;//子级市

  ListBoxItemSubThoroughfare.ItemData.Detail := Address.SubThoroughfare;//街道

  ListBoxItemThoroughfare.ItemData.Detail    := Address.Thoroughfare;//子街道

end;

获取本机信息

  FMX.Android.DeviceInfo.GetInformation;

  Memo1.Lines.Add('ID:'+FMX.Android.DeviceInfo.ID);

  Memo1.Lines.Add('IMEI:'+FMX.Android.DeviceInfo.IMEI);

  Memo1.Lines.Add('User:'+FMX.Android.DeviceInfo.User);

  Memo1.Lines.Add('Host:'+FMX.Android.DeviceInfo.Host);

  Memo1.Lines.Add('Tags:'+FMX.Android.DeviceInfo.Tags);

  Memo1.Lines.Add('Time:'+FMX.Android.DeviceInfo.Time);

  Memo1.Lines.Add('AType:'+FMX.Android.DeviceInfo.AType);

  Memo1.Lines.Add('Board:'+FMX.Android.DeviceInfo.Board);

  Memo1.Lines.Add('Radio:'+FMX.Android.DeviceInfo.Radio);

  Memo1.Lines.Add('Brand:'+FMX.Android.DeviceInfo.Brand);

  Memo1.Lines.Add('Model:'+FMX.Android.DeviceInfo.Model);

  Memo1.Lines.Add('Serial:'+FMX.Android.DeviceInfo.Serial);

  Memo1.Lines.Add('Device:'+FMX.Android.DeviceInfo.Device);

  Memo1.Lines.Add('CpuABI:'+FMX.Android.DeviceInfo.CpuABI);

  Memo1.Lines.Add('CpuABI2:'+FMX.Android.DeviceInfo.CpuABI2);

  Memo1.Lines.Add('Display:'+FMX.Android.DeviceInfo.Display);

  Memo1.Lines.Add('Product:'+FMX.Android.DeviceInfo.Product);

  Memo1.Lines.Add('Hardware:'+FMX.Android.DeviceInfo.Hardware);

  Memo1.Lines.Add('Bootloader:'+FMX.Android.DeviceInfo.Bootloader);

  Memo1.Lines.Add('FingerPrint:'+FMX.Android.DeviceInfo.FingerPrint);

  Memo1.Lines.Add('Manufacturer:'+FMX.Android.DeviceInfo.Manufacturer);

MapView1: TMapView;//地图足迹

WebBrowser1: TWebBrowser; //浏览器

WebBrowser1.Navigate('www.baidu.com'); //打开网页

WebBrowser1.URL := '';//打开网页

WebBrowser1.GoForward; //前进

WebBrowser1.GoBack;//后退

ShowMessage、MessageDlg、InputQuery //对话框很方便

消息提醒(从手机屏幕顶部向下滑动,出现的提示消息)

NotificationC: TNotificationCenter;

procedure TNotificationsForm.btnSendNotificationImmediatelyClick(

  Sender: TObject);

var

  Notification: TNotification;

begin

  { verify if the service is actually supported }

  if NotificationC.Supported then

  begin

    Notification := NotificationC.CreateNotification;

    try

      Notification.Name := 'MyNotification';

      Notification.AlertBody := 'Delphi for Mobile is here!';

      Notification.FireDate := Now; //可修改发送消息时间

      { Send notification in Notification Center }

      NotificationC.ScheduleNotification(Notification);

      { also this method is equivalent }

      // NotificationService.PresentNotification(Notification);

    finally

      Notification.DisposeOf;

    end;

  end

end;

  if NotificationC.Supported then

    NotificationC.CancelNotification('MyNotification'); //取消消息

    NotificationC.CancelAll; //取消所有消息

程序事件服务

var

  FMXApplicationEventService: IFMXApplicationEventService;

begin

  if TPlatformServices.Current.SupportsPlatformService (IFMXApplicationEventService,

 IInterface(FMXApplicationEventService)) then

    FMXApplicationEventService.SetApplicationEventHandler(HandleAppEvent)

  else

     flag := false;

end;

function TForm1.HandleAppEvent(AAppEvent: TApplicationEvent; AContext: TObject)   : boolean;

begin

  if flag = false then

    exit;

  case AAppEvent of

    TApplicationEvent.aeEnteredBackground:

      begin

          //当程序后台运行了

      end;

  end;

  Result := true;

end;

电话信息(Call拨号)

PhoneDialerService: IFMXPhoneDialerService;

获取电话服务信息

procedure TPhoneDialerForm.btnGetCarrierInfoClick(Sender: TObject);

var

  PhoneDialerService: IFMXPhoneDialerService;

begin

  { test whether the PhoneDialer services are supported }

  if TPlatformServices.Current.SupportsPlatformService(IFMXPhoneDialerService, IInterface(PhoneDialerService)) then

  begin

    { if yes, then update the labels with the retrieved information }

    CarrierNameItem.ItemData.Detail := PhoneDialerService.GetCarrier.GetCarrierName;

    CountryCodeItem.ItemData.Detail := PhoneDialerService.GetCarrier.GetIsoCountryCode;

    NetworkCodeItem.ItemData.Detail := PhoneDialerService.GetCarrier.GetMobileCountryCode;

    MobileNetworkItem.ItemData.Detail := PhoneDialerService.GetCarrier.GetMobileNetwork;

  end

  else

    ShowMessage('PhoneDialer service not supported');

end;

拨号

procedure TPhoneDialerForm.btnMakeCallClick(Sender: TObject);

var

  PhoneDialerService: IFMXPhoneDialerService;

begin

  { test whether the PhoneDialer services are supported }

  if TPlatformServices.Current.SupportsPlatformService(IFMXPhoneDialerService, IInterface(PhoneDialerService)) then

  begin

    { if the Telephone Number is entered in the edit box then make the call, else

      display an error message }

    if edtTelephoneNumber.Text <> '' then

      PhoneDialerService.Call(edtTelephoneNumber.Text)

    else

    begin

      ShowMessage('Please type in a telephone number.');

      edtTelephoneNumber.SetFocus;

    end;

  end

  else

    ShowMessage('PhoneDialer service not supported');

end;

Intent :TJIntent

uses

  Androidapi.JNI.GraphicsContentViewText,

 FMX.Helpers.Android, Androidapi.JNI.Net, Androidapi.Helpers;

procedureCall_URI(constAAction

 : JString;constAURI: string);

var

  uri: Jnet_Uri;

  Intent: JIntent;

begin

  uri := StrToJURI(AURI);

  Intent := TJIntent.JavaClass.init(AAction,

 uri);

  {Intent.putExtra()

//短信

Call_URI(TJIntent.JavaClass.ACTION_SENDTO, 'smsto:137114553XX');

Intent.putExtra(StringToJString('sms_body'), StringToJString('测试短信'));

  如果是要发短信等复杂的应用,需要传递各种其他的参数.要用到Intent.putExtra()传递多个参数.

  这里只封装最简单的,具体Intent.putExtra()的用法,可以查询Java的资料.大把的

  }

  SharedActivityContext.startActivity(Intent);

end;


//使用例子:

//打电话

Call_URI(TJIntent.JavaClass.ACTION_CALL, 'tel:137114553XX');

//打开地图显示某个坐标点

Call_URI(TJIntent.JavaClass.ACTION_VIEW, 'geo:38.899533,-77.036476');

//打开网页

Call_URI(TJIntent.JavaClass.ACTION_VIEW, 'www.baidu.com');

//发送电子邮件

 Call_URI(TJIntent.JavaClass.ACTION_SENDTO, 'mailto:wr960204@126.com');

//播放音乐

Call_URI(TJIntent.JavaClass.ACTION_VIEW, 'file:///sdcard/download/最炫民族风.mp3');

回到主画面procedure TForm1.Button3Click(Sender: TObject);var  Intent: JIntent;begin  Intent:= TJIntent.Create;  Intent.setAction(TJIntent.JavaClass.ACTION_MAIN);  Intent.addCategory(TJIntent.JavaClass.CATEGORY_HOME);  Intent.setFlags(TJIntent.JavaClass.FLAG_ACTIVITY_NEW_TASK);  MainActivity.startActivity(Intent);end;

条码扫描(需要安装zxing)

procedure TINVMCForm.btnSCANClick(Sender: TObject);var  uri: Jnet_Uri;       //引用Androidapi.JNI.Net  Intent: JIntent;    //引用Androidapi.JNI.GraphicsContentViewText  jstr:JString;begin  inherited;  uri := StrToJURI('com.google.zxing.client.android.SCAN');  //引用FMX.Helpers.Android  //Intent := TJIntent.JavaClass.init(jstring(('com.google.zxing.client.android.SCAN');  Intent := TJIntent.JavaClass.init(StringToJString('com.google.zxing.client.android.SCAN'));  SharedActivityContext.startActivity(Intent);end;

function GetZXingIntent: JIntent;

const

  GOOGLE_ZXING = 'com.google.zxing.client.android.SCAN';

  GOOGLE_ZXING_PACKAGE = 'com.google.zxing.client.android';

begin

  Result := TJIntent.JavaClass.init(StringToJString(GOOGLE_ZXING));

  Result.setPackage(StringToJString(GOOGLE_ZXING_PACKAGE));

end;

//是否存在对应

function IsIntentCallable(const AIntent: JIntent): Boolean;

var

  LJPackageManager: JPackageManager;

begin

  Result := False;

  if Assigned(AIntent) then

  begin

    LJPackageManager := SharedActivityContext.getPackageManager;

    Result := LJPackageManager.queryIntentActivities(AIntent,

      TJPackageManager.JavaClass.MATCH_DEFAULT_ONLY).size <> ;

  end;

end;

获取手机信息

function GetPhoneInfo(): string;

Var

  TelephonyManager: JTelephonyManager;  TelephonyServiceNative: JObject;

begin

  result := '';

  TelephonyServiceNative := SharedActivityContext.getSystemService

    (TJContext.JavaClass.TELEPHONY_SERVICE);

  if Assigned(TelephonyServiceNative) then

    TelephonyManager := TJTelephonyManager.Wrap

      ((TelephonyServiceNative as ILocalObject).GetObjectID);

  result := JStringToString(TelephonyManager.getLine1Number);//取得手机号

  //TelephonyManager.getDeviceId 取IMEI

  //TelephonyManager.getLine1Number 取MSISDN  手机号,大部分SIM卡中不会写入这个信息

  //TelephonyManager.getSimSerialNumber 取ICCID

  //TelephonyManager.getSubscriberId 取IMSI  运营商实际上是用这个查询的

end;

手机振动

uses  FMX.Helpers.Android,  Androidapi.JNI.App,

 Androidapi.JNI.Os,  Androidapi.JNIBridge, FMX.StdCtrls;

procedure TForm1.Button2Click(Sender: TObject);

function GetVibratorArray(const AintArr:array of int64):TJavaArray<int64>;//震动规律函数var  Lindex:integer;begin  Result:=TJavaArray<int64>.Create(Length(AintArr));  for Lindex:=Low(AintArr) to High(AintArr) do      Result.Items [Lindex]:= AintArr[Lindex];end;var   LVibrator:JVibrator;

   LJavaArray:TJavaArray<int64>;begin   LVibrator:=TJVibrator.Wrap((SharedActivity.getSystemService(TJActivity.javaClass.VIBRATOR_SERVICE ) as iLocalObject).GetObjectID );//引用震动   if not LVibrator.hasVibrator then   begin     showmessage('手机不支持震动');     exit;   end;   LVibrator.vibrate(200);//震动200ms

   LVibrator.cancel ;//立刻停止震动

   LJavaArray:=GetVibratorArray([,,,]);//调用震动规律   LVibrator.vibrate(LJavaArray,-1);//不重复,  震动一 次

   LJavaArray:=GetVibratorArray([,,,]);//调用震动规律   LVibrator.vibrate(LJavaArray,0);//v不停重复,大于0的参数,可以指定震动次数end;

网络传送文件(类似Server/Client)

TTetheringManager|设备管理、TTetheringAppProfile|文件发送

蓝牙

System.Bluetooth单元中主要包含一下几个类

TBluetoothManager、TBluetoothDeviceList、TBluetoothAdapter、TBluetoothDevice、TBluetoothService、

TBluetoothServiceList、TBluetoothSocket

TBluetoothManager是蓝牙管理器,用于蓝牙设备管理,包括发现蓝牙设备,获取配对设备,处理远程配对请求等功能

TBluetoothDeviceList是蓝牙设备列表,TBluetoothDeviceList = class(TObjectList<TBluetoothDevice>),可以通过TBluetoothManager.GetPairedDevices获得配对设备列表

TBluetoothAdapter本机蓝牙设备,实现配对、取消配对等功能,可通过TBluetoothManager.CurrentAdapter得到当前蓝牙设备

TBluetoothDevice远端蓝牙设备,每个远端设备可以提供若干个服务(TBluetoothService),

TBluetoothService远端蓝牙设备服务,包括服务名和UUID

TBluetoothServiceList服务列表 = class(TList<TBluetoothService>);可通过TBluetoothDevice.GetServices获得远端设备服务列表

TBluetoothSocket蓝牙通讯套接字,通过 TBluetoothDevice.CreateClientSocket(StringToGUID(ServiceGUI),

 True/False)创建

TimeEdit1: TTimeEdit;//时间选择

HorzScrollBox1: THorzScrollBox;横拉组件

MultiView1: TMultiView;//多余视图(Mode主明细表,可更改弹出方式)

EMSProvider: TEMSProvider;//企业移动服务

BBAS Client(组件组TKinveyProvider、TParseProvider);移动客户端数据连接组件

TabItem1: TTabItem;//多页

退出键不退出程序

procedure TPForm.FormKeyUp(Sender: TObject; var Key: Word; var KeyChar: Char;

  Shift: TShiftState);

begin

  if Key = vkHardwareBack then

  begin

    {$IFDEF ANDROID}

    MessageDlg('确认退出吗?', System.UITypes.TMsgDlgType.mtInformation,

    [

      System.UITypes.TMsgDlgBtn.mbYes,

      //System.UITypes.TMsgDlgBtn.mbNo,

      System.UITypes.TMsgDlgBtn.mbCancel

    ], , System.UITypes.TMsgDlgBtn.mbCancel,

    procedure(const AResult: TModalResult)

    begin

      if AResult = mrYES then

         MainActivity.finish; { 退出程序 }   // use FMX.Platform.Android

      end);

    {$ENDIF ANDROID}

    //close;

    Key := ;

    exit;

  end;

end;

Application.FormFactor.Orientations := [TFormOrientation.Landscape]; //坚屏

Application.FormFactor.Orientations := [TFormOrientation.Portrait];//横屏

当前网络状态(Androidapi.JNI.Network.pas)

IsConnected|连接,IsWiFiConnected|Wifi是否连接,IsMobileConnected|移动网络是否连接

剪贴版FClipboardService: IFMXClipboardService;

TPlatformServices.Current.SupportsPlatformService(IFMXClipboardService,    IInterface(FClipboardService));

FClipboardService.SetClipboard(Tvalue(Edit1.Text));  //复制

FClipboardService.GetClipboard.ToString;  //粘贴

键盘FService: IFMXVirtualKeyboardToolbarService;

if TPlatformServices.Current.SupportsPlatformService (IFMXVirtualKeyboardToolbarService, IInterface(FService)) then

begin

  FService.SetToolbarEnabled(true);

  FService.SetHideKeyboardButtonVisibility(true);

end;

添加桌面快捷方式

procedure Tform1.Button1Click(Sender: TObject);

{$IFDEF ANDROID}

var

  ShortcutIntent: JIntent;

  addIntent: JIntent;

  wIconIdentifier : integer;

  wIconResource : JIntent_ShortcutIconResource;

{$ENDIF}

begin

{$IFDEF ANDROID}

  ShortcutIntent := TJIntent.JavaClass.init(SharedActivityContext, SharedActivityContext.getClass);

  ShortcutIntent.setAction(TJIntent.JavaClass.ACTION_MAIN);

  addIntent := TJIntent.Create;

  addIntent.putExtra(TJIntent.JavaClass.EXTRA_SHORTCUT_INTENT, TJParcelable.Wrap((shortcutIntent as ILocalObject).GetObjectID));

  addIntent.putExtra(TJIntent.JavaClass.EXTRA_SHORTCUT_NAME, StringToJString(Application.Title));

  addIntent.setAction(StringToJString('com.android.launcher.action.INSTALL_SHORTCUT'));

  // get icon resource identifier

  wIconIdentifier := SharedActivity.getResources.getIdentifier(StringToJString('ic_launcher'), StringToJString('drawable'), StringToJString('com.embarcadero.Project1'));

  wIconResource := TJIntent_ShortcutIconResource.JavaClass.fromContext(SharedActivityContext, wIconIdentifier);

  // set icon for shortcut

  addIntent.putExtra(TJIntent.JavaClass.EXTRA_SHORTCUT_ICON_RESOURCE, TJParcelable.Wrap((wIconResource as ILocalObject).GetObjectID));

  SharedActivityContext.sendBroadcast(addIntent);

{$ENDIF}

end;

截取屏幕图片

function MakeScaleScreenshot(Sender: TControl): TBitmap;

  function GetScreenScale: Single;

  var

    ScreenService: IFMXScreenService;

  begin

    Result := ;

    if TPlatformServices.Current.SupportsPlatformService(IFMXScreenService,  IInterface(ScreenService)) then

    begin

      Result := ScreenService.GetScreenScale;

    end;

  end;

var

  fScreenScale: Single;

begin

  fScreenScale := GetScreenScale;

  Result := TBitmap.Create(Round(Sender.Width * fScreenScale),

    Round(Sender.Height * fScreenScale));

  Result.Clear();

  if Result.Canvas.BeginScene then

    try

      Sender.PaintTo(Result.Canvas, RectF(, , Result.Width, Result.Height));

    finally

      Result.Canvas.EndScene;

    end;

end;

---------------------
DELPHI XE Android 开发笔记的更多相关文章
- Delphi For Android 开发笔记 2 NEXTGEN下的字符串类型
delphi开发速度迅捷至少有30%(猜的,呵呵)的原因是因为其字符串(string.WideString.PChar.PAnsiChar等)处理能力. 而从delphi XE4开始,在system等 ...
- Delphi For Android 开发笔记 1 - 开发工具介绍
在开始前,推荐喜欢delphi或者pascal的朋友,如果想将原来Windows的软件工程移植到Android,可使用CodeTyphon+Delphi XE7进行开发. 1.CodeTyphon C ...
- Delphi For Android 开发笔记-附:如何Delphi中同时实现Windows、Android版的GetModuleFileName函数
在Windows中开发DLL时,经常会需要获取当前DLL所在目录以便读取同目录下的其他文件,而目前Delphi在开发android时,其实没多大必要获取,因为整个工程只有一个so文件,而这个so文件也 ...
- Android开发笔记:打包数据库
对于数据比较多的控制一般会加入SQLite数据库进行数据存储,在打包时这些数据库是不自动打包到apk中的,如何创建数据库呢 方法1:将创建数据库的sql语句在SQLiteHelper继承类中实现,在第 ...
- Android开发笔记--hello world 和目录结构
原文:Android开发笔记--hello world 和目录结构 每接触一个新东西 都有一个hello world的例子. 1.新建项目 2.配置AVD AVD 没有要新建个,如果不能创建 运行SD ...
- 【转】Android开发笔记(序)写在前面的目录
原文:http://blog.csdn.net/aqi00/article/details/50012511 知识点分类 一方面写写自己走过的弯路掉进去的坑,避免以后再犯:另一方面希望通过分享自己的经 ...
- [APP] Android 开发笔记 003-使用Ant Release 打包与keystore加密说明
接上节 [APP] Android 开发笔记 002 5. 使用ant release 打包 1)制作 密钥文件 release.keystore (*.keystore) keytool -genk ...
- [APP] Android 开发笔记 002-命令行创建默认项目结构说明
接上节:[APP] Android 开发笔记 001 4. 默认项目结构说明: 这里我使用Sublime Text 进行加载.
- Android开发笔记——以Volley图片加载、缓存、请求及展示为例理解Volley架构设计
Volley是由Google开源的.用于Android平台上的网络通信库.Volley通过优化Android的网络请求流程,形成了以Request-RequestQueue-Response为主线的网 ...
随机推荐
- lua----------------使用VS2015搭建lua开发环境的一些侥幸成功经验,
所以本篇博文介绍在Windows平台下,使用VS2015搭建lua开发环境的一些侥幸成功经验,安装过程参考网上教程,安装过程如下(参考http://www.byjth.com/lua/33.html) ...
- Android 开发规范
一. 总包命名规范: 1. 主程序:com . 公司简写 . 项目名称简写 如彩票主程序: com.whszzy.caipiao 2. 独立模块:com . 公司简写 . 项目名称简写 . 模块名称 ...
- eclipse调用jni
http://blog.chinaunix.net/uid-27003388-id-3235189.html 1. 在Eclipse里创建一个Java project(jni_test): ...
- (个人)Linux基本指令收集
1. 删除文件 其中 -r为向下递归删除 -f为强行删除,不做提示 rm -rf name 1 1 rm -rf name 2. 目录跳转指令 cd .. --跳转到上一级 cd ../ - ...
- 运行 Shell 脚本有两种方法:
1.作为可执行程序 将上面的代码保存为 test.sh,并 cd 到相应目录: chmod +x ./test.sh #使脚本具有执行权限 ./test.sh #执行脚本 注意,一定要写成 ./tes ...
- 各大引擎矩阵的矩阵存储方式 ----行矩阵 or 列矩阵
OpenGL 里面的矩阵 float m[16]; OpenGL中的矩阵是这样的 m[0] m[4] m[8] m[12] m[1] m[5] m[9] m[13] m[2] m[6] m[10] ...
- 1 最简单的hello world
preface 今天我开始自学flask了,由此记录学习中的点点滴滴. 有问题请联系我(Mr.Leo 18500777133@sina.cn) include: 简介flask hello world ...
- 谁应该在CCB(变更控制委员会)中?
In software development, a Change Control Board (CCB) or Software Change Control Board (SCCB) is a c ...
- Github上搭建个人博客记录
1.注册,用户名一定要起好,别随便起. 2.登录后,新建一个仓库repositories.new一个. 命名为用户名.github.io.如果发现不一样进Settings修改,rename. 3.仓库 ...
- 安装MySQL后经常弹出taskeng.exe~
taskeng.exe,是Microsoft任务计划程序引擎调用的安全进程.文件路径为C:\Windows\system32\taskeng.exe.大小165KB. 解决办法: 这个问题是Wind ...