爬虫Scrapy框架-1
Scrapy
第一步:安装
linux:
pip3 install scrapy
windows:
1:pip3 install wheel ,安装wheel模块
2.下载twisted:http://www.lfd.uci.edu/~gohlke/pythonlibs/#twisted(根据python版本下载一般为36,也可以尝试下载32位的)
3.进入第二步下载文件的目录,执行 pip3 install Twisted-18.7.0-cp36-cp36m-win_amd64.whl
4,pip3 install pywin32
5.pip3 install scrapy
第二步:创建工程 scrapy startproject xxx xxx:表示工程的名字

第四步:创建爬虫文件 scrapy genspider fileName xxx.com fileName:爬虫文件的名字 xxx.com :后面网址即指定要爬取网页的地址

第五步:执行爬虫文件 scrapy crawl xxx xxx:即第四步爬虫文件的名字

实例1:爬取https://www.qiushibaike.com/pic/糗事百科-糗图,下面发表的作者及文字内容
settings.py设置:
#google浏览器

USER_AGENT ='Mozilla/5.0 (Windows NT 10.0; WOW64) AppleWebKit/537.36 (KHTML, like Gecko) Chrome/69.0.3497.81 Safari/537.36'

#网站协议设置为false

ROBOTSTXT_OBEY = False

#开启管道(后面数字指管道的优先级,值越小,优先级越高)

ITEM_PIPELINES = {

   'qiubai_all.pipelines.QiubaiAllPipeline': 300,

}
items.py的设置:
import scrapy

class QiubaiAllItem(scrapy.Item):

    # define the fields for your item here like:

    # name = scrapy.Field()

    #设置2个属性,对应爬取文件qiutu调用,存放爬取的相应数据(存什么样的数据都可以)

    author = scrapy.Field()

    content = scrapy.Field()
qiutu.py爬取文件设置
# -*- coding: utf-8 -*-

import scrapy

from qiubai_all.items import QiubaiAllItem

class QiutuSpider(scrapy.Spider):

    name = 'qiutu'

    # allowed_domains = ['https://www.qiushibaike.com/pic/']

    start_urls = ['http://www.qiushibaike.com/pic/']

    # 指定一个页码通用的url,为了爬取全部分页内容

    url="https://www.qiushibaike.com/pic/page/%d/?s=5127071"

    pageNum=1

    def parse(self, response):

        # div_list=response.xpath('//div[@class='author clearfix']/a[2]/h2/text()')

        div_list=response.xpath('//*[@id="content-left"]/div')

        for div in div_list:

            #xpath函数的返回值是selector对象(使用xpath表达式解析出来的内容是存放在Selector对象中的)

            item = QiubaiAllItem()

            item['author']=div.xpath('.//h2/text()').extract_first()

            item['content']=div.xpath('.//div[@class="content"]/span/text()').extract_first()

            #循环多少次就会向管道提交多少次数据

            yield item

            if self.pageNum <= 35:

                self.pageNum += 1

                print('开始爬取第%d页数据'%self.pageNum)

                #新页码的url

                new_url = format(self.url%self.pageNum)

                #向新的页面发送请求,回调函数从新调用上面的parse方法

                # callback:回调函数(指定解析数据的规则)

                yield scrapy.Request(url=new_url,callback=self.parse)
pipelines.py管道设置:
# -*- coding: utf-8 -*-

# Define your item pipelines here

#

# Don't forget to add your pipeline to the ITEM_PIPELINES setting

# See: https://doc.scrapy.org/en/latest/topics/item-pipeline.html

class QiubaiAllPipeline(object):

    def __init__(self):

        self.fp=None

    #爬虫开始时执行,只执行一次

    def open_spider(self,spider):

        print('开始爬虫')

        self.fp=open('./data1.txt','w',encoding='utf-8')

    #该函数作用:items中每来一个yiled数据,就会执行一次这个文件,逐步写入

    def process_item(self, item, spider):

        #获取item中的数据

        self.fp.write(item['author'] + ':' + item['content'] + '\n\n')

        return item #返回给了引擎

    # 爬虫结束时执行,只执行一次

    def close_spider(self,spider):

        print('结束爬虫')

        self.fp.close()
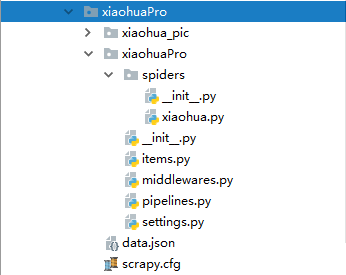
实例2:爬取校花网http://www.521609.com/meinvxiaohua/,下载里面所有的图片和标题

大家Scrapy配置环境:
settings里面的设置:
BOT_NAME = 'xiaohuaPro'

SPIDER_MODULES = ['xiaohuaPro.spiders']

NEWSPIDER_MODULE = 'xiaohuaPro.spiders'

# Crawl responsibly by identifying yourself (and your website) on the user-agent

#USER_AGENT = 'xiaohuaPro (+http://www.yourdomain.com)'

USER_AGENT ='Mozilla/5.0 (Windows NT 10.0; WOW64) AppleWebKit/537.36 (KHTML, like Gecko) Chrome/69.0.3497.81 Safari/537.36'

# Obey robots.txt rules

ROBOTSTXT_OBEY = True

ITEM_PIPELINES = {

   'xiaohuaPro.pipelines.XiaohuaproPipeline': 300,

}
items.py里面的设置:
import scrapy

class XiaohuaproItem(scrapy.Item):

    # define the fields for your item here like:

    # name = scrapy.Field()

    img_url = scrapy.Field()

    img_name = scrapy.Field()
xiaohua.py爬虫文件里面的设置:
# -*- coding: utf-8 -*-

import scrapy

from xiaohuaPro.items import XiaohuaproItem

class XiaohuaSpider(scrapy.Spider):

    name = 'xiaohua' #指定运行爬虫程序时用的名字

    # allowed_domains = ['www.521609.com/daxuemeinv']

    start_urls = ['http://www.521609.com/daxuemeinv/']

    #爬取多页

    url='http://www.521609.com/daxuemeinv/list8%d.html' #每页的url

    page_num=1  #起始页

    def parse(self, response):

        li_list=response.xpath("//*[@id='content']/div[2]/div[2]/ul/li")

        for li in li_list:

            item=XiaohuaproItem()

            item['img_url'] = li.xpath('./a/img/@src').extract_first()

            #拼接上图片完整的路径

            item['img_url'] =  'http://www.521609.com'+item['img_url']

            item['img_name'] = li.xpath('./a/img/@alt').extract_first()

            yield item  #提交item到管道进行持久化

        #爬取所有页码数据

        if self.page_num <=23:

            self.page_num+=1

            url = format(self.url%self.page_num)

            #递归爬取函数

            yield scrapy.Request(url=url,callback=self.parse)
pipelines.py管道里面的设置:
# -*- coding: utf-8 -*-

# Define your item pipelines here

#

# Don't forget to add your pipeline to the ITEM_PIPELINES setting

# See: https://doc.scrapy.org/en/latest/topics/item-pipeline.html

import json,os

import urllib.request

class XiaohuaproPipeline(object):

    def __init__(self):

        self.fp=None

    def open_spider(self,spider):

        print('开始爬虫')

        self.fp = open('./data.json','w',encoding='utf-8')

    def process_item(self, item, spider):

        img_dic = {

            'img_url':item['img_url'],

            'img_name':item['img_name']

        }

        json_string = json.dumps(img_dic,ensure_ascii=False)

        self.fp.write(json_string)

        if not os.path.exists('xiaohua_pic'):

            os.mkdir('xiaohua_pic')

        #下载图片

        #拼接下载后的图片名字

        filePath='xiaohua_pic/'+item['img_name']+'.png'

        urllib.request.urlretrieve(url=item['img_url'],filename=filePath)

        print(filePath+'下载成功')

        return item

    def close_spider(self,spider):

        self.fp.close()

        print('爬虫结束')
爬虫Scrapy框架-1的更多相关文章
- python爬虫scrapy框架——人工识别登录知乎倒立文字验证码和数字英文验证码(2)
操作环境:python3 在上一文中python爬虫scrapy框架--人工识别知乎登录知乎倒立文字验证码和数字英文验证码(1)我们已经介绍了用Requests库来登录知乎,本文如果看不懂可以先看之前 ...
- 爬虫scrapy框架之CrawlSpider
爬虫scrapy框架之CrawlSpider 引入 提问:如果想要通过爬虫程序去爬取全站数据的话,有几种实现方法? 方法一:基于Scrapy框架中的Spider的递归爬取进行实现(Request模 ...
- 安装爬虫 scrapy 框架前提条件
安装爬虫 scrapy 框架前提条件 (不然 会 报错) pip install pypiwin32
- 爬虫Ⅱ:scrapy框架
爬虫Ⅱ:scrapy框架 step5: Scrapy框架初识 Scrapy框架的使用 pySpider 什么是框架: 就是一个具有很强通用性且集成了很多功能的项目模板(可以被应用在各种需求中) scr ...
- Python爬虫Scrapy框架入门(2)
本文是跟着大神博客,尝试从网站上爬一堆东西,一堆你懂得的东西 附上原创链接: http://www.cnblogs.com/qiyeboy/p/5428240.html 基本思路是,查看网页元素,填写 ...
- 爬虫Scrapy框架运用----房天下二手房数据采集
在许多电商和互联网金融的公司为了更好地服务用户,他们需要爬虫工程师对用户的行为数据进行搜集.分析和整合,为人们的行为选择提供更多的参考依据,去服务于人们的行为方式,甚至影响人们的生活方式.我们的scr ...
- 自己动手实现爬虫scrapy框架思路汇总
这里先简要温习下爬虫实际操作: cd ~/Desktop/spider scrapy startproject lastspider # 创建爬虫工程 cd lastspider/ # 进入工程 sc ...
- 爬虫--Scrapy框架课程介绍
Scrapy框架课程介绍: 框架的简介和基础使用 持久化存储 代理和cookie 日志等级和请求传参 CrawlSpider 基于redis的分布式爬虫 一scrapy框架的简介和基础使用 a) ...
- 爬虫--Scrapy框架的基本使用
流程框架 安装Scrapy: (1)在pycharm里直接就可以进行安装Scrapy (2)若在conda里安装scrapy,需要进入cmd里输入指令conda install scrapy ...
- Python网咯爬虫 — Scrapy框架应用
Scrapy框架 Scrapy是一个高级的爬虫框架,它不仅包括了爬虫的特征,还可以方便地将爬虫数据保存到CSV.Json等文件中. Scrapy用途广泛,可以用于数据挖掘.监测 ...
随机推荐
- Android Studio maven-metadata.xml 卡着不动原因和解决方法
头一天好好的,第二天就卡着了. 一直在这个地方不动,如果停止就会报 Error:Could not run build action using Gradle distribution ‘https: ...
- httpHelper请求辅助类
#import <Foundation/Foundation.h> #import "AFNetworking.h" @interface AFHttpClient : ...
- python+selenium之中类/函数/模块的简单介绍和方法调用
# coding=utf-8 class ClassA (object): string1 = "这是一个字符串." def instancefunc(self): print ( ...
- 修改字体篇:css3@font-face@字体转换@浏览器字体支持
@font-face { font-family: 'MyWebFont'; src: url('webfont.eot'); /* IE9 Compat Modes */ src: url('web ...
- UVA 1599, POJ 3092 Ideal Path 理想路径 (逆向BFS跑层次图)
大体思路是从终点反向做一次BFS得到一个层次图,然后从起点开始依次向更小的层跑,跑的时候选则字典序最小的,由于可能有多个满足条件的点,所以要把这层满足条件的点保存起来,在跑下一层.跑完一层就会得到这层 ...
- UVA 1609 Foul Play 不公平竞赛 (构(luan)造(gao)+递归)
题意:有n支队伍(n是2的整数幂,2<=n<=4),打淘汰赛,胜者进入下一轮,其中1号队伍能打败至少一半的队伍,对于它不能打败的队伍l,一定存在一支它能够打败的队伍w,使得w能直接打败l, ...
- iperf安装与使用
从官网下载相应版本. https://iperf.fr/iperf-download.php centos7 安装 rpm -i iperf3-3.1.3-1.fc24.x86_64.rpm ubun ...
- C++ Stack 与String
// ConsoleApplication1.cpp : 此文件包含 "main" 函数.程序执行将在此处开始并结束. // #include "pch.h" ...
- ADO 输入输出文本及获取指定字符串
---恢复内容开始--- 1.获取文本:声明别量,指定文本路径,获取文本内容. string Text=System.IO.File.ReadAllText(@"C:\xxx\xxx\xxx ...
- ssh整合思想初步 structs2 Spring Hibernate三大框架各自要点
Web层用Structs2的action Service层用Spring的IoC和aop以及JdbcTemplate或者Transaction事务(创建对象及维护对象间的关系) Dao层用Hibern ...