ISP PIPLINE (二) LensShading Correct
what is the LSC?
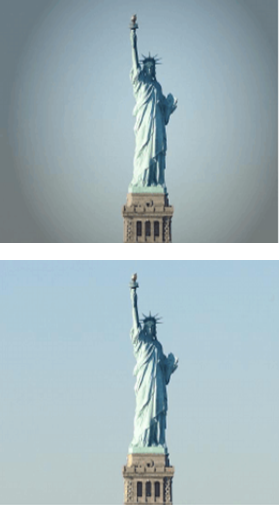
lens shading 分为:Y-shading , color shading。
在讲LSC之前,我们先来理解一个重要的术语--CRA(Chief ray angle)。
CRA:分为lens cra , sensor cra两种。
1.1什么是lens CRA?
定义:最大像高处的主光线与光轴的倾角。备注:最大像高定义为 像素响应降低为零度角像素响应的80%的像素点。
因为Lens CRA 的存在,所以就出现了FOV (filed of view) 所谓的视角的概念。视角大小=2*CRA。
下图为lens CRA示意图。

1.2 什么是sensor的CRA
sensor的CRA 说白了是sensor与之配对的micro lens的CRA.
圈1 表示lens折射过来的光,圈2表示micro lens再次折射的光。可以看出,sensor的光电转换二极管接收到的光并不是 lens直接折射过来的,而是经过microlens再次折射过来的。所以你明白了什么呢?! 这也就是为什么图像边缘会变暗 的原因,光电转换二极管并不会全部接收到光能。这是LensShading中Y-shading的主要原因。

一般情况下,当lens_cra < micro_cra的时候,在sensor传感器的边缘只会出现Y-shading。

倘若,lens_cra > micro_cra, sensor传感器可能会因为无法有效捕捉某频率的光,就会出现偏色的情况,即Color- shading。比如microlens 对R ,G,B的折射率不同,在R_pixel上接收了很小的能量,而在B_pixel上接受了相对较多的能 量。

如何处理或者叫减轻shading带来的图像不均问题呢?
1.lens cra要小于micro cra,这样既可以减缓y-shading,又可以大大避免color-shading.
2.因为镜头是圆的,画面的对角线是最接近镜头成像直径的,所以sensor有效区域最大尺寸是对角线尺寸
3.硬件矫正


4.软件矫正(下面会细讲)
how to LSC with software?
一般模组厂会根据矫正工具将图像划分为17*13(qualcomm),15*15(MTK),33*25(Samsung)等区间,计算每一块的四通道平均值,然后对每个通道与中心块的四通道平均值做除法,得到每个点的增益倍数,整个lut存储在otp中,手机端就可以根据lut进行插值计算每个pixel的增益。
一般用双线性差值或者多项式拟合的方法,确定每个pixel的增益。

原始图片的rgb通道(节选自网络):

y-shading 增益之后,基本与中心数值在同一个平面(节选自网络):

color-shading 增益之后,各区域的r/g,b/g均值相同(节选自网络):

上面三张图片为了让大家理解,节选自网络。本人也模拟了shading矫正过程,但由于colorshading不严重所以矫正效果不明显。下面是我的矫正过程:
1.原始图:

2.三通道三维图

3.(17*13block)r,g,b平均

4.colorgain

5、lensgain=ygain+colorgain

6. 还原后三通道值

7.还原后图片

附上我的代码:
clc
clear all;
close all;
BLOCK_H = 17
BLOCK_V = 13
img = imread('1.bmp');
r= medfilt2(img(:,:,1));%中值滤波抑制边缘凸起噪声
g= medfilt2(img(:,:,2));
b= medfilt2(img(:,:,3));
figure(1)
[rows,cols,channels] = size(img);
width = 1:cols; height = 1:rows; [X1,Y1] = meshgrid(width,height);
mesh(X1,Y1,im2double(r)); hold on; mesh(X1,Y1,im2double(g)); hold on; mesh(X1,Y1,im2double(b));

subSampleRGB=ones(BLOCK_V+1,BLOCK_H+1,3);%6*6*3 gainlut

strideX=floor(cols/BLOCK_H)
strideY=floor(rows/BLOCK_V)
for i=1:BLOCK_H+1%cols
    for j=1:BLOCK_V+1%rows
        for k=1:3%channels
            if i==1
                if j==1%left_top
                   subSampleRGB(j,i,k)=mean2( img(1:floor(strideY*0.5),                                1:floor(strideX*0.5),k) );
                elseif j==BLOCK_V+1 %left_bottom
                   subSampleRGB(j,i,k)=mean2( img(floor((BLOCK_V-0.5)*strideY):BLOCK_V*strideY,        1:floor(strideX*0.5),k) );
                else %left_middle
                   subSampleRGB(j,i,k)=mean2( img(floor((j-1-0.5)*strideY):floor((j-1+0.5)*strideY),   1:floor(strideX*0.5),k) );
                end
            elseif i==BLOCK_H+1
                if j==1%right_top
                   subSampleRGB(j,i,k)=mean2( img(1:floor(strideY*0.5),                                floor(strideX*(BLOCK_H-0.5)):BLOCK_H*strideX,k) );
                elseif j==BLOCK_V+1 %right_bottom
                   subSampleRGB(j,i,k)=mean2( img(floor((BLOCK_V-0.5)*strideY):BLOCK_V*strideY,        floor(strideX*(BLOCK_H-0.5)):BLOCK_H*strideX,k) );
                else %right_middle
                   subSampleRGB(j,i,k)=mean2( img(floor((j-1-0.5)*strideY):floor((j-1+0.5)*strideY),        floor(strideX*(BLOCK_H-0.5)):BLOCK_H*strideX,k) );
                end
            elseif j==1%top without corner
                if i~=1&&i~=BLOCK_H+1
                    subSampleRGB(j,i,k)=mean2( img(1:floor(0.5*strideY),                               floor(strideX*(i-1-0.5)):floor(strideX*(i-1+0.5)),k) );
                end
            elseif j==BLOCK_V+1%bottom without corner
                if i~=1&&i~=BLOCK_H+1
                    subSampleRGB(j,i,k)=mean2( img(floor((BLOCK_V-0.5)*strideY):BLOCK_V*strideY,       floor(strideX*(i-1-0.5)):floor(strideX*(i-1+0.5)),k));
                end
            else
                if i~=1&&i~=BLOCK_H+1&&j~=1&&j~=BLOCK_V+1 %center area
                    subSampleRGB(j,i,k)=mean2( img(floor((j-1-0.5)*strideY):floor((j-1+0.5)*strideY),  floor(strideX*(i-1-0.5)):floor(strideX*(i-1+0.5)),k));
                end
            end
        end
    end
end

figure(2)
[A,B] = meshgrid(1:BLOCK_H+1,1:BLOCK_V+1);
mesh(A,B,subSampleRGB(:,:,1));
hold on
mesh(A,B,subSampleRGB(:,:,2));
hold on
mesh(A,B,subSampleRGB(:,:,3));

%Gainlut luma gain (Y-shading gain)
gainlut=zeros(BLOCK_V+1,BLOCK_H+1,3);% gainlut
for i = 1:BLOCK_H+1
    for j =1:BLOCK_V+1
        for k = 1:3
           gainlut(j,i,k)=mean2( subSampleRGB(floor(BLOCK_V/2+1) : floor(BLOCK_V/2+1)+1,  floor(BLOCK_H/2+1) : floor(BLOCK_H/2+1)+1,k)) / subSampleRGB(j,i,k);
        end
    end
end

%Gainlut chroma gain (colorshading gain)
gainlut_c = zeros(BLOCK_V+1,BLOCK_H+1,2);
center_RoverG = mean2( subSampleRGB(floor(BLOCK_V/2+1) : floor(BLOCK_V/2+1)+1,  floor(BLOCK_H/2+1) : floor(BLOCK_H/2+1)+1,1)) / mean2( subSampleRGB(floor(BLOCK_V/2+1) : floor(BLOCK_V/2+1)+1,  floor(BLOCK_H/2+1) : floor(BLOCK_H/2+1)+1,2));
center_BoverG = mean2( subSampleRGB(floor(BLOCK_V/2+1) : floor(BLOCK_V/2+1)+1,  floor(BLOCK_H/2+1) : floor(BLOCK_H/2+1)+1,3)) / mean2( subSampleRGB(floor(BLOCK_V/2+1) : floor(BLOCK_V/2+1)+1,  floor(BLOCK_H/2+1) : floor(BLOCK_H/2+1)+1,2));
for i = 1:BLOCK_H+1
    for j =1:BLOCK_V+1
           RoverG = subSampleRGB(j,i,1)/subSampleRGB(j,i,2);
           BoverG = subSampleRGB(j,i,3)/subSampleRGB(j,i,2);
           gainlut_c(j,i,1) = center_RoverG/RoverG-1;
           gainlut_c(j,i,2) = center_BoverG/BoverG-1;
    end
end

%chroma+luma gain
gainlut_full = zeros(BLOCK_V+1,BLOCK_H+1,2);
for i = 1:BLOCK_H+1
    for j =1:BLOCK_V+1
           gainlut_full(:,:,1) = gainlut(:,:,1) + gainlut_c(j,i,1);
           gainlut_full(:,:,2) = gainlut(:,:,2) + gainlut_c(j,i,2);
    end
end

%(BLOCK_H+1)*(BLOCK_V+1) colorgain
figure(3)
[C,D] = meshgrid(1:BLOCK_H+1,1:BLOCK_V+1);
mesh(C,D,gainlut_c(:,:,1))
hold on
mesh(C,D,gainlut_c(:,:,2))

figure(4)
mesh(C,D,gainlut_full(:,:,1))
hold on
mesh(C,D,gainlut_full(:,:,2))
hold on
mesh(C,D,gainlut(:,:,2))

%双线性插值FullGainLut
x = 1:strideX:cols+1;
x(end) = cols;
y = 1:strideY:rows+1;
y(end) = rows;

xitp = 1:cols;
yitp = 1:rows;
[Xitp,Yitp]=meshgrid(xitp,yitp);
rgain=interp2(x,y,gainlut(:,:,1),Xitp,Yitp);
ggain=interp2(x,y,gainlut(:,:,2),Xitp,Yitp);
bgain=interp2(x,y,gainlut(:,:,3),Xitp,Yitp);

%shading r,b,g gain
figure(5)
r=im2uint8( (im2double(r).*rgain) );
mesh(X1,Y1,im2double(r));
b=im2uint8( (im2double(b).*bgain) );
hold on
mesh(X1,Y1,im2double(b));
g=im2uint8( (im2double(g).*ggain) );
hold on
mesh(X1,Y1,im2double(g));

%shading corrected img
figure(6)
lscgain = cat(3,rgain,ggain,bgain);%merge三通道gain
imgDoubleType = im2double(img);
imgDoubleType = imgDoubleType.*lscgain;
imgUint = im2uint8(imgDoubleType);
imshow(imgUint)
ISP PIPLINE (二) LensShading Correct的更多相关文章
- ISP PIPLINE (六) 3A 综述
前言: 上一篇文章: ISP PIPLINE (五) Denoise 下一篇文章: (1)3A定义包括什么 Iris:自动光圈,根据环境自动调节光圈. 既然讲到光圈,就先看一下光圈是什么,以及它如何影 ...
- ISP PIPLINE (十四) AE(自动曝光)
自动曝光可以可以通过调节 模拟增益,数字增益,曝光时间,光圈大小来调剂曝光. 曝光在ISP PIPLINE的位置. (先介绍一个额外的知识点: ) gamma compression(也就是de-ga ...
- ISP PIPLINE(零) 知识综述预热
本文为camera isp pipline概述 ISP,即image signal processing.为图像成型做的处理工作.适应不同光学环境下图像的还原. pipline流程如下: 光通过LEN ...
- ISP PIPLINE (十二) Sharpening
什么是sharpening? 不解释,从左到右为sharpen , 从右到左为blur. 简单理解为边缘增强,使得轮廓清晰.增强对比度. 如何进行sharpening? 下面是实际sharpen的过程 ...
- ISP PIPLINE (七) gamma
what is the gamma? CCD.CMOS成像方式是通过像点中的"硅"感受光线的强弱而获得画面.而硅感光是物理成像,它真实地反应光线强度的变化,来多少就输出多少,因此它 ...
- ISP PIPLINE (一) BLC 以及 线性化
what is the BlackLevel? 暗电流来源1.raw8为例,单个pixel的有效值是0~255,但是实际AD芯片的精度可能无法将电压值很小的一部分转换出来,芯片厂会刻意添加一个固定的偏 ...
- ISP PIPLINE (十五) AF
主流的AF: CDAF, PDAF, laser assist AF(这个只是辅助,在微距或者拍摄纹理不明显的场景下好用). AF的大致原理就是检测图像锐度或者等价于锐度的参数,推动马达实现合焦或者对 ...
- ISP PIPLINE (九_2) Denoise 之 time domain denoise
时域噪声是空域噪声在时间上波动的一种描述. 1.多帧平均去噪法 1.1 理论: 1.2 帧数增加,噪声减小: 1.3 IIR滤波器的效果 2.1中的两种方法在拍摄视频的时候,如果有运动物体,则会出现拖 ...
- ISP PIPLINE (九_1) Denoise 之 space domain denoise
1.空间域噪声类型 1.gauss+possion 2.椒盐噪声(dpc处理已经处理了) 去除空域噪声有哪些方法? 空域噪声一般的思想是对某pixel邻域的pixels进行加权平均. 比如 1.高斯降 ...
随机推荐
- 编写高质量的Python代码系列(一)之用Pythonic方式来思考
Python开发者用Pythonic这个形容词来描述具有特定风格的代码.这种风格是大家在使用Python语言进行编程并相互协作的过程中逐渐形成的习惯.那么,如何以改风格完成常见的Python编程工作呢 ...
- JENKINS针对不同项目组对用户进行权限分配
权限需求 因JENKINS上存有de(开发).te(测试).re(预发布)等三个不同环境的项目,同时因为项目需求,需要对不同的开发及测试人员配置不同的jenkins权限,即以项目为单位,对不同人员进行 ...
- oldboy s21day07(深浅拷贝及文件操作)
#!/usr/bin/env python# -*- coding:utf-8 -*- # 1.看代码写结果'''v1 = [1, 2, 3, 4, 5]v2 = [v1, v1, v1]v1.app ...
- MongoDB and GUI 管理界面
MongoDB https://www.mongodb.com/ MongoDB AtlasDatabase as a Service The best way to deploy, operate, ...
- Linux常用命令大全(非常全!!!)
Linux常用命令大全(非常全!!!) 最近都在和Linux打交道,感觉还不错.我觉得Linux相比windows比较麻烦的就是很多东西都要用命令来控制,当然,这也是很多人喜欢linux的原因,比较短 ...
- IDEA远程调试服务器代码
先在idea添加一个remote,host填服务器ip,port填监听服务器端口,默认5005 然后在服务器tomcat catalina.sh 添加(红色部分): JAVA_OPTS="$ ...
- 使用Cobbler批量部署Linux和Windows:Windows系统批量安装(三)
Tutorial: Installing Windows with cobbler (cobbler安装Windows) Windows系统的自动安装需要用到Win PE工具.流程如下: 定制Win ...
- 【原创】大数据基础之Drill(2)Drill1.14+Hive2.1.1运行
问题 Drill最新版本是1.14,从1.13开始Drill支持hive的版本升级到2.3.2,详见1.13的release notes The Hive client for Drill is up ...
- Python-Django-BBS
一个项目从无到有 1 需求分析 -登录ajax,图形验证码 -注册forms和ajax,上传头像,头像预览 -博客首页 -个人站点 -点赞,点踩 -评论 -根评论 -子评论 -后台展示 -添加文章 - ...
- 原生js实现无缝轮播
原生js实现无缝轮播 因为要做到无缝,所以就要把第一张图片和最后一张连接起来,在此处采用js克隆了第一张图片的节点,添加到最后,显示图片序号的小圆按钮也是使用js动态添加的. html部分 <d ...
