在MVC中利用uploadify插件实现上传文件的功能
趁着近段的空闲时间,开发任务不是很重,就一直想把以前在仓促时间里所写的多文件上传功能改一下,在网上找了很多例子,觉得uploadify还可以,就想用它来试试。实现自己想要的功能。根据官网的开发文档,同时借鉴别人的经验,经过断断续续的修改(中间一直被安排其它事),把uploadify默认的样式改,同时把共性都封装了一下,最终完工了。
1.在_Layout.cshtml 页面中引入js文件和CSS文件:
- @*-------上传文件--------*@
- <link href="@Url.Content("~/Scripts/uploadify/css/uploadify.css")" rel="stylesheet" />
- <script src="@Url.Content("~/Scripts/JSScript/upload.js")"></script>
- <script src="@Url.Content("~/Scripts/uploadify/jquery.uploadify.min.js")"></script>
- <script src="@Url.Content("~/Scripts/jquery-1.7..min.js")" type="text/javascript"></script>
引入文件
2.我把每个页面都用到的方法封装在upload.js文件里,同时对各个相关的属性都作了解释(最主要的是 'swf': '/Scripts/uploadify/uploadify.swf'这个的路径要正确):
- function upload(config) {
- $("#" + config.id).uploadify({
- 'method': config.method ? config.method : 'post',//默认是’post’,可以设置为’get’
- 'formData': config.formData,
- 'swf': '/Scripts/uploadify/uploadify.swf', //关键的路径要正确
- 'uploader': '/HanNeng/Upload',
- 'buttonClass': config.buttonClass ? config.buttonClass : null, //额外增加的上传按钮样式类型
- 'buttonImage': config.buttonImage ? config.buttonImage : null, //按钮的背景图片
- 'buttonText': config.buttonText ? config.buttonText : '选择文件',//按钮显示的文字
- 'auto': config.auto ? config.auto : true, //选择文件后是否自动上传,默认是true,为自动上传
- 'height': config.width ? config.width : , //按钮的高度
- 'width': config.width ? config.width : , //按钮的宽度
- 'fileTypeDesc': config.fileTypeDesc, //文件类型的说明
- 'fileTypeExts': config.fileTypeExts, //指定允许上传的文件类型,默认*.*
- 'fileSizeLimit': config.fileSizeLimit, //上传文件大小限制,默认单位是KB,若需要限制大小在100KB以内, 可设置该属性为:‘100KB’
- 'removeTimeout': , //上传完成后的进度条的显示时间
- 'queueSizeLimit': config.queueSizeLimit, //上传队列长度限制,一次最多可上传多少个文件
- 'overrideEvents': ['onDialogClose', 'onUploadSuccess', 'onUploadError', 'onSelectError'], //不弹出默认的提示信息
- 'onSWFReady': config.sfdisable == true ? uploadify_onSWFReady : null, //如果有disable参数且为true时,就禁用掉上传功能
- 'onUploadStart': function (file) { //在一个文件开始上传之前触发。
- $("#" + config.id).uploadify("settings", config.formKey, config.formData);
- },
- 'onSelect': uploadify_onSelect, //选择文件后触发
- 'onSelectError': uploadify_onSelectError, //选择文件后出错时触发
- 'onUploadError': uploadify_onUploadError,//上传文件失败触发
- 'onUploadSuccess': uploadify_onUploadSuccess //在每一个文件上传成功后触发
- });
- }
- //选择文件错误调用的方法
- var uploadify_onSelectError = function (file, errorCode, errorMsg) {
- var msgText = "上传失败,原因:\n\n";
- switch (errorCode) {
- case SWFUpload.QUEUE_ERROR.QUEUE_LIMIT_EXCEEDED:
- msgText += " 每次上传的文件数量最多只可上传 " + this.settings.queueSizeLimit + "个文件!\n";
- break;
- case SWFUpload.QUEUE_ERROR.FILE_EXCEEDS_SIZE_LIMIT:
- msgText += " 文件 【" + file.name + "】 大小超过系统限制的( " + this.settings.fileSizeLimit + " )大小!\n";
- break;
- case SWFUpload.QUEUE_ERROR.ZERO_BYTE_FILE:
- msgText += " 文件 【" + file.name + "】 大小为0,不可上传!\n";
- break;
- case SWFUpload.QUEUE_ERROR.INVALID_FILETYPE:
- msgText += " 所选文件 【" + file.name + "】 的格式不正确,仅限上传(" + this.settings.fileTypeExts + ")的文件格式!\n";
- break;
- default:
- msgText += "错误代码:" + errorCode + "\n" + errorMsg;
- }
- art.dialog.alert(msgText);
- }
- //文件上传错误调用的方法
- var uploadify_onUploadError = function (file, errorCode, errorMsg, errorString) {
- // 手工取消不弹出提示
- if (errorCode == SWFUpload.UPLOAD_ERROR.FILE_CANCELLED
- || errorCode == SWFUpload.UPLOAD_ERROR.UPLOAD_STOPPED) {
- return;
- }
- var msgText = "上传失败\n\n";
- switch (errorCode) {
- case SWFUpload.UPLOAD_ERROR.HTTP_ERROR:
- msgText += " HTTP 错误\n" + errorMsg;
- break;
- case SWFUpload.UPLOAD_ERROR.MISSING_UPLOAD_URL:
- msgText += " 上传文件 【" + file.name + "】 丢失,请重新上传!\n";
- break;
- case SWFUpload.UPLOAD_ERROR.IO_ERROR:
- msgText += " IO错误!\n";
- break;
- case SWFUpload.UPLOAD_ERROR.SECURITY_ERROR:
- msgText += " 安全性错误\n" + errorMsg;
- break;
- case SWFUpload.UPLOAD_ERROR.UPLOAD_LIMIT_EXCEEDED:
- msgText += " 每次最多上传 " + this.settings.uploadLimit + "个!\n";
- break;
- case SWFUpload.UPLOAD_ERROR.UPLOAD_FAILED:
- msgText += errorMsg;
- break;
- case SWFUpload.UPLOAD_ERROR.SPECIFIED_FILE_ID_NOT_FOUND:
- msgText += " 找不到指定文件,请重新操作!\n";
- break;
- case SWFUpload.UPLOAD_ERROR.FILE_VALIDATION_FAILED:
- msgText += "参数错误!\n";
- break;
- default:
- msgText += "文件:【" + file.name + "】\n错误码:" + errorCode + "\n"
- + errorMsg + "\n" + errorString;
- }
- art.dialog.alert(msgText);
- return parameters;
- }
- //选择文件调用的方法
- var uploadify_onSelect = function () {
- }
- //上传成功后调用的方法
- var uploadify_onUploadSuccess = function (file, data, response) {
- var innerHtml = "";
- if (response) {
- var json = (new Function("", "return " + data))();
- innerHtml = "<li style=\"list-style: disc\">"
- + "<a style='color:#C51616' href='/HanNeng/DownFile?filePath=" + json.filePath + "&fileName=" + file.name + "&fileId=" + json.aID + "&backUrl=" + json.backUrl + "&url=" + json.url;
- if (json.urlID != "") {
- innerHtml += "?id=" + json.urlID;
- }
- innerHtml += "'>" + file.name + "</a>" + "<a style='margin-left: 10px;' href='javascript:void()' name='deleteImg' curid='" + json.aID + "' onclick=\"DeleteFile(this)\">"
- + "<img src='/Content/images/delete.png' /></a></li>";
- //当上传的文档为课题的相关文档时,上传成功后作特殊处理
- if (json.attType.indexOf("KT") >= ) {
- $.ajax({
- type: 'POST',
- url: '/Subject/SubjectUploadDoc',
- dataType: 'json',
- data: { guid: json.guid, atttype: json.attType },
- success: function (data) {
- if (data.isok) {
- }
- }
- });
- }
- } else {
- innerHtml = "<div>该附件上传失败,请重新上传</div>";
- }
- $("#filename").html($("#filename").html() + innerHtml);
- }
- //检测FLASH失败调用
- var uploadify_onFallback = function () {
- art.dialog.alert("您未安装FLASH控件,无法上传图片!请安装FLASH控件后再试。");
- }
- //加载完毕后,禁用uploadify时触发(通过disable方法)
- var uploadify_onSWFReady = function () {
- $('#file_upload').uploadify('disable', true);
- $(".uploadify-button-text").css("color", "#999");
- }
upload.js
3.MVC里控制器Controller的上传代码,并插入数据表中('uploader'这个引用到),在return Json()返回自己想要的参数,之后在上传成功后,在uploadify_onUploadSuccess方法里获取传过来的参数:
- #region uploadify上传文件方法
- [AcceptVerbs(HttpVerbs.Post)]
- public JsonResult Upload(HttpPostedFileBase fileData)
- {
- HanNeng.Common.UpLoadHelper upload = new HanNeng.Common.UpLoadHelper();
- string guid = HttpContext.Request.Form["guid"];
- string attType = HttpContext.Request.Form["attType"];
- string strUrl = HttpContext.Request.Form["url"];
- string strUrlID = HttpContext.Request.Form["urlID"];
- string backUrl = HttpContext.Request.Form["backUrl"];
- int i = ;
- int aid = ;
- bool istrue = false;
- if (fileData != null)
- {
- try
- {
- //文件上传后的保存路径
- string filePath = upload.FilePath;//文件保存的目录
- if (!Directory.Exists(filePath))
- Directory.CreateDirectory(filePath); //如果不存在UploadFile文件夹,则创建UploadFile文件夹
- upload.FileName = System.IO.Path.GetFileName(fileData.FileName); //得到文件名字
- upload.FileWithoutName = System.IO.Path.GetFileNameWithoutExtension(fileData.FileName); //不含有扩展名
- upload.FileSize = fileData.ContentLength; //得到文件大小
- upload.FileExt = upload.GetExt(fileData.FileName);//得到文件扩展名
- upload.Category = fileData.ContentType; //得到文件输出类型
- upload.FileNewName = upload.GetFileName(upload.FileExt);
- //存入文件
- fileData.SaveAs(filePath + upload.FileNewName);//保存文件到文件夹中
- string fileName = Path.GetFileName(fileData.FileName);// 原始文件名称
- string fileExtension = Path.GetExtension(fileName); // 文件扩展名
- fileData.SaveAs(filePath + upload.FileNewName);
- string path = "/UploadFile/" + System.IO.Path.GetFileName(upload.FileNewName);
- Model.Attachment att = new Model.Attachment();
- att.AttachmentID = System.Guid.NewGuid().ToString("D");
- att.FileName = upload.FileName;
- att.FileLogicName = upload.FileNewName;
- att.AttachmentType = attType;
- att.FID = guid;
- att.FilePath = path;
- att.FileSize = upload.FileSize;
- att.FileExtension = upload.FileExt;
- att.CreateUserID = Identity.UserID;
- att.CreateTime = DateTime.Now;
- att.Category = upload.Category;
- att.States = ;
- att.Summary = (i + ).ToString(); //排序
- istrue = new BLL.Attachment().Add(att) > ;
- if (istrue)
- {
- Model.Attachment matt = new BLL.Attachment().GetModel("AttachmentID", att.AttachmentID);
- if (matt != null)
- aid = matt.AttachmentAutoID;
- }
- return Json(new
- {
- Success = true,
- fileName = att.FileName,
- SaveName = att.FileLogicName,
- attType = att.AttachmentType,
- filePath = att.FilePath,
- guid = att.FID,
- aID = aid,
- url = strUrl,
- urlID = strUrlID,
- backUrl = backUrl
- }, JsonRequestBehavior.AllowGet);
- }
- catch (Exception ex)
- {
- return Json(new { Success = false, Message = ex.Message }, JsonRequestBehavior.AllowGet);
- }
- }
- else
- return Json(new { Success = false, Message = "请选择要上传的文件!" }, JsonRequestBehavior.AllowGet);
- }
- #endregion
Upload方法
4.删除已上传文件的方法:
- #region 无刷新删除上传的附件
- public JsonResult DeleteFile(int aID)
- {
- bool isOk = false;
- if (aID > )
- {
- Model.Attachment att = new BLL.Attachment().GetModel(aID);
- if (att != null)
- {
- isOk = new BLL.Attachment().Delete(aID);
- //将文件夹里的文件也一起删除
- if (System.IO.Directory.Exists(Request.MapPath("~/UploadFile/")))
- {
- if (System.IO.File.Exists(Request.MapPath("~/UploadFile/" + att.FileLogicName)))
- {
- System.IO.File.Delete(Request.MapPath("~/UploadFile/" + att.FileLogicName));
- }
- }
- }
- }
- return Json(new { success = isOk });
- }
- #endregion
DeleteFile方法
5.下载文件的方法
- #region 下载文件-DownFile
- /// <summary>
- /// 下载文件
- /// </summary>
- /// <param name="filePath">文件路径</param>
- /// <param name="fileName">文件名</param>
- /// <param name="fileId">下载文件自增id</param>
- /// <param name="url">下载失败返回界面url</param>
- /// <returns></returns>
- public ActionResult DownFile(string filePath, string fileName, string fileId, string url, string backUrl, string r = null)
- {
- string strurl = "";
- if (url != null)
- strurl = url;
- if (r != null)
- strurl = url + "&r=" + r;
- if (!string.IsNullOrEmpty(backUrl))
- {
- strurl = strurl.Contains("?") ? strurl + "&backUrl=" + Url.Encode(backUrl) : strurl + "?backUrl=" + Url.Encode(backUrl);
- }
- if (string.IsNullOrEmpty(filePath) || string.IsNullOrEmpty(fileName) || string.IsNullOrEmpty(fileId))
- {
- return ShowRedirectMessage("下载失败", url != null ? strurl : "/Student/TableList");
- }
- //绝对路径
- filePath = Server.MapPath(filePath);
- if (!System.IO.File.Exists(filePath))
- {
- new BLL.Attachment().Delete(Convert.ToInt32(fileId));
- return ShowRedirectMessage("下载的文件不存在", url != null ? strurl : "/Student/TableList");
- }
- FileStream fs = new FileStream(filePath, FileMode.Open);
- byte[] bytes = new byte[(int)fs.Length];
- fs.Read(bytes, , bytes.Length);//读取文件
- fs.Close();
- Response.Charset = "UTF-8";
- Response.ContentEncoding = System.Text.Encoding.GetEncoding("UTF-8");
- Response.ContentType = "application/octet-stream";//以二进制流输出给浏览器
- //attachment:作为附件下载 inline:直接打开
- Response.AddHeader("Content-Disposition", "attachment; filename=" + Server.UrlEncode(fileName));
- Response.BinaryWrite(bytes);
- Response.End();
- return new EmptyResult();
- }
- #endregion
- #region 获取附件列表 GetProFile
- /// <summary>
- /// 获取附件列表
- /// </summary>
- /// <param name="guid"></param>
- /// <param name="attType"></param>
- /// <param name="a"></param>
- /// <returns></returns>
- public static List<MvcHtmlString> GetProFile(string guid, string attType, string a = null, string url = null, string backUrl = null)
- {
- List<Model.Attachment> M_Att = new BLL.Attachment().GetModelList(guid, attType);
- List<MvcHtmlString> list = new List<MvcHtmlString>();
- string str = "";
- foreach (var item in M_Att)
- {
- str = "<a style='color:#C51616' href='/HanNeng/DownFile?filePath=" + item.FilePath + "&fileName=" + item.FileName + "&fileId=" + item.AttachmentAutoID + "&url=" + url + "&backUrl=" + backUrl + "'>" + item.FileName + "</a>";
- if (a != null)
- {
- str += "<a style='margin-left: 10px;' href='javascript:void()' name='deleteImg' curid='" + item.AttachmentAutoID + "' onclick=\"DeleteFile(this)\"><img src='/Content/images/delete.png' /></a>";
- }
- list.Add(new MvcHtmlString(str));
- }
- return list;
- }
- #endregion
下载文件
6.在页面上的调用,设置一个全局变量var disable = false;是因为有些页面要根据权限禁用掉上传的功能。当全部加载完毕调用的是uploadify_onSWFReady方法后,如果disable为true时就禁用,为false时就可上传:
- var disable = false; //全局变量
- //文件上传
- function uploadfile() {
- var config = {
- id: "file_upload",
- formKey: "formData",
- formData: { 'guid': $("#GUID").val(), 'attType': 'XM-PS-101', 'url': '/ProjectInfo/ProjectInfoAdd', 'urlID': $("#ID").val(), 'backUrl': $("#backUrl").val() },
- fileTypeDesc: '文件',
- fileTypeExts: '*.jpg;*.png;*.doc;*.docx;*.xls;*.xlsx;*.pdf',
- sfdisable: disable
- };
- upload(config);
- }
页面调用上传的方法
- <input type="button" name="file_upload" id="upload" style="width: 84px; height: 29px;" class="uploadify-button uploadify uploadify-button-text" value="选择文件" />
- <input type="file" name="file_upload" id="file_upload" style="display:none"/>
- <ul id="filename" class="ulfile" style="padding-left: 20px"></ul>
页面的html
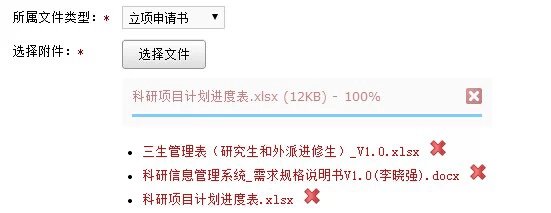
7.最终效果图:


作者:静水思寒
出处:http://www.cnblogs.com/jingshuisihan/
本文版权归作者和博客园共有,欢迎转载,但未经作者同意必须保留此段声明,且在文章页面明显位置给出原文连接,否则保留追究法律责任的权利。
在MVC中利用uploadify插件实现上传文件的功能的更多相关文章
- 利用ajaxfileupload插件异步上传文件
html代码: <input type="file" id="imgFile" name="imgFile" /> js代码: ...
- 利用TortoiseGit向Github上传文件
利用TortoiseGit向Github上传文件 第一步:建一个新文件夹,作为本地仓库 第二步:右键选择设置为版本库 若弹出,确认即可 重新打开改文件,会发现多了一个绿色的小勾 在文件夹中会自动生成一 ...
- ueditor1.3.6jsp版在struts2应用中上传图片报"未找到上传文件"解决方案
摘要: ueditor1.3.6jsp版在struts2应用中上传图片报"未找到上传文件"解决方案 在struts2应用中使用ueditor富文本编辑器上传图片或者附件时,即使配置 ...
- python中使用multipart/form-data请求上传文件
最近测试的接口是上传文件的接口,上传单个文件,我主要使用了2种方法~ 接口例如: URL: http://www.baidu.com/*** method:post 参数: { "salar ...
- 编写Java程序,实现客户端向服务端上传文件的功能
查看本章节 查看作业目录 需求说明: 实现客户端向服务端上传文件的功能 当启动服务端后,运行客户端程序,系统提示客户在客户端输入上传文件的完整路径.当客户在客户端输入完成后,服务端实现文件上传 实现思 ...
- c# asp.net mvc4 使用uploadify插件实现上传功能
[1]首先去官网下载插件:http://www.uploadify.com/download/ .ww我使用的是免费的,基于flash的版本.因为基于H5的版本需付费使用,然后使用该插件也就是做做毕设 ...
- CI(2.2) 配置 jquery的上传插件Uploadify(v3.2) 上传文件
1.下载uploadify, 我的是v3.2 2.模板页面引入: <base href='{base_url()}' /> <script type="text/jav ...
- shell中利用ftp 上传文件夹功能
我们知道ftp 只能用来上传或者下载文件,一次单个或者多个,怎么实现将文件夹的上传和下载呢? 可以利用先在remote ip上建立一个相同的文件夹目录,然后将文件放到各自的目录中去 1.循环遍历出要上 ...
- .net MVC借助Iframe实现无刷新上传文件
html: <div id="uploadwindow" style="display: none;"> <form action=" ...
随机推荐
- web前端开发框架搜集
Web应用框架(Web application framework)是一种电脑软件框架,用来支持动态网站.网络应用程序及网络服务的开发.这种框架有助于减轻网页开发时共通性活动的工作负荷,例如许多框架提 ...
- Cocos2d粒子系统二
粒子系统的属性: 粒子的发射速度 重力模式(模式A): 重力 方向 速度 +- 变动 切向加速度 +- 变动 径向加速度 +- 变动 半径模式(模式B): 开始半径 +- 变动 结束半径 +- 变动 ...
- C语言初学 给已知公式求圆周率
公式: 圆周率=1-1/3+1/5-1/7+......+1/(4n-3)-1/(4n-1) #include<stdio.h> #include<math.h> main() ...
- javaWeb防止恶意登陆或防盗链的使用
使用场景:明明引用了一个正确的图片地址,但显示出来的却是一个红叉或写有“此图片仅限于***网站用户交流沟通使用”之类的“假图片”.用嗅探软件找到了多媒体资源的真实地址用下载软件仍然不能下载.下载一些资 ...
- 02 - 替换SetInput方法 VTK 6.0 迁移 (2013-06-30 16:22)
VTK6 引入了许多不兼容的变化,这其中就包括用SetInputData()和SetInputConnection()替换SetInput()方法.在先前的版本中,VTK4 引入了SetInput() ...
- startActivityForResult案例
Info:startActivty 与 startActivityForResult区别 (1):startActivity 启动了其他Activity之后不会再回调过来,此时启动者与被启动者在启动后 ...
- TimeZone 时区 (JS .NET JSON MYSQL)
来源参考 : http://www.cnblogs.com/qiuyi21/archive/2008/03/04/1089456.html 来源参考 : http://walkingice.blogs ...
- WPF自定义控件与样式(15)-终结篇
原文:WPF自定义控件与样式(15)-终结篇 系列文章目录 WPF自定义控件与样式(1)-矢量字体图标(iconfont) WPF自定义控件与样式(2)-自定义按钮FButton WPF自定义控件与 ...
- Qt入门(3)——信号和槽
信号和槽用于对象间的通讯.信号/槽机制是Qt的一个中心特征并且也许是Qt与其它工具包的最不相同的部分.在图形用户界面编程中,我们经常希望一个窗口部件的一个变化被通知给另一个窗口部件.更一般地,我们希望 ...
- 2015第24周四Spring事务4
Spring配置文件中关于事务配置总是由三个组成部分,分别是DataSource.TransactionManager和代理机制这三部分,无论哪种配置方式,一般变化的只是代理机制这部分. Da ...