BSBuDeJie_03
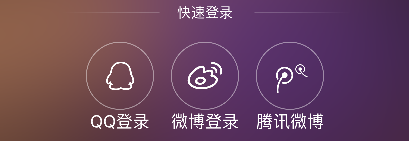
一 快速登录
1 改变状态栏的style
- (UIStatusBarStyle)preferredStatusBarStyle

{

    return UIStatusBarStyleLightContent;

}

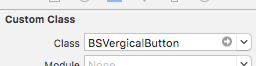
2 自定义按钮(图片在上,文字在下)
- (void)awakeFromNib

{

    self.titleLabel.textAlignment = NSTextAlignmentCenter;

}

- (void)layoutSubviews

{

    [super layoutSubviews];

    //调整图片

    self.imageView.x = ;

    self.imageView.y = ;

    self.imageView.width = self.width;

    self.imageView.height = self.imageView.width ;

    //调整文字

    self.titleLabel.x = ;

    self.titleLabel.y = self.imageView.height;

    self.titleLabel.width = self.width;

    self.titleLabel.height = self.height - self.titleLabel.y;

}
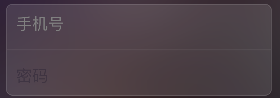
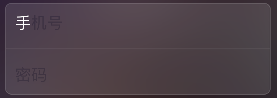
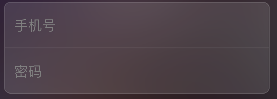
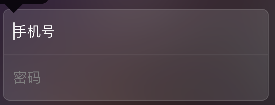
二 简单的登录框
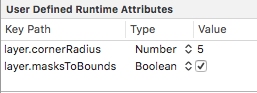
三 xib中使用kvc
四 占位文字颜色 - 01
若使用某种属性,在Inspecter中找,否则转到头文件中寻找
改变内部的属性,通过属性或重写某种方法
1 使用富文本技术
    //文字属性

    NSMutableDictionary *attrs = [NSMutableDictionary dictionary];

    attrs[NSForegroundColorAttributeName] = [UIColor grayColor];

    //NSAttributedString:带有属性的文字(富文本技术)

    NSAttributedString *placeholder = [[NSAttributedString alloc] initWithString:@"手机号" attributes:attrs];

    self.phoneField.attributedPlaceholder = placeholder;
2 可变属性
    //NSMutableAttributedString:可变

    NSMutableAttributedString *placeholder = [[NSMutableAttributedString alloc] initWithString:@"手机号"];

    [placeholder setAttributes:@{NSForegroundColorAttributeName : [UIColor whiteColor]} range:NSMakeRange(, )];

    self.phoneField.attributedPlaceholder = placeholder;
3 监听键盘弹出的两种方法
3.1 通过通知
3.2 通过textField的代理
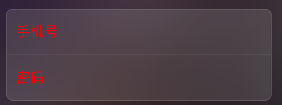
五 占位文字:drawPlaceholderInRect - 02
自定义TextField
- (void)drawPlaceholderInRect:(CGRect)rect

{

    [self.placeholder drawInRect:CGRectMake(, , rect.size.width, ) withAttributes:@{NSForegroundColorAttributeName : [UIColor grayColor], NSFontAttributeName : self.font}];

}
六 占位文字颜色 (运行时)runtime - 03
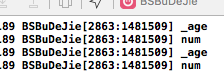
1 查找内部的成员变量 runtime
1.1 苹果官方一套C语言库, 能做很多底层操作(比如访问隐藏一些成员变量/成员方法...)
@interface BSTextField : UITextField

{

    int _age;

    int num;

}

@end
- (void)awakeFromNib

{

    unsigned int count = ;

    Ivar *ivars = class_copyIvarList([self class], &count);

    for (int i = ; i < count; i++) {

        //取出成员变量

        Ivar ivar = *(ivars + i);

        BSLog(@"%s", ivar_getName(ivar));

    }

}
2
- (void)awakeFromNib

{

    UILabel *placeholderLabel = [self valueForKeyPath:@"_placeholderLabel"];

    placeholderLabel.textColor = [UIColor redColor];

}
- (void)awakeFromNib

{

//    UILabel *placeholderLabel = [self valueForKeyPath:@"_placeholderLabel"];

//    placeholderLabel.textColor = [UIColor redColor];

    [self setValue:[UIColor grayColor] forKey:@"_placeholderLabel.textColor"];
   //设置光标颜色和占位文字颜色一致
   self.tintColor = [self.textColor;
}
3 代码整理
static NSString * const BSPlaceholderColorKeyPath = @"_placeholderLabel.textColor";

@implementation BSTextField

//- (void)awakeFromNib

//{

//    unsigned int count = 0;

//

//    Ivar *ivars = class_copyIvarList([UITextField class], &count);

//    for (int i = 0; i < count; i++) {

//        //取出成员变量

//        Ivar ivar = *(ivars + i);

//        //打印成员变量的名字

//        BSLog(@"%s", ivar_getName(ivar));

//    }

//

//    //释放

//    free(ivars);

//}

- (void)awakeFromNib

{

//    UILabel *placeholderLabel = [self valueForKeyPath:@"_placeholderLabel"];

//    placeholderLabel.textColor = [UIColor redColor];

    //修改占位文字颜色

//    [self setValue:[UIColor grayColor] forKey:@"_placeholderLabel.textColor"];

    //设置光标颜色和文字颜色一致

    self.tintColor = self.textColor;

    //不成为第一响应者

    [self resignFirstResponder];

}

//当前文本框聚焦时

- (BOOL)becomeFirstResponder

{

    //修改占位文字颜色

    [self setValue:self.textColor forKeyPath:BSPlaceholderColorKeyPath];

    return [super becomeFirstResponder];

}

//当前文本框失去焦点时

- (BOOL)resignFirstResponder

{

    //修改占位文字颜色

    [self setValue:[UIColor grayColor] forKeyPath:BSPlaceholderColorKeyPath];

    return [super resignFirstResponder];

}
七 注册框
1 清除按钮
2 控制间距约束实现滑动效果
/* 登录框距离控制器view左边的间距 */

@property (weak, nonatomic) IBOutlet NSLayoutConstraint *loginViewLeftMargin;
- (IBAction)showLoginOrRegister:(UIButton *)sender {

    //退出键盘

    [self.view endEditing:YES];

    if (self.loginViewLeftMargin.constant == ) {//显示注册

        self.loginViewLeftMargin.constant = - self.view.width;

        sender.selected = YES;

    }else{//显示登录

        self.loginViewLeftMargin.constant = ;

        sender.selected = NO;

    }

   [UIView animateWithDuration:0.25 animations:^{

       [self.view layoutIfNeeded];

   }];

}
八
九 推送界面
1 键盘类型

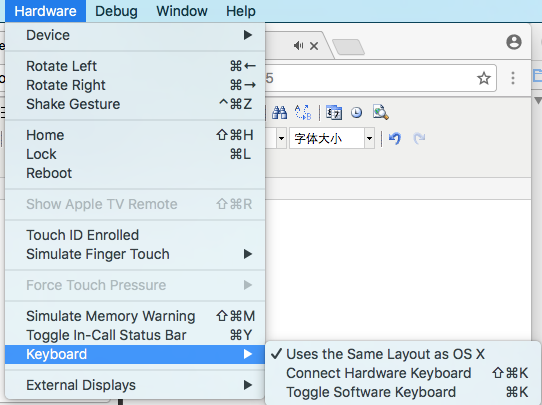
2 模拟器的键盘和电脑相连
3 判断是否第一次启动
获得当前软件版本号,通过当前软件的版本号和沙盒中存储的版本号相比,判断是否是初次打开
+ (void)show

{

    //获得当前软件的版本号

    NSString *key = @"CFBundleShortVersionString";

    NSString *currentVersion = [NSBundle mainBundle].infoDictionary[key];

    //获得沙盒中存储的版本号

    NSString *sanboxVersion = [[NSUserDefaults standardUserDefaults] stringForKey:key];

    if (![currentVersion isEqualToString:sanboxVersion]){//第一次打开当前版本

        UIWindow *window = [UIApplication sharedApplication].keyWindow;

        BSPushGuideView *guideView = [BSPushGuideView guideView];

        guideView.frame = window.frame;

        [window addSubview:guideView];

        //存储版本号

        [[NSUserDefaults standardUserDefaults] setObject:currentVersion forKey:key];

        [[NSUserDefaults standardUserDefaults] synchronize];

    }

}
4 若点击图片某一范围有效果,可用按钮覆盖上去
十
十一 顶部标签内容
1 白色半透明的背景色
    UIView *titlesView = [[UIView alloc] init];

    //白色半透明

    titlesView.backgroundColor = [UIColor colorWithRed:1.0 green:1.0 blue:1.0 alpha:0.5];

    titlesView.backgroundColor = [UIColor colorWithWhite:1.0 alpha:0.5];

    titlesView.backgroundColor = [[UIColor whiteColor] colorWithAlphaComponent:0.5];

    titlesView.width = self.view.width;

    titlesView.height = ;

    titlesView.y = ;

    [self.view addSubview:titlesView];
2 顶部的标签栏
    //内部的子标签

    NSArray *titles = @[@"全部", @"视频", @"声音", @"图片", @"段子"];

    CGFloat width = titlesView.width / titles.count;

    CGFloat height = titlesView.height;

    for (NSInteger i = ; i < titles.count; i++) {

        UIButton *button = [[UIButton alloc] init];

        button.height = height;

        button.width = width;

        button.x = i * width;

        [button setTitle:titles[i] forState:UIControlStateNormal];

        [button setTitleColor:[UIColor grayColor] forState:UIControlStateNormal];

        button.titleLabel.font = [UIFont systemFontOfSize:];

        [titlesView addSubview:button];

    }
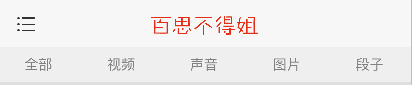
3 标签栏底部的指示器
    //底部的红色指示器

    UIView *indicatorView = [[UIView alloc] init];

    indicatorView.backgroundColor = [UIColor redColor];

    indicatorView.height = ;

    indicatorView.y = titlesView.height - indicatorView.height;

    [titlesView addSubview:indicatorView];

    self.indicatorView = indicatorView;
- (void)titleClick:(UIButton *)button

{

    [UIView animateWithDuration:0.25 animations:^{

        self.indicatorView.width = button.width;

        self.indicatorView.centerX = button.centerX;

    }];

}

十二 标签的选中和动画
1 选中
    //修改按钮颜色

    self.selectedButton.selected = NO;

    button.selected = YES;

    self.selectedButton = button;

2 防止一个标签重复被点 - Disabled
        [button setTitleColor:[UIColor grayColor] forState:UIControlStateNormal];

        [button setTitleColor:[UIColor redColor] forState:UIControlStateDisabled];
    //修改按钮颜色 防止标签重复被点

    self.selectedButton.enabled = YES;

    button.enabled = NO;

    self.selectedButton = button;
3 默认点击第一个按钮
        //默认点击第一个按钮

        if (i == ) {

            [self titleClick:button];

        }

4 强制布局
[button layoutIfNeeded];//强制布局(强制更新子控件的frame)
十三 显示子控制器
十四
十五 子控制器显示
1 系统自动创建的控制器的内边距默认是20
    //取出子控制器

    UITableViewController *vc = self.childViewControllers[index];

    vc.view.x = scrollView.contentOffset.x;

    vc.view.y = ;//设置内边距为0 其默认为20
2 设置滚动条的内边距
    //滚动条的内边距

    vc.tableView.scrollIndicatorInsets = vc.tableView.contentInset;
十六 加载文字帖子数据
将数据写入文件
[responseObject writeToFile:@"/Users/chenxiaolei/Desktop/duanzi.plist" atomically:YES];
BSBuDeJie_03的更多相关文章
随机推荐
- Spring各jar包的作用
spring.jar是包含有完整发布的单个jar 包,spring.jar中包含除了spring-mock.jar里所包含的内容外其它所有jar包的内容,因为只有在开发环境下才会用到 spring-m ...
- DAY6 使用ping钥匙临时开启SSH:22端口,实现远程安全SSH登录管理就这么简单
设置防火墙策略时,关于SSH:22访问权限,我们常常会设置服务器只接受某个固定IP(如公司IP)访问,但是当我们出差或在家情况需要登录服务器怎么办呢? 常用两种解决方案:1.通过VPN操作登录主机: ...
- iOS开发——UI进阶篇(十九)UISearchBar控件简介
最近用到搜索功能.总结一下 搜索,无疑可以使用UISearchBar控件! 那就先了解一下UISearchBar控件吧! UISearchBar控件就是要为你完成搜索功能的一个专用控件.它集成了很多你 ...
- python多线程学习记录
1.多线程的创建 import threading t = t.theading.Thread(target, args--) t.SetDeamon(True)//设置为守护进程 t.start() ...
- 如何用angularjs给从后台传来数据添加链接
<!DOCTYPE html> <html ng-app="myApp"> <head> <meta charset="UTF- ...
- ubuntu16.04 NVIDIA显卡驱动安装
安装环境:Ubuntu16.04 1.打开终端,先删除旧的驱动: sudo apt-get purge nvidia* 2禁用自带的 nouveau nvidia驱动 (important!) 创建一 ...
- 【转】Java读取matlab的.mat数据文件
参考:Java读取mat文件 下载链接:ujmp jmatio 下载完两个.jar文件之后,如何引用到java项目当中?项目名称->右键->Property->Java Build ...
- Linux Swap分区设定
因为准备在linux上面安装Oracle数据库,据说swap分区小于4G容易失败,天啦噜的我连swap分区是啥都不是非常清楚, 大概有个印象吧,但先搞大了再说. 测试证明Ubuntu14默认的swap ...
- How to install OpenBazaar Server in CentOS7
helps from: https://github.com/OpenBazaar/OpenBazaar-Server http://stackoverflow.com/questions/24917 ...
- Cannot find the Word template:WordToRqm.dot
方案一: 如果你的word中没有“开发工具”,就在“选项”中找到“自定义功能区”,右侧列表中找到“开发工具”,添加. 转到“开发工具”选项卡,com加载项,里面有个关于Powerdesigner的,反 ...