vue2.0 之 douban (四)创建Swipe图片轮播组件
swiper中文文档:http://www.swiper.com.cn
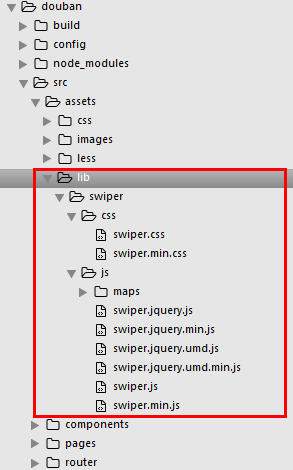
1.我们在components文件夹里创建一个swipe组件,将需要用到的js以及css文件复制到assets/lib文件夹下,如图:
然后根据swiper的使用方法:http://www.swiper.com.cn/usage/index.html
将html结构复制到swipe组件里,引入css文件,以及js
<template>

  <div class="swiper-container">

    <div class="swiper-wrapper">

      <div class="swiper-slide">Slide 1</div>

        <div class="swiper-slide">Slide 2</div>

        <div class="swiper-slide">Slide 3</div>

    </div>

    <!-- 分页器 -->

   <div class="swiper-pagination"></div>

  </div>

</template>

<script>

  import '../assets/lib/swiper/js/swiper.js'

  export default {

    mounted() {

     var mySwiper = new Swiper ('.swiper-container', {

     loop: true,

    // 如果需要分页器

    pagination: '.swiper-pagination',

  })

    }

  }

</script>

<style>

  @import '../assets/lib/swiper/css/swiper.css';

  .swiper-pagination-bullet-active {

    background: #fff;

  }

</style>
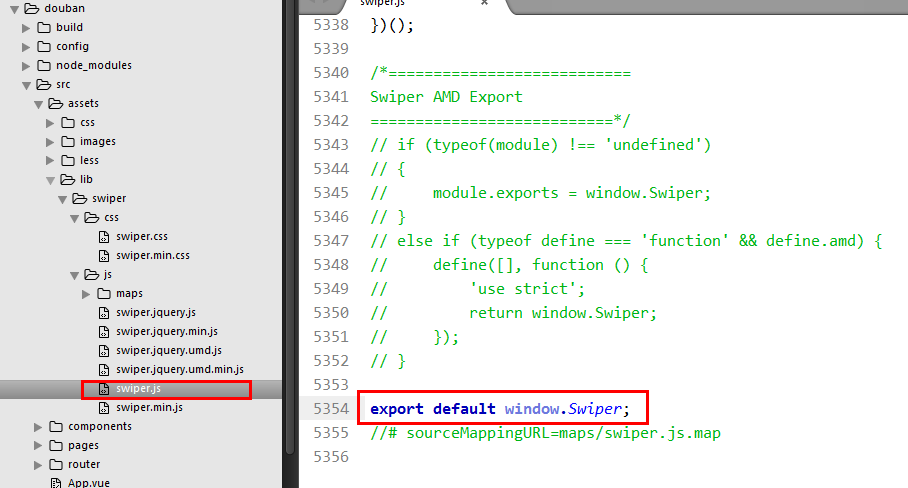
保存预览会报错,我们将swiper.js尾部需要修改一下
将AMD模式删掉,改成
export default window.Swiper;
我们可能在一个页面引用多个swipe组件,就会发生命名冲突,所以我们在实例化swiper的时候,类名需要变化一下,例如:
<m-swipe swipeid="swipe01"></m-swipe>

<m-swipe swipeid="swipe02"></m-swipe>
<div class="swiper-container" :class="swipeid">

  <div class="swiper-wrapper">

    <div class="swiper-slide">Slide 1</div>

      <div class="swiper-slide">Slide 2</div>

      <div class="swiper-slide">Slide 3</div>

  </div>

  <!-- 分页器 -->

  <div class=".swiper-pagination"></div>

</div>

export default {

  props: {

    swipeid: {

      type: String,

      default: 'swipe01'

    }

  },

  mounted() {

    var That = this;

    new Swiper('.'+That.swipeid, {

      loop: true,

      // 如果需要分页器

      pagination: '.swiper-pagination',

    })

  }

}
2.组件化
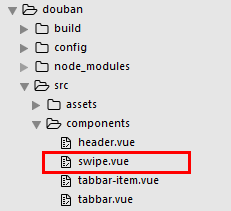
swipe.vue
<template>

  <div class="swiper-container" :class="swipeid">

    <div class="swiper-wrapper">

      <slot name="swiper-con"></slot>

    </div>

    <!-- 分页器 -->

    <div :class="{'swiper-pagination':pagination}"></div>

  </div>

</template>

<script>

  import '../assets/lib/swiper/js/swiper.js'

  export default {

    props: {

      swipeid: {

        type: String,

        default: ''

      },

      effect: {

        type: String,

        default: 'slide'

      },

      loop: {

        type: Boolean,

        default: true

      },

      direction: {

        type: String,

        default: 'horizontal'

      },

      pagination: {

        type: Boolean,

        default: true

      },

      autoplay: {

        type: Number,

        default: 5000,

      },

      paginationType: {

        type: String,

        default: 'bullets'

      }

    },

    mounted() {

      var That = this;

      new Swiper('.'+That.swipeid, {

        //循环

        loop: That.loop,

        //分页器

        pagination: '.swiper-pagination',

        //分页类型

        paginationType: That.paginationType, //fraction,progress,bullets

        //自动播放

        autoplay: That.autoplay,

        //方向

        direction: That.direction,

        //特效

        effect: That.effect, //slide,fade,coverflow,cube

      })

    }

  }

</script>

<style>

  @import '../assets/lib/swiper/css/swiper.css';

  .swiper-pagination-bullet-active {

    background: #fff;

  }

</style>
Index.vue
<template>

  <div>

    <m-header title="豆瓣app" :bg="true" fixed>

      <a href="javascript:;" slot="right">分享</a>

    </m-header>

    <div class="page-content">

      <m-swipe swipeid="swipe01" :autoplay="1000" effect="cube">

        <div class="swiper-slide slide02" slot="swiper-con">Slide 1</div>

        <div class="swiper-slide slide01" slot="swiper-con">Slide 2</div>

        <div class="swiper-slide slide03" slot="swiper-con">Slide 3</div>

      </m-swipe>

      <m-swipe swipeid="swipe021" :loop="false" paginationType="fraction" :autoplay="2000">

        <div class="swiper-slide slide01" slot="swiper-con">Slide 1</div>

        <div class="swiper-slide slide02" slot="swiper-con">Slide 2</div>

        <div class="swiper-slide slide03" slot="swiper-con">Slide 3</div>

      </m-swipe>

    </div>

  </div>

</template>

<script>

  import mHeader from '../../components/header'

  import mSwipe from '../../components/swipe'

  export default {

    name: 'index',

    components: {

      mHeader,

      mSwipe

    }

  }

</script>

<style lang="less">

.is-fixed ~ .page-content{

padding-top:44px;

}

.slide01{

  background: #41b883;

  text-align: center;

  line-height: 200px;

  font-size: 30px;

  color: #fff;

}

.slide02{

  background: #364a60;

  text-align: center;

  line-height: 200px;

  font-size: 30px;

  color: #fff;

}

.slide03{

  background: #ea6f5a;

  text-align: center;

  line-height: 200px;

  font-size: 30px;

  color: #fff;

}

</style>
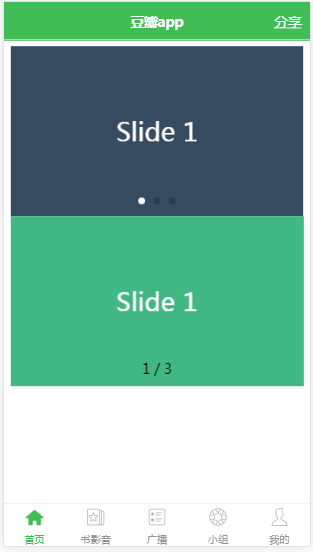
效果图
vue2.0 之 douban (四)创建Swipe图片轮播组件的更多相关文章
- 一分钟搞定AlloyTouch图片轮播组件
轮播图也涉及到触摸和触摸反馈,同时,AlloyTouch可以把惯性运动打开或者关闭,并且设置min和max为运动区域,超出会自动回弹. 除了一般的竖向滚动,AlloyTouch也可以支持横向滚动,甚至 ...
- Angular2组件与指令的小实践——实现一个图片轮播组件
如果说模块系统是Angular2的灵魂,那其组件体系就是其躯体,在模块的支持下渲染出所有用户直接看得见的东西,一个项目最表层的东西就是组件呈现的视图.而除了直接看的见的躯体之外,一个完整的" ...
- Omi-touch实战 移动端图片轮播组件的封装
pc端的轮播,移动端的轮播都很常见.一年前,我还为手机端没有左滑,右滑事件从而封装了一个swipe库,可以自定义超过多少滑动时间就不触发,也可以设置滑动多少距离才触发,这一个功能的代码就达到400多行 ...
- 如何将angular-ui的图片轮播组件封装成一个指令
在项目开发中我们经常会遇到图片轮播的功能点: 如果我们开发人员自己原生手写,将会花费很多的时间,最终得不偿失. 接下来就详细说说如何使用angular-ui发热图片轮播模块,并且将它写成一个指令(便于 ...
- Vue学习—Vue写一个图片轮播组件
1.先看效果: 熟悉的图片轮播,只要是个网站,百分之90以上会有个图片轮播.我认为使用图片轮播. 第一可以给人以一种美观的感受,而不会显得网站那么呆板, 第二可以增加显示内容,同样的区域可以显示更多内 ...
- 如何将angular-ui-bootstrap的图片轮播组件封装成一个指令
在项目开发中我们经常会遇到图片轮播的功能点: 如果我们开发人员自己原生手写,将会花费很多的时间,最终得不偿失. 接下来就详细说说如何使用angular-ui发热图片轮播模块,并且将它写成一个指令(便于 ...
- vue2.0:(四)、首页入门,组件拆分1
为什么需要组件拆分呢?这样才能更符合模块化这样一个理念. 首先是index.html,代码如下: <!DOCTYPE html> <html> <head> < ...
- JavaScript实现图片轮播组件
效果: 自动循环播放图片,下方有按钮可以切换到对应图片. 添加一个动画来实现图片切换. 鼠标停在图片上时,轮播停止,出现左右两个箭头,点击可以切换图片. 鼠标移开图片区域时,从当前位置继续轮播. 提供 ...
- EUI Scroller实现图片轮播 组件 ItemScroller
一 自定义组件如下 /** * 文 件 名:ItemScroll.ts * 功 能: 滚动组件 * 内 容: 自定义组件,支持多张图片水平(垂直)切换滚动 * * Example: * 1. 从自定义 ...
随机推荐
- Java数据结构之单向环形链表(解决Josephu约瑟夫环问题)
1.Josephu(约瑟夫.约瑟夫环)问题: 设编号为1,2,… n的n个人围坐一圈,约定编号为k(1<=k<=n)的人从1开始报数,数到m 的那个人出列,它的下一位又从1开始报数,数到m ...
- IDEA导入Junit jar包,在JavaSE的Module中使用Junit测试
写代码时偶尔想试一下自己的小想法,于是在IDEA中建了一个JavaEE项目.JavaEE项目中只能在main方法中运行代码块,不如单元测试的@Test灵活. 于是在网上找到了Junit的jar包:Do ...
- 安装Pycharm(方便编辑代码的IDE(编辑器))以及 使用Pycharm新建项目
安装Pycharm(方便编辑代码的IDE(编辑器))以及 使用Pycharm新建项目 一.下载安装Pycharm 首先要下载Pycharm这个软件,官网的下载地址是: http://www.jetbr ...
- 坐标轴刻度取值算法-基于魔数数组-源于echarts的y轴刻度计算需求
本文链接:https://blog.csdn.net/qq_26909801/article/details/96966372数值型坐标轴刻度计算算法前言算法描述上代码代码运行效果结语前言因实习的公司 ...
- JavaScript是如何工作的:引擎,运行时间以及调用栈的概述
JavaScript是如何工作的:引擎,运行时以及调用栈的概述 原文:How JavaScript works: an overview of the engine, the runtime, and ...
- 【React -- 5/100】 组件复用
组件复用 React组件复用概述 思考:如果两个组件中的部分功能相似或相同,该如何处理? 处理方式:复用相似的功能 复用什么? state 操作state的方法 两种方式: render props模 ...
- 算法学习之选择排序算法的python实现
——参考自<算法图解> def findSmallest(arr): # 假设第一个元素最小 smallest = arr[0] smallest_index = 0 for i in r ...
- 互联网技术笔试总通不过?leetcode刷对了么
https://36kr.com/p/5084645 Leetcode,绕都绕不过去的程序员刷题神器 编者按:本文来自逆行求职(ID:nixingjihua). 对所有求职技术岗位的童鞋来说,有这么一 ...
- Java并发——原子变量和原子操作
很多情况下我们只是需要一个简单的.高效的.线程安全的递增递减方案.注意,这里有三个条件:简单,意味着程序员尽可能少的操作底层或者实现起来要比较容易:高效意味着耗用资源要少,程序处理速度要快:线程安全也 ...
- linux服务器安全配置攻略
引言: 最小的权限+最少的服务=最大的安全 所以,无论是配置任何服务器,我们都必须把不用的服务关闭.把系统权限设置到最小话,这样才能保证服务器最大的安全.下面是CentOS服务器安全设置,供大家参考. ...