Ionic3 与Electron制作桌面应用
Ionic3 与Electron制作桌面应用
ionic:https://ionicframework.com
electron:https://electron.atom.io
ionic是一个混合开发框架,electron是一个开发跨平台桌面应用的框架。
此教程包括三个步骤:
1. 创建ionic项目,开启服务
2. 在项目中添加electron依赖
3. 添加webpack配置和electron主体脚本以electron的方式运行项目
在教程第二部分,首先会创建一个简单的angular2服务来访问electron的api;然后给不同平台编译分包。
最终源代码地址:https://github.com/lohanitech/ion-electron
准备工作和预备知识:
1 安装和了解ionic
2 安装和了解electron
1. 创建Ionic项目,开启服务
运行如下命令
ionic start ion-electron
进入ion-electron文件夹运行:
ionic serve
可以在本地浏览器中输入 http://localhost:8100 预览效果
2. 在项目中安装electron依赖
在项目中运行如下命令:
npm install electron electron-builder foreman --save-dev
electron是我们要整合进来的一个桌面开发
electron-builder用于编译electron的脚本
foreman用于模拟多进程的node包。
安装完成后,package.json如下:
"name": "ion-electron",

  "author": {

    "name": "Damodar Lohani",

    "email": "example@example.com",

    "url": "https://lohanitech.com/members/damodar-lohani"

  },

  "description": "ionic framework based electron project",

  "main": "electron/electron.js",

  "config": {

    "ionic_bundler": "webpack",

    "ionic_webpack": "./config/webpack.config.js"

  },

  "build": {

    "appId": "com.lohanitech.ionic-electron-test",

    "electronVersion": "1.7.5",

    "asar":false,

    "files": [

      "www/**/*",

      "electron/*"

    ]

  }
3. 添加webpack配置和electron主体脚本以electron的方式运行项目
在项目中新建一个文件夹名为config,并在其中加入一个文件名为webpack.config.js,将如下代码复制进去。
首先是ionic相关的配置,(目前位于 node_modules/@ionic/app-scripts/config/webpack.config.js),在源文件中加入:
externals: [

    (function () {

        var IGNORES = ["fs","child_process","electron","path","assert","cluster","crypto","dns","domain","events","http","https","net","os","process","punycode","querystring","readline","repl","stream","string_decoder","tls","tty","dgram","url","util","v8","vm","zlib"];

        return function (context, request, callback) {

            if (IGNORES.indexOf(request) >= 0) {

                return callback(null, "require('" + request + "')");

            }

            return callback();

        };

    })()

  ],
最新的webpack配置变为如下(最新的配置文件我们需要在dev配置和production配置中添加):
/*

 * The webpack config exports an object that has a valid webpack configuration

 * For each environment name. By default, there are two Ionic environments:

 * "dev" and "prod". As such, the webpack.config.js exports a dictionary object

 * with "keys" for "dev" and "prod", where the value is a valid webpack configuration

 * For details on configuring webpack, see their documentation here

 * https://webpack.js.org/configuration/

 */

var path = require('path');

var webpack = require('webpack');

var ionicWebpackFactory = require(process.env.IONIC_WEBPACK_FACTORY);

var ModuleConcatPlugin = require('webpack/lib/optimize/ModuleConcatenationPlugin');

var PurifyPlugin = require('@angular-devkit/build-optimizer').PurifyPlugin;

var optimizedProdLoaders = [

  {

    test: /\.json$/,

    loader: 'json-loader'

  },

  {

    test: /\.js$/,

    loader: [

      {

        loader: process.env.IONIC_CACHE_LOADER

      },

{

        loader: '@angular-devkit/build-optimizer/webpack-loader',

        options: {

          sourceMap: true

        }

      },

    ]

  },

  {

    test: /\.ts$/,

    loader: [

      {

        loader: process.env.IONIC_CACHE_LOADER

      },

{

        loader: '@angular-devkit/build-optimizer/webpack-loader',

        options: {

          sourceMap: true

        }

      },

{

        loader: process.env.IONIC_WEBPACK_LOADER

      }

    ]

  }

];

function getProdLoaders() {

  if (process.env.IONIC_OPTIMIZE_JS === 'true') {

    return optimizedProdLoaders;

  }

  return devConfig.module.loaders;

}

var devConfig = {

  entry: process.env.IONIC_APP_ENTRY_POINT,

  output: {

    path: '{{BUILD}}',

    publicPath: 'build/',

    filename: '[name].js',

    devtoolModuleFilenameTemplate: ionicWebpackFactory.getSourceMapperFunction(),

  },

  externals: [

    (function () {

        var IGNORES = ["fs","child_process","electron","path","assert","cluster","crypto","dns","domain","events","http","https","net","os","process","punycode","querystring","readline","repl","stream","string_decoder","tls","tty","dgram","url","util","v8","vm","zlib"];

        return function (context, request, callback) {

            if (IGNORES.indexOf(request) >= 0) {

                return callback(null, "require('" + request + "')");

            }

            return callback();

        };

    })()

  ],

  devtool: process.env.IONIC_SOURCE_MAP_TYPE,

resolve: {

    extensions: ['.ts', '.js', '.json'],

    modules: [path.resolve('node_modules')]

  },

module: {

    loaders: [

      {

        test: /\.json$/,

        loader: 'json-loader'

      },

      {

        test: /\.ts$/,

        loader: process.env.IONIC_WEBPACK_LOADER

      }

    ]

  },

plugins: [

    ionicWebpackFactory.getIonicEnvironmentPlugin(),

    ionicWebpackFactory.getCommonChunksPlugin()

  ],

// Some libraries import Node modules but don't use them in the browser.

  // Tell Webpack to provide empty mocks for them so importing them works.

  node: {

    fs: 'empty',

    net: 'empty',

    tls: 'empty'

  }

};

var prodConfig = {

  entry: process.env.IONIC_APP_ENTRY_POINT,

  output: {

    path: '{{BUILD}}',

    publicPath: 'build/',

    filename: '[name].js',

    devtoolModuleFilenameTemplate: ionicWebpackFactory.getSourceMapperFunction(),

  },

  externals: [

    (function () {

        var IGNORES = ["fs","child_process","electron","path","assert","cluster","crypto","dns","domain","events","http","https","net","os","process","punycode","querystring","readline","repl","stream","string_decoder","tls","tty","dgram","url","util","v8","vm","zlib"];

        return function (context, request, callback) {

            if (IGNORES.indexOf(request) >= 0) {

                return callback(null, "require('" + request + "')");

            }

            return callback();

        };

    })()

  ],

  devtool: process.env.IONIC_SOURCE_MAP_TYPE,

resolve: {

    extensions: ['.ts', '.js', '.json'],

    modules: [path.resolve('node_modules')]

  },

module: {

    loaders: getProdLoaders()

  },

plugins: [

    ionicWebpackFactory.getIonicEnvironmentPlugin(),

    ionicWebpackFactory.getCommonChunksPlugin(),

    new ModuleConcatPlugin(),

    new PurifyPlugin()

  ],

// Some libraries import Node modules but don't use them in the browser.

  // Tell Webpack to provide empty mocks for them so importing them works.

  node: {

    fs: 'empty',

    net: 'empty',

    tls: 'empty'

  }

};

module.exports = {

  dev: devConfig,

  prod: prodConfig

}
这是ionic的webpack配置,只需稍作改动就可以与electron一起使用了。
添加election主脚本
在项目内创建一个文件夹名为electron,在其中新建一个electron.js。这个是创建和加载electron窗口的主脚本。打开electron.js,贴入以下代码:
'use strict';

const electron = require('electron');

// Module to control application life.

const {

    app } = electron;

// Module to create native browser window.

const {

    BrowserWindow

} = electron;

let win;

function createWindow() {

    // Create the browser window.

    win = new BrowserWindow({

        width: 1024,

        height: 600

    });

    var url = 'file://' + __dirname + '/../www/index.html';

    var Args = process.argv.slice(2);

    Args.forEach(function (val) {

        if (val === "test") {

            url = 'http://localhost:8100'

        }

    });

    // and load the index.html of the app.

    win.loadURL(url);

    // Open the DevTools.

    win.webContents.openDevTools();

    // Emitted when the window is closed.

    win.on('closed', () => {

        // Dereference the window object, usually you would store windows

        // in an array if your app supports multi windows, this is the time

        // when you should delete the corresponding element.

        win = null;

    });

}

// This method will be called when Electron has finished

// initialization and is ready to create browser windows.

// Some APIs can only be used after this event occurs.

app.on('ready', createWindow);

// Quit when all windows are closed.

app.on('window-all-closed', () => {

    // On OS X it is common for applications and their menu bar

    // to stay active until the user quits explicitly with Cmd + Q

    if (process.platform !== 'darwin') {

        app.quit();

    }

});

app.on('activate', () => {

    // On OS X it's common to re-create a window in the app when the

    // dock icon is clicked and there are no other windows open.

    if (win === null) {

        createWindow();

    }

});
在package.json中加入启动脚本
在package.json的scripts中贴入以下代码:
"scripts": {

    "dev": "nf start",

    "start":"ionic-app-scripts serve",

    "electron dist": "electron .",

    "ebuild":"npm run build && node_modules/.bin/build",

    "clean": "ionic-app-scripts clean",

    "build": "ionic-app-scripts build",

    "ionic:build": "ionic-app-scripts build",

    "ionic:serve": "ionic-app-scripts serve"

  }
由于现在加入了foreman,我们需要给他添加配置。在项目根目录下新建文件Procfile,贴入代码:
ionic: npm start


electron: node electron-wait-ionic.js
在根目录下新建electron-wait-ionic.js,更新如下:
const net = require('net');

const port = 8100;

process.env.E_URL = `http://localhost:${port}`;

const client = new net.Socket();

let startedElectron = false;

const tryConnection = () => client.connect({port: port}, () => {

        client.end();

        if(!startedElectron) {

            console.log('starting electron');

            startedElectron = true;

            const exec = require('child_process').exec;

            exec('electron .');

        }

    }

);

tryConnection();

client.on('error', (error) => {

    setTimeout(tryConnection, 1000);

});
这个脚本的作用是尝试连接端口8100,因为8100端口在electron接入的时候会激活。如果连接失败会接着连接。
此时,运行npm run dev会以开发模式运行项目。
由于electron在完全编译之前会运行服务,所以第一次可能会看到空白页面,发生这种情况的话可以根据console输出信息,在编译完成后按ctrl+r重新加载electron窗口即可。
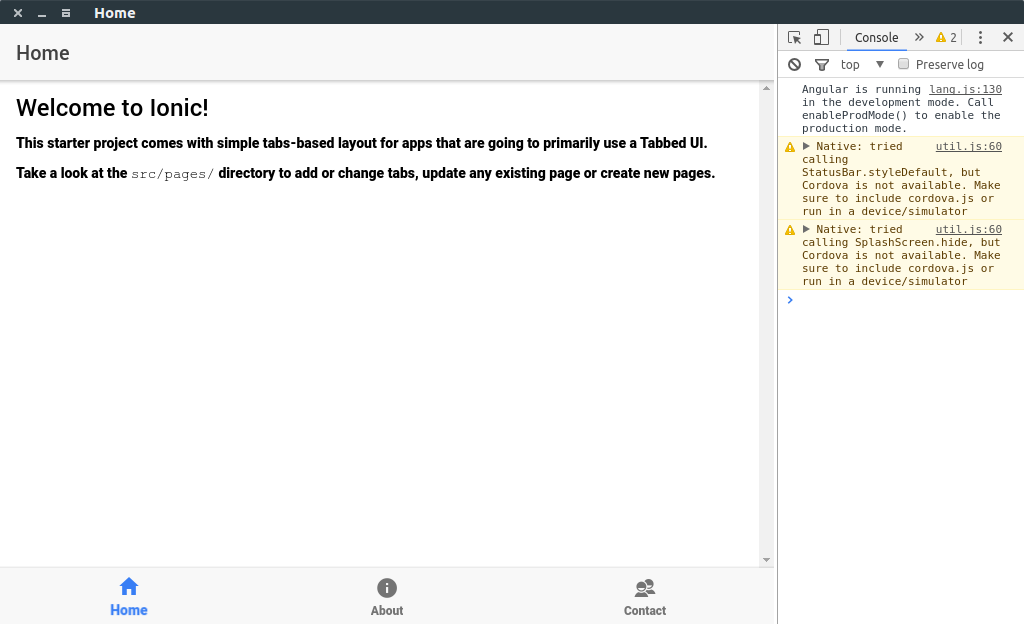
正常工作的效果图如下:
完成此教程可以查看第二部分来学习如何在Ionic项目中访问electron的api。
Ionic3 与Electron制作桌面应用的更多相关文章
- electron+vue制作桌面应用--自定义标题栏
electron会默认显示边框和标题栏,如下图 我们来看一下如何自定义一个更加有(gao)意(da)思(shang)的标题栏,例如网易云音乐这种 首先我们要把默认的标题栏删掉,找到主进程中创建窗体部分 ...
- 使用 Electron 构建桌面应用(拖动控制篇)
使用 Electron 构建桌面应用(拖动控制篇) 当窗口被定义了大小,我们也就是在自定义这个窗口,使得它不可拉伸没有框架,让它看起来就像一个真正的声效器浮在桌面上. 现在问题来了 – 要如何移动或者 ...
- AngularJS 和 Electron 构建桌面应用
译]使用 AngularJS 和 Electron 构建桌面应用 原文: Creating Desktop Applications With AngularJS and GitHub Electro ...
- 在deepin系统中制作桌面快捷方式
在使用deepin-wine 安装一些软件的时候,每次启动都需要到.deepinwine目录下运行deepin-wine xx.exe.笔者在安装过HeidiSql之后,一直苦于这种情况.比较好的解决 ...
- electron制作聊天界面(仿制qq)
效果图: 样式使用scss和flex布局 这也是制作IM系统的最后一个界面了!在制作之前参考了qq和千牛 需要注意的点 qq将滚动条美化了 而且在无操作的情况下是不会显示的 滚动条美化 ::-webk ...
- 使用 AngularJS 和 Electron 构建桌面应用
GitHub 的 Electron 框架(以前叫做 Atom Shell)允许你使用 HTML, CSS 和 JavaScript 编写跨平台的桌面应用.它是io.js 运行时的衍生,专注于桌面应用而 ...
- node-webkit制作桌面应用
心血来潮突然想用js尝试写桌面应用,突然发现我大js真的无所不能.在网上搜到了这么一个东东:node-webkit.用Node.js来进行系统资源的访问,用HTML+CSS完成页面的搭建.哇,一切突然 ...
- Electron 实战桌面计算器应用
前言 Electron 是一个搭建跨平台桌面应用的框架,仅仅使用 JavaScript.HTML 以及 CSS,即可快速而容易地搭建一个原生应用.这对于想要涉及其他领域的开发者来说是一个非常大的福利. ...
- electron --- 构建桌面应用
最近无意间看到了electron和nw的相关信息,感到很惊讶,因为学习前端也有一段时间了,竟然发现js还有这么强大的功能,因为js不仅可以写网页.写webapp.写hybrid,以及前不久出现的小程序 ...
- 使用Electron开发桌面应用
Electron 框架的前身是 Atom Shell,可以让你写使用 JavaScript,HTML 和 CSS 构建跨平台的桌面应用程序.它是基于io.js 和 Chromium 开源项目,并用于在 ...
随机推荐
- R 语言柱状图示例笔记
由于微信不允许外部链接,你需要点击文章尾部左下角的 "阅读原文",才能访问文章中链接. 一.基础柱状图 1. barplot 命令 基于barplot基础柱状图颜色.方向及分组的绘 ...
- 网站开发[1] - Spring Boot 快速建立项目
前言 学校的数据库课程要求做出前端页面对数据库进行交互, 可以使用 Python 或者 Java 语言作为后端, Python语言使用起来非常方便, 但出于对自己的挑战以及更加贴合实际企业开发, 我选 ...
- elementUi+table实现表格数据滚动
elementUi+table实现表格数据滚动 引用vue和elementUI CDN // 引用elementUI CDN <script src="https://unpkg.co ...
- 【HMS Core】华为帐号服务,获取Access Token报错{sub_error:20152,error_description:invalid code,error:1101}
[问题描述] 华为账号服务,接口获取Access Token报错:{sub_error:20152,error_description:invalid code,error:1101} [问题分析 ...
- 逍遥自在学C语言 | 指针的基础用法
前言 在C语言中,指针是一项重要的概念,它允许我们直接访问和操作内存地址. 可以说,指针是C语言一大优势.用得好,你写程序如同赵子龙百万军中取上将首级:用得不好,则各种问题层出不穷,有种双拳难敌四手的 ...
- 【webpack系列】从基础配置到掌握进阶用法
前言 本篇文章将介绍一些webpack的进阶用法,演示内容继承自上一篇文章的内容,所以没看过上一篇文章的建议先学习上一篇内容再阅读此篇内容,会更有利于此篇的学习- 文件指纹 文件指纹指的是打包输出的文 ...
- 2023-06-25:redis中什么是缓存穿透?该如何解决?
2023-06-25:redis中什么是缓存穿透?该如何解决? 答案2023-06-25: 缓存穿透 缓存穿透指的是查询一个根本不存在的数据,在这种情况下,无论是缓存层还是存储层都无法命中.因此,每次 ...
- win10系统网络图标变成一个地球模型并且无法连上网络
最近在家远程办公,但是遇到个很棘手的问题,电脑突然连不上无线网络了.... 无线网络图标变成地球模型如下:
- 最近很火的开源培训系统,支持免费商用,3个月1000star!
项目简介 PlayEdu 开源培训系统自发布以来,3个月内帮助上千位开发者部署了私有化培训平台,并在 Github 上获得了1000star. 项目地址 Github 地址:https://githu ...
- 用写代码的方式画图-试下PlantUML吧
1 序言 所谓一图胜千言,大家平日在工作中编写文档时,往往都需要画各种图来表达中心思想,比如流程图.时序图.UML 图,很多人选择使用 Axure .PrecessOn.Diagrams(darw.i ...