Android(java)学习笔记174:服务(service)之混合方式开启服务
1. 前面我们已经讲过可以使用两种方式开启服务
startService----stopService:
oncreate() ---> onstartCommand() ---> onstartCommand()---> onDestory();
bindService----unbindService:
oncreate() ---> onbind() --->onUnbind() ---> onDestory();
为什么需要采用混合的方式开启服务?
答:startService服务长期后天运行,不可以调用服务里面的方式;
bindService可以调用服务的方法,但是不能长期在后台运行。(bindService和Activity同时死)
综合上面两种方式的优点,采用混合的方式开启服务(继承了上面两种的优点):
(1)服务长期后台运行。
(2)可以调用服务的方法。
2.利用案例说明混合方式开启服务:
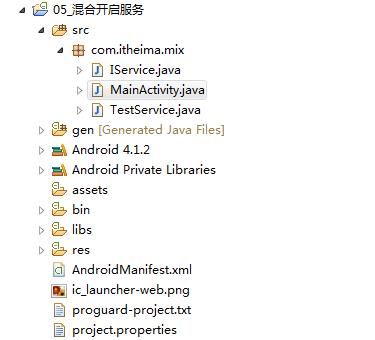
(1)创建一个Android项目如下:
(2)我们首先看看布局文件activity_main.xml,如下:
<LinearLayout xmlns:android="http://schemas.android.com/apk/res/android"

    xmlns:tools="http://schemas.android.com/tools"

    android:layout_width="match_parent"

    android:orientation="vertical"

    android:layout_height="match_parent"

    tools:context=".MainActivity" >

    <Button

        android:onClick="start"

        android:layout_width="match_parent"

        android:layout_height="wrap_content"

        android:text="开启服务" />

    <Button

        android:onClick="stop"

        android:layout_width="match_parent"

        android:layout_height="wrap_content"

        android:text="停止服务" />

    <Button

        android:onClick="bind"

        android:layout_width="match_parent"

        android:layout_height="wrap_content"

        android:text="绑定服务" />

    <Button

        android:onClick="unbind"

        android:layout_width="match_parent"

        android:layout_height="wrap_content"

        android:text="解除绑定服务" />

    <Button

        android:onClick="call"

        android:layout_width="match_parent"

        android:layout_height="wrap_content"

        android:text="调用服务的方法" />

</LinearLayout>
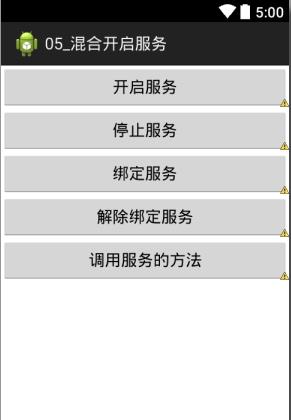
布局效果如下:
(3)其中MainActivity.java:
 package com.itheima.mix;

 import android.app.Activity;

 import android.content.ComponentName;

 import android.content.Intent;

 import android.content.ServiceConnection;

 import android.os.Bundle;

 import android.os.IBinder;

 import android.view.View;

 public class MainActivity extends Activity {

     private MyConn conn;

     private IService iService;

     @Override

     protected void onCreate(Bundle savedInstanceState) {

         super.onCreate(savedInstanceState);

         setContentView(R.layout.activity_main);

     }

     //以start的方式i开启服务

     public void start(View view){

         Intent intent = new Intent(this,TestService.class);

         startService(intent);

     }

     //停止服务

     public void stop(View view){

         Intent intent = new Intent(this,TestService.class);

         stopService(intent);

     }

     //绑定服务u

     public void bind(View view){

         Intent intent = new Intent(this,TestService.class);

         conn = new MyConn();

         bindService(intent, conn, BIND_AUTO_CREATE);

     }

     private class MyConn implements ServiceConnection{

         @Override

         public void onServiceConnected(ComponentName name, IBinder service) {

             iService = (IService) service;

         }

         @Override

         public void onServiceDisconnected(ComponentName name) {

         }

     }

     //解绑服务

     public void unbind(View view){

         unbindService(conn);

     }

     public void call (View view){

         iService.callMethodInService();

     }

 }
其中使用到的Service为自定义的TestService,如下:
 package com.itheima.mix;

 import android.app.Service;

 import android.content.Intent;

 import android.os.Binder;

 import android.os.IBinder;

 import android.widget.Toast;

 public class TestService extends Service {

     private class MyBinder extends Binder implements IService{

         @Override

         public void callMethodInService() {

             methodInService();

         }

     }

     @Override

     public IBinder onBind(Intent intent) {

         System.out.println("服务被绑定 onBind");

         return new MyBinder();

     }

     @Override

     public boolean onUnbind(Intent intent) {

         System.out.println("服务被解绑 onUnbind");

         return super.onUnbind(intent);

     }

     @Override

     public void onCreate() {

         System.out.println("服务被创建 oncreate");

         super.onCreate();

     }

     @Override

     public int onStartCommand(Intent intent, int flags, int startId) {

         System.out.println("onStartCommand");

         return super.onStartCommand(intent, flags, startId);

     }

     @Override

     public void onDestroy() {

         System.out.println("服务被销毁 onDestroy");

         super.onDestroy();

     }

     public void methodInService(){

         Toast.makeText(this, "我是服务里面的方法", 0).show();

     }

 }
还有上面使用到的接口IService,如下:
package com.itheima.mix;

public interface IService {

    public void callMethodInService();

}
既然上面使用到了自定义的service的TestService,所以要在AndroidMainfest.xml注册TestService这个组件,如下:
 <?xml version="1.0" encoding="utf-8"?>

 <manifest xmlns:android="http://schemas.android.com/apk/res/android"

     package="com.itheima.mix"

     android:versionCode="1"

     android:versionName="1.0" >

     <uses-sdk

         android:minSdkVersion="8"

         android:targetSdkVersion="17" />

     <application

         android:allowBackup="true"

         android:icon="@drawable/ic_launcher"

         android:label="@string/app_name"

         android:theme="@style/AppTheme" >

         <activity

             android:name="com.itheima.mix.MainActivity"

             android:label="@string/app_name" >

             <intent-filter>

                 <action android:name="android.intent.action.MAIN" />

                 <category android:name="android.intent.category.LAUNCHER" />

             </intent-filter>

         </activity>

         <service android:name="com.itheima.mix.TestService"></service>

     </application>

 </manifest>
3. 特别注意:
混合模式开启服务
推荐使用的步骤:
(1)startService() ----> 保证服务长期后天运行
(2)如果要调用服务的方法 ---->bindService()绑定服务
(3)就可以调用服务的方法
(4)unbindservice 解绑服务
(5)服务还是长期后台运行
(6)如果要停止服务,stopService();
Android(java)学习笔记174:服务(service)之混合方式开启服务的更多相关文章
- Android(java)学习笔记231:服务(service)之混合方式开启服务
1. 前面我们已经讲过可以使用两种方式开启服务 startService----stopService: oncreate() ---> onstartCommand() ---& ...
- 《Java学习笔记(第8版)》学习指导
<Java学习笔记(第8版)>学习指导 目录 图书简况 学习指导 第一章 Java平台概论 第二章 从JDK到IDE 第三章 基础语法 第四章 认识对象 第五章 对象封装 第六章 继承与多 ...
- Java学习笔记4
Java学习笔记4 1. JDK.JRE和JVM分别是什么,区别是什么? 答: ①.JDK 是整个Java的核心,包括了Java运行环境.Java工具和Java基础类库. ②.JRE(Java Run ...
- 20155234 2016-2017-2第十周《Java学习笔记》学习总结
20155234第十周<Java学习笔记>学习总结 教材学习内容总结 网络编程 在两个或两个以上的设备(例如计算机)之间传输数据.程序员所作的事情就是把数据发送到指定的位置,或者接收到指定 ...
- Android:日常学习笔记(2)——分析第一个Android应用程序
Android:日常学习笔记(2)——分析第一个Android应用程序 Android项目结构 整体目录结构分析 说明: 除了APP目录外,其他目录都是自动生成的.APP目录的下的内容才是我们的工作重 ...
- java学习笔记之基础篇
java选择语句之switch //switch可以用于等值判断 switch (e) //int ,或则可以自动转化成int 的类型,(byte char short)枚举jdk 7中可以防止字 ...
- Android Studio 学习笔记(一)环境搭建、文件目录等相关说明
Android Studio 学习笔记(一)环境搭建.文件目录等相关说明 引入 对APP开发而言,Android和iOS是两大主流开发平台,其中区别在于 Android用java语言,用Android ...
- 0028 Java学习笔记-面向对象-Lambda表达式
匿名内部类与Lambda表达式示例 下面代码来源于:0027 Java学习笔记-面向对象-(非静态.静态.局部.匿名)内部类 package testpack; public class Test1{ ...
- Android自动化学习笔记:编写MonkeyRunner脚本的几种方式
---------------------------------------------------------------------------------------------------- ...
随机推荐
- GCD深入理解(1)
写在前面 本文原文为raywenderlich的<grand-central-dispatch-in-depth-part-1>:顺便提及一下,笔者认为,对于iOS初学者而言,raywen ...
- 未能加载文件或程序集“Microsoft.ReportViewer.WebForms, Version=9.0.0.0, Culture=neutral, PublicKeyT
VS2008开发的网站,本地测试没问题,上传到服务器就出错,提示: 引用内容未能加载文件或程序集“Microsoft.ReportViewer.WebForms, Version=9.0.0.0, C ...
- Struts2 文件上传 之 文件类型 allowedTypes
转自:https://www.cnblogs.com/zxwBj/p/8546889.html '.a' : 'application/octet-stream', '.ai' : ...
- 【205】C#实现远程桌面访问
参考:Remote Desktop using C#.NET 参考文件:TscForm.zip 本博客主要是讲述怎样用 .NET 平台中 Microsoft Terminal Services Cli ...
- In-App Purchase Programming Guide----(三) ----Retrieving Product Information
Retrieving Product Information In the first part of the purchase process, your app retrieves informa ...
- 第九篇 .NET高级技术ref、out
普通参数是“值类型传递拷贝,引用类型传递引用”,但是都不能在函数内部修改外部变量的指向(p.Age=5不是可以吗?),这时候要用ref或者out(相当于把变量都传进去了),他们的作用不同:ref的作用 ...
- VS2019+ASP.NETCore+图表
原帖学习踩坑:https://www.cnblogs.com/fzqm-lwz/p/9704973.html,主要根据大佬原帖内容,实现尝试,进行一些修改: 实现方式一:通过标记帮助程序将JS代码传到 ...
- Luogu2261[CQOI2007]余数求和 【数论】By cellur925
题目传送门 省选题竟然送了这么多分,60分直接暴力算就行.(算了,07年的省选) 数学题嘛,通常我们需要把式子展开,然后寻找一些性质化简=w=. 展开式以及寻找规律的过程lyd老师讲的很清楚T_T,放 ...
- PHP 遍历一个文件夹下所有文件和子文件夹的方法
话不多说,直接上代码 <?php function my_dir($dir) { $files = []; if(@$handle = opendir($dir)) { while(($file ...
- wordpress模板安装
wordpress的模板安装方法是: 1.把下载好的模板的目录整体复制到wordpress\wp-content\themes下面,不需要单独复制哪个文件 2.到后台的"外观"中选 ...