centos7 mysql-server 安装过程
官网下载安装mysql-server
# wget http://dev.mysql.com/get/mysql-community-release-el7-5.noarch.rpm

# rpm -ivh mysql-community-release-el7-5.noarch.rpm

# yum install mysql-community-server
安装成功后重启mysql服务。
# service mysqld restart
初次安装mysql,root账户没有密码。

[root@yl-web yl]# mysql -u root

Welcome to the MySQL monitor.  Commands end with ; or \g.

Your MySQL connection id is 3

Server version: 5.6.26 MySQL Community Server (GPL)

Copyright (c) 2000, 2015, Oracle and/or its affiliates. All rights reserved.

Oracle is a registered trademark of Oracle Corporation and/or its

affiliates. Other names may be trademarks of their respective

owners.

Type 'help;' or '\h' for help. Type '\c' to clear the current input statement.

mysql> show databases;

+--------------------+

| Database           |

+--------------------+

| information_schema |

| mysql              |

| performance_schema |

| test               |

+--------------------+

4 rows in set (0.01 sec)

mysql>
设置密码
mysql> set password for 'root'@'localhost' =password('password');

Query OK, 0 rows affected (0.00 sec)

mysql>
不需要重启数据库即可生效。
在mysql安装过程中如下内容:
Installed:
  mysql-community-client.x86_64 0:5.6.26-2.el7                mysql-community-devel.x86_64 0:5.6.26-2.el7
  mysql-community-libs.x86_64 0:5.6.26-2.el7                  mysql-community-server.x86_64 0:5.6.26-2.el7

Dependency Installed:
  mysql-community-common.x86_64 0:5.6.26-2.el7

Replaced:
  mariadb.x86_64 1:5.5.41-2.el7_0          mariadb-devel.x86_64 1:5.5.41-2.el7_0   mariadb-libs.x86_64 1:5.5.41-2.el7_0
  mariadb-server.x86_64 1:5.5.41-2.el7_0
三、配置mysql
1、编码
mysql配置文件为/etc/my.cnf
最后加上编码配置
[mysql]

default-character-set =utf8
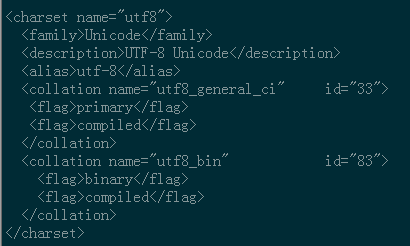
这里的字符编码必须和/usr/share/mysql/charsets/Index.xml中一致。
2、远程连接设置
把在所有数据库的所有表的所有权限赋值给位于所有IP地址的root用户。
mysql> grant all privileges on *.* to root@'%'identified by 'password';
如果是新用户而不是root,则要先新建用户
mysql>create user 'username'@'%' identified by 'password';
此时就可以进行远程连接了。
防火墙配置
防火墙设置一下,不然3306端口还是无法访问。
1 iptables -I INPUT -p tcp -m state --state NEW -m tcp --dport 3306 -j ACCEPT
设置完之后,查看一下是否能通过。
1 iptables -L -n

如果想要限制访问。
iptables -D INPUT -p tcp -m state --state NEW -m tcp --dport 3306 -j ACCEPT
OK,这样就可以远程访问了。
来源:https://www.cnblogs.com/starof/p/4680083.html
centos7 mysql-server 安装过程的更多相关文章
- 19.CentOS7下PostgreSQL安装过程
CentOS7下PostgreSQL安装过程 装包 sudo yum install postgresql-server postgresql-contrib 说明: 这种方式直接明了,其他方法也可以 ...
- CentOS7离线安装Mysql(详细安装过程)
Mysql安装 下载mysql离线安装包 https://cdn.mysql.com//Downloads/MySQL-5.7/mysql-5.7.27-1.el7.x86_64.rpm-bundle ...
- centos7 mysql的安装
本文记录centos7安装mysql的一些过程与遇到的一些坑 下载mysql的压缩包,直接从官网上面下载,链接:http://dev.mysql.com/downloads/mysql/ 选择 MyS ...
- centos7 mysql数据库安装和配置
一.系统环境 yum update升级以后的系统版本为 [root@yl-web yl]# cat /etc/redhat-release CentOS Linux release 7.1.1503 ...
- (转)linux下mysql的安装过程
最近在linux安装了mysql,根据网上收集的资料和个人的操作过程,大概做了个整理,以便以后进行参考回顾. 1.下载mysql-5.1.36.tar.gz,并且解压. tar -xzvf mysql ...
- centos7 mysql数据库安装和配置(转, 未验证)
一.系统环境 yum update升级以后的系统版本为 [root@yl-web yl]# cat /etc/redhat-release CentOS Linux release 7.1.1503 ...
- MySQL详细安装过程
目录 一.概述 二.MySQL安装 三.安装成功验证 四.NavicatforMySQL下载及使用 一.概述 MySQL版本:5.7.17 下载地址:http://rj.baidu.com/soft/ ...
- MySQL的安装过程
近期对MySQL做了一些研究. 曾经主要接触的是SQL SERVER.所以,今天对该安装过程做了一些总结以及使用过程中的一些心得.并分享给大家. 记得前面.分享过一篇关于数据库的几种连接方式.而 ...
- CentOS7 MySql数据库安装配置(单实例)
一. 安装mysql-server 官网下载安装 # wget http://dev.mysql.com/get/mysql-community-release-el7-5.noarch.rpm # ...
- 安装解压版本的MySQL,安装过程中的常见命令,检查windows系统错误日志的方式来检查MySQL启动错误,关于Fatal error: Can't open and lock privilege
以端口 port = 3306 # 设置mysql的安装目录 basedir=D://Installed//mysql-5.6.26-winx64//mysql-5.6.26-winx64 # ...
随机推荐
- 一、hadoop部署
一.Java环境 yum 安装方式安装 1.搜索JDK安装包 yum search java|grep jdk 2.安装 yum install java-1.8.0-openjdk-src.x86_ ...
- Learning to Rank(转)
https://blog.csdn.net/kunlong0909/article/details/16805889 Table of Contents 1 前言 2 LTR流程 3 训练数据的获取4 ...
- C-Lodop打印服务没启动怎么办
C-Lodop作为服务,解决了高版本火狐谷歌不支持np插件问题,支持跳出来浏览器的限制,支持所有浏览器,默认是只需安装一次,以后每次开机自启动,但是如果禁止了开机启动项等问题,会造成之后突然出现没启动 ...
- How to remove tag on Github
git tag -d 22 git push origin :refs/tags/22
- vuex2.0 基本使用(3) --- getter
有的组件中获取到 store 中的state, 需要对进行加工才能使用,computed 属性中就需要写操作函数,如果有多个组件中都需要进行这个操作,那么在各个组件中都写相同的函数,那就非常麻烦,这 ...
- 【数学建模】day09-聚类分析
0. 多元分析之聚类分析. 聚类分析是一种定量方法,从数据的角度,对样本或指标进行分类,进而进行更好的分析. 分为Q型聚类和R型聚类. 1. Q型聚类分析是对样本进行分类.有若干样本,我们把这些样本分 ...
- 上传第三方jar包至maven私服,以geotools为例
上传jar包(模块打包方式为jar) mvn deploy:deploy-file -DgroupId=org.geotools -DartifactId=gt-api -Dversion=10.3 ...
- python学习日记(匿名函数)
匿名函数 简介 匿名函数:为了解决那些功能很简单的需求而设计的一句话函数. python 使用 lambda 来创建匿名函数. 所谓匿名,意即不再使用 def 语句这样标准的形式定义一个函数. lam ...
- 【CF1009F】Dominant Indices(长链剖分)
[CF1009F]Dominant Indices(长链剖分) 题面 洛谷 CF 翻译: 给定一棵\(n\)个点,以\(1\)号点为根的有根树. 对于每个点,回答在它子树中, 假设距离它为\(d\)的 ...
- 用c#查询各快递物流信息
前面介绍过<用快递100接口查询各快递物流信息>,里面用的是API接口,但有些快递不支持这种方式,本文介绍的HtmlAPI支持所有快递公司. 支持包括EMS.邮政.顺丰和申通在内的所有公司 ...