SpringBoot整合redis哨兵主从服务
前提环境:
主从配置 http://www.cnblogs.com/zwcry/p/9046207.html
哨兵配置 https://www.cnblogs.com/zwcry/p/9134721.html
1.配置pom.xml

- <project xmlns="http://maven.apache.org/POM/4.0.0" xmlns:xsi="http://www.w3.org/2001/XMLSchema-instance" xsi:schemaLocation="http://maven.apache.org/POM/4.0.0 http://maven.apache.org/xsd/maven-4.0.0.xsd">
- <modelVersion>4.0.0</modelVersion>
- <groupId>szw</groupId>
- <artifactId>springboot_redis_sentinel</artifactId>
- <version>0.0.1-SNAPSHOT</version>
- <name>springboot_redis_sentinel</name>
- <description>springboot整合redis哨兵</description>
- <properties>
- <project.build.sourceEncoding>UTF-8</project.build.sourceEncoding>
- <project.reporting.outputEncoding>UTF-8</project.reporting.outputEncoding>
- <java.version>1.8</java.version>
- <start-class>com.sze.redis.SzwRedisApplication</start-class>
- </properties>
- <parent>
- <groupId>org.springframework.boot</groupId>
- <artifactId>spring-boot-starter-parent</artifactId>
- <version>1.4.2.RELEASE</version>
- <relativePath></relativePath>
- </parent>
- <dependencies>
- <!-- 使用web启动器 -->
- <dependency>
- <groupId>org.springframework.boot</groupId>
- <artifactId>spring-boot-starter-web</artifactId>
- </dependency>
- <!-- 使用aop模板启动器 -->
- <dependency>
- <groupId>org.springframework.boot</groupId>
- <artifactId>spring-boot-starter-aop</artifactId>
- </dependency>
- <!-- 测试 -->
- <dependency>
- <groupId>org.springframework.boot</groupId>
- <artifactId>spring-boot-starter-test</artifactId>
- <scope>test</scope>
- </dependency>
- <dependency>
- <groupId>org.springframework.boot</groupId>
- <artifactId>spring-boot-starter-redis</artifactId>
- </dependency>
- </dependencies>
- <!-- deploy -->
- <distributionManagement>
- <repository>
- <id>releases</id>
- <name>Releases</name>
- <url>http://192.168.3.71:8081/nexus/content/repositories/releases/</url>
- </repository>
- <snapshotRepository>
- <id>snapshots</id>
- <name>Snapshots</name>
- <url>http://192.168.3.71:8081/nexus/content/repositories/snapshots/</url>
- </snapshotRepository>
- </distributionManagement>
- <!-- download -->
- <repositories>
- <repository>
- <id>sicdt</id>
- <name>Sicdt</name>
- <url>http://192.168.3.71:8081/nexus/content/groups/public</url>
- </repository>
- <repository>
- <id>spring-releases</id>
- <url>https://repo.spring.io/libs-release</url>
- </repository>
- </repositories>
- <pluginRepositories>
- <pluginRepository>
- <id>spring-releases</id>
- <url>https://repo.spring.io/libs-release</url>
- </pluginRepository>
- </pluginRepositories>
- <build>
- <plugins>
- <!-- 要将源码放上去,需要加入这个插件 -->
- <plugin>
- <groupId>org.apache.maven.plugins</groupId>
- <artifactId>maven-source-plugin</artifactId>
- <configuration>
- <attach>true</attach>
- </configuration>
- <executions>
- <execution>
- <phase>compile</phase>
- <goals>
- <goal>jar</goal>
- </goals>
- </execution>
- </executions>
- </plugin>
- <!-- 打包 -->
- <plugin>
- <groupId>org.springframework.boot</groupId>
- <artifactId>spring-boot-maven-plugin</artifactId>
- <configuration>
- <fork>true</fork>
- </configuration>
- </plugin>
- </plugins>
- </build>
- </project>
2.配置application.properties
- ##单服务器
- spring.redis.host=39.107.119.256
- ##单端口
- spring.redis.port=6381
- ## 连接池最大连接数(使用负值表示没有限制)
- spring.redis.pool.max-active=300
- ## Redis数据库索引(默认为0)
- spring.redis.database=0
- ## 连接池最大阻塞等待时间(使用负值表示没有限制)
- spring.redis.pool.max-wait=-1
- ## 连接池中的最大空闲连接
- spring.redis.pool.max-idle=100
- ## 连接池中的最小空闲连接
- spring.redis.pool.min-idle=20
- ## 连接超时时间(毫秒)
- spring.redis.timeout=60000
- #哨兵的配置列表
- spring.redis.sentinel.master=mymaster
- spring.redis.sentinel.nodes=39.107.119.256:26379
##哨兵集群
#spring.redis.sentinel.nodes=39.107.119.254:26379,39.107.119.254:26380
3.编写启动类
- package com.szw.redis;
- import org.springframework.boot.SpringApplication;
- import org.springframework.boot.autoconfigure.SpringBootApplication;
- @SpringBootApplication
- public class SzwRedisApplication {
- public static void main(String[] args) {
- System.setProperty("spring.devtools.restart.enabled", "false");
- SpringApplication.run(SzwRedisApplication.class, args);
- }
- }
4.单元测试
- package com.sze.redis;
- import javax.annotation.PostConstruct;
- import org.junit.Test;
- import org.junit.runner.RunWith;
- import org.springframework.beans.factory.annotation.Autowired;
- import org.springframework.boot.test.context.SpringBootTest;
- import org.springframework.data.redis.core.StringRedisTemplate;
- import org.springframework.data.redis.core.ValueOperations;
- import org.springframework.test.annotation.DirtiesContext;
- import org.springframework.test.context.junit4.SpringRunner;
- @RunWith(SpringRunner.class)
- @SpringBootTest
- public class SentinelTest {
- @Autowired
- StringRedisTemplate redisTemplate;
- ValueOperations<String, String> stringRedis;
- @PostConstruct
- public void init(){
- stringRedis=redisTemplate.opsForValue();
- }
- @Test
- public void testString (){
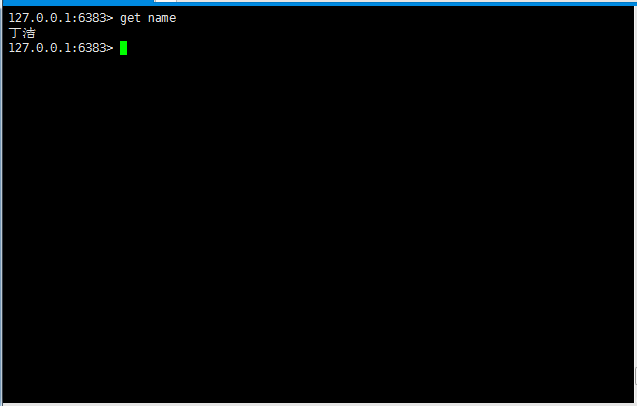
- stringRedis.set("name", "丁洁");
- System.out.println(stringRedis.get("name"));
- }
- }
5.多个哨兵配置
- ##单服务器
- spring.redis.host=39.107.119.256
- ##单端口
- spring.redis.port=6381
- ## 连接池最大连接数(使用负值表示没有限制)
- spring.redis.pool.max-active=300
- ## Redis数据库索引(默认为0)
- spring.redis.database=0
- ## 连接池最大阻塞等待时间(使用负值表示没有限制)
- spring.redis.pool.max-wait=-1
- ## 连接池中的最大空闲连接
- spring.redis.pool.max-idle=100
- ## 连接池中的最小空闲连接
- spring.redis.pool.min-idle=20
- ## 连接超时时间(毫秒)
- spring.redis.timeout=60000
- #哨兵的配置列表
- spring.redis.sentinel.master=mymaster
- spring.redis.sentinel.nodes=39.107.119.256:26379,39.107.119.256:26380
SpringBoot整合redis哨兵主从服务的更多相关文章
- SpringBoot整合Redis集群
一.环境搭建 Redis集群环境搭建:https://www.cnblogs.com/zwcry/p/9174233.html 二.Spring整合Redis集群 1.pom.xml <proj ...
- Redis-基本概念、java操作redis、springboot整合redis,分布式缓存,分布式session管理等
NoSQL的引言 Redis数据库相关指令 Redis持久化相关机制 SpringBoot操作Redis Redis分布式缓存实现 Resis中主从复制架构和哨兵机制 Redis集群搭建 Redis实 ...
- springboot整合redis——redisTemplate的使用
一.概述 相关redis的概述,参见Nosql章节 redisTemplate的介绍,参考:http://blog.csdn.net/ruby_one/article/details/79141940 ...
- 三:Springboot整合Redis
一:springboot整合redis redis版本:3.0.0 运行环境:linux 1.安装redis 1.1安装gcc yum install gcc-c++ 1.2解压redis.3.0.0 ...
- SpringBoot整合Redis使用Restful风格实现CRUD功能
前言 本篇文章主要介绍的是SpringBoot整合Redis,使用Restful风格实现的CRUD功能. Redis 介绍 Redis 是完全开源免费的,遵守BSD协议,是一个高性能的key-valu ...
- Spring Boot(十三):整合Redis哨兵,集群模式实践
前面的两篇文章(Redis的持久化方案, 一文掌握Redis的三种集群方案)分别介绍了Redis的持久化与集群方案 -- 包括主从复制模式.哨兵模式.Cluster模式,其中主从复制模式由于不能自动做 ...
- SpringBoot整合Redis、mybatis实战,封装RedisUtils工具类,redis缓存mybatis数据 附源码
创建SpringBoot项目 在线创建方式 网址:https://start.spring.io/ 然后创建Controller.Mapper.Service包 SpringBoot整合Redis 引 ...
- SpringBoot整合Redis、ApachSolr和SpringSession
SpringBoot整合Redis.ApachSolr和SpringSession 一.简介 SpringBoot自从问世以来,以其方便的配置受到了广大开发者的青睐.它提供了各种starter简化很多 ...
- SpringBoot整合Redis及Redis工具类撰写
SpringBoot整合Redis的博客很多,但是很多都不是我想要的结果.因为我只需要整合完成后,可以操作Redis就可以了,并不需要配合缓存相关的注解使用(如@Cacheable). ...
随机推荐
- import Vue form 'vue’的意思
1.import Vue form ‘vue’ 写全的话是import Vue from ‘…/nodemouls/vue/list/vue.js’: 此时在webpack.base.conf.js中 ...
- SQL Server数据恢复准备之TRUNCATE TABLE理解
SQL Server数据恢复准备之TRUNCATE TABLE理解 转自:https://blog.51cto.com/aimax/2142553 易语随风去关注0人评论6717人阅读2018-07- ...
- vant - 头部 - header【Layout 布局】【Icon 图标】
安装 npm i vant -S [main.js] import Vant from 'vant'; import 'vant/lib/index.css'; Vue.use(Vant); [ind ...
- one order 理解
1: one order core
- javascript封装animate动画
面向对象式: Element.prototype.animate=animate; Element.prototype.getStyle=getStyle; function animate(json ...
- 算法笔记-PHP实现栈的操作
[栈]后进先出,先进后出,这就是典型的“栈”结构. 任何数据结构都是对特定应用场景的抽象,数组和链表虽然使用起来更加灵活,但却暴露了几乎所有的操作,难免会引发错误操作的风险. ...
- [vue]webpack3最佳实践篇
vue-render: https://www.cnblogs.com/iiiiiher/articles/9465311.html es6模块的导入导出 https://www.cnblogs.co ...
- Python生态工具、文本处理和系统管理(虚拟)
一.Python生态工具 一.Python内置小工具 1.秒级启动一个下载服务器 Python 内置了一个下载服务器就能够显著提升效率了 . 例如, 你的同事要让你传的文件位于某一个目录下,那么,你可 ...
- 【MySQL】-NO.21.MySQL.1.MySQL.1.001-【Install MySQL5.7 On Windows】
1.0.0 Summary Tittle:[MySQL]-NO.21.MySQL.1.MySQL.1.001-[Install MySQL5.7 On Windows] Style:Web Serie ...
- gerrit设置非小组成员禁止下载代码
对gerrit有所了解的同学,都知道gerrit 是我们常用的一个来做代码审核的工具,其中的权限管理,是一个非常重要的环节,关于每个权限的使用范围,可以参考博客https://blog.csdn.ne ...