ROS和Gazebo进行机器人仿真(一)
Gazebo是一种多机器人仿真器,可用于室内外机器人仿真。Gazebo在ROS中有良好的接口,包含ROS和Gazebo的所有控制。
若要实现ROS到Gazebo的通信,我们必须安装ROS-Gazebo接口。
应该安装以下软件包:
$ sudo apt install ros-melodic-gazebo-ros-pkgs ros-melodic-gazebo-msgs ros-melodic-gazebo-plugins ros-melodic-gazebo-ros-control
*gazebo_ros_pkgs : 它包含用于将ROS和Gazebo连接的封装和工具。
*gazebo-msgs : 它包含ROS和Gazebo交互的消息和服务的数据结构。
*gazebo-plugins : 它包含用于传感器、执行结构的Gazebo插件。
*gazebo-ros-control : 它包含用于在ROS和Gazebo之间通信的标准控制器。
安装后,请使用以下命令检查Gazebo是否安装正确:
$ roscore & rosrun gazebo_ros gazebo
一.为Gazebo创建机械臂仿真模型
我们可以通过添加仿真参数来更新现有的机器人描述,从而创建一个机械臂仿真模型。
我们需要去创建一个软件包:
$ catkin_create_pkg seven_dof_arm_gazebo gazebo_msgs gazebo_plugins gazebo_ros gazebo_ros_control mastering_ros_robot_description_pkg
也可以在相应的Git库中获得完整的软件包。如下:
$ git clone https://github.com/jocacace/seven_dof_arm_gazebo.git
可以在seven_dof_arm.xacro文件中看到机器人的完整仿真模型,上一章讲过。
该文件包含了URDF标签,这对于仿真是必要的,我们将定义碰撞、惯性、传动、关节、连杆、以及Gazebo。
我们可以使用seven_dof_arm_gazebo软件包来启动现有的仿真模型,启动文件为:seven_dof_arm_world.launch的启动文件。
代码如下:
 1 <launch>

 2

 3   <!-- these are the arguments you can pass this launch file, for example paused:=t   rue -->

 4   <arg name="paused" default="false"/>

 5   <arg name="use_sim_time" default="true"/>

 6   <arg name="gui" default="true"/>

 7   <arg name="headless" default="false"/>

 8   <arg name="debug" default="false"/>

 9

10   <!-- We resume the logic in empty_world.launch -->

11   <include file="$(find gazebo_ros)/launch/empty_world.launch">

12     <arg name="debug" value="$(arg debug)" />

13     <arg name="gui" value="$(arg gui)" />

14     <arg name="paused" value="$(arg paused)"/>

15     <arg name="use_sim_time" value="$(arg use_sim_time)"/>

16     <arg name="headless" value="$(arg headless)"/>

17   </include>

18

19   <!-- Load the URDF into the ROS Parameter Server -->

20   <param name="robot_description" command="$(find xacro)/xacro --inorder '$(find ma   stering_ros_robot_description_pkg)/urdf/seven_dof_arm.xacro'" />

21

22

23   <!-- Run a python script to the send a service call to gazebo_ros to spawn a URDF    robot -->

24   <node name="urdf_spawner" pkg="gazebo_ros" type="spawn_model" respawn="false" out   put="screen"

25     args="-urdf -model seven_dof_arm -param robot_description"/>

26

27

28 </launch>
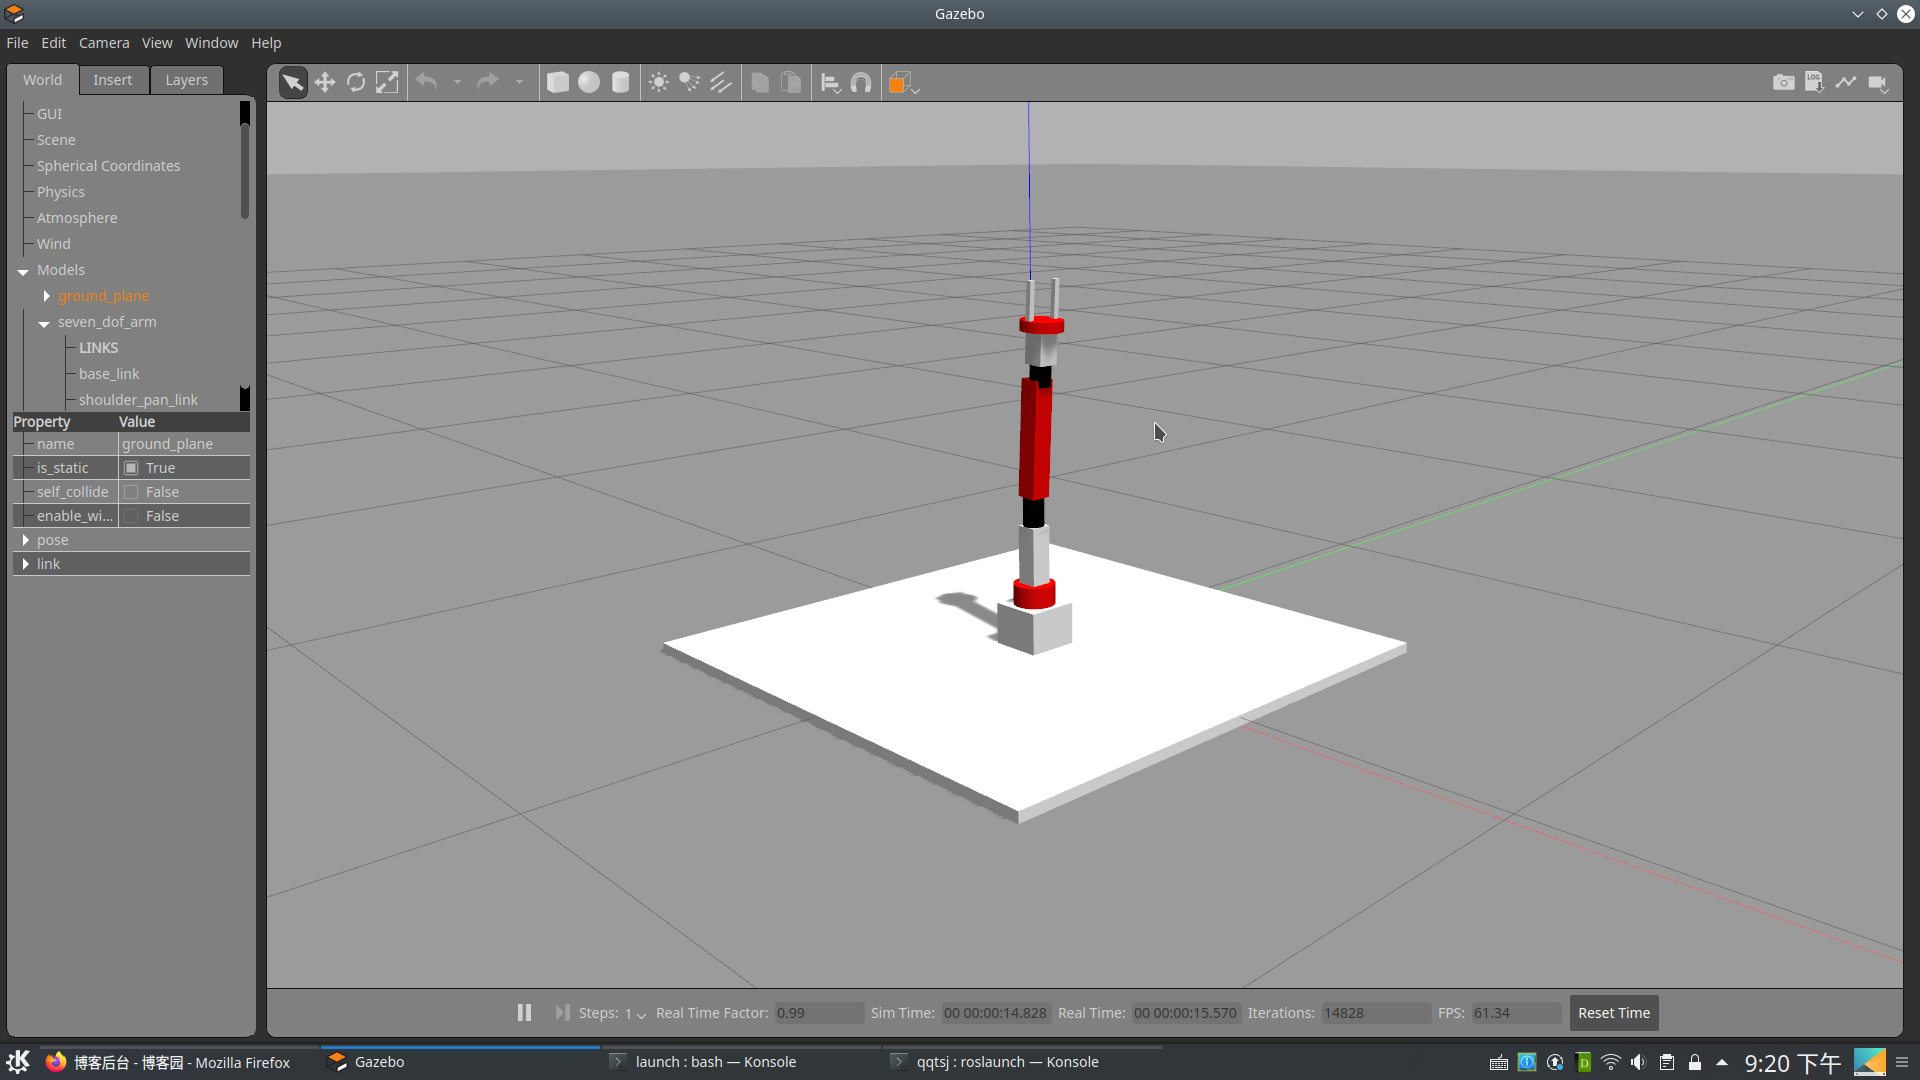
启动以下命令来显示仿真机械臂
$ roslaunch seven_dof_arm_gazebo seven_dof_arm_world.launch
模型如下:
接下来我们来详细的讨论一下机器人的仿真模型文件
1.为Gazebo机器人模型添加颜色和纹理
在机器人仿真中我们可以看到每个连杆都有不同的颜色和纹理。在xacro文件中,下面的标签可以为机器人的连杆提供纹理和颜色:
140   <gazebo reference="bottom_link">

141     <material>Gazebo/White</material>

142   </gazebo>

172   <gazebo reference="base_link">

173     <material>Gazebo/White</material>

174   </gazebo>

210   <gazebo reference="shoulder_pan_link">

211     <material>Gazebo/Red</material>

212   </gazebo>
2.添加transmission标签来启动模型
为了使用ROS控制器来启动机器人,我们需要定义<transmission>(传动)标签来连接执行机构和关节,以下是为传动的宏:
 92    <xacro:macro name="transmission_block" params="joint_name">

 93       <transmission name="tran1">

 94         <type>transmission_interface/SimpleTransmission</type>

 95         <joint name="${joint_name}">

 96           <hardwareInterface>hardware_interface/PositionJointInterface</hardwareIn    terface>

 97         </joint>

 98         <actuator name="motor1">

 99           <hardwareInterface>hardware_interface/PositionJointInterface</hardwareIn    terface>

100           <mechanicalReduction>1</mechanicalReduction>

101         </actuator>

102       </transmission>

103    </xacro:macro>
在这里<joint name="">是连接启动器的关节。<type>标签是传动类型。目前,仅支持简单的传动transmission_interface/SimpleTransmission. <hardwareInterface>
标签是要加载的硬件接口类型(位置、速度或力度),在该示例中,使用了位置控制硬件接口。这个硬件接口由gazebo_ros_control插件加载,下一节将看到。
3.添加gazebo_ros_control插件
在添加传动标签后,我们应该在仿真模型中添加gazebo_ros_control插件来解析传动标签并分配适当的硬件接口和控制管理器。代码如下:
563   <gazebo>

564     <plugin name="gazebo_ros_control" filename="libgazebo_ros_control.so">

565       <robotNamespace>/seven_dof_arm</robotNamespace>

566     </plugin>

567   </gazebo>

568
<plugin>标签指定了要加载的插件名是libgazebo_ros_control.so。可以将<robotNamespace>标签作为机器人的名称,
如果我们没有指定名称,它将从URDF 自动加载机器人的名称。我们还可以在参数服务器(<robotParam>)上指定控制器刷新速率(<control-Period>),robot_description(URDF)
的位置以及机器人硬件接口的类型(<robotSimType>).默认的硬件接口可以是:JointStateInerface、EffortJointInterface或VelocityJointInterface.
4.在Gazebo中添加3D视觉传感器
在Gazebo中,我们可以仿真机器人的运动和物理特征,也可以对传感器进行仿真。
要在Gazebo中创建一个传感器,我们就必须对Gazebo中传感器的行为进行建模。
Gazebo中有一些预先创建的传感器模型,可以直接在代码中使用而无需编写新模型。
这里,我们在Gazebo中添加了一个名为Asus Xtion Pro模型的3D视觉传感器(通常称为RGB-D传感器)。传感器已经在gazebo_ros_pkgs/gazebo_plugins的ROS软件包中实现。
Gazebo中的每个模型都可以作为Gazebo_ROS插件实现,可以将其插入URDF文件来加载。
以下是我们如何在seven_dof_arm_with_rgbd.xacro机器人的xacro文件中把Gazebo定义和Xtion Pro的物理机器人模型包含进来的:
<xacro:include filename="$(find mastering_ros_robot_description_pkg)/urdf/sensor s/xtion_pro_live.urdf.xacro"/>
在xtion_pro_live.urdf.xacro文件内部,我们可以看到以下代码:
 1 <?xml version="1.0"?>

 2 <robot xmlns:xacro="http://ros.org/wiki/xacro">

 3

 4   <xacro:include filename="$(find mastering_ros_robot_description_pkg)/urdf/sensors   /xtion_pro_live.gazebo.xacro"/>

 5

 6   <xacro:macro name="dummy_inertial">

 7     <inertial>

 8       <origin xyz="0 0 0" rpy="0 0 0"/>

 9       <mass value="0.001"/>

10       <inertia ixx="0.00001" ixy="0" ixz="0"

11                iyy="0.00001" iyz="0"

12                izz="0.00001"/>

13     </inertial>

14   </xacro:macro>

15

16   <xacro:macro name="xtion_pro_live" params="name parent *origin *optical_origin">

17

18     <!-- frames in the center of the camera -->

19     <joint name="${name}_joint" type="fixed">

20       <xacro:insert_block name="origin"/>

21       <parent link="${parent}_link"/>

22       <child link="${name}_link"/>

23     </joint>

24

25     <link name="${name}_link">

26       <inertial>

27         <origin xyz="-0.00936000000 -0.00003000000 -0.00273000000" rpy="0 0 0"/>

28         <mass value="0.21970000000"/>

29         <inertia ixx="0.00000429247" ixy="0.00000000000" ixz="0.00000002565"

30                  iyy="0.00000008027" iyz="0.00000000000"

31                  izz="0.00000427339"/>

32       </inertial>

33       <visual>

34         <origin xyz="0 0 0" rpy="0 0 0"/>

35         <geometry>

36           <mesh filename="package://mastering_ros_robot_description_pkg/meshes/sens   ors/xtion_pro_live/xtion_pro_live.dae"/>

37         </geometry>

38         <material name="DarkGrey"/>

39       </visual>

40     </link>

41

42     <joint name="${name}_optical_joint" type="fixed">

43       <xacro:insert_block name="optical_origin"/>

44       <parent link="${name}_link"/>

45       <child link="${name}_optical_frame"/>

46     </joint>

47

48     <link name="${name}_optical_frame">

49       <dummy_inertial/>

50     </link>

51

52     <!-- Depth sensor frames -->

53     <joint name="${name}_depth_joint" type="fixed">

54       <origin xyz="0.0 0.049 0.0" rpy="0 0 0"/>

55       <parent link="${name}_link"/>

56       <child link="${name}_depth_frame"/>

57     </joint>

58

59     <link name="${name}_depth_frame">

60       <dummy_inertial/>

61     </link>

62

63     <joint name="${name}_depth_optical_joint" type="fixed">

64       <origin xyz="0 0 0" rpy="${-90.0 * deg_to_rad} 0.0 ${-90.0 * deg_to_rad}"/>

65       <parent link="${name}_depth_frame"/>

66       <child link="${name}_depth_optical_frame"/>

67     </joint>

68

69     <link name="${name}_depth_optical_frame">

70       <dummy_inertial/>

71     </link>

72

73     <!-- RGB sensor frames -->

74     <joint name="${name}_rgb_joint" type="fixed">

75       <origin xyz="0.0 0.022 0.0" rpy="0 0 0"/>

76       <parent link="${name}_link"/>

77       <child link="${name}_rgb_frame"/>

78     </joint>

79

80     <link name="${name}_rgb_frame">

81       <dummy_inertial/>

82     </link>

83

84     <joint name="${name}_rgb_optical_joint" type="fixed">

85       <origin xyz="0 0 0" rpy="${-90.0 * deg_to_rad} 0.0 ${-90.0 * deg_to_rad}"/>

86       <parent link="${name}_rgb_frame"/>

87       <child link="${name}_rgb_optical_frame"/>

88     </joint>

89

90     <link name="${name}_rgb_optical_frame">

91       <dummy_inertial/>

92     </link>

93

94     <xacro:xtion_pro_live_rgbd_camera_gazebo name="${name}"/>

95   </xacro:macro>

96

97 </robot>
在这里,我们可以看到它包含另一个名为xtion_pro_live.gazebo.xacro的文件,该文件包含Xtion Pro在Gazebo中的完整定义。
我们还可以看到一个名为xtion_pro_live的宏定义,其中包含Xtion Pro的完整模型定义,包括连杆和关节:
<mesh filename="package://mastering_ros_robot_description_pkg/meshes/sens ors/xtion_pro_live/xtion_pro_live.dae"/>
在宏定义中,我们将导入一个Asus Xtion Pro的网格文件该文件将在Gazebo中显示为相机连杆。
在mastering_ros_robot_description_pkg/urdf/sensors/xtion_pro_live.gazebo.xacro文件中,
我们可以设置Xtion Pro的Gazebo-ROS插件,我们将插件定义为宏,并支持RGB和深度相机,插件的定义如下:
67         <plugin name="${name}_frame_controller" filename="libgazebo_ros_openni_kine   ct.so">

68           <alwaysOn>true</alwaysOn>

69           <updateRate>6.0</updateRate>

70           <cameraName>${name}</cameraName>

71

72           <imageTopicName>rgb/image_raw</imageTopicName>

73           <cameraInfoTopicName>rgb/camera_info</cameraInfoTopicName>

74           <pointCloudTopicName>rgb/points</pointCloudTopicName>

75

76           <depthImageTopicName>depth/image_raw</depthImageTopicName>

77           <depthImageCameraInfoTopicName>depth/camera_info</depthImageCameraInfoTop   icName>

78

79           <frameName>${name}_optical_frame</frameName>

80           <pointCloudCutoff>0.05</pointCloudCutoff>

81           <pointCloudCutoffMax>5</pointCloudCutoffMax>

82           <rangeMax>1.5</rangeMax>

83

84         </plugin>
Xtion Pro的插件文件名是libgazebo_ros_openni_kinect.so,我们可以定义插件参数,例如相机名称,图像话题等。
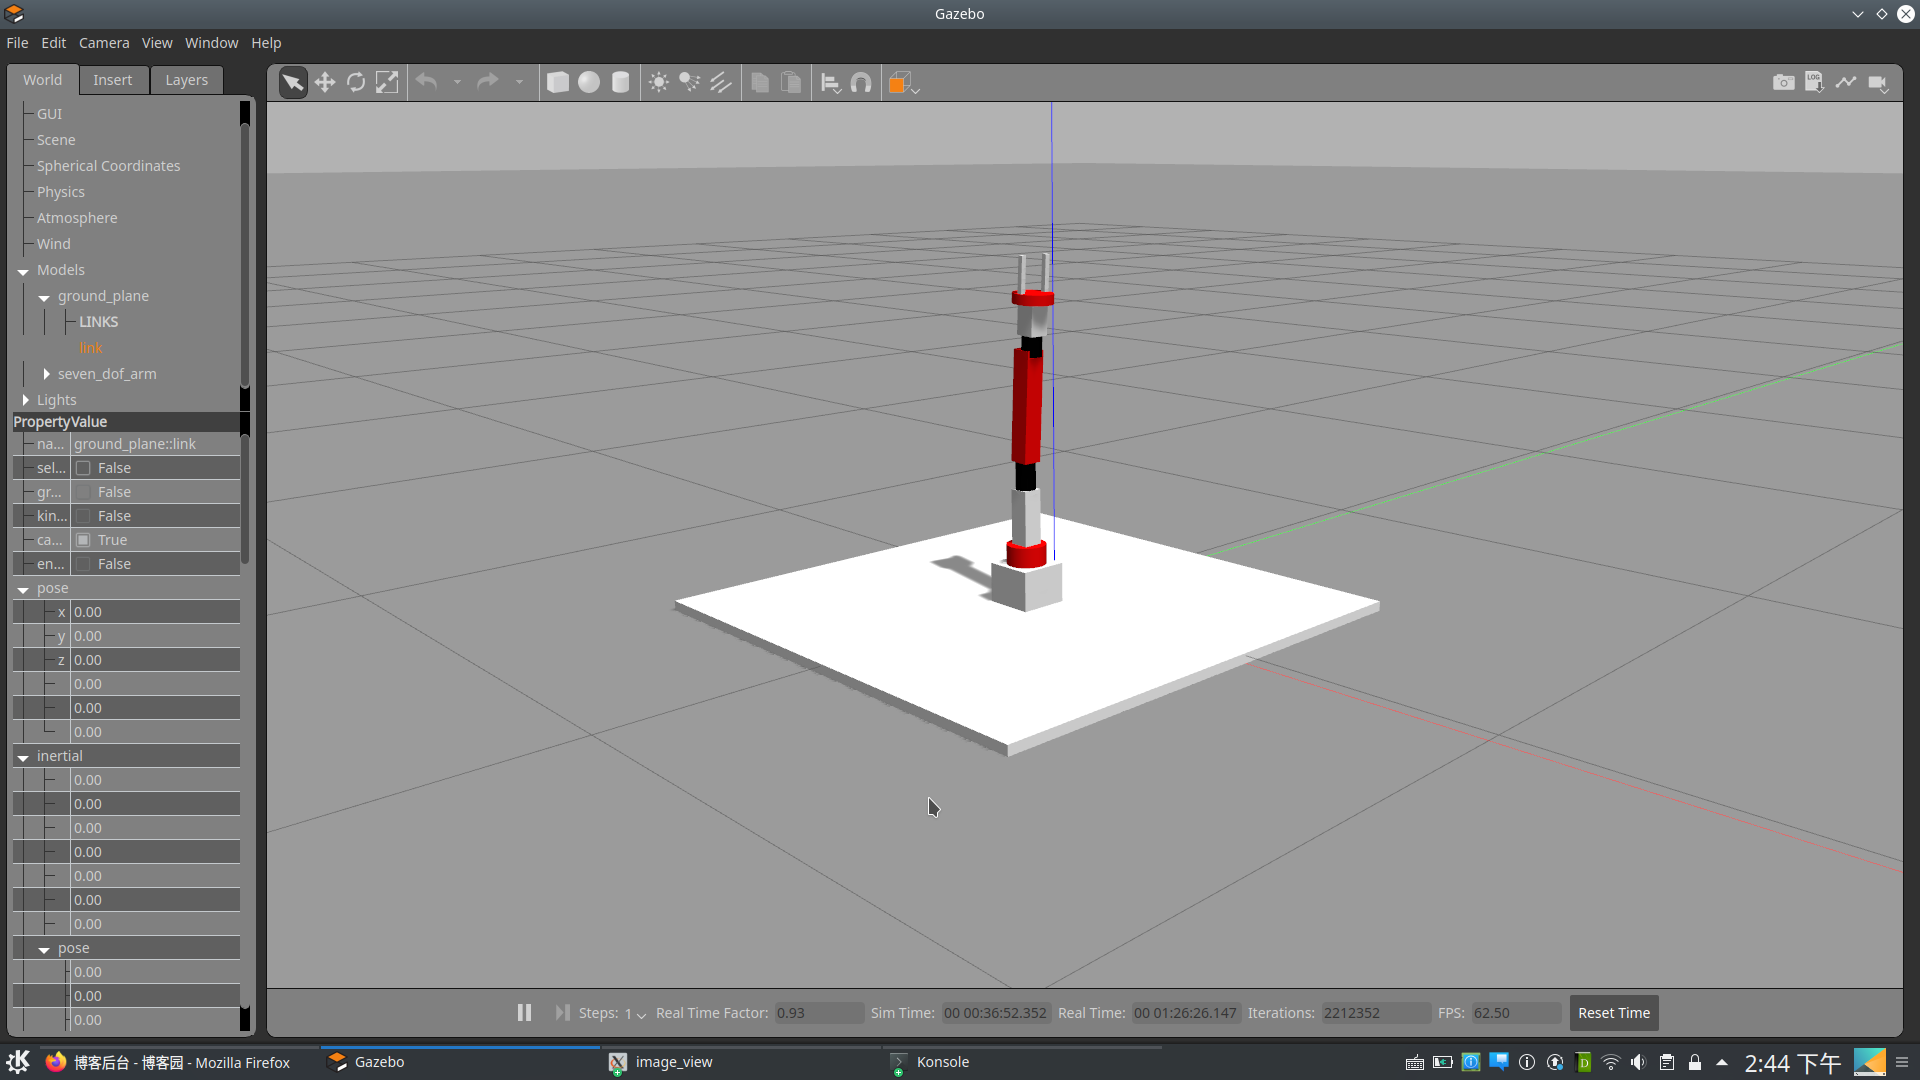
二.仿真装有Xtion Pro的机械臂
现在已经了解了Gazebo中相机插件的定义,我们可以使用以下命令启动完整的仿真:
$ roslaunch seven_dof_arm_gazebo seven_dof_arm_with_rgbd_world.launch
我们就可以看到一个机器人模型,在机械臂顶部装有一个传感器,如图所示:
可视化三维传感器数据
使用上述命令启动仿真后,我们可以检查由传感器插件生成的话题,如图所示:
命令:qqtsj ~ catkin_ws :rostopic list
/clock
/gazebo/link_states
/gazebo/model_states
/gazebo/parameter_descriptions
/gazebo/parameter_updates
/gazebo/set_link_state
/gazebo/set_model_state
/image_view_1581403067208774218/output
/image_view_1581403067208774218/parameter_descriptions
/image_view_1581403067208774218/parameter_updates
/rgbd_camera/depth/camera_info
/rgbd_camera/depth/image_raw
/rgbd_camera/depth/points
/rgbd_camera/ir/camera_info
/rgbd_camera/ir/image_raw
/rgbd_camera/ir/image_raw/compressed
/rgbd_camera/ir/image_raw/compressed/parameter_descriptions
/rgbd_camera/ir/image_raw/compressed/parameter_updates
/rgbd_camera/ir/image_raw/compressedDepth
/rgbd_camera/ir/image_raw/compressedDepth/parameter_descriptions
/rgbd_camera/ir/image_raw/compressedDepth/parameter_updates
/rgbd_camera/ir/image_raw/theora
/rgbd_camera/ir/image_raw/theora/parameter_descriptions
/rgbd_camera/ir/image_raw/theora/parameter_updates
/rgbd_camera/parameter_descriptions
/rgbd_camera/parameter_updates
/rgbd_camera/rgb/camera_info
/rgbd_camera/rgb/image_raw
/rgbd_camera/rgb/image_raw/compressed
/rgbd_camera/rgb/image_raw/compressed/parameter_descriptions
/rgbd_camera/rgb/image_raw/compressed/parameter_updates
/rgbd_camera/rgb/image_raw/compressedDepth
/rgbd_camera/rgb/image_raw/compressedDepth/parameter_descriptions
/rgbd_camera/rgb/image_raw/compressedDepth/parameter_updates
/rgbd_camera/rgb/image_raw/theora
/rgbd_camera/rgb/image_raw/theora/parameter_descriptions
/rgbd_camera/rgb/image_raw/theora/parameter_updates
/rgbd_camera/rgb/points
/rosout
/rosout_agg
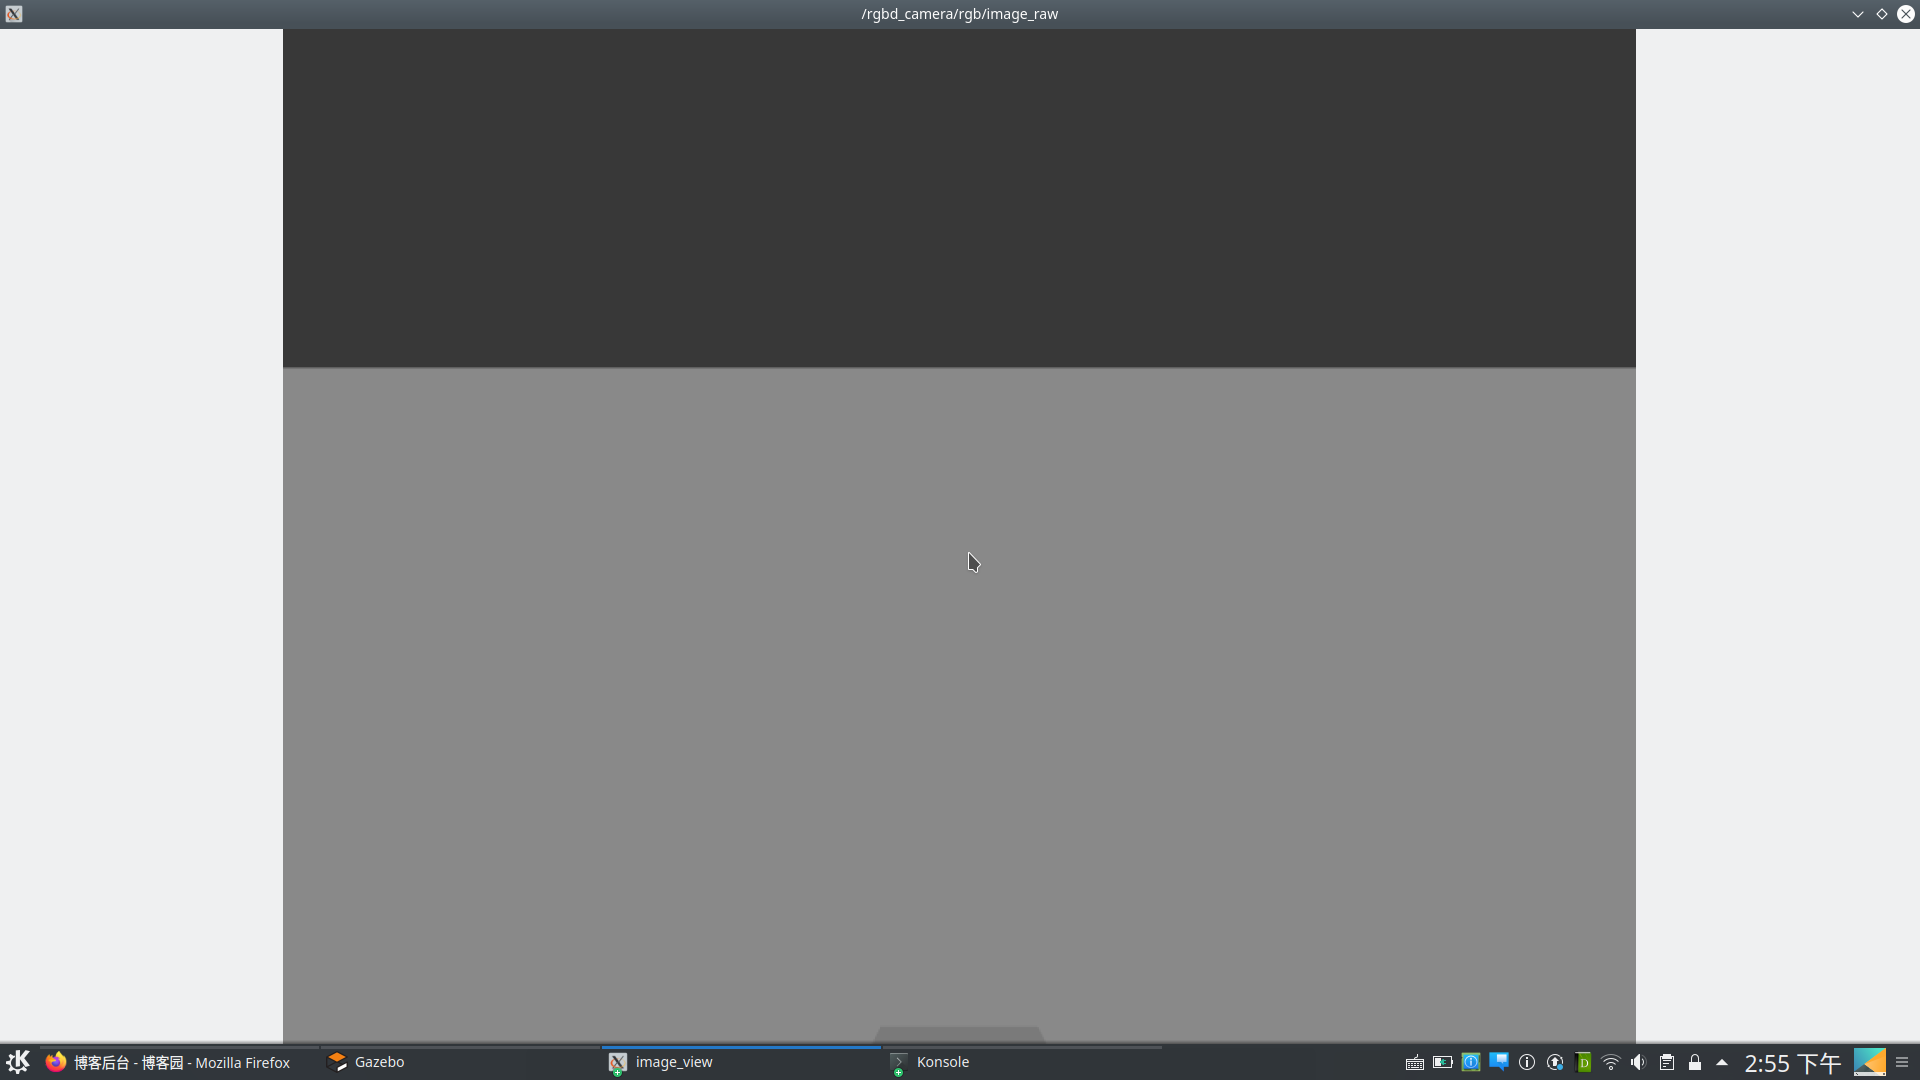
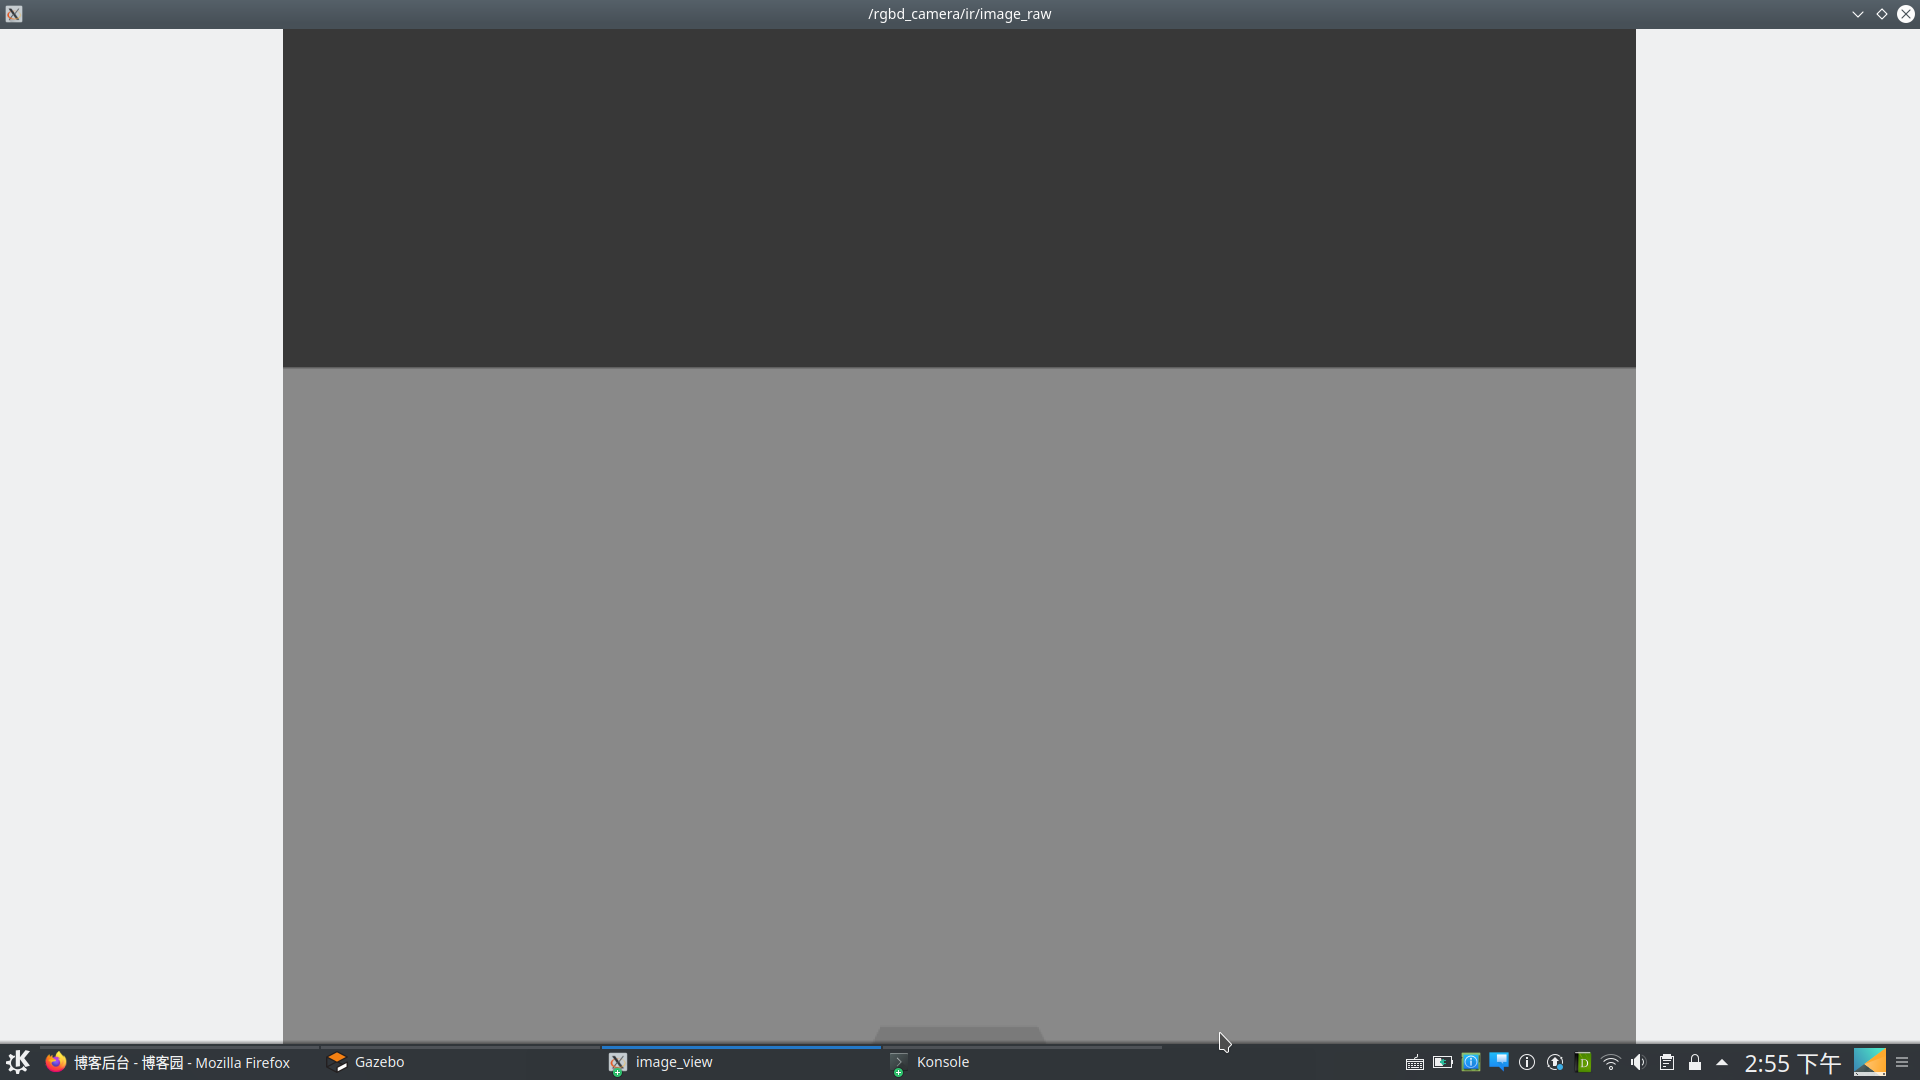
我们使用名为image_view的工具来查看3D视觉传感器的图像数据:
*查看RGB原始图像:
$ rosrun image_view image_view image:=/rgbd_camera/rgb/image_raw
*查看IR原始图像:
$rosrun image_view image_view image:=/rgbd_camera/ir/image_raw
*查看深度图像
$rosrun image_view image_view image:=/rgbd_camera/depth/image_raw
如下为以上的截图:
ROS和Gazebo进行机器人仿真(一)的更多相关文章
- ROS和Gazebo进行机器人仿真(二)
一.在Gazebo中使用ROS控制器 在本节中,我们将讨论如何在Gazebo中让机器人的每个关节运动. 为了让关节动起来,我们需要分配一个ROS控制器,尤其是,我们需要为每个关节连上一个与transm ...
- ROS(indigo)swarm_robot 群机器人示例Gazebo
ROS(indigo)swarm_robot 群机器人示例Gazebo 参考网址:https://github.com/yangliu28/swarm_robot_ros_sim 安装提示:catki ...
- ROS_Kinetic_x 基於ROS和Gazebo的RoboCup中型組仿真系統(多機器人協作)
國防科學技術大學發布了RoboCup中型組仿真平臺,基於ROS和Gazebo設計. 該平臺可以用於多機器人協作研究.參考資料如下: ROS新聞:1 http://www.ros.org/news ...
- 机器人与机器人仿真技术(zz)
http://www.viblue.com/archives/5587.htm 一.机器人简介: 机器人(Robot)是自动执行工作的机器装置.它既可以接受人类指挥,又可以运行预先编排的程序,也可以根 ...
- Emotiv脑电设备与RDS机器人仿真初步测试
Emotiv脑电设备与RDS机器人仿真初步测试 在脑电设备相关算法进行真实机器人测试前,有必要进行大量仿真验证算法,节约开发时间. 这里给我启发的Emotiv使用所参考的一些网址. 官网:https: ...
- 基于 Mathematica 的机器人仿真环境(机械臂篇)[转]
完美的教程,没有之一,收藏学习. 目的 本文手把手教你在 Mathematica 软件中搭建机器人的仿真环境,具体包括以下内容(所使用的版本是 Mathematica 11.1,更早的版本可能缺少某些 ...
- ROS中的3D机器人建模(二)
一,创建我们的第一个URDF模型 我们设计的第一个机器人模型是pan-and-tilt机械结构,代码如下 pan_tilt.urdf: 1 <?xml version="1.0&quo ...
- 在ROS Kinetic中使用Gazebo 8进行机器人仿真
在ROS Kinetic中使用Gazebo 8比在ROS Indigo中使用Gazebo 3-8要容易一些. 目前最新稳定版本的Gazebo8为8.1.1. 安装流程如下: $ sudo apt-g ...
- ROS探索总结(四)——简单的机器人仿真
前边我们已经介绍了ROS的基本情况,以及新手入门ROS的初级教程,现在就要真正的使用ROS进入机器人世界了.接下来我们涉及到的很多例程都是<ROS by Example>这本书的内容,我是 ...
随机推荐
- HDU5179 beautiful number 题解 数位DP
题目链接:http://acm.hdu.edu.cn/showproblem.php?pid=5179 题目大意: 给你一个数 \(A = a_1a_2 \cdots a_n\) ,我们称 \(A\) ...
- 在.NET Core中批量注入Grpc服务
GRPC 是谷歌发布的一个开源.高性能.通用RPC服务,尽管大部分 RPC 框架都使用 TCP 协议,但其实 UDP 也可以,而 gRPC 干脆就用了 HTTP2.还有就是它具有跨平台.跨语言 等特性 ...
- SpringBoot-2.1.1系列二:使用websocket
1.什么是websocket? WebSocket协议是基于TCP的一种新的网络协议.它实现了浏览器与服务器全双工(full-duplex)通信--允许服务器主动发送信息给客户端. 2.为什么需要使用 ...
- BZOJ 2038: [2009国家集训队]小Z的袜子 (莫队)
题目传送门:小Z的袜子 Description 作为一个生活散漫的人,小Z每天早上都要耗费很久从一堆五颜六色的袜子中找出一双来穿.终于有一天,小Z再也无法忍受这恼人的找袜子过程,于是他决定听天由命…… ...
- kettle连接oracle数据库报错,ORA-12505
报错信息: Error connecting to database: (using class oracle.jdbc.driver.OracleDriver) Listener refused t ...
- Spring Cloud(二):Web服务客户端之Ribbon
上文介绍了服务如何通过Eureka实现注册,以及如何从Eureka获取已经注册的服务列表.那么拿到注册服务列表后, 如何进行服务调用?一个简单的实现是可以从被调用服务的实例列表中选择一个服务实例,通过 ...
- js 极简获取表单 元素 !
let s =[]; $.each($('#formSearch input'),(m,n)=>{s.push(n)}); //示例获取表单所有 input 下滑线分割的 name 集合.set ...
- k8s内运行ubuntu容器
k8s内运行ubuntu镜像 环境 互相能访问的4台机器master,node01,node02,node03,4核心,内存8G 使用root操作 安装k8s 在master安装docker.kube ...
- Graph Transformer Networks 论文分享
论文地址:https://arxiv.org/abs/1911.06455 实现代码地址:https://github.com/ seongjunyun/Graph_Transformer_Netwo ...
- Mysql-SQL优化-子查询替代LEFT JOIN
表A:批次信息表, 表B:实际批次明细表, Mysql版本:5.6.36 两表之间的数据体量差异:表B是表A的10000倍. 经过结转,表B通常保留 1千5百万数据.表A就是1千多条数据. 计算近24 ...