07vue 自定义全局组件 通用流程
1.全局组件的目录
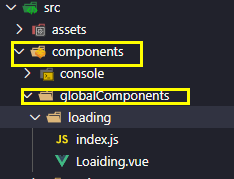
2.loading/index.js
- import LoadingComp from './Loaiding'
- const compName=LoadingComp.name //获取组件的名字 当做全局组件名字使用
- const loading = {
- //Vue.use()方法就会自动执行install
- install(Vue) {
- Vue.component(compName, LoadingComp)
- }
- }
- export default loading
3.loading/Loading.vue
- <template>
- <div>
- <h3>{{loadingMessage}}</h3>
- <h3>{{aa}}</h3>
- </div>
- </template>
- <script>
- export default {
- name: "Loading",
- props: {
- aa: {
- type: String,
- }
- },
- data() {
- return {
- loadingMessage: "loading..."
- };
- },
- methods: {},
- };
- </script>
- <style lang="scss" scoped>
- </style>
4.main.js全局注册
- import Loading from './components/globalComponents/loading/index'
- Vue.use(Loading)
5.使用
- <template>
- <div>
- <loading></loading> //无需注册 直接使用
- </div>
- </template>
批量导入多个自定义全局组件
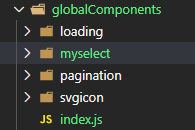
index.js文件(上面globalComponents下面统一新建一个index.js文件)
- import loading from './loading'
- import mySelect from './myselect'
- export default {
- loading,
- mySelect
- }
- //main.js 批量导入全局自定义组件
- import globalComponents from './components/globalComponents'
- for (let key in globalComponents) {
- Vue.use(globalComponents[key])
- }
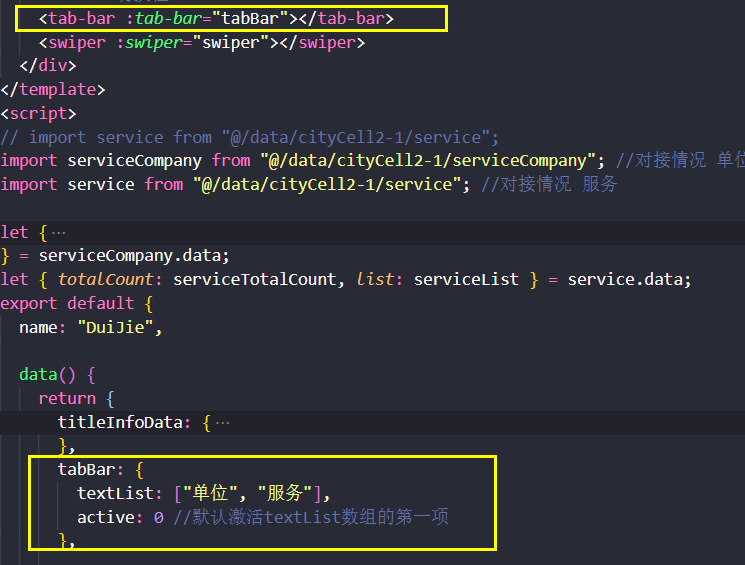
自定义全局TarBar组件
- <!-- TabBar.vue-->
- <template>
- <div
- class="tab"
- v-if="defaultTarBar.textList.length!==0"
- :style="{width:defaultTarBar.textList.length*45+'px'}"
- >
- <span
- v-for="(item, index) in defaultTarBar.textList"
- :key="index"
- :class="[defaultTarBar.active===index?'active':'']"
- @click="tabClick(index,item)"
- >{{item}}</span>
- </div>
- </template>
- <script>
- export default {
- name: "TabBar",
- props: {
- tabBar: {
- type: Object,
- required: true
- }
- },
- data() {
- return {
- defaultTarBar: {
- textList: [],
- active: 0
- }
- };
- },
- methods: {
- initDefaultTarBar() {
- this.defaultTarBar={...this.defaultTarBar,...this.tabBar}
- },
- tabClick(index, item) {
- // console.log(index, item);
- this.defaultTarBar.active = index;
- this.tabBar.active = index;
- }
- },
- created() {
- this.initDefaultTarBar();
- }
- };
- </script>
- <style lang="less" scoped>
- .tab {
- display: flex;
- flex-flow: nowrap row;
- justify-content: space-between;
- align-items: center;
- // width: 100px;
- background: #1f4b74;
- overflow: hidden;
- border-radius: 30px;
- cursor: pointer;
- text-align: center;
- position: absolute;
- right: 0;
- top: 0;
- span {
- flex: 1; //平分
- color: #5addff;
- }
- .active {
- background: #5addff;
- color: #070931;
- }
- }
- </style>
- //index.js
import TabBar from './TabBar'- const compName = TabBar.name //获取组件的名字 当做全局组件名字使用
- console.log("compName", compName)
- const tabBar = {
- //Vue.use()方法就会自动执行install
- install(Vue) {
- Vue.component(compName, TabBar)
- }
- }
- export default tabBar
使用tarbar.vue
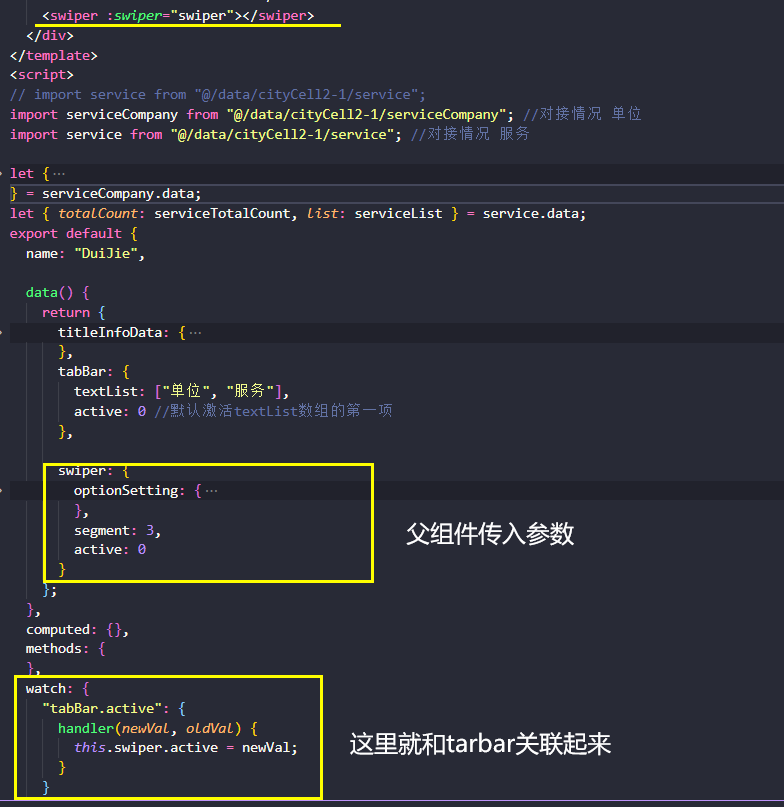
自定义Swiper全局组件
- <!--1Swiper使用与两组不同的数据,点击切换不同的数据源 但是两组数据的展示效果是一样的。
2.另外也是将一个很长的数据list[],切了segment段,分列一起滚动。
3. 下载安装 vue-seamless-scroll 单文件引用
-->- <template>
- <div class="container" v-if="computedListData.length!==0">
- <div v-for="( segmentList,index) in computedListData" :key="index">
- <scroll
- :data="segmentList"
- :class-option="defaultSwiper.optionSetting"
- class="seamless-warp"
- >
- <ul class="item">
- <li class="li" v-for="item in segmentList" :key="item">{{item}}</li>
- </ul>
- </scroll>
- </div>
- </div>
- </template>
- <script>
- // import vueSeamless from "vue-seamless-scroll";
- import serviceCompany from "@/data/cityCell2-1/serviceCompany"; //对接情况 单位
- import service from "@/data/cityCell2-1/service"; //对接情况 服务
- let {
- totalCount: serviceCompanyTotalCount,
- list: serviceCompanyList
- } = serviceCompany.data;
- let { totalCount: serviceTotalCount, list: serviceList } = service.data;
- import scroll from "vue-seamless-scroll"; //导入组件
- export default {
- name: "Swiper",
- props: {
- swiper: {
- type: Object
- }
- },
- components: {
- scroll
- },
- data() {
- return {
- serviceCompanyList: serviceCompanyList, //公司(单位)列表 15
- serviceList: serviceList, //服务列表 40个
- defaultSwiper: {
- optionSetting: {
- step: 0.4, // 数值越大速度滚动越快
- limitMoveNum: 7, // 开始无缝滚动的数据量 this.dataList.length
- hoverStop: false, // 是否开启鼠标悬停stop
- direction: 1, // 0向下 1向上 2向左 3向右
- openWatch: true, // 开启数据实时监控刷新dom
- singleHeight: 0, // 单步运动停止的高度(默认值0是无缝不停止的滚动) direction => 0/1
- singleWidth: 0, // 单步运动停止的宽度(默认值0是无缝不停止的滚动) direction => 2/3
- waitTime: 1000 // 单步运动停止的时间(默认值1000ms)
- },
- segment: 4,
- active: 0 //配合tarbar切换的
- }
- };
- },
- computed: {
- computedListData() {
- const obj = {
- 0: this._segmentArr(
- this.serviceCompanyList,
- this.defaultSwiper.segment
- ),
- 1: this._segmentArr(this.serviceList, this.defaultSwiper.segment)
- };
- return obj[this.defaultSwiper.active];
- }
- },
- methods: {
- initDefaultSwiper() {
- this.defaultSwiper = { ...this.defaultSwiper, ...this.swiper };
- }
- },
- created() {
- this.initDefaultSwiper();
- },
- watch: {
- "swiper.active": {
- handler(newVal) {
- this.defaultSwiper.active = newVal;
- }
- }
- }
- };
- </script>
- <style lang="less" scoped>
- .container {
- display: flex;
- flex-flow: nowrap row;
- justify-content: space-between;
- align-items: flex-start;
- padding: 0.9rem 0.2rem 0.3rem 0.2rem;
- .seamless-warp {
- height: 87%;
- overflow: hidden;
- .item {
- text-align: left;
- .li {
- padding-left: 10px;
- font-size: 14px;
- margin-bottom: 0.2rem;
- overflow: hidden;
- white-space: nowrap;
- text-overflow: ellipsis;
- position: relative;
- &:before {
- content: "";
- width: 4px;
- height: 4px;
- background: rgba(90, 221, 255, 0.3);
- position: absolute;
- top: 9px;
- left: 0;
- }
- }
- }
- }
- }
- </style>
- //index.js
import Swiper from './Swiper'- const compName = Swiper.name //获取组件的名字 当做全局组件名字使用
- const swiper = {
- //Vue.use()方法就会自动执行install
- install(Vue) {
- Vue.component(compName, Swiper)
- }
- }
- export default swiper
use
07vue 自定义全局组件 通用流程的更多相关文章
- vue2 自定义全局组件(Loading加载效果)
vue2 自定义全局组件(Loading加载效果) github地址: https://github.com/ccyinghua/custom-global-component 一.构建项目 vue ...
- Vuejs自定义全局组件--loading
不管是使用框架,还是不使用任何的框架,我们都不可避免的需要与“加载中……”打交道,刚刚学习了Vuejs自定义组件的写法,就现学现卖,介绍一下吧! 先看一下目录结构,一般情况下,每一个组件都新建一个新的 ...
- 8svg 自定义全局组件
0.https://www.npmjs.com/package/vue2-svg-icon 直接使用vue2-svg-icon插件 .如果不使用,就使用下面用法 注意:用阿里图标时候,最好都选择#ff ...
- vue自定义全局组件(自定义插件)
有时候我们在做开发的时候,就想自己写一个插件然后就可以使用自己的插件,那种成就感很强.博主最近研究element-ui和axios的时候,发现他们是自定义组件,但是唯一有一点不同的是,在用elemen ...
- vue 自定义全局组件
- 自定义vue全局组件use使用(解释vue.use()的原理)
我们在前面学习到是用别人的组件:Vue.use(VueRouter).Vue.use(Mint)等等.其实使用的这些都是全剧组件,这里我们就来讲解一下怎么样定义一个全局组件,并解释vue.use()的 ...
- 自定义vue全局组件use使用、vuex的使用
自定义vue全局组件use使用(解释vue.use()的原理)我们在前面学习到是用别人的组件:Vue.use(VueRouter).Vue.use(Mint)等等.其实使用的这些都是全剧组件,这里我们 ...
- Django---FORM组件.FORM组件的字段,FORM组件校验流程,FORM组件的全局和局部钩子,FORM和Model的组合
Django---FORM组件.FORM组件的字段,FORM组件校验流程,FORM组件的全局和局部钩子,FORM和Model的组合 一丶FORM的介绍 1.生成页面可用的HTML标签 2.对用户提交的 ...
- Vue 使用use、prototype自定义自己的全局组件
使用Vue.use()写一个自己的全局组件. 目录如下: 然后在Loading.vue里面定义自己的组件模板 <template> <div v-if="loadFlag& ...
随机推荐
- QComboBox设置下拉item大小
1.首先给ComboBox设置view: ui->comboBox->setView(new QListView()); 注意:这一句需要放在在所在界面的构造函数里,否则不生效. 2.给c ...
- 027_go语言中的通道选择器
代码演示 package main import "fmt" import "time" func main() { c1 := make(chan strin ...
- Python3,逻辑运算符
优先级 ()>not>and>or 1.or 在python中,逻辑运算符or,x or y, 如果x为True则返回x,如果x为False返回y值.因为如果x为True那么or运算 ...
- Windows10 无法完全关闭Hyper-V导致VirtualBox 虚拟机无法启动
win10本来已经安装使用了VirtualBox. 突然心血来潮决定试试系统自带的虚拟机Hyper-V.发现并没有想象中的好用.随后在启用或关闭 Windows功能中关闭了Hyper-V. 这时我发现 ...
- JavaScript按位运算符~
1. JavaScript按位运算符 Bit operators work on 32 bits numbers. 2. JavaScript按位运算符~ 值得注意的是,在JavaScript中,~5 ...
- JavaScript小游戏实例:简单的键盘练习
键盘是一种常用的输入设备,灵活熟练地使用键盘进行输入是计算机用户需掌握的一门基本功.下面我们编写一个简单的键盘练习游戏. 1.刺破气泡交互式小动画 在编写简单的键盘练习游戏之前,先设计一个简单地刺破气 ...
- 线程安全&Java内存模型
目录 Java内存模型 关于线程安全 Volatile关键字 Synchronized锁 重入锁 Lock锁 死锁 乐观锁与悲观锁 乐观锁(适合多读场景) 悲观锁(适合多写场景) Java内存模型 J ...
- object detection 总结
1.基础 自己对于YOLOV1,2,3都比较熟悉. RCNN也比较熟悉.这个是自己目前掌握的基础2.第一步 看一下2019年的井喷的anchor free的网络3.第二步 看一下以往,引用多的网路4. ...
- 08 vi全屏文本编辑器
打开文件vim /path/to/somefilevim +# :打开文件,并定位于第#行(如下的 vi +33 profile) vim +:打开文件,定位至最后一行vim +/PATTERN : ...
- 面试官:怎么做JDK8的垃圾收集器的调优?
面试官:怎么做JDK8的垃圾收集器的调优? 看着面试官真诚的眼神,心中暗想看起来年纪轻轻却提出如此直击灵魂的问题.擦了擦额头上汗,我稍微调整了一下紧张的情绪,对面试官说: 在JDK8中有Serial收 ...