IntelliJ IDEA 2017版 spring-boot加载jsp配置详解(详细图文实例)
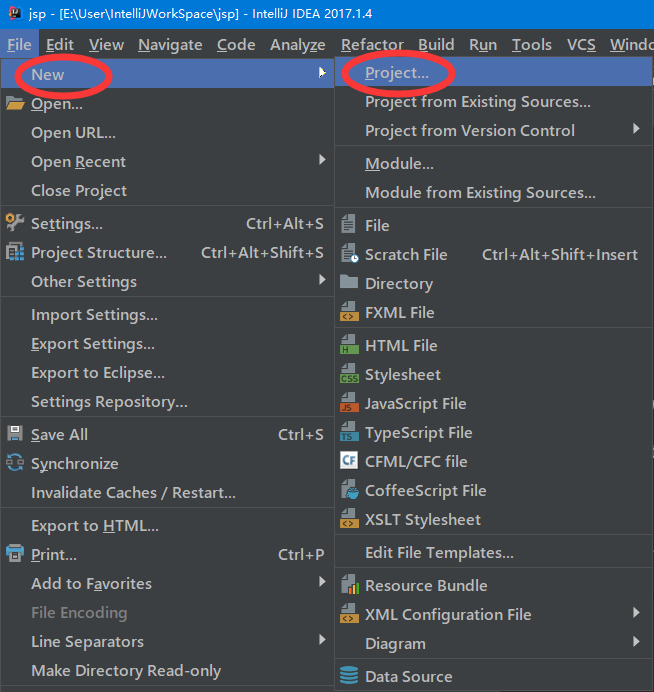
一、创建项目
(File--->New-->Project)
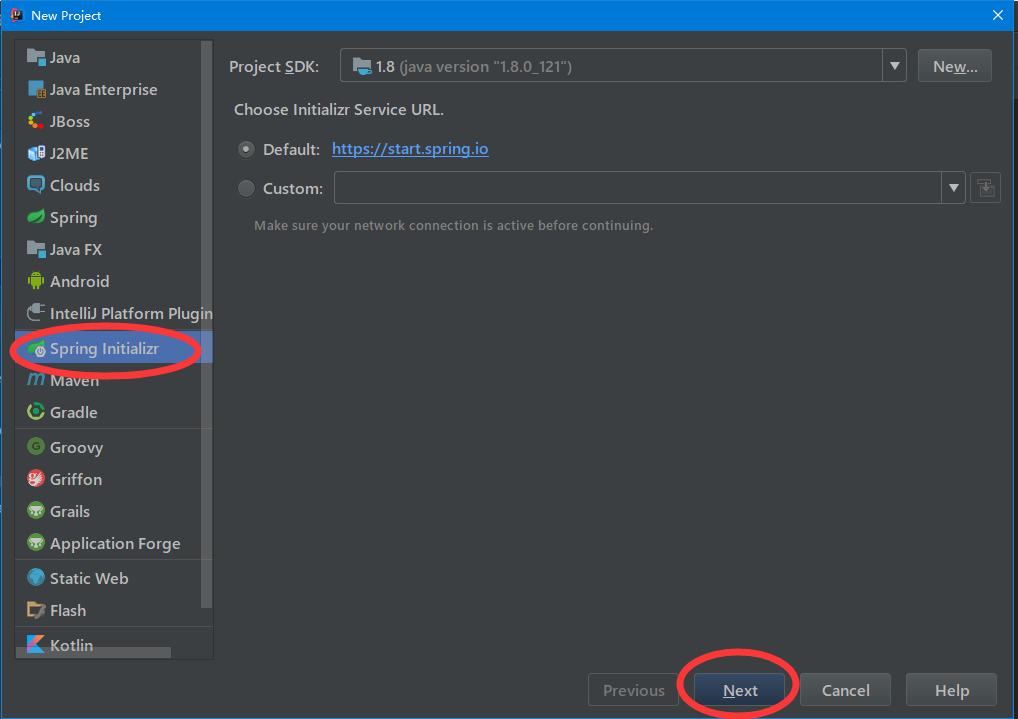
2、项目配置内容
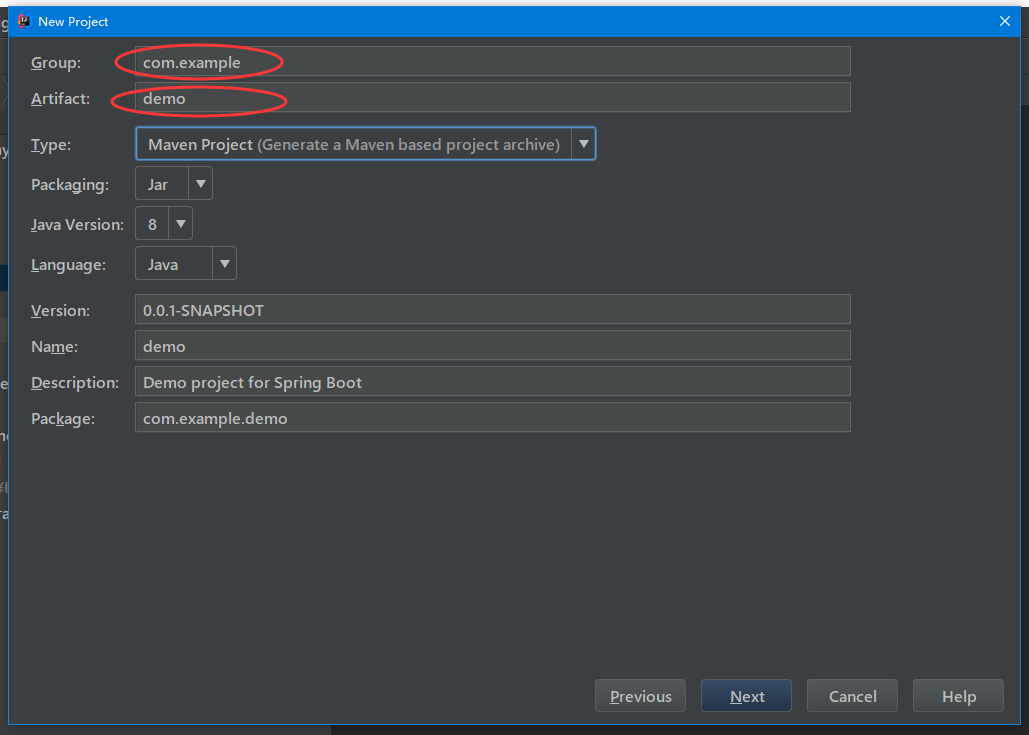
3、选择配置项目的Group包名,Artifact项目名称
4、选择项目类型为web类型

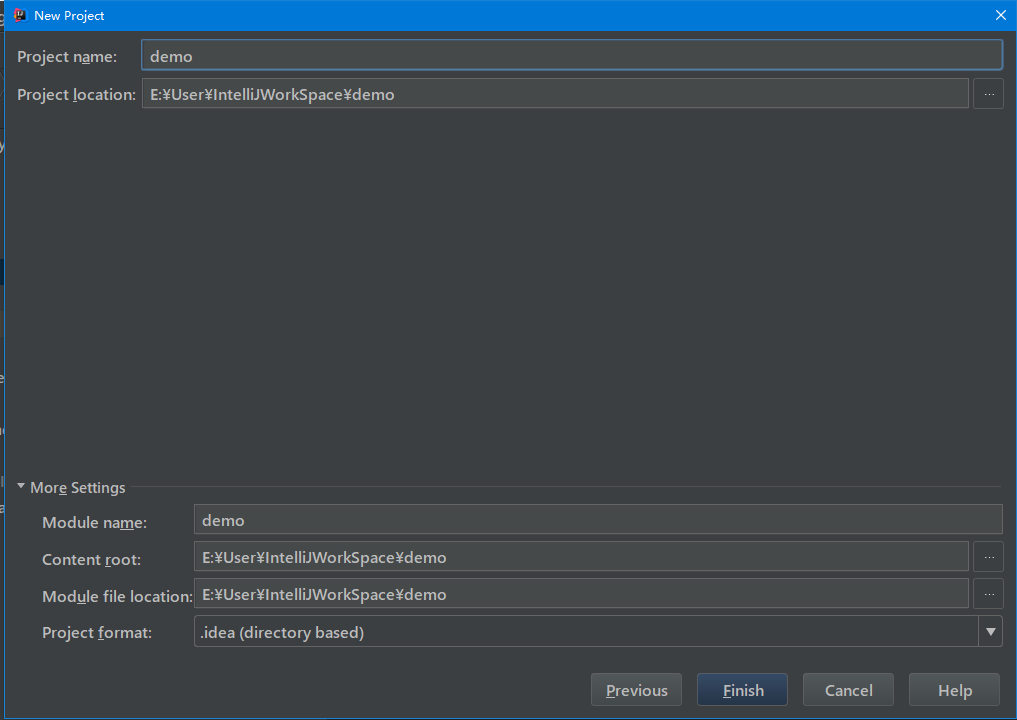
5、创建成功,点击最后一步finish
二、代码编写
1、搭建pom.xml文件
 <?xml version="1.0" encoding="UTF-8"?>

 <project xmlns="http://maven.apache.org/POM/4.0.0" xmlns:xsi="http://www.w3.org/2001/XMLSchema-instance"

          xsi:schemaLocation="http://maven.apache.org/POM/4.0.0 http://maven.apache.org/xsd/maven-4.0.0.xsd">

     <modelVersion>4.0.0</modelVersion>

     <groupId>com.springboot</groupId>

     <artifactId>jsp</artifactId>

     <version>0.0.1-SNAPSHOT</version>

     <packaging>jar</packaging>

     <name>jsp</name>

     <url>http://maven.apache.org</url>

     <description>Demo project for Spring Boot</description>

     <parent>

         <groupId>org.springframework.boot</groupId>

         <artifactId>spring-boot-starter-parent</artifactId>

         <version>1.5.9.RELEASE</version>

         <relativePath/> <!-- lookup parent from repository -->

     </parent>

     <properties>

         <project.build.sourceEncoding>UTF-8</project.build.sourceEncoding>

         <project.reporting.outputEncoding>UTF-8</project.reporting.outputEncoding>

         <java.version>1.8</java.version>

     </properties>

     <dependencies>

         <dependency>

             <groupId>org.springframework.boot</groupId>

             <artifactId>spring-boot-starter-web</artifactId>

         </dependency>

         <dependency>

             <groupId>org.springframework.boot</groupId>

             <artifactId>spring-boot-starter-test</artifactId>

             <scope>test</scope>

         </dependency>

         <!-- servlet 依赖. -->

         <dependency>

             <groupId>javax.servlet</groupId>

             <artifactId>javax.servlet-api</artifactId>

             <scope>provided</scope>

         </dependency>

         <!--

                 JSTL(JSP Standard Tag Library,JSP标准标签库)是一个不断完善的开放源代码的JSP标签库,是由apache的jakarta小组来维护的。

          -->

         <dependency>

             <groupId>javax.servlet</groupId>

             <artifactId>jstl</artifactId>

         </dependency>

         <!-- tomcat 的支持.-->

         <dependency>

             <groupId>org.springframework.boot</groupId>

             <artifactId>spring-boot-starter-tomcat</artifactId>

             <scope>provided</scope>

         </dependency>

         <dependency>

             <groupId>org.apache.tomcat.embed</groupId>

             <artifactId>tomcat-embed-jasper</artifactId>

             <!--<scope>provided</scope>-->

         </dependency>

         <dependency>

             <groupId>org.eclipse.jdt.core.compiler</groupId>

             <artifactId>ecj</artifactId>

             <version>4.6.1</version>

             <scope>provided</scope>

         </dependency>

     </dependencies>

     <build>

         <plugins>

             <plugin>

                 <groupId>org.springframework.boot</groupId>

                 <artifactId>spring-boot-maven-plugin</artifactId>

             </plugin>

         </plugins>

     </build>

 </project>
2、application配置
 #页面默认前缀目录

 spring.mvc.view.prefix=/WEB-INF/jsp/

 # 响应默认后缀

 spring.mvc.view.suffix=.jsp
3、Application类编辑
 package com.springboot;

 import org.springframework.boot.SpringApplication;

 import org.springframework.boot.autoconfigure.SpringBootApplication;

 @SpringBootApplication

 public class JspApplication {

     public static void main(String[] args) {

         SpringApplication.run(JspApplication.class, args);

     }

 }
4、Controller测试类编辑
 package com.springboot.controller;

 import org.springframework.stereotype.Controller;

 import org.springframework.web.bind.annotation.RequestMapping;

 import java.util.Map;

 /**

  * Created by liuya on 2018-01-28.

  */

 @Controller

 public class JSPController {

     @RequestMapping("/index")

     public String index(Map<String, Object> map) {

         map.put("name","Andy");

         return "mytest";

     }

 }
三、界面配置
由于IntellJ下的项目不自带webapp,所以需要手动自行添加
方法如图
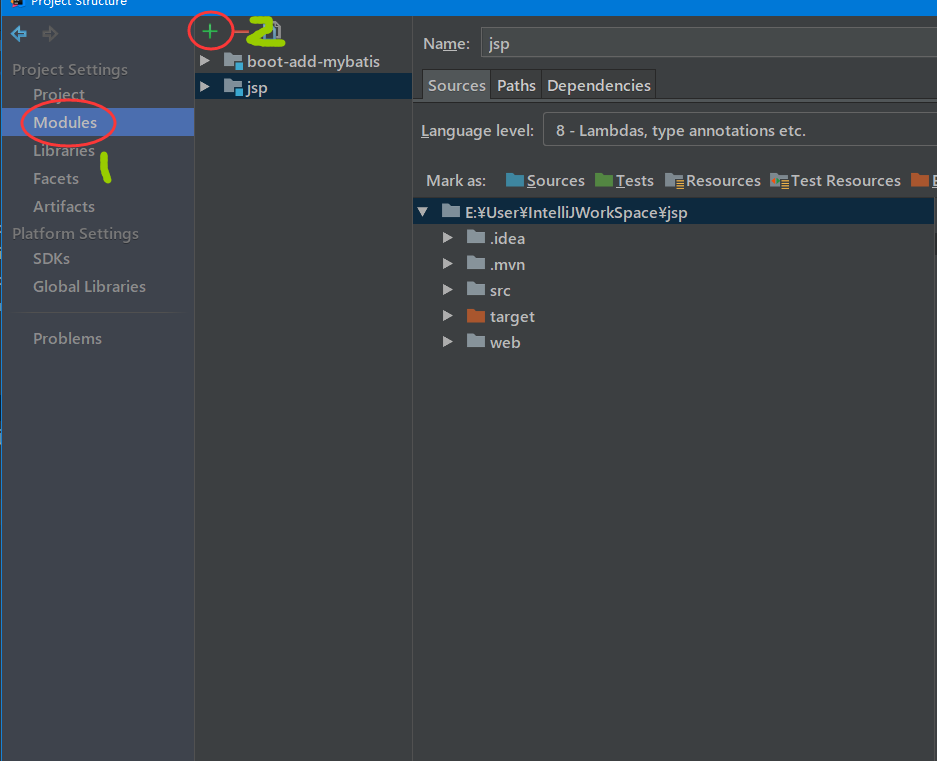
1、选中项目--->file-->Project Structure

2、如图选中module ,选中jsp,然后选择2的加号
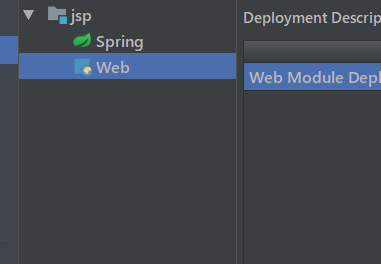
3、加号弹出框中选择web

4、就会在目录下生成一个web,然后我们对web进行配置
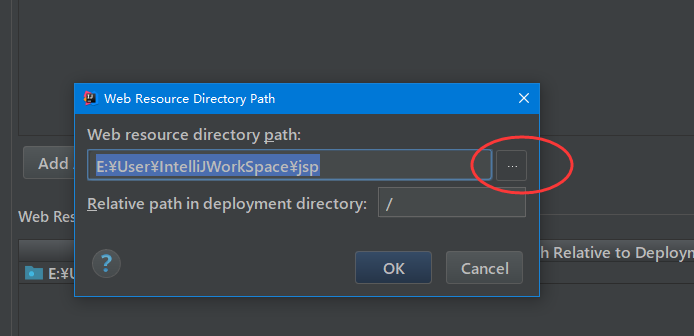
5、web配置到项目中,选中web然后找到右边的小加号

6、找到自己的项目,然后选择你自己建立的web文件夹(一般有个默认路径,但是我们不用,选择后边的省略号)
7、点击后弹出如图,然后选择自己的web,如图
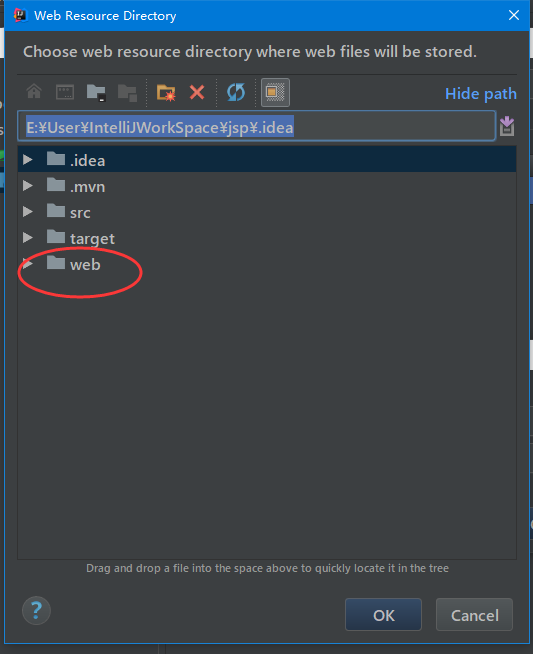
8、点击ok,然后就发现文件夹变为了带点的文件夹,然后在文件夹下建立jsp子文件夹,然后在其中加入测试代码
 <%--

   Created by IntelliJ IDEA.

   User: liuya

   Date: 2018-01-28

   Time: 下午 06:12

   To change this template use File | Settings | File Templates.

 --%>

 <%@ page contentType="text/html;charset=UTF-8" language="java" %>

 <html>

 <head>

     <title>mytestdemo</title>

 </head>

 <body>

 <center>

     <h2>Hello ${name} </h2>

 </center>

 </body>

 </html>
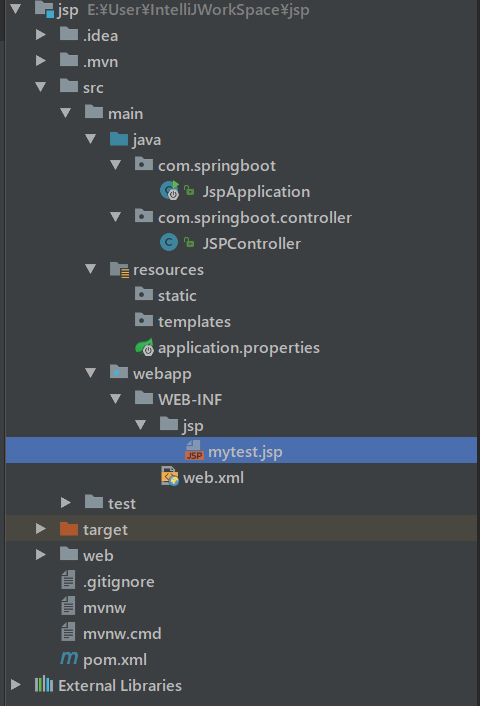
9、项目的各个目录层级
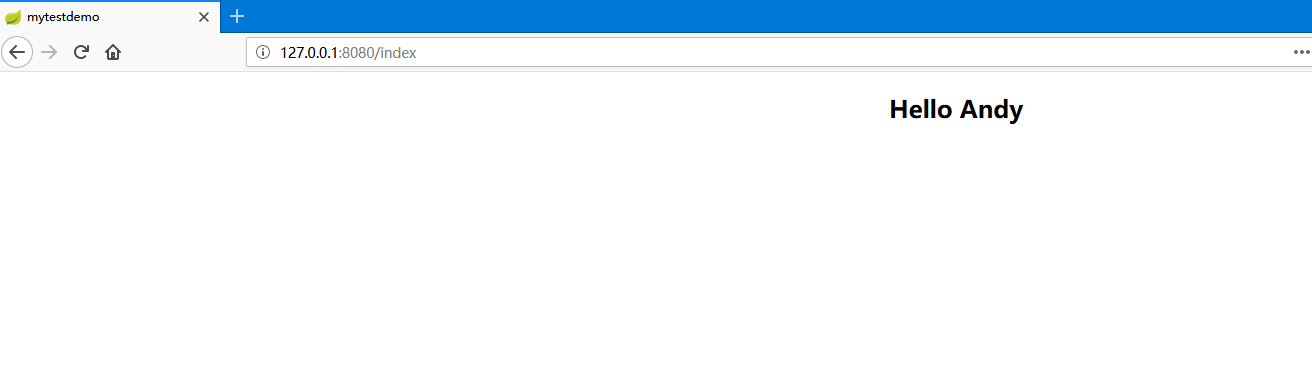
10、访问地址:http://127.0.0.1:8080/index,测试如图返回为测试成功
IntelliJ IDEA 2017版 spring-boot加载jsp配置详解(详细图文实例)的更多相关文章
- spring boot加载自定义配置
1.通过@Value 配置文件中 wechat: ssh: host: 192.0.1.1 port: 22 加载类 @Component @Data public class SftpConfig ...
- spring boot 加载jsp
1.spring boot启动类继承SpringBootServletInitializer ,并且重写configure方法 package com.springapp.mvc;import jav ...
- Spring Boot 2.0 教程 - 配置详解
Spring Boot 可以通过properties文件,YAML文件,环境变量和命令行参数进行配置.属性值可以通过,@Value注解,Environment或者ConfigurationProper ...
- web.xml的加载过程配置详解
一:web.xml加载过程 简单说一下,web.xml的加载过程.当我们启动一个WEB项目容器时,容器包括(JBoss,Tomcat等).首先会去读取web.xml配置文件里的配置,当这一步骤没有 ...
- spring boot slf4j日记记录配置详解
https://blog.csdn.net/liuweixiao520/article/details/78900779
- Spring Boot加载配置文件
问题1:Spring如何加载配置,配置文件位置? 1.默认位置: Spring Boot默认的配置文件名称为application.properties,SpringApplication将从以下位置 ...
- Spring Boot加载application.properties配置文件顺序规则
SpringApplication会从以下路径加载所有的application.properties文件: 1.file:./config/(当前目录下的config文件夹) 2.file:./(当前 ...
- spring boot 加载web容器tomcat流程源码分析
spring boot 加载web容器tomcat流程源码分析 我本地的springboot版本是2.5.1,后面的分析都是基于这个版本 <parent> <groupId>o ...
- Spring Boot源码中模块详解
Spring Boot源码中模块详解 一.源码 spring boot2.1版本源码地址:https://github.com/spring-projects/spring-boot/tree/2.1 ...
随机推荐
- ios 避免navigationcontroller出现时scrollview内容被resize
viewDidLoad中设置以下属性 self.automaticallyAdjustsScrollViewInsets = NO;
- X86汇编概要
来自:https://www.cnblogs.com/jiftle/p/8453106.html 本文翻译自:http://www.cs.virginia.edu/~evans/cs216/guide ...
- iKcamp|基于Koa2搭建Node.js实战(含视频)☞ 处理静态资源
视频地址:https://www.cctalk.com/v/15114923882788 处理静态资源 无非花开花落,静静. 指定静态资源目录 这里我们使用第三方中间件: koa-static 安装并 ...
- C#四舍五入说明
string.Format("{0:N2}", d) 与 Math.Round(d, 2).ToString() 不总是相等 string.Format("{0:N2}& ...
- Ansiable Manage MySQL global variables
mysql_variables - Manage MySQL global variables New in version 1.3. Synopsis Requirements (on host t ...
- 执行js,通过js显示隐藏的输入框,或者给input赋值
在测试过程中,有些输入框是隐藏的,如果直接对他进行赋值,会找不到这个输入框,从而导致脚本运行失败. 例如下面的这个密码输入框: 登录密码输入框分为两个input,下面的是提示的,上面的才是真正存下来的 ...
- 二级联动的作业&左右移动作业
<!DOCTYPE html> <html lang="en"> <head> <meta charset="UTF-8&quo ...
- Mask_RCNN Test
- php 账号不能同时登陆,当其它地方登陆时,当前账号失效
解决的思路是每当用户登陆时我们必需记录当前的用户id和session_id,如果有人在其它地方用此账号登陆时,我们把此用户id对应的session_id的session文件删除,并重新记录当前的ses ...
- VBA json parser[z]
http://www.ediy.co.nz/vbjson-json-parser-library-in-vb6-xidc55680.html VB-JSON: A Visual Basic 6 (VB ...