C#串口通讯实例
本文参考《C#网络通信程序设计》(张晓明 编著)
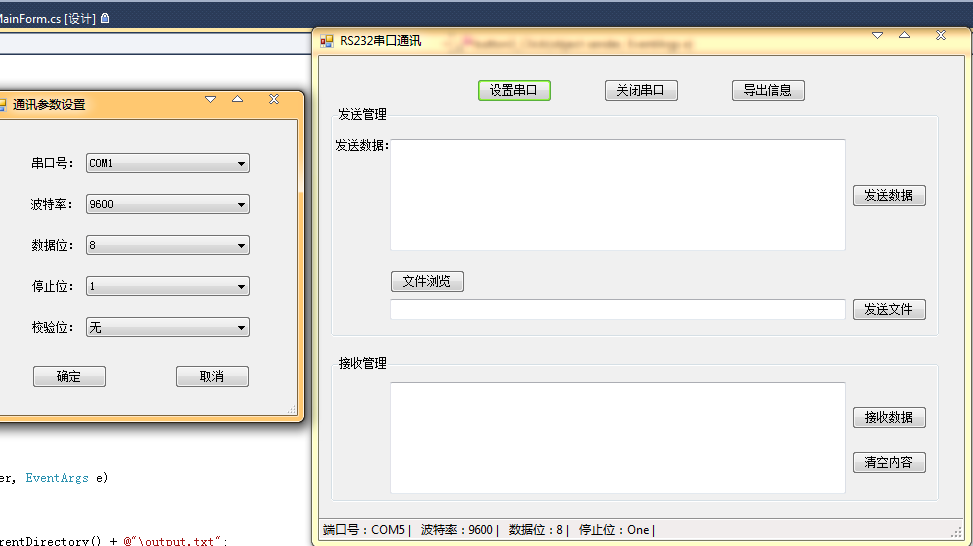
程序界面如下图:
参数设置界面代码如下:
using System;

using System.Collections.Generic;

using System.ComponentModel;

using System.Data;

using System.Drawing;

using System.Linq;

using System.Text;

using System.Windows.Forms;

using System.IO.Ports;

namespace ComDemo

{

    public partial class ComSet : Form

    {

        public ComSet()

        {

            InitializeComponent();

        }

        private void ComSet_Load(object sender, EventArgs e)

        {

            //串口

            string[] ports = SerialPort.GetPortNames();

            foreach (string port in ports)

            {

                cmbPort.Items.Add(port);

            }

            cmbPort.SelectedIndex = ;

            //波特率

            cmbBaudRate.Items.Add("");

            cmbBaudRate.Items.Add("");

            cmbBaudRate.Items.Add("");

            cmbBaudRate.Items.Add("");

            cmbBaudRate.Items.Add("");

            cmbBaudRate.Items.Add("");

            cmbBaudRate.Items.Add("");

            cmbBaudRate.Items.Add("");

            cmbBaudRate.Items.Add("");

            cmbBaudRate.Items.Add("");

            cmbBaudRate.Items.Add("");

            cmbBaudRate.Items.Add("");

            cmbBaudRate.Items.Add("");

            cmbBaudRate.SelectedIndex = ;

            //数据位

            cmbDataBits.Items.Add("");

            cmbDataBits.Items.Add("");

            cmbDataBits.Items.Add("");

            cmbDataBits.Items.Add("");

            cmbDataBits.SelectedIndex = ;

            //停止位

            cmbStopBit.Items.Add("");

            cmbStopBit.SelectedIndex = ;

            //佼验位

            cmbParity.Items.Add("无");

            cmbParity.SelectedIndex = ;

        }

        private void bntOK_Click(object sender, EventArgs e)

        {

            //以下4个参数都是从窗体MainForm传入的

            MainForm.strProtName = cmbPort.Text;

            MainForm.strBaudRate = cmbBaudRate.Text;

            MainForm.strDataBits = cmbDataBits.Text;

            MainForm.strStopBits = cmbStopBit.Text;

            DialogResult = DialogResult.OK;

        }

        private void bntCancel_Click(object sender, EventArgs e)

        {

            DialogResult = DialogResult.Cancel;

        }

    }

}
主界面代码如下:
using System;

using System.Collections.Generic;

using System.ComponentModel;

using System.Data;

using System.Drawing;

using System.Linq;

using System.Text;

using System.Windows.Forms;

using System.IO.Ports;

using System.IO;

using System.Threading;

namespace ComDemo

{

    public partial class MainForm : Form

    {

        public MainForm()

        {

            InitializeComponent();

        }

        private Thread getRecevice;

        protected Boolean stop = false;

        protected Boolean conState = false;

        private StreamReader sRead;

        string strRecieve;

        bool bAccpet = false;

        SerialPort sp = new SerialPort();//实例化串口通讯类

        //以下定义4个公有变量,用于参数传递

        public static string strProtName = "";

        public static string strBaudRate = "";

        public static string strDataBits = "";

        public static string strStopBits = "";

        private void MainForm_Load(object sender, EventArgs e)

        {

            groupBox1.Enabled = false;

            groupBox2.Enabled = false;

            this.toolStripStatusLabel1.Text = "端口号:端口未打开 | ";

            this.toolStripStatusLabel2.Text = "波特率:端口未打开 | ";

            this.toolStripStatusLabel3.Text = "数据位:端口未打开 | ";

            this.toolStripStatusLabel4.Text = "停止位:端口未打开 | ";

            this.toolStripStatusLabel5.Text = "";

        }

        //串口设计

        private void btnSetSP_Click(object sender, EventArgs e)

        {

            timer1.Enabled = false;

            sp.Close();

            ComSet dlg = new ComSet();

            if (dlg.ShowDialog() == DialogResult.OK)

            {

                sp.PortName = strProtName;//串口号

                sp.BaudRate = int.Parse(strBaudRate);//波特率

                sp.DataBits = int.Parse(strDataBits);//数据位

                sp.StopBits = (StopBits)int.Parse(strStopBits);//停止位

                sp.ReadTimeout = ;//读取数据的超时时间,引发ReadExisting异常

            }

        }

        //打开/关闭串口

        private void bntSwitchSP_Click(object sender, EventArgs e)

        {

            if (bntSwitchSP.Text == "打开串口")

            {

                if (strProtName != "" && strBaudRate != "" && strDataBits != "" && strStopBits != "")

                {

                    try

                    {

                        if (sp.IsOpen)

                        {

                            sp.Close();

                            sp.Open();//打开串口

                        }

                        else

                        {

                            sp.Open();//打开串口

                        }

                        bntSwitchSP.Text = "关闭串口";

                        groupBox1.Enabled = true;

                        groupBox2.Enabled = true;

                        this.toolStripStatusLabel1.Text = "端口号:" + sp.PortName + " | ";

                        this.toolStripStatusLabel2.Text = "波特率:" + sp.BaudRate + " | ";

                        this.toolStripStatusLabel3.Text = "数据位:" + sp.DataBits + " | ";

                        this.toolStripStatusLabel4.Text = "停止位:" + sp.StopBits + " | ";

                        this.toolStripStatusLabel5.Text = "";

                    }

                    catch (Exception ex)

                    {

                        MessageBox.Show("错误:" + ex.Message, "C#串口通信");

                    }

                }

                else

                {

                    MessageBox.Show("请先设置串口!", "RS232串口通信");

                }

            }

            else

            {

                timer1.Enabled = false;

                timer2.Enabled = false;

                bntSwitchSP.Text = "打开串口";

                if (sp.IsOpen)

                    sp.Close();

                groupBox1.Enabled = false;

                groupBox2.Enabled = false;

                this.toolStripStatusLabel1.Text = "端口号:端口未打开 | ";

                this.toolStripStatusLabel2.Text = "波特率:端口未打开 | ";

                this.toolStripStatusLabel3.Text = "数据位:端口未打开 | ";

                this.toolStripStatusLabel4.Text = "停止位:端口未打开 | ";

                this.toolStripStatusLabel5.Text = "";

            }

        }

        //发送数据

        private void bntSendData_Click(object sender, EventArgs e)

        {

            if (sp.IsOpen)

            {

                try

                {

                    sp.Encoding = System.Text.Encoding.GetEncoding("GB2312");

                    sp.Write(txtSend.Text);//发送数据

                }

                catch (Exception ex)

                {

                    MessageBox.Show("错误:" + ex.Message);

                }

            }

            else

            {

                MessageBox.Show("请先打开串口!");

            }

        }

        //选择文件

        private void btnOpenFile_Click(object sender, EventArgs e)

        {

            OpenFileDialog open = new OpenFileDialog();

            open.InitialDirectory = "c\\";

            open.RestoreDirectory = true;

            open.FilterIndex = ;

            open.Filter = "txt文件(*.txt)|*.txt";

            if (open.ShowDialog() == DialogResult.OK)

            {

                try

                {

                    if (open.OpenFile() != null)

                    {

                        txtFileName.Text = open.FileName;

                    }

                }

                catch (Exception err1)

                {

                    MessageBox.Show("文件打开错误!  " + err1.Message, "提示信息", MessageBoxButtons.OK, MessageBoxIcon.Warning);

                }

            }

        }

        //发送文件内容

        private void bntSendFile_Click(object sender, EventArgs e)

        {

            string fileName = txtFileName.Text.Trim();

            if (fileName == "")

            {

                MessageBox.Show("请选择要发送的文件!", "Error");

                return;

            }

            else

            {

                //sRead = new StreamReader(fileName);

                sRead = new StreamReader(fileName,Encoding.Default);//解决中文乱码问题

            }

            timer1.Start();

        }

        //发送文件时钟

        private void timer1_Tick(object sender, EventArgs e)

        {

            string str1;

            str1 = sRead.ReadLine();

            if (str1 == null)

            {

                timer1.Stop();

                sRead.Close();

                MessageBox.Show("文件发送成功!", "C#串口通讯");

                this.toolStripStatusLabel5.Text = "";

                return;

            }

            byte[] data = Encoding.Default.GetBytes(str1);

            sp.Write(data, , data.Length);

            this.toolStripStatusLabel5.Text = "   文件发送中...";

        }

        //接收数据

        private void btnReceiveData_Click(object sender, EventArgs e)

        {

            if (btnReceiveData.Text == "接收数据")

            {

                sp.Encoding = Encoding.GetEncoding("GB2312");

                if (sp.IsOpen)

                {

                    //timer2.Enabled = true; //使用主线程进行

                    //使用委托以及多线程进行

                    bAccpet = true;

                    getRecevice = new Thread(new ThreadStart(testDelegate));

                    //getRecevice.IsBackground = true;

                    getRecevice.Start();

                    btnReceiveData.Text = "停止接收";

                }

                else

                {

                    MessageBox.Show("请先打开串口");

                }

            }

            else

            {

                //timer2.Enabled = false;

                bAccpet = false;

                try

                {   //停止主监听线程

                    if (null != getRecevice)

                    {

                        if (getRecevice.IsAlive)

                        {

                            if (!getRecevice.Join())

                            {

                                //关闭线程

                                getRecevice.Abort();

                            }

                        }

                        getRecevice = null;

                    }

                }

                catch { }

                btnReceiveData.Text = "接收数据";

            }

        }

        private void testDelegate()

        {

            reaction r = new reaction(fun);

            r();

        }

        //用于接收数据的定时时钟

        private void timer2_Tick(object sender, EventArgs e)

        {

            string str = sp.ReadExisting();

            string str2 = str.Replace("\r", "\r\n");

            txtReceiveData.AppendText(str2);

            txtReceiveData.ScrollToCaret();

        }

        //下面用到了接收信息的代理功能,此为设计的要点之一

        delegate void DelegateAcceptData();

        void fun()

        {

            while (bAccpet)

            {

                AcceptData();

            }

        }

        delegate void reaction();

        void AcceptData()

        {

            if (txtReceiveData.InvokeRequired)

            {

                try

                {

                    DelegateAcceptData ddd = new DelegateAcceptData(AcceptData);

                    this.Invoke(ddd, new object[] { });

                }

                catch { }

            }

            else

            {

                try

                {

                    strRecieve = sp.ReadExisting();

                    txtReceiveData.AppendText(strRecieve);

                }

                catch (Exception ex) { }

            }

        }

        private void bntClear_Click(object sender, EventArgs e)

        {

            txtReceiveData.Text = "";

        }

        private void button3_Click(object sender, EventArgs e)

        {

            try

            {

                string path = Directory.GetCurrentDirectory() + @"\output.txt";

                string content = this.txtReceiveData.Text;

                FileStream fs = new FileStream(path, FileMode.OpenOrCreate, FileAccess.Write);

                StreamWriter write = new StreamWriter(fs);

                write.Write(content);

                write.Flush();

                write.Close();

                fs.Close();

                MessageBox.Show("接收信息导出在:" + path);

            }

            catch (Exception ex)

            {

                MessageBox.Show(ex.Message);

            }

        }

    }

}
C#串口通讯实例的更多相关文章
- C#串口通讯
本文提供一个用C#实现串口通讯实例,亲自编写,亲测可用! 开发环境:VS2008+.net FrameWork3.5(实际上2.0应该也可以) 第一步 创建一个WinForm窗体,拉入一些界面元素 重 ...
- 用SPCOMM 在 Delphi中实现串口通讯 转
用Delphi 实现串口通讯,常用的几种方法为:使用控件如MSCOMM和SPCOMM,使用API函数或者在Delphi 中调用其它串口通讯程序.利用API编写串口通信程序较为复杂,需要掌握大量通信 ...
- 教程-Delphi MSComm 实时串口通讯
Delphi MSComm 实时串口通讯 MSComm控件具有丰富的与串口通信密切相关的属性,提供了对串口进行的多种操作,进而使串行通信变得十分简便.MSComm的控件属性较多,常用的属性如下:1) ...
- Linux 虚拟串口及 Qt 串口通信实例
Linux 虚拟串口及 Qt 串口通信实例 2011-06-22 17:49 佚名 互联网 字号:T | T Linux 虚拟串口及 Qt 串口通信实例是本文所要介绍的内容,在实现过程中,打开了两个伪 ...
- win7系统下用vspd软件进行串口编程实例
http://blog.csdn.net/qiusuo800/article/details/8299777 目前,我在学习C#串口编程类的基础知识,在网上也找了一些资料,但都存在一些问题,现在他们基 ...
- 第20章 USART—串口通讯
本章参考资料:<STM32F76xxx参考手册>USART章节. 学习本章时,配合<STM32F76xxx参考手册>USART章节一起阅读,效果会更佳,特别是涉及到寄存器说明的 ...
- 第20章 USART—串口通讯—零死角玩转STM32-F429系列
第20章 USART—串口通讯 全套200集视频教程和1000页PDF教程请到秉火论坛下载:www.firebbs.cn 野火视频教程优酷观看网址:http://i.youku.com/fi ...
- C#串口通讯教程 简化一切 只保留核心功能 这可能是最易于理解的一篇教程
C#串口通讯教程 简化一切 只保留核心功能 这可能是最易于理解的一篇教程 串口的定义,请自行了解. C#操作串口通讯在.Net强大类库的支持下,只需要三个步骤: 1 创建 2 打开 3 发送/接受 ...
- Arduino 串口通讯参考笔记 - Serial 类库及相关函数介绍
声明: 本ID发布的所有文章及随笔均为原创,可随意转载,单转载文章必须注明作者 aiyauto 及包含原文出处地址 http://www.cnblogs.com/aiyauto/p/7071712.h ...
随机推荐
- win7优化
- WPF附加属性
附加属性实质也是依赖属性,是说一个属性本来不属于某个对象,但由于某种需求被后来附加上的,也就是说把对象放入一个特定环境后才具有的属性 例子:人在学校有年纪和班级两个属性,人放在学校里会获得年级和班级两 ...
- 在Oracle中使用Entity Framework 6 CodeFirst
项目中需要将系统从SQLServer数据库迁移到Oracle上.由于原大部分数据访问操作都是通过包装了Entity Framework的统一访问入口实现的,所以需要研究Entity Framework ...
- blade and soul races guide
Race Four races are available for those who wish to choose the path of martial arts: the careful Gon ...
- 从客户端(txtContent="<p>1</p>")中检测到有潜在危险的 Request.Form 值
输入1也报这个错误, <pages validateRequest="false" 改了也不行,在页头改也不行.到底什么情况呢? 从这个地方找到了答案:http://nt.d ...
- tomcat apache 实现负载平衡的小demo
软件:1个apache,2个tomcat module包:mod_jk.so(下载地址:http://tomcat.apache.org/download-connectors.cgi) 下载文件解压 ...
- pushlet
自己准备做一个小游戏,租个云服务,然后挂在网上,可以跟同学一起玩,不过首先布置的是,这个游戏是否能实现,多人在线网页游戏,考虑到是否能够实时查询,在网上借鉴了下聊天原理,http长连接,搜索到push ...
- AsyncTask异步交互和httpurlconnection结合使用
//网络请求数据 package com.baidu.myutils; import java.io.BufferedReader; import java.io.InputStreamReader; ...
- 网卡故障:弹出界面eth0: 错误:没有找到合适的设备:没有找到可用于链接System eth0 的
原文地址:http://www.mamicode.com/info-detail-112000.html 报错截图如下: 排错步骤如下: 1:查看系统是否识别相应网卡(发现没有eth0网卡存在): 根 ...
- tesseract 编译与使用(windows)
tesseract是google的一个开源OCR项目,项目地址已经迁移到github(现在 2016/09),地址 https://github.com/tesseract-ocr/tesseract ...