Mars3D与第三方集成
1. 引言
Mars3D是基于Cesium的Web端的三维GIS库,对Cesium做了进一步封装和扩展
Mars3D官网:Mars3D三维可视化平台 | 火星科技
Mars3D开发手册:开发教程 - Mars3D三维可视化平台 | 火星科技
GitHub地址:Mars3D三维可视化平台 | 火星科技
API文档:API文档 - Mars3D三维可视化平台 | 火星科技
以下是一些Mars3D与一些第三方库集成的使用案例
2. 集成示例
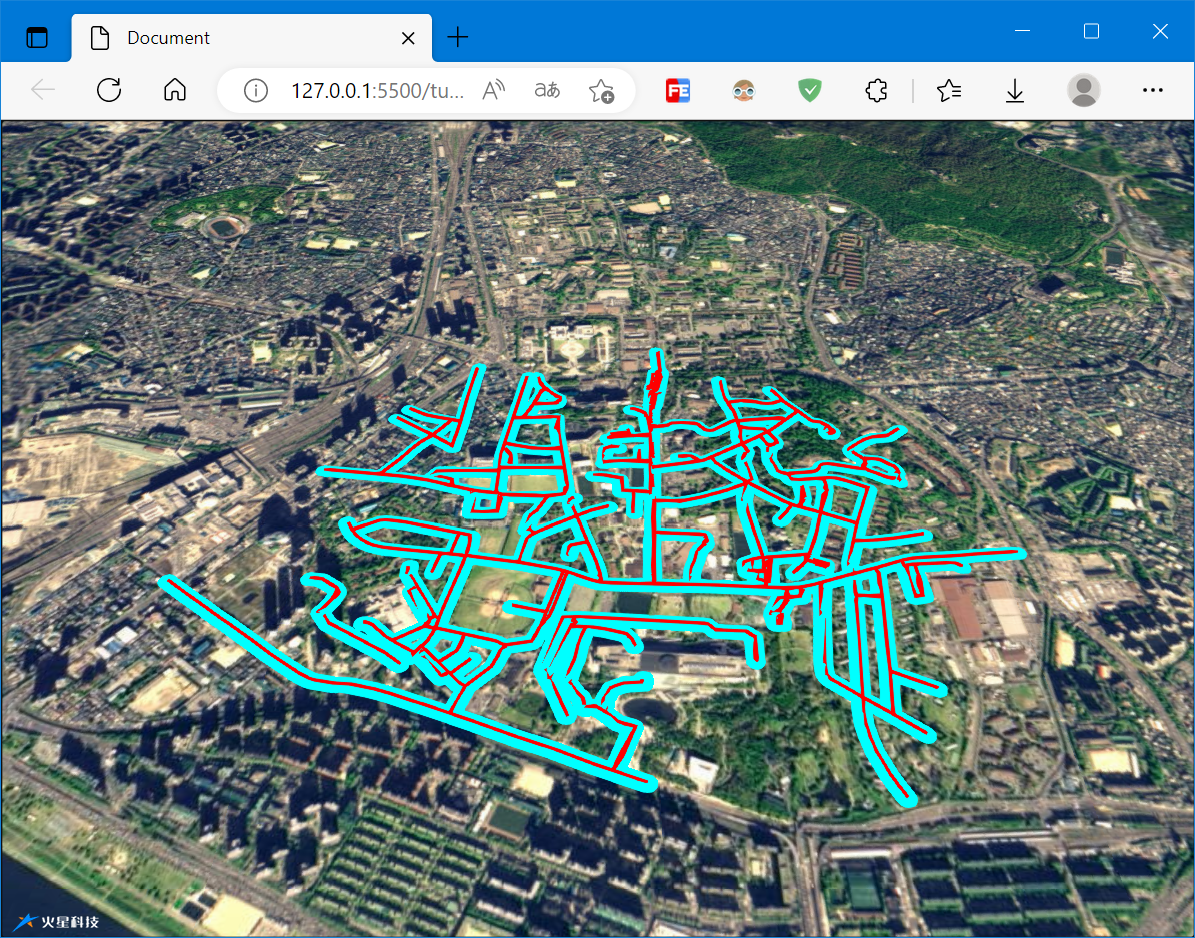
2.1 Turf
Turf客户端分析库,【需要引入Turf库】
将数据转换为GeoJson对象并使用Turf进行分析
<!DOCTYPE html>

<html lang="en">

<head>

    <meta charset="UTF-8">

    <meta http-equiv="X-UA-Compatible" content="IE=edge">

    <meta name="viewport" content="width=device-width, initial-scale=1.0">

    <title>Document</title>

    <!--引入cesium基础lib-->

    <link href="https://unpkg.com/mars3d-cesium/Build/Cesium/Widgets/widgets.css" rel="stylesheet" type="text/css" />

    <script src="https://unpkg.com/mars3d-cesium/Build/Cesium/Cesium.js" type="text/javascript"></script>

    <!--引入turf基础lib-->

    <script src="http://mars3d.cn/lib/turf/turf.min.js"></script>

    <!--引入mars3d库lib-->

    <link href="https://unpkg.com/mars3d/dist/mars3d.css" rel="stylesheet" type="text/css" />

    <script src="https://unpkg.com/mars3d/dist/mars3d.js" type="text/javascript"></script>

    <style>

        html,

        body,

        .mars3d-container {

            width: 100%;

            height: 100%;

            margin: 0;

            padding: 0;

            overflow: hidden;

        }

    </style>

</head>

<body>

    <div id="mars3dContainer" class="mars3d-container"></div>

    <script>

        let mapOptions = {

            basemaps: [{ name: "天地图", type: "tdt", layer: "img_d", show: true }],

        }

        const map = new mars3d.Map("mars3dContainer", mapOptions)

        map.setSceneOptions({

            center: { lat: 31.72076, lng: 117.033888, alt: 223798, heading: 0, pitch: -45 }

        })

        // 创建矢量数据图层

        const geoJsonLayer = new mars3d.layer.GeoJsonLayer({

            url: "https://openlayers.org/en/latest/examples/data/geojson/roads-seoul.geojson",

            symbol: {

                type: "polyline",

                styleOptions: {

                    color: "#f00",

                    width: 4

                }

            },

            flyTo: true

        })

        map.addLayer(geoJsonLayer)

        //绑定监听事件

        geoJsonLayer.on(mars3d.EventType.load, function (event) {

            console.log('矢量数据对象加载完成', event)

            const geojson = geoJsonLayer.toGeoJSON()

            console.log(geojson)

            const buffered = turf.buffer(geojson, 25, { units: 'meters' })

            console.log(buffered)

            const bufferedLayer = new mars3d.layer.GeoJsonLayer({

                data: buffered,

                symbol: {

                    type: "polygon",

                    styleOptions: {

                        color: "#0ff"

                    }

                },

                flyTo: true

            })

            map.addLayer(bufferedLayer)

        })

    </script>

</body>

</html>
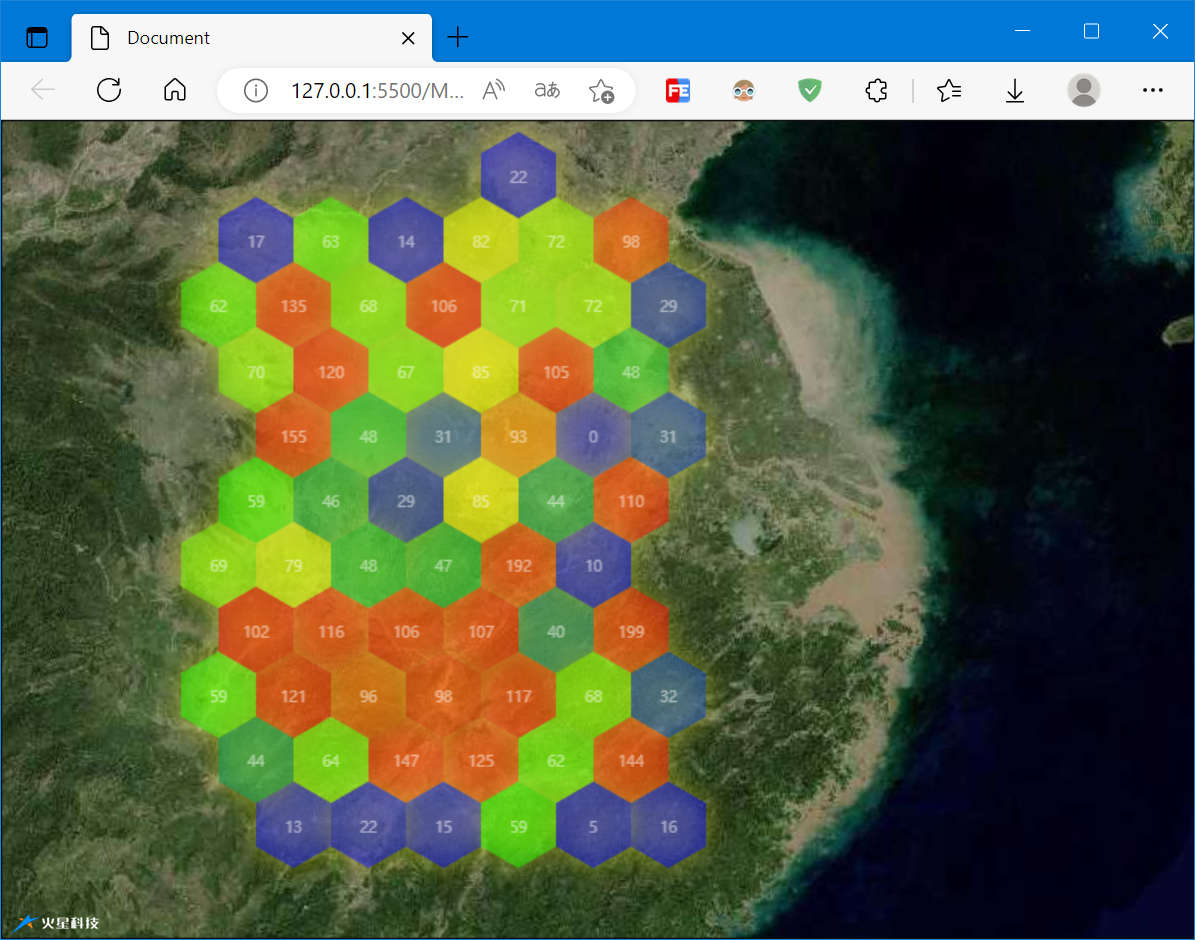
2.2 MapV
- new mars3d.layer.MapVLayer(options, dataSet)
MapV图层 【需要引入 mapv.js 库 和 mars3d-mapv 插件库】
<!DOCTYPE html>

<html lang="en">

<head>

    <meta charset="UTF-8">

    <meta http-equiv="X-UA-Compatible" content="IE=edge">

    <meta name="viewport" content="width=device-width, initial-scale=1.0">

    <title>Document</title>

    <!--引入cesium基础lib-->

    <link href="https://unpkg.com/mars3d-cesium/Build/Cesium/Widgets/widgets.css" rel="stylesheet" type="text/css" />

    <script src="https://unpkg.com/mars3d-cesium/Build/Cesium/Cesium.js" type="text/javascript"></script>

    <!--引入mapV基础lib-->

    <script src="http://mars3d.cn/lib/mapV/mapv.min.js"></script>

    <!--引入mars3d库lib-->

    <link href="https://unpkg.com/mars3d/dist/mars3d.css" rel="stylesheet" type="text/css" />

    <script src="https://unpkg.com/mars3d/dist/mars3d.js" type="text/javascript"></script>

    <script src="http://mars3d.cn/lib/mars3d/plugins/mapv/mars3d-mapv.js"></script>

    <style>

        html,

        body,

        .mars3d-container {

            width: 100%;

            height: 100%;

            margin: 0;

            padding: 0;

            overflow: hidden;

        }

    </style>

</head>

<body>

    <div id="mars3dContainer" class="mars3d-container"></div>

    <script>

        let mapOptions = {

            basemaps: [{ name: "天地图", type: "tdt", layer: "img_d", show: true }],

        }

        const map = new mars3d.Map("mars3dContainer", mapOptions)

        map.setSceneOptions({

            center: { lat: 31.72076, lng: 117.033888, alt: 223798, heading: 0, pitch: -45 }

        })

        // 构造数据

        let positions = []

        let geojson = []

        let randomCount = 300

        while (randomCount--) {

            // 取区域内的随机点

            let point = [random(113 * 1000, 119 * 1000) / 1000, random(28 * 1000, 35 * 1000) / 1000]

            positions.push(Cesium.Cartesian3.fromDegrees(point[0], point[1]))

            geojson.push({

                geometry: {

                    type: "Point",

                    coordinates: point

                },

                count: 30 * Math.random()

            })

        }

        console.log(geojson)

        map.camera.flyTo({

            destination: Cesium.Rectangle.fromCartesianArray(positions)

        })

        // mapv图层参数

        let options = {

            fillStyle: "rgba(55, 50, 250, 0.8)",

            shadowColor: "rgba(255, 250, 50, 1)",

            shadowBlur: 20,

            max: 100,

            size: 50,

            label: {

                show: true,

                fillStyle: "white"

            },

            globalAlpha: 0.5,

            gradient: {

                0.25: "rgb(0,0,255)",

                0.55: "rgb(0,255,0)",

                0.85: "yellow",

                1.0: "rgb(255,0,0)"

            },

            draw: "honeycomb",

            data: geojson // 数据

        }

        // 创建MapV图层

        const mapVLayer = new mars3d.layer.MapVLayer(options)

        map.addLayer(mapVLayer)

        mapVLayer.on("click", function (event) {

            console.log("单击了图层", event)

        })

        function random(min, max) {

            return Math.floor(Math.random() * (max - min + 1) + min)

        }

    </script>

</body>

</html>
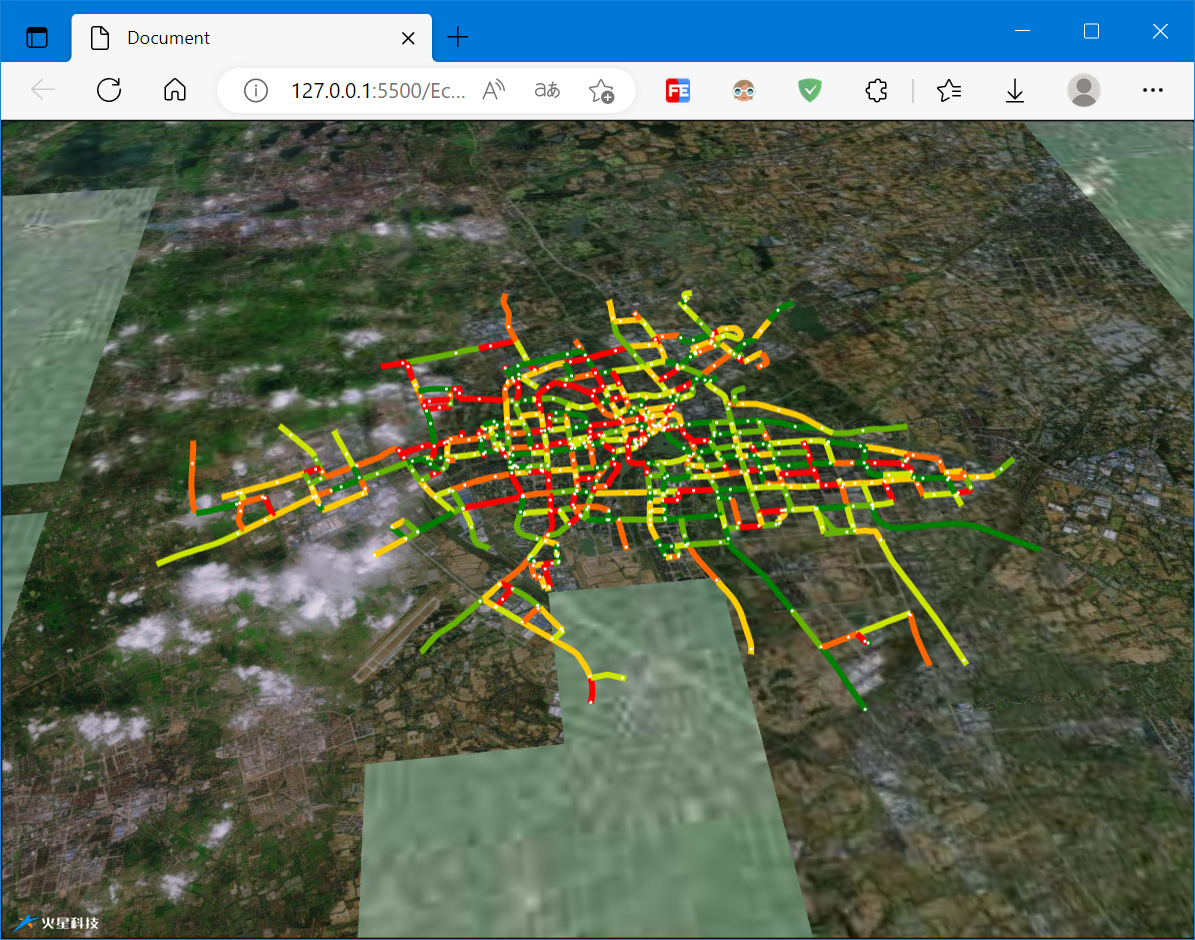
2.3 Echarts
- new mars3d.layer.EchartsLayer(options)
Echarts图层, 【需要引入 echarts 库 和 mars3d-echarts 插件库】
<!DOCTYPE html>

<html lang="en">

<head>

    <meta charset="UTF-8">

    <meta http-equiv="X-UA-Compatible" content="IE=edge">

    <meta name="viewport" content="width=device-width, initial-scale=1.0">

    <title>Document</title>

    <!--引入cesium基础lib-->

    <link href="https://unpkg.com/mars3d-cesium/Build/Cesium/Widgets/widgets.css" rel="stylesheet" type="text/css" />

    <script src="https://unpkg.com/mars3d-cesium/Build/Cesium/Cesium.js" type="text/javascript"></script>

    <!--引入echarts基础lib-->

    <script src="http://mars3d.cn/lib/echarts/echarts.min.js"></script>

    <script src="http://mars3d.cn/lib/echarts/echarts-gl/echarts-gl.min.js"></script>

    <!--引入mars3d库lib-->

    <link href="https://unpkg.com/mars3d/dist/mars3d.css" rel="stylesheet" type="text/css" />

    <script src="https://unpkg.com/mars3d/dist/mars3d.js" type="text/javascript"></script>

    <script src="http://mars3d.cn/lib/mars3d/plugins/echarts/mars3d-echarts.js"></script>

    <style>

        html,

        body,

        .mars3d-container {

            width: 100%;

            height: 100%;

            margin: 0;

            padding: 0;

            overflow: hidden;

        }

    </style>

</head>

<body>

    <div id="mars3dContainer" class="mars3d-container"></div>

    <script>

        let mapOptions = {

            basemaps: [{ name: "天地图", type: "tdt", layer: "img_d", show: true }],

        }

        const map = new mars3d.Map("mars3dContainer", mapOptions)

        map.setSceneOptions({

            center: { lat: 30.589203, lng: 120.732051, alt: 18446, heading: 2, pitch: -49 }

        })

        mars3d.Util.fetchJson({ url: "//data.mars3d.cn/file/apidemo/lineroad.json" })

            .then(function (json) {

                let options = {

                    animation: false,

                    visualMap: {

                        type: "piecewise",

                        left: "right",

                        bottom: 46,

                        min: 0,

                        max: 15,

                        splitNumber: 5,

                        maxOpen: true,

                        color: ["red", "yellow", "green"],

                        textStyle: {

                            color: "#ffffff"

                        }

                    },

                    tooltip: {

                        formatter: function (params, ticket, callback) {

                            return "拥堵指数:" + params.value

                        },

                        trigger: "item"

                    },

                    series: [

                        {

                            type: "lines",

                            coordinateSystem: "mars3dMap",

                            polyline: true,

                            data: json.data,

                            lineStyle: {

                                normal: {

                                    opacity: 1,

                                    width: 4

                                },

                                emphasis: {

                                    width: 6

                                }

                            },

                            effect: {

                                show: true,

                                symbolSize: 2,

                                color: "white"

                            }

                        }

                    ]

                }

                const echartsLayer = new mars3d.layer.EchartsLayer(options)

                map.addLayer(echartsLayer)

            })

    </script>

</body>

</html>
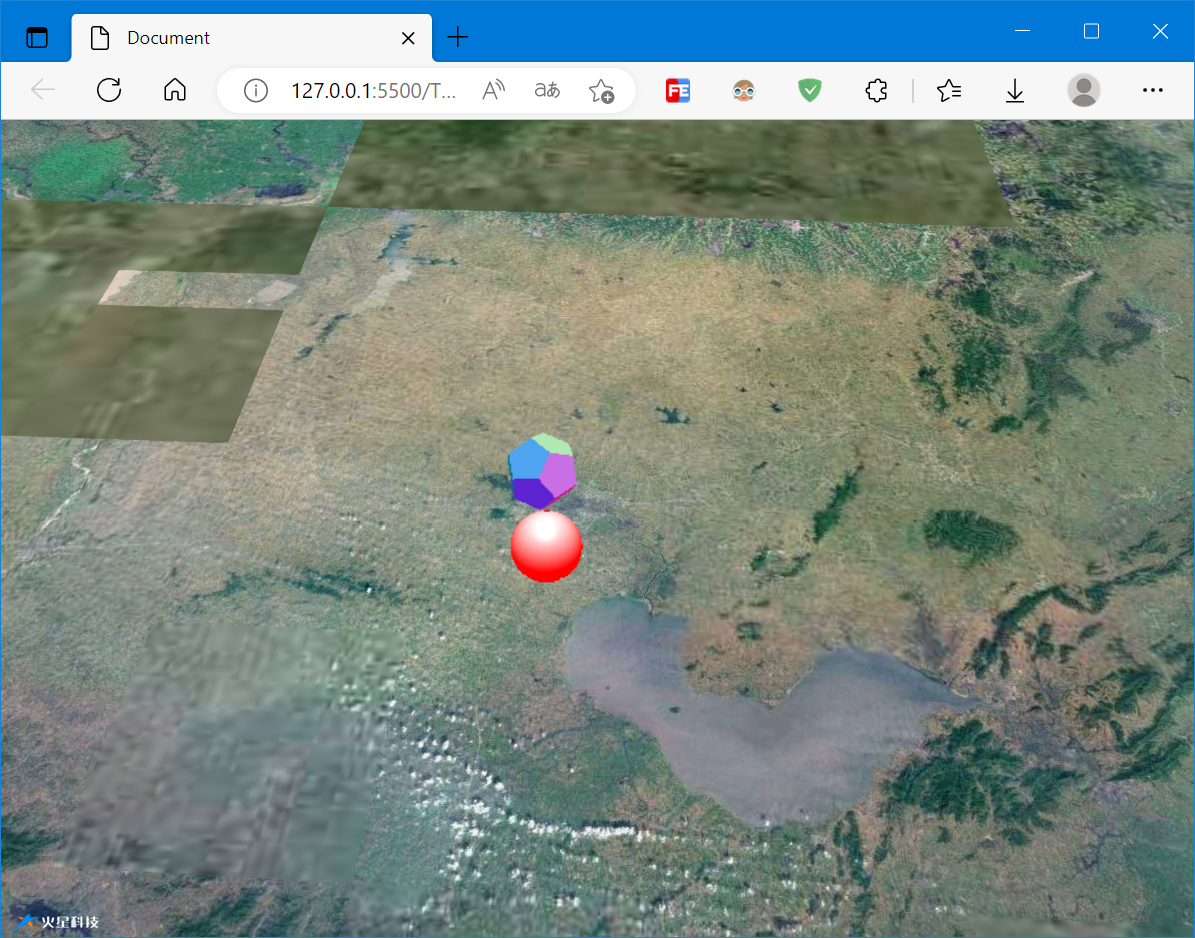
2.4 ThreeJS
ThreeJS集成,这里使用了官方示例的集成代码,【需要引入Three JS库和集成代码】
集成代码如下:
const BaseLayer = mars3d.layer.BaseLayer

const THREE = window.THREE

// 与THREE.js集成

class ThreeLayer extends BaseLayer {

  constructor(options = {}) {

    super(options)

    this._pointerEvents = this.options.pointerEvents

  }

  _showHook(show) {

    if (show) {

      this._threejsContainer.style.visibility = "visible"

    } else {

      this._threejsContainer.style.visibility = "hidden"

    }

  }

  /**

   * 对象添加到地图前创建一些对象的钩子方法,

   * 只会调用一次

   * @return {void}  无

   * @private

   */

  _mountedHook() {

    if (!THREE) {

      throw new Error("请引入 three.js 库 ")

    }

    const scene = this._map.scene

    const threeContainer = mars3d.DomUtil.create("div", "mars3d-threejs")

    threeContainer.style.position = "absolute"

    threeContainer.style.top = "0px"

    threeContainer.style.left = "0px"

    threeContainer.style.width = scene.canvas.clientWidth + "px"

    threeContainer.style.height = scene.canvas.clientHeight + "px"

    threeContainer.style.pointerEvents = this._pointerEvents ? "auto" : "none" // auto时可以交互,但是没法放大地球, none 没法交互

    this._container = threeContainer

    const fov = 45

    const aspect = scene.canvas.clientWidth / scene.canvas.clientHeight

    const near = 1

    const far = 10 * 1000 * 1000 // needs to be far to support Cesium's world-scale rendering

    this.scene = new THREE.Scene()

    this.camera = new THREE.PerspectiveCamera(fov, aspect, near, far)

    this.renderer = new THREE.WebGLRenderer({ alpha: true })

    threeContainer.appendChild(this.renderer.domElement)

  }

  /**

   * 对象添加到地图上的创建钩子方法,

   * 每次add时都会调用

   * @return {void}  无

   * @private

   */

  _addedHook() {

    if (this._container) {

      this._map.container.appendChild(this._container)

    }

    this._map.viewer.useDefaultRenderLoop = false // 关闭自动渲染

    // eslint-disable-next-line

    const that = this

    ;(function frame() {

      // animateFrame: requestAnimationFrame事件句柄,用来清除操作

      that._animateFrame = window.requestAnimationFrame(frame)

      that.update() // 按帧率执行

    })()

  }

  /**

   * 对象从地图上移除的创建钩子方法,

   * 每次remove时都会调用

   * @return {void}  无

   * @private

   */

  _removedHook() {

    window.cancelAnimationFrame(this._animateFrame)

    delete this._animateFrame

    this._map.viewer.useDefaultRenderLoop = true

    if (this._container) {

      this._map.container.removeChild(this._container)

    }

  }

  update() {

    this.renderCesium()

    this.renderThreeObj()

    this.renderCamera()

  }

  renderCesium() {

    this._map.viewer.render()

  }

  renderThreeObj() {

    const width = this._container.clientWidth

    const height = this._container.clientHeight

    this.renderer.setSize(width, height)

    this.renderer.render(this.scene, this.camera)

  }

  renderCamera() {

    // register Three.js scene with Cesium

    this.camera.fov = Cesium.Math.toDegrees(this._map.camera.frustum.fovy) // ThreeJS FOV is vertical

    this.camera.updateProjectionMatrix()

    // Clone Cesium Camera projection position so the

    // Three.js Object will appear to be at the same place as above the Cesium Globe

    this.camera.matrixAutoUpdate = false

    this.camera.lookAt(new THREE.Vector3(0, 0, 0))

    const cvm = this._map.camera.viewMatrix

    const civm = this._map.camera.inverseViewMatrix

    this.camera.matrixWorld.set(

      civm[0],

      civm[4],

      civm[8],

      civm[12],

      civm[1],

      civm[5],

      civm[9],

      civm[13],

      civm[2],

      civm[6],

      civm[10],

      civm[14],

      civm[3],

      civm[7],

      civm[11],

      civm[15]

    )

    this.camera.matrixWorldInverse.set(

      cvm[0],

      cvm[4],

      cvm[8],

      cvm[12],

      cvm[1],

      cvm[5],

      cvm[9],

      cvm[13],

      cvm[2],

      cvm[6],

      cvm[10],

      cvm[14],

      cvm[3],

      cvm[7],

      cvm[11],

      cvm[15]

    )

    const width = this._map.scene.canvas.clientWidth

    const height = this._map.scene.canvas.clientHeight

    this.camera.aspect = width / height

    this.renderer.setSize(width, height)

    this.camera.updateProjectionMatrix()

    this.renderer.clear()

    this.renderer.render(this.scene, this.camera)

  }

}
示例代码文件:
<!DOCTYPE html>

<html lang="en">

<head>

    <meta charset="UTF-8">

    <meta http-equiv="X-UA-Compatible" content="IE=edge">

    <meta name="viewport" content="width=device-width, initial-scale=1.0">

    <title>Document</title>

    <!--引入cesium基础lib-->

    <link href="https://unpkg.com/mars3d-cesium/Build/Cesium/Widgets/widgets.css" rel="stylesheet" type="text/css" />

    <script src="https://unpkg.com/mars3d-cesium/Build/Cesium/Cesium.js" type="text/javascript"></script>

    <!--引入threejs基础lib-->

    <script src="http://mars3d.cn/lib/three/three.js"></script>

    <!--引入mars3d库lib-->

    <link href="https://unpkg.com/mars3d/dist/mars3d.css" rel="stylesheet" type="text/css" />

    <script src="https://unpkg.com/mars3d/dist/mars3d.js" type="text/javascript"></script>

    <script src="http://mars3d.cn/example/thirdParty/threejs/demo/ThreeLayer.js"></script>

    <style>

        html,

        body,

        .mars3d-container {

            width: 100%;

            height: 100%;

            margin: 0;

            padding: 0;

            overflow: hidden;

        }

    </style>

</head>

<body>

    <div id="mars3dContainer" class="mars3d-container"></div>

    <script>

        let mapOptions = {

            basemaps: [{ name: "天地图", type: "tdt", layer: "img_d", show: true }],

        }

        const map = new mars3d.Map("mars3dContainer", mapOptions)

        map.setSceneOptions({

            center: { lat: 30.980053, lng: 117.375049, alt: 110976, heading: 357, pitch: -50 }

        })

        const threeLayer = new ThreeLayer()

        map.addLayer(threeLayer)

        let minWGS84 = [117.142184, 31.869697]

        let maxWGS84 = [117.357015, 31.713898]

        let ce = Cesium.Cartesian3.fromDegrees((minWGS84[0] + maxWGS84[0]) / 2, (minWGS84[1] + maxWGS84[1]) / 2 - 1, 200000)

        let geometry = new THREE.SphereGeometry(1, 32, 32)

        const sphere = new THREE.Mesh(geometry, new THREE.MeshPhongMaterial({ color: 0xffffff, side: THREE.DoubleSide })) // 12面体

        // translate "up" in Three.js space so the "bottom" of the mesh is the handle

        sphere.scale.set(5000, 5000, 5000)

        sphere.uuid = "sphere"

        const sphereYup = new THREE.Group()

        sphereYup.add(sphere)

        threeLayer.scene.add(sphereYup) // don’t forget to add it to the Three.js scene manually

        sphereYup.position.set(ce.x, ce.y, ce.z)

        let arrXdObj = []

        let xdObj = new XDObject()

        xdObj.threeMesh = sphereYup

        xdObj.minWGS84 = minWGS84

        xdObj.maxWGS84 = maxWGS84

        arrXdObj.push(xdObj)

        geometry = new THREE.DodecahedronGeometry()

        const dodecahedronMesh = new THREE.Mesh(geometry, new THREE.MeshNormalMaterial()) // 12面体

        dodecahedronMesh.scale.set(5000, 5000, 5000)

        dodecahedronMesh.position.z += 15000

        // translate "up" in Three.js space so the "bottom" of the mesh is the handle

        dodecahedronMesh.rotation.x = Math.PI / 2 // rotate mesh for Cesium's Y-up system

        dodecahedronMesh.uuid = "12面体"

        const dodecahedronMeshYup = new THREE.Group()

        dodecahedronMeshYup.add(dodecahedronMesh)

        threeLayer.scene.add(dodecahedronMeshYup) // don’t forget to add it to the Three.js scene manually

        dodecahedronMeshYup.position.set(ce.x, ce.y, ce.z)

        // Assign Three.js object mesh to our object array

        xdObj = new XDObject()

        xdObj.threeMesh = dodecahedronMeshYup

        xdObj.minWGS84 = minWGS84

        xdObj.maxWGS84 = maxWGS84

        arrXdObj.push(xdObj)

        // 添加灯光,点光源

        const spotLight = new THREE.SpotLight(0xffffff)

        spotLight.position.set(0, 0, 50000)

        spotLight.castShadow = true // 设置光源投射阴影

        spotLight.intensity = 1

        sphereYup.add(spotLight)

        // 添加环境光

        const hemiLight = new THREE.HemisphereLight(0xff0000, 0xff0000, 1)

        sphereYup.add(hemiLight)

        let cartToVec = function (cart) {

            return new THREE.Vector3(cart.x, cart.y, cart.z)

        }

        // Configure Three.js meshes to stand against globe center position up direction

        for (var id in arrXdObj) {

            minWGS84 = arrXdObj[id].minWGS84

            maxWGS84 = arrXdObj[id].maxWGS84

            // convert lat/long center position to Cartesian3

            let center = Cesium.Cartesian3.fromDegrees((minWGS84[0] + maxWGS84[0]) / 2, (minWGS84[1] + maxWGS84[1]) / 2)

            // get forward direction for orienting model

            let centerHigh = Cesium.Cartesian3.fromDegrees((minWGS84[0] + maxWGS84[0]) / 2, (minWGS84[1] + maxWGS84[1]) / 2, 1)

            // use direction from bottom left to top left as up-vector

            let bottomLeft = cartToVec(Cesium.Cartesian3.fromDegrees(minWGS84[0], minWGS84[1]))

            let topLeft = cartToVec(Cesium.Cartesian3.fromDegrees(minWGS84[0], maxWGS84[1]))

            let latDir = new THREE.Vector3().subVectors(bottomLeft, topLeft).normalize()

            // configure entity position and orientation

            arrXdObj[id].threeMesh.position.copy(center)

            arrXdObj[id].threeMesh.lookAt(centerHigh)

            arrXdObj[id].threeMesh.up.copy(latDir)

        }

        function XDObject() {

            this.threeMesh = null

            this.minWGS84 = null

            this.maxWGS84 = null

        }

    </script>

</body>

</html>
3. 参考资料
[1]功能示例(Vue版) - Mars3D三维可视化平台 | 火星科技
[2]API文档 - Mars3D三维可视化平台 | 火星科技
[3]开发教程 - Mars3D三维可视化平台 | 火星科技
Mars3D与第三方集成的更多相关文章
- Android应用开发中,第三方集成新浪微博(sinaWeiboSDK)的过程记录
作为一个android开发人员,不可避免的要学会使用和集成第三方API的能力 而新浪微博作为现在最主要的新闻速递媒体,使用十分普遍,并且提供了较为详细的API接入方法,故此选择集成sinaWeibiS ...
- spring boot 常见的第三方集成
spring boot基于1.x. 一 集成redis 1.1 配置 spring.redis.host = localhost spring.redis.port = 6379 spring.red ...
- swift-sharesdk集成微信、Facebook第三方登录
好久没有写博客了.最近忙得没有时间更新博客,很忙很忙. 今天就把自己做过的第三方集成和大家分享一下,请大家多多指教. 第一步: 一.获取AppKey(去官方平台注册) 二.下载SDK 三.快速集成 第 ...
- 【原】iOS学习47之第三方-FMDB
将 CocoaPods 安装后,按照 CocoaPods 的使用说明就可以将 FMDB 第三方集成到工程中,具体请看博客iOS学习46之第三方CocoaPods的安装和使用(通用方法) 1. FMDB ...
- 【原】iOS学习之第三方-AFNetworking1.3.0
将 CocoaPods 安装后,按照 CocoaPods 的使用说明就可以将 AFNetworking 第三方集成到工程中,具体请看上篇博客iOS学习46之第三方CocoaPods的安装和使用(通用方 ...
- Android如何调用第三方SO库
问题描述:Android如何调用第三方SO库:已知条件:SO库为Android版本连接库(*.so文件),并提供了详细的接口说明:已了解解决方案:1.将SO文件直接放到libs/armeabi下,然后 ...
- Android如何调用第三方SO库(转)
源:Android如何调用第三方SO库 问题描述:Android如何调用第三方SO库:已知条件:SO库为Android版本连接库(*.so文件),并提供了详细的接口说明:已了解解决方案:1.将SO文件 ...
- 【下一代核心技术DevOps】:(五)微服务CI与Rancher持续集成
1. 引言 DevOps的核心魅力是快速的持续集成交付,降低研发和实施运维之间的交互,使得传统的各种扯皮现象统统消失.最重要的是降低成本 保障产品交付可靠性. 使用Rancher作为持续集成的关键环节 ...
- SimpleSSO:使用Microsoft.Owin.Security.OAuth搭建OAuth2.0授权服务端
目录 前言 OAuth2.0简介 授权模式 (SimpleSSO示例) 使用Microsoft.Owin.Security.SimpleSSO模拟OpenID认证 通过authorization co ...
- react native 中webview内的点击事件传到外部原生调用
先说一下我使用webview的时候遇到的一个功能需求 是这样的,上图中的这个页面是用h5做的,但是由于点击"我的优惠劵"是需要跳转到我原生的页面,也就是说我需要获得这个h5提供的点 ...
随机推荐
- SVNAdmin2 - 基于web的SVN管理系统
1. 介绍 SVNAdmin2 是一款通过图形界面管理服务端SVN的web程序. 正常情况下配置SVN仓库的人员权限需要登录到服务器手动修改 authz 和 passwd 两个文件,当仓库结构和人员权 ...
- 有来实验室|第一篇:Seata1.5.2版本部署和开源全栈商城订单支付业务实战
在线体验:Seata实验室 一. 前言 相信 youlai-mall 的实验室大家有曾在项目中见到过,但应该都还处于陌生的阶段,毕竟在此之前实验室多是以概念般的形式存在,所以我想借着此次的机会,对其进 ...
- python中文件操作相关基础知识
python中文件操作相关基础知识 文件的概念 1,文件的概念? 文件就是操作系统暴露给用户操作硬盘的快捷方式 , 当我们双击一个文件进行打开时,其实就是把硬盘中的数据加载到了内存中,然后展示给我们 ...
- 学习Django框架之前所需要了解的知识点
目录 一: Web应用 1.Web应用程序什么? 2.软件开发架构 3.Web应用程序的优点 4.Web应用程序的缺点 5.B/S架构优点 6.Web框架本质 二:MVC和MTV模式 1.MVC设计模 ...
- 痞子衡嵌入式:低功耗&高性能边缘人工智能应用的新答案 - MCXN947
大家好,我是痞子衡,是正经搞技术的痞子.今天痞子衡给大家介绍的是恩智浦MCX系列MCU的新品MCXN947. 自 2015 年恩智浦和飞思卡尔合并成新恩智浦之后,关于它们各自的 Arm Cortex- ...
- python 之选择结构(if --elif --else)
python中有三种结构:顺序结构.选择结构.循环结构,此处介绍选择结构. if -- else 结构: if 判断条件: 执行语句 else: 执行语句 当if后面的判断条件为真(True)时,执行 ...
- C语言 根据掩码计算网段的起止ip
原文地址:https://www.yuque.com/docs/share/85a26263-484a-42f6-880b-2b511ae1bd20?# 根据ipv4掩码计算 #include < ...
- CH9434-MCU代码移植,芯片使用详细说明(附Linux开发资料链接)
简介 CH9434是一款SPI转四串口转接芯片,提供四组全双工的9线异步串口,用于单片机/嵌入式/安卓系统扩展异步串口.提供25路GPIO,以及支持RS485收发控制引脚TNOW.本篇基于STM32F ...
- 编写异步任务@Async出现bean无法注入的问题解决方案
在编写一个异步任务时出现报错:"The bean 'asyncShenCe' could not be injected as a 'com.sinochem.api.service.imp ...
- .NET性能优化-使用RecyclableMemoryStream替代MemoryStream
提到MemoryStream大家可能都不陌生,在编写代码中或多或少有使用过:比如Json序列化反序列化.导出PDF/Excel/Word.进行图片或者文字处理等场景.但是如果使用它高频.大数据量处理这 ...