1、Android-活动(上)
1.1、活动是什么
活动(Activity)是最容易吸引用户的地方,他是一种可以包含用户界面的组件
主要用于和用户进行交互
一个用户可以包含零个或多个活动,不包含活动的程序少见
1.2、活动的基本用法
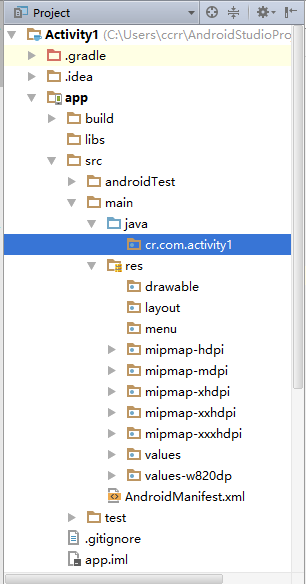
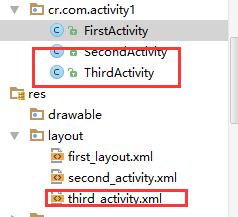
首先创建好一个工程,目录如下图:
1.2.1、手动创建活动
在cr.com.activity1上右键--New--Activity--Empty Activity
进行创建一个活动

关于选项:
Generate Layout File:自动为新创建的活动创建一个对用的布局文件
Launcher Activity:将创建的活动设置为当前项目的主活动
此时创建好的类:
public class FirstActivity extends AppCompatActivity {

    @Override

    protected void onCreate(Bundle savedInstanceState) {

        super.onCreate(savedInstanceState);

    }

}
创建好的活动都继承了AppCompatActivity,并且都有应该实现实现其中方法
这里简单的调用父类的onCreate()方法
后续需要加入更多的处理事务的逻辑。
1.2.2、创建豪加载布局
在layout文件上右键--Layout resource file进行创建布局文件
这里默认先选择LinearLayout布局
first_layout
<?xml version="1.0" encoding="utf-8"?>
<LinearLayout xmlns:android="http://schemas.android.com/apk/res/android"
    android:orientation="vertical" android:layout_width="match_parent"
    android:layout_height="match_parent">

    <Button
        android:id="@+id/button_1"
        android:text="Button 1"
        android:layout_width="match_parent"
        android:layout_height="wrap_content" />

</LinearLayout>
布局文件中添加Button元素
android:id:给当前元素添加唯一的标识符(类似前端中的id)
android:layout_width:指定当前元素的宽度
------match_parent:之当前元素和父元素一样宽
android:layout_height:指定当前元素的高度
------wrap_content:当前元素的高度可以刚好包含内容
android:textL:指定当前元素的显示内容
使用观察视图:
此时是可以对当前的按钮元素进行显示
在FirstActivity的oncreate()方法中:
public class FirstActivity extends AppCompatActivity {

    @Override

    protected void onCreate(Bundle savedInstanceState) {

        super.onCreate(savedInstanceState);

        setContentView(R.layout.first_layout);

    }

}
这里的setContentView()是给当前的活动加载一个布局
在方法中一般是传入布局文件的id
1.2.3、在AndroidManifest.xml文件中进行注册
<?xml version="1.0" encoding="utf-8"?>

<manifest xmlns:android="http://schemas.android.com/apk/res/android"

    package="cr.com.activity1">

    <application

        android:allowBackup="true"

        android:icon="@mipmap/ic_launcher"

        android:label="@string/app_name"

        android:supportsRtl="true"

        android:theme="@style/AppTheme">

        <activity android:name=".FirstActivity"></activity>

    </application>

</manifest>
通过<activity>标签来对活动进行注册,注册的声明需要放在<application>标签中
android:name指定哪一个具体的活动
.FirstActivity是之前创建的类,其余的包在manifest已经进行填写。
若要程序运行还需要在配置中设置主活动
<?xml version="1.0" encoding="utf-8"?>

<manifest xmlns:android="http://schemas.android.com/apk/res/android"

package="cr.com.activity1">

<application

    android:allowBackup="true"

    android:icon="@mipmap/ic_launcher"

    android:label="@string/app_name"

    android:supportsRtl="true"

    android:theme="@style/AppTheme">

    <activity android:name=".FirstActivity" android:label="first">
        <intent-filter>

            <action android:name="android.intent.action.MAIN"></action>

            <category android:name="android.intent.category.LAUNCHER"></category>

        </intent-filter>

    </activity>

</application>

</manifest>
只需要在标签中添加上述的两个声明
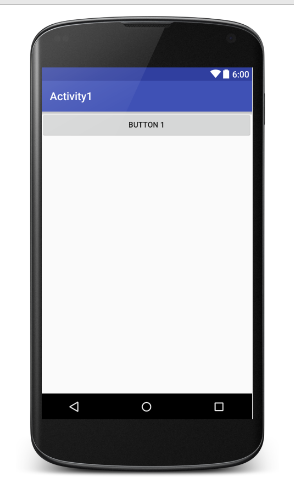
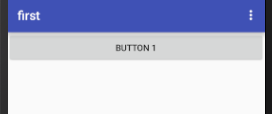
同时也可以使用android:label:进行指定当前活动中标题栏的内容
标题栏是显示在活动的最顶部,同时也会成为启动器中应用程序显示的名称

此时运行显示界面
1.2.4、在活动中使用Toast
Toast是Android系统提供一种非常好的提醒方式
在程序中可以使用其提供一些短小的信息
这些信息会在一段时间自动消失,不会占用任何的屏幕的空间
代码:
public class FirstActivity extends AppCompatActivity {
@Override
protected void onCreate(Bundle savedInstanceState) {
super.onCreate(savedInstanceState);
setContentView(R.layout.first_layout);
Button button1 = (Button) findViewById(R.id.button_1);
button1.setOnClickListener(new View.OnClickListener() {
@Override
public void onClick(View v) {
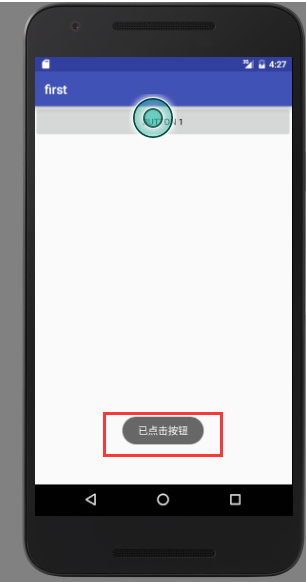
Toast.makeText(FirstActivity.this,"已点击按钮",Toast.LENGTH_SHORT).show();
}
});
}
}
使用findViewById()方法获取在布局文件中的定义的元素
得到的是是一个View对象,需要进行墙砖为Button属性
setOnClickListener():为按钮注册一个监听器,点击事件就会触发监听器的onClick()方法
所以弹出Toast功能需要在onclick()方法中进行编写
通过静态方法makeText()创建一个Toast对象
在进行调用show()方法将Toast显示出来
makeText传入的三个参数:
第一个:Toast要求的上下文,由于活动本身就是一个Context对象,所以此时直接传入
第二个:Toast显示的文本内容
第三个:显示的时长,此时是两个选择:LENGTH_SHORT和LENGTH_LONG
1.2.5、在活动中使用Menu
手机屏幕非常有限,充分利用手机界面的空间是很重要的。
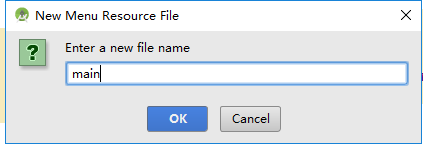
若没有文件夹进行创建menu文件夹
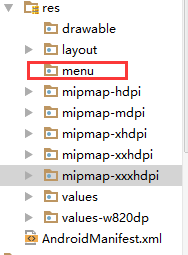
右键--Menu resource file进行创建一个mein文件
<?xml version="1.0" encoding="utf-8"?>

<menu xmlns:android="http://schemas.android.com/apk/res/android">

    <item android:id="@+id/add_item"

        android:title="add">

    </item>

    <item android:id="@+id/remove_item"

        android:title="remove">

    </item>

</menu>
<item>标签就是用来创建具体的菜单项
android:id指定唯一的标识
android:title:指定名称
在firstActivity中实现如下两个方法:
@Override
public boolean onCreateOptionsMenu(Menu menu) {
getMenuInflater().inflate(R.menu.main,menu);
return true;
} @Override
public boolean onOptionsItemSelected(MenuItem item) {
switch (item.getItemId()){
case R.id.add_item:
Toast.makeText(FirstActivity.this, "add...", Toast.LENGTH_SHORT).show();
break;
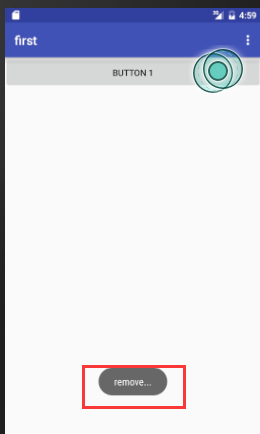
case R.id.remove_item:
Toast.makeText(FirstActivity.this, "remove...", Toast.LENGTH_SHORT).show();
break;
default:
}
return true;
}
onCreateOptionsMenu()方法,用于显示菜单
getMenuInflater()方法能得到MenuInflater对象,在调用inflate()方法就可以给当前活动创建菜单了
inflate()方法接受两个参数:
第一个参数:用于指定通过哪一个配置资源来创建菜单
第二个参数:指定菜单项将添加到哪一个menu对象中
返回值为true:表示允许创建的菜单显示出来
返回值为false:创建的菜单无法显示
onOptionsItemSelected()方法:用于响应自定义菜单的响应事件
item.getItemId()来判断点击的是哪一个带单项
1.2.6、销毁一个活动
销毁活动的两种方式:
1、按一下back键
2、使用finish()方法
修改之前对button1的监听代码:
        Button button1 = (Button) findViewById(R.id.button_1);

        button1.setOnClickListener(new View.OnClickListener() {

            @Override

            public void onClick(View v) {

               finish();

            }

        });
点击一下就会销毁活动
1.3、使用Intent
1.3.1、显示Intent
新建一个活动:
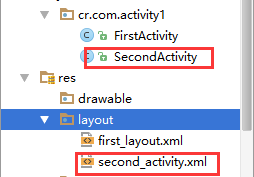
second_activity.xml
<?xml version="1.0" encoding="utf-8"?>

<RelativeLayout xmlns:android="http://schemas.android.com/apk/res/android"

    xmlns:tools="http://schemas.android.com/tools"

    android:layout_width="match_parent"

    android:layout_height="match_parent"

    android:paddingBottom="@dimen/activity_vertical_margin"

    android:paddingLeft="@dimen/activity_horizontal_margin"

    android:paddingRight="@dimen/activity_horizontal_margin"

    android:paddingTop="@dimen/activity_vertical_margin"

    tools:context="cr.com.activity1.SecondActivity">

    <Button

        android:id="@+id/button_2"

        android:text="Button 2"

        android:layout_width="match_parent"

        android:layout_height="wrap_content" />

</RelativeLayout>
SecondActivity.java
public class SecondActivity extends AppCompatActivity {

    @Override

    protected void onCreate(Bundle savedInstanceState) {

        super.onCreate(savedInstanceState);

        setContentView(R.layout.second_activity);

    }

}
此时还需要在 文件中进行注册
    <application

        android:allowBackup="true"

        android:icon="@mipmap/ic_launcher"

        android:label="@string/app_name"

        android:supportsRtl="true"

        android:theme="@style/AppTheme">

        <activity

            android:name=".FirstActivity"

            android:label="first">

            <intent-filter>

                <action android:name="android.intent.action.MAIN" />

                <category android:name="android.intent.category.LAUNCHER" />

            </intent-filter>

        </activity>

        <activity android:name=".SecondActivity"></activity>

    </application>
关于Intent:
Intent是Android程序中各组件之间进行交互数据的一种重要方式
可以指明当前组件想要执行的操作,还可以在不同组件之间进行传递数据
Intent一般可以用于启动服务,启动服务以及发送广播等场景
大致分为两种:
1、显示
2、隐式
Intent有多个构造函数的重载,其中一个是Intent(Context packageContext,Class<?>cls)
这个构造函数接受两个参数
1、要求提供一个启动活动的上下文
2、要启动的上下文
继续对button1进行修改:
public class FirstActivity extends AppCompatActivity {

    @Override

    protected void onCreate(Bundle savedInstanceState) {

        super.onCreate(savedInstanceState);

        setContentView(R.layout.first_layout);

        Button button1 = (Button) findViewById(R.id.button_1);

        button1.setOnClickListener(new View.OnClickListener() {

            @Override

            public void onClick(View v) {

                Intent intent = new Intent(FirstActivity.this,SecondActivity.class);

                startActivity(intent);

            }

        });

    }
}
这里首先构造出一个Intent,传入FirstActivity作为上下文
传入SecondActivity作为目标活动
通过startActivity()方法来执行Intent
点击:

若要返回到上一个活动,back键就可以销毁当前活动,返回到上衣活动!!
1.3.2、隐式Intent
隐式不明确指定想要启动哪一个活动
而是指定了一系列更为抽象的action个category等信息
然后交给系统去分析这个Intent
著熬出合适的活动去启动
AndroidManifest.xml
指定当前活动能够响应的action和category
        <activity android:name=".SecondActivity">

            <intent-filter>

                <action android:name="android.intent.action.ACTION_START"></action>

                <category android:name="android.intent.category.DEFAULT"></category>

            </intent-filter>

        </activity>
action指定可以响应的活动:android.intent.action.ACTION_START
category是一些附加信息,更精确指明了活动的能狗响应的Intent还带category
当前只有两个标签都能匹配才会进行响应
修改button1
    @Override

    protected void onCreate(Bundle savedInstanceState) {

        super.onCreate(savedInstanceState);

        setContentView(R.layout.first_layout);

        Button button1 = (Button) findViewById(R.id.button_1);

        button1.setOnClickListener(new View.OnClickListener() {

            @Override

            public void onClick(View v) {

                Intent intent = new Intent("android.intent.action.ACTION_START");

                intent.addCategory("android.intent.category.DEFAULT");

                startActivity(intent);

            }

        });

    }
<category android:name="android.intent.category.DEFAULT"></category>是默认的
写不写均可以,在调用startActivity()方法时会自动添加到Intent
可以对其进行添加不同的属性
        <activity android:name=".SecondActivity">

            <intent-filter>

                <action android:name="android.intent.action.ACTION_START"></action>

                <category android:name="android.intent.category.DEFAULT"></category>

                <category android:name="android.intent.category.SECOND"></category>

            </intent-filter>

        </activity>
category可以同时指定多个,但是action自能指定一个
测试和之前的显式调用结果一样!!!
1.3.3、更多隐式Intent的使用
调用系统的浏览器:
 Button button1 = (Button) findViewById(R.id.button_1);

        button1.setOnClickListener(new View.OnClickListener() {

            @Override

            public void onClick(View v) {

                Intent intent = new Intent(Intent.ACTION_VIEW);

                intent.setData(Uri.parse("http://www.baidu.con"));

                startActivity(intent);

            }

        });
Intent.ACTION_VIEW:Android系统的内置动作,常量值为android.intent.action.VIEW
Uri.parse()方法,将一个网易解析成一个Uri对象,在调用setData()方法将这个uri传递过去
还可以在<intent-filter>标签中在配置一个date标签,更精确的指定当前活动能够响应的什么类型数据
data标签中可以配置一下的内容:

新建活动:
AndroidMainifest.xml
        <activity android:name=".ThirdActivity">

            <intent-filter>

                <action android:name="android.intent.action.VIEW"></action>

                <category android:name="android.intent.category.DEFAULT"></category>

                <data android:scheme="http"></data>

            </intent-filter>

        </activity>
指定了能够响应的action是Intent
category是默认的值
在data标签中指定数据的协议必须是http协议
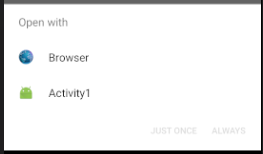
系统弹出一个列表,显示能够响应这个Intent的所有程序
选择第一个和之前一样会在浏览器中进行打开
JUST ONCE表四只是这次使用选择的程序打开
ALWAYS表示一致使用这次的选择打开
虽然声明了ThoedActivity是可以响应打开网页
但实际这个活动并没有加载并显示网页的功能
在项目中进行不要出现这种可能会五代用户的行为
geo表示显示地理位置
tel表示拨号
进行修改测试的代码:
Button button1 = (Button) findViewById(R.id.button_1);
button1.setOnClickListener(new View.OnClickListener() {
    @Override
    public void onClick(View v) {
        Intent intent = new Intent(Intent.ACTION_DIAL);
        intent.setData(Uri.parse("tel:10000"));
        startActivity(intent);
    }
});

首先指定Intent的action
是Intent.ACTION_DIAL这也是安卓系统的内置活动
然后再data部分制定了协议是tel号码是10000
1.2.4、向下一个活动传递数据
不同活动活动之前进行数据的传毒
Intent提供了一系列putExtra()方法的重载
可以把将要传递的数据暂存再Intent中,启动另一个活动后,再从中取出数据
FirstActivity.java
        Button button1 = (Button) findViewById(R.id.button_1);

        button1.setOnClickListener(new View.OnClickListener() {

            @Override

            public void onClick(View v) {

                Intent intent = new Intent(FirstActivity.this,SecondActivity.class);

                intent.putExtra("data","date......");

                startActivity(intent);

            }

        });
使用显式的Intent的方式来启动SecondActivity
通过putExtra()方法传递了一个字符,有两个参数
1、键,用于后面的Intent中取值
2、传递的数据
SecondActivity.java
public class SecondActivity extends AppCompatActivity {

    @Override

    protected void onCreate(Bundle savedInstanceState) {

        super.onCreate(savedInstanceState);

        setContentView(R.layout.second_activity);

        Intent intent = getIntent();

        String data = intent.getStringExtra("data");

        Log.d("date--------",data);

    }

}
首先是通过getIntent()方法获启动SecondActivity的Intent
然后掉哦那个getStringExtra()方法传入响应的键值,就可以获取到数据
字符型数据:getStringExtra()
整型数据:getIntExtra()
布尔型数据:getBooleanExtra()
等
再运行之后点击按钮:
控制台会进行相关的打印

1.3.5、返回数据给上一个活动
数据可以正向的传递给下一个活动
同时也可以进行传递给上一个活动
返回键back可以返回带上一个活动但是没有进行相关的数据传递
Activity中有一个方法:startActivityForResult()方法也是用来启动活动的
但是这方法期望再销毁活动时能够给返回一个结果给上一个活动
两个参数:
1、Intent
2、参数的请求码,用于再之后的回调判断数据的来源
首先是FirstActivity.java
    @Override

    protected void onCreate(Bundle savedInstanceState) {

        super.onCreate(savedInstanceState);

        setContentView(R.layout.first_layout);

        Button button1 = (Button) findViewById(R.id.button_1);

        button1.setOnClickListener(new View.OnClickListener() {

            @Override

            public void onClick(View v) {

                Intent intent = new Intent(FirstActivity.this,SecondActivity.class);

               startActivityForResult(intent,);

            }

        });

    }
这里使用startActivityForResult方法来启动SecondActivity
请求码只要是一个唯一值就可以了
其次是SecondActivity.java
 @Override

    protected void onCreate(Bundle savedInstanceState) {

        super.onCreate(savedInstanceState);

        setContentView(R.layout.second_activity);

        Button button2 = (Button) findViewById(R.id.button_2);

        button2.setOnClickListener(new View.OnClickListener() {

            @Override

            public void onClick(View v) {

                Intent intent = new Intent();

                intent.putExtra("date","date....");

                setResult(RESULT_OK,intent);

                finish();

            }

        });

    }
这里构建了一个Intent
这个Intent只是用于传递数据
将要传递的数据存放在Intent中
再调用setResutl()方法接受两个参数
1、用于向上一个活动返回处理结果,一般用RESULT_OK或者RESULT_CANCELED
2、把带有数据的Intent传递回去
调用finish()方法使用了销毁当前的活动
最后回到FirstActivity.java
 @Override

    protected void onActivityResult(int requestCode, int resultCode, Intent data) {

        switch (requestCode){

            case :

                if (requestCode == RESULT_OK){

                    String date = data.getStringExtra("date");

                    Log.d("date---",date);

                }

                break;

            default:

        }

    }
带有三个参数onActivityResult()
1、requestCode:启动活动时传入的请求码
2、resultCode返回数据传入时的处理结果
3、data携带返回数据的Intent
由于再一个活动可能调用startActivityForResult()方法启动很多不同的活动
每一个活动都会回到onActivityResult() 这个方法中
因此需要检验requestCode的值来判断数据来源
确定是其返回的周,再通过resultCode值来判断处理结果是否成功
最后从data中取值并打印出来
此时完成了向上一个活动返回数据的工作

如果通过Back键返回到上衣活动只需要在SecondActivity中重写onBackPresses()方法来解决这个问题
    @Override

    public void onBackPressed() {

        Intent intent = new Intent();

        intent.putExtra("date","date....");

        setResult(RESULT_OK,intent);

        finish();

    }
1、Android-活动(上)的更多相关文章
- S5PV210之Sate210-F DIY硬件,移植uboot,kernel,android 活动现在已经进入实施阶段吗,欢迎广大网友参与 !
大家一起来diy 超低价四核的exynos4412或者Cortex A8S5pv210开源开发板 商业版Sate210已经完成了好久了.Sate4412 也已经出来.但是这两个接口非常全,主要是针对企 ...
- Android活动和碎片的生命周期及addToBackStack()方法
开始学了Android活动的生命周期后又到了碎片的生命周期,就开始有点乱了.又看了一些总结的文章有一个挺详细的:https://blog.csdn.net/lecepin/article/detail ...
- 强烈推荐:Android史上最强大的自定义任务软件Tasker
强烈推荐:Android史上最强大的自定义任务软件Taskerhttp://bbs.mumayi.com/thread-28387-1-1.html(出处: 木蚂蚁手机乐园) Android上的Tas ...
- 让“是男人就下到100层”在Android平台上跑起来
原工程:https://github.com/jeekun/DownFloors 移植后的代码:HelloCpp.zip 移植后的APK:HelloCpp.apk 说明:(cocos2d-x版本是“ ...
- Android Studio上NDK/JNI开发环境问题
基础环境: 操作系统 —— Windows 7 Android Studio —— 1.5.1(android-studio-bundle-141.2456560-windows.exe) NDK — ...
- 非root Android设备上Tcpdump的实现
通常我们在Android应用中执行某个命令时会使用"Runtime.getRuntime().exec("命令路径")"这种方式,但是当我们执行抓包操作时,使用 ...
- Android活动启动模式
在android中,android活动是以栈的方式进行存储,在栈中的活动不断被重新激活至前台和不断被终止也不断被排序.因此对于栈中的活动管理也是一个比较麻烦的事情. android给我们提供了两类活动 ...
- 在ios android设备上使用 Protobuf (使用dll方式)
http://game.ceeger.com/forum/read.php?tid=13479 如果你的工程可以以.Net 2.0 subset模式运行,请看这个帖子中的方法. 地址:http://g ...
- arcgis android 图上记录gps轨迹
原文 arcgis android 图上记录gps轨迹 public class MainActivity extends Activity { MapView mMapView; Location ...
- Android Studio上方便使用butterknife注解框架的偷懒插件Android Butterknife Zelezny
首先提下ButterKnifey已经更新到版本7.0.1了,现在注解已经不叫@InjectView了,而叫@Bind,感觉更贴合语义.同时注册的方式也从 ButterKnife.inject(this ...
随机推荐
- MySql的隔离级别总结
使用MySql也有一段时间了,但是很多MySql相关或者说是数据库相关的知识还是一知半解,最近在学hibernate这个框架时碰到挺多和数据库相关的知识盲区,所以下面根据自己对MySql系统相关知识消 ...
- 腾讯云安全组,实现服务器外网ip访问网站
添加访问地ip出入站规则HTTP,并将云主机添加到安全组中.
- mysql数据同步
随着各行业信息化水平的不断提升,各种各样的信息管理系统都被广泛使用,各系统间数据完全独立,形成了大量的信息孤岛.出于管理及决策方面的需求,实现各平台的数据同步是一个很迫切的需求,TreeSoft数据库 ...
- Jenkins-在节点上执行copy命令,将节点机上的文件拷贝到映射的网络驱动盘中报错,访问被拒绝 找不到指定驱动器
问题如标题,根据网友提供的解决方法,完美解决: 在jenkins中执行这个命令时报错 说无法访问. 重新映射一次可解决这个问题,添加一条 net use 命令
- 5.Resource注解解析
Resource有两种使用场景 1.Resource 当Resource后面没带参数的时候是根据它所注释的属性名称到applicationContext.xml文件中查找是否有bean的id与之匹配, ...
- DOM基础代码练习(一)
上一篇介绍了一下DOM的一些基础的知识,这里我整理了一些有关上一篇知识点的一些封装函数. 1.遍历元素节点 function retChild(node) { var child = node.chi ...
- BZOJ4568: [Scoi2016]幸运数字(线性基 倍增)
题意 题目链接 Sol 线性基是可以合并的 倍增维护一下 然后就做完了?? 喵喵喵? // luogu-judger-enable-o2 #include<bits/stdc++.h> # ...
- Sass、Less、Stylus,我选Sass!
Sass官网 | Sass中文 简介:待添加 Less 简介:待添加 Stylus 简介:待添加
- LeetCode 531----Lonely Pixel I----两种算法之间性能的比较
Lonely Pixel I 两种算法之间的性能比较 今天参加LeetCode Weekly Contest 22,第二题 "Lonely Pixel I" 问题描述如下: Giv ...
- android toast使用方法
1.默认展示 // 第一个参数:当前的上下文环境.可用getApplicationContext()或this // 第二个参数:要显示的字符串.也可是R.string中字符串ID // 第三个参数: ...