SPA项目开发--表单验证、增删改
1. 表单验证
Form组件提供了表单验证的功能,只需要通过 rules 属性传入约定的验证规则,
并将Form-Item的prop属性设置为需校验的字段名即可
<el-form-item label="活动名称" prop="name">
<el-form :model="ruleForm" :rules="rules" ref="ruleForm"
1、
- <el-dialog :title="title" :visible.sync="editFormVisible" width="30%" @click="closeDialog">
- <el-form label-width="120px" :model="editForm" :rules="rules" ref="editForm">
- <el-form-item label="文章标题" prop="title">
- <el-input size="small" v-model="editForm.title" auto-complete="off" placeholder="请输入文章标题"></el-input>
- </el-form-item>
- <el-form-item label="文章内容" prop="body">
- <el-input size="small" v-model="editForm.body" auto-complete="off" placeholder="请输入文章内容"></el-input>
- </el-form-item>
- </el-form>
- <div slot="footer" class="dialog-footer">
- <el-button size="small" @click="closeDialog">取消</el-button>
- <el-button size="small" type="primary" class="title" @click="submitForm('editForm')">保存</el-button>
- </div>
- </el-dialog>
2、
- rules: {
- title: [{
- required: true,
- message: '请输入文章标题',
- trigger: 'blur'
- },
- {
- min: 3,
- max: 5,
- message: '标题长度在 3 到 5 个字符',
- trigger: 'blur'
- }
- ],
- body: [{
- required: true,
- message: '请输入文章内容',
- trigger: 'change'
- }]
- }
2、数据增删改
- <template>
- <div>
- <!-- 搜索筛选 -->
- <el-form :inline="true" :model="formInline" class="user-search">
- <el-form-item label="搜索:">
- <el-input size="small" v-model="formInline.title" placeholder="输入文章标题"></el-input>
- </el-form-item>
- <el-form-item>
- <el-button size="small" type="primary" icon="el-icon-search" @click="search">搜索</el-button>
- <el-button size="small" type="primary" icon="el-icon-plus" @click="handleAdd()">添加</el-button>
- </el-form-item>
- </el-form>
- <!--列表-->
- <el-table size="small" :data="listData" border element-loading-text="拼命加载中" style="min-width: 1;">
- <el-table-column align="center" type="selection" min-width="1">
- </el-table-column>
- <el-table-column sortable prop="id" label="文章的ID" min-width="1">
- </el-table-column>
- <el-table-column sortable prop="title" label="文章的标题" min-width="2">
- </el-table-column>
- <el-table-column sortable prop="body" label="文章的内容" min-width="4">
- </el-table-column>
- <el-table-column align="center" label="操作" min-width="2">
- <template slot-scope="scope">
- <el-button size="mini" @click="handleEdit(scope.$index, scope.row)">编辑</el-button>
- <el-button size="mini" type="danger" @click="deleteUser(scope.$index, scope.row)">删除</el-button>
- </template>
- </el-table-column>
- </el-table>
- <!-- 分页条 -->
- <el-pagination style="margin-top: 20px;" @size-change="handleSizeChange" @current-change="handleCurrentChange"
- :current-page="formInline.page" :page-sizes="[10, 20, 30, 50]" :page-size="100" layout="total, sizes, prev, pager, next, jumper"
- :total="total">
- </el-pagination>
- <!-- 编辑界面 -->
- <el-dialog :title="title" :visible.sync="editFormVisible" width="30%" @click="closeDialog">
- <el-form label-width="120px" :model="editForm" :rules="rules" ref="editForm">
- <el-form-item label="文章标题" prop="title">
- <el-input size="small" v-model="editForm.title" auto-complete="off" placeholder="请输入文章标题"></el-input>
- </el-form-item>
- <el-form-item label="文章内容" prop="body">
- <el-input size="small" v-model="editForm.body" auto-complete="off" placeholder="请输入文章内容"></el-input>
- </el-form-item>
- </el-form>
- <div slot="footer" class="dialog-footer">
- <el-button size="small" @click="closeDialog">取消</el-button>
- <el-button size="small" type="primary" class="title" @click="submitForm('editForm')">保存</el-button>
- </div>
- </el-dialog>
- </div>
- </template>
- <script>
- export default {
- data() {
- return {
- listData: [],
- formInline: {
- page: 1,
- rows: 10,
- title: ''
- },
- total:0,
- editForm: {
- id: 0,
- title: '',
- body: ''
- },
- editFormVisible: false,
- title: '',
- rules: {
- title: [{
- required: true,
- message: '请输入文章标题',
- trigger: 'blur'
- },
- {
- min: 3,
- max: 5,
- message: '标题长度在 3 到 5 个字符',
- trigger: 'blur'
- }
- ],
- body: [{
- required: true,
- message: '请输入文章内容',
- trigger: 'change'
- }]
- }
- };
- },
- methods: {
- doSearch(params) {
- let url = this.axios.urls.SYSTEM_ARTICLE_LIST;
- this.axios.post(url, params).then((response) => {
- console.log(response);
- this.listData = response.data.result;
- this.total = response.data.pageBean.total;
- }).catch((response) => {
- console.log(response);
- });
- },
- handleSizeChange(rows) {
- console.log('页码大小发生改变的时候触发');
- this.formInline.page = 1;
- this.formInline.rows = rows;
- this.search();
- },
- handleCurrentChange(page) {
- console.log('当前页页码发生改变的时候触发');
- this.formInline.page = page;
- this.search();
- },
- search() {
- this.doSearch(this.formInline);
- },
- closeDialog() {
- },
- submitForm(formName) {
- this.$refs[formName].validate((valid) => {
- if (valid) {
- let url;
- if (this.editForm.id == 0) {
- url = this.axios.urls.SYSTEM_ARTICLE_ADD;
- } else {
- url = this.axios.urls.SYSTEM_ARTICLE_EDIT;
- }
- // let url = 'http://localhost:8080/T216_SSH/vue/userAction_login.action';
- this.axios.post(url, this.editForm).then((response) => {
- console.log(response);
- this.clearData();
- this.search();
- }).catch(function(error) {
- console.log(error);
- });
- } else {
- console.log('error submit!!');
- return false;
- }
- });
- },
- //新增文章
- handleAdd() {
- this.clearData(); //清除弹出窗体中残留的信息
- this.editFormVisible = true;
- this.title = '新增文章';
- },
- //编辑文章
- handleEdit(index, row) {
- this.editFormVisible = true;
- this.title = '编辑文章';
- this.editForm.id = row.id;
- this.editForm.title = row.title;
- this.editForm.body = row.body;
- },
- //删除文章
- deleteUser(index, row) {
- let url = this.axios.urls.SYSTEM_ARTICLE_DEL;
- this.axios.post(url, {id:row.id}).then((response) => {
- console.log(response);
- this.clearData();
- this.search();
- }).catch(function(error) {
- console.log(error);
- });
- },
- //清除弹出窗体中残留的信息
- clearData() {
- this.editFormVisible = false;
- this.title = '';
- this.editForm.id = 0;
- this.editForm.title = '';
- this.editForm.body = '';
- }
- },
- created() {
- this.doSearch({});
- }
- }
- </script>
- <style>
- </style>
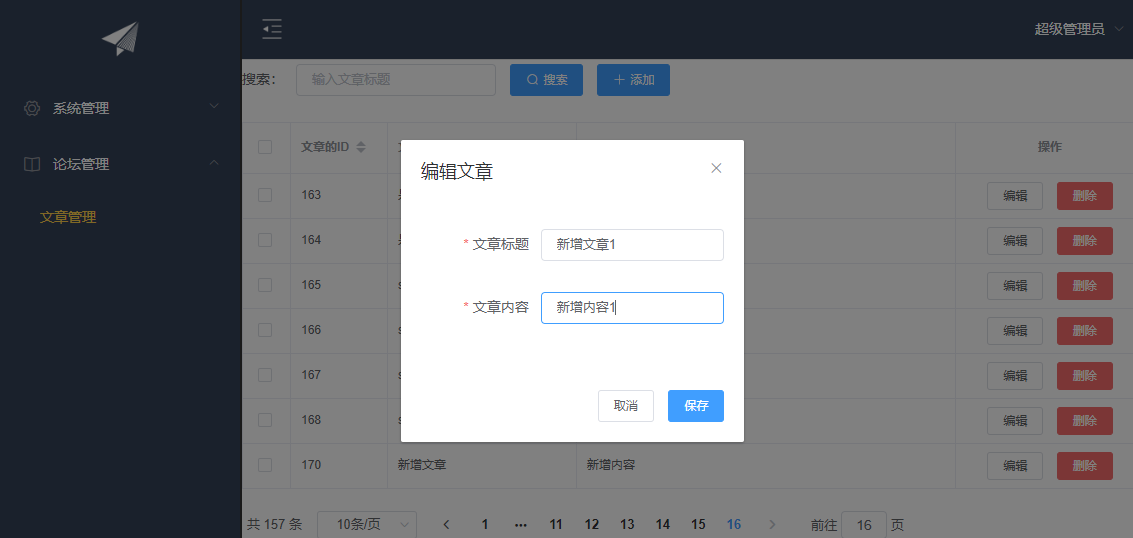
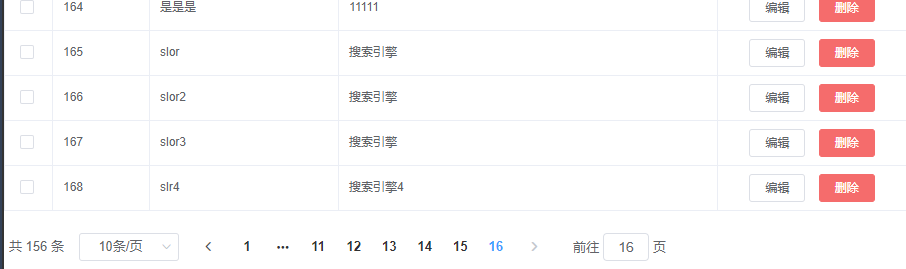
3、展示效果
表单验证
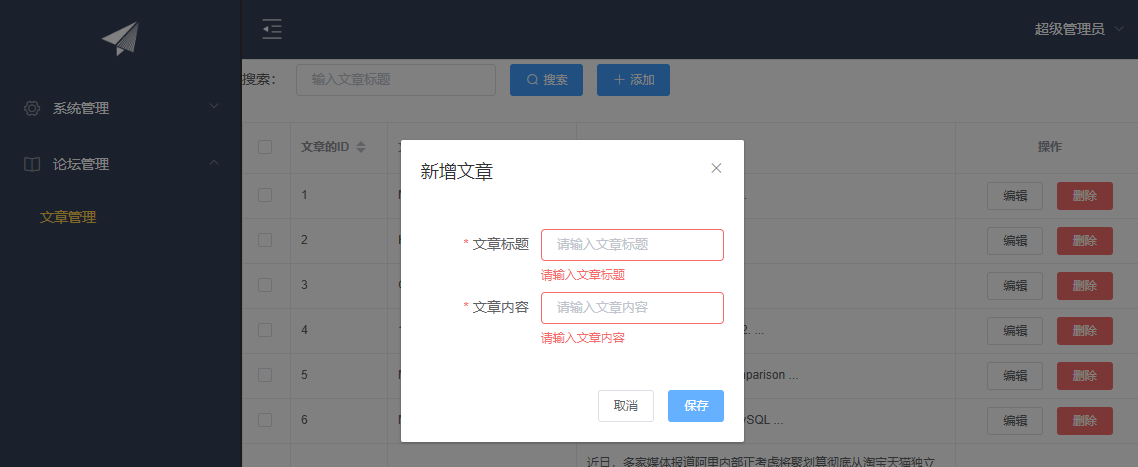
新增

修改

删除后
谢谢观看!!!
SPA项目开发--表单验证、增删改的更多相关文章
- vue.js带复选框表单的增删改查
近段时间由于公司项目要求,前端开始使用VUE框架进行开发,最近刚开始学习,做了一个表单的增删改查,和大家分享一下. 页面模型代码设计如下 <template> <div id=&qu ...
- django-orm框架表单的增删改查
08.14自我总结 django-orm框架 一.orm基本配置 1.创建django项目 命令行:cmd先去到django创建目录,然后输入django-admin startproject dja ...
- Web开发-表单验证
表单验证是Web开发中必不可少的一个环节,用来限制用户输入数据的规范和一致性.那么如何能够简化这一任务,让开发人员通过简单的属性设置就能达到目的呢? FineUI在这一点上也是下足了功夫,比Asp.N ...
- AppBox实战: 如何实现一对多表单的增删改查
本篇通过完整示例介绍如何实现一对多关系表单的相应服务及视图. 一.准备数据结构 示例所采用的数据结构为"物资需求"一对多"物资清单",通过IDE的实体设 ...
- angularjs 表单验证(不完整版)
针对项目实践表单验证总结: angular 的 form表单验证:form内需要novalidate取消默认验证,用ng自己的验证,form的名字是非常必要的 栗子:以注册为栗子,下面是注册的部分: ...
- SPA项目之CRUD+表单验证
1. 表单验证 Form组件提供了表单验证的功能,只需要通过 rules 属性传入约定的验证规则, 并将Form-Item的prop属性设置为需校验的字段名即可 <el-dialog :titl ...
- SPA项目开发之CRUD+表单验证
表单验证 Form组件提供了表单验证的功能,只需要通过 rules 属性传入约定的验证规则, 并将Form-Item的prop属性设置为需校验的字段名即可 <el-form-item label ...
- 测试开发【提测平台】分享10-Element UI抽屉和表单校验&增改接口合并实现应用管理
微信搜索[大奇测试开],关注这个坚持分享测试开发干货的家伙. 开篇说个小讨论,一个群里聊天聊到关于更新篇章的长度,是小篇幅多次,还是每次按照一个小完整的功能,我个人的是按照后种来的,主要的思考就是希望 ...
- Online Coding开发模式 (通过在线配置实现一个表模型的增删改查功能,无需写任何代码)
JEECG 智能开发平台. 开发模式由代码生成器转变为Online Coding模式 (通过在线配置实现一个表模型的增删改查功能,无需一行代码,支持用户自定义 ...
随机推荐
- day39——SQL语句简单介绍、库、表、记录、安装mysql简单命令
day39 SQL语句简单介绍 库(增删改查) 查看数据库 show databases; 查看其中一个库 show create database db1; 创建数据库 create databas ...
- VC6.0- C语言-winsocket-警告warning C4761
错误介绍 操作系统:windows10 IDE:VC6.0 语言:C语言 项目内容简介:编写一个双人网络海战棋对战游戏 警告类型:警告warning C4761 integral size misma ...
- 使用 Issue 管理软件项目详解
文章来源:http://www.ruanyifeng.com/blog/2017/08/issue.html 软件开发(尤其是商业软件)离不开项目管理,Issue 是最通用的管理工具之一. 本文介绍 ...
- SAS学习笔记58 单元格格式化设计
单元格行_row_ 对于行单元格,主要就通过_row_这么一个自动变量的方式,来对单元格所有行进行格式化设计 例如,对性别为“男”的单元格所在行颜色设定为红色: 单元格列_col_ 将_row_改成_ ...
- Docker入门以及常用命令
目的: Docker入门 Docker简介 Centos7安装Docker Docker HelloWorld运行原理解析 阿里云镜像仓库配置 Docker常用命令 Docker基本命令 Docker ...
- quartz2.3.0(十四)trigger触发器优先级排序
job任务类: package org.quartz.examples.example14; import org.slf4j.Logger; import org.slf4j.LoggerFacto ...
- Synchronized 与Lock的不同之处
Synchronized 与Lock的不同之处 用法不一样.synchronized既可以加在方法上,也可以加载特定的代码块上,括号中表示需要锁的对象.而Lock需要显示地指定起始位置和终止位置.sy ...
- WebClient 请求 https 页面出错:未能创建 SSL/TLS 安全通道
ServicePointManager.SecurityProtocol = SecurityProtocolType.Ssl3 | SecurityProtocolType.Tls | Securi ...
- kubernetes第七章--管理存储资源
- error LNK2005: “找到一个或多个多重定义的符号” 已经在 xxxx.obj 中定义 的解决方法
1 问题还原 这里我有三个源文件:Base.hpp, Base.cpp 和 main.cpp 在Base.hpp里面定义一个基类,注意,基类只包含构造函数和析构函数的声明,函数在Base.cpp里实现 ...