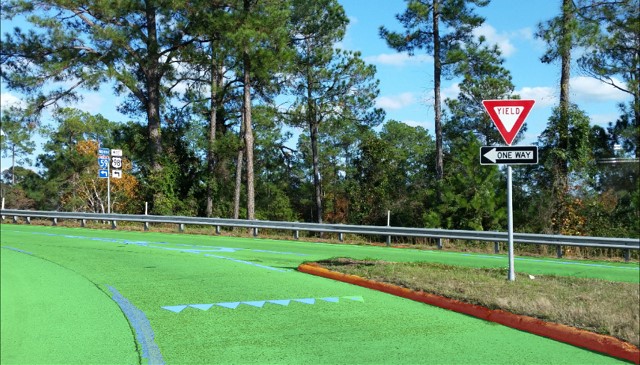
一、来源
模型例子自己带来副图像
二、简化
#include <algorithm>
#include <fstream>
#include <iomanip>
#include <vector>
#include <string>
#include <chrono>
#include <memory>
#include <utility>
#include <format_reader_ptr.h>
#include <inference_engine.hpp>
#include <ext_list.hpp>
#include <samples/slog.hpp>
#include <samples/args_helper.hpp>
#include <samples/ocv_common.hpp>
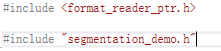
#include <format_reader_ptr.h>
#include "segmentation_demo.h"
using namespace InferenceEngine;
using namespace std;
using namespace cv;
//-i E:/OpenVINO_modelZoo/road.png -m E:/OpenVINO_modelZoo/road-segmentation-adas-0001.xml
void main()
{
std::vector<std::string> images;
string imageNames = "E:/OpenVINO_modelZoo/road.png";
images.push_back(imageNames);
// --------------------------- 1.为IE准备插件-------------------------------------
InferencePlugin plugin(PluginDispatcher().getSuitablePlugin(TargetDevice::eCPU));
printPluginVersion(plugin, std::cout);//正确回显表示成功
plugin.AddExtension(std::make_shared<Extensions::Cpu::CpuExtensions>());//Extension,useful
// --------------------------- 2.读取IR模型(xml和bin)---------------------------------
CNNNetReader networkReader;
networkReader.ReadNetwork("E:/OpenVINO_modelZoo/road-segmentation-adas-0001.xml");
networkReader.ReadWeights("E:/OpenVINO_modelZoo/road-segmentation-adas-0001.bin");
CNNNetwork network = networkReader.getNetwork();
// --------------------------- 3. 准备输入输出的------------------------------------------
InputsDataMap inputInfo(network.getInputsInfo());//获得输入信息
BlobMap inputBlobs; //保持所有输入的blob数据
if (inputInfo.size() != 1) throw std::logic_error("错误,该模型应该为单输入");
auto inputInfoItem = *inputInfo.begin();//开始读入
std::vector<std::shared_ptr<unsigned char>> imagesData;
for (auto & i : images) {
FormatReader::ReaderPtr reader(i.c_str()); //使用FormatReader来读取图片数据,这里的images是一个vector,注意对于批量数据的读取
if (reader.get() == nullptr) {
slog::warn << "Image " + i + " 无法读取!" << slog::endl;
continue;
}
/** 获得图片数据 **/
std::shared_ptr<unsigned char> data(
reader->getData(inputInfoItem.second->getTensorDesc().getDims()[3],
inputInfoItem.second->getTensorDesc().getDims()[2]));
if (data.get() != nullptr) {
imagesData.push_back(data);
}
}
if (imagesData.empty()) throw std::logic_error("错误的格式,请检查!");
network.setBatchSize(imagesData.size());
slog::info << "Batch size is " << std::to_string(networkReader.getNetwork().getBatchSize()) << slog::endl;
inputInfoItem.second->setPrecision(Precision::U8);
//准备输出数据
OutputsDataMap outputInfo(network.getOutputsInfo());
std::string firstOutputName;
for (auto & item : outputInfo) {
if (firstOutputName.empty()) {
firstOutputName = item.first;
}
DataPtr outputData = item.second;
if (!outputData) {
throw std::logic_error("错误的格式,请检查!");
}
item.second->setPrecision(Precision::FP32);
}
// --------------------------- 4. 读取模型 ------------------------------------------(后面这些操作应该可以合并了)
ExecutableNetwork executableNetwork = plugin.LoadNetwork(network, {});
// --------------------------- 5. 创建推断 -------------------------------------------------
InferRequest infer_request = executableNetwork.CreateInferRequest();
// --------------------------- 6. 将数据塞入模型 -------------------------------------------------
for (const auto & item : inputInfo) {
/** 创建输入BLOB **/
Blob::Ptr input = infer_request.GetBlob(item.first);
/** 3 通道塞数据 **/
size_t num_channels = input->getTensorDesc().getDims()[1];
size_t image_size = input->getTensorDesc().getDims()[3] * input->getTensorDesc().getDims()[2];
auto data = input->buffer().as<PrecisionTrait<Precision::U8>::value_type*>();
for (size_t image_id = 0; image_id < imagesData.size(); ++image_id) {
for (size_t pid = 0; pid < image_size; pid++) {
for (size_t ch = 0; ch < num_channels; ++ch) {
data[image_id * image_size * num_channels + ch * image_size + pid] = imagesData.at(image_id).get()[pid*num_channels + ch];
}
}
}
}
// --------------------------- 7. 推断结果 -------------------------------------------------
for (size_t iter = 0; iter < images.size(); ++iter) {
infer_request.Infer();//多张图片多次推断
}
// --------------------------- 8. 处理结果-------------------------------------------------------
slog::info << "输出结果" << slog::endl;
const Blob::Ptr output_blob = infer_request.GetBlob(firstOutputName);
const auto output_data = output_blob->buffer().as<float*>();
size_t N = output_blob->getTensorDesc().getDims().at(0);
size_t C = output_blob->getTensorDesc().getDims().at(1);
size_t H = output_blob->getTensorDesc().getDims().at(2);
size_t W = output_blob->getTensorDesc().getDims().at(3);
size_t image_stride = W * H * C;
for (size_t image = 0; image < N; ++image) {
std::vector<std::vector<size_t>> outArrayClasses(H, std::vector<size_t>(W, 0));
std::vector<std::vector<float>> outArrayProb(H, std::vector<float>(W, 0.));
for (size_t w = 0; w < W; ++w) {
for (size_t h = 0; h < H; ++h) {
if (C == 1) {
outArrayClasses[h][w] = static_cast<size_t>(output_data[image_stride * image + W * h + w]);
}
else {
for (size_t ch = 0; ch < C; ++ch) {
auto data = output_data[image_stride * image + W * H * ch + W * h + w];
if (data > outArrayProb[h][w]) {
outArrayClasses[h][w] = ch;
outArrayProb[h][w] = data;
}
}
}
}
}
std::string fileName = "out_" + std::to_string(image) + ".bmp";
std::ofstream outFile(fileName, std::ofstream::binary);
if (!outFile.is_open()) {
throw std::logic_error("Can't open file : " + fileName);
}
writeOutputBmp(outArrayClasses, C, outFile); //输出的代码
slog::info << "File : " << fileName << " was created" << slog::endl;
}
// -----------------------------------------------------------------------------------------------------
}
在改写的过程中有几点注意
1、添加lib和对应的dll文件,主要就是用于文件读取的;
以及format_reader.dll 文件放到目录下面;
2、头文件修改正确
三、改写
这个代码里面使用的是format_reader,使用起来颇为不方便,修改为OpenCV负责输入输出。
#include <algorithm>
#include <fstream>
#include <iomanip>
#include <vector>
#include <string>
#include <chrono>
#include <memory>
#include <utility>
#include <format_reader_ptr.h>
#include <inference_engine.hpp>
#include <ext_list.hpp>
#include <samples/slog.hpp>
#include <samples/args_helper.hpp>
#include <samples/ocv_common.hpp>
#include <format_reader_ptr.h>
#include "segmentation_demo.h"
using namespace InferenceEngine;
using namespace std;
using namespace cv;
//-i E:/OpenVINO_modelZoo/road.png -m E:/OpenVINO_modelZoo/road-segmentation-adas-0001.xml
void main()
{
std::vector<std::string> images;
string imageNames = "E:/OpenVINO_modelZoo/road.png";
images.push_back(imageNames);
// --------------------------- 1.为IE准备插件-------------------------------------
InferencePlugin plugin(PluginDispatcher().getSuitablePlugin(TargetDevice::eCPU));
printPluginVersion(plugin, std::cout);//正确回显表示成功
plugin.AddExtension(std::make_shared<Extensions::Cpu::CpuExtensions>());//Extension,useful
// --------------------------- 2.读取IR模型(xml和bin)---------------------------------
CNNNetReader networkReader;
networkReader.ReadNetwork("E:/OpenVINO_modelZoo/road-segmentation-adas-0001.xml");
networkReader.ReadWeights("E:/OpenVINO_modelZoo/road-segmentation-adas-0001.bin");
CNNNetwork network = networkReader.getNetwork();
// --------------------------- 3. 准备输入输出的------------------------------------------
InputsDataMap inputInfo(network.getInputsInfo());//获得输入信息
BlobMap inputBlobs; //保持所有输入的blob数据
if (inputInfo.size() != 1) throw std::logic_error("错误,该模型应该为单输入");
//auto lrInputInfoItem = *inputInfo.begin();//开始读入
//int w = static_cast<int>(lrInputInfoItem.second->getTensorDesc().getDims()[3]); //这种写法也是可以的,它的first就是data
//int h = static_cast<int>(lrInputInfoItem.second->getTensorDesc().getDims()[2]);
auto lrInputInfoItem = inputInfo["data"]; //开始读入
int w = static_cast<int>(lrInputInfoItem->getTensorDesc().getDims()[3]); //模型要求的输入大小
int h = static_cast<int>(lrInputInfoItem->getTensorDesc().getDims()[2]);
Mat src = imread(imageNames);
if (src.empty())
return;
network.setBatchSize(1);//只有1副图片,故BatchSize = 1
//准备输出数据
OutputsDataMap outputInfo(network.getOutputsInfo());//获得输出信息
std::string firstOutputName;
for (auto &item : outputInfo) {
if (firstOutputName.empty()) {
firstOutputName = item.first;
}
DataPtr outputData = item.second;
if (!outputData) {
throw std::logic_error("错误的格式,请检查!");
}
item.second->setPrecision(Precision::FP32);
}
// --------------------------- 4. 读取模型 ------------------------------------------(后面这些操作应该可以合并了)
ExecutableNetwork executableNetwork = plugin.LoadNetwork(network, {});
// --------------------------- 5. 创建推断 -------------------------------------------------
InferRequest infer_request = executableNetwork.CreateInferRequest();
// --------------------------- 6. 将数据塞入模型 -------------------------------------------------
Blob::Ptr lrInputBlob = infer_request.GetBlob("data"); //data这个名字是我看出来的,实际上这里可以更统一一些
matU8ToBlob<float_t>(src, lrInputBlob, 0);//重要的转换函数,第3个参数是batchSize,应该是自己+1的
// --------------------------- 7. 推断结果 -------------------------------------------------
infer_request.Infer();//多张图片多次推断
// --------------------------- 8. 处理结果-------------------------------------------------------
const Blob::Ptr outputBlob = infer_request.GetBlob(firstOutputName);
const auto outputData = outputBlob->buffer().as<PrecisionTrait<Precision::FP32>::value_type*>();
size_t numOfImages = outputBlob->getTensorDesc().getDims()[0];
size_t numOfChannels = outputBlob->getTensorDesc().getDims()[1];
h = outputBlob->getTensorDesc().getDims()[2];
w = outputBlob->getTensorDesc().getDims()[3];
size_t nunOfPixels = w * h; //写在内存里的结果,还是要拼出来的
std::vector<cv::Mat> imgPlanes{ cv::Mat(h, w, CV_32FC1, &(outputData[0])),
cv::Mat(h, w, CV_32FC1, &(outputData[nunOfPixels])),
cv::Mat(h, w, CV_32FC1, &(outputData[nunOfPixels * 2])) };
for (auto & img : imgPlanes) //本来是平的
img.convertTo(img, CV_8UC1, 255);
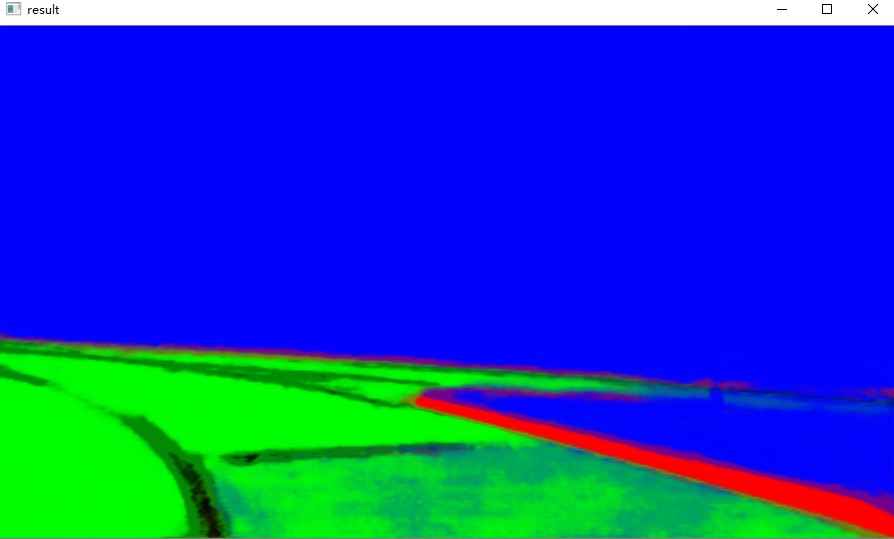
cv::Mat resultImg;
cv::merge(imgPlanes, resultImg);
cv::imshow("result", resultImg);
cv::waitKey();
}
这里需要注意的一点是在读取图片的大小的时候,我这里使用了
Blob::Ptr lrInputBlob = infer_request.GetBlob("data"); //data这个名字是我看出来的,实际上这里可以更统一一些
其前提是我知道这里叫做 data,这里可以改成更统一的方式。
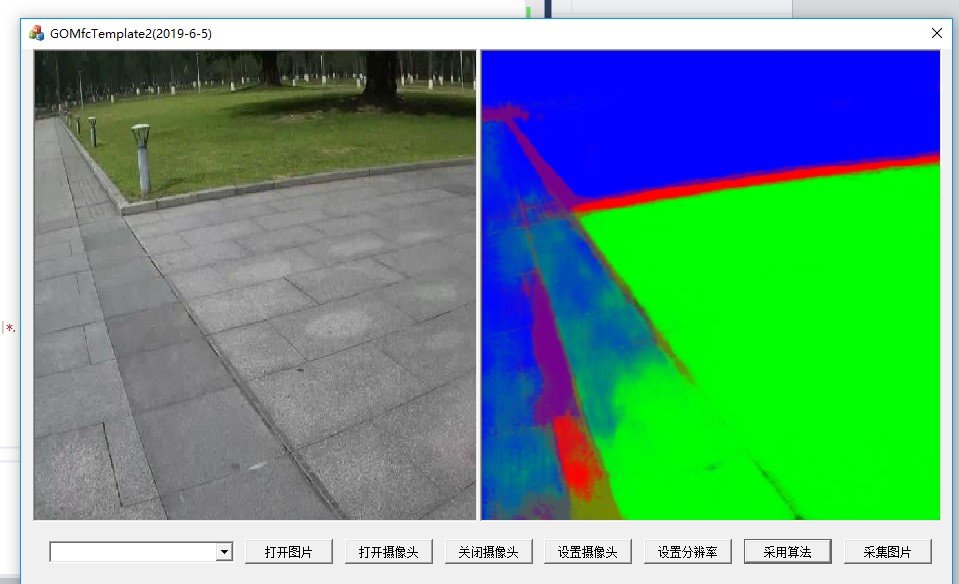
从结果来看,我认为OpenCV转换后的结果更好。当然差别只是在着色而已。
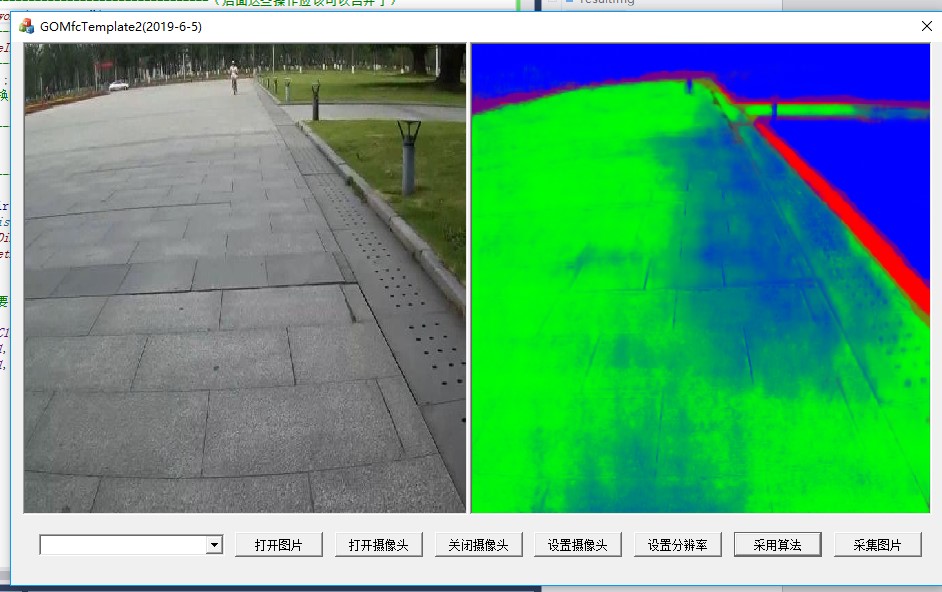
四、数据集测试
使用UAS Dataset进行测试,主要是想看一看批量数据的处理。使用Sample中的程序进行处理:
这个操作应该就是多张图片。
这个输入输出的界面就LOW了,我认为没有必要在函数中进行这个处理,函数处理单张就可以。原模型也是不支持视频的。
该造后的效果就很好
五、融合
在GOMFCTemplate中运行
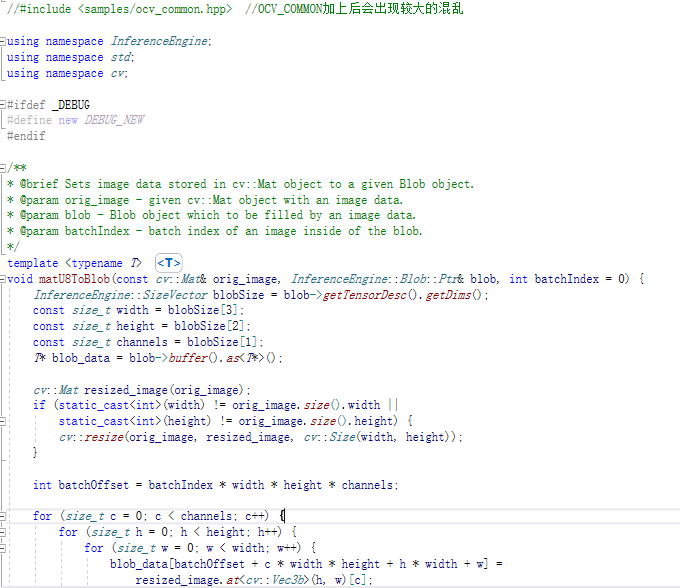
其中,容易犯错的地方(release版本和debug版本的 cpu_extension重名,所以不能放到system目录下面):
以及OCV_COMMON可能引起混乱
第一步是直接替换
目前存在的一个突出问题,就是模型的创建和模型的infer独立的问题。这个东西在OpenVINO中可能有,但要去寻找,不是直接告诉你的东西。
做到这一步,虽然代码已经可以运行,但是突出的问题就是没有模块化,整个运算步骤都在循环中,这样效率肯定是很低下的。并且在资源的销毁处还存在问题。
可以进一步将其封装为函数:
比如类似这里面的

就是下一步需要参考的。
- 编程添加"作为服务登录”权利(包括例子和API)
搜索"log on as a service programmatically" https://msdn.microsoft.com/en-us/library/windows/ ...
- 限制访问次数例子和Ajax的some
-- 限制访问次数作业解答 -- -- urls.py 里-- from django.conf.urls import url from django.contrib import admin fr ...
- lambda表达式的应用例子和JavaSE 8特性
在JavaSE 8 引入了lambda表达式,lambda表达式的引入带来的好处是:通过语法上的改进,减少开发人员需要编写和维护的代码数量.这个在下面使用和不使用lambda的对比中可以清晰看出来. ...
- vuex的简单例子和vue model组件
好久没用过vuex了,vuex官方示例的计算器counter是用的webpack打包了单文件组件,不方便回顾,今天把代码改成了html引人的方式,方便回顾 <!DOCTYPE html> ...
- threading包的例子和queue包的例子
参考:https://www.cnblogs.com/tkqasn/p/5700281.html 参考:https://www.cnblogs.com/tkqasn/p/5700281.html th ...
- python 正则的使用例子和goupby
111122333类似这字符串的分类 Solution 1 ... using a regular expression def countAndSay(self, n): s = ' for _ i ...
- python 03—字符串分割
字符串分割 例:sentenc = "I am an Englist sentenc" sentence.split() split()把字符串按照空格进行分割,所以得到的结果是 ...
- 语义分割之RefineNet
背景介绍 近来年,深度卷积网络在目标检测方面取得了一定的成绩.但对于密集预测,仍存在一定不足,原因是频繁的卷积和池化导致最终的特征分辨率降低. 针对这个问题,目前主要采用两种方法:第一种:空洞卷积,如 ...
- CVPR目标检测与实例分割算法解析:FCOS(2019),Mask R-CNN(2019),PolarMask(2020)
CVPR目标检测与实例分割算法解析:FCOS(2019),Mask R-CNN(2019),PolarMask(2020)1. 目标检测:FCOS(CVPR 2019)目标检测算法FCOS(FCOS: ...
随机推荐
- 【RAC】将单实例备份集恢复为rac数据库
[RAC]将单实例备份集恢复为rac数据库 一.1 BLOG文档结构图 一.2 前言部分 一.2.1 导读 各位技术爱好者,看完本文后,你可以掌握如下的技能,也可以学到一些其它你所不知道的知识, ...
- GNS3、Wireshark、SecureCRT 环境部署
本次GNS3环境部署教程基于官方推荐的稳定版1.5.4.初次接触此软件,详细的使用方法不是很清楚,所以以此作为学习记录,仅供参考,后期补充. 软件介绍 GNS3 GNS3是一款具有图形化界面可以运行在 ...
- asp.net core 默认采用小驼峰命名和自定义模型验证
services.AddMvc(options => { options.Filters.Add<ApiExceptionAttribute>(); }).SetCompatibil ...
- 使用TFT LCD制作Arduino触摸屏计算器
Arduino开发板总是可以帮助我们轻松地构建一个项目,并使其看起来更具有吸引力.对一个带有触摸功能的液晶显示屏进行编程听起来可能是一件复杂的工作,但是通过使用Arduino库和扩展模块可以使得这项工 ...
- CentOS7:sorry,that didn't work.please try again!
参考以下解决方案,重点是vi etc/selinux/config 把 enforcing 改为 disable 应用场景 linux管理员忘记root密码,需要进行找回操作.注意事项:本文基于cen ...
- 利用avicap32.dll实现的实时视频传输
直接上代码吧! 在窗体上调用的类: using System; using System.Collections.Generic; using System.ComponentModel; using ...
- myeclipse常用快捷(持续更新)
最近开始转用myeclipse,总结一下快捷方式:(我喜欢用的) [Ctrl+O] 显示类中方法和属性的大纲,能快速定位类的方法和属性,在查找Bug时非常有用. [Ctrl+M] 窗口最大 ...
- 学习:MessageBox API
函数功能: MessageBox 函数用于显示一个模态对话框,其中包含一个系统图标. 一组按钮和一个简短的特定于应用程序消息,如状态或错误的信息. 消息框中返回一个整数值,该值指示用户单击了哪个按钮. ...
- Kerberos身份验证流程
介绍:Kerberos 是一种由 MIT(麻省理工大学)提出的一种网络身份验证协议.它旨在通过使用密钥加密技术为客户端/服务器应用程序提供强身份验证. 在 Kerberos 认证中,最主要的问题是如何 ...
- python操作json文件获取内容
写case时,将case 写到json文件比写到,写python一定要学会处理json 以下,是要处理的json 处理操作包括:打开json文件,获取json文件内容,关闭json文件,读取内容中的对 ...