基于 SpringBoot2.0+优雅整合 SpringBoot+Mybatis
SpringBoot 整合 Mybatis 有两种常用的方式,一种就是我们常见的 xml 的方式 ,还有一种是全注解的方式。我觉得这两者没有谁比谁好,在 SQL 语句不太长的情况下,我觉得全注解的方式一定是比较清晰简洁的。但是,复杂的 SQL 确实不太适合和代码写在一起。
下面就开始吧!
目录:
一 开发前的准备
1.1 环境参数
- 开发工具:IDEA
- 基础工具:Maven+JDK8
- 所用技术:SpringBoot+Mybatis
- 数据库:MySQL
- SpringBoot版本:2.1.0
1.2 创建工程
创建一个基本的 SpringBoot 项目,我这里就不多说这方面问题了,具体可以参考下面这篇文章:
https://blog.csdn.net/qq_34337272/article/details/79563606
1.3 创建数据库和 user 用户表
我们的数据库很简单,只有 4 个字段:用户 id、姓名、年龄、余额,如下图所示:

添加了“余额money”字段是为了给大家简单的演示一下事务管理的方式。
建表语句:
CREATE TABLE `user` (

  `id` int(13) NOT NULL AUTO_INCREMENT COMMENT '主键',

  `name` varchar(33) DEFAULT NULL COMMENT '姓名',

  `age` int(3) DEFAULT NULL COMMENT '年龄',

  `money` double DEFAULT NULL COMMENT '账户余额',

  PRIMARY KEY (`id`)

) ENGINE=InnoDB AUTO_INCREMENT=5 DEFAULT CHARSET=utf8
1.4 配置 pom 文件中的相关依赖
由于要整合 springboot 和 mybatis 所以加入了artifactId 为 mybatis-spring-boot-starter 的依赖,由于使用了Mysql 数据库 所以加入了artifactId 为 mysql-connector-java 的依赖。
    <dependencies>

        <dependency>

            <groupId>org.springframework.boot</groupId>

            <artifactId>spring-boot-starter-web</artifactId>

        </dependency>

        <dependency>

            <groupId>org.mybatis.spring.boot</groupId>

            <artifactId>mybatis-spring-boot-starter</artifactId>

            <version>1.3.2</version>

        </dependency>

        <dependency>

            <groupId>mysql</groupId>

            <artifactId>mysql-connector-java</artifactId>

            <scope>runtime</scope>

        </dependency>

        <dependency>

            <groupId>org.springframework.boot</groupId>

            <artifactId>spring-boot-starter-test</artifactId>

            <scope>test</scope>

        </dependency>

    </dependencies>
1.5 配置 application.properties
由于我使用的是比较新的Mysql连接驱动,所以配置文件可能和之前有一点不同。
server.port=8333

spring.datasource.url=jdbc:mysql://127.0.0.1:3306/erp?useUnicode=true&characterEncoding=utf8&useSSL=false&serverTimezone=GMT%2B8

spring.datasource.username=root

spring.datasource.password=153963

spring.datasource.driver-class-name=com.mysql.cj.jdbc.Driver
注意:我们使用的 mysql-connector-java 8+ ,JDBC 连接到mysql-connector-java 6+以上的需要指定时区 serverTimezone=GMT%2B8。另外我们之前使用配置 Mysql数据连接是一般是这样指定driver-class-name=com.mysql.jdbc.Driver,但是现在不可以必须为 否则控制台下面的异常:
Loading class `com.mysql.jdbc.Driver'. This is deprecated. The new driver class is `com.mysql.cj.jdbc.Driver'. The driver is automatically registered via the SPI and manual loading of the driver class is generally unnecessary.
上面异常的意思是:com.mysql.jdbc.Driver 被弃用了。新的驱动类是 com.mysql.cj.jdbc.Driver。驱动程序通过SPI自动注册,手动加载类通常是不必要。
如果你非要写把com.mysql.jdbc.Driver 改为com.mysql.cj.jdbc.Driver 即可。
1.6 创建用户类 Bean
public class User {

    private int id;

    private String name;

    private int age;

    private double money;

    ...

    此处省略getter、setter以及 toString方法

}
二 全注解的方式
先来看一下 全注解的方式,这种方式和后面提到的 xml 的方式的区别仅仅在于 一个将 sql 语句写在 java 代码中,一个写在 xml 配置文件中。全注方式解转换成 xml 方式仅需做一点点改变即可,我在后面会提到。
项目结构:
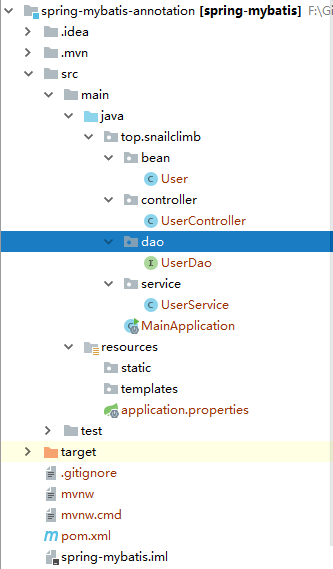
2.1 Dao 层开发
UserDao.java
@Mapper

public interface UserDao {

    /**

     * 通过名字查询用户信息

     */

    @Select("SELECT * FROM user WHERE name = #{name}")

    User findUserByName(@Param("name") String name);

    /**

     * 查询所有用户信息

     */

    @Select("SELECT * FROM user")

    List<User> findAllUser();

    /**

     * 插入用户信息

     */

    @Insert("INSERT INTO user(name, age,money) VALUES(#{name}, #{age}, #{money})")

    void insertUser(@Param("name") String name, @Param("age") Integer age, @Param("money") Double money);

    /**

     * 根据 id 更新用户信息

     */

    @Update("UPDATE  user SET name = #{name},age = #{age},money= #{money} WHERE id = #{id}")

    void updateUser(@Param("name") String name, @Param("age") Integer age, @Param("money") Double money,

                    @Param("id") int id);

    /**

     * 根据 id 删除用户信息

     */

    @Delete("DELETE from user WHERE id = #{id}")

    void deleteUser(@Param("id") int id);

}
2.2 service 层
@Service

public class UserService {

    @Autowired

    private UserDao userDao;

    /**

     * 根据名字查找用户

     */

    public User selectUserByName(String name) {

        return userDao.findUserByName(name);

    }

    /**

     * 查找所有用户

     */

    public List<User> selectAllUser() {

        return userDao.findAllUser();

    }

    /**

     * 插入两个用户

     */

    public void insertService() {

        userDao.insertUser("SnailClimb", 22, 3000.0);

        userDao.insertUser("Daisy", 19, 3000.0);

    }

    /**

     * 根据id 删除用户

     */

    public void deleteService(int id) {

        userDao.deleteUser(id);

    }

    /**

     * 模拟事务。由于加上了 @Transactional注解,如果转账中途出了意外 SnailClimb 和 Daisy 的钱都不会改变。

     */

    @Transactional

    public void changemoney() {

        userDao.updateUser("SnailClimb", 22, 2000.0, 3);

        // 模拟转账过程中可能遇到的意外状况

        int temp = 1 / 0;

        userDao.updateUser("Daisy", 19, 4000.0, 4);

    }

}
2.3 Controller 层
@RestController

@RequestMapping("/user")

public class UserController {

    @Autowired

    private UserService userService;

    @RequestMapping("/query")

    public User testQuery() {

        return userService.selectUserByName("Daisy");

    }

    @RequestMapping("/insert")

    public List<User> testInsert() {

        userService.insertService();

        return userService.selectAllUser();

    }

    @RequestMapping("/changemoney")

    public List<User> testchangemoney() {

        userService.changemoney();

        return userService.selectAllUser();

    }

    @RequestMapping("/delete")

    public String testDelete() {

        userService.deleteService(3);

        return "OK";

    }

}
2.4 启动类
//此注解表示SpringBoot启动类

@SpringBootApplication

// 此注解表示动态扫描DAO接口所在包,实际上不加下面这条语句也可以找到

@MapperScan("top.snailclimb.dao")

public class MainApplication {

    public static void main(String[] args) {

        SpringApplication.run(MainApplication.class, args);

    }

}
2.5 简单测试
上述代码经过测试都没问题,这里贴一下根据姓名查询的测试的结果。

三 xml 的方式
项目结构:

相比于注解的方式主要有以下几点改变,非常容易实现。
3.1 Dao 层的改动
我这里只演示一个根据姓名找人的方法。
UserDao.java
@Mapper

public interface UserDao {

    /**

     * 通过名字查询用户信息

     */

    User findUserByName(String name);

}
UserMapper.xml
<?xml version="1.0" encoding="UTF-8"?>

<!DOCTYPE mapper PUBLIC "-//mybatis.org//DTD Mapper 3.0//EN"

        "http://mybatis.org/dtd/mybatis-3-mapper.dtd">

<mapper namespace="top.snailclimb.dao.UserDao">

    <select id="findUserByName" parameterType="String" resultType="top.snailclimb.bean.User">

        SELECT * FROM user WHERE name = #{name}

    </select>

</mapper>
3.2 配置文件的改动
配置文件中加入下面这句话:
mybatis.mapper-locations=classpath:mapper/*.xml
基于 SpringBoot2.0+优雅整合 SpringBoot+Mybatis的更多相关文章
- SpringBoot(十一):springboot2.0.2下配置mybatis generator环境,并自定义字段/getter/settetr注释
Mybatis Generator是供开发者在mybatis开发时,快速构建mapper xml,mapper类,model类的一个插件工具.它相对来说对开发者是有很大的帮助的,但是它也有不足之处,比 ...
- springboot2.0+mysql整合mybatis,发现查询出来的时间比数据库datetime值快了8小时
参考:https://blog.csdn.net/lx12345_/article/details/82020858 修改后查询数据正常
- 零基础IDEA整合SpringBoot + Mybatis项目,及常见问题详细解答
开发环境介绍:IDEA + maven + springboot2.1.4 1.用IDEA搭建SpringBoot项目:File - New - Project - Spring Initializr ...
- 使用RESTful风格整合springboot+mybatis
说明: 本文是springboot和mybatis的整合,Controller层使用的是RESTful风格,数据连接池使用的是c3p0,通过postman进行测试 项目结构如下: 1.引入pom.xm ...
- SpringBoot2.0之整合Kafka
maven依赖: <project xmlns="http://maven.apache.org/POM/4.0.0" xmlns:xsi="http://www. ...
- SpringBoot2.0之整合ElasticSearch
就类比数据库到时候去实现 服务器端配置 集群名字 与yml名字一致 pom: <project xmlns="http://maven.apache.org/POM/4.0.0&qu ...
- SpringBoot2.0之整合ActiveMQ(发布订阅模式)
发布订阅模式与前面的点对点模式很类似,简直一毛一样 注意:发布订阅模式 先启动消费者 公用pom: <project xmlns="http://maven.apache.org/PO ...
- SpringBoot2.0之整合ActiveMQ(点对点模式)
<project xmlns="http://maven.apache.org/POM/4.0.0" xmlns:xsi="http://www.w3.org/20 ...
- SpringBoot2.0之整合Dubbo
Dubbo支持协议 Dubbo支持dubbo.rmi.hessian.http.webservice.thrift.redis等多种协议,但是Dubbo官网是推荐我们使用Dubbo协议的. Sprin ...
随机推荐
- typora安装自定义主题小计
我写MarkDown一直使用VSCode,后来因为有导出PDF的需求,就用了typora(含书签) PS:VSCode的导出PDF虽然也可以,但不含书签 typora的默认主题是github,虽然还可 ...
- C# 获取所有可用的打印机
C# 获取所有安装了的打印机代码如下: using System.Drawing.Printing; var printers = PrinterSettings.InstalledPrinters; ...
- Java生成前三位是字母循环的字典
title: Java生成前三位是字母循环的字典 date: 2018-08-17 18:52:22 tags: Java --- 最近要破解一个秘密,还好这个密码是有线索的,已知密码的前三位是三个字 ...
- QTableWidget表格属性
ui->tableWidget->setEditTriggers(QAbstractItemView::NoEditTriggers); //设置不可编辑 ui->tableWidg ...
- Kaldi语音识别快速入门
一.简介 Kaldi是使用C++编写的语音识别工具包,Apache License v2.0许可.主要供语音识别研究人员使用.Kaldi的目标和范围与HTK类似.目标是拥有易于修改和扩展的现代而灵活的 ...
- Jenkins+GitLab+Ansible-playbook的环境安装(yum)
1.安装GitLab 1.1 配置gitlab的yum源 # 参考:https://packages.gitlab.com/gitlab/gitlab-ce/install#bash-rpm curl ...
- Nginx 核心配置-自定义错误页面
Nginx 核心配置-自定义错误页面 作者:尹正杰 版权声明:原创作品,谢绝转载!否则将追究法律责任. 生产环境中错误页面一般都是UI或开发工程师提供的,他们已经在软件中定义好了,我们这里就简单写个h ...
- Resin开放远程调试端口
Resin开放远程调试端口在启动加载的resin.xml中,找到 <server-default>, 在其下加入 <jvm-arg>-Xdebug</jvm-arg&g ...
- Codeforces A. Playlist(暴力剪枝)
题目描述: Playlist time limit per test 2 seconds memory limit per test 256 megabytes input standard inpu ...
- mysql 单表,多表,符合条件,子查询
单表: HAVING过滤 二次筛选 只能是group by 之后的字段 1.查询各岗位内包含的员工个数小于2的岗位名.岗位内包含员工名字.个数 select post,group_concat(nam ...