centos 7 安装 Docker Engine-CentOS 社区版
获取Docker Engine-CentOS社区: https://docs.docker.com/install/linux/docker-ce/centos/
1.操作系统要求
1.1 要安装 Docker Engine-Community ,您需要一个 CentOS 7 的维护版本.不支持或未测试存档版本.
1.2 该 centos-extras 库必须启用.默认情况下,此存储库是启用的,但是如果已禁用它,则需要 重新启用它.
1.3 overlay2 建议使用存储驱动程序.
< centos-extras >
CentOS Extras-在 CentOS 5 和 6 中,为CentOS提供附加功能而不破坏上游兼容性或更新基本组件的软件包,但未经上游测试或上游产品中没有提供.

在 CentOS 7 中,这是一个上游存储库,以及其他CentOS软件包.CentOS 开发团队已经测试了该存储库中的每个项目,并且它们都与 CentOS 一起使用.

该存储库随CentOS一起提供,并且默认情况下处于启用状态.
------------------------------------------------------------------------------------------

开启 CentOS Extra

路径 /etc/yum.repos.d

文件 CentOS-Base.repo

[extras] //extras 模块

enabled= //编辑把 "0" 修改为 "1" ,没有enabled=0或1,建议添加 enabled=1 启动 extras 软件模块仓库
#软件仓库被配置成 enabled=0 时,yum 在安装或升级软件包时不会将该仓库做为软件包提供源.

------------------------------------------------------------------------------------------
[root@localhost yum.repos.d]# (cat -n CentOS-Base.repo;pwd)

       # CentOS-Base.repo

       #

       # The mirror system uses the connecting IP address of the client and the

       # update status of each mirror to pick mirrors that are updated to and

       # geographically close to the client.  You should use this for CentOS updates

       # unless you are manually picking other mirrors.

       #

       # If the mirrorlist= does not work for you, as a fall back you can try the

       # remarked out baseurl= line instead.

      #

      #

      [base]

      name=CentOS-$releasever - Base

      mirrorlist=http://mirrorlist.centos.org/?release=$releasever&arch=$basearch&repo=os&infra=$infra

      #baseurl=http://mirror.centos.org/centos/$releasever/os/$basearch/

      gpgcheck=

      gpgkey=file:///etc/pki/rpm-gpg/RPM-GPG-KEY-CentOS-7

      #released updates

      [updates]

      name=CentOS-$releasever - Updates

      mirrorlist=http://mirrorlist.centos.org/?release=$releasever&arch=$basearch&repo=updates&infra=$infra

      #baseurl=http://mirror.centos.org/centos/$releasever/updates/$basearch/

      gpgcheck=

      gpgkey=file:///etc/pki/rpm-gpg/RPM-GPG-KEY-CentOS-7

      #additional packages that may be useful

      [extras]

      name=CentOS-$releasever - Extras

      mirrorlist=http://mirrorlist.centos.org/?release=$releasever&arch=$basearch&repo=extras&infra=$infra

      #baseurl=http://mirror.centos.org/centos/$releasever/extras/$basearch/

      gpgcheck=

      enabled=

      gpgkey=file:///etc/pki/rpm-gpg/RPM-GPG-KEY-CentOS-7

      #additional packages that extend functionality of existing packages

      [centosplus]

      name=CentOS-$releasever - Plus

      mirrorlist=http://mirrorlist.centos.org/?release=$releasever&arch=$basearch&repo=centosplus&infra=$infra

      #baseurl=http://mirror.centos.org/centos/$releasever/centosplus/$basearch/

      gpgcheck=

      enabled=

      gpgkey=file:///etc/pki/rpm-gpg/RPM-GPG-KEY-CentOS-7

/etc/yum.repos.d
2.卸载旧版本
sudo yum remove docker \

docker-client \

docker-client-latest \

docker-common \

docker-latest \

docker-latest-logrotate \

docker-logrotate \

docker-engine
较旧的Docker版本称为docker或docker-engine.如果已安装这些程序,请卸载它们以及相关的依赖项.
[root@localhost ~]# sudo yum remove docker \

> docker-client \

> docker-client-latest \

> docker-common \

> docker-latest \

> docker-latest-logrotate \

> docker-logrotate \

> docker-engine
3.使用存储库安装
在新主机上首次安装Docker Engine-Community之前,需要设置Docker存储库.之后,您可以从存储库安装和更新Docker.
设置存储库
3.1 安装所需的软件包.yum-utils提供了yum-config-manager 效用,并device-mapper-persistent-data和lvm2由需要 devicemapper存储驱动程序.
sudo yum install -y yum-utils \

device-mapper-persistent-data \

lvm2
[root@localhost ~]# sudo yum install -y yum-utils \

> device-mapper-persistent-data \

> lvm2
3.2 使用以下命令来设置稳定的存储库.
sudo yum-config-manager \

--add-repo \

https://download.docker.com/linux/centos/docker-ce.repo
[root@localhost ~]# sudo yum-config-manager \

> --add-repo \

> https://download.docker.com/linux/centos/docker-ce.repo
4.安装 DOCKER ENGINE-CentOS 社区版
安装最新版本的Docker Engine-Community和containerd,或者转到下一步安装特定版本:
sudo yum install -y docker-ce docker-ce-cli containerd.io
[root@localhost ~]# sudo yum install -y docker-ce docker-ce-cli containerd.io
如果提示您接受GPG密钥,请验证指纹是否匹配 060A 61C5 1B55 8A7F 742B 77AA C52F EB6B 621E 9F35,如果是,则接受它.
5.有多个Docker存储库吗?
如果启用了多个Docker存储库,则在未在yum installor yum update命令中指定版本的情况下进行安装或更新将始终安装可能的最高版本,这可能不适合您的稳定性需求.
Docker已安装但尚未启动.docker创建该组,但没有用户添加到该组.
要安装特定版本的Docker Engine-Community,请在存储库中列出可用版本,然后选择并安装:
一种.列出并排序您存储库中可用的版本.此示例按版本号(从高到低)对结果进行排序,并被截断:
yum list docker-ce --showduplicates | sort -r
[root@localhost ~]# yum list docker-ce --showduplicates | sort -r

 * updates: mirrors.aliyun.com

Loading mirror speeds from cached hostfile

Loaded plugins: fastestmirror

Installed Packages

 * extras: mirrors.aliyun.com

 * epel: hkg.mirror.rackspace.com

docker-ce.x86_64            :19.03.-.el7                    docker-ce-stable

docker-ce.x86_64            :19.03.-.el7                    @docker-ce-stable

docker-ce.x86_64            :19.03.-.el7                    docker-ce-stable

docker-ce.x86_64            :19.03.-.el7                    docker-ce-stable

docker-ce.x86_64            :19.03.-.el7                    docker-ce-stable

docker-ce.x86_64            :18.09.-.el7                    docker-ce-stable

docker-ce.x86_64            :18.09.-.el7                    docker-ce-stable

docker-ce.x86_64            :18.09.-.el7                    docker-ce-stable

docker-ce.x86_64            :18.09.-.el7                    docker-ce-stable

docker-ce.x86_64            :18.09.-.el7                    docker-ce-stable

docker-ce.x86_64            :18.09.-.el7                    docker-ce-stable

docker-ce.x86_64            :18.09.-.el7                    docker-ce-stable

docker-ce.x86_64            :18.09.-.el7                    docker-ce-stable

docker-ce.x86_64            :18.09.-.el7                    docker-ce-stable

docker-ce.x86_64            :18.09.-.el7                    docker-ce-stable

docker-ce.x86_64            18.06..ce-.el7                   docker-ce-stable

docker-ce.x86_64            18.06..ce-.el7                   docker-ce-stable

docker-ce.x86_64            18.06..ce-.el7                   docker-ce-stable

docker-ce.x86_64            18.06..ce-.el7                   docker-ce-stable

docker-ce.x86_64            18.03..ce-.el7.centos            docker-ce-stable

docker-ce.x86_64            18.03..ce-.el7.centos            docker-ce-stable

docker-ce.x86_64            17.12..ce-.el7.centos            docker-ce-stable

docker-ce.x86_64            17.12..ce-.el7.centos            docker-ce-stable

docker-ce.x86_64            17.09..ce-.el7.centos            docker-ce-stable

docker-ce.x86_64            17.09..ce-.el7.centos            docker-ce-stable

docker-ce.x86_64            17.06..ce-.el7.centos            docker-ce-stable

docker-ce.x86_64            17.06..ce-.el7.centos            docker-ce-stable

docker-ce.x86_64            17.06..ce-.el7.centos            docker-ce-stable

docker-ce.x86_64            17.03..ce-.el7                   docker-ce-stable

docker-ce.x86_64            17.03..ce-.el7.centos            docker-ce-stable

docker-ce.x86_64            17.03..ce-.el7.centos            docker-ce-stable

docker-ce.x86_64            17.03..ce-.el7.centos            docker-ce-stable

 * base: mirrors.aliyun.com

Available Packages
返回的列表取决于启用的存储库,并且特定于您的CentOS版本(.el7在此示例中以后缀表示)
通过其完全合格的软件包名称安装特定版本,该软件包名称是软件包名称(docker-ce)加上版本字符串(第二列),从第一个冒号(:)一直到第一个连字符,并用连字符(-)分隔.例如,docker-ce-18.09.1
sudo yum install -y docker-ce-<VERSION_STRING> docker-ce-cli-<VERSION_STRING> containerd.io
Docker已安装但尚未启动.
6.启动Docker
[root@localhost ~]# sudo systemctl start docker
7.检查Docker进程
[root@localhost ~]# pgrep -l docker

 dockerd
8.通过运行 hello-world 映像来验证是否正确安装了Docker Engine-Community.
[root@localhost ~]# sudo docker run hello-world

Unable to find image 'hello-world:latest' locally

latest: Pulling from library/hello-world

1b930d010525: Pull complete

Digest: sha256:c3b4ada4687bbaa170745b3e4dd8ac3f194ca95b2d0518b417fb47e5879d9b5f

Status: Downloaded newer image for hello-world:latest

Hello from Docker!

This message shows that your installation appears to be working correctly.

To generate this message, Docker took the following steps:

 . The Docker client contacted the Docker daemon.

 . The Docker daemon pulled the "hello-world" image from the Docker Hub.

    (amd64)

 . The Docker daemon created a new container from that image which runs the

    executable that produces the output you are currently reading.

 . The Docker daemon streamed that output to the Docker client, which sent it

    to your terminal.

To try something more ambitious, you can run an Ubuntu container with:

 $ docker run -it ubuntu bash

Share images, automate workflows, and more with a free Docker ID:

 https://hub.docker.com/

For more examples and ideas, visit:

 https://docs.docker.com/get-started/
运行命令下载测试图像并在容器中运行。容器运行时,它会打印参考消息并退出.
Docker Engine-Community已安装并正在运行.
您需要使用sudo来运行Docker命令.继续进行Linux后安装,以允许非特权用户运行Docker命令以及其他可选配置步骤.
Docker创建该组,但没有用户添加到该组.
.创建用户名

[root@localhost ~]# useradd wwweee000

[root@localhost ~]# passwd wwweee000

Changing password for user wwweee000.

New password:

BAD PASSWORD: The password is a palindrome

Retype new password:

passwd: all authentication tokens updated successfully.

.创建docker用户组名

[root@localhost ~]# sudo groupadd docker

groupadd: group 'docker' already exists

. 应用wwweee000用户加入docker用户组

[root@localhost ~]# sudo usermod -aG docker wwweee000

. 切换或者退出当前账户再从新登入

su root             切换到root用户

su wwweee000        再切换到原来的应用用户以上配置才生效

[root@localhost ~]# vi /etc/sudoers

root    ALL=(ALL)         ALL

wwweee000    ALL=(ALL)         ALL

[root@localhost ~]# cat -n /etc/sudoers | grep "root\|wwweee000"

       ## the root user, without needing the root password.

      ## Allow root to run any commands anywhere

     root    ALL=(ALL)       ALL

     wwweee000    ALL=(ALL)       ALL

     ## cdrom as root

[root@localhost ~]# chmod u+w /etc/sudoers

[root@localhost ~]# newgrp docker

[root@localhost ~]# sudo systemctl restart docker

[root@localhost ~]# su wwweee000

[wwweee000@localhost root]$ cd

[wwweee000@localhost ~]$ docker run hello-world

Hello from Docker!

This message shows that your installation appears to be working correctly.

To generate this message, Docker took the following steps:

 . The Docker client contacted the Docker daemon.

 . The Docker daemon pulled the "hello-world" image from the Docker Hub.

    (amd64)

 . The Docker daemon created a new container from that image which runs the

    executable that produces the output you are currently reading.

 . The Docker daemon streamed that output to the Docker client, which sent it

    to your terminal.

To try something more ambitious, you can run an Ubuntu container with:

 $ docker run -it ubuntu bash

Share images, automate workflows, and more with a free Docker ID:

 https://hub.docker.com/

For more examples and ideas, visit:

 https://docs.docker.com/get-started/

[wwweee000@localhost ~]$ su root

Password:

[root@localhost wwweee000]# cd

[root@localhost ~]#

说明:

这里说下你可以sudoers添加下面四行中任意一条

youuser ALL=(ALL) ALL

%youuser ALL=(ALL) ALL

youuser ALL=(ALL) NOPASSWD: ALL

%youuser ALL=(ALL) NOPASSWD: ALL

第一行:允许用户youuser执行sudo命令(需要输入密码).

第二行:允许用户组youuser里面的用户执行sudo命令(需要输入密码).

第三行:允许用户youuser执行sudo命令,并且在执行的时候不输入密码.

第四行:允许用户组youuser里面的用户执行sudo命令,并且在执行的时候不输入密码.

撤销sudoers文件写权限,命令: chmod u-w /etc/sudoers
----------------------------------------------------------------------------------------------------------------------------------------------------------
------------------------------------------------------------------安装完成 ---------------------------------------------------------------------------
----------------------------------------------------------------------------------------------------------------------------------------------------------
----------------------------------------------------------------------------------------------------------------------------------------------------------
1.从软件包安装(参考)
如果无法使用Docker的存储库安装Docker,则可以下载该.rpm发行版的 文件并手动安装.
每次升级Docker Engine-Community时,都需要下载一个新文件.
转到 https://download.docker.com/linux/centos/7/x86_64/stable/Packages/ 并下载.rpm要安装的Docker版本的文件.
注意:要安装夜间 或测试(预发布)软件包,stable 请将上述URL中的单词更改为nightly或test. 了解每晚和测试频道.
安装 Docker Engine-Community ,将下面的路径更改为您下载Docker软件包的路径.
[root@localhost ~]# sudo yum install /path/to/package.rpm
Docker已安装但尚未启动.docker创建该组,但没有用户添加到该组.
启动Docker.
[root@localhost ~]# sudo systemctl start docker
通过运行hello-world 映像来验证是否正确安装了 Docker Engine-Community .
[root@localhost ~]# sudo docker run hello-world
运行命令下载测试图像并在容器中运行.容器运行时,它会打印参考消息并退出.
Docker Engine-Community已安装并正在运行.您需要使用sudo来运行Docker命令.
继续执行Linux的安装后步骤,以允许非特权用户运行Docker命令以及其他可选配置步骤.
升级DOCKER引擎-社区
要升级Docker Engine-Community,请下载更新的软件包文件,然后使用 代替,并指向新文件,重复 安装过程.
[root@localhost ~]# yum -y upgradeyum -y install
2.使用便捷脚本进行安装(参考)
Docker在get.docker.com 和test.docker.com上提供了方便脚本,用于将Docker Engine-Community的边缘版本和测试版本快速且非交互地安装到开发环境中.
脚本的源代码在 docker-install存储库中.
不建议在生产环境中使用这些脚本,在使用它们之前,您应该了解潜在的风险:
脚本需要运行root或具有sudo特权.因此,在运行脚本之前,应仔细检查和审核脚本.
这些脚本尝试检测Linux发行版和版本,并为您配置软件包管理系统.此外,脚本不允许您自定义任何安装参数.
从Docker的角度或您自己组织的准则和标准的角度来看,这可能导致不支持的配置.
这些脚本将安装软件包管理器的所有依赖项和建议,而无需进行确认.这可能会安装大量软件包,具体取决于主机的当前配置.
该脚本未提供用于指定要安装哪个版本的Docker的选项,而是安装了在“ edge”通道中发布的最新版本.
如果已使用其他机制将Docker安装在主机上,请不要使用便捷脚本.
本示例使用get.docker.com上的脚本在Linux上安装最新版本的Docker Engine-Community.
要安装最新的测试版本,请改用test.docker.com.在下面的每个命令,取代每次出现get用test.
警告:
在本地运行之前,请务必检查从Internet下载的脚本.
[root@localhost ~]# curl -fsSL https://get.docker.com -o get-docker.sh

[root@localhost ~]# sudo sh get-docker.sh

<output truncated>
如果要使用Docker作为非root用户,则现在应考虑使用类似以下方式将用户添加到“ docker”组:
[root@localhost ~]# sudo usermod -aG docker wwweee000
请记住注销并重新登录才能生效!
警告:
将用户添加到“docker”组后,他们可以运行容器,该容器可用于获取Docker主机上的根特权.
Docker Engine-CentOS社区已安装.它会自动在DEB基于发布的版本上启动.
在 RPM 基于发行版的系统上,您需要使用相应的systemctl或service命令手动启动它 .
如消息所示,默认情况下,非root用户无法运行Docker命令.
使用便捷脚本后升级DOCKER
如果使用便捷脚本安装了Docker ,则应直接使用包管理器升级 Docker.
重新运行便利程序脚本没有任何好处,并且如果尝试重新添加已经添加到主机的存储库,则可能导致问题.
卸载Docker Engine-社区
卸载Docker软件包:
[root@localhost ~]# sudo yum remove docker-ce
主机上的映像,容器,卷或自定义配置文件不会自动删除.要删除所有图像,容器和卷:
[root@localhost ~]# sudo rm -rf /var/lib/docker
您必须手动删除所有已编辑的配置文件.
----------------------------------------------------------------------------------------------------------------------------------------------------------
---------------------------------------------overlay2 建议使用存储驱动程序.------------------------------------------------------------------
----------------------------------------------------------------------------------------------------------------------------------------------------------
----------------------------------------------------------------------------------------------------------------------------------------------------------
.docker默认的存储目录是/var/lib/docker
[root@localhost ~]# ls -lh /var/lib/docker
total .0K
drwx------ root root Oct : builder
drwx--x--x root root Oct : buildkit
drwx------ root root .0K Oct : containers
drwx------ root root Oct : image
drwxr-x--- root root Oct : network
drwx------ root root .0K Oct : overlay2
drwx------ root root Oct : plugins
drwx------ root root Oct : runtimes
drwx------ root root Oct : swarm
drwx------ root root Oct : tmp
drwx------ root root Oct : trust
drwx------ root root Oct : volumes .启动nginx容器
[root@localhost ~]# docker run -d nginx //会下载nginx镜像并运行一个nginx镜像容器进程
Unable to find image 'nginx:latest' locally
latest: Pulling from library/nginx
b8f262c62ec6: Pull complete
e9218e8f93b1: Pull complete
7acba7289aa3: Pull complete
Digest: sha256:aeded0f2a861747f43a01cf1018cf9efe2bdd02afd57d2b11fcc7fcadc16ccd1
Status: Downloaded newer image for nginx:latest
c6970c0f854135f75998ed1bdc0c7cc2ebea86acd3fe02451063cde641b8a4d1 .查找 Docker Hub 上的 nginx 镜像
[root@localhost ~]# docker search nginx
NAME DESCRIPTION STARS OFFICIAL AUTOMATED
nginx Official build of Nginx. [OK]
jwilder/nginx-proxy Automated Nginx reverse proxy for docker con… [OK]
richarvey/nginx-php-fpm Container running Nginx + PHP-FPM capable of… [OK]
linuxserver/nginx An Nginx container, brought to you by LinuxS…
bitnami/nginx Bitnami nginx Docker Image [OK]
tiangolo/nginx-rtmp Docker image with Nginx using the nginx-rtmp… [OK]
nginxdemos/hello NGINX webserver that serves a simple page co… [OK]
jlesage/nginx-proxy-manager Docker container for Nginx Proxy Manager [OK]
jc21/nginx-proxy-manager Docker container for managing Nginx proxy ho…
nginx/nginx-ingress NGINX Ingress Controller for Kubernetes
privatebin/nginx-fpm-alpine PrivateBin running on an Nginx, php-fpm & Al… [OK]
schmunk42/nginx-redirect A very simple container to redirect HTTP tra… [OK]
blacklabelops/nginx Dockerized Nginx Reverse Proxy Server. [OK]
centos/nginx--centos7 Platform for running nginx 1.8 or building n…
centos/nginx--centos7 Platform for running nginx 1.12 or building …
nginxinc/nginx-unprivileged Unprivileged NGINX Dockerfiles
nginx/nginx-prometheus-exporter NGINX Prometheus Exporter
sophos/nginx-vts-exporter Simple server that scrapes Nginx vts stats a… [OK]
1science/nginx Nginx Docker images that include Consul Temp… [OK]
mailu/nginx Mailu nginx frontend [OK]
pebbletech/nginx-proxy nginx-proxy sets up a container running ngin… [OK]
travix/nginx NGinx reverse proxy [OK]
ansibleplaybookbundle/nginx-apb An APB to deploy NGINX [OK]
centos/nginx--centos7 Platform for running nginx 1.10 or building …
wodby/nginx Generic nginx [OK] .拉取官方的镜像
[root@localhost ~]# docker pull nginx
Using default tag: latest
latest: Pulling from library/nginx
Digest: sha256:aeded0f2a861747f43a01cf1018cf9efe2bdd02afd57d2b11fcc7fcadc16ccd1
Status: Image is up to date for nginx:latest
docker.io/library/nginx:latest .查到本地镜像列表里 REPOSITORY 为 nginx 的镜像
[root@localhost ~]# docker images nginx
REPOSITORY TAG IMAGE ID CREATED SIZE
nginx latest f949e7d76d63 weeks ago 126MB .查看网卡信息(多了个docker0网卡)
[root@localhost ~]# ip a
: lo: <LOOPBACK,UP,LOWER_UP> mtu qdisc noqueue state UNKNOWN group default qlen
link/loopback ::::: brd :::::
inet 127.0.0.1/ scope host lo
valid_lft forever preferred_lft forever
inet6 ::/ scope host
valid_lft forever preferred_lft forever
: ens33: <BROADCAST,MULTICAST,UP,LOWER_UP> mtu qdisc pfifo_fast state UP group default qlen
link/ether :0c::f2:3d:bf brd ff:ff:ff:ff:ff:ff
inet 192.168.1.3/ brd 192.168.1.255 scope global noprefixroute ens33
valid_lft forever preferred_lft forever
inet6 fe80::9a8:d0da:266f:5ac7/ scope link noprefixroute
valid_lft forever preferred_lft forever
: docker0: <NO-CARRIER,BROADCAST,MULTICAST,UP> mtu qdisc noqueue state DOWN group default
link/ether ::::de:d4 brd ff:ff:ff:ff:ff:ff
inet 172.17.0.1/ brd 172.17.255.255 scope global docker0
valid_lft forever preferred_lft forever
inet6 fe80:::32ff:fe18:ded4/ scope link
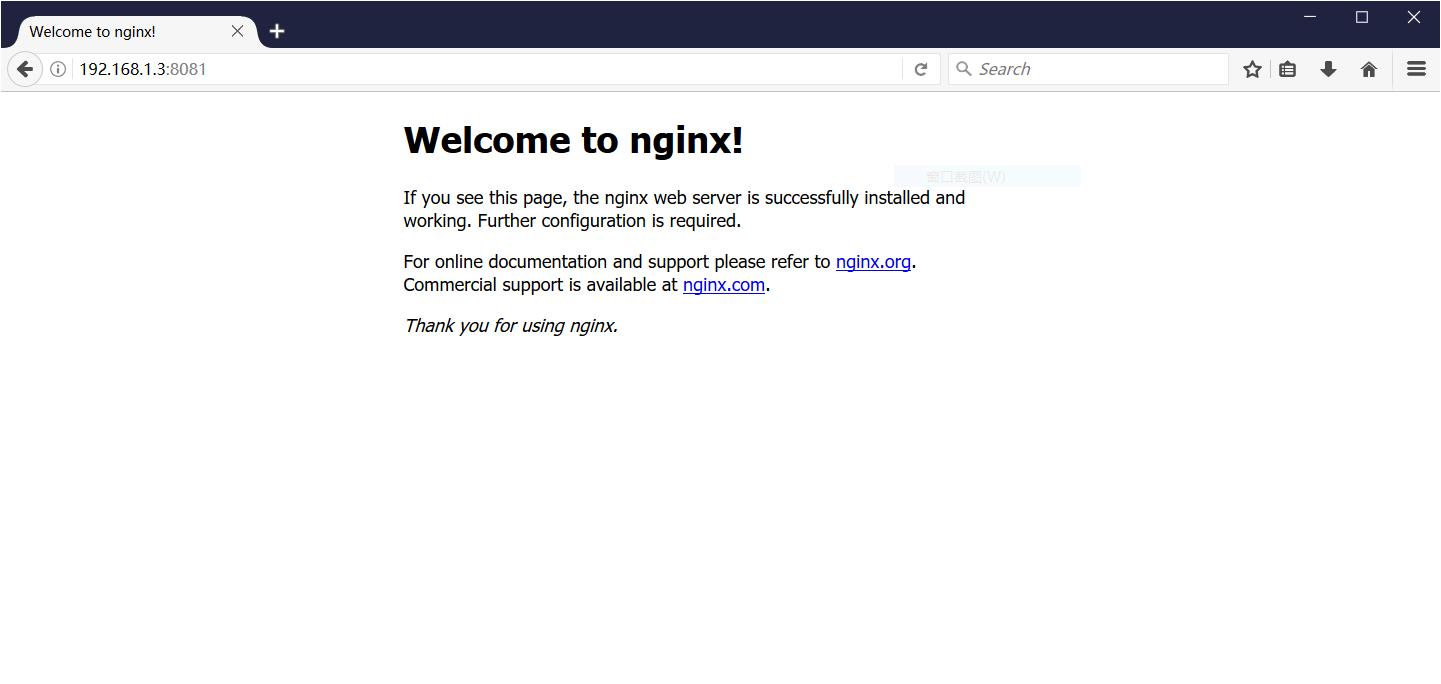
valid_lft forever preferred_lft forever .启动一个 Nginx 容器 [root@localhost ~]# docker run --name nginx_name -p : -d nginx
cd5b2b7338504b1e0a5dc074b796e37b4959fd93ec5260c14f0b3284929c1396 nginx_name 容器名称设置不要使用-
the -d设置容器在在后台一直运行
the -p 端口进行映射,将本地 端口映射到容器内部的 端口
7c82f5afa73e2d8d031ed95d109b4e1cd7e39292591a3dd9dd94caeb772079b1 为容器的 ID [root@localhost ~]# ip a
: lo: <LOOPBACK,UP,LOWER_UP> mtu qdisc noqueue state UNKNOWN group default qlen
link/loopback ::::: brd :::::
inet 127.0.0.1/ scope host lo
valid_lft forever preferred_lft forever
inet6 ::/ scope host
valid_lft forever preferred_lft forever
: ens33: <BROADCAST,MULTICAST,UP,LOWER_UP> mtu qdisc pfifo_fast state UP group default qlen
link/ether :0c::f2:3d:bf brd ff:ff:ff:ff:ff:ff
inet 192.168.1.3/ brd 192.168.1.255 scope global noprefixroute ens33
valid_lft forever preferred_lft forever
inet6 fe80::9a8:d0da:266f:5ac7/ scope link noprefixroute
valid_lft forever preferred_lft forever
: docker0: <BROADCAST,MULTICAST,UP,LOWER_UP> mtu qdisc noqueue state UP group default
link/ether ::::de:d4 brd ff:ff:ff:ff:ff:ff
inet 172.17.0.1/ brd 172.17.255.255 scope global docker0
valid_lft forever preferred_lft forever
inet6 fe80:::32ff:fe18:ded4/ scope link
valid_lft forever preferred_lft forever
: vethd3e3ef9@if18: <BROADCAST,MULTICAST,UP,LOWER_UP> mtu qdisc noqueue master docker0 state UP group default
link/ether :2d::0d::da brd ff:ff:ff:ff:ff:ff link-netnsid
inet6 fe80::802d:54ff:fe0d:34da/ scope link
valid_lft forever preferred_lft forever .查找nginx运行进程信息
[root@localhost ~]# docker ps|grep nginx
cd5b2b733850 nginx "nginx -g 'daemon of…" About a minute ago Up About a minute 0.0.0.0:->/tcp runoob-nginx-test [root@localhost ~]# docker top nginx_name
UID PID PPID C STIME TTY TIME CMD
root : ? :: nginx: master process nginx -g daemon off;
: ? :: nginx: worker process [root@localhost ~]# ps -ef | grep nginx
root : ? :: nginx: master process nginx -g daemon off;
: ? :: nginx: worker process
root : pts/ :: grep --color=auto nginx .查看Docker进程
列出所有在运行的容器信息
CONTAINER ID IMAGE COMMAND CREATED STATUS PORTS NAMES
cd5b2b733850 nginx "nginx -g 'daemon of…" minutes ago Up minutes 0.0.0.0:->/tcp nginx_name .列出最近创建的5个容器信息
[root@localhost ~]# docker ps -n
CONTAINER ID IMAGE COMMAND CREATED STATUS PORTS NAMES
cd5b2b733850 nginx "nginx -g 'daemon of…" minutes ago Up minutes 0.0.0.0:->/tcp nginx_name .列出所有创建的容器ID
[root@localhost ~]# docker ps -a -q
cd5b2b733850 .确认使用 overlay2 使用存储驱动程序
[root@localhost ~]# ls -lh /var/lib/docker/image/
total
drwx------ root root Oct : overlay2 .查看overlay2目录
[root@localhost ~]# tree -L /var/lib/docker/image/overlay2/
/var/lib/docker/image/overlay2/
├── distribution
│ ├── diffid-by-digest
│ └── v2metadata-by-diffid
├── imagedb
│ ├── content
│ └── metadata
├── layerdb
│ ├── mounts
│ ├── sha256
│ └── tmp
└── repositories.json directories, file .停止 nginx_name
[root@localhost ~]# docker stop nginx_name
nginx_name .删除 nginx_name 容器
[root@localhost ~]# docker rm nginx_name
nginx_name .删除后查看网卡信息
[root@localhost ~]# ip a
: lo: <LOOPBACK,UP,LOWER_UP> mtu qdisc noqueue state UNKNOWN group default qlen
link/loopback ::::: brd :::::
inet 127.0.0.1/ scope host lo
valid_lft forever preferred_lft forever
inet6 ::/ scope host
valid_lft forever preferred_lft forever
: ens33: <BROADCAST,MULTICAST,UP,LOWER_UP> mtu qdisc pfifo_fast state UP group default qlen
link/ether :0c::f2:3d:bf brd ff:ff:ff:ff:ff:ff
inet 192.168.1.3/ brd 192.168.1.255 scope global noprefixroute ens33
valid_lft forever preferred_lft forever
inet6 fe80::9a8:d0da:266f:5ac7/ scope link noprefixroute
valid_lft forever preferred_lft forever
: docker0: <NO-CARRIER,BROADCAST,MULTICAST,UP> mtu qdisc noqueue state DOWN group default
link/ether ::::de:d4 brd ff:ff:ff:ff:ff:ff
inet 172.17.0.1/ brd 172.17.255.255 scope global docker0
valid_lft forever preferred_lft forever
inet6 fe80:::32ff:fe18:ded4/ scope link
valid_lft forever preferred_lft forever .切换普通用户wwweee000
[root@localhost ~]# su wwweee000
[wwweee000@localhost root]$ cd
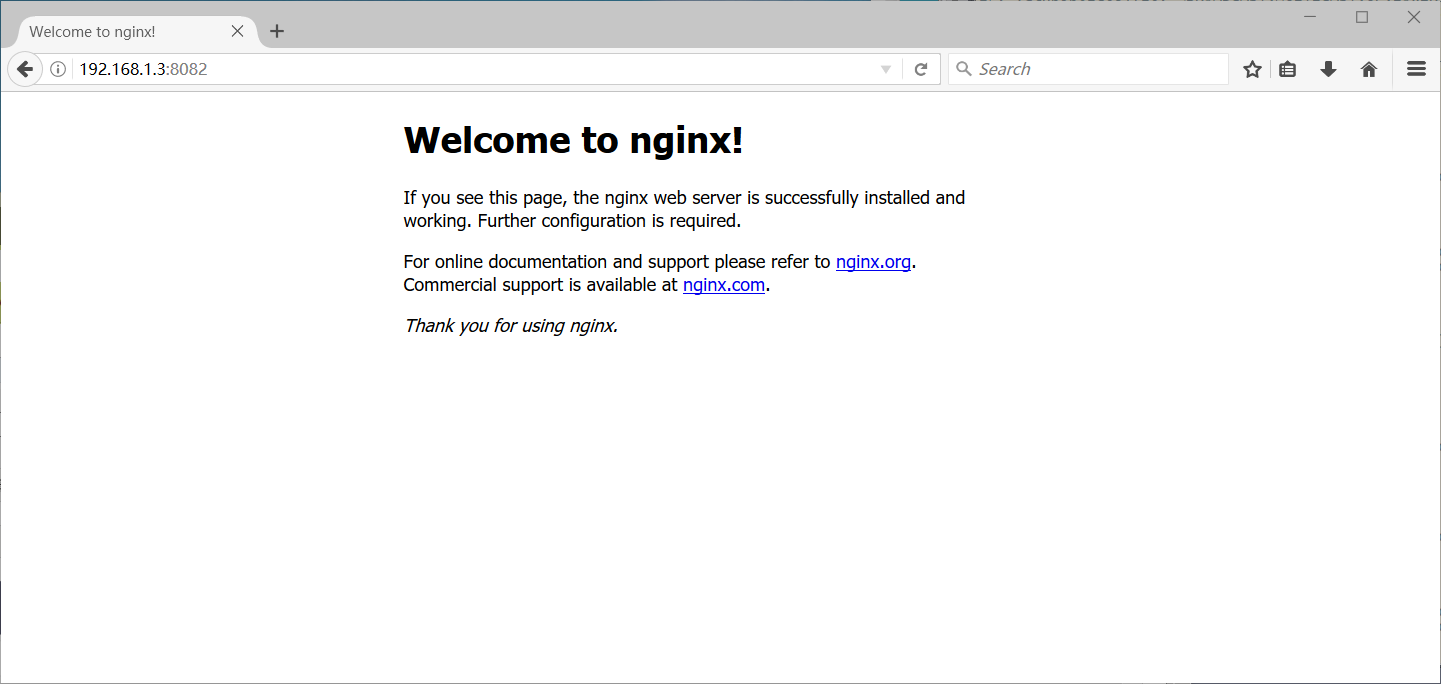
[wwweee000@localhost ~]$ docker run --name nginx_name_wwweee000 -p : -d nginx
79f9741f257ac4fc8079b4283d9830cec8d2a5d85fde530bf08aec3f5a1970a3
[wwweee000@localhost ~]$ docker ps |grep nginx_name_wwweee000
79f9741f257a nginx "nginx -g 'daemon of…" About a minute ago Up About a minute 0.0.0.0:->/tcp nginx_name_wwweee000
[wwweee000@localhost ~]$ docker ps
CONTAINER ID IMAGE COMMAND CREATED STATUS PORTS NAMES
79f9741f257a nginx "nginx -g 'daemon of…" minutes ago Up minutes 0.0.0.0:->/tcp nginx_name_wwweee000
ae4026623f4a nginx "nginx -g 'daemon of…" minutes ago Up minutes 0.0.0.0:->/tcp nginx_name
[wwweee000@localhost ~]$ ip a
: lo: <LOOPBACK,UP,LOWER_UP> mtu qdisc noqueue state UNKNOWN group default qlen
link/loopback ::::: brd :::::
inet 127.0.0.1/ scope host lo
valid_lft forever preferred_lft forever
inet6 ::/ scope host
valid_lft forever preferred_lft forever
: ens33: <BROADCAST,MULTICAST,UP,LOWER_UP> mtu qdisc pfifo_fast state UP group default qlen
link/ether :0c::f2:3d:bf brd ff:ff:ff:ff:ff:ff
inet 192.168.1.3/ brd 192.168.1.255 scope global noprefixroute ens33
valid_lft forever preferred_lft forever
inet6 fe80::9a8:d0da:266f:5ac7/ scope link noprefixroute
valid_lft forever preferred_lft forever
: docker0: <BROADCAST,MULTICAST,UP,LOWER_UP> mtu qdisc noqueue state UP group default
link/ether ::::de:d4 brd ff:ff:ff:ff:ff:ff
inet 172.17.0.1/ brd 172.17.255.255 scope global docker0
valid_lft forever preferred_lft forever
inet6 fe80:::32ff:fe18:ded4/ scope link
valid_lft forever preferred_lft forever
: vethb5b02c6@if26: <BROADCAST,MULTICAST,UP,LOWER_UP> mtu qdisc noqueue master docker0 state UP group default
link/ether 2e::6a::a6:a5 brd ff:ff:ff:ff:ff:ff link-netnsid
inet6 fe80::2c82:6aff:fe01:a6a5/ scope link
valid_lft forever preferred_lft forever
: veth13521f0@if28: <BROADCAST,MULTICAST,UP,LOWER_UP> mtu qdisc noqueue master docker0 state UP group default
link/ether :d1::0a:0f:3d brd ff:ff:ff:ff:ff:ff link-netnsid
inet6 fe80::20d1:38ff:fe0a:f3d/ scope link
valid_lft forever preferred_lft forever .普通用户也可以停止root用户docker容器
[wwweee000@localhost ~]$ docker stop nginx_name
nginx_name
[wwweee000@localhost ~]$ docker ps
CONTAINER ID IMAGE COMMAND CREATED STATUS PORTS NAMES
79f9741f257a nginx "nginx -g 'daemon of…" minutes ago Up minutes 0.0.0.0:->/tcp nginx_name_wwweee000
[wwweee000@localhost ~]$ docker restart nginx_name
nginx_name
[wwweee000@localhost ~]$ docker ps
CONTAINER ID IMAGE COMMAND CREATED STATUS PORTS NAMES
79f9741f257a nginx "nginx -g 'daemon of…" minutes ago Up minutes 0.0.0.0:->/tcp nginx_name_wwweee000
ae4026623f4a nginx "nginx -g 'daemon of…" minutes ago Up seconds 0.0.0.0:->/tcp nginx_name docker ps // 查看所有正在运行容器
docker stop containerId // containerId 是容器的ID docker ps -a // 查看所有容器
docker ps -a -q // 查看所有容器ID docker stop $(docker ps -a -q) // stop停止所有容器
docker rm $(docker ps -a -q) // remove删除所有容器 docker kill 容器ID或容器名 //直接关闭容器 .设置用户管理root用户组的容器进行操作(参考)
https://www.jb51.net/article/149430.htm
centos 7 安装 Docker Engine-CentOS 社区版的更多相关文章
- Centos下安装Docker,并配置国内docker源
Centos下安装Docker 替换为国内的yum源(可选): mv /etc/yum.repos.d/CentOS-Base.repo /etc/yum.repos.d/CentOS-Base.re ...
- CentOS 7 安装 Docker
CentOS 7 安装 Docker 这里介绍 ContOS 7 的安装 docker V1.2+,包括阿里云加速 docker 镜像下载的设置,这对提升使用 docker 体验至关重要.其他系统安装 ...
- centos 在线安装 docker
镜像下载.域名解析.时间同步请点击 阿里巴巴开源镜像站 在新主机上首次安装Docker Engine之前,需要设置Docker存储库.之后,您可以从存储库安装和更新Docker. 设置存储库 安装yu ...
- 在RedHat/CentOS下安装Docker(不升级内核)
由于内核版本问题,最初仅Ubuntu可以较好的支持Docker.不过,由于RedHat系列OS(REHL.CentOS)是目前主流的Linux服务器操作系统,所以令RedHat系列OS支持Docker ...
- 简单介绍一下在CentOS上安装Docker。
简单介绍一下在CentOS上安装Docker. 前置条件: 64-bit 系统 kernel 3.10+ 1.检查内核版本,返回的值大于3.10即可. $ uname -r 2.使用 sudo 或 r ...
- Centos 下面安装 docker
试过了虚拟机VM ,今天尝试在虚拟机centos 中安装 docker ,入门是看的阮一峰的http://www.ruanyifeng.com/blog/2018/02/docker-tutorial ...
- docker学习之路-centos下安装docker
前言 我要在云服务器上做一个asp.net core的webapi应用,使用docker来部署应用,中间用到的任何组件包括nginx和sqlserver 2017都是用docker来装载运行,所以,这 ...
- Docker学习笔记之-在CentOS中安装Docker
上一节演示了如何 通过Xshell连接CentOS服务,链接:Docker学习笔记之-通过Xshell连接 CentOS服务 本节将演示 如何在CentOS中安装 Docker 第一步:更新系统包到最 ...
- Centos7安装Docker Engine
一.先决条件 首选需要一个64位操作系统和3.10或者更版本的内核. 查看当前内核版本: $ uname -r -.el7.x86_64 二.yum安装Docker Engine 安装Docker E ...
- 在Ubuntu上安装Docker Engine
在Ubuntu上安装Docker Engine 这篇文章是介绍如何在在Ubuntu上安装Docker Engine,就是Google翻译官方文档的版本,英语好的直接官方原文.原文 要在Ubuntu上开 ...
随机推荐
- SpringMVC中实现Bean Validation(JSR 303 JSR 349 JSR 380)
JSR 303是针对bean数据校验提出的一个规范.使用注解方式实现数据校验. 每个注解的用法这里就不多介绍,请移步JSR 303 - Bean Validation 介绍及最佳实践 笔者上面提到的J ...
- Django之权限(起步)
一. 权限概述 1. 认识权限 为什么要有权限? 因为权限让不同的用户拥有不同的功能. 权限可以对功能进行划分. 生活中处处有权限. 比如, 腾讯视频会员才有观看某个最新电影的权限, 你有房间钥匙就有 ...
- Django-Form组件-formset_factory
Formset 多个表单的集合,可以同时提交多个from表单中的数据,在web页面中,可以在同一个页面,提交多个form表单. Django针对不同的formset提供了3种方法: formset_f ...
- C++学习笔记-异常处理
程序设计的要求之一就是程序的健壮性.希望程序在运行时能够不出或者少出问题.但是,在程序的实际运行时,总会有一些因素会导致程序不能正常运行.异常处理(Exception Handling)就是要提出或者 ...
- css 未知子元素宽高的居中
.parent{ position:relative; } .child{ position:absolute; left:50%; top:50%; transform:translate(-50% ...
- 19.通过MAPREDUCE 把收集数据进行清洗
在eclipse软件里创建一个maven项目 jdk要换成本地安装的1.8版本的 加载pom.xml文件 <project xmlns="http://maven.apache.org ...
- SQL Pretty Printer for SSMS 很棒的格式化插件
SQL Pretty Printer for SSMS 很不错的SQL格式化插件 写SQL语句或者脚本时,看到凌乱的格式就头大了,于是决心找一款SQL语句格式化的工具. 功夫不负有心人还真的被我找 ...
- 【LOJ】#3095. 「SNOI2019」字符串
LOJ#3095. 「SNOI2019」字符串 如果两个串\(i,j\)比较\(i < j\),如果离\(a_{i}\)最近的不同的数是\(a_{k}\),如果\(j < k\)那么\(i ...
- HDU-6704 K-th occurrence (后缀自动机father树上倍增建权值线段树合并)
layout: post title: HDU-6704 K-th occurrence (后缀自动机father树上倍增建权值线段树合并) author: "luowentaoaa&quo ...
- laravel-admin关联查询问题解决办法
文档是这么说的: 按照文档上来,没有成功,网上找了好久,说是没有在模型中关联,关联之后的运行结果是这样的: 还是没有成功啊,仔细研究返现是这里写错了,whereHas后面跟的是model中的方法名,而 ...