MyBatis学习存档(4)——进行CRUD操作
使用MyBatis进行数据库的CRUD操作有2种方式:一种如之前所说的接口+xml,而另一种是通过对接口上的方法加注解(@Select @Insert @Delete @Update)
但是通常情况下不建议使用注解进行操作,原因在于MyBatis最强大的特性在于其动态sql,若使用注解则无法使用动态sql
因此此处仅仅对注解进行简单的举例
一、注解
<?xml version="1.0" encoding="UTF-8" ?>

<!DOCTYPE mapper PUBLIC "-//mybatis.org//DTD Mapper 3.0//EN" "http://mybatis.org/dtd/mybatis-3-mapper.dtd" >

<mapper namespace="com.mapper.UsersMapper" >

  <resultMap id="BaseResultMap" type="com.pojo.Users" >

    <id column="id" property="id" jdbcType="INTEGER" />

    <result column="name" property="name" jdbcType="VARCHAR" />

    <result column="password" property="password" jdbcType="VARCHAR" />

  </resultMap>

  <sql id="Base_Column_List" >

    id, name, password

  </sql>

  <select id="selectByPrimaryKey" resultMap="BaseResultMap" parameterType="java.lang.Integer" >

    select

    <include refid="Base_Column_List" />

    from users

    where id = #{id,jdbcType=INTEGER}

  </select>

  <update id="updateByPrimaryKeySelective" parameterType="com.pojo.Users" >

    update users

    <set >

      <if test="name != null" >

        name = #{name,jdbcType=VARCHAR},

      </if>

      <if test="password != null" >

        password = #{password,jdbcType=VARCHAR},

      </if>

    </set>

    where id = #{id,jdbcType=INTEGER}

  </update>

  <update id="updateByPrimaryKey" parameterType="com.pojo.Users" >

    update users

    set name = #{name,jdbcType=VARCHAR},

      password = #{password,jdbcType=VARCHAR}

    where id = #{id,jdbcType=INTEGER}

  </update>

</mapper>
UsersMapper.xml
package com.mapper;

import org.apache.ibatis.annotations.Select;

import com.pojo.Users;

public interface UsersMapper {

    @Select("select id, name, password from users where id = #{id}")

    Users selectByPrimaryKey(Integer id);

    int updateByPrimaryKeySelective(Users record);

}
UsersMapper.java
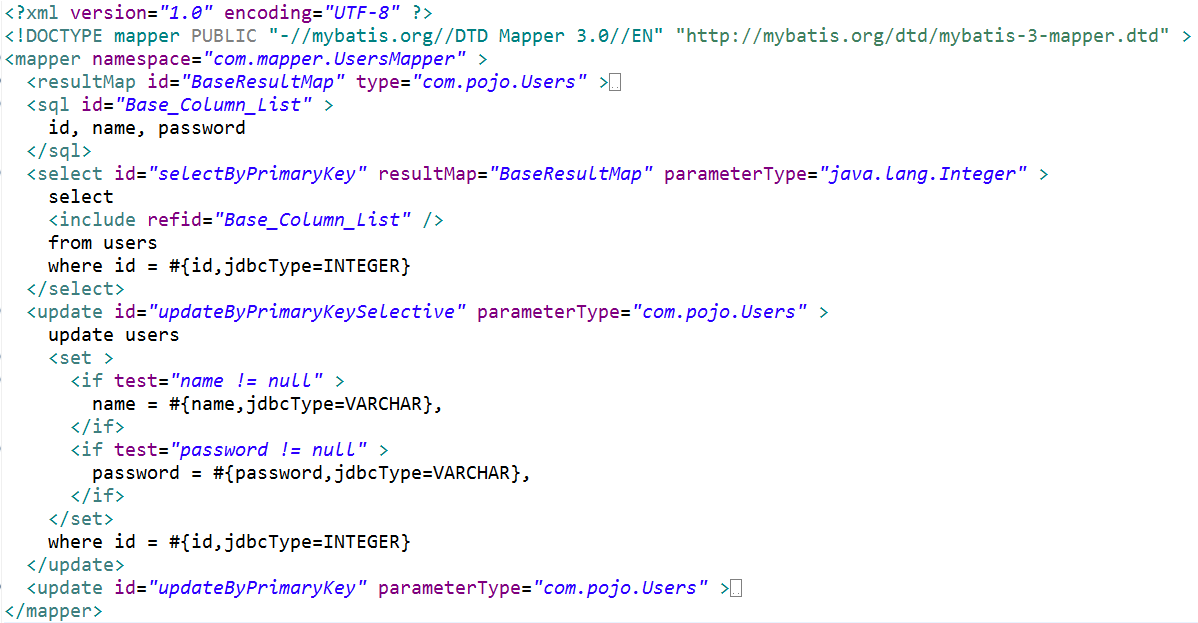
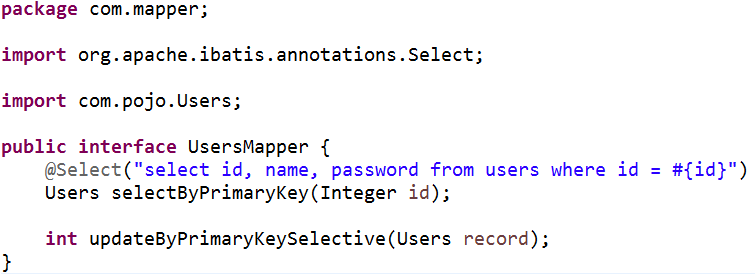
依旧以之前反向生成的UsersMapper为例,为显得简洁些,仅保留了2个方法:selectByPrimaryKey和updateByPrimaryKeySelective
打上注解的方法selectByPrimaryKey,其注解效果和xml中的一致,但updateByPrimaryKeySelective方法却无法打上注解,原因无它,该方法使用了动态sql,而注解中无法使用动态sql
二、接口+xml
为了之后好举例,此处重新创建了一个名为student的表,并反向生成了映射文件和实体类,并进行了些许改动
2.1 创建student表并反向生成映射文件和实体类
sql语句如下:
CREATE TABLE student(id INT PRIMARY KEY identity(1,1), name VARCHAR(20), class VARCHAR(20));
反向生成步骤不再多说
2.2 更改映射文件和实体类
反向生成后会发现实体类Student报错了,点开发现在class处报错——class是java的关键字
所以我们应当将class改成clazz,这样就不会报错了
仅仅更改实体类是不够的,还需将映射xml中对应的字段进行修改
最后对接口及xml进行一定的更改,最终结果如下
package com.mapper;

import com.pojo.Student;

public interface StudentMapper {

    //通过id删除学生

    int deleteById(Integer id);

    //添加学生

    int insertStudent(Student record);

    //通过id查找学生

    Student selectById(Integer id);

}
StudentMapper.java
<?xml version="1.0" encoding="UTF-8" ?>

<!DOCTYPE mapper PUBLIC "-//mybatis.org//DTD Mapper 3.0//EN" "http://mybatis.org/dtd/mybatis-3-mapper.dtd" >

<mapper namespace="com.mapper.StudentMapper" >

  <resultMap id="BaseResultMap" type="com.pojo.Student" >

    <id column="id" property="id" jdbcType="INTEGER" />

    <result column="name" property="name" jdbcType="VARCHAR" />

    <result column="class" property="clazz" jdbcType="VARCHAR" />

  </resultMap>

  <sql id="Base_Column_List" >

    id, name, class

  </sql>

  <!-- 通过id查找学生 -->

  <select id="selectById" resultMap="BaseResultMap" parameterType="java.lang.Integer" >

    select

    <include refid="Base_Column_List" />

    from student

    where id = #{id,jdbcType=INTEGER}

  </select>

  <!-- 通过id删除学生 -->

  <delete id="deleteById" parameterType="java.lang.Integer" >

    delete from student

    where id = #{id,jdbcType=INTEGER}

  </delete>

  <!-- 添加学生 -->

  <insert id="insertStudent" parameterType="com.pojo.Student" >

    insert into student (name, class)

    values (#{name,jdbcType=VARCHAR}, #{clazz,jdbcType=VARCHAR})

  </insert>

</mapper>
StudentMapper.xml
package com.pojo;

public class Student {

    private Integer id;

    private String name;

    private String clazz;

    public Integer getId() {

        return id;

    }

    public void setId(Integer id) {

        this.id = id;

    }

    public String getName() {

        return name;

    }

    public void setName(String name) {

        this.name = name == null ? null : name.trim();

    }

    public String getClazz() {

        return clazz;

    }

    public void setClazz(String clazz) {

        this.clazz = clazz == null ? null : clazz.trim();

    }

    @Override

    public String toString() {

        return "Student [id=" + id + ", name=" + name + ", clazz=" + clazz + "]";

    }

}
Student.java
2.3 对数据库进行CRUD操作
1、首先添加一个学生,代码如下:
package com.test;

import java.io.InputStream;

import org.apache.ibatis.io.Resources;

import org.apache.ibatis.session.SqlSession;

import org.apache.ibatis.session.SqlSessionFactory;

import org.apache.ibatis.session.SqlSessionFactoryBuilder;

import com.mapper.StudentMapper;

import com.pojo.Student;

public class TestInsert {

    public static void main(String[] args) throws Exception {

        //mybatis的核心配置文件

        String resource = "mybatis-config.xml";

        //使用MyBatis提供的Resources类加载mybatis的配置文件

        InputStream  is = Resources.getResourceAsStream(resource);

        //构建SqlSession的工厂

        SqlSessionFactory factory = new SqlSessionFactoryBuilder().build(is);

        //开启SqlSession

        SqlSession session = factory.openSession();

        //通过映射接口执行操作

        StudentMapper mapper = session.getMapper(StudentMapper.class);

        //new一个名叫张三 一年1班的学生

        Student stu = new Student();

        stu.setName("张三");

        stu.setClazz("一年1班");

        try {

            mapper.insertStudent(stu);

            //提交

            session.commit();

        } catch (Exception e){

            //回滚

            session.rollback();

            System.out.println("添加失败");

        } finally {

            session.close();

        }

        System.out.println("添加成功");

    }

}
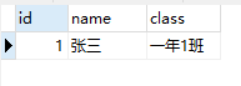
结果:可以从日志中看到sql语句及传入的参数,最后输出“添加成功”

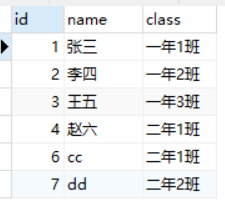
在数据库里查看下添加的结果:确实多了一条数据
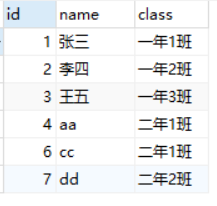
为了之后方便操作,在此可以多添加几条数据:

2、查询指定id的学生,代码如下:
package com.test;

import java.io.InputStream;

import org.apache.ibatis.io.Resources;

import org.apache.ibatis.session.SqlSession;

import org.apache.ibatis.session.SqlSessionFactory;

import org.apache.ibatis.session.SqlSessionFactoryBuilder;

import com.mapper.StudentMapper;

import com.pojo.Student;

public class TestSelect {

    public static void main(String[] args) throws Exception {

        //mybatis的核心配置文件

        String resource = "mybatis-config.xml";

        //使用MyBatis提供的Resources类加载mybatis的配置文件

        InputStream  is = Resources.getResourceAsStream(resource);

        //构建SqlSession的工厂

        SqlSessionFactory factory = new SqlSessionFactoryBuilder().build(is);

        //开启SqlSession

        SqlSession session = factory.openSession();

        //通过映射接口执行操作

        StudentMapper mapper = session.getMapper(StudentMapper.class);

        Student student = mapper.selectById(1);

        System.out.println(student);

        session.close();

    }

}
结果如下:

3、删除指定id的学生,代码如下:
package com.test;

import java.io.InputStream;

import org.apache.ibatis.io.Resources;

import org.apache.ibatis.session.SqlSession;

import org.apache.ibatis.session.SqlSessionFactory;

import org.apache.ibatis.session.SqlSessionFactoryBuilder;

import com.mapper.StudentMapper;

public class TestDelete {

    public static void main(String[] args) throws Exception {

        //mybatis的核心配置文件

        String resource = "mybatis-config.xml";

        //使用MyBatis提供的Resources类加载mybatis的配置文件

        InputStream  is = Resources.getResourceAsStream(resource);

        //构建SqlSession的工厂

        SqlSessionFactory factory = new SqlSessionFactoryBuilder().build(is);

        //开启SqlSession

        SqlSession session = factory.openSession();

        //通过映射接口执行操作

        StudentMapper mapper = session.getMapper(StudentMapper.class);

        try {

            mapper.deleteById(5);

            //提交

            session.commit();

        } catch (Exception e){

            //回滚

            session.rollback();

            System.out.println("删除失败");

        } finally {

            session.close();

        }

        System.out.println("删除成功");

    }

}
结果如下:

现在再看数据库中的数据,发现id为5的学生已经不见了:
4、更改指定id的学生姓名
此时,StudentMapper里并没有update相关的方法,所以需要手动添加方法。现在接口中定义updateStudentById方法,然后在xml中编写相应的节点:使用update节点,id与方法名一致,传入参数类型为Student类,节点内为sql语句
package com.mapper;

import com.pojo.Student;

public interface StudentMapper {

    //通过id删除学生

    int deleteById(Integer id);

    //添加学生

    int insertStudent(Student record);

    //通过id查找学生

    Student selectById(Integer id);

    //更改指定id学生的姓名

    int updateStudentById(Student student);

}
StudentMappe.java
<?xml version="1.0" encoding="UTF-8" ?>

<!DOCTYPE mapper PUBLIC "-//mybatis.org//DTD Mapper 3.0//EN" "http://mybatis.org/dtd/mybatis-3-mapper.dtd" >

<mapper namespace="com.mapper.StudentMapper" >

  <resultMap id="BaseResultMap" type="com.pojo.Student" >

    <id column="id" property="id" jdbcType="INTEGER" />

    <result column="name" property="name" jdbcType="VARCHAR" />

    <result column="class" property="clazz" jdbcType="VARCHAR" />

  </resultMap>

  <sql id="Base_Column_List" >

    id, name, class

  </sql>

  <!-- 通过id查找学生 -->

  <select id="selectById" resultMap="BaseResultMap" parameterType="java.lang.Integer" >

    select

    <include refid="Base_Column_List" />

    from student

    where id = #{id,jdbcType=INTEGER}

  </select>

  <!-- 通过id删除学生 -->

  <delete id="deleteById" parameterType="java.lang.Integer" >

    delete from student

    where id = #{id,jdbcType=INTEGER}

  </delete>

  <!-- 添加学生 -->

  <insert id="insertStudent" parameterType="com.pojo.Student" >

    insert into student (name, class)

    values (#{name,jdbcType=VARCHAR}, #{clazz,jdbcType=VARCHAR})

  </insert>

  <!-- 更改指定id学生的姓名 -->

  <update id="updateStudentById" parameterType="com.pojo.Student">

    update student set name = #{name} where id = #{id}

  </update>

</mapper>
StudentMapper.xml
编写测试类,先从数据库中查询获得需要修改的学生信息,再更改其姓名,最后提交
package com.test;

import java.io.InputStream;

import org.apache.ibatis.io.Resources;

import org.apache.ibatis.session.SqlSession;

import org.apache.ibatis.session.SqlSessionFactory;

import org.apache.ibatis.session.SqlSessionFactoryBuilder;

import com.mapper.StudentMapper;

import com.pojo.Student;

public class TestUpdate {

    public static void main(String[] args) throws Exception {

        //mybatis的核心配置文件

        String resource = "mybatis-config.xml";

        //使用MyBatis提供的Resources类加载mybatis的配置文件

        InputStream  is = Resources.getResourceAsStream(resource);

        //构建SqlSession的工厂

        SqlSessionFactory factory = new SqlSessionFactoryBuilder().build(is);

        //开启SqlSession

        SqlSession session = factory.openSession();

        //通过映射接口执行操作

        StudentMapper mapper = session.getMapper(StudentMapper.class);

        Student student = mapper.selectById(4);

        System.out.println(student);

        student.setName("赵六");

        try{

            mapper.updateStudentById(student);

            //提交

            session.commit();

        } catch (Exception e){

            //回滚

            session.rollback();

            System.out.println("更改失败");

        }

        System.out.println("更改成功");

        session.close();

    }

}
结果和数据库如下:

5、现更改需求:更改指定id学生所在的班级
又多了一个update的需求,需要再新增一个方法吗?并不需要,只需在updateStudentById方法对应的映射sql中进行更改就可以了,这时就可以用到动态sql了
<!-- 更改指定id学生的姓名 -->

  <update id="updateStudentById" parameterType="com.pojo.Student">

    update student

    <set>

      <if test="name != null">

          name = #{name} ,

      </if>

      <if test="clazz != null">

          class = #{clazz} ,

      </if>

    </set>

    where id = #{id}

  </update>
将update节点改为上述,再编写测试类
package com.test;

import java.io.InputStream;

import org.apache.ibatis.io.Resources;

import org.apache.ibatis.session.SqlSession;

import org.apache.ibatis.session.SqlSessionFactory;

import org.apache.ibatis.session.SqlSessionFactoryBuilder;

import com.mapper.StudentMapper;

import com.pojo.Student;

public class TestUpdate {

    public static void main(String[] args) throws Exception {

        //mybatis的核心配置文件

        String resource = "mybatis-config.xml";

        //使用MyBatis提供的Resources类加载mybatis的配置文件

        InputStream  is = Resources.getResourceAsStream(resource);

        //构建SqlSession的工厂

        SqlSessionFactory factory = new SqlSessionFactoryBuilder().build(is);

        //开启SqlSession

        SqlSession session = factory.openSession();

        //通过映射接口执行操作

        StudentMapper mapper = session.getMapper(StudentMapper.class);

        Student student = new Student();

        student.setId(4);

        student.setClazz("三年1班");

        System.out.println(student);

        try{

            mapper.updateStudentById(student);

            //提交

            session.commit();

        } catch (Exception e){

            //回滚

            session.rollback();

            System.out.println("更改失败");

        }

        System.out.println("更改成功");

        session.close();

    }

}
先new一个Student,再set它的id和class,此时name为null,执行update操作

可以看见执行的sql为update student SET class = ? where id = ?
如果我们将name的值set为aaa,再看执行的sql语句:

可以看见执行的sql为update student SET name = ? , class = ? where id = ?
这就是动态sql,除了if外,还有choose (when, otherwise),trim (where, set),foreach,这些节点的使用方式与JSTL标签的使用类似
三、动态sql
3.1 if
最简单的节点,只需配置test属性即可,test内为布尔表达式,为true时if语句块中的sql语句才会存在,且不会对sql进行任何变动,因此有时会出现多逗号、and、or、where的情况,通常与对应的节点使用,如set、where等
3.2 choose (when, otherwise)
choose节点下有2个子节点when和otherwise,when节点中有1个属性test,和if的类似
该节点的语法与if...else if...else类似
<choose>

   <when test="表达式1">

      sql语句1

   </when>

   <when test="表达式2">

      sql语句2

   </when>

   <otherwise>

      sql语句3

   </otherwise>

</choose>
例如上述例子,当表达式1为true时,有且仅有sql语句1会被执行,不会有2和3;当表达式1、2都不满足时,就会执行sql语句3
3.3 trim
有4个属性:prefix、suffix、prefixOverrides、suffixOverrides。它可以更灵活地去除多余关键字,可以替代where和set
以2.5中的sql语句为例,可变更如下,效果是一样的:
  <!-- 更改指定id学生的姓名 -->

  <update id="updateStudentById" parameterType="com.pojo.Student">

    update student

    <trim prefix="set" suffixOverrides="," suffix="where id = #{id}">

      <if test="name != null">name = #{name},</if>

      <if test="clazz != null">class = #{clazz},</if>

    </trim>

  </update>
3.4 foreach
用于迭代一个集合,通常用于in条件,其属性如下:
item:集合名称(传入的变量名)
index:指定迭代次数的名称
collection:必须指定,表示传入的集合是什么类型的
list
array
map-key
open:语句的开始
separator:每次循环的分割符
close:语句的结束
MyBatis学习存档(4)——进行CRUD操作的更多相关文章
- Mybatis学习(二) - CRUD操作(增删改查操作)
直接上例子: 1.项目结构: 2.具体代码及配置 User.java package com.mybatis.bean; public class User { private int id; pri ...
- MyBatis学习存档(3)——mapper.xml映射文件
MyBatis 真正的强大在于映射语句,专注于SQL,功能强大,SQL映射的配置却是相当简单 所以我们来看看映射文件的具体结构 一.xml节点结构 mapper为根节点 - namespace命名空间 ...
- Mybatis基于代理Dao实现CRUD操作 及 Mybatis的参数深入
Mybatis基于代理Dao实现CRUD操作 使用要求: 1.持久层接口和持久层接口的映射配置必须在相同的包下 2.持久层映射配置中mapper标签的namespace属性取值必须是持久层接口的全限定 ...
- 使用MyBatis对数据库中表实现CRUD操作(二)
一.使用MyBatis对表实现CRUD操作 1.定义sql映射 userMapper.xml <?xml version="1.0" encoding="UTF-8 ...
- Springboot整合Mybatis实现级联一对多CRUD操作
在关系型数据库中,随处可见表之间的连接,对级联的表进行增删改查也是程序员必备的基础技能.关于Spring Boot整合Mybatis在之前已经详细写过,不熟悉的可以回顾Spring Boot整合Myb ...
- Spring Boot整合Mybatis完成级联一对多CRUD操作
在关系型数据库中,随处可见表之间的连接,对级联的表进行增删改查也是程序员必备的基础技能.关于Spring Boot整合Mybatis在之前已经详细写过,不熟悉的可以回顾Spring Boot整合Myb ...
- MyBatis学习 之 六、insert操作返回主键
数据库操作怎能少了INSERT操作呢?下面记录MyBatis关于INSERT操作的笔记,以便日后查阅. 二. insert元素 属性详解 其属性如下: parameterType ,入参的全 ...
- MyBatis学习存档(5)——联表查询
之前的数据库操作都是基于一张表进行操作的,若一次查询涉及到多张表,那该如何进行操作呢? 首先明确联表查询的几个关系,大体可以分为一对一和一对多这两种情况,接下来对这两种情况进行分析: 一.建立表.添加 ...
- MyBatis学习存档(1)——入门
一.简介 MyBatis的前身是iBatis,本是Apache的一个开源的项目 MyBatis是一个数据持久层(ORM)框架,把实体类和SQL语句之间建立了映射关系,是一种半自动化的ORM实现 MyB ...
随机推荐
- python爬虫-爬坑之路
背景简介 爬取外国的某两个网站的数据,网站都没有被墙,爬取三种数据. A: 爬取页面并存储到数据库 B: 爬取页面内的表格内数据并存储到数据库 C: 爬取页面,分析页面并将页面的所有数据分类存入数据库 ...
- 删除顺序表L中下标为p(0<=p<=length-1)的元素,成功返回1,不成功返回0,并将删除元素的值赋给e
原创:转载请注明出处. [天勤2-2]删除顺序表L中下标为p(0<=p<=length-1)的元素,成功返回1,不成功返回0,并将删除元素的值赋给e 代码: //删除顺序表L中下标为p(0 ...
- vue 中引入第三方js库
以 jQuery 为例 一.绝对路径直接引入,全局可用 主入口页面 index.html 中用 script 标签引入: <script src="./static/jquery-1. ...
- Qt configure 参数
在编译QT前,可加各种参数来定制自己想要的QT库.这对需要裁减QT库的朋友来说非常重要.对于如何编译QT,可以参考:http://hi.baidu.com/agassi%5Fp/blog/item/4 ...
- VUE -- Identifier 'n_type' is not in camel case
Identifier 'n_type' is not in camel case 参数名的 `_` 去掉就好了
- Facebook币Libra学习-6.发行属于自己的代币Token案例(含源码)
在这个简短的概述中,我们描述了我们在eToro标记化资产背后实施技术的初步经验,即MoveIR语言中的(eToken),用于在Libra网络上进行部署. Libra协议是一个确定性状态机,它将数据存储 ...
- SQL-W3School-高级:SQL NULL 函数
ylbtech-SQL-W3School-高级:SQL NULL 函数 1.返回顶部 1. SQL ISNULL().NVL().IFNULL() 和 COALESCE() 函数 请看下面的 &quo ...
- IO注意事项
read()方法返回值为什么是int? 因为字节输入流可以操作任意类型的文件,比如图片音频等,这些文件底层都是以二进制形式的存储的,如果每次读取都返回byte,有可能在读到中间的时候遇到1111111 ...
- HTTP的响应协议
响应行介绍,响应状态码 1XX: 客户端请求服务器,但是请求未完成,服务器什么事也没干 2XX: 表示响应成功,代表性的状态码就是200 3XX: 请求重定向,代表性的状态码302 4XX: 客户端发 ...
- 使用druid连接池带来的坑testOnBorrow=false
首先说一下自己程序中遇到的问题,前一段时间新写了一个项目,主要架构改进,为前端提供接口(spring +springmvc+mybatis) 在新项目中使用的是阿里的druid连接池,配置简单,除了数 ...