powerdesigner连接postgresql数据库生成pdm及word文档
1、准备软件:
powerdesigner165与postgresql的驱动:psqlodbc_11_01_0000
2、安装并破解完成powerdesigner165
参看链接:https://www.cnblogs.com/zksfyz/p/8966594.html
3、安装postgresql的驱动:psqlodbc_11_01_0000
参看链接:https://blog.51cto.com/fengyuzaitu/2438827
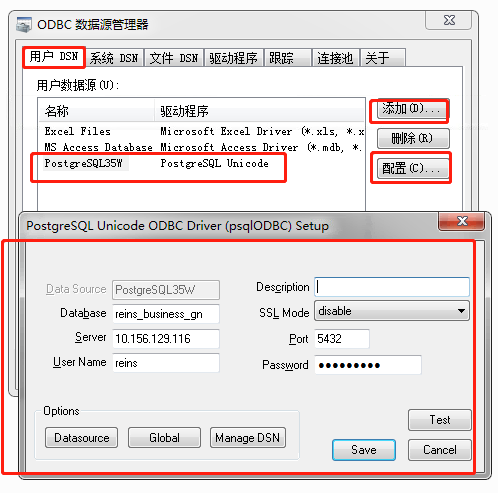
4、配置postgresql的驱动
搜索开始栏ODBC,用户DSN,添加驱动
参看链接:https://blog.51cto.com/fengyuzaitu/2438827
5、powerdesigner连接数据库
搜索关键词:
powerdesigner连接postgresql数据库生成pdm及word文档
powerdesigner导出word文档
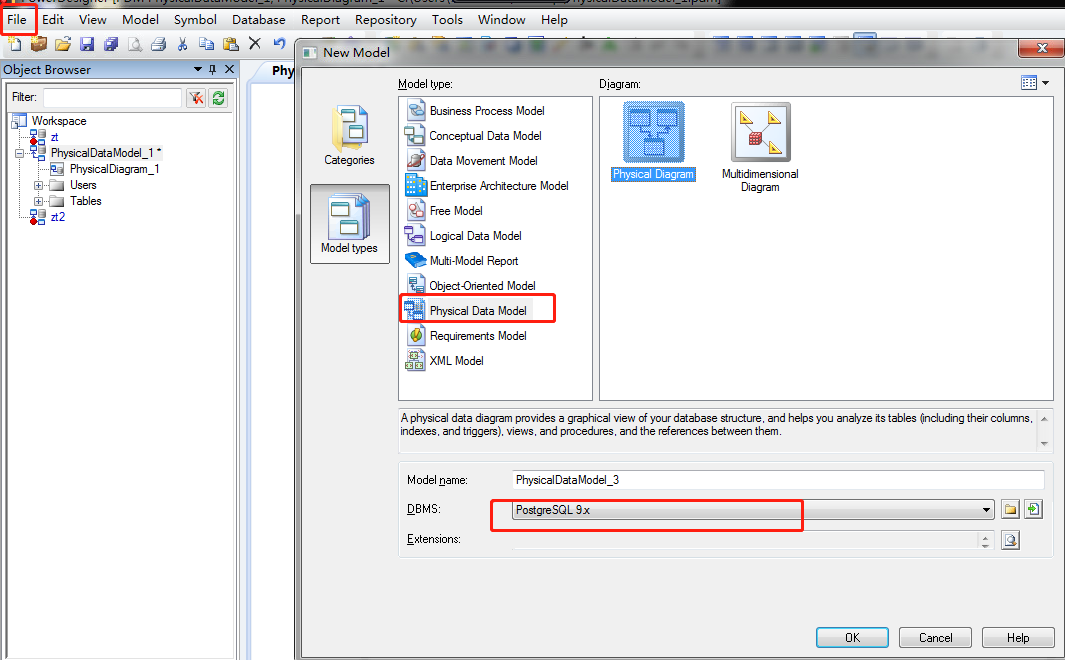
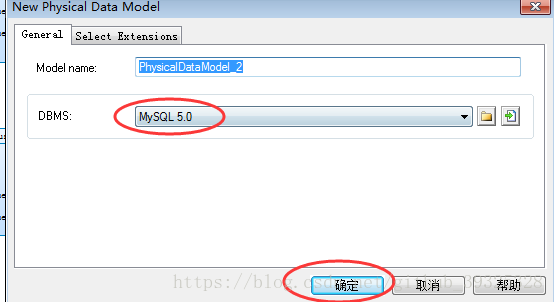
(1)创建model
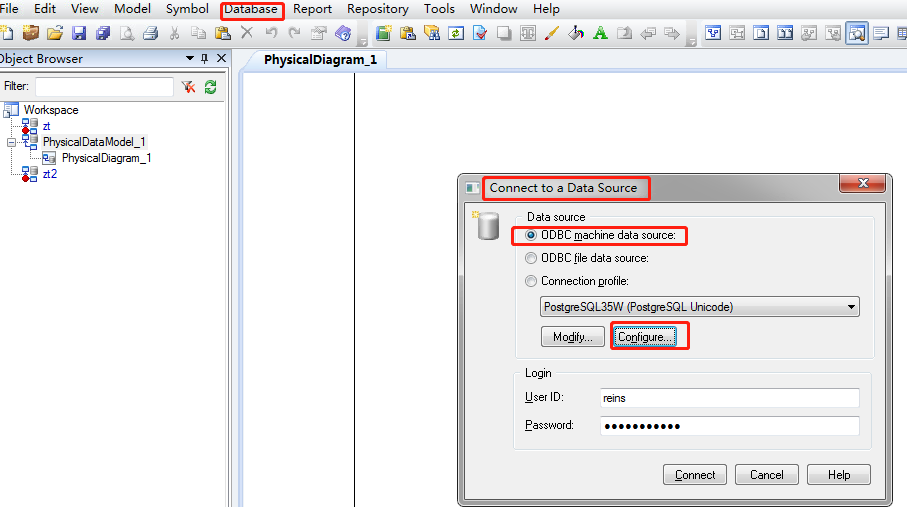
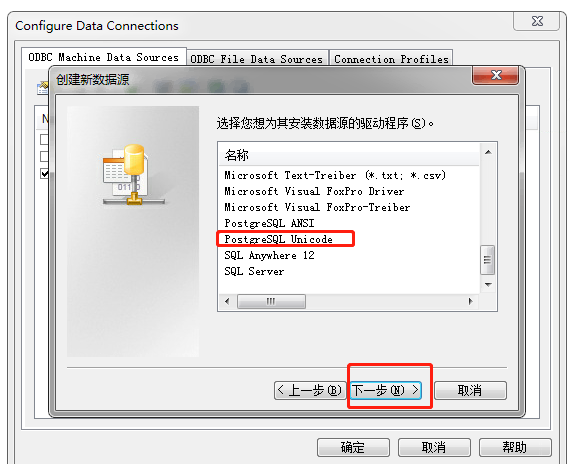
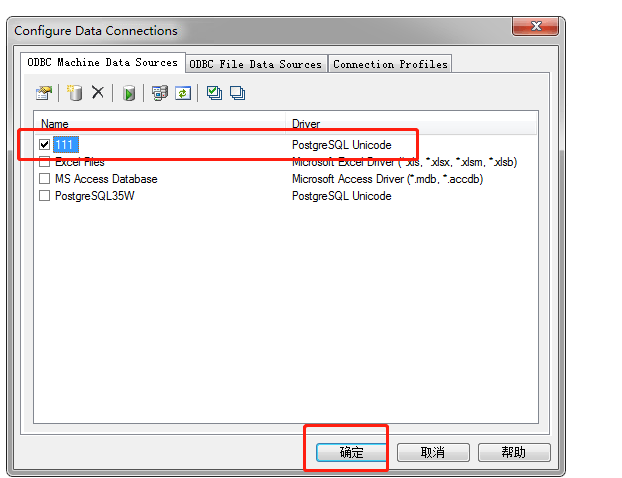
 (2)连接数据库
第一步:
第二步:

第三步:
第四步:
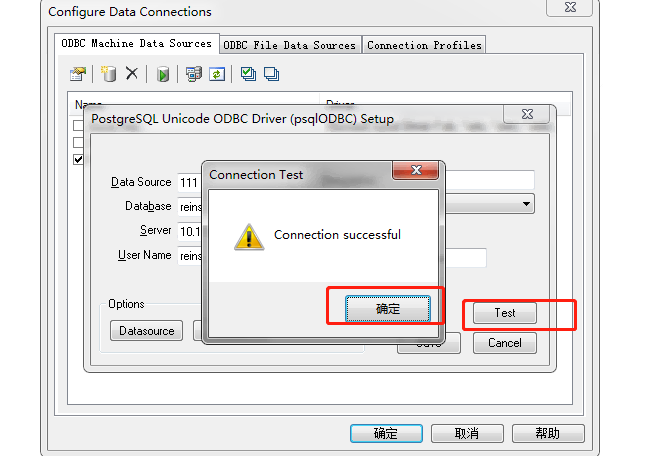
第五步:
第六步:

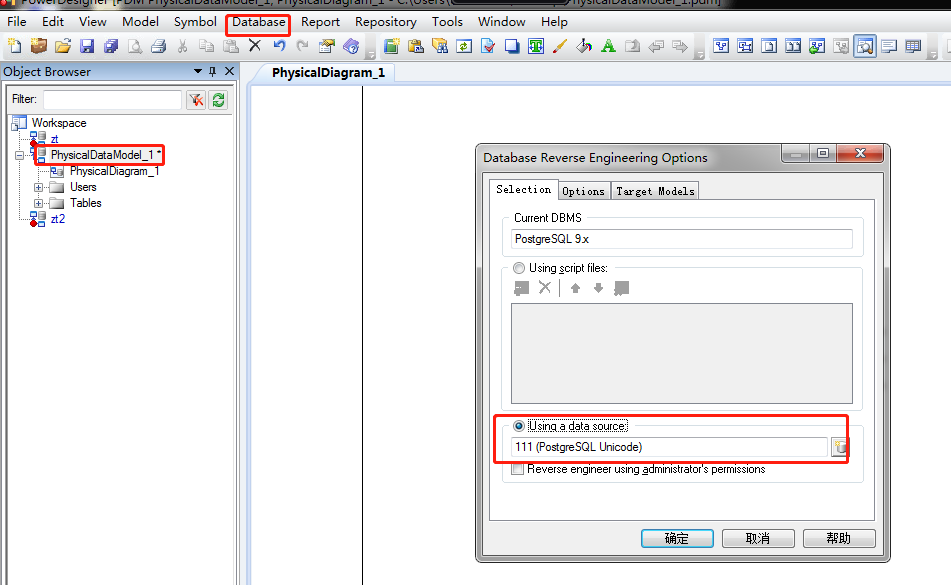
(3)model连接数据库生成pdm
选中新创建的model,
Database–>Update Model from Database…
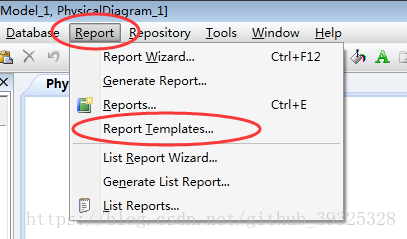
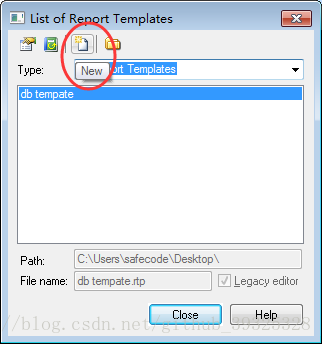
(4)创建word模板
一、创建导出模版
1.Report下点击Report Templates...
2.点击新建
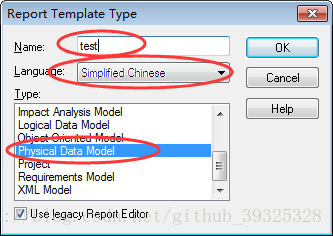
3.配置模版:模版名,简体中文,物理模型
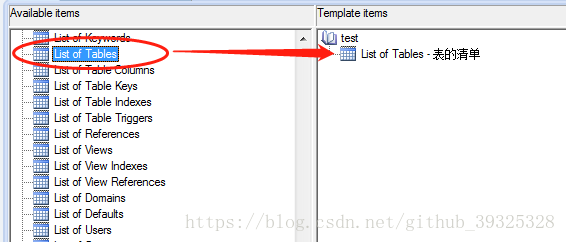
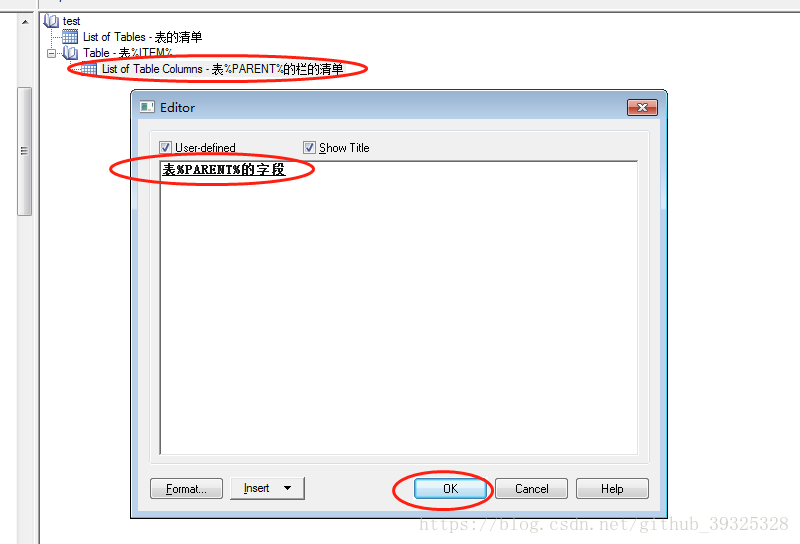
4.配置模版显示项
Available items -- List of Tables 双击移动至右侧,用于显示全部表信息
Available items -- Table -- List of Table Columns 双击移动至右侧,用于显示单表信息

List of Table Columns -- 右键 -- Layout... -- 自定义要显示的字段和宽度
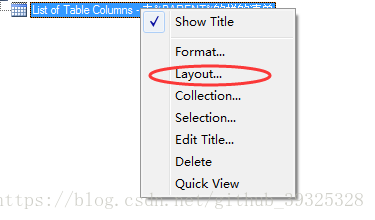
一般选择以下几项:是否主键、字段名、数据类型、注释

5.配置模版显示风格
双击节点可以编辑中文描述
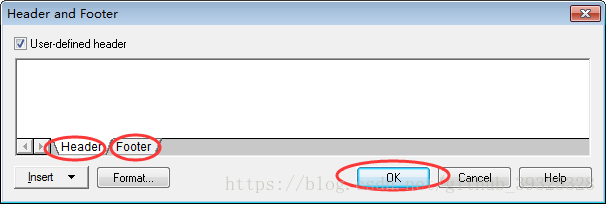
模版名称 -- 右键 -- Header/Footer... -- 自定义页眉页脚
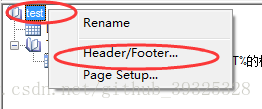
这里不需要,直接删除
6.保存模版
建议将自己创建.rtp模版文件,保存到PowerDesigner默认模版目录中:PowerDesigner 16.5\Resource Files\Report Templates

二、根据模版生成数据库文档
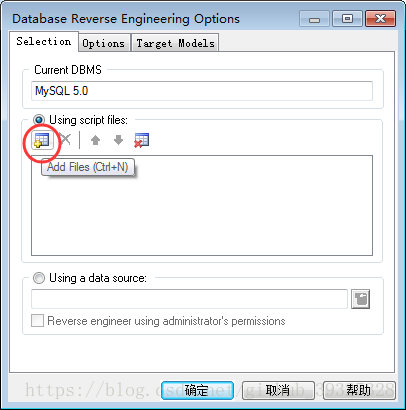
1.导入sql反向生成物理模型
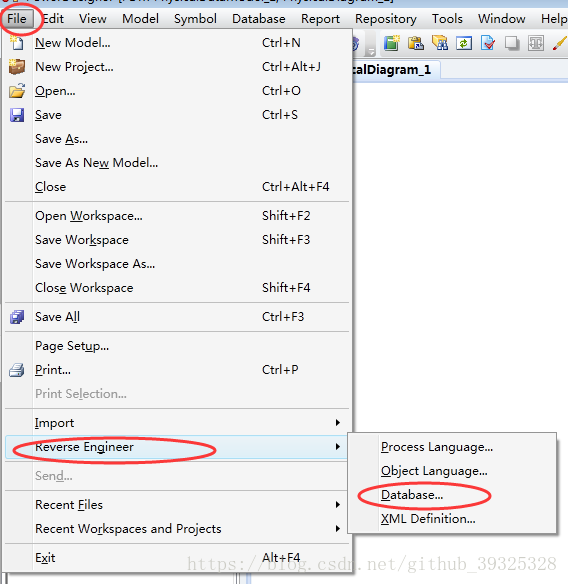
根据数据库选择,我用的是mysql
添加.sql文件,点击确定
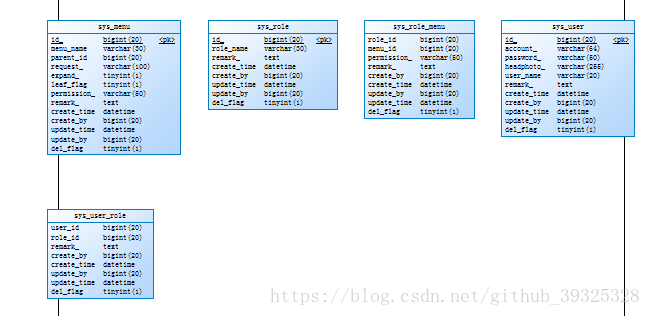
成功反向生成物理模型
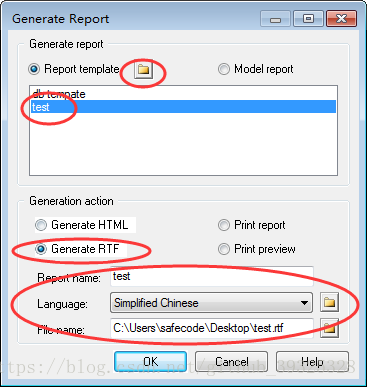
2.Report下点击Generate Report...
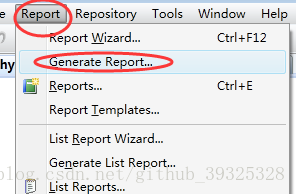
找到刚刚保存的模版,并生成RTF
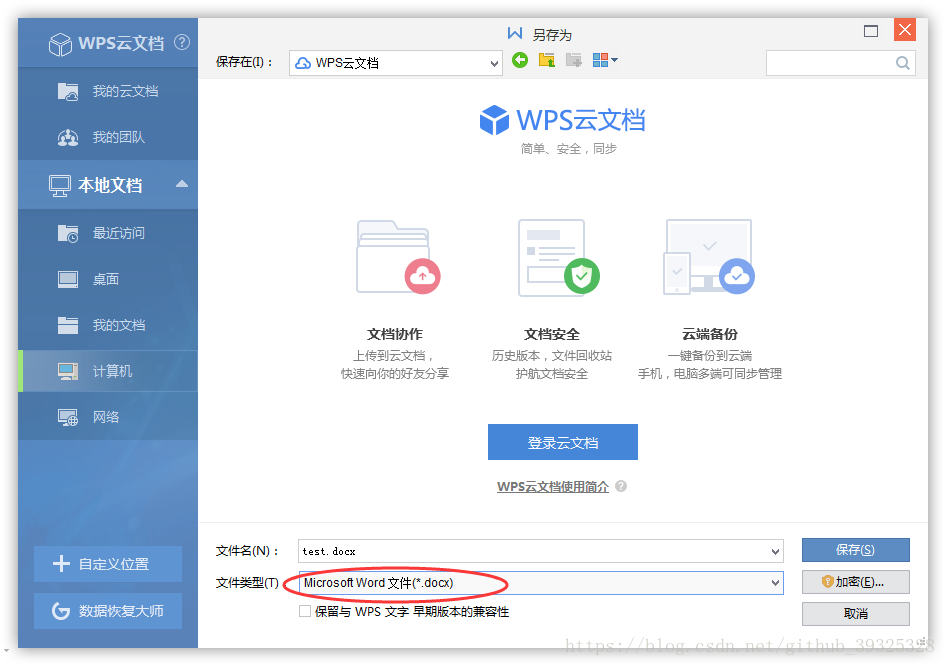
3.rtf转doc或docx
打开生成rtf文件,点击另存为,选择文件类型*.doc或者*.docx
参看链接:
https://blog.csdn.net/move_on_on/article/details/89175490
https://blog.csdn.net/github_39325328/article/details/80902471
6、修改pdm文档的表name为中文名(均需要保证数据库有注释comment)
PowerDesigner中NAME和COMMENT的互相转换,需要执行语句
由于PDM 的表中 Name 会默认=Code 所以很不方便, 所以需要将 StereoType 显示到表的外面来
打开[工具]->[显示属性](英文:Display Preferences) ->Content->Table->右边面板Columns框中 勾选: StereoType ,这样再在 StereoType中填入code字段相同内容就会显示在图形界面上了
使用说明: 在【Tools】-【Execute Commands】-【Edit/Run Script】 下。输入下面你要选择的语句即可,也可以保存起来,以便下次使用,后缀为.vbs。
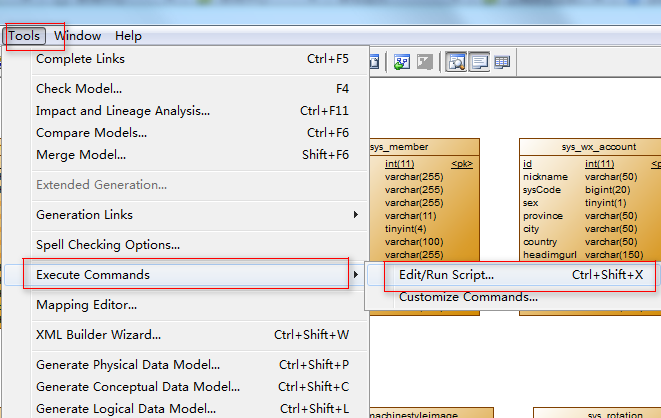
需要注意的问题是:运行语句时必须在Module模式下,如果是导出报表时执行会出现错误提示。
1.Name转到Comment注释字段。一般情况下只填写NAME,COMMENT可以运行语句自动生成。
将该语句保存为name2comment.vbs
'把pd中那么name想自动添加到comment里面

'如果comment为空,则填入name;如果不为空,则保留不变,这样可以避免已有的注释丢失.

Option   Explicit

ValidationMode   =   True

InteractiveMode   =   im_Batch

Dim   mdl   '   the   current   model

'   get   the   current   active   model

Set   mdl   =   ActiveModel

If   (mdl   Is   Nothing)   Then

      MsgBox   "There   is   no   current   Model "

ElseIf   Not   mdl.IsKindOf(PdPDM.cls_Model)   Then

      MsgBox   "The   current   model   is   not   an   Physical   Data   model. "

Else

      ProcessFolder   mdl

End   If

'   This   routine   copy   name   into   comment   for   each   table,   each   column   and   each   view

'   of   the   current   folder

Private   sub   ProcessFolder(folder)

      Dim   Tab   'running     table

      for   each   Tab   in   folder.tables

            if   not   tab.isShortcut then

                     if  trim(tab.comment)="" then'如果有表的注释,则不改变它.如果没有表注释.则把name添加到注释里面.

                        tab.comment   =   tab.name

                     end if

                  Dim   col   '   running   column

                  for   each   col   in   tab.columns

                        if trim(col.comment)="" then '如果col的comment为空,则填入name,如果已有注释,则不添加;这样可以避免已有注释丢失.

                           col.comment=   col.name

                        end if

                  next

            end   if

      next

      Dim   view   'running   view

      for   each   view   in   folder.Views

            if   not   view.isShortcut and trim(view.comment)=""  then

                  view.comment   =   view.name

            end   if

      next

      '   go   into   the   sub-packages

      Dim   f   '   running   folder

      For   Each   f   In   folder.Packages

            if   not   f.IsShortcut   then

                  ProcessFolder   f

            end   if

      Next

end   sub
2.将Comment内容保存到NAME中,comment2name.vbs 实习互换。语句为:
Option   Explicit

ValidationMode   =   True

InteractiveMode   =   im_Batch

Dim   mdl   '   the   current   model

'   get   the   current   active   model

Set   mdl   =   ActiveModel

If   (mdl   Is   Nothing)   Then

      MsgBox   "There   is   no   current   Model "

ElseIf   Not   mdl.IsKindOf(PdPDM.cls_Model)   Then

      MsgBox   "The   current   model   is   not   an   Physical   Data   model. "

Else

      ProcessFolder   mdl

End   If

Private   sub   ProcessFolder(folder)

On Error Resume Next

      Dim   Tab   'running     table

      for   each   Tab   in   folder.tables

            if   not   tab.isShortcut   then

                  tab.name   =   tab.comment

                  Dim   col   '   running   column

                  for   each   col   in   tab.columns

                  if col.comment="" then

                  else

                        col.name=   col.comment

                  end if

                  next

            end   if

      next

      Dim   view   'running   view

      for   each   view   in   folder.Views

            if   not   view.isShortcut   then

                  view.name   =   view.comment

            end   if

      next

      '   go   into   the   sub-packages

      Dim   f   '   running   folder

      For   Each   f   In   folder.Packages

            if   not   f.IsShortcut   then

                  ProcessFolder   f

            end   if

      Next

end   sub
3、执行效果


参看链接:
https://blog.csdn.net/weixin_50750933/article/details/108667494
https://www.cnblogs.com/happy2010/p/10882019.html
powerdesigner连接postgresql数据库生成pdm及word文档的更多相关文章
- 使用 powerdesigner 将数据库表结构逆向工程生成对应的word文档
本机系统win10 + mysql 5.7.17 + powerDesigner 16.5 + mysql-connector-odbc-5.3.9-winx32.msi 1 使用 PowerDesi ...
- PowerDesigner连接mysql逆向生成pdm
常用的建模工具有:PowerDesigner和ERWin,后者已快被淘汰,但前者依然活跃.相信大家都遇到过项目组已经运营很很久,但是竟然连一个ER图都没有,今天就讲解一下PowerDesigner连接 ...
- PowerDesigner导出word,PowerDesigner把表导出到word,PDM导出word文档
PowerDesigner导出word,PowerDesigner把表导出到word,PDM导出word文档 >>>>>>>>>>>& ...
- 自动生成并导出word文档
今天很荣幸又破解一现实难题:自动生成并导出word文档 先看页面效果: word效果: 代码: 先搭建struts2项目 创建action,并在struts.xml完成注册 <?xml vers ...
- C# WebForm 使用NPOI 2 生成简单的word文档(.docx)
使用NPOI可以方便的实现服务端对Word.Excel的读写.要实现对Word的读写操作,需要引用NPOI.OOXML.dll,应用命名空间XWPF. 本文使用NPOI 2.0实现对Word的基本生成 ...
- PowerDesigner连接Oracle数据库生成数据模型【本地连接方式】
步骤1:选择数据库 步骤2:选择要连接的数据库的版本 步骤3:新建数据库连接 步骤4:提供3种连接数据库方式(在此选择第3种),并且点击配置按钮,进行下一步 步骤5:点击此按钮,填 ...
- Java中用Apache POI生成excel和word文档
概述: 近期在做项目的过程中遇到了excel的数据导出和word的图文表报告的导出功能.最后决定用Apache POI来完毕该项功能.本文就项目实现过程中的一些思路与代码与大家共享.同一时候.也作为自 ...
- PowerDesigner连接Oracle数据库生成数据模型【数据源连接方式】
1.进入操作系统的管理工具 2.选择ODBC数据源[32位或64位] 3.列表中是当前数据库已有的数据源,右侧点击添加按钮,添加适合自己的数据源 4.在列表中选择索要连接数据库的ODBC驱动[这里我要 ...
- 根据Excel的内容和word模板生成对应的word文档
Sub setname() Dim I As Integer Dim pspname As String Dim pspnumber As String Dim path As String Dim ...
随机推荐
- Hive窗口函数保姆级教程
在SQL中有一类函数叫做聚合函数,例如sum().avg().max()等等,这类函数可以将多行数据按照规则聚集为一行,一般来讲聚集后的行数是要少于聚集前的行数的.但是有时我们想要既显示聚集前的数据, ...
- Centos flock 防止脚本重复运行
如果crontab设定任务每分钟执行一次,但执行的任务需要花费5分钟,这时系统会再执行导致两个相同的任务在执行.发生这种情况下可能会出现一些并发问题,严重时会导致出现脏数据性能瓶颈等恶性循环.为了防止 ...
- 【C++】类
一个简单例子: 1 //c++ 类 2 #include<iostream> 3 using namespace std; 4 class Point 5 { 6 private: 7 i ...
- 搭建 MySQL 高可用高性能集群
什么是MySQL集群,什么是MySQL集群,如果你想知道什么是MySQL集群,我现在就带你研究. MySQL 是一款流行的轻量级数据库,很多应用都是使用它作为数据存储.作为小型应用的数据库,它完全可以 ...
- leetcode5697. 检查二进制字符串字段
5697. 检查二进制字符串字段给你一个二进制字符串 s ,该字符串 不含前导零 . 如果 s 最多包含 一个由连续的 '1' 组成的字段 ,返回 true .否则,返回 false . 示例 ...
- 『心善渊』Selenium3.0基础 — 2、Selenium测试框架环境搭建(Windows)
目录 1.浏览器安装 2.浏览器驱动下载 (1)ChromeDriver for Chrome (2)Geckodriver for Firefox (3)IEDriverServer for IE ...
- Golang的一致性哈希实现
Golang的一致性哈希实现 一致性哈希的具体介绍,可以参考:http://www.cnblogs.com/haippy/archive/2011/12/10/2282943.html 1 imp ...
- 02 SVN 与 Git 的优缺点
上一篇博客大致聊了聊关于版本控制系统的周边,这一篇我们就来继续唠唠作为近年来最受欢迎的两个版本控制系统的优缺点吧. 聊优缺点之前,先简单了解一下这两个这两个版本控制系统好了: 关于 SVN SVN 概 ...
- 开发小技巧之:unicode的排序和正则匹配
目录 简介 ASCII字符的排序 本地字符的排序 为什么不使用unicode进行排序 emoji的正则匹配 总结 简介 我们知道计算机最先兴起是在国外,出于当时计算机性能的考虑和外国常用字符的考虑,最 ...
- JUnit5的Tag、Filter、Order、Lifecycle
Tag JUnit5可以使用@Tag注解给测试类和测试方法打tag,这些tag能用来在执行时进行过滤,它跟group有点类似. tag应该遵循以下规则: 不能为null或者为空. 不能包含空格. 不能 ...