关于torch.nn.LSTM()的输入和输出
主角torch.nn.LSTM()
初始化时要传入的参数
 |  Args:

 |      input_size: The number of expected features in the input `x`

 |      hidden_size: The number of features in the hidden state `h`

 |      num_layers: Number of recurrent layers. E.g., setting ``num_layers=2``

 |          would mean stacking two LSTMs together to form a `stacked LSTM`,

 |          with the second LSTM taking in outputs of the first LSTM and

 |          computing the final results. Default: 1

 |      bias: If ``False``, then the layer does not use bias weights `b_ih` and `b_hh`.

 |          Default: ``True``

 |      batch_first: If ``True``, then the input and output tensors are provided

 |          as `(batch, seq, feature)` instead of `(seq, batch, feature)`.

 |          Note that this does not apply to hidden or cell states. See the

 |          Inputs/Outputs sections below for details.  Default: ``False``

 |      dropout: If non-zero, introduces a `Dropout` layer on the outputs of each

 |          LSTM layer except the last layer, with dropout probability equal to

 |          :attr:`dropout`. Default: 0

 |      bidirectional: If ``True``, becomes a bidirectional LSTM. Default: ``False``

 |      proj_size: If ``> 0``, will use LSTM with projections of corresponding size. Default: 0
input_size:一般是词嵌入的大小
hidden_size:隐含层的维度
num_layers:默认是1,单层LSTM
bias:是否使用bias
batch_first:默认为False,如果设置为True,则表示第一个维度表示的是batch_size
dropout:直接看英文吧
bidirectional:默认为False,表示单向LSTM,当设置为True,表示为双向LSTM,一般和num_layers配合使用(需要注意的是当该项设置为True时,将num_layers设置为1,表示由1个双向LSTM构成)
模型输入输出-单向LSTM
import torch

import torch.nn as nn

import numpy as np

inputs_numpy = np.random.random((64,32,300))

inputs = torch.from_numpy(inputs_numpy).to(torch.float32)

inputs.shape
torch.Size([64, 32, 300]):表示[batchsize, max_length, embedding_size]
hidden_size = 128

lstm = nn.LSTM(300, 128, batch_first=True, num_layers=1)

output, (hn, cn) = lstm(inputs)

print(output.shape)

print(hn.shape)

print(cn.shape)
torch.Size([64, 32, 128])
torch.Size([1, 64, 128])
torch.Size([1, 64, 128])
说明:
output:保存了每个时间步的输出,如果想要获取最后一个时间步的输出,则可以这么获取:output_last = output[:,-1,:]
h_n:包含的是句子的最后一个单词的隐藏状态,与句子的长度seq_length无关
c_n:包含的是句子的最后一个单词的细胞状态,与句子的长度seq_length无关
另外:最后一个时间步的输出等于最后一个隐含层的输出
output_last = output[:,-1,:]

hn_last = hn[-1]

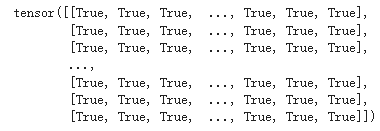
print(output_last.eq(hn_last))

模型输入输出-双向LSTM
首先我们要明确:
output :(seq_len, batch, num_directions * hidden_size)
h_n:(num_layers * num_directions, batch, hidden_size)
c_n :(num_layers * num_directions, batch, hidden_size)
其中num_layers表示层数,这里是1,num_directions表示方向数,由于是双向的,这里是2,也是,我们就有下面的结果:
import torch

import torch.nn as nn

import numpy as np

inputs_numpy = np.random.random((64,32,300))

inputs = torch.from_numpy(inputs_numpy).to(torch.float32)

inputs.shape

hidden_size = 128

lstm = nn.LSTM(300, 128, batch_first=True, num_layers=1, bidirectional=True)

output, (hn, cn) = lstm(inputs)

print(output.shape)

print(hn.shape)

print(cn.shape)
torch.Size([64, 32, 256])
torch.Size([2, 64, 128])
torch.Size([2, 64, 128])
这里面的hn包含两个元素,一个是正向的隐含层输出,一个是方向的隐含层输出。
#获取反向的最后一个output

output_last_backward = output[:,0,-hidden_size:]

#获反向最后一层的hn

hn_last_backward = hn[-1]

#反向最后的output等于最后一层的hn

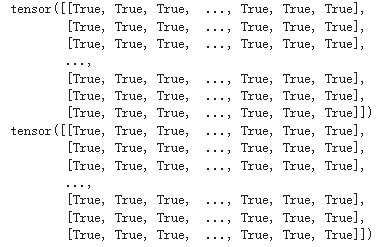
print(output_last_backward.eq(hn_last_backward))

#获取正向的最后一个output

output_last_forward = output[:,-1,:hidden_size]

#获取正向最后一层的hn

hn_last_forward = hn[-2]

# 反向最后的output等于最后一层的hn

print(output_last_forward.eq(hn_last_forward))

https://www.cnblogs.com/LiuXinyu12378/p/12322993.html
https://blog.csdn.net/m0_45478865/article/details/104455978
https://blog.csdn.net/foneone/article/details/104002372
关于torch.nn.LSTM()的输入和输出的更多相关文章
- torch.nn.LSTM()函数维度详解
123456789101112lstm=nn.LSTM(input_size, hidden_size, num_la ...
- PyTorch官方中文文档:torch.nn
torch.nn Parameters class torch.nn.Parameter() 艾伯特(http://www.aibbt.com/)国内第一家人工智能门户,微信公众号:aibbtcom ...
- pytorch nn.LSTM()参数详解
输入数据格式:input(seq_len, batch, input_size)h0(num_layers * num_directions, batch, hidden_size)c0(num_la ...
- pytorch中文文档-torch.nn.init常用函数-待添加
参考:https://pytorch.org/docs/stable/nn.html torch.nn.init.constant_(tensor, val) 使用参数val的值填满输入tensor ...
- pytorch中文文档-torch.nn常用函数-待添加-明天继续
https://pytorch.org/docs/stable/nn.html 1)卷积层 class torch.nn.Conv2d(in_channels, out_channels, kerne ...
- torch.nn.functional中softmax的作用及其参数说明
参考:https://pytorch-cn.readthedocs.io/zh/latest/package_references/functional/#_1 class torch.nn.Soft ...
- torch.nn.Embedding理解
Pytorch官网的解释是:一个保存了固定字典和大小的简单查找表.这个模块常用来保存词嵌入和用下标检索它们.模块的输入是一个下标的列表,输出是对应的词嵌入. torch.nn.Embedding(nu ...
- pytorch torch.nn.functional实现插值和上采样
interpolate torch.nn.functional.interpolate(input, size=None, scale_factor=None, mode='nearest', ali ...
- pytorch torch.nn 实现上采样——nn.Upsample
Vision layers 1)Upsample CLASS torch.nn.Upsample(size=None, scale_factor=None, mode='nearest', align ...
随机推荐
- 3D-camera结构光原理
3D-camera结构光原理 目前主流的深度探测技术是结构光,TOF,和双目.具体的百度就有很详细的信息. 而结构光也有双目结构光和散斑结构光等,没错,Iphone X 的3D深度相机就用 散斑结构光 ...
- RGB-D对红外热像仪和毫米波雷达标定
RGB-D对红外热像仪和毫米波雷达标定 Extrinsic Calibration of Thermal IR Camera and mmWave Radar by Exploiting Depth ...
- TensorFlow中的语义分割套件
TensorFlow中的语义分割套件 描述 该存储库用作语义细分套件.目标是轻松实现,训练和测试新的语义细分模型!完成以下内容: 训练和测试方式 资料扩充 几种最先进的模型.轻松随插即用 能够使用任何 ...
- python2向python3移植问题
问题: payload = "A"*140 # padding ropchain = p32(puts_plt) ropchain += p32(entry_point) ropc ...
- springboot——重定向解决刷新浏览器造成表单重复提交的问题(超详细)
原因:造成表单重复提交的原因是当我们刷新浏览器的时候,浏览器会发送上一次提交的请求.由于上一次提交的请求方式为post,刷新浏览器就会重新发送这个post请求,造成表单重复提交. 解决办法: 将请求当 ...
- SpringBoot2 参数管理实践,入参出参与校验
一.参数管理 在编程系统中,为了能写出良好的代码,会根据是各种设计模式.原则.约束等去规范代码,从而提高代码的可读性.复用性.可修改,实际上个人觉得,如果写出的代码很好,即别人修改也无法破坏原作者的思 ...
- 『无为则无心』Python基础 — 6、Python的注释
目录 1.注释的作用 2.注释的分类 单行注释 多行注释 3.注释的注意事项 4.什么时候需要使用注释 5.总结 提示:完成了前面的准备工作,之后的文章开始介绍Python的基本语法了. Python ...
- 解决使用gomod后goland导包报红问题
解决使用gomod后goland导包报红问题 项目环境: ubuntu14+goland 问题详情: 在root用户下执行go mod init {module name}使用了gomod,并编译了项 ...
- Java中对象初始化过程
Java为对象初始化提供了多种选项. 当new一个对象的时候,对象初始化开始: 1.首先,JVM加载类(只加载一次,所以,即使多次new对象,下面的代码也只会在第一次new的时候执行一次),此时, 静 ...
- 用python+pyqt5语言编写的扫雷小游戏软件
github源码地址:https://github.com/richenyunqi/Mine-game ,撒娇打滚求star哦~~ღ( ´・ᴗ・` )比心 扫雷主界面模块 整个扫雷界面使用大量的白色方 ...
