Api网关Kong集成Consul做服务发现及在Asp.Net Core中的使用
写在前面
Api网关我们之前是用 .netcore写的 Ocelot的,使用后并没有完全达到我们的预期,花了些时间了解后觉得kong可能是个更合适的选择。
简单说下kong对比ocelot打动我的:
1、kong可以直接代替Nginx/OpenRestry做前端服务器。
2、kong的功能强大,性能不俗,生态不错,操作面板,插件丰富,社区活跃;
本文目的
1、对kong和consul做个基本介绍;
2、kong集成consul 做服务发现;
3、Asp.net core WebApi 服务自动注册到Consul;
4、Asp.net core WebApi 自动注册路由规则到kong,实现程序启动即部署;
运行环境
172.16.1.30 CentOS Linux release 7.6.1810 (Core) (虚拟机单核2g)
Docker version 18.09.3, build 774a1f4
kong apigateway(enterprise) 2.3.x (docker安装)
kong
kong的简介

我们熟悉Nginx;
有个一个加强版的Nginx叫做OpenRestry,OpenRestry ≈ lua脚本+Nginx;
那么Kong 网关就是满血版的 OpenRestry,它有许许多多的的插件和各种丰富的功能,且提供对应的Rest Api,让你轻松打造你所能想象到的 网关+ web前端服务器的功能;
特点(翻译)
云原生:平台无关,kong支持任意平台,裸机容器或云平台;
k8s原生:原生支持k8s,有kong-ingress,支持l4+l7协议;
动态负载均衡:负载均衡到多个upstream;
Hash-based的负载均衡:根据cookie、session,ip等hash负载均衡;
断路器:自动剔除不健康的服务;
心跳检测:主动和被动心跳检测;
服务发现:通过第三方dns解析做服务发现,如consul;
Serverless:调用和保护 AWS Lambda or OpenWhisk functions directly ;
WebSockets:支持ws、wss协议;
gRPC:支持gRPC协议,并通过日志和插件监控流量;
OAuth2.0:轻松添加OAuth2.0支持;
日志:轻松记录请求和响应,通过HTTP, TCP, UDP, 或 直接到硬盘;
安全性:访问控制,爬虫检测、ip黑白名单等等;
Syslog:记录到系统日志;
SSL: 安装不同的SSL证书到服务;
监控:实时监控,提供关机负责负载均衡和性能指标;
整箱代理:kong可以作为正向代理服务器;
身份认证:HMAC, JWT, Basic, 各种奇奇怪怪的规则都支持.
限制器:流量限制功能;
传输转换:新增、删掉、或者修改你的请求或者响应;
缓存:请求缓存;
CLI:命令行控制支持;
Rest Api:Rest Api控制支持;
Geo-Replicated:夸时区请求支持;
故障检测与恢复:数据库(Cassandra /postgres)节点挂掉不影响kong的服务;
集群:所有kong节点都自动加入集群保持配置同步;
拓展性:分布式拓展原生支持,水平伸缩加减节点就行;
高性能:使用Nginx作为核心负载均衡组件,高性能可伸缩;
插件:高拓展性,插件式添加功能;
详细请看
github: https://github.com/Kong/kong
官方文档: https://docs.konghq.com
kong的安装
拉取镜像
docker pull kong/kong-gateway:2.3.3.2-alpine
给镜像改个名
docker tag <IMAGE_ID> kong-ee
创建一个网络
docker network create kong-ee-net
运行一个postgresSql 9.6,用来存取kong的配置
docker run -d --name kong-ee-database \

  --network=kong-ee-net \

  -p 5432:5432 \

  -e "POSTGRES_USER=kong" \

  -e "POSTGRES_DB=kong" \

  -e "POSTGRES_PASSWORD=kong" \

  postgres:9.6
启动kong
  docker run -d --name kong-ee2

  --network=kong-ee-net \

  -e "KONG_DATABASE=postgres" \

  -e "KONG_PG_HOST=172.16.1.30" \

  -e "KONG_PG_PASSWORD=kong" \

  -e "KONG_PROXY_ACCESS_LOG=/dev/stdout" \

  -e "KONG_ADMIN_ACCESS_LOG=/dev/stdout" \

  -e "KONG_PROXY_ERROR_LOG=/dev/stderr" \

  -e "KONG_ADMIN_ERROR_LOG=/dev/stderr" \

  -e "KONG_ADMIN_LISTEN=0.0.0.0:8001" \

  -e "KONG_ADMIN_GUI_URL=http://172.16.1.30:8002" \

  -e "KONG_DNS_RESOLVER=172.16.1.30:8600" \  #注意按需使用,consul的才配

  -p 8000:8000 \

  -p 8443:8443 \

  -p 8001:8001 \

  -p 8444:8444 \

  -p 8002:8002 \

  -p 8445:8445 \

  -p 8003:8003 \

  -p 8004:8004 \

  kong-ee

  //-e "KONG_DNS_RESOLVER=172.16.1.30:8600" 注意这个配置,这是我需要用的consul的dns配置,如果不想用consul做服务发现,删掉这行
这里说明一下,kong的配置是用postgres(或者Cassandra )来存配置,但每一次请求都不需要去读取数据库的。修改的配置会直接 reload 到内存中,不影响性能;
另外说说kong的集群;
因为kong 网关其实最终 表现为一个超级前端服务器+网关,所以每个连接到同个数据库的kong实例配置一样,连接同个数据库的kong作为一个集群;
一般在kong的前面是直接做dns解析就行,如果dns不支持多ip的话做keepalive + vip就行;
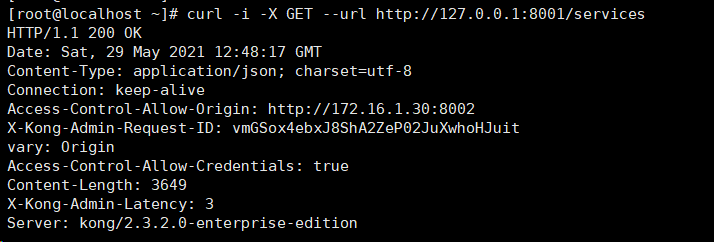
验证
#admin api 获取所有服务
curl -i -X GET --url http://127.0.0.1:8001/services
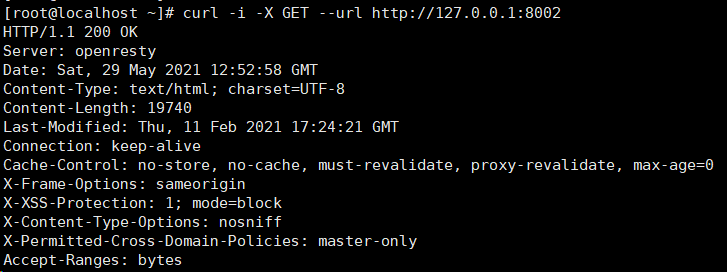
#admin 管理后台
curl -i -X GET --url http://127.0.0.1:8002
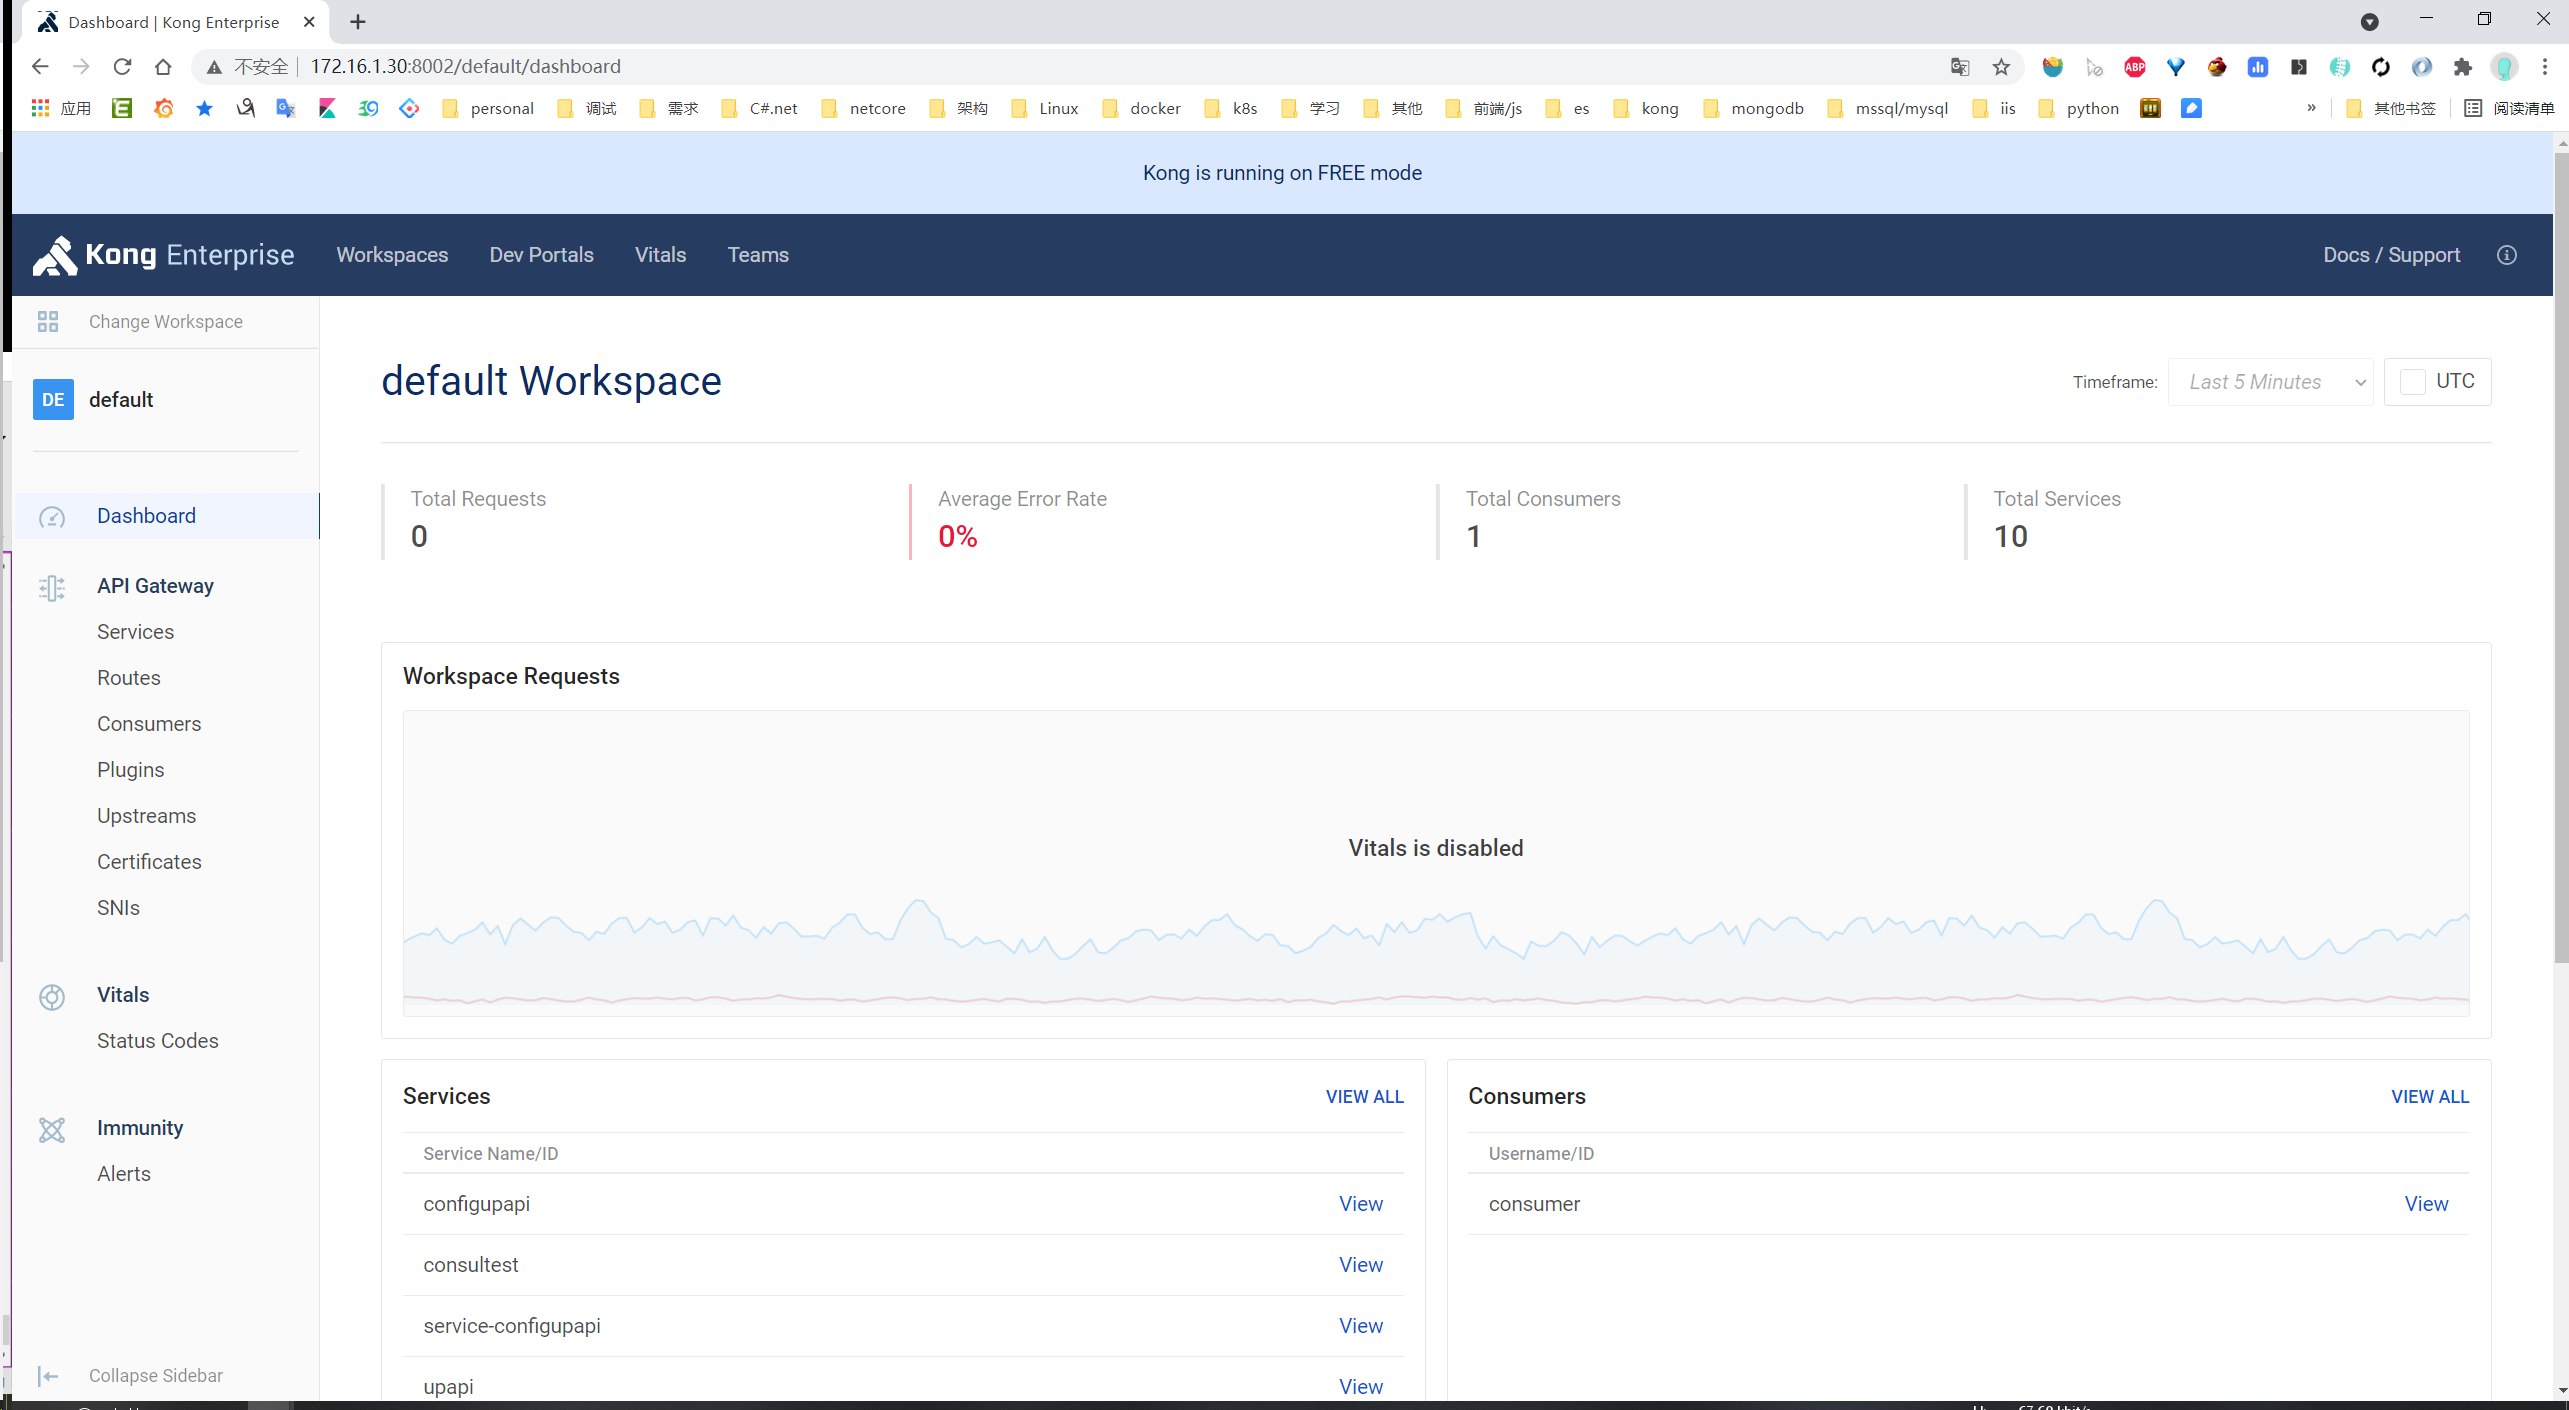
管理后台
consul
consul简介

Consul是HashiCorp公司推出的开源工具,用于实现分布式系统的服务发现与配置。与其他分布式服务注册与发现的方案,比如 Airbnb的SmartStack等相比,Consul的方案更“一站式”,内置了服务注册与发现框 架、分布一致性协议实现、健康检查、Key/Value存储、多数据中心方案,不再需要依赖其他工具(比如ZooKeeper等),使用起来也较 为简单。
其实就是做服务治理的。
github: https://github.com/hashicorp/consul
官方文档: https://www.consul.io/
consul的安装
直接docker安装
*这是作为开发节点安装
docker run -d --name=dev-consul1 --network=host -e CONSUL_BIND_INTERFACE=eth0 consul:1.8
安装成功
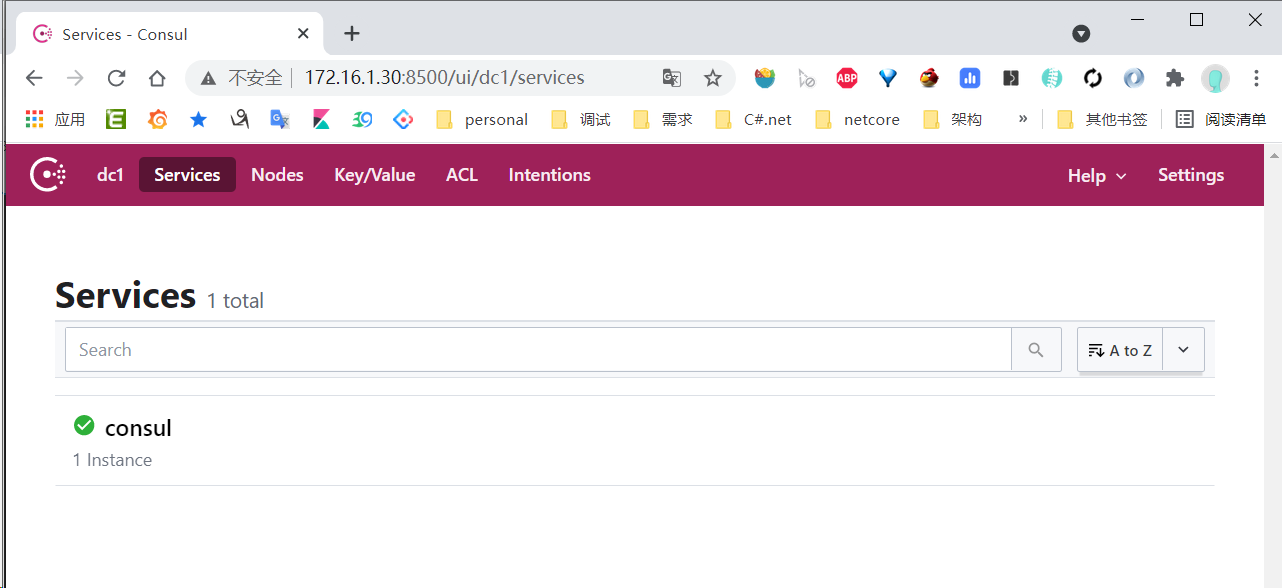
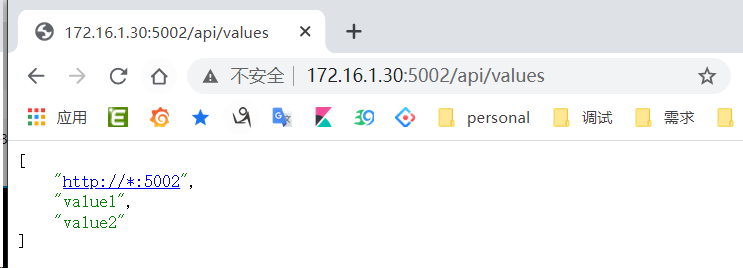
运行一个WebApi服务
先在服务运行一个Asp.net Core WebApi (就是是新建的一个包含),我的版本是3.1的,我给服务命名:DemoApi31,监听端口5002
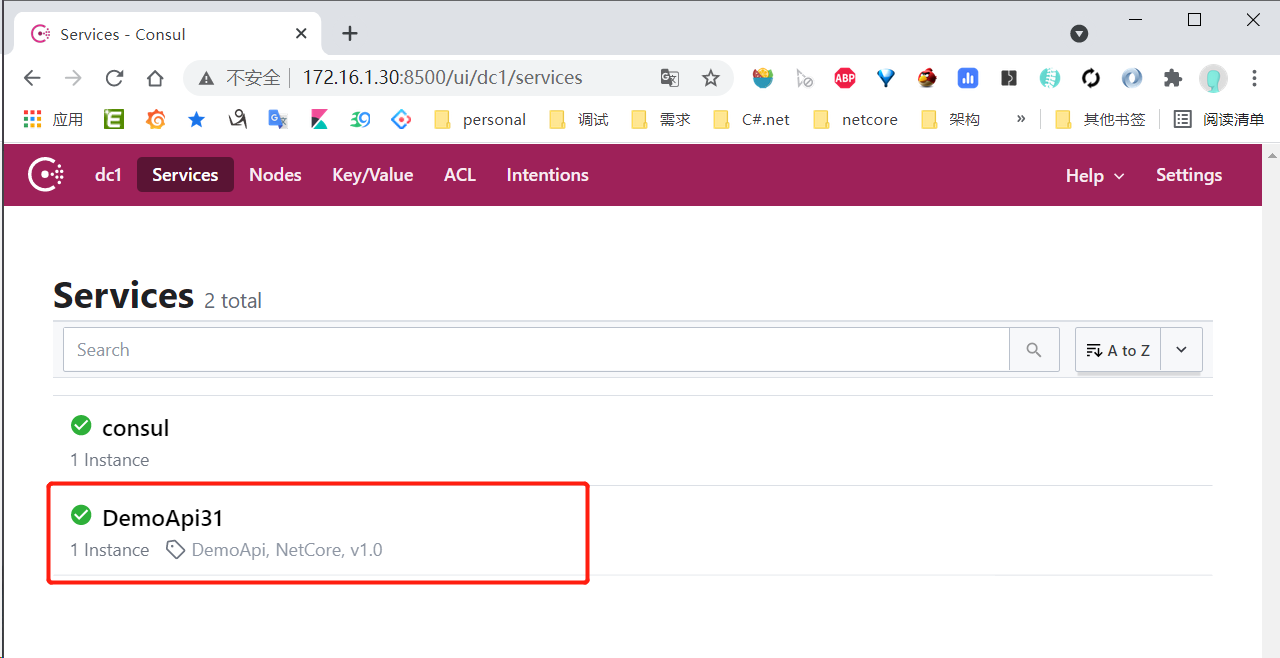
将服务注册到Consul
curl --location --request PUT 'http://172.16.1.30:8500/v1/agent/service/register' \

--header 'Content-Type: application/json' \

--data-raw '{

  "ID": "DemoApi31_172.16.1.30:5002",

  "Name": "DemoApi31",

  "Address": "172.18.1.30",

  "Port": 5002,

  "EnableTagOverride": false,

  "Weights": {

    "Passing": 10,

    "Warning": 1

  }

}'
注册成功:
Dns解析验证
# 如果没安装dig 安装:yum install bind-utils

dig @172.16.1.30 -p 8600 Demoapi31.service.consul SRV
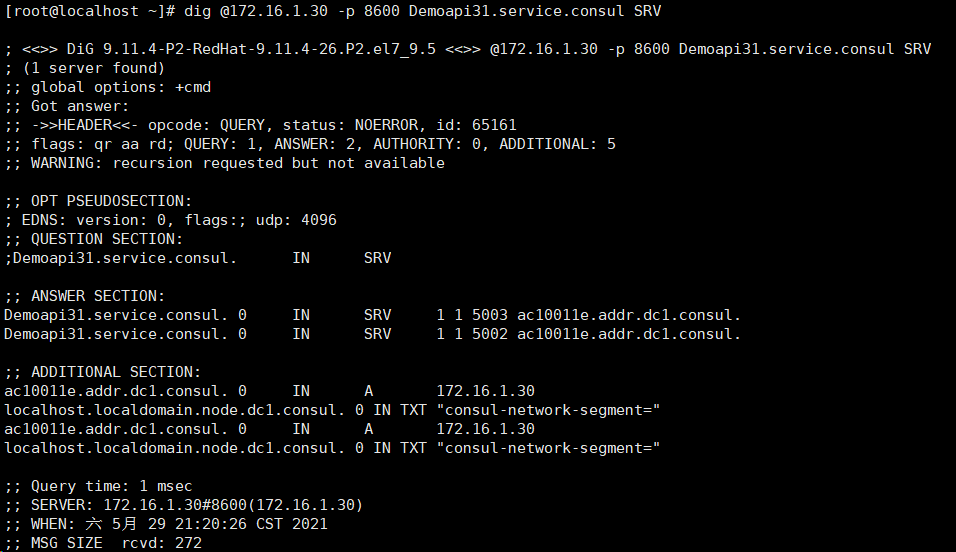
ok,我们这里已经把服务注册到consul,且能通过dns常解析到了,我们做跟kong的集成吧。
consul提供内置Dns解析和Rest Api 两种方式集成做服务发现,我们这里跟kong的集成选用的Dns方式。
kong集成consul做服务发现
因为consul的角色是dns服务器,所以非常简单,我们已注册好的 DemoApi31为例:
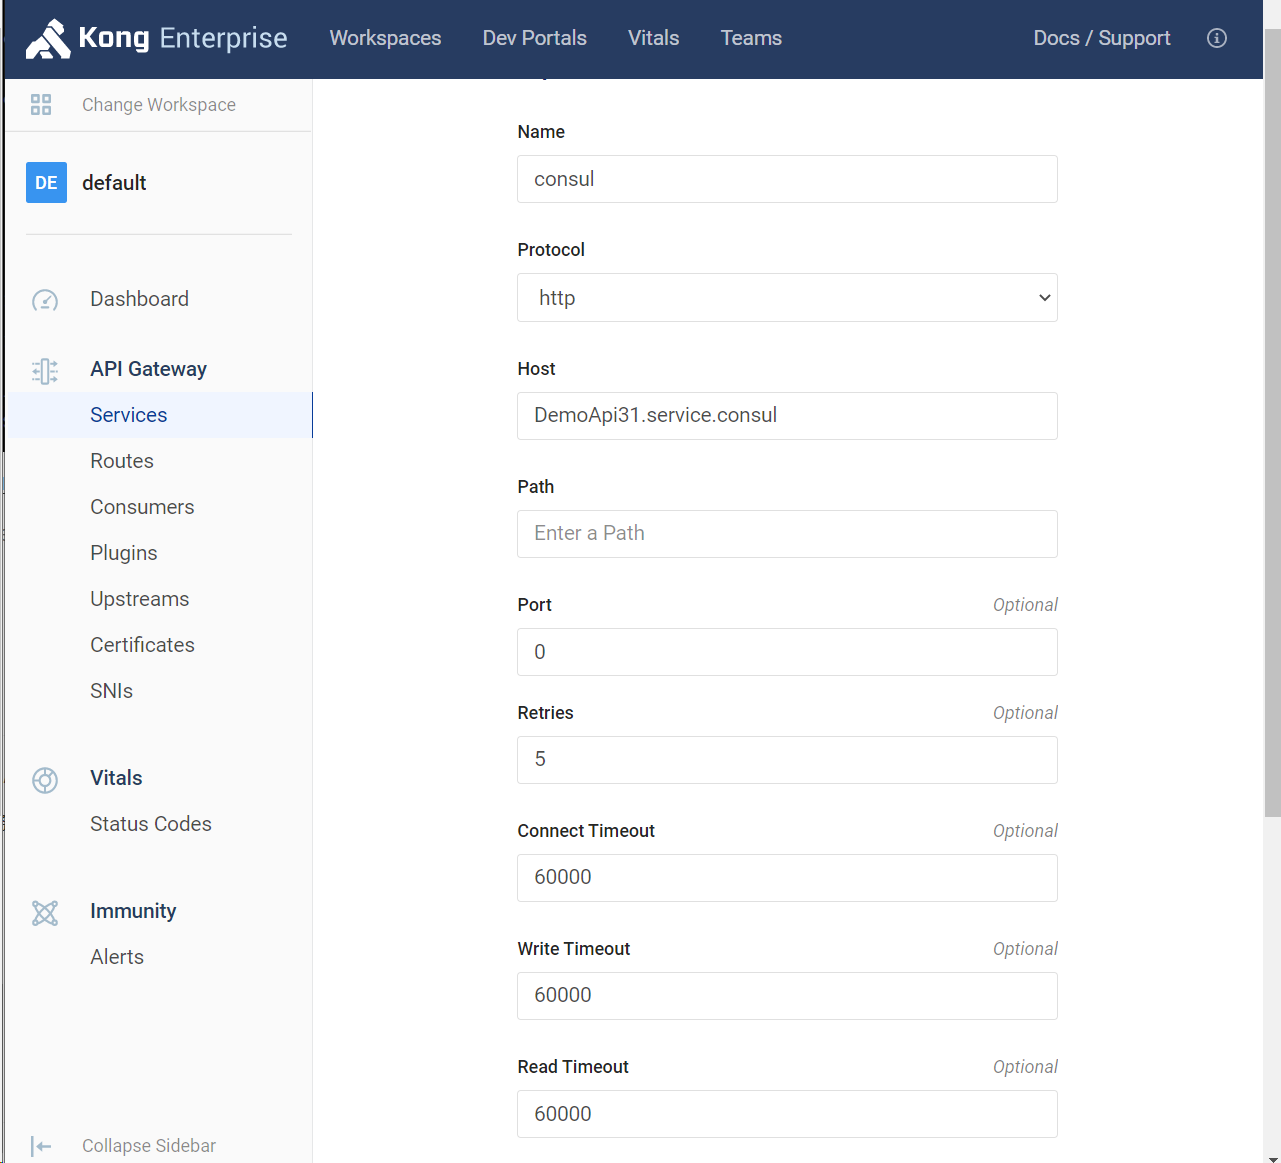
1、创建一个名为consul的服务
DemoApi31.service.consul 是consu要求的格式
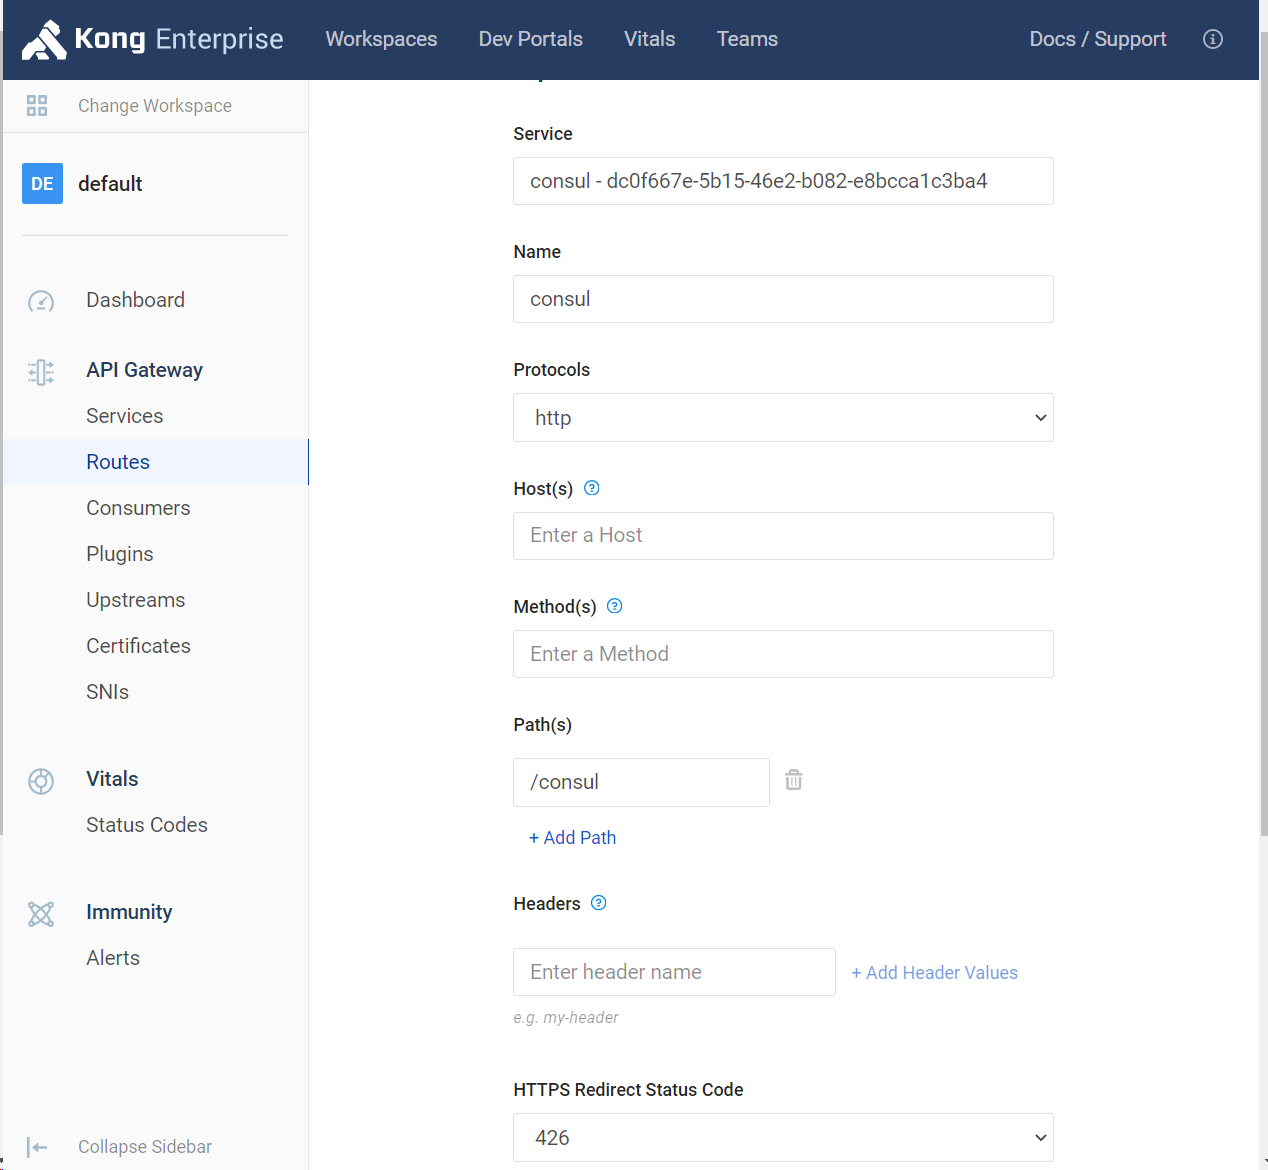
2、创建一个名为consul的路由
验证
访问我们配置的kong路由:http://172.16.1.30:8000/consul/api/values
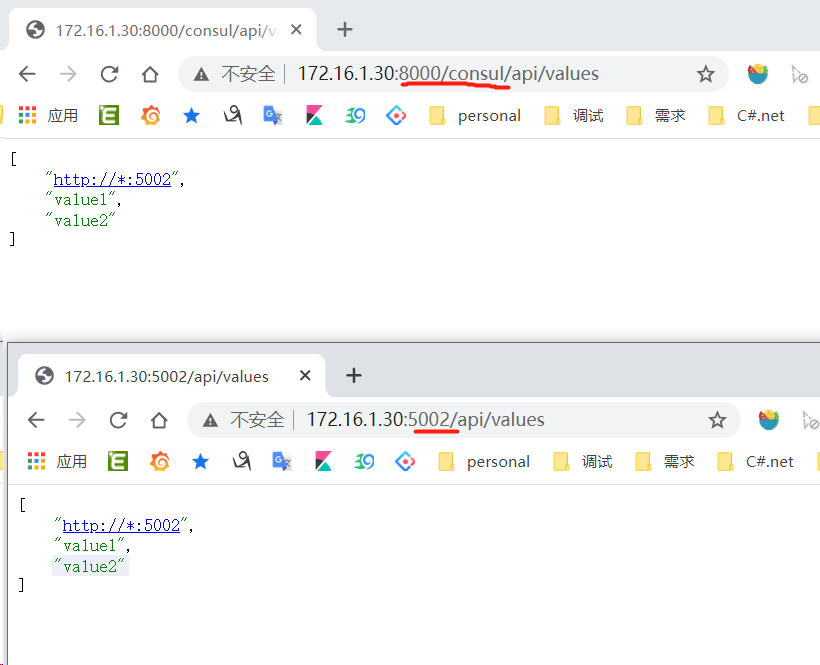
ok
到目前为止我们只完成了本文目的1、2
3,和4三请往下看;
在Asp.net Core中的使用
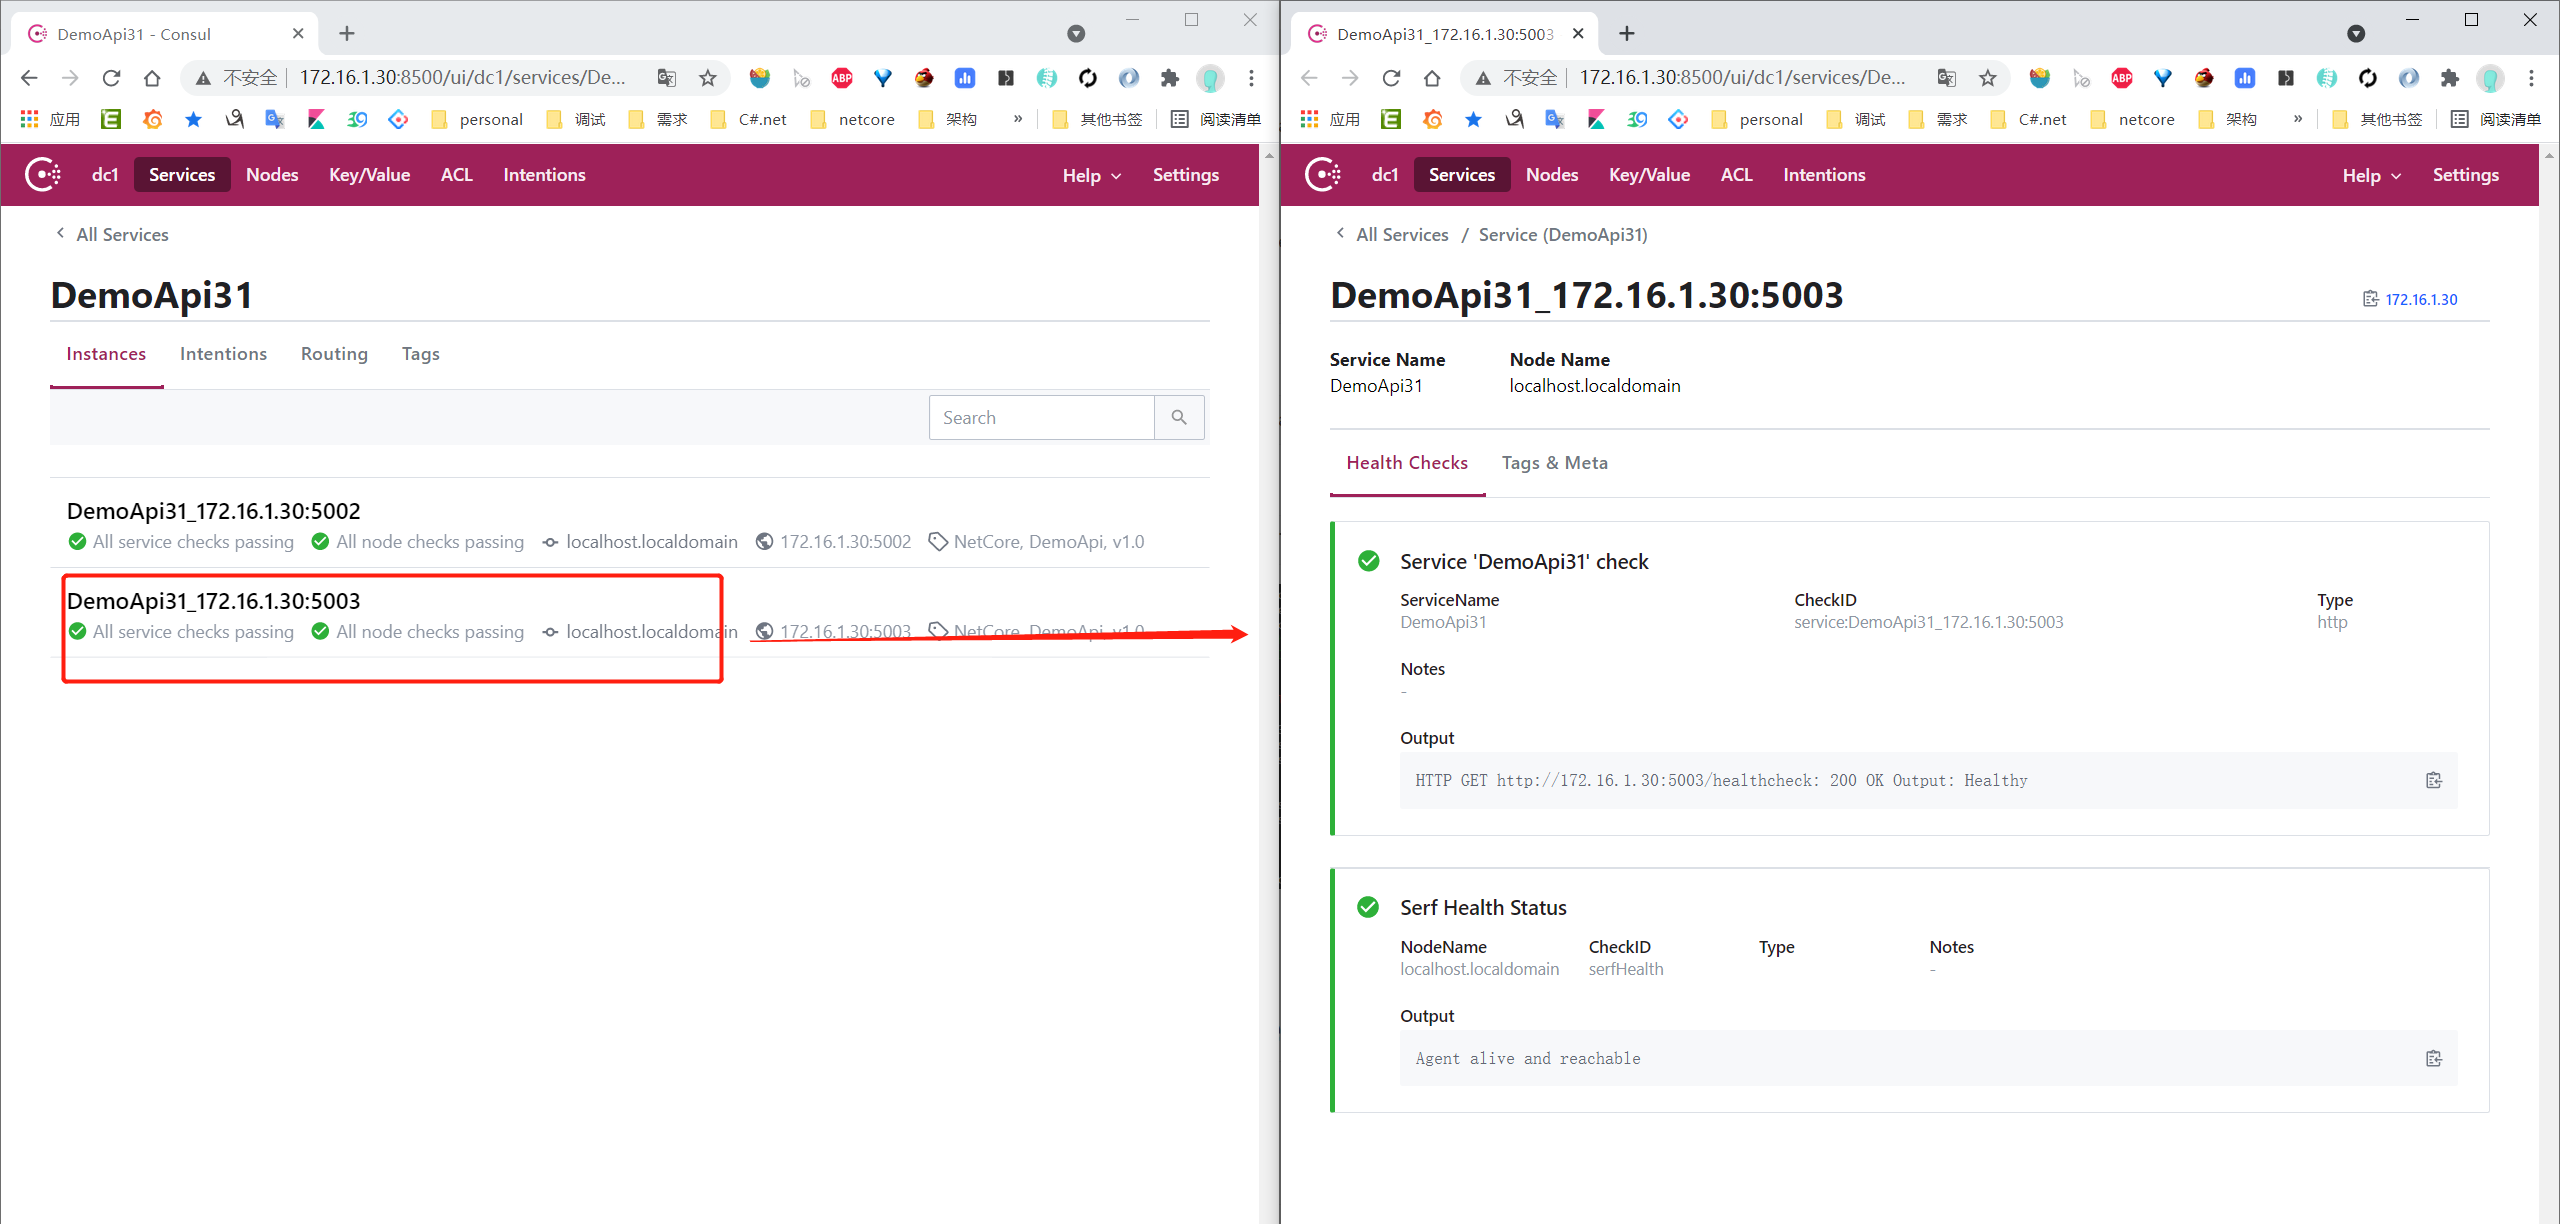
以之前的DemoApi31为例,换成5003端口,我需要达到的效果是,程序启动的时候就把服务注册到Consul 做好心跳检测,并同时部署到网关Kong,直接对外服务。
Asp.net Core 服务自动注册到Consul
安装nuget包
Install-Package Passport.Infrastructure -Version 0.1.4.7-preview-1
**加入配置appsettings.json**
大家主要各服务器要改成自己的
  "ServiceDiscovery": {

    "ServiceName": "DemoApi31",

    "Consul": {

      "HttpEndpoint": "http://172.16.1.30:8500",

      "HttpHeathCheck": {

        "Path": "/healthcheck",

        "TimeOunt": 10,

        "Interval": 10

      },

      "Tags": [

        "NetCore",

        "DemoApi",

        "v1.0"

      ]

    }

  }
StartUp.cs ConfigureServices方法
public void ConfigureServices(IServiceCollection services)

{

    //第一行

    PassportConfig.InitPassportConfig(Configuration, Environment);

    ......

    services.AddHealthChecks();

    services.AddConsul();

}
StartUp.cs Configure方法
app.UseHealthChecks("/healthcheck");
启动程序
dotnet DemoApi.Core3.1.dll --healthhost 172.16.1.30 --urls http://*:5003
源码解析
/// <summary>

/// 加入consul做服务管理

/// </summary>

/// <param name="services"></param>

/// <returns></returns>

public static IServiceCollection AddConsul(this IServiceCollection services)

{

    var options = PassportConfig.GetSection("ServiceDiscovery").Get<ServiceDiscoveryOptions>();

    if (options?.Disable != true)

    {

	var healthHost = PassportConfig.GetHealthHost();

	if (string.IsNullOrWhiteSpace(options?.ServiceName) || string.IsNullOrWhiteSpace(options?.Consul?.HttpEndPoint))

	{

	    throw new ArgumentNullException("ServiceDiscovery.ServiceName/Consul.HttpEndpoint cannot be null or empty!");

	}

	//实例化kongclient

	var consulClient = new ConsulClient(x => x.Address = new Uri(options.Consul.HttpEndPoint));

	services.AddSingleton(consulClient);

	services.Configure(new Action<ConsulOptions>(op =>

	{

	    op.HttpEndPoint = options.Consul.HttpEndPoint;

	    op.Token = options.Consul.Token;

	    op.TcpEndPoint = options.Consul.TcpEndPoint;

	}));

	var checkOptions = options.Consul.HttpHeathCheck;

	var checkUrl = $"http://{healthHost}:{PassportConfig.GetCurrentPort()}{checkOptions.Path}";

	new ConsulBuilder(consulClient)

	    .AddHttpHealthCheck(checkUrl, checkOptions.TimeOunt, checkOptions.Interval)

	    .RegisterService(options.ServiceName, healthHost, PassportConfig.GetCurrentPort(), options.Consul.Tags)

	    .Wait();

    }

    return services;

}
ConsulBuilder.cs 参考晓晨大佬
 public class ConsulBuilder

    {

        private readonly ConsulClient _client;

        private readonly List<AgentServiceCheck> _checks = new List<AgentServiceCheck>();

        public ConsulBuilder(ConsulClient client)

        {

            _client = client;

        }

        public ConsulBuilder AddHealthCheck(AgentServiceCheck check)

        {

            _checks.Add(check);

            return this;

        }

        /// <summary>

        ///

        /// </summary>

        /// <param name="url"></param>

        /// <param name="timeout">unit: second</param>

        /// <param name="interval">check interval. unit: second</param>

        /// <returns></returns>

        public ConsulBuilder AddHttpHealthCheck(string url, int timeout = 10, int interval = 10)

        {

            _checks.Add(new AgentServiceCheck()

            {

                DeregisterCriticalServiceAfter = TimeSpan.FromSeconds(timeout * 3),

                Interval = TimeSpan.FromSeconds(interval),

                HTTP = url,

                Timeout = TimeSpan.FromSeconds(timeout)

            });

            PassportConsole.Success($"[Consul]Add Http Healthcheck Success! CheckUrl:{url}");

            return this;

        }

        /// <summary>

        ///

        /// </summary>

        /// <param name="endpoint">GPRC service address.</param>

        /// <param name="grpcUseTls"></param>

        /// <param name="timeout">unit: second</param>

        /// <param name="interval">check interval. unit: second</param>

        /// <returns></returns>

        public ConsulBuilder AddGRPCHealthCheck(string endpoint, bool grpcUseTls = false, int timeout = 10, int interval = 10)

        {

            _checks.Add(new AgentServiceCheck()

            {

                DeregisterCriticalServiceAfter = TimeSpan.FromSeconds(20),

                Interval = TimeSpan.FromSeconds(interval),

                GRPC = endpoint,

                GRPCUseTLS = grpcUseTls,

                Timeout = TimeSpan.FromSeconds(timeout)

            });

            PassportConsole.Success($"[Consul]Add GRPC HealthCheck Success! Endpoint:{endpoint}");

            return this;

        }

        public async Task RegisterService(string name, string host, int port, string[] tags)

        {

            var registration = new AgentServiceRegistration()

            {

                Checks = _checks.ToArray(),

                ID = $"{name}_{host}:{port}",

                Name = name,

                Address = host,

                Port = port,

                Tags = tags

            };

            await _client.Agent.ServiceRegister(registration);

            PassportConsole.Success($"[Consul]Register Service Success! Name:{name} ID:{registration.ID}");

            AppDomain.CurrentDomain.ProcessExit += async (sender, e) =>

            {

                PassportConsole.Information($"[Consul] Service Deregisting ....  ID:{registration.ID}");

                await _client.Agent.ServiceDeregister(registration.ID);

            };

        }

        /// <summary>

        /// 移除服务

        /// </summary>

        /// <param name="serviceId"></param>

        public async Task Deregister(string serviceId)

        {

            await _client?.Agent?.ServiceDeregister(serviceId);

        }

    }
逻辑简单,确定自己需要用的是注册服务功能,调Consul Api 注册,然后程序退出的时候注销consul的服务就行;
Asp.net core WebApi 自动注册路由规则到kong
通过Consul
安装nuget包
#已安装跳过

Install-Package Passport.Infrastructure -Version 0.1.4.7-preview-1
**加入配置appsettings.json**
guid顺便去https://www.guidgen.com/ 生成一个
"Kong": {

    //"Disable": false, //true=禁用

    "Host": "http://172.16.1.30:8001",

    "Services": [

      {

        "Id": "72e21af8-283f-44c4-a766-53de8bb35c21", //guid

        "Name": "service-autoapi",

        "Retries": 5,

        "Protocol": "http",

        "Host": "DemoApi31.service.consul",

        "Port": 0,

        "Path": null,

        "Connect_timeout": 60000, //毫秒

        "Write_timeout": 60000,

        "Read_timeout": 60000,

        "Tags": null

      }

    ],

    "Routes": [

      {

        "Id": "5370e1b7-6c43-442d-9a44-23c249f958f7",

        "Name": "route-autoapi",

        "Protocols": [ "http" ],

        "Methods": null,

        "Hosts": null,

        "Paths": [ "/autoapi" ],

        "Https_redirect_status_code": 307,

        "Regex_priority": 0,

        "Strip_path": true,

        "Preserve_host": false,

        "Tags": null,

        "Service": {

          "Id": "72e21af8-283f-44c4-a766-53de8bb35c21" //这个id跟关联的Services的id一致

        }

      }

    ]

 }
StartUp.cs ConfigureServices方法
public void ConfigureServices(IServiceCollection services)

{

   ......

    services.AddConsul();

    services.RouteRegistToKong();

}
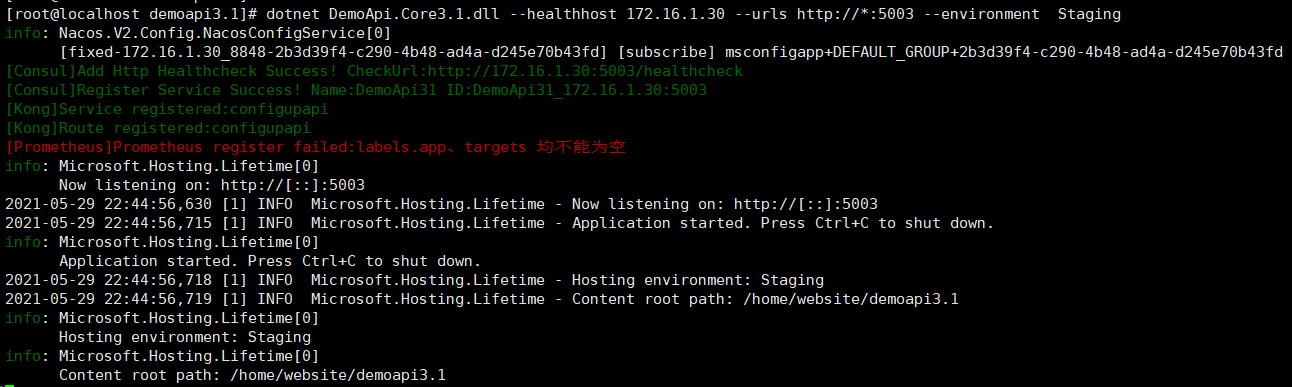
启动程序
dotnet DemoApi.Core3.1.dll --healthhost 172.16.1.30 --urls http://*:5003
验证
查看kong管理后台:
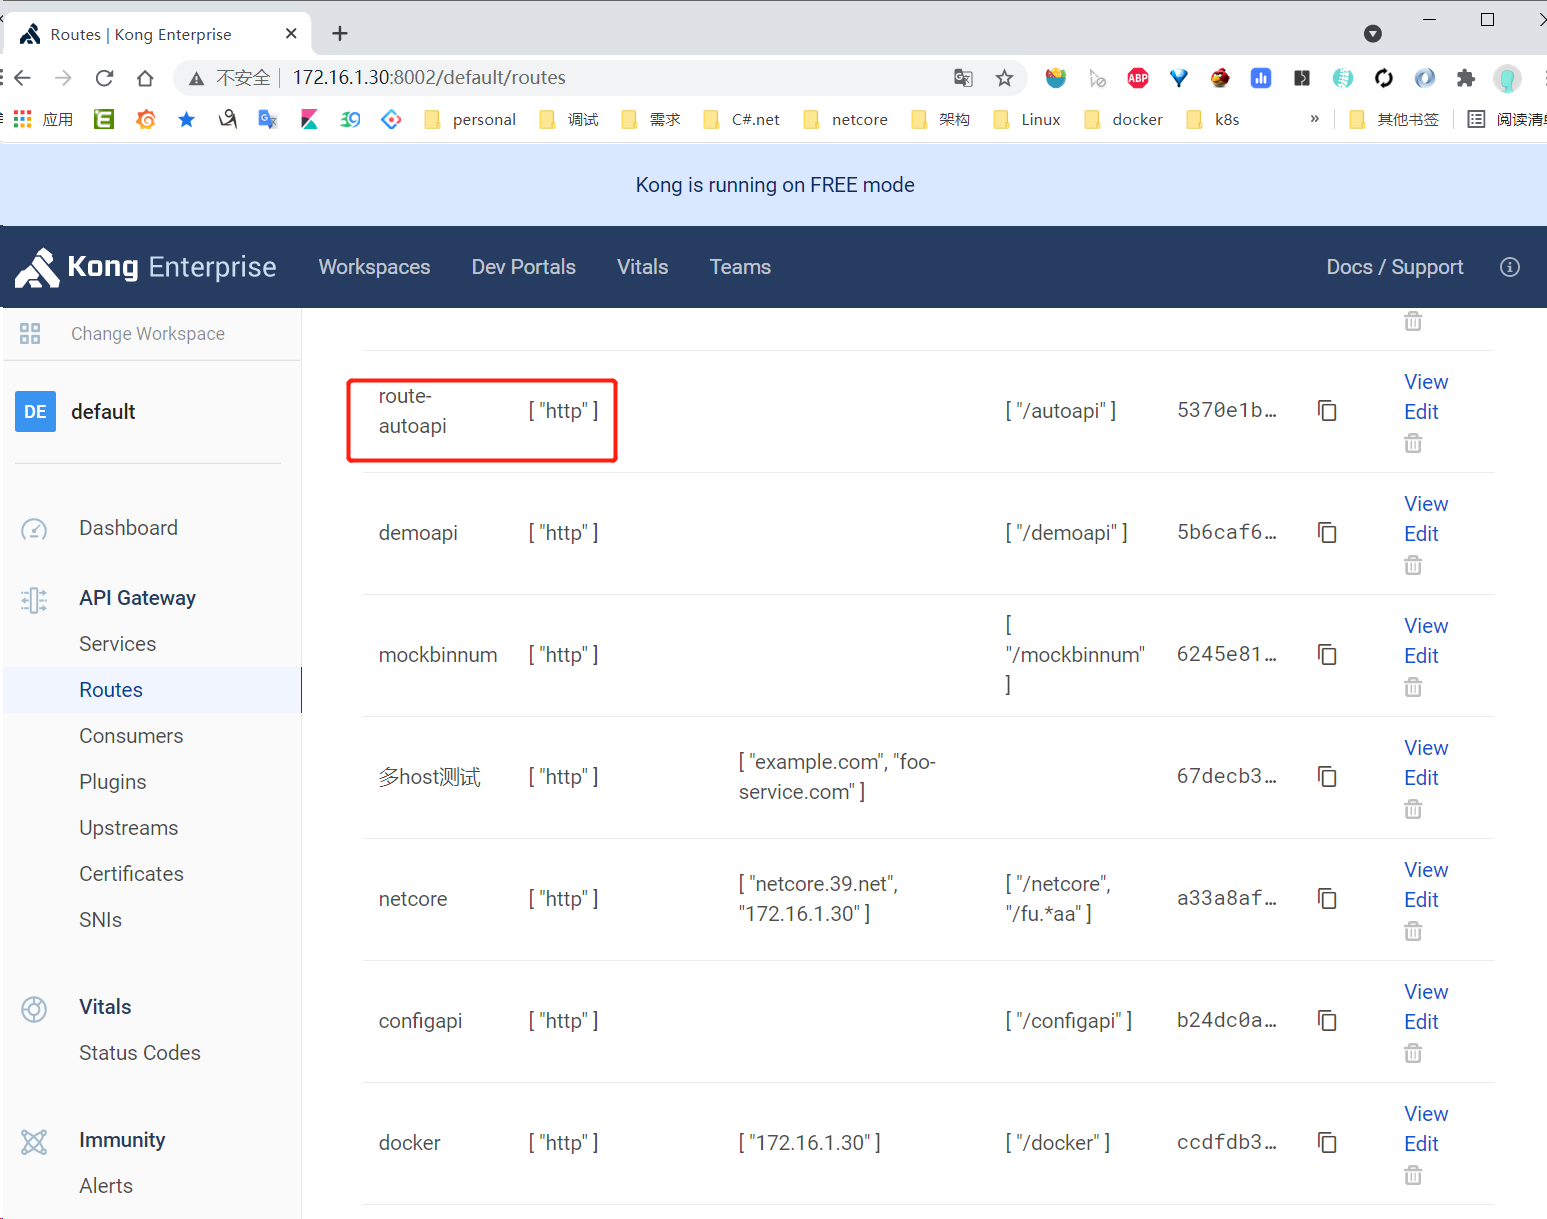
访问 http://172.16.1.30:8000/auto/api/values
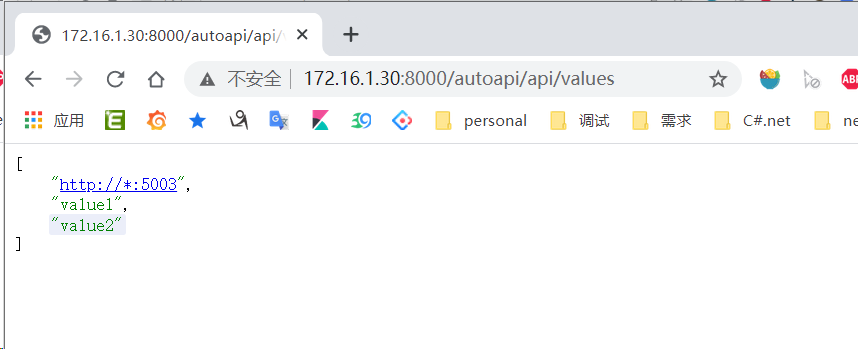
大功告成。
不通过Consul,直接配置路由到kong
StartUp.cs ConfigureServices方法
public void ConfigureServices(IServiceCollection services)

{

   ......

    //删掉这行services.AddConsul();

    services.RouteRegistToKong();

}
配置变为
"Kong": {

    //"Disable": false, //true=禁用

    "Host": "http://172.16.1.30:8001",

    "Services": [

      {

        "Id": "0f86015b-b170-4ada-b045-740ae7d77ed6", //guid

        "Name": "configupapi",

        "Retries": 5,

        "Protocol": "http",

        "Host": "configupapi",

        "Port": 0,

        "Path": null,

        "Connect_timeout": 60000, //毫秒

        "Write_timeout": 60000,

        "Read_timeout": 60000,

        "Tags": null

      }

    ],

    "Routes": [

      {

        "Id": "1be79a57-af87-43b0-a0a0-b7a6cc0c5ade",

        "Name": "configupapi",

        "Protocols": [ "http" ],

        "Methods": null,

        "Hosts": null,

        "Paths": [ "/configupapi" ],

        "Https_redirect_status_code": 307,

        "Regex_priority": 0,

        "Strip_path": true,

        "Preserve_host": false,

        "Tags": null,

        "Service": {

          "Id": "0f86015b-b170-4ada-b045-740ae7d77ed6" //这个id跟Services的id一致

        }

      }

    ],

    "Upstream": {

      "Id": "8efd15af-df78-422f-97a0-9072fa7e7431",

      "Tags": [ "exampleapi", "v1.0" ],

      "Name": "configupapi",

      "Hash_on": "none",

      "Healthchecks": {

        "Active": {

          "Unhealthy": {

            "Http_statuses": [ 429, 500, 501, 502, 503, 504, 505 ],

            "Tcp_failures": 1,

            "Timeouts": 2,

            "Http_failures": 1,

            "Interval": 5

          },

          "Type": "http",

          "Http_path": "/healthcheck",

          "Timeout": 1,

          "Healthy": {

            "Successes": 1,

            "Interval": 20,

            "Http_statuses": [ 200, 302 ]

          },

          "Https_verify_certificate": true,

          "Concurrency": 1

        },

        "Passive": {

          "Unhealthy": {

            "Http_statuses": [ 429, 500, 501, 502, 503, 504, 505 ]

          },

          "Healthy": {

            "Http_statuses": [ 200, 201, 302 ]

          },

          "Type": "http"

        }

      },

      "Hash_on_cookie_path": "/",

      "Hash_fallback": "none",

      "Slots": 10000

    },

    "Target": {

      "Tags": [ "exampleapi", "v1.0" ],

      "Weight": 100

    }

  }
源码解析
/// <summary>

/// 路由注册到kong;

/// </summary>

/// <param name="services"></param>

/// <returns></returns>

public static IServiceCollection RouteRegistToKong(this IServiceCollection services)

{

    if (!PassportConfig.GetBool("Kong:Disable"))

    {

	var konghost = PassportConfig.Get("Kong:Host") ?? throw new ArgumentNullException("Kong:Host cannot be null or empty!");

	var options = new KongClientOptions(HttpClientFactory.Create(), konghost);

	var client = new KongClient(options);

	services.AddSingleton<KongClient>(client);

	var upStream = PassportConfig.GetSection("Kong:Upstream").Get<UpStream>();

	var target = PassportConfig.GetSection("Kong:Target").Get<TargetInfo>();

	if (upStream != null && target != null)

	{

	    upStream.Created_at = DateTime.Now;

	    upStream = client.UpStream.UpdateOrCreate(upStream).Result;

	    target.Target = $"{PassportConfig.GetHealthHost()}:{PassportConfig.GetCurrentPort()}";

	    target.Id = PassportTools.GuidFromString($"{Dns.GetHostName()}{target.Target}");

	    target.Created_at = DateTime.Now;

	    target.UpStream = new TargetInfo.UpStreamId { Id = upStream.Id.Value };

	    client.Target.Add(target).Wait();

	    PassportConsole.Success($"[Kong]UpStream registered:{upStream.Name} Target:{target.Target}");

	    // app.UseKongHealthChecks(upStream, onExecuter);

	}

	var kongServices = PassportConfig.GetSection("Kong:Services").Get<ServiceInfo[]>();

	var kongRoutes = PassportConfig.GetSection("Kong:Routes").Get<RouteInfo[]>();

	if (kongServices?.Length > 0 == true)

	{

	    foreach (var item in kongServices)

	    {

		item.Updated_at = DateTime.Now;

		item.Path = string.IsNullOrWhiteSpace(item.Path) ? null : item.Path;

		client.Service.UpdateOrCreate(item).Wait();

		PassportConsole.Success($"[Kong]Service registered:{item.Name}");

	    }

	}

	if (kongRoutes?.Length > 0 == true)

	{

	    foreach (var item in kongRoutes)

	    {

		item.Updated_at = DateTime.Now;

		client.Route.UpdateOrCreate(item).Wait();

		PassportConsole.Success($"[Kong]Route registered:{item.Name}");

	    }

	}

    }

    return services;

}
逻辑也简单,也是调用kong配置把本该手工配置的路由,分别调用upstream、service、route Api修改配置。有区别的是程序退出时不会去删对应的路由;
总结
我在各技术博客都没有看到总结的比较好的kong+consul+asp.net core的集成文章,特此总结。期待您的点赞留意;
[参考]
https://www.cnblogs.com/stulzq/p/11942691.html
https://github.com/lianggx/Kong.Net
Api网关Kong集成Consul做服务发现及在Asp.Net Core中的使用的更多相关文章
- 使用Consul做服务发现的若干姿势
从2016年起就开始接触Consul,使用的主要目的就是做服务发现,后来逐步应用于生产环境,并总结了少许使用经验.最开始使用Consul的人不多,为了方便交流创建了一个QQ群,这两年微服务越来越火,使 ...
- Consul做服务发现
使用Consul做服务发现的若干姿势 https://www.cnblogs.com/bossma/p/9756809.html 从2016年起就开始接触Consul,使用的主要目的就是做服务发现,后 ...
- Go | Go 使用 consul 做服务发现
Go 使用 consul 做服务发现 目录 Go 使用 consul 做服务发现 前言 一.目标 二.使用步骤 1. 安装 consul 2. 服务注册 定义接口 具体实现 测试用例 3. 服务发现 ...
- go-micro使用Consul做服务发现的方法和原理
go-micro v4默认使用mdns做服务发现.不过也支持采用其它的服务发现中间件,因为多年来一直使用Consul做服务发现,为了方便和其它服务集成,所以还是选择了Consul.这篇文章将介绍go- ...
- .Netcore 2.0 Ocelot Api网关教程(4)- 服务发现
本文介绍Ocelot中的服务发现(Service Discovery),Ocelot允许指定一个服务发现提供器,之后将从中寻找下游服务的host和port来进行请求路由.关于服务发现的详细介绍请点击. ...
- 使用Redis Stream来做消息队列和在Asp.Net Core中的实现
写在前面 我一直以来使用redis的时候,很多低烈度需求(并发要求不是很高)需要用到消息队列的时候,在项目本身已经使用了Redis的情况下都想直接用Redis来做消息队列,而不想引入新的服务,kafk ...
- ASP.NET Core中的依赖注入(4): 构造函数的选择与服务生命周期管理
ServiceProvider最终提供的服务实例都是根据对应的ServiceDescriptor创建的,对于一个具体的ServiceDescriptor对象来说,如果它的ImplementationI ...
- 如何在 ASP.NET Core 中构建轻量级服务
在 ASP.NET Core 中处理 Web 应用程序时,我们可能经常希望构建轻量级服务,也就是没有模板或控制器类的服务. 轻量级服务可以降低资源消耗,而且能够提高性能.我们可以在 Startup 或 ...
- ASP.NET Core中的依赖注入(3): 服务的注册与提供
在采用了依赖注入的应用中,我们总是直接利用DI容器直接获取所需的服务实例,换句话说,DI容器起到了一个服务提供者的角色,它能够根据我们提供的服务描述信息提供一个可用的服务对象.ASP.NET Core ...
随机推荐
- 记一次 医院.NET公众号系统 线程CPU双高分析
一:背景 1. 讲故事 上周四有位朋友加wx咨询他的程序出现 CPU + 线程 双高的情况,希望我能帮忙排查下,如下图: 从截图看只是线程爆高,没看到 cpu 爆高哈,有意思的是这位朋友说他: 一直在 ...
- SpringMVC笔记(五)
1. 拦截器 1.1 拦截器和过滤器 SpringMVC的处理器拦截器类似于Servlet开发过程中的过滤器Filter,用于对处理器进行预处理和后处理.我们可以自定义一些拦截器来实现特定的功能 过滤 ...
- 15- web安全测试与appscan Scrawlr的使用
web应用安全性问题 认证与授权测试要点 认证与授权测试要点之授权 session与cookie之cookie测试点: session测试点: 上传文件漏洞 SQL注入 SQL注入原理 SQL注入检查 ...
- flex 的 三个参数 flex:1 0 auto
flex :flex-group flex-shirk flex-basis ①.flex-group 剩余空间索取 默认值为0,不索取 eg:父元素400,子元素A为100px,B为200px. ...
- 织梦seo
建站-->采集文章-->sitemap-->robots->百度提交链接(主推和自动结合)-->后续优化 http://jingyan.baidu.com/article ...
- Android木马病毒com.schemedroid的分析报告
某安全公司移动病毒分析报告的面试题目,该病毒样本的代码量比较大,最大的分析障碍是该病毒样本的类名称和类方法名称以及类成员变量的名称被混淆为无法辨认的特殊字符,每个被分析的类中所有的字符串都被加密处理了 ...
- 深入浅出带你玩转sqlilabs(二)
MYSQL高权限注入 mysql跨库注入 详情请看上一篇:深入浅出带你玩转sqlilabs(一) mysql文件操作注入-sqlilabs less7 可能用到的函数: into outfile()函 ...
- Tensorflow Probability Distributions 简介
摘要:Tensorflow Distributions提供了两类抽象:distributions和bijectors.distributions提供了一系列具备快速.数值稳定的采样.对数概率计算以及其 ...
- 巧用SQL拼接语句
前言: 在日常数据库运维过程中,可能经常会用到各种拼接语句,巧用拼接SQL可以让我们的工作方便很多,达到事半功倍的效果.本篇文章将会分享几个日常会用到的SQL拼接案例,类似的SQL还可以举一反三,探索 ...
- C++ primer plus读书笔记——第8章 函数探幽
第8章 函数探幽 1. 对于内联函数,编译器将使用相应的函数代码替换函数调用,程序无需跳到一个位置执行代码,再调回来.因此,内联函数的运行速度比常规函数稍快,但代价是需要占用更多内存. 2. 要使用内 ...