confluence搭建破解及汉化教程
注:本文参考了 《 confluence搭建破解及汉化教程 》
本文是在yum环境搭建好,且可用联网的前提下进行的实际操作并作记录的。
关于yum本地环境搭建可以参考此文:《CentOS7.2 创建本地YUM源和局域网YUM源》
关于linux 环境联网。设置静态ip 可以参考此文:《Centos7 设置静态IP地址》也可以直接设置为动态ip.
Confluence是一个专业的企业知识管理与协同软件,也可以用于构建企业wiki。使用简单,但它强大的编辑和站点管理特征能够帮助团队成员之间共享信息、文档协作、集体讨论,信息推送。
在此记录下搭建以及破解过程。
一.环境介绍
1.jdk-8u151-linux-x64.rpm
2.mysql-server-5.1.73-8.el6_8.x86_64.rpm
3.atlassian-confluence-5.6.6-x64.bin
4.操作系统centos6.5
64位
二.安装步骤
1.安装JAVA环境
参考一:《Centos7 linux 卸载自带安装的jdk 并yum自动安装jdk1.8》。本博主自己搭建的jdk环境安装是用了该“参考一”的操作方式。
参考二:
#在/usr目录下创建java目录

mkdir /usr/java

#下载jdk-8u151-linux-x64.rpm安装包。

wget http://download.oracle.com/otn-pub/java/jdk/8u151-b12/e758a0de34e24606bca991d704f6dcbf/jdk-8u151-linux-i586.rpm

##安装

rpm -ivh jdk-8u151-linux-i586.rpm

#配置环境变量

vim /etc/profile

#在最后文件末尾加入

JAVA_HOME=/usr/java/jdk1.7.0_79

JRE_HOME=/usr/java/jdk1.7.0_79/jre

CLASS_PATH=.:$JAVA_HOME/lib/dt.jar:$JAVA_HOME/lib/tools.jar:$JRE_HOME/lib

PATH=$PATH:$JAVA_HOME/bin:$JRE_HOME/bin

export JAVA_HOME JRE_HOME CLASS_PATH PATH

#更新配置

source /etc/profile

#查看JAVA版本

java -version
2.安装mysql
注:本段内容参考了:《CentOS7安装MySQL》
1: 下载并安装MySQL官方的 Yum Repository
[root@localhost ~]# wget -i -c http://dev.mysql.com/get/mysql57-community-release-el7-10.noarch.rpm[root@localhost ~]# wget -i -c http://dev.mysql.com/get/mysql57-community-release-el7-10.noarch.rpm
--2018-07-19 01:23:39-- http://dev.mysql.com/get/mysql57-community-release-el7-10.noarch.rpm
Resolving dev.mysql.com (dev.mysql.com)... 137.254.60.11
Connecting to dev.mysql.com (dev.mysql.com)|137.254.60.11|:80... connected.
HTTP request sent, awaiting response... 301 Moved Permanently
Location: https://dev.mysql.com/get/mysql57-community-release-el7-10.noarch.rpm [following]
--2018-07-19 01:23:39-- https://dev.mysql.com/get/mysql57-community-release-el7-10.noarch.rpm
Connecting to dev.mysql.com (dev.mysql.com)|137.254.60.11|:443... connected.
HTTP request sent, awaiting response... 302 Found
Location: https://repo.mysql.com//mysql57-community-release-el7-10.noarch.rpm [following]
--2018-07-19 01:23:41-- https://repo.mysql.com//mysql57-community-release-el7-10.noarch.rpm
Resolving repo.mysql.com (repo.mysql.com)... 23.59.65.109
Connecting to repo.mysql.com (repo.mysql.com)|23.59.65.109|:443... connected.
HTTP request sent, awaiting response... 200 OK
Length: 25548 (25K) [application/x-redhat-package-manager]
Saving to: ysql57-community-release-el7-10.noarch.rpm 100%[==================================================================================================================================>] 25,548 149KB/s in 0.2s 2018-07-19 01:23:42 (149 KB/s) - ysql57-community-release-el7-10.noarch.rpmsaved [25548/25548] -c: No such file or directory
No URLs found in -c.
FINISHED --2018-07-19 01:23:42--
Total wall clock time: 2.8s
Downloaded: 1 files, 25K in 0.2s (149 KB/s)
[root@localhost ~]# ls
anaconda-ks.cfg Documents initial-setup-ks.cfg linuxamd64_12102_database_2of2.zipmysql57-community-release-el7-10.noarch.rpm
  Public     Videos

Desktop          Downloads  linuxamd64_12102_database_1of2.zip  Music                               Pictures                                     Templates

[root@localhost ~]#
使用上面的命令就直接下载了安装用的Yum
Repository,大概25KB的样子,然后就可以直接yum安装了。[root@localhost ~]# yum -y install mysql57-community-release-el7-10.noarch.rpm[root@localhost ~]# yum -y install mysql57-community-release-el7-10.noarch.rpm
Loaded plugins: fastestmirror, langpacks
Examining mysql57-community-release-el7-10.noarch.rpm: mysql57-community-release-el7-10.noarch
Marking mysql57-community-release-el7-10.noarch.rpm to be installed
Resolving Dependencies
--> Running transaction check
---> Package mysql57-community-release.noarch 0:el7-10 will be installed
--> Finished Dependency Resolution
file://yum/mnt/repodata/repomd.xml: [Errno 14] curl#37 - "Couldn't open file /mnt/repodata/repomd.xml"
Trying other mirror. Dependencies Resolved ============================================================================================================================================================================
Package Arch Version Repository Size
============================================================================================================================================================================
Installing:
mysql57-community-release noarch el7-10 /mysql57-community-release-el7-10.noarch 30 k Transaction Summary
============================================================================================================================================================================
Install 1 Package Total size: 30 k
Installed size: 30 k
Downloading packages:
Running transaction check
Running transaction test
Transaction test succeeded
Running transaction
Installing : mysql57-community-release-el7-10.noarch 1/1
Verifying : mysql57-community-release-el7-10.noarch 1/1 Installed:
mysql57-community-release.noarch 0:el7-10 Complete!
[root@localhost ~]#之后就开始安装MySQL服务器。
[root@localhost ~]# yum -y install mysql-community-server[root@localhost ~]# yum -y install mysql-community-server
Loaded plugins: fastestmirror, langpacks
file://yum/mnt/repodata/repomd.xml: [Errno 14] curl#37 - "Couldn't open file /mnt/repodata/repomd.xml"
Trying other mirror.
mysql-connectors-community | 2.5 kB 00:00:00
mysql-tools-community | 2.5 kB 00:00:00
mysql57-community | 2.5 kB 00:00:00
(1/3): mysql-connectors-community/x86_64/primary_db | 20 kB 00:00:00
(2/3): mysql-tools-community/x86_64/primary_db | 41 kB 00:00:00
(3/3): mysql57-community/x86_64/primary_db | 144 kB 00:00:00
Loading mirror speeds from cached hostfile
Resolving Dependencies
--> Running transaction check
---> Package mysql-community-server.x86_64 0:5.7.22-1.el7 will be installed
--> Processing Dependency: mysql-community-common(x86-64) = 5.7.22-1.el7 for package: mysql-community-server-5.7.22-1.el7.x86_64
--> Processing Dependency: mysql-community-client(x86-64) >= 5.7.9 for package: mysql-community-server-5.7.22-1.el7.x86_64
--> Running transaction check
---> Package mariadb.x86_64 1:5.5.52-1.el7 will be obsoleted
---> Package mysql-community-client.x86_64 0:5.7.22-1.el7 will be obsoleting
--> Processing Dependency: mysql-community-libs(x86-64) >= 5.7.9 for package: mysql-community-client-5.7.22-1.el7.x86_64
---> Package mysql-community-common.x86_64 0:5.7.22-1.el7 will be installed
--> Running transaction check
---> Package mariadb-libs.x86_64 1:5.5.52-1.el7 will be obsoleted
--> Processing Dependency: libmysqlclient.so.18()(64bit) for package: 2:postfix-2.10.1-6.el7.x86_64
--> Processing Dependency: libmysqlclient.so.18()(64bit) for package: 1:mariadb-devel-5.5.52-1.el7.x86_64
--> Processing Dependency: libmysqlclient.so.18(libmysqlclient_18)(64bit) for package: 2:postfix-2.10.1-6.el7.x86_64
--> Processing Dependency: mariadb-libs(x86-64) = 1:5.5.52-1.el7 for package: 1:mariadb-devel-5.5.52-1.el7.x86_64
---> Package mysql-community-libs.x86_64 0:5.7.22-1.el7 will be obsoleting
--> Running transaction check
---> Package mariadb-devel.x86_64 1:5.5.52-1.el7 will be obsoleted
---> Package mysql-community-devel.x86_64 0:5.7.22-1.el7 will be obsoleting
---> Package mysql-community-libs-compat.x86_64 0:5.7.22-1.el7 will be obsoleting
--> Finished Dependency Resolution Dependencies Resolved ============================================================================================================================================================================
Package Arch Version Repository Size
============================================================================================================================================================================
Installing:
mysql-community-client x86_64 5.7.22-1.el7 mysql57-community 24 M
replacing mariadb.x86_64 1:5.5.52-1.el7
mysql-community-devel x86_64 5.7.22-1.el7 mysql57-community 3.6 M
replacing mariadb-devel.x86_64 1:5.5.52-1.el7
mysql-community-libs x86_64 5.7.22-1.el7 mysql57-community 2.1 M
replacing mariadb-libs.x86_64 1:5.5.52-1.el7
mysql-community-libs-compat x86_64 5.7.22-1.el7 mysql57-community 2.0 M
replacing mariadb-libs.x86_64 1:5.5.52-1.el7
mysql-community-server x86_64 5.7.22-1.el7 mysql57-community 165 M
Installing for dependencies:
mysql-community-common x86_64 5.7.22-1.el7 mysql57-community 274 k Transaction Summary
============================================================================================================================================================================
Install 5 Packages (+1 Dependent package) Total download size: 197 M
Downloading packages:
warning: /var/cache/yum/x86_64/7/mysql57-community/packages/mysql-community-common-5.7.22-1.el7.x86_64.rpm: Header V3 DSA/SHA1 Signature, key ID 5072e1f5: NOKEY0:18:11 ETA
Public key for mysql-community-common-5.7.22-1.el7.x86_64.rpm is not installed
(1/6): mysql-community-common-5.7.22-1.el7.x86_64.rpm | 274 kB 00:00:01
(2/6): mysql-community-devel-5.7.22-1.el7.x86_64.rpm | 3.6 MB 00:00:06
(3/6): mysql-community-libs-5.7.22-1.el7.x86_64.rpm | 2.1 MB 00:00:03
(4/6): mysql-community-libs-compat-5.7.22-1.el7.x86_64.rpm | 2.0 MB 00:00:03
(5/6): mysql-community-client-5.7.22-1.el7.x86_64.rpm | 24 MB 00:00:38
(6/6): mysql-community-server-5.7.22-1.el7.x86_64.rpm | 165 MB 00:11:41
----------------------------------------------------------------------------------------------------------------------------------------------------------------------------
Total 281 kB/s | 197 MB 00:11:57
Retrieving key from file:///etc/pki/rpm-gpg/RPM-GPG-KEY-mysql
Importing GPG key 0x5072E1F5:
Userid : "MySQL Release Engineering <mysql-build@oss.oracle.com>"
Fingerprint: a4a9 4068 76fc bd3c 4567 70c8 8c71 8d3b 5072 e1f5
Package : mysql57-community-release-el7-10.noarch (installed)
From : /etc/pki/rpm-gpg/RPM-GPG-KEY-mysql
Running transaction check
Running transaction test
Transaction test succeeded
Running transaction
Installing : mysql-community-common-5.7.22-1.el7.x86_64 1/9
Installing : mysql-community-libs-5.7.22-1.el7.x86_64 2/9
Installing : mysql-community-client-5.7.22-1.el7.x86_64 3/9
Installing : mysql-community-server-5.7.22-1.el7.x86_64 4/9
Installing : mysql-community-libs-compat-5.7.22-1.el7.x86_64 5/9
Installing : mysql-community-devel-5.7.22-1.el7.x86_64 6/9
Erasing : 1:mariadb-devel-5.5.52-1.el7.x86_64 7/9
Erasing : 1:mariadb-5.5.52-1.el7.x86_64 8/9
Erasing : 1:mariadb-libs-5.5.52-1.el7.x86_64 9/9
Verifying : mysql-community-libs-compat-5.7.22-1.el7.x86_64 1/9
Verifying : mysql-community-common-5.7.22-1.el7.x86_64 2/9
Verifying : mysql-community-devel-5.7.22-1.el7.x86_64 3/9
Verifying : mysql-community-server-5.7.22-1.el7.x86_64 4/9
Verifying : mysql-community-client-5.7.22-1.el7.x86_64 5/9
Verifying : mysql-community-libs-5.7.22-1.el7.x86_64 6/9
Verifying : 1:mariadb-5.5.52-1.el7.x86_64 7/9
Verifying : 1:mariadb-libs-5.5.52-1.el7.x86_64 8/9
Verifying : 1:mariadb-devel-5.5.52-1.el7.x86_64 9/9 Installed:
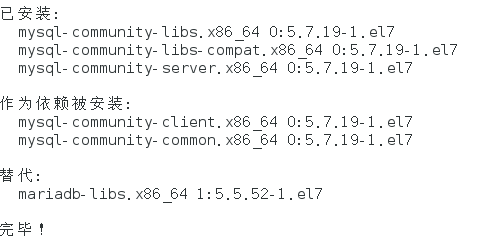
mysql-community-client.x86_64 0:5.7.22-1.el7 mysql-community-devel.x86_64 0:5.7.22-1.el7 mysql-community-libs.x86_64 0:5.7.22-1.el7
mysql-community-libs-compat.x86_64 0:5.7.22-1.el7 mysql-community-server.x86_64 0:5.7.22-1.el7 Dependency Installed:
mysql-community-common.x86_64 0:5.7.22-1.el7 Replaced:
mariadb.x86_64 1:5.5.52-1.el7 mariadb-devel.x86_64 1:5.5.52-1.el7 mariadb-libs.x86_64 1:5.5.52-1.el7 Complete!
[root@localhost ~]#这步可能会花些时间,安装完成后就会覆盖掉之前的mariadb。
至此MySQL就安装完成了,然后是对MySQL的一些设置。
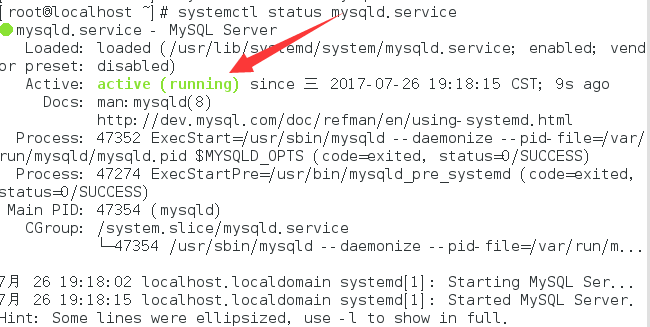
2:启动mysql,查看MySQL运行状态,并重置密码 123456
[root@localhost ~]# systemctl start  mysqld.service

[root@localhost ~]# systemctl status mysqld.service

[0m mysqld.service - MySQL Server

   Loaded: loaded (/usr/lib/systemd/system/mysqld.service; enabled; vendor preset: disabled)

   Active: active (running) since Thu 2018-07-19 07:56:21 CST; 19s ago

     Docs: man:mysqld(8)

           http://dev.mysql.com/doc/refman/en/using-systemd.html

  Process: 11839 ExecStart=/usr/sbin/mysqld --daemonize --pid-file=/var/run/mysqld/mysqld.pid $MYSQLD_OPTS (code=exited, status=0/SUCCESS)

  Process: 11753 ExecStartPre=/usr/bin/mysqld_pre_systemd (code=exited, status=0/SUCCESS)

 Main PID: 11842 (mysqld)

   CGroup: /system.slice/mysqld.service

           11842 /usr/sbin/mysqld --daemonize --pid-file=/var/run/mysqld/mysqld.pid

Jul 19 07:55:59 localhost.localdomain systemd[1]: Starting MySQL Server...

Jul 19 07:56:21 localhost.localdomain systemd[1]: Started MySQL Server.

[root@localhost ~]#
此时MySQL已经开始正常运行,不过要想进入MySQL还得先找出此时root用户的密码,通过如下命令可以在日志文件中找出密码:
[root@localhost ~]# grep "password" /var/log/mysqld.log[root@localhost ~]# grep "password" /var/log/mysqld.log
2018-07-18T23:56:15.261967Z 1 [Note] A temporary password is generated for root@localhost: %w-=S)1C-?3H
[root@localhost ~]#
如下命令进入数据库:
[root@localhost ~]# mysql -uroot -p
输入初始密码,此时不能做任何事情,因为MySQL默认必须修改密码之后才能操作数据库:
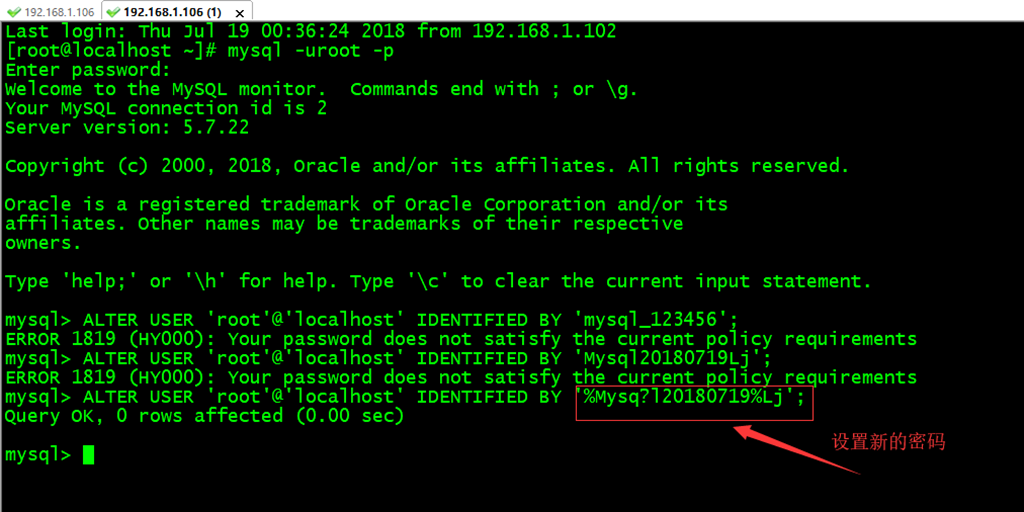
mysql> ALTER USER 'root'@'localhost' IDENTIFIED BY '%Mysq?l20180719%Lj';这里有个问题,新密码设置的时候如果设置的过于简单会报错:
原因是因为MySQL有密码设置的规范,具体是与validate_password_policy的值有关:
Last login: Thu Jul 19 00:36:24 2018 from 192.168.1.102

[root@localhost ~]# mysql -uroot -p

Enter password:

Welcome to the MySQL monitor.  Commands end with ; or \g.

Your MySQL connection id is 2

Server version: 5.7.22

Copyright (c) 2000, 2018, Oracle and/or its affiliates. All rights reserved.

Oracle is a registered trademark of Oracle Corporation and/or its

affiliates. Other names may be trademarks of their respective

owners.

Type 'help;' or '\h' for help. Type '\c' to clear the current input statement.

mysql> ALTER USER 'root'@'localhost' IDENTIFIED BY 'mysql_123456';

ERROR 1819 (HY000): Your password does not satisfy the current policy requirements

mysql> ALTER USER 'root'@'localhost' IDENTIFIED BY 'Mysql20180719Lj';

ERROR 1819 (HY000): Your password does not satisfy the current policy requirements

mysql> ALTER USER 'root'@'localhost' IDENTIFIED BY '%Mysq?l20180719%Lj';

Query OK, 0 rows affected (0.00 sec)

mysql>
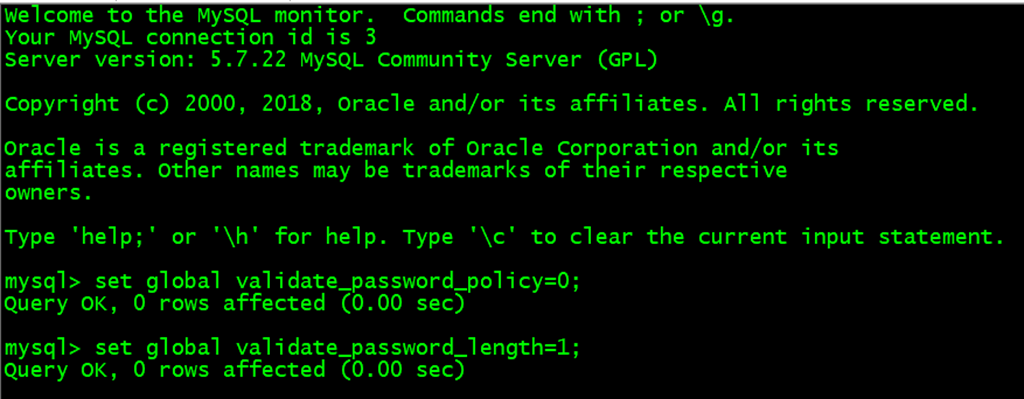
密码的长度是由validate_password_length决定的,而validate_password_length的计算公式是:
validate_password_length = validate_password_number_count + validate_password_special_char_count + (2 * validate_password_mixed_case_count)我的是已经修改过的,初始情况下第一个的值是ON,validate_password_length是8。可以通过如下命令修改:
mysql> set global validate_password_policy=0;

mysql> set global validate_password_length=1;
[root@localhost ~]# mysql -uroot -p

Enter password:

Welcome to the MySQL monitor.  Commands end with ; or \g.

Your MySQL connection id is 3

Server version: 5.7.22 MySQL Community Server (GPL)

Copyright (c) 2000, 2018, Oracle and/or its affiliates. All rights reserved.

Oracle is a registered trademark of Oracle Corporation and/or its

affiliates. Other names may be trademarks of their respective

owners.

Type 'help;' or '\h' for help. Type '\c' to clear the current input statement.

mysql> set global validate_password_policy=0;

Query OK, 0 rows affected (0.00 sec)

mysql> set global validate_password_length=1;

Query OK, 0 rows affected (0.00 sec)

mysql> ALTER USER 'root'@'localhost' IDENTIFIED BY '';

Query OK, 0 rows affected (0.00 sec)

mysql>
设置之后就是我上面查出来的那几个值了,此时密码就可以设置的很简单,例如1234之类的。到此数据库的密码设置就完成了。
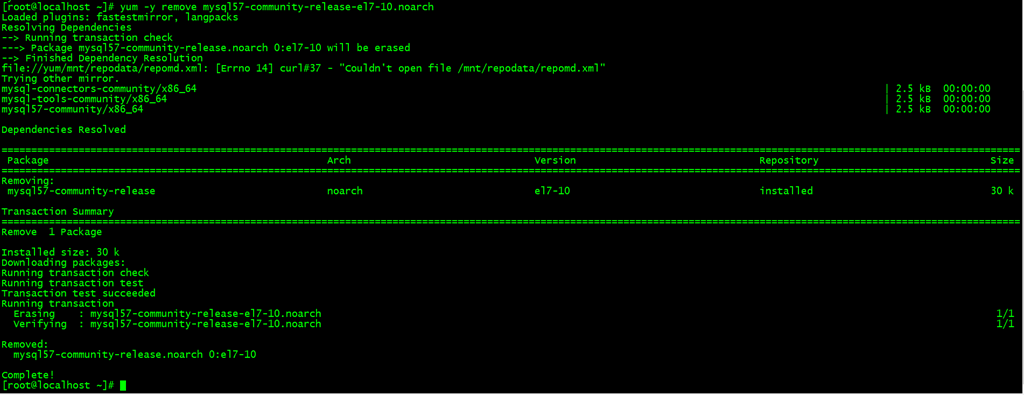
但此时还有一个问题,就是因为安装了Yum
Repository,以后每次yum操作都会自动更新,需要把这个卸载掉:[root@localhost ~]# yum -y remove mysql57-community-release-el7-10.noarch
此时才算真的完成了。
或者参考下文内容:
mysqladmin -u root password '123456'3:设置mysql开机自启动。
注:本段内容来自于《CentOS 7安装Mysql并设置开机自启动》
1 vim /etc/rc.local

2 添加service mysqld start
下文为本博主自己操作详情:
[root@localhost ~]# cat /etc/rc.local

#!/bin/bash

# THIS FILE IS ADDED FOR COMPATIBILITY PURPOSES

#

# It is highly advisable to create own systemd services or udev rules

# to run scripts during boot instead of using this file.

#

# In contrast to previous versions due to parallel execution during boot

# this script will NOT be run after all other services.

#

# Please note that you must run 'chmod +x /etc/rc.d/rc.local' to ensure

# that this script will be executed during boot.

touch /var/lock/subsys/local

# add JAVA_HOME

export JAVA_HOME=/etc/alternatives/java_sdk_1.8.0

[root@localhost ~]# vi /etc/rc.local

#!/bin/bash

# THIS FILE IS ADDED FOR COMPATIBILITY PURPOSES

#

# It is highly advisable to create own systemd services or udev rules

# to run scripts during boot instead of using this file.

#

# In contrast to previous versions due to parallel execution during boot

# this script will NOT be run after all other services.

#

# Please note that you must run 'chmod +x /etc/rc.d/rc.local' to ensure

# that this script will be executed during boot.

touch /var/lock/subsys/local

# add JAVA_HOME

export JAVA_HOME=/etc/alternatives/java_sdk_1.8.0

service mysqld start

~

~

~

~

~

~

~

~

~

~

~

~

~

~

~

~

~

~

~

~

~

~

~

~

"/etc/rc.local" 19L, 563C written

[root@localhost ~]# cat /etc/rc.local

#!/bin/bash

# THIS FILE IS ADDED FOR COMPATIBILITY PURPOSES

#

# It is highly advisable to create own systemd services or udev rules

# to run scripts during boot instead of using this file.

#

# In contrast to previous versions due to parallel execution during boot

# this script will NOT be run after all other services.

#

# Please note that you must run 'chmod +x /etc/rc.d/rc.local' to ensure

# that this script will be executed during boot.

touch /var/lock/subsys/local

# add JAVA_HOME

export JAVA_HOME=/etc/alternatives/java_sdk_1.8.0

service mysqld start

[root@localhost ~]#
关于自启动:只适用于mysqld没有自启动的条件下。
如果默认mysql是自启动的,可能和rc.local中的自启动出现乱序之类的问题。
更稳妥的一个解决办法见:
注:本段内容来自于《CentOS 7 程序自启动的问题 》
CentOS
7 程序自启动的问题一、问题现象:
系统重启后,发现mysqld服务启动正常,但是依赖mysql数据库的应用程序A启动失败。
查看日志显示,程序A启动的时候链接数据库失败。
二、原因分析:
mysqld服务是正常启动的。
此时手动重启程序A,A也正常运行。
结论:说明程序A启动的时候,mysqld可能没有启动。
三、启动顺序
首先想到的就是调整mysqld服务的启动顺序,让它高过我的程序A。
然而发现/etc/init.d路径下没有关于mysqld的启动脚本。
四、解决思路
按照链接指示安装的mysqld默认是自动启动的。
可以取消mysqld的自启动,然后写一个启动脚本确保它启动在程序A启动之前。
五、解决办法
1. 查看系统当前默认启动项目的方法,不再是setup之类的了。
systemctl list-unit-files执行此命令能查看当前系统的服务启动和服务状态。
结果显示如下:
1 ...

2 microcode.service                           enabled

3 mysql.service                               enabled

4 mysqld.service                              enabled

5 NetworkManager-dispatcher.service           enabled

6 ...
2. 取消mysqld的自启动
systemctl disable mysqld执行该命令后再查看当前系统的服务状态:
1 ...

2 microcode.service                           enabled

3 mysqld.service                              disabled

4 NetworkManager-dispatcher.service           enabled

5 ...
3. 自定义/etc/rc.local
先执行systemctl start mysqld
再执行startA
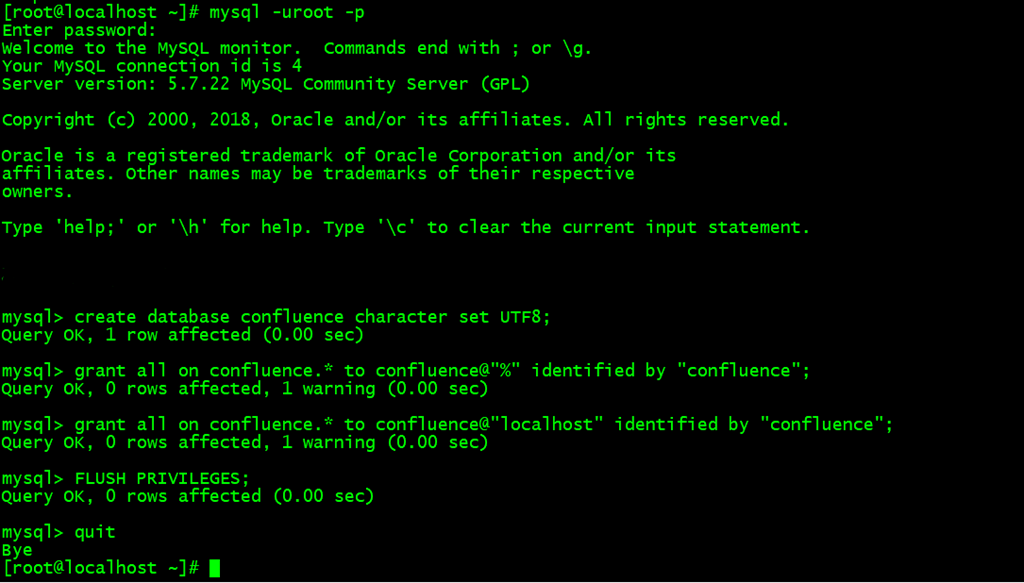
4:登入mysql ,创建:confluence 数据库
mysql -u root -p

create database confluence character set UTF8;

grant all on confluence.* to confluence@"%" identified by "confluence";

grant all on confluence.* to confluence@"localhost" identified by "confluence";

FLUSH PRIVILEGES;

quit
具体操作为:
5:解决中文乱码问题
vim /etc/my.cnf

#在[mysql]下面添加下述代码

character-set-server =utf8
具体操作如下:
[root@localhost ~]# cat /etc/my.cnf
# For advice on how to change settings please see
# http://dev.mysql.com/doc/refman/5.7/en/server-configuration-defaults.html [mysqld]
#
# Remove leading # and set to the amount of RAM for the most important data
# cache in MySQL. Start at 70% of total RAM for dedicated server, else 10%.
# innodb_buffer_pool_size = 128M
#
# Remove leading # to turn on a very important data integrity option: logging
# changes to the binary log between backups.
# log_bin
#
# Remove leading # to set options mainly useful for reporting servers.
# The server defaults are faster for transactions and fast SELECTs.
# Adjust sizes as needed, experiment to find the optimal values.
# join_buffer_size = 128M
# sort_buffer_size = 2M
# read_rnd_buffer_size = 2M
datadir=/var/lib/mysql
socket=/var/lib/mysql/mysql.sock # Disabling symbolic-links is recommended to prevent assorted security risks
symbolic-links=0 log-error=/var/log/mysqld.log
pid-file=/var/run/mysqld/mysqld.pid
[root@localhost ~]# vi /etc/my.cnf # For advice on how to change settings please see
# http://dev.mysql.com/doc/refman/5.7/en/server-configuration-defaults.html [mysqld]
character-set-server =utf8
#
# Remove leading # and set to the amount of RAM for the most important data
# cache in MySQL. Start at 70% of total RAM for dedicated server, else 10%.
# innodb_buffer_pool_size = 128M
#
# Remove leading # to turn on a very important data integrity option: logging
# changes to the binary log between backups.
# log_bin
#
# Remove leading # to set options mainly useful for reporting servers.
# The server defaults are faster for transactions and fast SELECTs.
# Adjust sizes as needed, experiment to find the optimal values.
# join_buffer_size = 128M
# sort_buffer_size = 2M
# read_rnd_buffer_size = 2M
datadir=/var/lib/mysql
socket=/var/lib/mysql/mysql.sock # Disabling symbolic-links is recommended to prevent assorted security risks
symbolic-links=0 log-error=/var/log/mysqld.log
pid-file=/var/run/mysqld/mysqld.pid
~
~
~
~
~
~
~
~
~
~
~
~
~
~
~
"/etc/my.cnf" 28L, 987C written
[root@localhost ~]# cat /etc/my.cnf
# For advice on how to change settings please see
# http://dev.mysql.com/doc/refman/5.7/en/server-configuration-defaults.html [mysqld]
character-set-server =utf8
#
# Remove leading # and set to the amount of RAM for the most important data
# cache in MySQL. Start at 70% of total RAM for dedicated server, else 10%.
# innodb_buffer_pool_size = 128M
#
# Remove leading # to turn on a very important data integrity option: logging
# changes to the binary log between backups.
# log_bin
#
# Remove leading # to set options mainly useful for reporting servers.
# The server defaults are faster for transactions and fast SELECTs.
# Adjust sizes as needed, experiment to find the optimal values.
# join_buffer_size = 128M
# sort_buffer_size = 2M
# read_rnd_buffer_size = 2M
datadir=/var/lib/mysql
socket=/var/lib/mysql/mysql.sock # Disabling symbolic-links is recommended to prevent assorted security risks
symbolic-links=0 log-error=/var/log/mysqld.log
pid-file=/var/run/mysqld/mysqld.pid
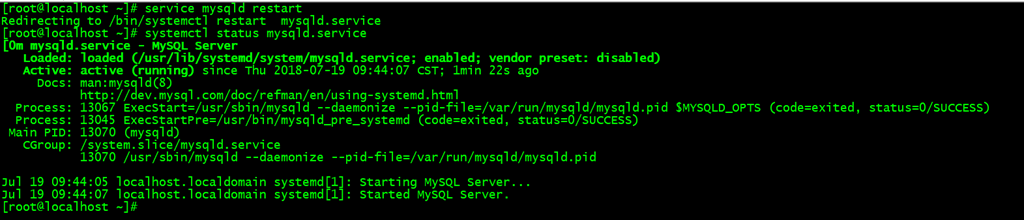
[root@localhost ~]#6:重启mysql
service mysqld restart
6: 处理:“centos7 上安装mysql5.7后登录报错ERROR 1045 (28000)”
[root@localhost ~]#  mysql -uroot -p

Enter password:

ERROR 1045 (28000): Access denied for user 'root'@'localhost' (using password: YES)
1,停止mysql服务
systemctl stop mysqld.service2,修改配置文件无密码登录
vi /etc/my.cnf在最尾部加上
skip-grant-tables保存
3,启动mysql
systemctl start mysqld.service4,登录musql
mysql -u root此处注意不要加-p
5,修改密码,mysql5.7用此语法
use mysql ;update mysql.user set authentication_string=password('123456') where user='root' ;
flush privileges;//刷新
6,回到第二步骤去掉加上的
skip-grant-tables保存 重启mysql就ok了
#########################################################################
其实默认安装完了mysql后或在日志中生成一个默认的密码 /var/log/mysqld.log 中
拿到默认密码后登录mysql 进行密码重新设置
set password=password('you password');如果密码级别与默认的级别要求不符时候会报
Your password does not satisfy the current policy requirements此时需要修改级别与最小的默认密码位数
然后在进行设置密码就好了
###################
远程连接时1130错误
7:关闭iptables
server iptables stop
注:本段内容来至于《CentOS7 关闭防火墙》
CentOS6关闭防火墙使用以下命令,
//临时关闭

service iptables stop

//禁止开机启动

chkconfig iptables off
- 1
- 2
- 3
- 4
CentOS7中若使用同样的命令会报错,
stop  iptables.service

Failed to stop iptables.service: Unit iptables.service not loaded.
- 1
- 2
这是因为CentOS7版本后防火墙默认使用firewalld,因此在CentOS7中关闭防火墙使用以下命令,
//临时关闭

systemctl stop firewalld

//禁止开机启动

systemctl disable firewalld

Removed symlink /etc/systemd/system/multi-user.target.wants/firewalld.service.

Removed symlink /etc/systemd/system/dbus-org.fedoraproject.FirewallD1.service.
- 1
- 2
- 3
- 4
- 5
- 6
当然,如果安装了iptables-service,也可以使用下面的命令,
yum install -y iptables-services

//关闭防火墙

service iptables stop

Redirecting to /bin/systemctl stop  iptables.service

//检查防火墙状态

service iptables status

Redirecting to /bin/systemctl status  iptables.service

鈼iptables.service - IPv4 firewall with iptables

   Loaded: loaded (/usr/lib/systemd/system/iptables.service; disabled; vendor preset: disabled)

   Active: inactive (dead)
8:关闭selinux
vim /etc/selinux/config

SELINUX=disabled
具体操作如下:
[root@localhost ~]# cat /etc/selinux/config

# This file controls the state of SELinux on the system.

# SELINUX= can take one of these three values:

#     enforcing - SELinux security policy is enforced.

#     permissive - SELinux prints warnings instead of enforcing.

#     disabled - No SELinux policy is loaded.

SELINUX=enforcing

# SELINUXTYPE= can take one of three two values:

#     targeted - Targeted processes are protected,

#     minimum - Modification of targeted policy. Only selected processes are protected.

#     mls - Multi Level Security protection.

SELINUXTYPE=targeted

[root@localhost ~]# vim /etc/selinux/config

# This file controls the state of SELinux on the system.

# SELINUX= can take one of these three values:

#     enforcing - SELinux security policy is enforced.

#     permissive - SELinux prints warnings instead of enforcing.

#     disabled - No SELinux policy is loaded.

#SELINUX=enforcing

SELINUX=disabled

# SELINUXTYPE= can take one of three two values:

#     targeted - Targeted processes are protected,

#     minimum - Modification of targeted policy. Only selected processes are protected.

#     mls - Multi Level Security protection.

SELINUXTYPE=targeted

~

~

~

~

~

~

~

~

~

~

~

~

~

~

~

~

~

~

~

~

~

~

~

~

~

~

~

~

"/etc/selinux/config" 15L, 565C written

[root@localhost ~]# cat /etc/selinux/config

# This file controls the state of SELinux on the system.

# SELINUX= can take one of these three values:

#     enforcing - SELinux security policy is enforced.

#     permissive - SELinux prints warnings instead of enforcing.

#     disabled - No SELinux policy is loaded.

#SELINUX=enforcing

SELINUX=disabled

# SELINUXTYPE= can take one of three two values:

#     targeted - Targeted processes are protected,

#     minimum - Modification of targeted policy. Only selected processes are protected.

#     mls - Multi Level Security protection.

SELINUXTYPE=targeted

[root@localhost ~]#
关闭iptables 和关闭selinux 主要是为了方便后续的操作,一般无法访问或者其他问题大部分都是由上述两种服务开启导致,为了不必要的影响。可以在机器初始化时候关闭。


3:安装confluence
1:下载confluence
curl -o atlassian-confluence-5.6.6-x64.bin https://downloads.atlassian.com/software/confluence/downloads/atlassian-confluence-5.6.6-x64.bin
以下连接是confluence下载路径及版本
https://www.atlassian.com/software/confluence/download-archives
2:为confluence添加执行权限
chmod +x atlassian-confluence-5.6.6-x64.bin[root@localhost ~]# ls -al
total 2886728
dr-xr-x---. 17 root root 4096 Jul 19 17:09 .
dr-xr-xr-x. 18 root root 244 Jul 8 19:11 ..
-rw-------. 1 root root 1848 Aug 20 2017 anaconda-ks.cfg-rw-r--r--. 1 root root 267843959 Jul 19 17:30 atlassian-confluence-5.6.6-x64.bin
-rw-------. 1 root root 195 Jul 8 17:09 .bash_history
-rw-r--r--. 1 root root 18 Dec 29 2013 .bash_logout
-rw-r--r--. 1 root root 176 Dec 29 2013 .bash_profile
-rw-r--r--. 1 root root 176 Dec 29 2013 .bashrc
drwx------. 11 root root 225 Jul 8 19:39 .cache
drwx------. 15 root root 276 Dec 13 2017 .config
-rw-r--r--. 1 root root 100 Dec 29 2013 .cshrc
drwx------. 3 root root 25 Aug 20 2017 .dbus
drwxr-xr-x. 2 root root 6 Dec 13 2017 Desktop
drwxr-xr-x. 2 root root 6 Dec 13 2017 Documents
drwxr-xr-x. 2 root root 6 Dec 13 2017 Downloads
-rw-------. 1 root root 16 Dec 13 2017 .esd_auth
-rw-------. 1 root root 1860 Jul 19 00:34 .ICEauthority
-rw-r--r--. 1 root root 1879 Aug 20 2017 initial-setup-ks.cfg
-rw-r--r--. 1 root root 1673544724 Dec 13 2017 linuxamd64_12102_database_1of2.zip
-rw-r--r--. 1 root root 1014530602 Dec 13 2017 linuxamd64_12102_database_2of2.zip
drwx------. 3 root root 19 Dec 13 2017 .local
drwxr-xr-x. 4 root root 39 Jul 8 19:39 .mozilla
drwxr-xr-x. 2 root root 6 Dec 13 2017 Music
-rw-r--r--. 1 root root 25548 Apr 7 2017 mysql57-community-release-el7-10.noarch.rpm
-rw-------. 1 root root 179 Jul 19 09:36 .mysql_history
drwxr-xr-x. 2 root root 6 Dec 13 2017 Pictures
drwxr-----. 3 root root 19 Jul 19 17:09 .pki
drwxr-xr-x. 2 root root 6 Dec 13 2017 Public
drwxr-xr-x. 3 root root 17 Dec 13 2017 .redhat
-rw-r--r--. 1 root root 129 Dec 29 2013 .tcshrc
drwxr-xr-x. 2 root root 6 Dec 13 2017 Templates
drwxr-xr-x. 2 root root 6 Dec 13 2017 Videos
-rw-------. 1 root root 665 Jul 19 09:51 .viminfo
[root@localhost ~]# chmod +x atlassian-confluence-5.6.6-x64.bin
[root@localhost ~]# ls -al

total 2886728

dr-xr-x---. 17 root root       4096 Jul 19 17:09 .

dr-xr-xr-x. 18 root root        244 Jul  8 19:11 ..

-rw-------. 1 root root 1848 Aug 20 2017 anaconda-ks.cfg-rwxr-xr-x. 1 root root 267843959 Jul 19 17:30 atlassian-confluence-5.6.6-x64.bin
-rw-------. 1 root root 195 Jul 8 17:09 .bash_history
-rw-r--r--. 1 root root 18 Dec 29 2013 .bash_logout
-rw-r--r--. 1 root root 176 Dec 29 2013 .bash_profile
-rw-r--r--. 1 root root 176 Dec 29 2013 .bashrc
drwx------. 11 root root 225 Jul 8 19:39 .cache
drwx------. 15 root root 276 Dec 13 2017 .config
-rw-r--r--. 1 root root 100 Dec 29 2013 .cshrc
drwx------. 3 root root 25 Aug 20 2017 .dbus
drwxr-xr-x. 2 root root 6 Dec 13 2017 Desktop
drwxr-xr-x. 2 root root 6 Dec 13 2017 Documents
drwxr-xr-x. 2 root root 6 Dec 13 2017 Downloads
-rw-------. 1 root root 16 Dec 13 2017 .esd_auth
-rw-------. 1 root root 1860 Jul 19 00:34 .ICEauthority
-rw-r--r--. 1 root root 1879 Aug 20 2017 initial-setup-ks.cfg
-rw-r--r--. 1 root root 1673544724 Dec 13 2017 linuxamd64_12102_database_1of2.zip
-rw-r--r--. 1 root root 1014530602 Dec 13 2017 linuxamd64_12102_database_2of2.zip
drwx------. 3 root root 19 Dec 13 2017 .local
drwxr-xr-x. 4 root root 39 Jul 8 19:39 .mozilla
drwxr-xr-x. 2 root root 6 Dec 13 2017 Music
-rw-r--r--. 1 root root 25548 Apr 7 2017 mysql57-community-release-el7-10.noarch.rpm
-rw-------. 1 root root 179 Jul 19 09:36 .mysql_history
drwxr-xr-x. 2 root root 6 Dec 13 2017 Pictures
drwxr-----. 3 root root 19 Jul 19 17:09 .pki
drwxr-xr-x. 2 root root 6 Dec 13 2017 Public
drwxr-xr-x. 3 root root 17 Dec 13 2017 .redhat
-rw-r--r--. 1 root root 129 Dec 29 2013 .tcshrc
drwxr-xr-x. 2 root root 6 Dec 13 2017 Templates
drwxr-xr-x. 2 root root 6 Dec 13 2017 Videos
-rw-------. 1 root root 665 Jul 19 09:51 .viminfo
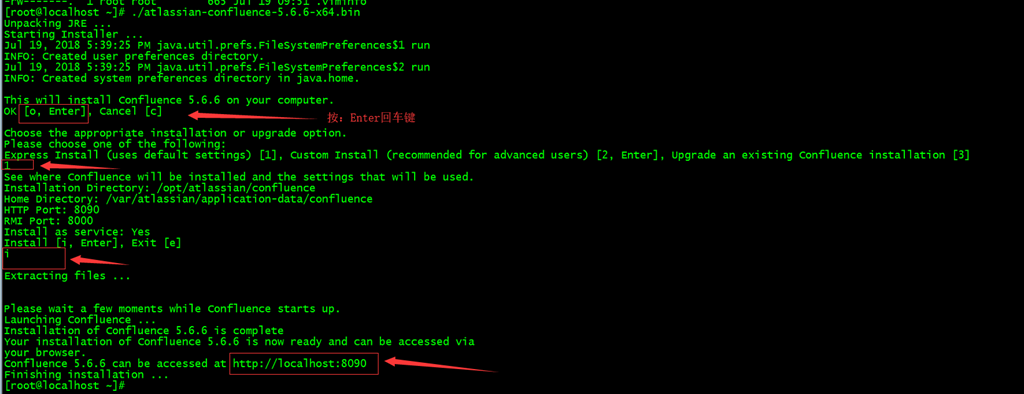
[root@localhost ~]#3:安装
./atlassian-confluence-5.6.6-x64.bin按照提示,以此选择 “o”“1”“i”
4:confluence的路径
/opt/atlassian/confluence 和 /var/atlassian/application-data/confluence5:一般日志文件存路径:
/var/atlassian/application-data/confluence/logs/

4:破解步骤
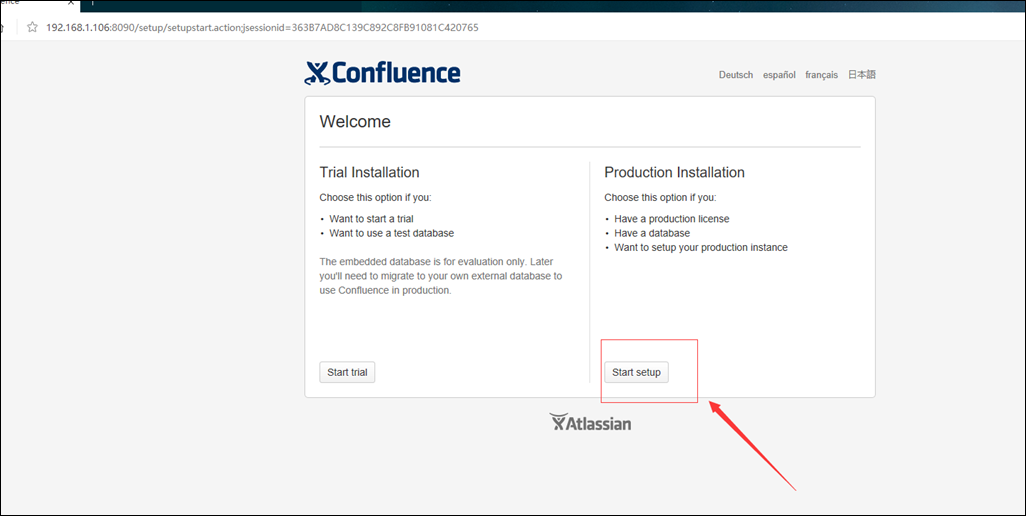
1:输入访问地址,获取ServerID.
在浏览器输入http://本机IP地址:8090 进行访问 例如:http://192.168.1.10:8090 #注意中英文半角问题。
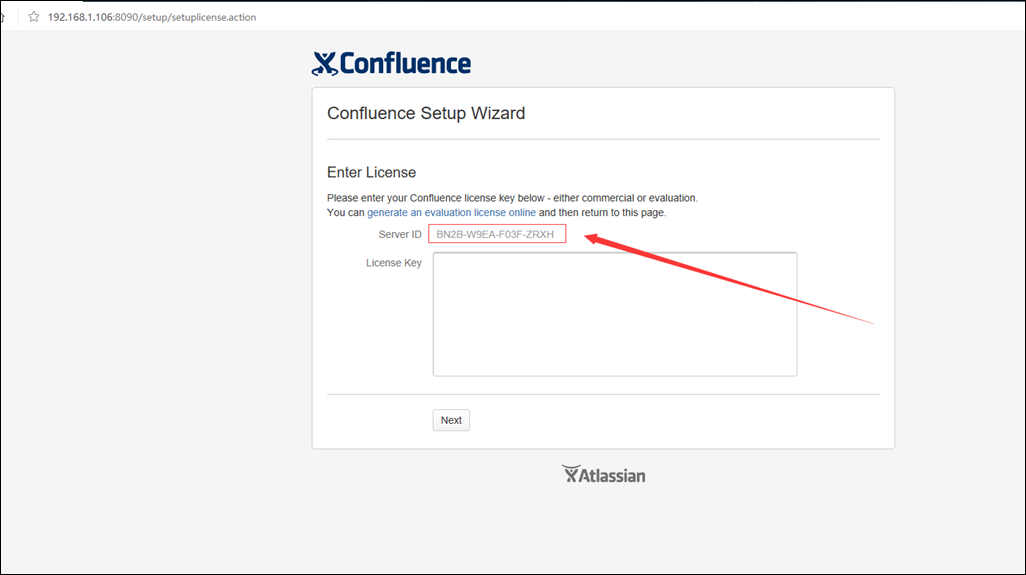
找一个文档把页面上的ServerID 复制下来 #很重要
ServierId: BN2B-W9EA-F03F-ZRXH
2:关闭confluence
[root@localhost confluence]#service confluence stop
3:删除jar文件
cd /opt/atlassian/confluence/confluence/WEB-INF/lib/

ll | grep atlassian-extras | wc -l
[root@localhost confluence]# cd /opt/atlassian/confluence/confluence/WEB-INF/lib/
[root@localhost lib]# ls
activeobjects-dbex-0.28.2.jar bndlib-1.43.0-atlassian-1.jar jta-1.0.1B.jar
activeobjects-spi-0.28.2.jar botocss-core-4.3.jar jtds-1.2.2.jar
analytics-api-3.37.jar bsf-2.3.0.jar jtidy-r8-20060801.jar
antisamy-1.4.2-atlassian-14.jar c3p0-0.9.1.2.jar jul-to-slf4j-1.7.7.jar
antlr-2.7.7.jar cglib-2.1_3.jar jython-2.1-forked.jar
antlr-runtime-3.4.jar commons-beanutils-1.8.3.jar ldaptemplate-1.0.1.jar
aopalliance-1.0.jar commons-codec-1.8.jar log4j-1.2.15.jar
applinks-api-4.2.3.jar commons-collections-3.2.1.jar lucene-analyzers-common-4.4.0.jar
applinks-host-4.2.3.jar commons-digester-1.5.jar lucene-analyzers-kuromoji-4.4.0.jar
applinks-spi-4.2.3.jar commons-discovery-0.2.jar lucene-core-4.4.0.jar
asm-1.5.3.jar commons-fileupload-1.3.1.jar lucene-highlighter-4.4.0.jar
aspectjweaver-1.6.0.jar commons-httpclient-3.1.jar lucene-memory-4.4.0.jar
atlassian-annotations-0.11.jar commons-io-1.4.jar lucene-misc-4.4.0.jar
atlassian-bandana-3.1.jar commons-jrcs-diff-0.1.7.jar lucene-queries-4.4.0.jar
atlassian-bonnie-6.1.2.jar commons-lang-2.6.jar lucene-queryparser-4.4.0.jar
atlassian-cache-api-2.3.4.jar commons-lang3-3.1.jar lucene-sandbox-4.4.0.jar
atlassian-cache-common-impl-2.3.4.jar commons-logging-1.1.3.jar lucene-upgrader-1.0-lucene36.jar
atlassian-cache-ehcache-2.3.4.jar commons-pool-1.5.4.jar mail-1.4.5.jar
atlassian-cache-memory-2.3.4.jar concurrent-1.3.4.jar modz-detector-0.8.1.jar
atlassian-config-0.21.jar confluence-5.6.6.jar nekohtml-1.9.15.jar
atlassian-cookie-tools-3.2.3.jar confluence-bucket-5.6.6.jar odmg-3.0.jar
atlassian-core-4.6.11.jar confluence-cache-ehcache-5.6.6.jar ognl-2.6.5-atlassian-2.jar
atlassian-embedded-crowd-atlassian-user-1.7.3.jar confluence-compatibility-5.6.6.jar org.apache.felix.framework-3.0.2.jar
atlassian-event-2.3.5.jar confluence-java-api-5.6.6.jar oro-2.0.8.jar
atlassian-extras-api-3.2.jar confluence-rest-api-5.6.6.jar oscache-2.2.jar
atlassian-extras-common-3.2.jar confluence-rest-serialization-5.6.6.jar oscore-2.2.7-atlassian-1.jar
atlassian-extras-core-3.2.jar confluence-rpc-plugin-5.6.6.jar osuser-atl.user.jar
atlassian-extras-decoder-api-3.2.jar confluence-upgrade-5.6.6.jar package-scanner-0.9.5.jar
atlassian-extras-decoder-v2-3.2.jar crowd-api-2.7.1.jar pdfbox-1.8.4.jar
atlassian-extras-legacy-3.2.jar crowd-core-2.7.1.jar postgresql-9.2-1002.jdbc4.jar
atlassian-flushable-gzipoutputstream-1.1.jar crowd-events-2.7.1.jar propertyset-1.3-21Nov03.jar
atlassian-gzipfilter-1.23.jar crowd-integration-api-2.7.1.jar quartz-1.8.0.jar
atlassian-hibernate2-extras-4.1.1.jar crowd-integration-client-common-2.7.1.jar radeox-1.0b2-forked-22Apr2004.jar
atlassian-hsqdlb-server-integration-1.1.0.jar crowd-integration-client-rest-2.7.1.jar rome-1.0.jar
atlassian-html-encoder-1.4.jar crowd-integration-seraph25-2.7.1.jar runtime-20070801.jar
atlassian-http-0.0.8.8.jar crowd-ldap-2.7.1.jar sac-1.3.jar
atlassian-image-consumer-1.0.1.jar crowd-password-encoders-2.7.1.jar sal-api-2.12.1.jar
atlassian-ip-3.1.jar crowd-persistence-2.7.1.jar sal-spi-2.12.1.jar
atlassian-jdk-utilities-0.4.jar crowd-persistence-file-2.7.1.jar sal-spring-2.12.1.jar
atlassian-johnson-0.10.jar crowd-remote-2.7.1.jar sanselan-0.97-incubator.jar
atlassian-json-api-0.9.jar cssparser-0.9.5.jar serializer-2.7.1.jar
atlassian-json-jsonorg-0.9.jar daisydiff-1.1-atlassian-5.jar sitemesh-2.5-atlassian-6.jar
atlassian-mail-2.5.0.jar dom4j-1.4-full.jar slf4j-api-1.7.7.jar
atlassian-paddle-5.jar dragonfly-api-1.1.jar slf4j-log4j12-1.7.7.jar
atlassian-password-encoder-3.2.jar dragonfly-core-1.1.jar slide-2.1.jar
atlassian-plugins-core-3.2.8.jar dragonfly-spi-1.1.jar soy-template-renderer-api-2.8.0.jar
atlassian-plugins-osgi-3.2.8.jar ehcache-2.8.2.jar spring-aop-2.5.6.SEC03.jar
atlassian-plugins-osgi-events-3.2.8.jar embedded-crowd-api-2.7.1.jar spring-beans-2.5.6.SEC03.jar
atlassian-plugins-schema-3.2.8.jar embedded-crowd-core-2.7.1.jar spring-context-2.5.6.SEC03.jar
atlassian-plugins-servlet-3.2.8.jar embedded-crowd-spi-2.7.1.jar spring-context-support-2.5.6.SEC03.jar
atlassian-plugins-spring-3.2.8.jar fontbox-1.8.4.jar spring-core-2.5.6.SEC03-atlassian-6.jar
atlassian-plugins-webfragment-3.0.1.jar fugue-1.1.jar spring-hibernate2-2.5.6-atlassian-1.jar
atlassian-plugins-webresource-3.1.1-PLUGWEB-85-m05.jar gson-1.6.jar spring-jdbc-2.5.6.SEC03.jar
atlassian-plugins-webresource-api-3.1.1-PLUGWEB-85-m05.jar guava-11.0.2-atlassian-02.jar spring-ldap-core-1.3.1.RELEASE.jar
atlassian-plugins-webresource-common-3.2.8.jar guava-bridge-11.0.2-atlassian-02.jar spring-orm-2.5.6.SEC03.jar
atlassian-profiling-1.9.jar hibernate-2.1.8-atlassian-27.jar spring-security-core-3.1.4.RELEASE.jar
atlassian-renderer-legacy-6.2.10.jar hsqldb-2.3.0.jar spring-tx-2.5.6.SEC03.jar
atlassian-secure-random-3.2.3.jar icu4j-3.8.jar spring-web-2.5.6.SEC03.jar
atlassian-secure-xml-3.2.3.jar jackson-core-asl-1.9.1.jar stax-api-1.0-2.jar
atlassian-seraph-3.0.0.jar jackson-mapper-asl-1.9.1.jar stax-utils-20040917.jar
atlassian-spring-2.0.0.jar jai_codec-1.1.3.jar stringtemplate-3.2.1.jar
atlassian-spring-hibernate2-2.0.0.jar jai_core-1.1.3.jar urlrewritefilter-4.0.4.jar
atlassian-spring-interceptor-adapter-spi-1.1.jar jai-core-1.1.3.jar velocity-1.6.4-atlassian-1.jar
atlassian-tenancy-api-1.4.1.jar jakarta-regexp-1.4.jar velocity-htmlsafe-1.2-fixedscm.jar
atlassian-threadlocal-1.4.jar javasimon-core-3.4.0.jar velocity-tools-view-1.1.jar
atlassian-trackback-0.10.jar jaxb-api-2.1.jar webwork-2.1.5-atlassian-3.jar
atlassian-trusted-apps-core-3.0.8.jar jaxb-impl-2.1.10.jar wsdl4j-1.6.1.jar
atlassian-trusted-apps-seraph-integration-3.0.8.jar jcaptcha-all-1.0-RC6.jar wstx-asl-3.2.9-atlassian-1.jar
atlassian-user-3.0.jar jcip-annotations-1.0.jar xalan-2.7.1.jar
atlassian-util-concurrent-2.4.1.jar jcommon-1.0.0.jar xercesImpl-2.11.0.jar
atlassian-velocity-1.3.jar jdom-1.0.jar xfire-aegis-1.2.6.jar
atlassian-xwork-10-1.17.jar jempbox-1.8.4.jar xfire-core-1.2.6.jar
atlassian-xwork-core-1.17.jar jfreechart-1.0.0.jar xmlrpc-2.0+xmlrpc61.1+sbfix.jar
batik-css-1.7.jar joda-time-2.3.jar xmlrpc-supplementary-character-support-0.2.jar
batik-ext-1.7.jar json-20070829.jar XmlSchema-1.1.jar
batik-util-1.7.jar json-simple-1.1.1.jar xpp3_min-1.1.3.4.O.jar
bcmail-jdk15on-1.50.jar jsoup-1.7.2.jar xstream-1.1.1.jar
bcpkix-jdk15on-1.50.jar jsr305-2.0.2.jar xwork-1.0.3.6.jar
bcprov-jdk15on-1.50.jar jsr311-api-1.1.1.jar
beehive-api-0.1.3.jar jstyleparser-1.13-atlassian-2.jar
[root@localhost lib]# ll | grep atlassian-extras | wc -l
6
[root@localhost lib]# rm -fr atlassian-extra*
[root@localhost lib]# ll | grep atlassian-extras | wc -l
0
[root@localhost lib]#4:运行破解jar包程序
解压破解包,把里面的atlassian-extras-3.2.jar、Confluence-5.6.6-language-pack-zh_CN.jar、mysql-connector-java-5.1.39-bin.jar三个jar文件复制到/opt/atlassian/confluence/confluence/WEB-INF/lib目录下
破解包链接地址 https://pan.baidu.com/s/1i509VaX #包含上述三个包
atlassian-extras-3.2.jar文件是和license相关的,Confluence-5.6.6-language-pack-zh_CN.jar是confluence中文语言包,而mysql-connector-java-5.1.39-bin.jar是confluence连接mysql数据库相关的jar包。
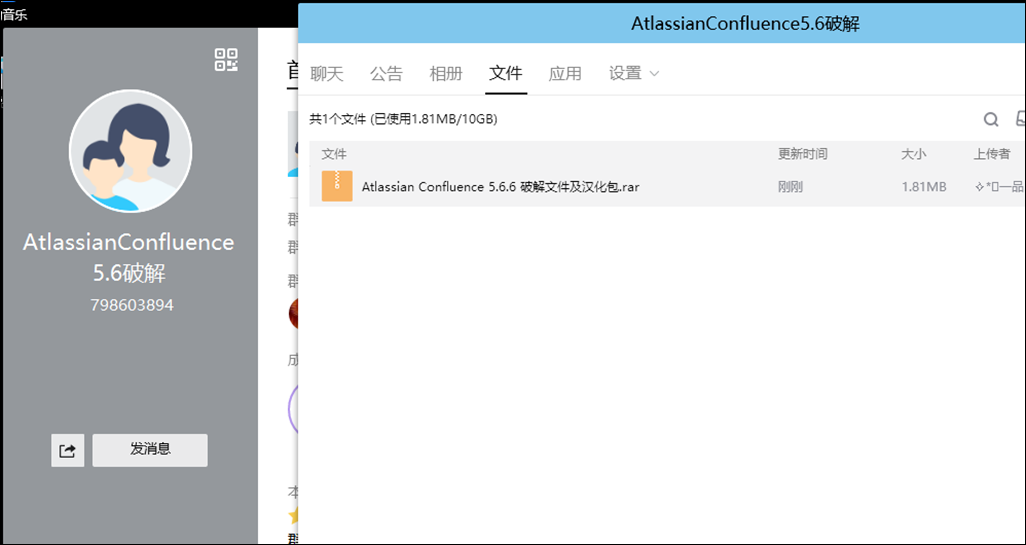
注:破解包下载方式:
一;https://pan.baidu.com/s/1clpfUQ
二:下图的QQ群 的群文件里 ---
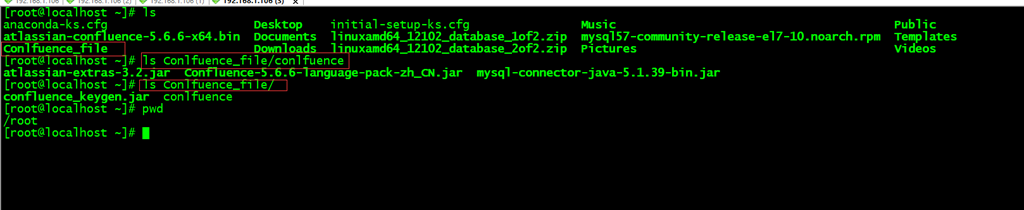
把破解包放到了 /root/的目录下:
[root@localhost ~]# ls
anaconda-ks.cfg Desktop initial-setup-ks.cfg Music Public
atlassian-confluence-5.6.6-x64.bin Documents linuxamd64_12102_database_1of2.zip mysql57-community-release-el7-10.noarch.rpm Templates
Conlfuence_file Downloads linuxamd64_12102_database_2of2.zip Pictures Videos
[root@localhost ~]# ls Conlfuence_file/conlfuence
atlassian-extras-3.2.jar Confluence-5.6.6-language-pack-zh_CN.jar mysql-connector-java-5.1.39-bin.jar
[root@localhost ~]# ls Conlfuence_file/
confluence_keygen.jar conlfuence
[root@localhost ~]# pwd
/root
[root@localhost ~]# cp Conlfuence_file/conlfuence/* /opt/atlassian/confluence/confluence/WEB-INF/lib/
[root@localhost ~]# cd /opt/atlassian/confluence/confluence/WEB-INF/lib/
[root@localhost lib]# ll | grep atlassian-extras | wc -l
1
[root@localhost lib]# ll | grep Confluence-5.6.6-language-pack-zh_CN.jar | wc -l
1
[root@localhost lib]# ll | grep atlassian-extras-3.2.jar | wc -l
1
[root@localhost lib]# ll | grep mysql-connector-java-5.1.39-bin.jar | wc -l
1
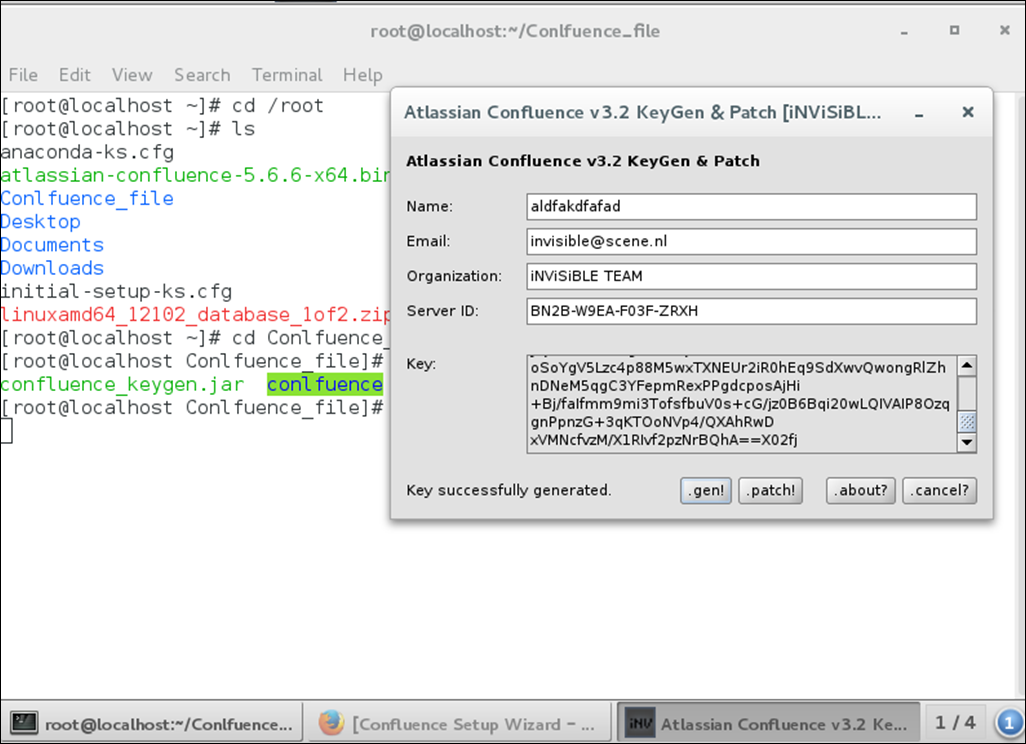
[root@localhost lib]#运行破解jar包程序
java -jar confluence_keygen.jar#此步骤需要在图形界面下操作。
NAME #此方框内容可以随意填写。
把上述复制的ServerID 粘贴到 ServerID 框中。
点击.gen!
把KEY中生成的KEY复制出来。
AAABNg0ODAoPeJxtkMtuwjAQRff+CktdByWhVQHJUk1iVNo8EAl97UyYFKvGID+i8vc1pNlUXcxid
OfeOTM39d7hJydxNMVxOIsns9sJTqraN9EEpWAaLU5WHBVJjqqVDlQDqHCHLeiy3RjQhgQRSjTwy
1DKLZCLMwjvg2iKvMfyxhb8AITLXcu/fLV8hxofNvKK6IBY7WCYZDkXkgjVCSO2Eh5MAwpGSiLWc
emuO0jLpYE+IRNeN1CfT3DdkZR5ztbJkmbIBykLinte9n0S+tyzjcceLA7iuz5guCSRzljQxXEHh
oSoYgV5Lzc4p88M5wxTXNEUr2iR0hEq9SdXwvQwongRlZhnDNeM5qgC3YFepmRexPPgdcposAjHi
+Bj/faIfmm9mi3TofsfbuV0s+cG/jz0B6Bqi20wLQIVAIP8OzqgnPpnzG+3qKTOoNVp4/QXAhRwD
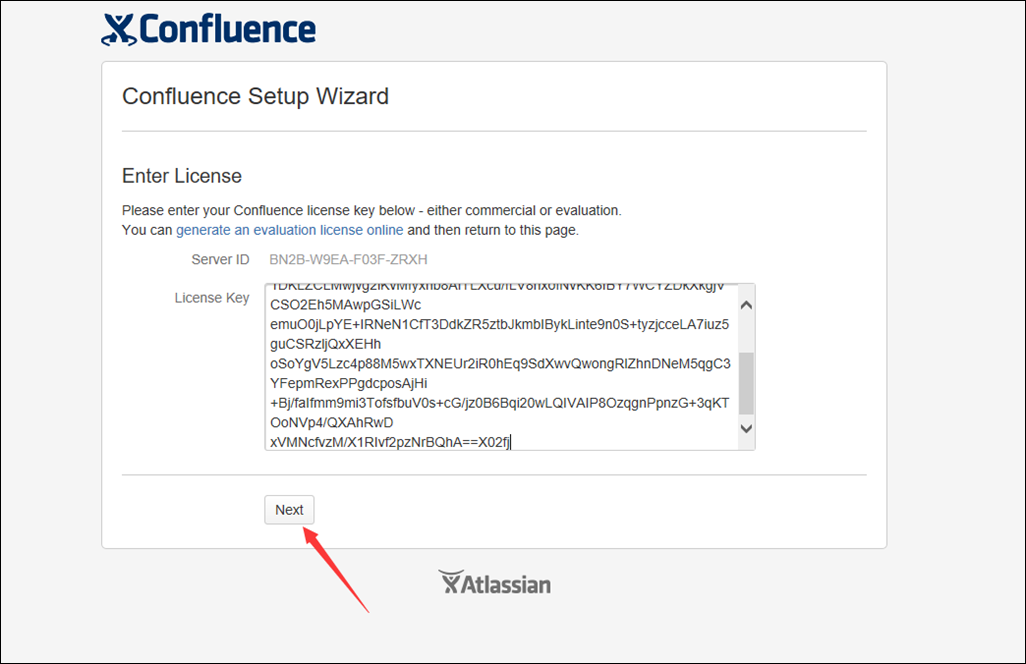
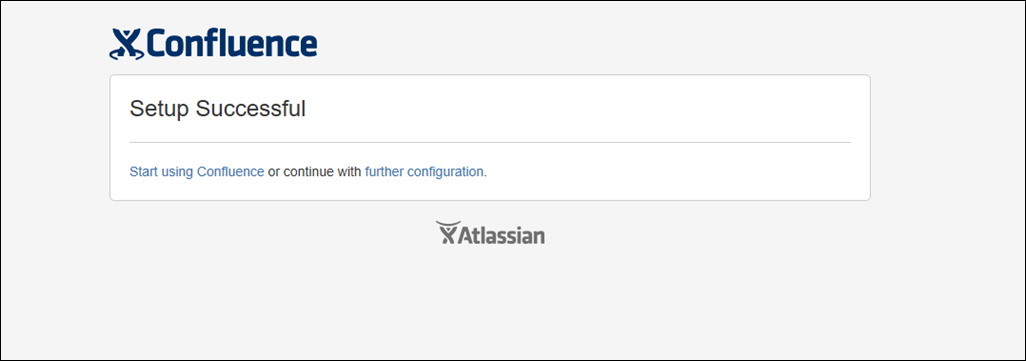
xVMNcfvzM/X1RIvf2pzNrBQhA==X02fj5:启动confluence
把key 粘贴到license key中
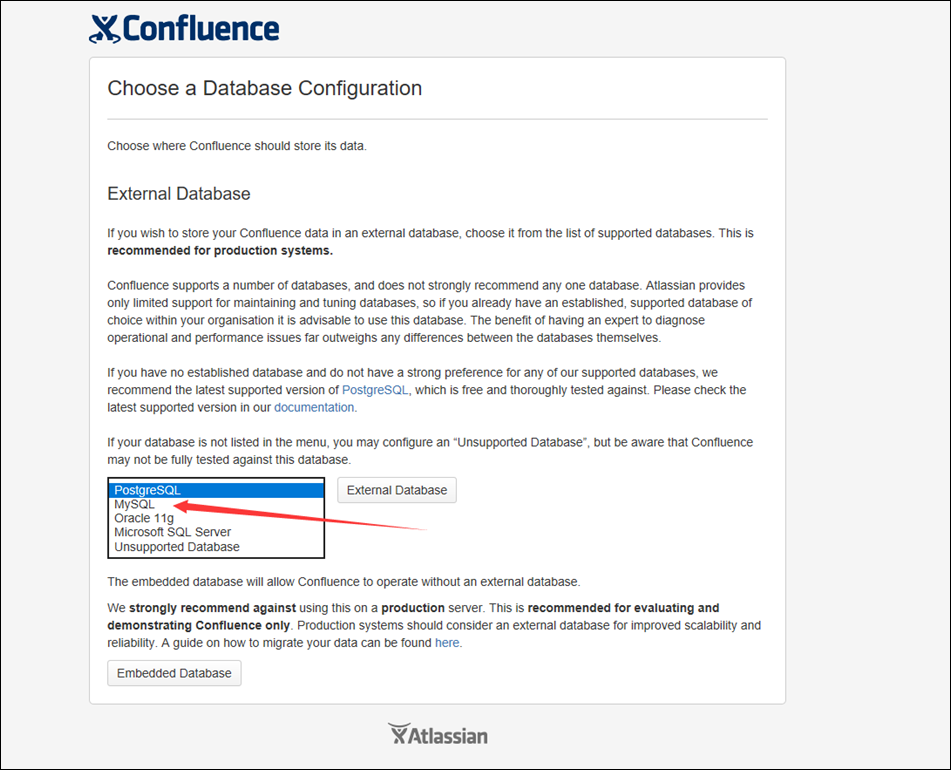
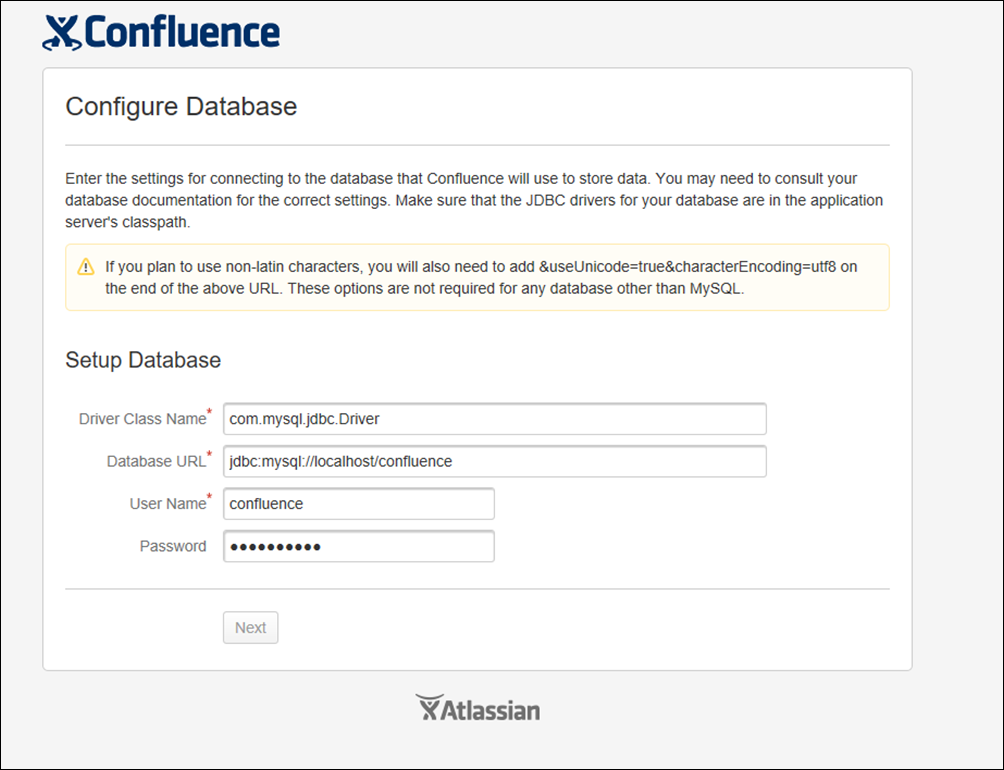
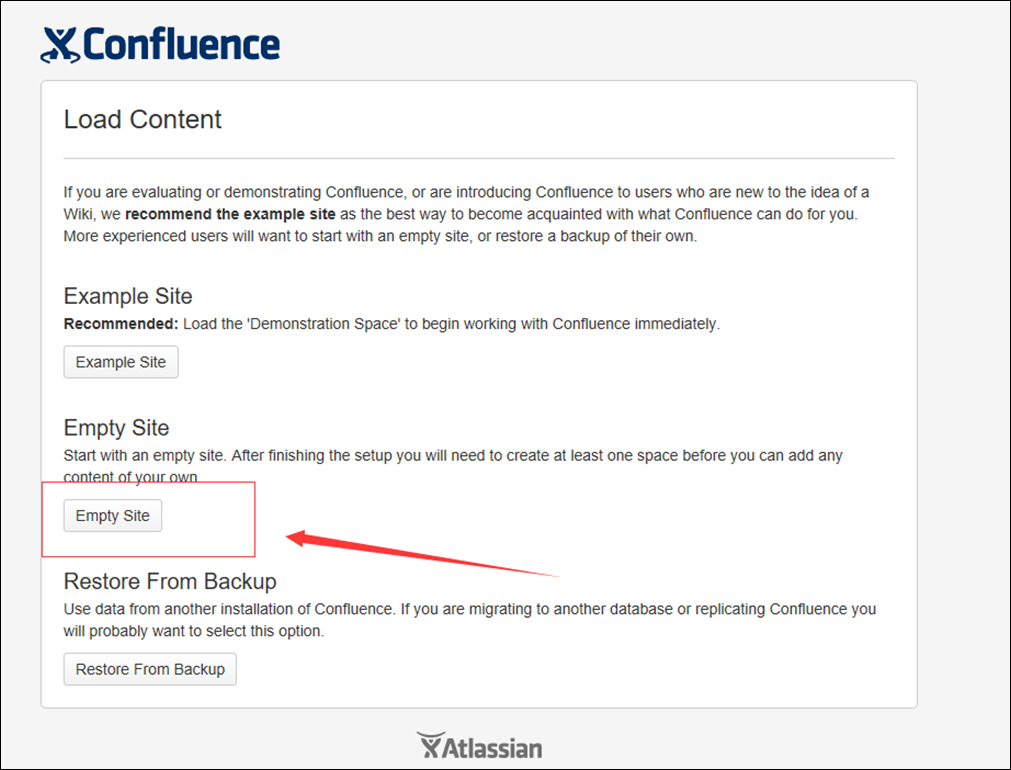
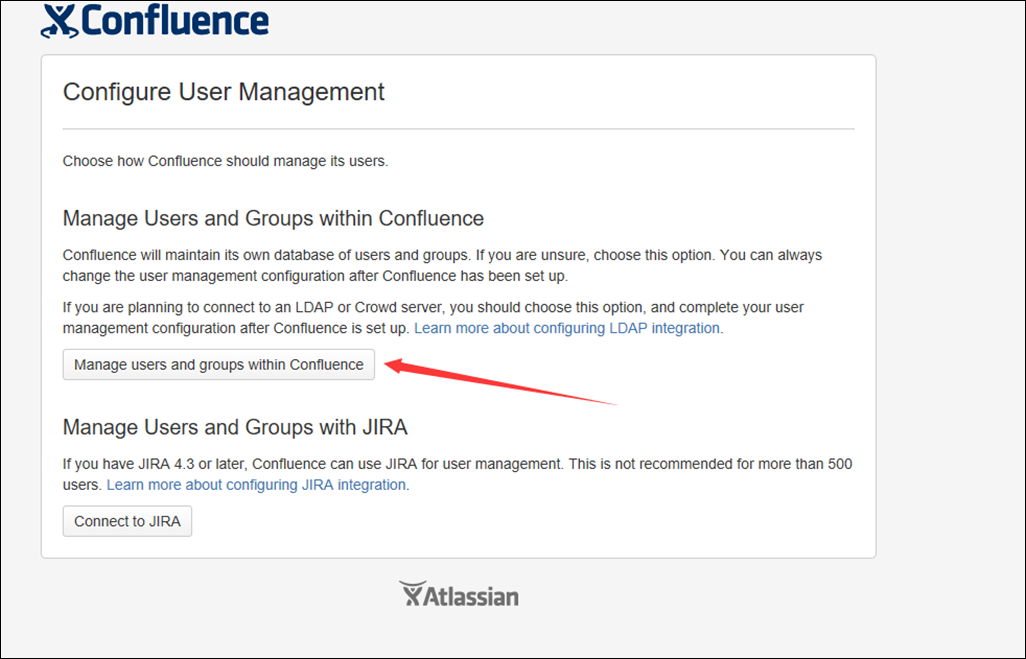
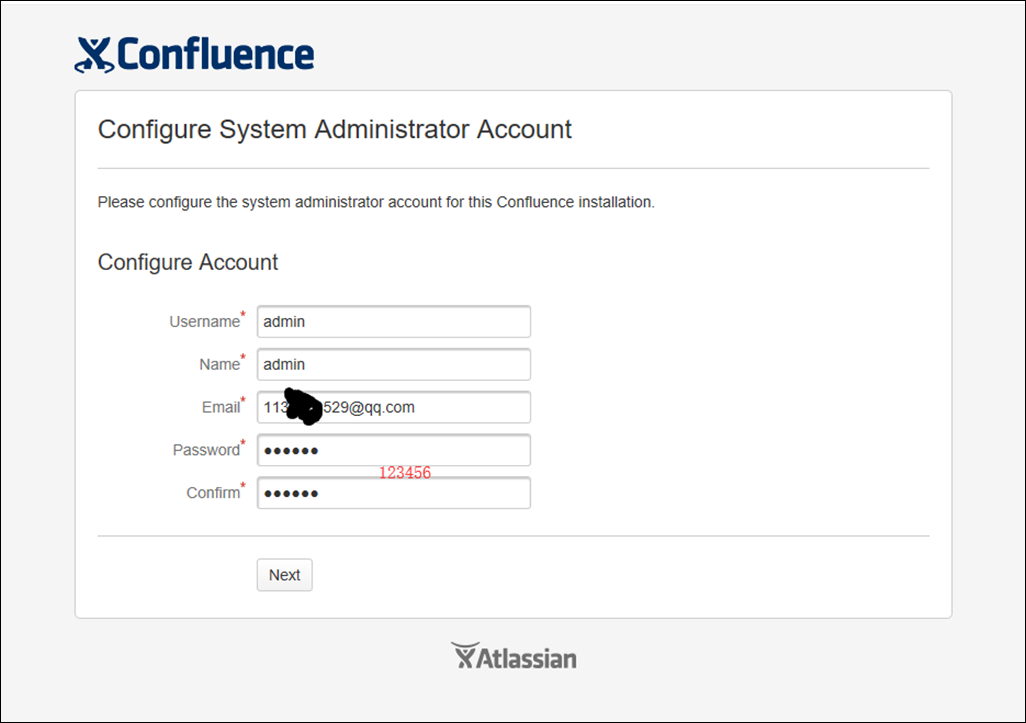
选择下一步——>Direct JDBC——>在User name 和 Password 中输入 root 和 123456——>点击下一步——>选择Empty Site——>Manage users and groups within Confluence——>设置admin的帐号密码——>完成。
启动与停止命令的执行效果
[root@localhost ~]# service confluence stop

executing using dedicated user

If you encounter issues starting up Confluence, please see the Installation guide at http://confluence.atlassian.com/display/DOC/Confluence+Installation+Guide

Server startup logs are located in /opt/atlassian/confluence/logs/catalina.out

Using CATALINA_BASE:   /opt/atlassian/confluence

Using CATALINA_HOME:   /opt/atlassian/confluence

Using CATALINA_TMPDIR: /opt/atlassian/confluence/temp

Using JRE_HOME:        /opt/atlassian/confluence/jre/

Using CLASSPATH:       /opt/atlassian/confluence/bin/bootstrap.jar:/opt/atlassian/confluence/bin/tomcat-juli.jar

Using CATALINA_PID:    /opt/atlassian/confluence/work/catalina.pid

Killing Tomcat with the PID: 4149

The Tomcat process has been killed.

[root@localhost ~]# service confluence start

To run Confluence in the foreground, start the server with start-confluence.sh -fg

executing using dedicated user: confluence

If you encounter issues starting up Confluence, please see the Installation guide at http://confluence.atlassian.com/display/DOC/Confluence+Installation+Guide

Server startup logs are located in /opt/atlassian/confluence/logs/catalina.out

Using CATALINA_BASE:   /opt/atlassian/confluence

Using CATALINA_HOME:   /opt/atlassian/confluence

Using CATALINA_TMPDIR: /opt/atlassian/confluence/temp

Using JRE_HOME:        /opt/atlassian/confluence/jre/

Using CLASSPATH:       /opt/atlassian/confluence/bin/bootstrap.jar:/opt/atlassian/confluence/bin/tomcat-juli.jar

Using CATALINA_PID:    /opt/atlassian/confluence/work/catalina.pid

Tomcat started.


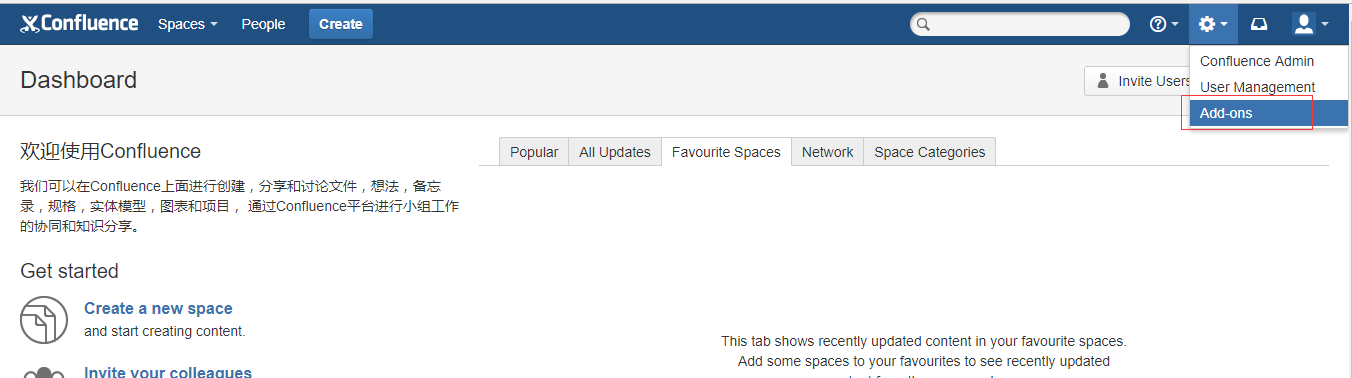
五:汉化
登入界面之后选择“齿轮”图标,选择
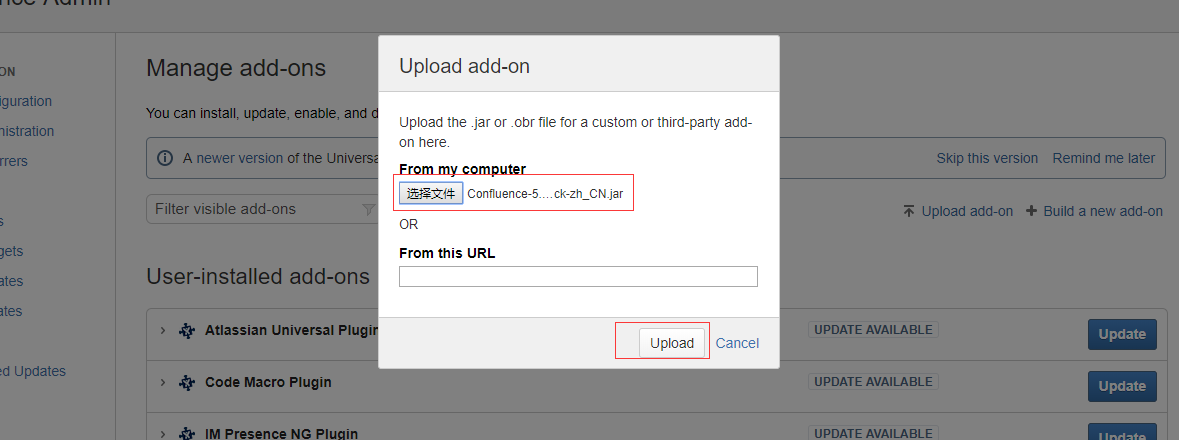
Add-ons 在界面右方选择 Upload add-on
然后把上述的 Confluence-5.6.6-language-pack-zh_CN上传上去。完成之后重启confluence服务service
confluence restart打开界面完成汉化,至此安装破解汉化完毕。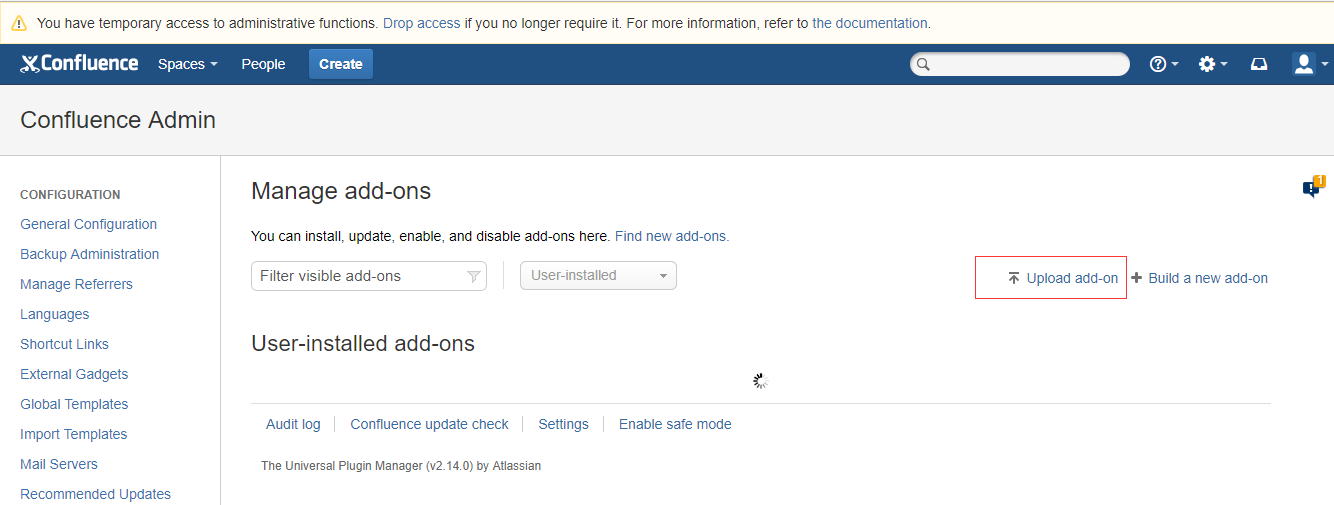
FAQ
:出现 HTTP Status 500 - java.lang.IllegalStateException: Spring Application
context has not been set先重启confluence和mysql,若不行可以执行
rm
-rf /var/atlassian/application-data/confluence/confluence.cfg.xml.然后重启confluence解决。
confluence搭建破解及汉化教程的更多相关文章
- LoadRunner之安装、破解、汉化教程(一)
安装前,把所有的杀毒软件和防火墙关闭 安装前,把所有的杀毒软件和防火墙关闭 安装前,把所有的杀毒软件和防火墙关闭........ 注意事项: 安装前,把所有的杀毒软件和防火墙关闭. 若以前安装 ...
- [原创]电路仿真设计multisim 14安装,破解,汉化教程
硬件工程师开发产品.利用multisim 等辅助软件进行设计仿真可以有效提高开发效率,减少设计弯路. 本文博乐就带大家一起进行multisim 14安装破解汉化. 首先下载multisim 14安装文 ...
- WebStorm 2019 3.3 安装及破解教程附汉化教程
WebStorm2019 3.3 安装及破解教程附加汉化教程 安装包及破解补丁 链接: https://pan.baidu.com/s/19ATTAW3Tsm0huIJSqYChTw 提取码:1ei7 ...
- ERDAS 2014安装破解及汉化图文教程
关于ERDAS 2014 的安装破解及其汉化过程: 说明:汉化只是之针对英语能力不能正常满足使用软件的朋友们.如果英语过专八,完全没有必要汉化!在此之前查了好多关于ERDAS汉化的文档,可惜只是简单的 ...
- DevExpress控件安装破解和汉化使用教程
这段时间因公司业务需要.net开发且需要用到DevExpress控件,我自己研究学习了一下,用的是visual studio(2013)和DevExpress(V14.1.4),VS2013的下载安装 ...
- 使用Crowd2.7集成Confluence5.3与JIRA6.1,并安装、破解及汉化,实现单点登录【原创】
鉴于目前没有针对Crowd.Confluence.Jira安装.集成和破解最新的方法,总结今天安装.破解及集成的经验,编写此文,方便大家进行配置也方便自己以后参考.此文参考多篇破解文章,并经过作者 ...
- WebStorm下载,破解,汉化,debug调试,以及会debug会出现的问题
一 .webstorm软件下载,破解 1.WebStorm 10 下载地址:http://download.jetbrains.8686c.com/webstorm/WebStorm-10.0.5.e ...
- Axure安装、破解、汉化全套
最近公司准备使用敏捷开发流程,然后刚好需要Axure这个软件,就去找了些资源分享给大家,希望对大家有所帮助: 全套安装,破解,汉化下载地址: 链接: https://pan.baidu.com/s/1 ...
- 【转帖】ECLIPSE-JEE-LUNA-SR2官方汉化教程
ECLIPSE-JEE-LUNA-SR2官方汉化教程 工具/原料 Eclipse-jee-luna-SR2 步骤/方法 1.在浏览器输入网址http://www.eclipse.org/babel/d ...
随机推荐
- PHP调用API接口实现天气查询功能
天气预报查询接口API,在这里我使用的是国家气象局天气预报接口 使用较多的还有:新浪天气预报接口.百度天气预报接口.google天气接口.Yahoo天气接口等等. 1.查询方式 根据地名查询各城市天气 ...
- Debian Security Advisory(Debian安全报告) DSA-4410-1 openjdk-8 security update
Debian Security Advisory(Debian安全报告) DSA-4410-1 openjdk-8 security update Package :openjdk-8 CVE ID: ...
- 2.2 if语句
if判断语句 <1>if判断语句介绍 if语句是用来进行判断的,其使用格式如下: if 要判断的条件: 条件成立时,要做的事情 demo1:(demo的中文意思:演示.案例) age = ...
- [C++]猜数字游戏的提示(Master-Mind Hints,UVa340)
[本博文非博主原创,思路与题目均摘自 刘汝佳<算法竞赛与入门经典(第2版)>] Question 例题3-4 猜数字游戏的提示(Master-Mind Hints,UVa340) 实现一个 ...
- 数据库设计理论与实践·<一>总结
一.数据库生命周期 数据库生命周期流程图如下: 二.各阶段附图 附图1.1 数据流图 附图1.2 数据字典-方式1 补充说明:数据字典既可以单张表格表示,也可以多种(数据项表/数据结构表/数据流表/外 ...
- 嵌入式开发-迅为4418开发板Android4.4.4实现ble功能
①.如果是迅为4418开发板:在4418/android/device/nexell/drone2/device.mk中添加: frameworks/native/data/etc/android.h ...
- Flume思维导图
- 前端html1.
HTML介绍 转载http://www.cnblogs.com/liwenzhou/p/7988087.html Web服务本质 import socket sk = socket.socket() ...
- RPO攻击 & share your mind
参考文章: https://xz.aliyun.com/t/2220 http://www.thespanner.co.uk/2014/03/21/rpo/ https://www.lorexxar. ...
- python - 中文编码/ASCII
Python 中文编码 为了处理汉字,程序员设计了用于简体中文的GB2312和用于繁体中文的big5. GB2312(1980年)一共收录了7445个字符,包括6763个汉子和682个其他符号. ...