巡风源码阅读与分析---view.py
巡风是一款适用于企业内网的漏洞快速应急、巡航扫描系统,通过搜索功能可清晰的了解内部网络资产分布情况,并且可指定漏洞插件对搜索结果进行快速漏洞检测并输出结果报表。
环境:
巡风是基于python的flask框架写的,数据库为mongodb。
可安装在Windows OSX Linux Docker
Python2.7 pip mongodb
安装:
我安装在window,用于简单阅读代码和调试。
https://github.com/ysrc/xunfeng
下载后跟着官网的window安装教程即可。
然后运行 Run.bat (得使用管理员运行,不然没反应。。)
安装成功。
阅读:
使用的ide为pycharm
Run.bat

mogod.exe 用于启动mongodb
Run.py 启动web网站
Aider.py # 辅助验证脚本
VulScan.py # 漏洞检测引擎
NAScan.py # 网络资产信息抓取引擎
Run.py
from views.View import app

if __name__ == '__main__':

    #app.debug = True

    app.run(threaded=True, port=8888,host='')
去到views/View.py
一共有24个方法。
一个方法一个方法来看。
1.Search()
# 搜索页

@app.route('/filter')

@logincheck

def Search():

    return render_template('search.html')
@logincheck 使用了装饰器函数。跟过去查看views/lib/Login.py
# 登录状态检查

def logincheck(f):

    @wraps(f)

    def wrapper(*args, **kwargs):

        try:

            if session.has_key('login'):

                if session['login'] == 'loginsuccess':

                    return f(*args, **kwargs)

                else:

                    return redirect(url_for('Login'))

            else:

                return redirect(url_for('Login'))

        except Exception, e:

            print e

            return redirect(url_for('Error'))

    return wrapper
如果seesion中的login等于loginsuccess 就继续执行view.py下的函数。否则跳转掉Error模板。就是检测是否有登录。
回到Search()加载search.html模板
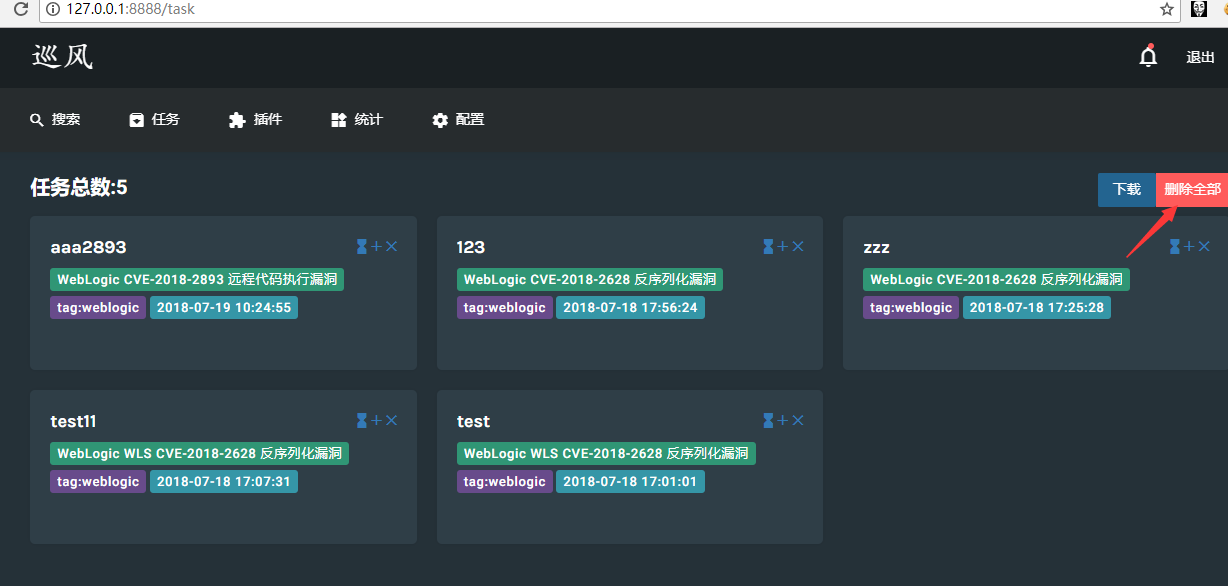
2.Deleteall()
# 删除所有

@app.route('/deleteall', methods=['post'])

@logincheck

@anticsrf

def Deleteall():

    Mongo.coll['Task'].remove({})

    return 'success'
先判断了登录状态,多了一个@anticsrf 装饰器函数。跟过去查看views/lib/AntiCSRF.py
# 检查referer

def anticsrf(f):

    @wraps(f)

    def wrapper(*args, **kwargs):

        try:

            if request.referrer and request.referrer.replace('http://', '').split('/')[0] == request.host:

                return f(*args, **kwargs)

            else:

                return redirect(url_for('NotFound'))

        except Exception, e:

            print e

            return redirect(url_for('Error'))

    return wrapper
判断是否有referrer头,而且将http://替换成空 再分割取第一部分,也就是取出网站的host,然后与本站host相比较。看是否一致。不一样的话,跳转404页面。否则就继续执行。
@anticsrf 就是防止CSRF漏洞的。
回到Deleteall()
Mongo 跟过去发现是连接mongoDB。选择Task这个数据表,移除所有数据。
就是将任务总数全部删除。
3.Main()
# 搜索结果页

@app.route('/')

@logincheck

def Main():

    q = request.args.get('q', '')

    page = int(request.args.get('page', ''))

    plugin = Mongo.coll['Plugin'].find()  # 插件列表

    plugin_type = plugin.distinct('type')  # 插件类型列表

    if q:  # 基于搜索条件显示结果

        result = q.strip().split(';')

        query = querylogic(result)

        cursor = Mongo.coll['Info'].find(query).sort('time', -1).limit(page_size).skip((page - 1) * page_size)

        return render_template('main.html', item=cursor, plugin=plugin, itemcount=cursor.count(),

                               plugin_type=plugin_type, query=q)

    else:  # 自定义,无任何结果,用户手工添加

        return render_template('main.html', item=[], plugin=plugin, itemcount=0, plugin_type=plugin_type)
判断是否登录(下同)
先获取传入的q 和page 。
plugin = Mongo.coll['Plugin'].find()  #连接数据库,列出Plugin中所有清单。

plugin_type = plugin.distinct('type') #从查询的所有清单里面获取名字是 type的数据。
然后将q进行分割“;”主要是分割类似这种的 q= 127.0.0.1;127.8.8.1
分成列表传入querylogic()函数。 跟过去看看views/lib/QueryLogic.py(详细:https://www.cnblogs.com/zhengjim/p/9406065.html)
将搜索的值q转成mongoDB能查询的语句。
cursor = Mongo.coll['Info'].find(query).sort('time', -1).limit(page_size).skip((page - 1) * page_size)
在info表里把条件代入查询sort()排序 limit()分页
最后传给视图
4.Getplugin()
# 获取插件信息异步

@app.route('/getplugin', methods=['get', 'post'])

@logincheck

def Getplugin():

    type = request.form.get('type', '')

    risk = request.form.get('risk', '')

    search = request.form.get('search', '')

    query = {}

    if type:

        query['type'] = type

    if risk:

        query['level'] = risk

    if search:

        search = unquote(search)

        query['name'] = {"$regex": search, '$options': 'i'}

    cursor = Mongo.coll['Plugin'].find(query)

    rsp = []

    for i in cursor:

        result = {'name': i['name'], 'info': i['info']}

        rsp.append(result)

    return json.dumps(rsp)
获取了type risk search 是否有值
没有的话,就全部查询。有的话 在Plugin表代入条件查询。然后将插件名字和信息转json格式返回。
5.Addtask()
# 新增任务异步

@app.route('/addtask', methods=['get', 'post'])

@logincheck

@anticsrf

def Addtask():

    title = request.form.get('title', '')

    plugin = request.form.get('plugin', '')

    condition = unquote(request.form.get('condition', ''))

    plan = request.form.get('plan', 0)

    ids = request.form.get('ids', '')

    isupdate = request.form.get('isupdate', '')

    resultcheck = request.form.get('resultcheck', '')

    result = 'fail'

    if plugin:

        targets = []

        if resultcheck == 'true':  # 结果集全选

            list = condition.strip().split(';')

            query = querylogic(list)

            cursor = Mongo.coll['Info'].find(query)

            for i in cursor:

                tar = [i['ip'], i['port']]

                targets.append(tar)

        else:  # 当前页结果选择

            for i in ids.split(','):

                tar = [i.split(':')[0], int(i.split(':')[1])]

                targets.append(tar)

        temp_result = True

        for p in plugin.split(','):

            query = querylogic(condition.strip().split(';'))

            item = {'status': 0, 'title': title, 'plugin': p, 'condition': condition, 'time': datetime.now(),

                    'target': targets, 'plan': int(plan), 'isupdate': int(isupdate), 'query': dumps(query)}

            insert_reuslt = Mongo.coll['Task'].insert(item)

            if not insert_reuslt:

                temp_result = False

        if temp_result:

            result = 'success'

    return result
先获取了页面传了的值 先默认result为fail
没有plugin的话直接返回fail
有的话,先判断结果集是否全选,将结果集的ip和port都加入列表,否则将当前页的ip将入列表。 然后执行插入。成功返回success
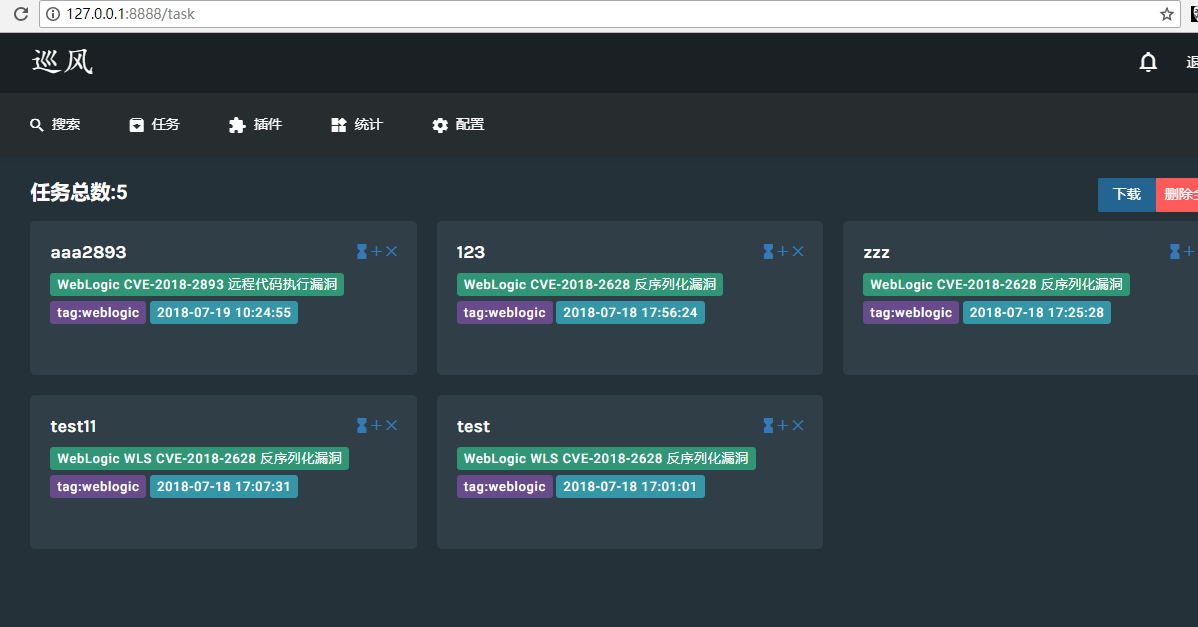
6.Task()
# 任务列表页面

@app.route('/task')

@logincheck

def Task():

    page = int(request.args.get('page', ''))

    cursor = Mongo.coll['Task'].find().sort('time', -1).limit(page_size).skip((page - 1) * page_size)

    return render_template('task.html', item=cursor)
查询出任务信息,展示。
7.Recheck()
# 复测任务异步

@app.route('/taskrecheck')

@logincheck

@anticsrf

def Recheck():

    tid = request.args.get('taskid', '')

    task = Mongo.coll['Task'].find_one({'_id': ObjectId(tid)})

    result = 'fail'

    if task and task['plan'] == 0 and task['status'] == 2:  # 一次性任务,并且已经扫描完成

        result = Mongo.coll['Task'].update({'_id': ObjectId(tid)}, {'$set': {'status': 0}})

        if result:

            result = 'success'

    return result
找到任务后,判断扫描完成后,更新数据库。返回success。
8.TaskDetail()
# 任务详情页面

@app.route('/taskdetail')

@logincheck

def TaskDetail():

    id = request.args.get('taskid', '')

    page = int(request.args.get('page', ''))

    taskdate = request.args.get('taskdate', "")

    plugin_name = ''

    task_info = Mongo.coll['Task'].find_one({'_id': ObjectId(id)})

    if task_info:

        plugin_name = task_info['plugin']

    vulcount = 0

    lastscan = Mongo.coll["Result"].distinct('task_date', {'task_id': ObjectId(id)})

    result_list = []

    if len(lastscan) > 0:

        lastscan.sort(reverse=True)

        if taskdate:  # 根据扫描批次查看结果

            cursor = Mongo.coll['Result'].find(

                {'task_id': ObjectId(id), 'task_date': datetime.strptime(taskdate, "%Y-%m-%d %H:%M:%S.%f")}).sort(

                'time', -1).limit(page_size).skip((page - 1) * page_size)

        else:  # 查看最新批次结果

            taskdate = lastscan[0].strftime("%Y-%m-%d %H:%M:%S.%f")

            cursor = Mongo.coll['Result'].find(

                {'task_id': ObjectId(id), 'task_date': lastscan[0]}).sort('time', -1).limit(page_size).skip(

                (page - 1) * page_size)

        vulcount = cursor.count()

        for _ in cursor:

            result_list.append(

                {'ip': _['ip'], 'port': _['port'], 'info': _['info'], 'vul_level': _['vul_info']['vul_level'],

                 'time': _['time']})

        # 速度优化,数据量多采取不同的方式查询

        if len(result_list) > 100:

            ip_hostname = {}

            hostname = Mongo.coll['Info'].aggregate(

                [{'$match': {'hostname': {'$ne': None}}}, {'$project': {'_id': 0, 'ip': 1, 'hostname': 1}}])

            for _ in hostname:

                if 'hostname' in hostname:

                    ip_hostname[_["ip"]] = _["hostname"]

            for _ in result_list:

                if 'ip' in ip_hostname:

                    _['hostname'] = ip_hostname[_["ip"]]

                else:

                    _['hostname'] = ''

        else:

            for _ in result_list:

                hostname = Mongo.coll['Info'].find_one({'ip': _['ip']})

                if hostname and 'hostname' in hostname:

                    _['hostname'] = hostname['hostname']

                else:

                    _['hostname'] = ''

    return render_template('detail.html', item=result_list, count=vulcount, id=id, taskdate=taskdate,

                           plugin_name=plugin_name, scanlist=lastscan)
通过id找到任务详情,然后将详情展示出来。有taskdate就是可以查询指定的日期。没有这个参数就是查询最新日期。当结果大于100,使用优化的查询语句。
9.DeleteTask()
# 删除任务异步

@app.route('/deletetask', methods=['get', 'post'])

@logincheck

@anticsrf

def DeleteTask():

    oid = request.form.get('oid', '')

    if oid:

        result = Mongo.coll['Task'].delete_one({'_id': ObjectId(oid)})

        if result.deleted_count > 0:

            result = Mongo.coll['Result'].delete_many({'task_id': ObjectId(oid)})

            if result:

                return 'success'

    return 'fail'
删除任务操作
10.Downloadxls()
# 下载excel报表异步

@app.route('/downloadxls', methods=['get', 'post'])

@logincheck

@anticsrf

def DownloadXls():

    tid = request.args.get('taskid', '')

    taskdate = request.args.get('taskdate', '')

    result_list = []

    if tid:  # 有任务id

        if taskdate:  # 从任务中拉取指定批次扫描结果

            taskdate = datetime.strptime(taskdate, "%Y-%m-%d %H:%M:%S.%f")

            cursor = Mongo.coll['Result'].find({'task_id': ObjectId(tid), 'task_date': taskdate}).sort(

                'time', -1)

        else:  # 从任务中直接取该任务最新一次扫描结果

            lastscan = Mongo.coll["Result"].distinct('task_date', {'task_id': ObjectId(tid)})

            if len(lastscan) == 0:

                cursor = []

                taskdate = datetime.now()

            else:

                lastscan.sort(reverse=True)

                taskdate = lastscan[0]

                cursor = Mongo.coll['Result'].find({'task_id': ObjectId(tid), 'task_date': taskdate}).sort(

                    'time', -1)

        title = Mongo.coll['Task'].find_one({'_id': ObjectId(tid)})['title']

        for _ in cursor:

            hostname = ''

            result = Mongo.coll['Info'].find_one({'ip': _['ip']})

            if result and 'hostname' in result:

                hostname = result['hostname']

            result_list.append(

                {'ip': _['ip'], 'port': _['port'], 'info': _['info'], 'vul_level': _['vul_info']['vul_level'],

                 'time': _['time'], 'vul_name': _['vul_info']['vul_name'], 'lastscan': taskdate, 'title': title,

                 'hostname': hostname})

        response = make_response(CreateTable(result_list, taskdate.strftime("%Y%m%d-%H%M%S")))

        if taskdate == '':

            response.headers["Content-Disposition"] = "attachment; filename=nodata.xls;"

        else:

            response.headers["Content-Disposition"] = "attachment; filename=" + quote(

                title.encode('utf-8')) + taskdate.strftime(

                "%Y-%m-%d-%H-%M-%S") + ".xls;"

    else:  # 下载综合报表

        tasks = Mongo.coll['Task'].find({})

        t_list = []

        for t in tasks:

            name = t['title']

            lastscan = Mongo.coll["Result"].distinct('task_date', {'task_id': t['_id']})

            if len(lastscan) == 0:

                cursor = Mongo.coll['Result'].find({'task_id': t['_id']})

                taskdate = None

            else:

                lastscan.sort(reverse=True)

                taskdate = lastscan[0]

                cursor = Mongo.coll['Result'].find({'task_id': t['_id'], 'task_date': taskdate})

            for _ in cursor:  # 单任务详情

                hostname = Mongo.coll['Info'].find_one({'ip': _['ip']})

                if hostname:

                    _['hostname'] = hostname['hostname']

                else:

                    _['hostname'] = None

                _['title'] = name

                _['vul_level'] = _['vul_info']['vul_level']

                _['vul_name'] = _['vul_info']['vul_name']

                _['lastscan'] = taskdate

                t_list.append(_)

        response = make_response(CreateTable(t_list, 'all_data'))

        response.headers["Content-Disposition"] = "attachment; filename=all_data.xls;"

    response.headers["Content-Type"] = "application/x-xls"

    return response
216-243行 将扫描结果查询出来后加到result_list
response = make_response(CreateTable(result_list, taskdate.strftime("%Y%m%d-%H%M%S")))
跟CreateTable()函数 View/lib/CreateExcel.py
def CreateTable(cursor, id):

    item = []

    item.append(['IP', '端口', '主机名', '风险等级', '漏洞描述', '插件类型', '任务名称', '时间', '扫描批次'])

    for i in cursor:

        if i['lastscan']:

            _ = [i['ip'], i['port'], i['hostname'], i['vul_level'], i['info'],

                 i['vul_name'], i['title'], i['time'].strftime('%Y-%m-%d %H:%M:%S'),

                 i['lastscan'].strftime('%Y-%m-%d %H:%M:%S')]

        else:

            _ = [i['ip'], i['port'], i['hostname'], i['vul_level'], i['info'],

                 i['vul_name'], i['title'], i['time'].strftime('%Y-%m-%d %H:%M:%S'), '']

        item.append(_)

    file = write_data(item, id)

    return file.getvalue()
创建个列表,将数据加入列表和描述对应起来。write_data()函数
def write_data(data, tname):

    file = xlwt.Workbook(encoding='utf-8')

    table = file.add_sheet(tname, cell_overwrite_ok=True)

    l = 0

    for line in data:

        c = 0

        for _ in line:

            table.write(l, c, line[c])

            c += 1

        l += 1

    sio = StringIO.StringIO()

    file.save(sio)

    return sio
通过xlwt包,将数据一行行写到文件里, 然后保存,文件名为时间格式。
回到view/view.py
make_response()返回文件名。 245-250行设置了http头和下载文件名字。后面返回下载。
251-277行同上。
11.search_result_xls()
# 搜索结果报表下载接口

@app.route('/searchxls', methods=['get'])

@logincheck

@anticsrf

def search_result_xls():

    query = request.args.get('query', '')

    if query:

        result = query.strip().split(';')

        filter_ = querylogic(result)

        cursor = Mongo.coll['Info'].find(filter_).sort('time', -1)

        title_tup = ('IP', '端口号', '主机名', '服务类型')

        xls = [title_tup, ]

        for info in cursor:

            item = (

                info.get('ip'), info.get('port'),

                info.get('hostname'), info.get('server')

            )

            xls.append(item)

        file = write_data(xls, 'search_result')

        resp = make_response(file.getvalue())

        resp.headers["Content-Disposition"] = "attachment; filename=search_result.xls;"

        resp.headers["Content-Type"] = "application/x-xls"

        resp.headers["X-Content-Type-Options"] = "nosniff"

        return resp

    else:

        redirect(url_for('NotFound'))
搜索结果有个话,写入文件下载。没有的话NotFound
12.Plugin()
# 插件列表页

@app.route('/plugin')

@logincheck

def Plugin():

    page = int(request.args.get('page', ''))

    cursor = Mongo.coll['Plugin'].find().limit(page_size).skip((page - 1) * page_size)

    return render_template('plugin.html', cursor=cursor, vultype=cursor.distinct('type'), count=cursor.count())
查询-展示
13.AddPlugin()
单独分析 (https://www.cnblogs.com/zhengjim/p/9406117.html)
14.DeletePlugin()
# 删除插件异步

@app.route('/deleteplugin', methods=['get', 'post'])

@logincheck

@anticsrf

def DeletePlugin():

    oid = request.form.get('oid', '')

    if oid:

        result = Mongo.coll['Plugin'].find_one_and_delete({'_id': ObjectId(oid)}, remove=True)

        if not result['filename'].find('.') > -1:

            result['filename'] = result['filename'] + '.py'

        if os.path.exists(file_path + result['filename']):

            os.remove(file_path + result['filename'])

            return 'success'

    return 'fail'
删除插件,从数据库中删除并且删除文件
15.Analysis()
# 统计页面

@app.route('/analysis')

@logincheck

def Analysis():

    ip = len(Mongo.coll['Info'].distinct('ip'))

    record = Mongo.coll['Info'].find().count()

    task = Mongo.coll['Task'].find().count()

    vul = int(Mongo.coll['Plugin'].group([], {}, {'count': 0},'function(doc,prev){prev.count = prev.count + doc.count}')[0]['count'])

    plugin = Mongo.coll['Plugin'].find().count()

    vultype = Mongo.coll['Plugin'].group(['type'], {"count":{"$ne":0}}, {'count': 0},'function(doc,prev){prev.count = prev.count + doc.count}')

    cur = Mongo.coll['Statistics'].find().sort('date', -1).limit(30)

    trend = []

    for i in cur:

        trend.append(

            {'time': i['date'], 'add': i['info']['add'], 'update': i['info']['update'], 'delete': i['info']['delete']})

    vulbeat = Mongo.coll['Heartbeat'].find_one({'name': 'load'})

    scanbeat = Mongo.coll['Heartbeat'].find_one({'name': 'heartbeat'})

    if vulbeat == None or scanbeat == None:

        taskpercent = 0

        taskalive = False

        scanalive = False

    else:

        taskpercent = vulbeat['value'] * 100

        taskalive = (datetime.now() - vulbeat['up_time']).seconds

        scanalive = (datetime.now() - scanbeat['up_time']).seconds

        taskalive = True if taskalive < 120 else False

        scanalive = True if scanalive < 120 else False

    server_type = Mongo.coll['Info'].aggregate(

        [{'$group': {'_id': '$server', 'count': {'$sum': 1}}}, {'$sort': {'count': -1}}])

    web_type = Mongo.coll['Info'].aggregate([{'$match': {'server': 'web'}}, {'$unwind': '$webinfo.tag'},

                                             {'$group': {'_id': '$webinfo.tag', 'count': {'$sum': 1}}},

                                             {'$sort': {'count': -1}}])

    return render_template('analysis.html', ip=ip, record=record, task=task, vul=vul, plugin=plugin, vultype=vultype,

                           trend=sorted(trend, key=lambda x: x['time']), taskpercent=taskpercent, taskalive=taskalive,

                           scanalive=scanalive, server_type=server_type, web_type=web_type)
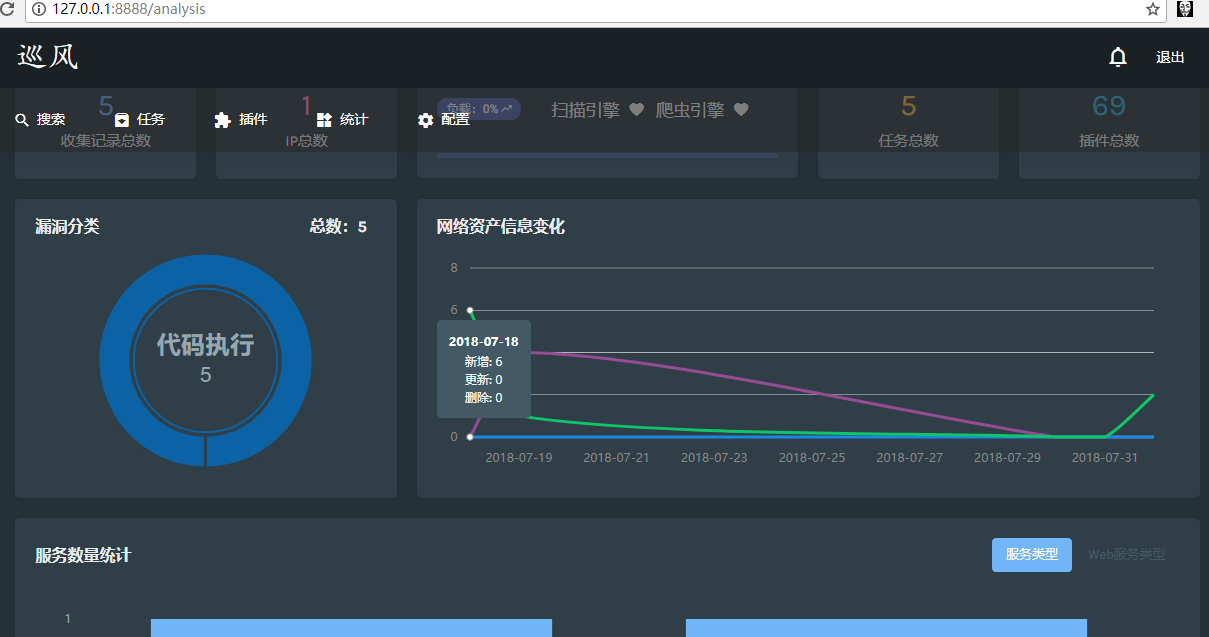
看了页面回来看代码,这个方法就是将数据库中的值查询出来然后显示,不具体分析语句。
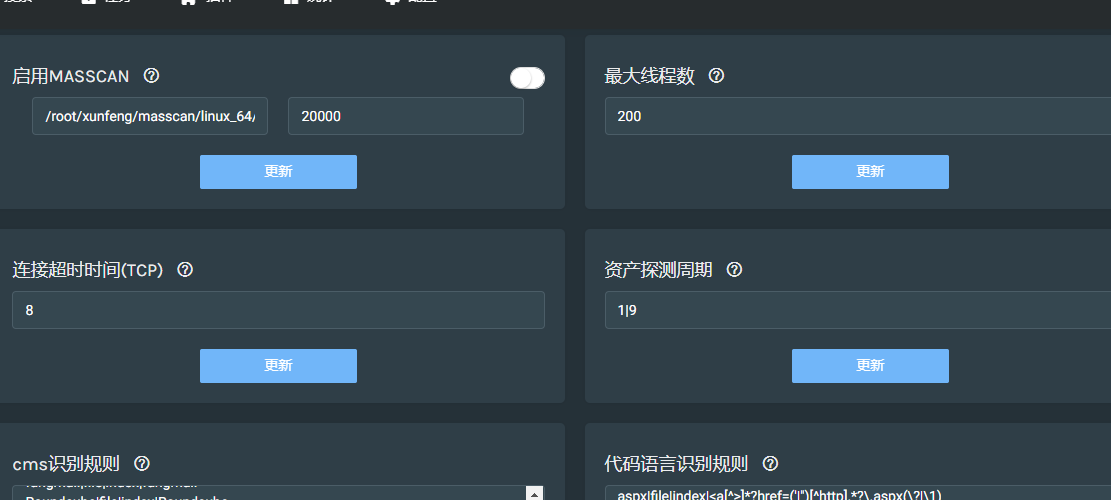
16.Config()
# 配置页面

@app.route('/config')

@logincheck

def Config():

    val = []

    table = request.args.get('config', '')

    if table in ("vulscan", "nascan"):

        dict = Mongo.coll['Config'].find_one({'type': table})

        if dict and 'config' in dict:

            dict = dict['config']

            for _ in dict:

                if _.find('_') > 0:

                    item_type = "list"

                else:

                    item_type = "word"

                val.append({"show": item_type, "type": _, "info": dict[_]["info"], "help": dict[_]["help"],

                            "value": dict[_]["value"]})

    val = sorted(val, key=lambda x: x["show"], reverse=True)

    return render_template('config.html', values=val)
判断是爬虫引擎还是扫描引擎,然后分别查询出数据。
17.UpdateConfig()
# 配置更新异步

@app.route('/updateconfig', methods=['get', 'post'])

@logincheck

@anticsrf

def UpdateConfig():

    rsp = 'fail'

    name = request.form.get('name', 'default')

    value = request.form.get('value', '')

    conftype = request.form.get('conftype', '')

    if name and value and conftype:

        if name == 'Masscan' or name == 'Port_list':

            origin_value = Mongo.coll['Config'].find_one({'type': 'nascan'})["config"][name]["value"]

            value = origin_value.split('|')[0] + '|' + value

        elif name == 'Port_list_Flag':

            name = 'Port_list'

            origin_value = Mongo.coll['Config'].find_one({'type': 'nascan'})["config"]['Port_list']["value"]

            value = value + '|' + origin_value.split('|')[1]

        elif name == 'Masscan_Flag':

            name = 'Masscan'

            path = Mongo.coll['Config'].find_one({'type': 'nascan'})["config"]["Masscan"]["value"]

            if len(path.split('|')) == 3:

                path = path.split('|')[1] + "|" + path.split('|')[2]

            else:

                path = path.split('|')[1]

            if value == '':

                value = '1|' + path

            else:

                value = '0|' + path

        result = Mongo.coll['Config'].update({"type": conftype}, {'$set': {'config.' + name + '.value': value}})

        if result:

            rsp = 'success'

    return rsp
先判断是更新哪一个配置。
根据name来判断是哪个配置,就从数据库去取对应的值,然后把提交过来的value加上去更新。
18.PullUpdate()
19.checkupdate()
20.installplugin()
# 拉取线上最新插件异步

@app.route('/pullupdate')

@logincheck

@anticsrf

def PullUpdate():

    rsp = 'err'

    f = urlopen('https://sec.ly.com/xunfeng/getlist')

    j = f.read().strip()

    if j:

        try:

            remotelist = json.loads(j)

            #remotelist_temp = copy.deepcopy(remotelist)

            plugin = Mongo.coll['Plugin'].find({'source': 1})

            for p in plugin:

                for remote in remotelist:

                    if p['name'] == remote['name'] and remote['coverage'] == 0:

                        remotelist.remove(remote)

            locallist = Mongo.coll['Update'].aggregate([{'$project': {'_id': 0, 'unicode': 1}}])

            local = []

            for i in locallist:

                local.append(i['unicode'])

            ret = [i for i in remotelist if i['unicode'] not in local]

            for i in ret:

                i['isInstall'] = 0

                Mongo.coll['Update'].insert(i)

            rsp = 'true'

        except:

            pass

    return rsp

# 检查本地已知的线上插件列表异步

@app.route('/checkupdate')

@logincheck

@anticsrf

def CheckUpdate():

    json = []

    notinstall = Mongo.coll['Update'].find({'isInstall': 0}).sort('unicode', -1)

    for _ in notinstall:

        json.append({'unicode': _['unicode'], 'name': _['name'], 'info': _['info'], 'time': _['pushtime'],

                     'author': _['author']})

    return dumps(json)

# 安装/下载插件异步

@app.route('/installplugin')

@logincheck

@anticsrf

def installplugin():

    rsp = 'fail'

    unicode = request.args.get('unicode', '')

    item = Mongo.coll['Update'].find_one({'unicode': unicode})

    json_string = {'add_time': datetime.now(), 'count': 0, 'source': 1}

    file_name = secure_filename(item['location'].split('/')[-1])

    if os.path.exists(file_path + file_name):

        if ".py" in file_name:

            db_record = Mongo.coll['Plugin'].find_one({'filename': file_name.split('.')[0]})

        else:

            db_record = Mongo.coll['Plugin'].find_one({'filename': file_name})

        if not db_record or not db_record['source'] == 1:

            file_name = file_name.split('.')[0] + '_' + str(datetime.now().second) + '.' + \

                        file_name.split('.')[-1]

        else:

            db_record = Mongo.coll['Plugin'].delete_one({'filename': file_name.split('.')[0]})

    if item['location'].find('/') == -1:

        urlretrieve('https://sec.ly.com/xunfeng/getplugin?name=' + item['location'], file_path + file_name)

    else:

        urlretrieve(item['location'], file_path + file_name)  # 兼容旧的插件源

    if os.path.exists(file_path + file_name):

        try:

            if file_name.split('.')[-1] == 'py':

                module = __import__(file_name.split('.')[0])

                mark_json = module.get_plugin_info()

                json_string['filename'] = file_name.split('.')[0]

            else:

                json_text = open(file_path + file_name, 'r').read()

                mark_json = json.loads(json_text)

                json_string['filename'] = file_name

                mark_json.pop('plugin')

            json_string.update(mark_json)

            Mongo.coll['Plugin'].insert(json_string)

            Mongo.coll['Update'].update_one({'unicode': unicode}, {'$set': {'isInstall': 1}})

            rsp = 'success'

        except:

            pass

    return rsp
均为更新插件的,不细分析。
在https://sec.ly.com/xunfeng/getlist 查询出最新插件,然后与数据库比较。
查看是否本地有安装。
https://sec.ly.com/xunfeng/getplugin?name= 在这里实现下载。
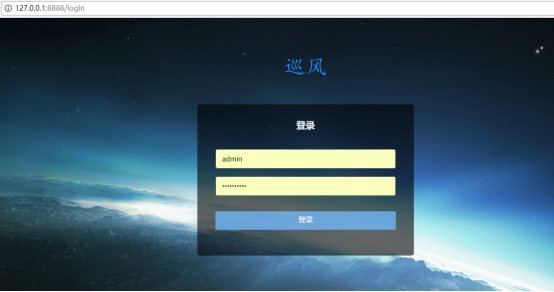
21.Login()
22.Loginout()
# 登录

@app.route('/login', methods=['get', 'post'])

def Login():

    if request.method == 'GET':

        return render_template('login.html')

    else:

        account = request.form.get('account')

        password = request.form.get('password')

        if account == app.config.get('ACCOUNT') and password == app.config.get('PASSWORD'):

            session['login'] = 'loginsuccess'

            return redirect(url_for('Search'))

        else:

            return redirect(url_for('Login'))

# 登出异步

@app.route('/loginout')

@logincheck

def LoginOut():

    session['login'] = ''

    return redirect(url_for('Login'))
一个登陆一个登出。
23.NotFound()
24.Error()
@app.route('/404')

def NotFound():

    return render_template('404.html')

@app.route('/500')

def Error():

    return render_template('500.html')
显示404 或500
阅读了view.py 里的每个方法具体都是干嘛的,对巡风扫描器整体有一个大概了解。
感谢ysrc开源。
巡风源码阅读与分析---view.py的更多相关文章
- 巡风源码阅读与分析---Aider.py
之前写过一遍Aider.py,但只是跟着代码一顿阅读没有灵魂,所以重新对它阅读并重新写一遍. 描述 文件位置:aider/aider.py 是用来辅助验证的脚本 官方描述就一句话 代码阅读分析 这个脚 ...
- 巡风源码阅读与分析---nascan.py
Nascan是巡风主要是做目标的资产识别(信息收集). nascan.py 文件位于 nascan/nascan.py # coding:utf-8 # author:wolf@YSRC import ...
- 巡风源码阅读与分析---AddPlugin()方法
文件位置:view/view.py AddPlugin() # 新增插件异步 @app.route('/addplugin', methods=['get', 'post']) @logincheck ...
- 巡风源码阅读与分析--querylogic函数
文件位置:views/lib/QueryLogic.py Querylogic() # 搜索逻辑 def querylogic(list): query = {} if len(list) > ...
- (3.4)mysql基础深入——mysql.server启动脚本源码阅读与分析
(3.4)mysql基础深入——mysql.server启动脚本源码阅读与分析 my.server主要分为3大部分 [1]变量初始化部分 [2]函数声明部分 [3]具体执行部分 #!/bin/sh # ...
- HTTP请求库——axios源码阅读与分析
概述 在前端开发过程中,我们经常会遇到需要发送异步请求的情况.而使用一个功能齐全,接口完善的HTTP请求库,能够在很大程度上减少我们的开发成本,提高我们的开发效率. axios是一个在近些年来非常火的 ...
- 如何实现一个HTTP请求库——axios源码阅读与分析 JavaScript
概述 在前端开发过程中,我们经常会遇到需要发送异步请求的情况.而使用一个功能齐全,接口完善的HTTP请求库,能够在很大程度上减少我们的开发成本,提高我们的开发效率. axios是一个在近些年来非常火的 ...
- python2.7-巡风源码阅读
推荐个脚本示例网站:https://www.programcreek.com/python/example/404/thread.start_new_thread,里面可以搜索函数在代码中的写法,只有 ...
- Iris框架源码阅读和分析
iris包结构简介 iris包含了很多包,下面这些是分析过程中接触到的东西. 能力有限,多多包涵,欢迎联系QQ:2922530320 一起交流 context包包含: Context (接口) con ...
随机推荐
- VMware启动时提示我已移动或我已复制该虚拟机
参考地址:https://blog.csdn.net/luxiangzhou/article/details/79626113 1.VMware启动时提示“我已移动该虚拟机”或“我已复制该虚拟机”,选 ...
- pypi pack and upload
upload 403 error need to change the name in setup.py upload 400 error need to change the version of ...
- pojo,javabean与entitybean
pojo:朴实无华的实体类 javabean:遵守某些规范的可重用的实体类 entitybean:与数据库中的数据记录对应的类 这个链接说的很明白!https://blog.csdn.net/chen ...
- vue 手机端样式统一配置
- Linux多线程编程,为什么要使用线程,使用线程的理由和优点等
线程?为什么有了进程还需要线程呢,他们有什么区别?使用线程有什么优势呢?还有多线程编程的一些细节问题,(http://www.0830120.com)如线程之间怎样同步.互斥,这些东西将在本文中介绍. ...
- Imcash:一边大裁员,一边大扩招,你能否成为区块链人才中的7%?
农历春节后,互联网创业圈并不太平. 最早,滴滴被曝裁员,占比约为全员的15%,涉及员工约2000人.CEO程维在全员会议上称公司要做好过冬准备.此后,京东接棒,其裁员对象上升至副总裁级别高管,比例占到 ...
- windows下apache+https环境配置
windows下apache+https环境配置 转 https://www.cnblogs.com/sandaizi/p/7519370.html 1.修改配置文件conf/httpd.conf,去 ...
- 输出九九乘法表(Python、Java、C、C++、JavaScript)
最近在学python的过程中,接触到了循环的知识,以及这个案例,于是写了下!感觉还不错,然后就用其它几种语言也试了下!! 接下来,就跟大家分享下实现方法!! 实现输出九九乘法表,主要用到的是循环的知识 ...
- 有关UnrealEngine材质编辑器中的Custom节点的一些小贴士
PS:本文写于2017.2.1日,使用版本为4.13.第二次更新时间为2017.3.15增加了四.一些材质编辑器中的奇怪的技巧: 一.前言在Unreal中材质编辑器提供了Custom节点,作为HLSL ...
- lua_table 学习
lua table (表) Table 的常用操作 local fruits = {“aaa”,”bbb”,”ccc”,”ddd”,”eee”,”fff”,”ggg”} table.co ...