matplotlib学习日记(十)-共享绘图区域的坐标轴
(1)共享单一绘图区域的坐标轴
'''
上一讲介绍了画布的划分,有时候想将多张图放在同一个绘图区域,
不想在每个绘图区域只绘制一幅图形,这时候借助共享坐标轴的方法实现在一个绘图区
绘制多幅图形的目的。
'''
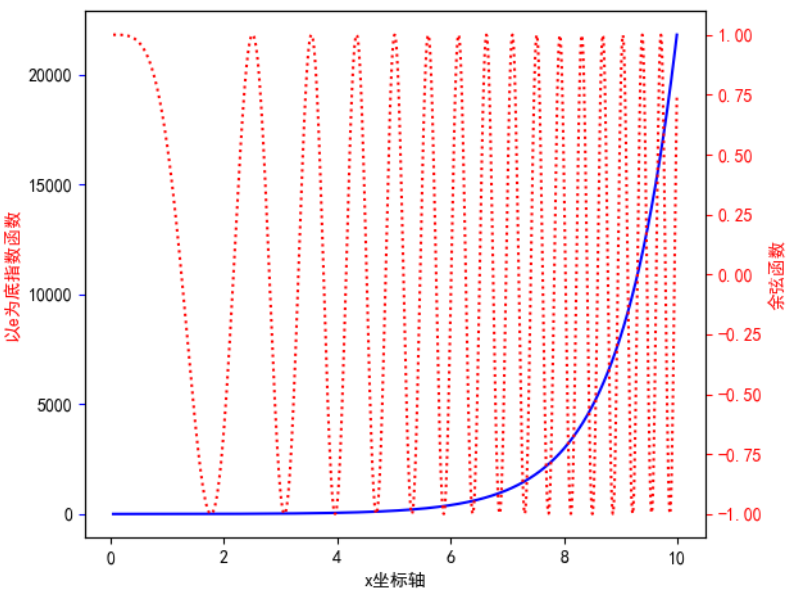
import matplotlib.pyplot as plt
import numpy as np
import matplotlib as mpl mpl.rcParams["font.sans-serif"]=["SimHei"]
mpl.rcParams["axes.unicode_minus"]=False fig, ax1 = plt.subplots()
t = np.arange(0.05, 10, 0.01)
s1 = np.exp(t)
ax1.plot(t, s1, c="b", ls="-") ax1.set_xlabel("x坐标轴") ax1.set_ylabel("以e为底指数函数", color="r")
ax1.tick_params("y", color="b")
#将y轴标签,主刻度线和刻度标签设置
ax2 = ax1.twinx()
#实例ax2的主轴与实例ax1的x轴是共享的,实例ax2的刻度线和刻度标签在右侧轴脊处绘制
s2 = np.cos(t**2)
ax2.plot(t, s2, c="r", ls=":") ax2.set_ylabel("余弦函数", color="r")
ax2.tick_params("y", colors="r") plt.show()
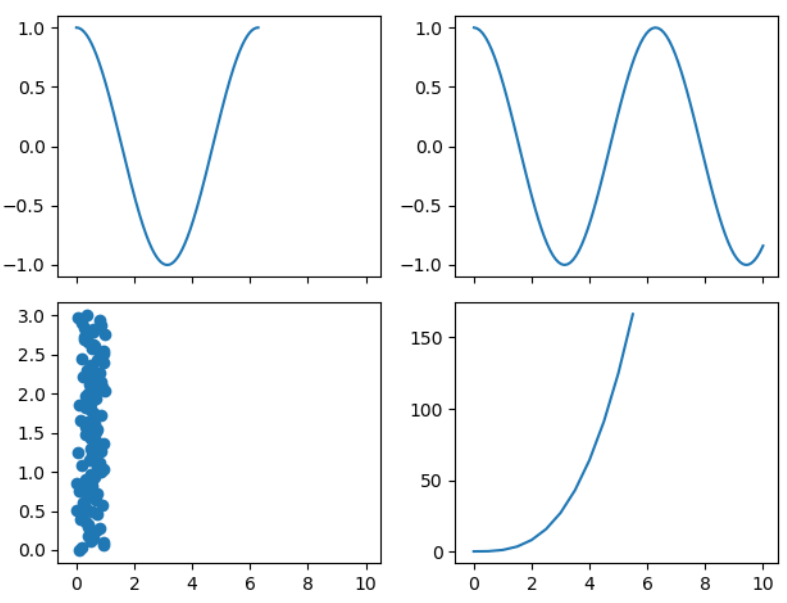
(2)共享不同子区绘图区域的坐标轴
'''

共享不同子区绘图区域的坐标轴的方法是subplots(2, 2, sharey=True),

sharey=True是一区,二区共享y轴,还有其他参数,row,col,all,none,

其中all和none分别等同True和False。

'''

import matplotlib.pyplot as plt

import numpy as np

x1 = np.linspace(0, 2*np.pi, 400)

y1 = np.cos(x1)

x2 = np.linspace(0.01, 10, 100)

y2 = np.cos(x2)

x3 = np.random.rand(100)

y3 = np.linspace(0, 3, 100)

x4 = np.arange(0, 6, 0.5)

y4 = np.power(x4, 3)

fig, ax = plt.subplots(2, 2)

#分成4个子区

ax1 = ax[0, 0]

ax1.plot(x1, y1)

#ax[0, 0]访问第一个子区

ax2 = ax[0, 1]

ax2.plot(x2, y2)

ax3 = ax[1, 0]

ax3.scatter(x3, y3)

ax4 = ax[1, 1]

ax4.plot(x4, y4)

plt.show()

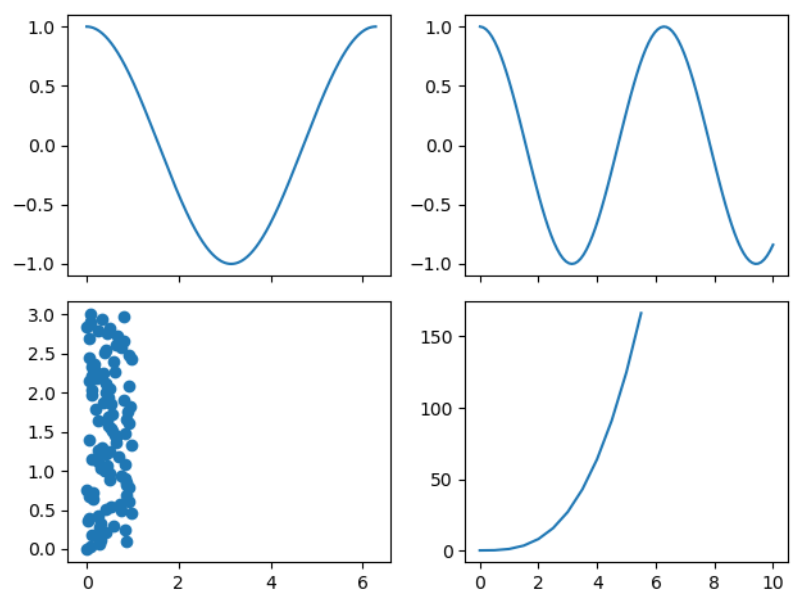
(3)将(2)中的plt.subplots(2, 2)改成plt.subplots(2, 2, sharex="all")-所有子区共享x轴
(4)参数sharex=“none”
与(2)相同
(5)参数sharex=“row”------->每一行x轴取值范围实现共享

(6)sharex="col"------------->每列共享x
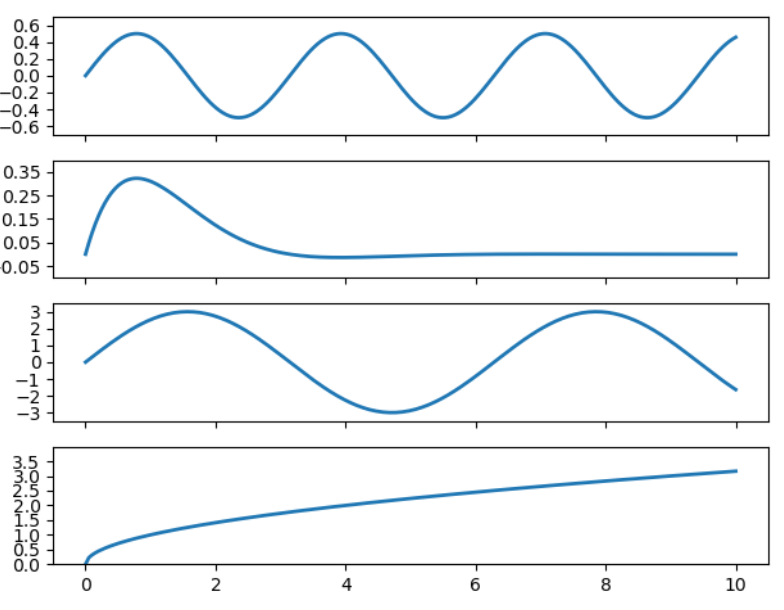
(7)将共享坐标轴的子区之间的空隙去掉,似乎出了点问题,还是有空隙
import matplotlib.pyplot as plt

import numpy as np

x = np.linspace(0.0, 10.0, 200)

y = np.cos(x)*np.sin(x)

y2 = np.exp(-x)*np.sin(x)

y3 = 3*np.sin(x)

y4 = np.power(x, 0.5)

fig, (ax1, ax2, ax3, ax4) = plt.subplots(4, 1, sharex="all")

fig.subplots_adjust(hspace=0)

ax1.plot(x, y, ls="-", lw=2)

ax1.set_yticks(np.arange(-0.6, 0.7, 0.2))

ax1.set_ylim(-0.7, 0.7)
(8)共享个别子区绘图区域的坐标轴
import matplotlib.pyplot as plt

import numpy as np

x1 = np.linspace(0, 2*np.pi, 400)

y1 = np.cos(x1**2)

x2 = np.linspace(0.01, 10, 100)

y2 = np.sin(x2)

x3 = np.random.rand(100)

y3 = np.linspace(0, 3, 100)

x4 = np.arange(0, 6, 0.5)

y4 = np.power(x4, 3)

fig, ax = plt.subplots(2, 2)

ax1 = plt.subplot(221)

ax1.plot(x1, y1)

ax2 = plt.subplot(222)

ax2.plot(x2, y2)

ax3 = plt.subplot(223)

ax3.plot(x3, y3)

ax4 = plt.subplot(224, sharex=ax1)

#与子区1共享x轴

ax4.plot(x4, y4)

plt.show()

matplotlib学习日记(十)-共享绘图区域的坐标轴的更多相关文章
- 『Python』matplotlib共享绘图区域坐标轴
1. 共享单一绘图区域的坐标轴 有时候,我们想将多张图形放在同一个绘图区域,不想在每个绘图区域只绘制一幅图形.这时候,就可以借助共享坐标轴的方法实现在一个绘图区域绘制多幅图形的目的. import n ...
- matplotlib学习日记(十)-划分画布的主要函数
(1)函数subplot()绘制网格区域中的几何形状相同的子区布局 import matplotlib.pyplot as plt import numpy as np '''函数subplot的介绍 ...
- matplotlib学习日记(一)------图表组成元素
1.使用函数绘制matplotlib的图表组成元素 (1)函数plot---变量的变化趋势 import matplotlib.pyplot as plt import numpy as np x ...
- matplotlib学习日记(十一)---坐标轴高阶应用
(一)设置坐标轴的位置和展示形式 (1)向画布中任意位置添加任意数量的坐标轴 ''' 通过在画布的任意位置和区域,讲解设置坐标轴的位置和坐标轴的展示形式的实现方法, 与subplot,subplots ...
- matplotlib学习日记(二)----图表组成练习
''' 将前面的知识进行练习 plot,scatter,legend等 ''' import matplotlib.pyplot as plt import numpy as np from matp ...
- Python学习日记(十八) 序列化模块
什么是序列? 就是每一个元素被有序的排成一列 什么是序列化? 就是将原本的列表.字典等内容转化成字符串的过程 什么时候会用到序列化? 数据存储(把数据放在文件.数据库),网络传输等 序列化的目的 1. ...
- matplotlib学习日记(九)-图形样式
(一)刻度线定位器和刻度格式器的使用方法 import matplotlib.pyplot as plt import numpy as np from matplotlib.ticker impor ...
- matplotlib学习日记(八)----完善统计图
(一)再说legend() import matplotlib.pyplot as plt import numpy as np x = np.arange(0, 2.1, 0.1) y = np.p ...
- matplotlib学习日记(七)---误差棒图
(一)误差棒图----误差置信区间的表示 import matplotlib.pyplot as plt import numpy as np x = np.linspace(0.1, 0.6, 10 ...
随机推荐
- C语言讲义——结构化编程(分支、循环)
顺序结构(从上到下) 分支结构(也叫选择结构) 循环结构 分支结构 if...else 最基本的分支结构是if(){}else{}. 为了代码的安全,同时也是出于代码规范的考虑,if()后面一定要加花 ...
- CentOS6.5&7更改开机启动时的CentOS标题
#现有CentOS6.5改以下配置文件 sed -i 's/CentOS/DntOS/g' /etc/centos-release sed -i 's/CentOS/DntOS/g' /etc/iss ...
- Alpha冲刺-第六次冲刺笔记
Alpha冲刺-冲刺笔记 这个作业属于哪个课程 https://edu.cnblogs.com/campus/fzzcxy/2018SE2 这个作业要求在哪里 https://edu.cnblogs. ...
- Django 的模板语法之过滤器
后端朝前端页面传递数据的方式 # 第一种 return render(request,'index.html',{'n':n}) # 第二种 return render(request,'index. ...
- 这 6 个 Spring Boot 项目够经典
不得不佩服 SpringBoot 的生态如此强大,今天我给大家推荐几款 Gitee 上优秀的后台管理系统,小伙伴们再也不用从头到尾撸一个项目了. SmartAdmin 我们开源一套漂亮的代码和一套整洁 ...
- 冰河教你一次性成功安装K8S集群(基于一主两从模式)
写在前面 研究K8S有一段时间了,最开始学习K8S时,根据网上的教程安装K8S环境总是报错.所以,我就改变了学习策略,先不搞环境搭建了.先通过官网学习了K8S的整体架构,底层原理,又硬啃了一遍K8S源 ...
- 基于React.js网页版弹窗|react pc端自定义对话框组件RLayer
基于React.js实现PC桌面端自定义弹窗组件RLayer. 前几天有分享一个Vue网页版弹框组件,今天分享一个最新开发的React PC桌面端自定义对话框组件. RLayer 一款基于react. ...
- 安装rose遇到的问题
将rose文件夹里面的rose.rar直接解压到rose安装目录里面的common文件夹中 安装教程与问题解决连接https://blog.csdn.net/Farewell_w/article/de ...
- 老猿学5G:多量纲计费与QoS的QCI、5QI、ARP、GBR和MBR
☞ ░ 前往老猿Python博文目录 ░ 一.多量纲计费 多量纲计费是与传统的计费模式相区别的一种计费模式,传统的计费基本上都是通过使用量.使用时长或包固定时长等方式计费,而多量纲计费是指在考虑以上方 ...
- PyQt(Python+Qt)学习随笔:QTableWidgetItem项的复选状态checkState访问方法
老猿Python博文目录 专栏:使用PyQt开发图形界面Python应用 老猿Python博客地址 QTableWidget表格部件中的QTableWidgetItem项可以单独设置复选状态,如图所有 ...