SpringBoot + Security学习笔记
SpringSecurity学习笔记
本以为是总结,最后写成了笔记,所以还是需要更加的努力啊。
开始的时候看了一遍官方文档,然后只看懂了加密器。
然后又学了一个尚硅谷的视频,虽然这个教程是在讲一个项目,但我没有听懂(应该是我自己的问题)
代码 https://gitee.com/pilearn/learning-spring-security
中文版文档 https://www.springcloud.cc/spring-security.html
尚硅谷视频链接 https://www.bilibili.com/video/BV15a411A7kP
什么是SpringSecurity
Security是Spring全家桶中一个安全框架,他的扩展能力非常的强,底层是一条过滤器链。通过简单的配置就可以使用,但通过自己的DIY,可以把每个权限细化到每个链接上去。
shiro没有学,但只推荐学一个安全框架
这里搭建的学习项目都是使用SpringBoot
获取SpringSecurity
你可以在maven官网获取最新版本
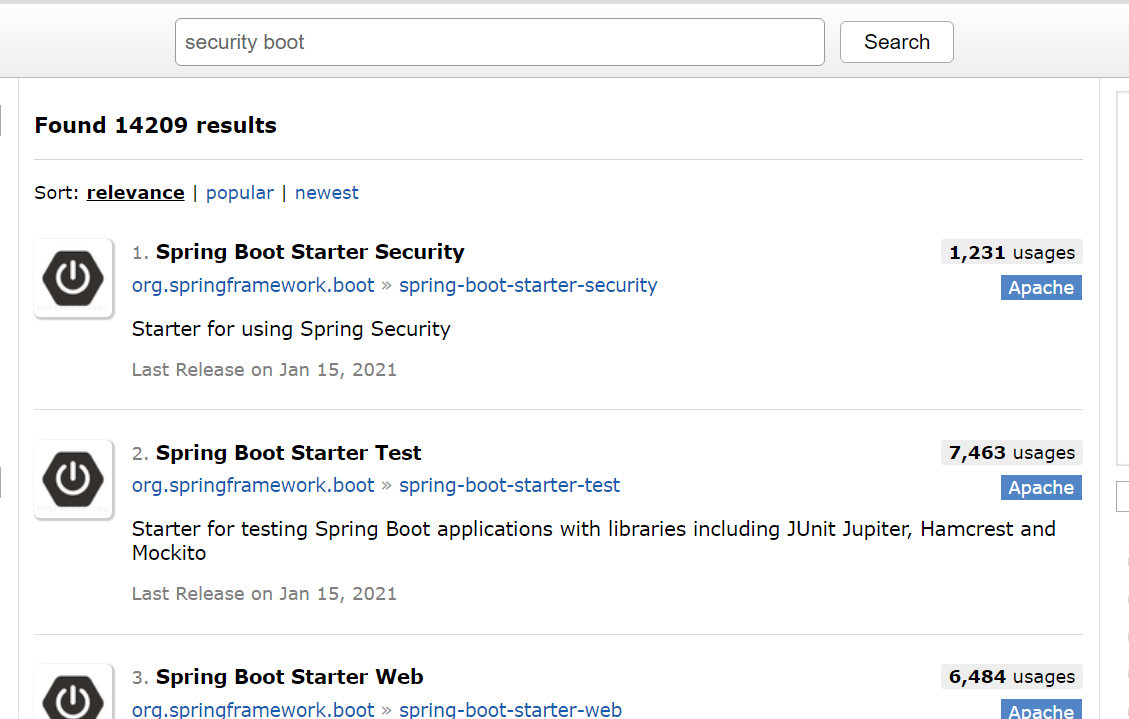
<dependency>

    <groupId>org.springframework.boot</groupId>

    <artifactId>spring-boot-starter-security</artifactId>

    <version>2.4.2</version>

</dependency>
开始一个SpringBoot项目
<?xml version="1.0" encoding="UTF-8"?>

<project xmlns="http://maven.apache.org/POM/4.0.0" xmlns:xsi="http://www.w3.org/2001/XMLSchema-instance"

         xsi:schemaLocation="http://maven.apache.org/POM/4.0.0 https://maven.apache.org/xsd/maven-4.0.0.xsd">

    <modelVersion>4.0.0</modelVersion>

    <parent>

        <groupId>org.springframework.boot</groupId>

        <artifactId>spring-boot-starter-parent</artifactId>

        <version>2.4.2</version>

        <relativePath/> <!-- lookup parent from repository -->

    </parent>

    <groupId>com.pipihao</groupId>

    <artifactId>securitylearn</artifactId>

    <version>0.0.1-SNAPSHOT</version>

    <name>securitylearn</name>

    <description>Demo project for Spring Boot</description>

    <properties>

        <java.version>1.8</java.version>

    </properties>

    <dependencies>

        <dependency>

            <groupId>com.alibaba</groupId>

            <artifactId>druid</artifactId>

            <version>1.1.21</version>

        </dependency>

        <dependency>

            <groupId>org.springframework.boot</groupId>

            <artifactId>spring-boot-starter-thymeleaf</artifactId>

        </dependency>

        <dependency>

            <groupId>org.springframework.boot</groupId>

            <artifactId>spring-boot-starter-security</artifactId>

        </dependency>

        <dependency>

            <groupId>org.springframework.boot</groupId>

            <artifactId>spring-boot-starter-web</artifactId>

        </dependency>

        <dependency>

            <groupId>org.mybatis.spring.boot</groupId>

            <artifactId>mybatis-spring-boot-starter</artifactId>

            <version>2.1.4</version>

        </dependency>

        <dependency>

            <groupId>mysql</groupId>

            <artifactId>mysql-connector-java</artifactId>

            <scope>runtime</scope>

        </dependency>

        <dependency>

            <groupId>org.projectlombok</groupId>

            <artifactId>lombok</artifactId>

            <optional>true</optional>

        </dependency>

        <dependency>

            <groupId>org.springframework.boot</groupId>

            <artifactId>spring-boot-starter-test</artifactId>

            <scope>test</scope>

        </dependency>

        <dependency>

            <groupId>org.springframework.security</groupId>

            <artifactId>spring-security-test</artifactId>

            <scope>test</scope>

        </dependency>

    </dependencies>

    <build>

        <plugins>

            <plugin>

                <groupId>org.springframework.boot</groupId>

                <artifactId>spring-boot-maven-plugin</artifactId>

                <configuration>

                    <excludes>

                        <exclude>

                            <groupId>org.projectlombok</groupId>

                            <artifactId>lombok</artifactId>

                        </exclude>

                    </excludes>

                </configuration>

            </plugin>

        </plugins>

    </build>

</project>
项目配置文件
server:

  port: 8001

spring:

  datasource:

    url: jdbc:mysql://localhost:3306/demo?serverTimezone=Asia/Shanghai

    username: root

    password: root

    driver-class-name: com.mysql.cj.jdbc.Driver

  thymeleaf:

    cache: false

    # 因为Thymeleaf很多有默认配置,所以只关了这个缓存,方便刷新
数据库文件
数据库版本为 8.0
运行项目
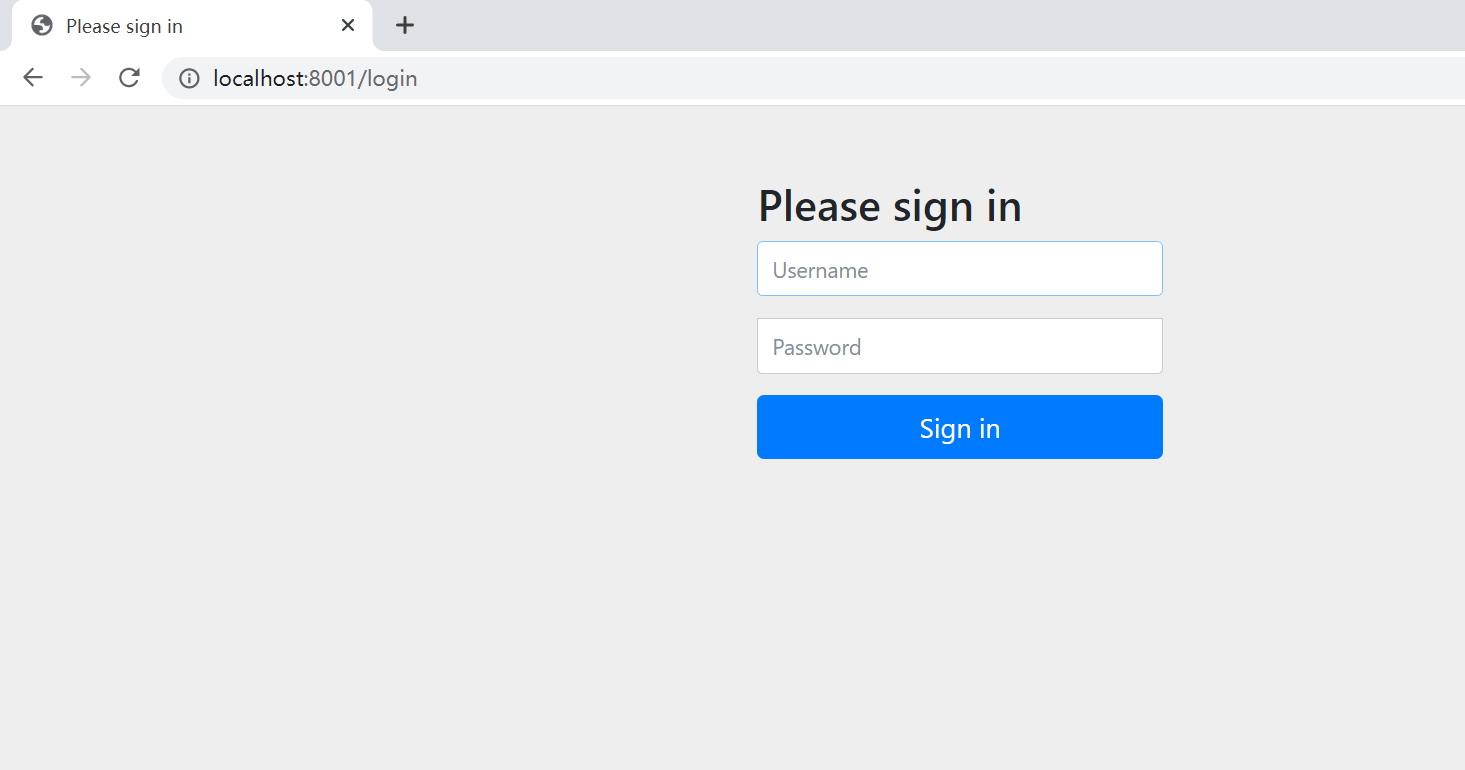

登录
用户名:user
密码:控制台输出的这密码
配置Security
方法一:通过配置文件修改登录账号密码
spring:

  security:

  	user:

  	  name: xx

  	  password: xx
方法二:通过自定义配置SecurityConfig配置类
WebSecurityConfigurerAdapter 类是是Security内置提供了一个默认身份验证的抽象类,继承此抽象类实现configure方法则可以对验证操作实现DIY。[于官方文档 6.3 标题可见]
UserDetailsService接口:查询数据库用户名和密码过程
- 创建类继承UsernamePasswordAuthenticationFilter,重写三个方法
* - 创建类实现UserDetailService,编写查询数据过程,返回User对象,这个User对象是安全框架提供对象。
- PasswordEncoder: 数据加密接口,用于返回User对象里面的密码加密
方法三:自定义配置类UserDetailsService
定义不验证链接
@Override

protected void configure(HttpSecurity http) throws Exception {

    /*

        使用and()方法表示关闭XML标记的Java配置,它允许我们继续配置父标记。如果您阅读代码,它也是有道理的。我想配置授权请求并配置表单登录并配置HTTP基本身份验证。

         */

    http

        .authorizeRequests()

        .antMatchers("/","/no").permitAll() //可以直接访问的路径

        .anyRequest().authenticated()

        .and()

        .formLogin()

        .loginPage("/login.html") //配置登录路径

        .loginProcessingUrl("/doLogin")

        .defaultSuccessUrl("/hallo")

        .permitAll()

        ; //设置 登录的网页

    http.csrf().disable(); //如果注释了这一行,全部要用_csrf的对象来验证了

}
配置访问权限/角色
如果是配置访问角色则使用是hasRole与hasAnyRole
这里非常建议点一下看一下hasRole的源码 使用Role的时候,User的权限列表是需要加ROLE_前缀的
这里直接使用的是hasAnyAuthority,还有一个方法是hasAuthority
前者可以配置多个权限,而后者只能配置一个权限
接口只是显示一个字符串
@GetMapping("test")

public String sayTest(){

    return "Test";

}
SecurityConfig代码
@Override

protected void configure(HttpSecurity http) throws Exception {

    /*

        使用and()方法表示关闭XML标记的Java配置,它允许我们继续配置父标记。如果您阅读代码,它也是有道理的。我想配置授权请求并配置表单登录并配置HTTP基本身份验证。

         */

    http

        .authorizeRequests()

        .antMatchers("/","/no").permitAll() //可以直接访问的路径

        .antMatchers("/test").hasAnyAuthority("admin") // 访问权限

        .anyRequest().authenticated()

        .and()

        .formLogin()

        .loginPage("/login.html") //配置登录路径

        .loginProcessingUrl("/doLogin")

        .defaultSuccessUrl("/hallo")

        .permitAll()

        ; //设置 登录的网页

    http.csrf().disable(); //如果注释了这一行,全部要用_csrf的对象来验证了

}
UserDetailsImpl代码
@Override

public UserDetails loadUserByUsername(String username) throws UsernameNotFoundException {

    if(StringUtils.isEmpty(username)){

        throw new RuntimeException("用户名不能为空");

    }

    IUser iUser= userMapper.getUserByUsername(username);

    if(iUser == null){

        throw new UsernameNotFoundException("无此用户");

    }

    /*此处查询用户角色*/

    List<GrantedAuthority> grantedAuthorityList =

        AuthorityUtils.createAuthorityList("admin"); // 权限的列表

    return new User(iUser.getUsername(),bCryptPasswordEncoder.encode(iUser.getPassword()),grantedAuthorityList);

}
自定义403界面
// 在此方法内加上一行  protected void configure(HttpSecurity http)

http.exceptionHandling().accessDeniedPage("/unauth.html");
权限注解
@Secured
判断是否有角色,这里匹配的角色需要加前缀ROLE_
@GetMapping("update")

@Secured({"ROLE_manager"})

public String update(){

    return "update";

}
使用其功能时需要在application类上开起
@SpringBootApplication

@MapperScan("com.pipihao.securitylearn.mapper")

@EnableGlobalMethodSecurity(securedEnabled = true)

public class SecuritylearnApplication {

    public static void main(String[] args) {

        SpringApplication.run(SecuritylearnApplication.class, args);

    }

}
UserDetailsServiceImpl
List<GrantedAuthority> grantedAuthorityList =

    AuthorityUtils.createAuthorityList("admin","ROLE_manager");
@PreAuthorize & @PostAuthorize
此注解即有权限验证功能,又有角色验证功能
@GetMapping("pre1")

@PreAuthorize("hasAnyRole('ROLE_manager')")

public String prePost1(){

    return "prePost1";

}

@GetMapping("pre2")

@PreAuthorize("hasAnyAuthority('admin')")

public String prePost2(){

    return "prePost2";

}
@SpringBootApplication

@EnableGlobalMethodSecurity(prePostEnabled = true)

public class SecuritylearnApplication {

    public static void main(String[] args) {

        SpringApplication.run(SecuritylearnApplication.class, args);

    }

}
@PostAuthorize 与@PreAuthorize的区别就是,Pre会先拦截后执行,而PostAuthorize是先执行,后拦截
所以我例子中没有过多的讲
@PreFilter & @PostFilter
Pre是过滤上传的数据,Post过滤返回的数据
@GetMapping("list")

@PostFilter("filterObject.username != 'admin' ")

public List<IUser> list(){

    List<IUser> iUsers = new ArrayList<>();

    iUsers.add(new IUser(1,"admin","123"));

    iUsers.add(new IUser(2,"user","123"));

    return iUsers;

}

// Applicationo类上还是要加上下面这个注解,并设置属性值

@EnableGlobalMethodSecurity(prePostEnabled = true)
效果图

上传则是同理,通过注解写好判断,然后测试即可,注:PreFilter过滤的也只是集合和数组
用户注销
/*配置退出登录*/

http.logout().logoutUrl("/logout").logoutSuccessUrl("no").permitAll();
登录后,直接通过浏览器,访问此路径即可(是的,就是如此)
location.href='/logout';
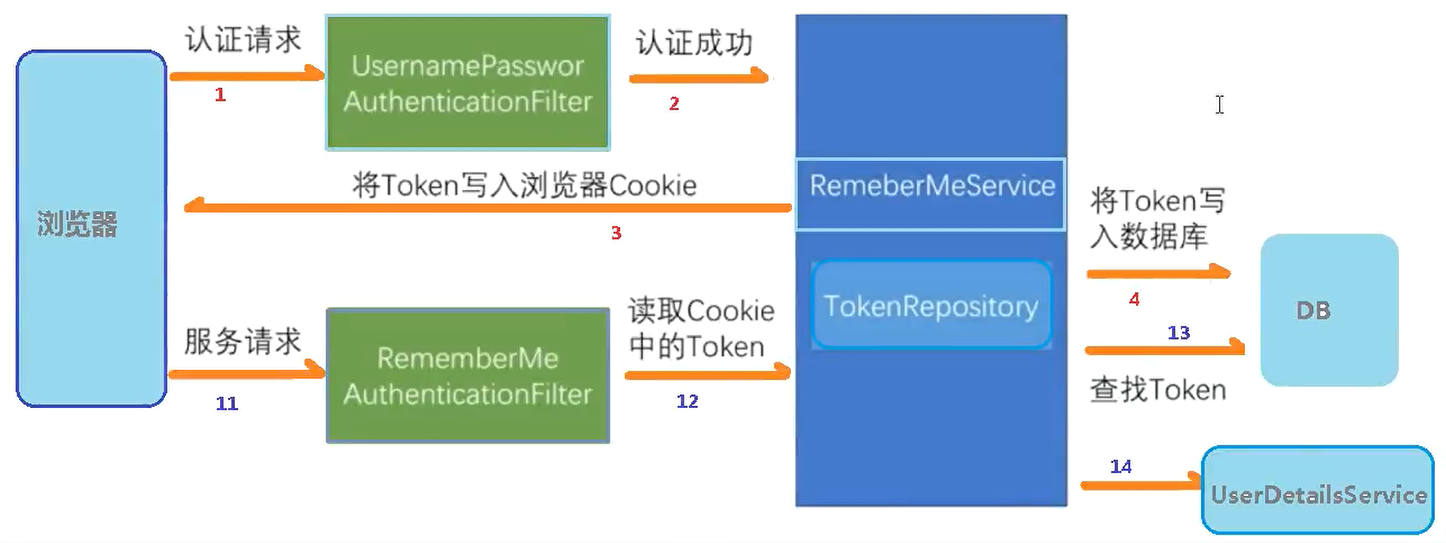
自动登录
下面是尚硅谷老师写的原理图和执行流程
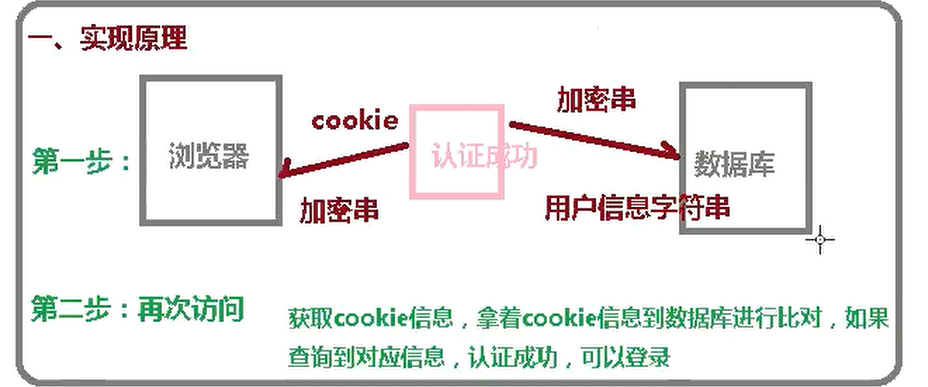
如果是微服务,则把数据库改成redis,把cookie改成jwt生成的token
Security 中的一个类内JdbcTokenRepositoryImpl
的常量CREATE_TABLE_SQL
create table persistent_logins (username varchar(64) not null, series varchar(64) primary key, token varchar(64) not null, last_used timestamp not null)
有兴趣的可以看看源码 没兴趣的直接在你使用的数据库内执行上面这行sql创建一个保存登录信息的表

JdbcTokenRepositoryImpl 是PersistentTokenRepository实现类
下面这种写那么应该是多态了
@Autowired

private DataSource dataSource;

@Bean

public PersistentTokenRepository persistentTokenRepository(){

    JdbcTokenRepositoryImpl jdbcTokenRepository = new JdbcTokenRepositoryImpl();

    jdbcTokenRepository.setDataSource(dataSource);

    //jdbcTokenRepository.setCreateTableOnStartup(true); 设置启动时创建自动登录表

    return jdbcTokenRepository;

}
SecurityConfig的方法
@Override

protected void configure(HttpSecurity http) throws Exception {

    /*自定义403链接*/

    http.exceptionHandling().accessDeniedPage("/unauth.html");

    /*配置退出登录*/

    http.logout().logoutUrl("/logout").logoutSuccessUrl("/no").permitAll();

    /*

        使用and()方法表示关闭XML标记的Java配置,它允许我们继续配置父标记。如果您阅读代码,它也是有道理的。我想配置授权请求并配置表单登录并配置HTTP基本身份验证。

         */

    http

        .authorizeRequests()

        .antMatchers("/","/no").permitAll() //可以直接访问的路径

        .antMatchers("/test").hasAnyAuthority("admin")

        .antMatchers("/unauth").hasAnyAuthority("xxx")

        .anyRequest().authenticated()

        .and()

        .formLogin()

        .loginPage("/login.html") //配置登录路径

        .loginProcessingUrl("/doLogin")

        .defaultSuccessUrl("/hallo")

        .permitAll()

        // -------------------就是下面这坨

        .and()

        .rememberMe().tokenRepository(persistentTokenRepository())

        .tokenValiditySeconds(60) // 自动保存的时间,秒为单位

        .userDetailsService(userDetailsService)

        ; //设置 登录的网页

    http.csrf().disable(); //如果注释了这一行,全部要用_csrf的对象来验证了

}
下面是登录界面
<form action="/doLogin" method="POST">

    user:<input type="text" name="username"><br>

    pswd:<input type="text" name="password"><br>

    <!--必须name=remember-me不然,是无法接收到是否自动登录的信息的-->

    自动登录 <input type="checkbox" name="remember-me"><br>

    <input type="submit">

</form>
然后在登录的时候打个勾,就可以自动登录了
在DB中会出现如下的信息

CSRF指令认证
第一步 把下面这一行注释了就开启了,也就是说他其实是默认开启的
如果没有关闭,则会NullPointerException
//http.csrf().disable();
Spring Security CSRF 会针对Patch,Post,Put,Delete方法进行防护。(都是一些要更改数据的方法)
系统默认提供了一个csrfToken对象放在HttpSession中,也就是我们所见到了_csrf对象
此对象可以直接使用
开启CSRF后,则登录的时【POST】,也需要验证CSRF,而使用HttpSession则需要使用模板引擎,这里我们使用的是Thymeleaf而非JSP。(大同小异)
注:使用Thymeleaf的时候,类上的Controller注解不能写成RestController,不然无法生效的
@Controller

public class LoginController {

    @GetMapping("login")

    public String login(){

        return "login";

    }

}
<!doctype html>

<html xmlns:th="http://www.thymeleaf.org">

<head>

    <meta charset="UTF-8">

    <meta name="viewport"

          content="width=device-width, user-scalable=no, initial-scale=1.0, maximum-scale=1.0, minimum-scale=1.0">

    <meta http-equiv="X-UA-Compatible" content="ie=edge">

    <title>登录</title>

</head>

<body>

<!--没加th:则不会有隐藏域自动生成-->

<form th:action="'/doLogin'" method="POST">

    user:<input type="text" name="username"><br>

    pswd:<input type="text" name="password"><br>

    <!--必须name=remember-me不然,是无法接收到是否自动登录的信息的-->

    自动登录 <input type="checkbox" name="remember-me"><br>

    <input type="submit">

</form>

</body>

</html>
切记,默认开了CSRF,则每个表单中应当手动添加一个隐藏域
当Thymeleaf因为你使用了th,则自动给你生成了。
所以 th:action="'/doLogin'" 这样写可以省事
如下图

总结
本是总结,谁知还是变成了学习笔记。总结代表着会,笔记代表着只能用,说不出什么名堂。这是看第二遍,当然,这也会像我用正则一样,每次用正则的时候,都要学一遍正则。
或许SpringSecurity并不难,难的只是步骤有点多。
老师讲的很不错,多听几遍就会了。
关于提高技术,应该看文档,把他提供的API都自己看懂。像用Redist代替DB,这样的微服务中,使用,很有效率。
接下来,我还会继续学习Security,并出些新笔记,这最多算是一个听课笔记。
SpringBoot + Security学习笔记的更多相关文章
- SpringBoot + Spring Security 学习笔记(五)实现短信验证码+登录功能
在 Spring Security 中基于表单的认证模式,默认就是密码帐号登录认证,那么对于短信验证码+登录的方式,Spring Security 没有现成的接口可以使用,所以需要自己的封装一个类似的 ...
- SpringBoot + Spring Security 学习笔记(三)实现图片验证码认证
整体实现逻辑 前端在登录页面时,自动从后台获取最新的验证码图片 服务器接收获取生成验证码请求,生成验证码和对应的图片,图片响应回前端,验证码保存一份到服务器的 session 中 前端用户登录时携带当 ...
- SpringBoot + Spring Security 学习笔记(二)安全认证流程源码详解
用户认证流程 UsernamePasswordAuthenticationFilter 我们直接来看UsernamePasswordAuthenticationFilter类, public clas ...
- SpringBoot 完整学习笔记免费分享
从0到进阶,完全系统性的学习笔记 每次我都会反复拿来观看,因为我们总会有遗漏忘记的地方,但是笔记不会. 希望大家能好好利用它,以下是笔记截图! 以上只是其中的一项部分,这份笔记可以说含金量超高,绝对会 ...
- SpringBoot + Spring Security 学习笔记(四)记住我功能实现
记住我功能的基本原理 当用户登录发起认证请求时,会通过UsernamePasswordAuthenticationFilter进行用户认证,认证成功之后,SpringSecurity 调用前期配置好的 ...
- SpringBoot + Spring Security 学习笔记(一)自定义基本使用及个性化登录配置
官方文档参考,5.1.2 中文参考文档,4.1 中文参考文档,4.1 官方文档中文翻译与源码解读 SpringSecurity 核心功能: 认证(你是谁) 授权(你能干什么) 攻击防护(防止伪造身份) ...
- Windows Security 学习笔记
对于Windows 在 Security 方面的学习. 纯兴趣. UNIX 的另外开一条路线学习. 话说今天查gpedit.msc的资料的时候发现 M$ 官网上怎么连个文档都没有. 后来才点了 gpe ...
- Spring Security学习笔记
Spring Web Security是Java web开发领域的一个认证(Authentication)/授权(Authorisation)框架,基于Servlet技术,更确切的说是基于Servle ...
- Spring Security学习笔记(三)
之前提到过认证后怎么存放用户信息,令牌token是一种方式,session是另一种方式,这里介绍使用spring session data redis存储httpSession. 添加了以上依赖后,我 ...
随机推荐
- JavaWeb——过滤器及监听器
什么是过滤器? 过滤器示意图 Filter是如何实现拦截的? Filter的生命周期 Filter的创建 Filter的销毁 FilterConfig接口 Servlet过滤器有关接口 过滤器配置 F ...
- 11月份 chrome 标签整理
Spring MVC框架相关 Java Web开发 和 linux下开发 汇总 项目源码 优秀的音视频开源框架 常用软件的下载 学习资源或网站 最后分享一些以前收藏的优秀博客 这两天经过3次面试,很幸 ...
- sourcetree注册
http://www.cnblogs.com/xiofee/p/sourcetree_pass_initialization_setup.html
- (24)bzip2命令:压缩文件(.bz2格式)&&bunzip2命令:bz2格式的解压缩命令
1.bzip2 命令同 gzip 命令类似,只能对文件进行压缩(或解压缩),对于目录只能压缩(或解压缩)该目录及子目录下的所有文件.当执行压缩任务完成后,会生成一个以".bz2"为 ...
- Java复习整理 Day02
1 package demo01; 2 3 import java.util.Scanner; 4 5 public class ScannerDemo01 { 6 public static voi ...
- Codeforces Round #625 Div. 2 D E
D题:https://codeforces.com/contest/1321/problem/D 题意:题目给个有向图,然后给一段序列,我们要沿着这个序列走,问走的过程中当前点到t的最短路会重构多少次 ...
- HDU6331 Problem M. Walking Plan【Floyd + 矩阵 + 分块】
HDU6331 Problem M. Walking Plan 题意: 给出一张有\(N\)个点的有向图,有\(q\)次询问,每次询问从\(s\)到\(t\)且最少走\(k\)条边的最短路径是多少 \ ...
- HDU6430 Problem E. TeaTree【dsu on tree】
Problem E. TeaTree Problem Description Recently, TeaTree acquire new knoledge gcd (Greatest Common D ...
- Codeforces Round #634 (Div. 3)
D题想复杂了,花了好多时间,感觉也没时间看F了,就来写个题解蹭蹭访问量把^_^ 传送门:1335 A. Candies and Two Sisters 题意:你要把n个糖果分给两个人,两个人的糖果数不 ...
- Codeforces Round #676 (Div. 2) XORwice、Putting Bricks in the Wall、Palindromifier
题目链接:XORwice 题意:给你两个数a.b.求一个数x,使得((a异或x)+(b异或x))这个值最小,输出最小那个x 题解: 输出(a|b)-(a&b)就行(猜了一手 代码: #incl ...