Pester: Unit Testing for PowerShell
Pester is a BDD inspired testing framework for PowerShell just like Jasmine is on the JavaScript side and RSpec is on the Ruby side for example (I do believe that JavaScript is one of the best comparisons for PowerShell though, it being a scripting language and all).
This blog post is meant as a quick introduction to what I think are the key take-aways of Pester and how I use it.

So why on earth should you test your PowerShell scripts, are they not meant to be ad-hoc?
I do believe, much like in any other language, that sometimes you don’t have the need to test your code (say what!?). Sometimes it definitely a place for ad-hoc code that just just executes once or twice just to accomplish something for the time being.
However when you’re constructing something that will survive over time and that others may use and improve, testing is extremely useful. Don’t let the word “script” or “shell” fool you, it’s still code.
PowerShell is often used in some sort of configuration scenario, may it be in a build/setup scenario for SharePoint or a deployment framework for your web application etc. It often deals a lot with external dependencies such as services and IO which are often hard to get under test. Or is it?
Disclaimer: I’m a BDD enthusiast and specifically I ‘m very fond of Specification by Example and the Gherkin syntax. This may (ok, it will) influence how I use the Pester framework which is really more leaning towards RSpec than Cucumber or SpecFlow (both being Gherkin family frameworks).
Note: All the code for this post can be found here.
1. Hello World
Let’s begin with a very quick example shall we. (btw this is the start of Roy Osherov´s StringCalculator Kata if you’re wondering):
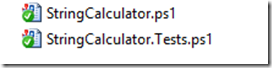
StringCalculator.Tests.ps1
|
01
02
03
04
05
06
07
08
09
10
11
12
13
14
15
16
17
|
$here = Split-Path -Parent $MyInvocation.MyCommand.Path$sut = (Split-Path -Leaf $MyInvocation.MyCommand.Path).Replace(".Tests.", "."). "$here\$sut"Describe "Add" { Context "when the input is an empty string" { $input = " " $expected = 0 $actual = Add $input It "should return zero" { $actual | Should Be $expected } }} |
please note: StringCalculator.ps1, which has the Add function, reside in the same directory as the tests. (Line 1-3 dot sources that file into the test).
We’ll go trough all the different parts of a pester test shortly but for now you should know that Describe-Context-It-Should-Be are Pesterkeywords/concepts. (in PowerShell terms, they are functions).
Executing the tests (from a PowerShell prompt)
|
1
2
3
4
|
Set-Location [PATH_TO_FOLDER_WITH_TESTS]Import-Module "[PATH_TO_PESTER_MODULE]\Pester.psm1" # may be optionalInvoke-Pester |
Pester will, out of the box, locate files named *.tests.ps1 in the current directory and downwards. (Therefore I’m setting the current location to where my tests reside with Set-Location).
Next, we’ll need to import the pester module (that may be optional if it has been added globally already as we’ll see examples of shortly).
Finally, kick it off with a call to Invoke-Pester.
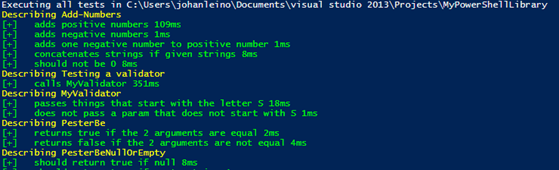
Result
Execute…watch it fail

…fix code…watch it succeed

…and now refactor.
2. Installation
So now that we’ve seen a simple example on how to use Pester we now need to find out how to get it onto our machine.
A few different options exist depending on the context one might say.
Manually
You always have the option to go to github and grab the bits and copy them (or fork/clone) to your machine.
Pros:
Easy, fast.
Cons:
The problem here is versioning. I mean…it’s not something compiled we’re getting it’s just a text file.
NuGet
If you’re working as a developer and want to use Pester for your library/scripts this is in my opinion the best choice. NuGet has the concept of versions at least. (Pester is 2.0.3 at the time of this post)
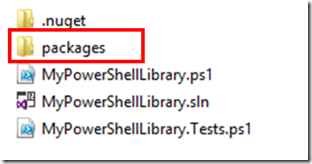
After you’ve installed the Pester NuGet package (Install-Package Pester) you’ll get a ‘packages’ folder that contains the Pester files.
Given that you now execute your tests from within that folder you’d call Pester like this:

Pros:
Known technology to many .NET developers and has a versioning story. You get the Pester code close to your own code and you know the version it has.
Cons:
You may need a solution file or something that NuGet can understand (packages.config) just for the sake of using NuGet.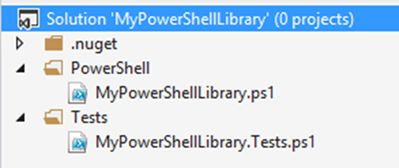
I’ll try to come back to the Pester/NuGet story in a future post perhaps when I aim to speak about TeamCity and Pester.
A word of caution using NuGet
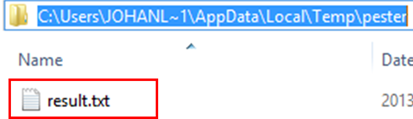
If your scripts reside in the same folder as the ‘packages’ folder (as the image above shows) here’s what can happen when you execute Pester.
See…it starts running the Pester test. That’s because Pester runs files names *.tests.ps1 in the current folder and all child folder. Pester itself is a child folder (the NuGet package includes all the tests as well).
So…you’ll need to do this:
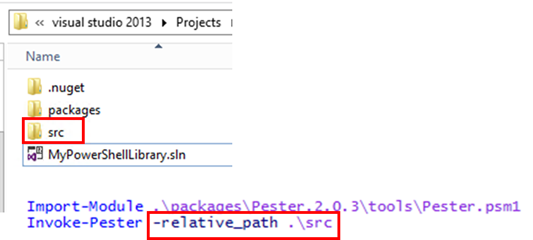
I’ve moved my scripts (and tests) into a subfolder (‘src’) and when I call Pester I make use of the relative path parameter to point it to start in that folder.
Chocolatey or PsGet
Another alternative is to get the Pester bits onto your machine once, a.k.a. global install.
Here you can use Chocolatey or PsGet. I’m showing you the PsGet approach simply because I didn’t get it working with Chocolatey actually.
I’ll start by installing PsGet on my machine (I’m using Chocolatey for that):

And then it’s actually pretty easy:

Done!
Pros:
Install once (handle updates once).
Cons:
Hard to handle versions on the entire system like this perhaps.
3. Pester Specifics
OK, now let’s go into more details on some Pester things that might be good to know about.
We’ll start by looking at that beginning test for the Add function again:

A. Describe
Instead of a test case class, Pester (BDD) uses a “describe” block for one test case.
Describe is a function that takes two parameters: a string and a script block.
The string is a name or title for a spec suite – usually what is under test.
The script block is the code that implements the spec suite – { …some code…}
Personal comment:
My style of writing tests in PowerShell is more towards function per function so describe for me is the name of the function that I’m putting under test.
In a regular unit test this would probably have been my test class (fixture).
B. Context
Context is just an alias for describe. It is used to organize test code into different contexts.
Personal comment:
I like to think of this as my ‘Given’-clause where I’d like to setup my preconditions. Or in AAA terms this is the ‘Arrange’ part .
Therefore I’m often writing it like “given [some condition]” (or “when [some condition]” but not in terms of the Gherkin-style when which describes the action)
Remember, this is your DSL so it’s very important that you feel comfortable with it and it makes sense to you.
C. It
Each test method is an “it” block. This would be the ‘act’ part.
Personal comment:
I often place my ‘act’ in the context part of the code as apart from the It-block.
This is just because of how Pester treats expectations and I might want to do multiple expectations on the same context.
D. Should
BDD style assertions are called expectations. Should is just a syntactic sugar that makes it more readable. Pester has a lot of very useful (readable) should expectations.
Personal comment:
I like to think of this as my ‘Then-clause where I check my post conditions.
Or in AAA terms this is the Assert part . Therefore I’m often writing it like “then [some condition]”.
Again, the DSL is important.
It’s Just Functions!
Since describe, context and it blocks are functions, they can contain any executable code necessary to implement the test. PowerShell scoping rules apply, so variables declared in a describe are available to any descendant block inside the suite.
4. Is that it?
This section will focus more on some personal “best practices” that I have found useful when working with Pester.
Using the file system and some useful tricks
A pretty common scenario for scripts might be to interact with the file system which is traditionally quite hard to handle with a test. Consider this:
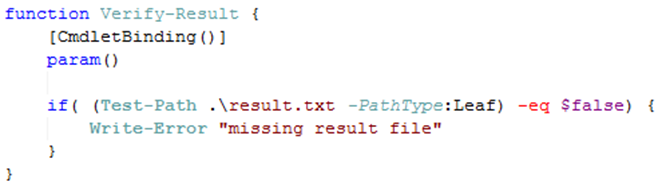
If we want to put that function under test to verify that it indeed writes an error when the result.txt file is missing, how do we do that?
No worries, Pester has the answer:
First, we’ll need to make sure we can add and remove the file as we please. Pester has something called a TestDrive which is a temporary folder that the test has access to.
Let’s see it in action. Start with a failing test… (the TDD purist would probably scream now and say that you can’t write code before you have a failing test…well I just did so).
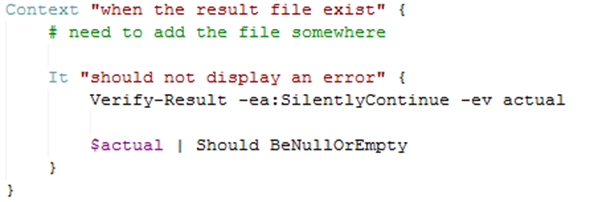

Indeed it fails and it fails because I couldn’t seem to figure out how to add the file (or setup my precondition so to say).
Let’s fix that.
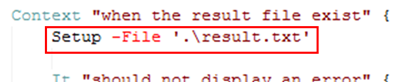
Setup let’s us add file or folder to a temporary location that only exist throughout our test…then it is deleted.
Indeed the file is added but the test still fails. That’s because we’re not executing the that location, pretty common scenario…the working directory issue.
We’ll use another Pester thing…the In-construct to help us solve that issue.
Let’s see it in action.
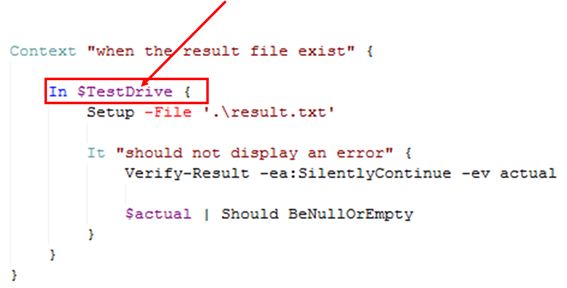
I’ve wrapped the whole ‘interacting with file system’ part in a call to the In function that takes a path and a script block. The path is taken from the pester global variable $TestDrive. The code is now executed with that temp folder and happy day!
And now it’s green.
Now we can refactor, right?
Here we have the opportunity for some refactoring. As I see it the test code is now a bit ‘cluttered’ with that call to in.
What if I should make something that can combine a call to context and combine it with the in call.
Coding by wishful thinking…
What if our code could look like that instead. In my world that would be better.
What we wish to accomplish is:
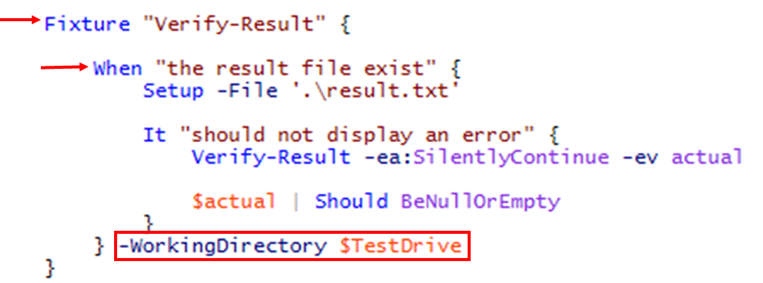
- Change ‘describe’ to ‘fixture’ instead.
- Change ‘context’ to ‘when’ and add a parameter to it, WorkingDirectory, that allow us to set the working folder for the entire when function.
The first thing I’m going need is a common place to implement those ‘wrapper functions’. In an object oriented world we would probably call this abase class. In PowerShell it’s simply just a file that I’m importing into the test files. Like this (with a bit of refactoring on the importing parts as well):
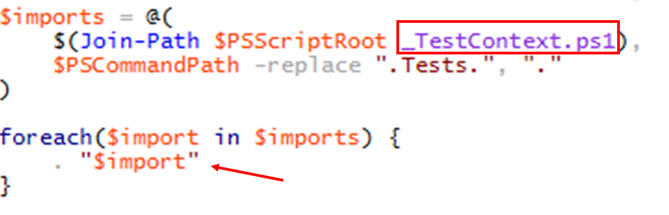
OK and here are those functions that are now in the _TestContext.ps1 file:
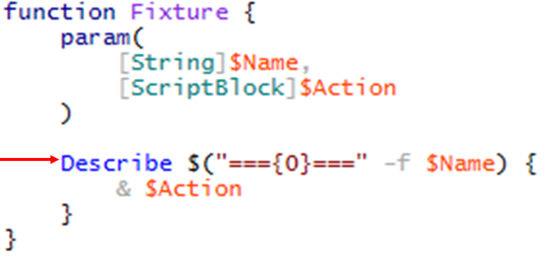
Fixture just wraps the call to describe and adds some text around the call.
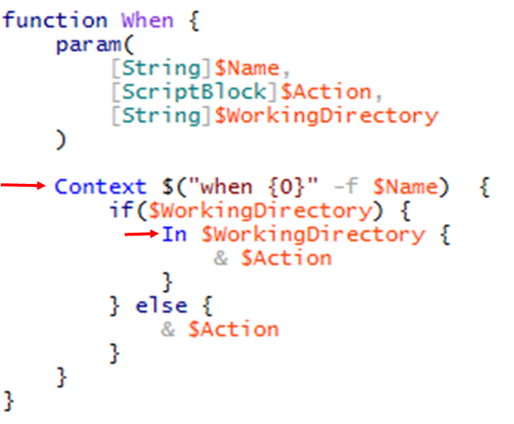
When wraps the call to context, with a prepended ‘when’, and optionally executes the code in the in-clause if you provide a working directory.
..and

Mocking
Yes it can be done. Great examples already exist at the Pester wiki.
Pester: Unit Testing for PowerShell的更多相关文章
- Unit Testing PowerShell Code with Pester
Summary: Guest blogger, Dave Wyatt, discusses using Pester to analyze small pieces of Windows PowerS ...
- Unit Testing with NSubstitute
These are the contents of my training session about unit testing, and also have some introductions a ...
- [Java Basics3] XML, Unit testing
What's the difference between DOM and SAX? DOM creates tree-like representation of the XML document ...
- Javascript单元测试Unit Testing之QUnit
body{ font: 16px/1.5em 微软雅黑,arial,verdana,helvetica,sans-serif; } QUnit是一个基于JQuery的单元测试Uni ...
- [Unit Testing] AngularJS Unit Testing - Karma
Install Karam: npm install -g karma npm install -g karma-cli Init Karam: karma init First test: 1. A ...
- C/C++ unit testing tools (39 found)---reference
http://www.opensourcetesting.org/unit_c.php API Sanity AutoTest Description: An automatic generator ...
- Unit testing Cmockery 简单使用
/********************************************************************** * Unit testing Cmockery 简单使用 ...
- Unit Testing a zend-mvc application
Unit Testing a zend-mvc application A solid unit test suite is essential for ongoing development in ...
- MVC Unit Testing学习笔记
MVC Unit Testing 参考文档: 1.http://www.asp.net/mvc/overview/testing 2.http://www.asp.net/mvc/tutorials/ ...
随机推荐
- MyEclipse的Hibernate Reverse Engineering失败解决方法
当使用MyEclipse的Hibernate逆向工程功能时,有时出现不成功的情况,点击finish按钮后对应的源文件目录没有生产相关对象,这时应该如何解决呢? 在国内的网站找了很久没找到,最后在国外的 ...
- Hapoop原理及MapReduce原理分析
Hapoop原理 Hadoop是一个开源的可运行于大规模集群上的分布式并行编程框架,其最核心的设计包括:MapReduce和HDFS.基于 Hadoop,你可以轻松地编写可处理海量数据的分布式并行程序 ...
- 时间管理(GTD)
今天中午看了30分钟老王讲战胜拖延症和时间管理 视频地址:多呗课堂 贴两个总结的图在此: 计划中使用的四象限法和十八分钟法很好. 今年多研究研究,实践一下Geting Things Done.
- MFC消息映射机制
1.MFC应用框架主要类之间的关系 MFC自动生成的框架中重要的类有:C-App.CMainFrame.C-Doc和C-View. 其他的类如CClassView.CFileView等都是在框架窗口( ...
- [九度OJ]1078.二叉树的遍历(重建)
原题链接:http://ac.jobdu.com/problem.php?pid=1078 题目描述: 二叉树的前序.中序.后序遍历的定义:前序遍历:对任一子树,先访问跟,然后遍历其左子树,最后遍历其 ...
- bzoj 1034 [ZJOI2008]泡泡堂BNB(贪心)
[题目链接] http://www.lydsy.com/JudgeOnline/problem.php?id=1034 [题意] 给两个序列以任意顺序比较,求出最大和最小得分. [思路] 排序后使用贪 ...
- python打包成exe(py2exe)
对比了几个打包工具,发现py2exe更好用一点,一个命令就可以. 1.获取 http://prdownloads.sourceforge.net/py2exe 下载python版本对应的.直接下载然后 ...
- grails2.3.11第二课
第二课主要介绍grails相关插件的使用,这是敏捷开发所必需的途径. 可以把grails的插件看作是grails正常项目的迷你型,因为看插件的源码,它的目录结构和正常项目相差无几. 官方开源插件地址 ...
- 压缩UI深度的代码实现
记录一下,或许同样使用深度的NGUI以后会用到. 目前的项目的UI是用Stage3D实现的,采用了类似NGUI填写深度来确定覆盖关系,但同时可以使用的深度是有一个固定范围的,导致的问题是如果UI过多深 ...
- (Relax DFS专题1.2)POJ 2386 Lake Counting(使用DFS来计算有多少坨东西是连通的)
题目大意:有N*M的矩阵稻田,'W'表示有积水的地方, '.'表示是干旱的地方,问稻田内一共有多少块积水,根据样例很容易得出,积水是8个方向任一方向相连即可. 题目大意:有N*M的矩阵稻田,'W'表示 ...