springboot+mybatis+thymeleaf项目搭建及前后端交互
前言
spring boot简化了spring的开发, 开发人员在开发过程中省去了大量的配置, 方便开发人员后期维护.
使用spring boot可以快速的开发出restful风格微服务架构.
本文将详细的介绍如何搭建一套spring boot 项目, 实现前后端交互.
开发工具 : IDEA , jdk 8 , mysql
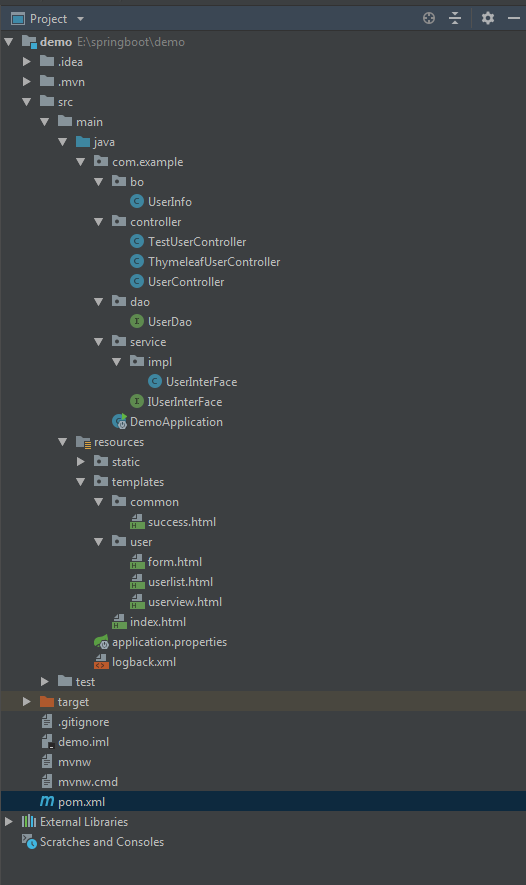
开发完成后目录截图 :
一. 新建项目
file-new-project-Spring Initializr
Project SDK选择JDK1.8, 后面直接下一步就可以

项目新建完成, 我们可以看到初始的目录结构, 修改pom.xml, 配置上项目开发需要的包. xml配置如下 :
<?xml version="1.0" encoding="UTF-8"?>

<project xmlns="http://maven.apache.org/POM/4.0.0" xmlns:xsi="http://www.w3.org/2001/XMLSchema-instance"

    xsi:schemaLocation="http://maven.apache.org/POM/4.0.0 http://maven.apache.org/xsd/maven-4.0.0.xsd">

    <modelVersion>4.0.0</modelVersion>

    <groupId>com.example</groupId>

    <artifactId>demo</artifactId>

    <version>0.0.1-SNAPSHOT</version>

    <packaging>jar</packaging>

    <name>demo</name>

    <description>Demo project for Spring Boot</description>

    <parent>

        <groupId>org.springframework.boot</groupId>

        <artifactId>spring-boot-starter-parent</artifactId>

        <version>2.0.6.RELEASE</version>

        <relativePath/> <!-- lookup parent from repository -->

    </parent>

    <properties>

        <project.build.sourceEncoding>UTF-8</project.build.sourceEncoding>

        <project.reporting.outputEncoding>UTF-8</project.reporting.outputEncoding>

        <java.version>1.8</java.version>

    </properties>

    <dependencies>

        <dependency>

            <groupId>org.springframework.boot</groupId>

            <artifactId>spring-boot-starter-web</artifactId>

        </dependency>

        <dependency>

            <groupId>org.springframework.boot</groupId>

            <artifactId>spring-boot-starter-test</artifactId>

            <scope>test</scope>

        </dependency>

        <dependency>

            <groupId>org.springframework.boot</groupId>

            <artifactId>spring-boot-starter-logging</artifactId>

        </dependency>

        <dependency>

            <groupId>org.mybatis.spring.boot</groupId>

            <artifactId>mybatis-spring-boot-starter</artifactId>

            <version>1.1.1</version>

        </dependency>

        <dependency>

            <groupId>mysql</groupId>

            <artifactId>mysql-connector-java</artifactId>

            <version>5.1.21</version>

        </dependency>

        <dependency>

            <groupId>org.springframework.boot</groupId>

            <artifactId>spring-boot-starter-thymeleaf</artifactId>

        </dependency>

    </dependencies>

    <build>

        <plugins>

            <plugin>

                <groupId>org.springframework.boot</groupId>

                <artifactId>spring-boot-maven-plugin</artifactId>

            </plugin>

        </plugins>

    </build>

</project>
修改application.properties 配置文件, 连接数据库.
spring.datasource.url=jdbc:mysql://localhost:3306/test?useUnicode=true&&characterEncoding=utf8
spring.datasource.username=root
spring.datasource.password=123456
spring.datasource.driver-class-name=com.mysql.jdbc.Driver spring.thymeleaf.encoding=utf-8
spring.thymeleaf.cache=false
spring.thymeleaf.mode=html5
二.项目开发
1.新建bo包, 存放实体类bean.
2.新建controller包, 存放控制层类.
3.新建dao包, 存放操作类.
4.新建service包, 存放服务接口类和实现类.
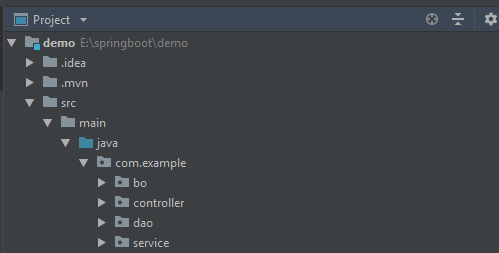
新建完成, 项目结构如下图:
项目包新建完毕, 首先我们新增实体类, UserInfo
package com.example.bo;

public class UserInfo {

    private String psname;

    private String cardno;

    private int id;

    public void setId(int id) {

        this.id = id;

    }

    public void setCardno(String cardno) {

        this.cardno = cardno;

    }

    public void setPsname(String psname) {

        this.psname = psname;

    }

    public String getPsname() {

        return psname;

    }

    public String getCardno() {

        return cardno;

    }

    public int getId() {

        return id;

    }

}
在我们之前新建的接口包里新增接口IUserInterFace , 新建接口实现类UserInterFace, 实现人员信息的查询, 新增, 修改, 删除. 实现类代码如下:
package com.example.service.impl;

import com.example.bo.UserInfo;

import com.example.dao.UserDao;

import com.example.service.IUserInterFace;

import org.springframework.beans.factory.annotation.Autowired;

import org.springframework.stereotype.Service;

import org.slf4j.LoggerFactory;

import org.slf4j.Logger;

import java.util.List;

@Service

public class UserInterFace implements IUserInterFace {

    private final Logger log = LoggerFactory.getLogger(UserInterFace.class);

    @Autowired UserDao ud;

    @Override

    public UserInfo getUserByCardno(String cardno){

        return ud.getUserByCardno(cardno);

    }

    @Override

    public UserInfo getUserById(int id){

        return ud.getUserById(id);

    }

    @Override

    public int getIntUser() {

        return 0;

    }

    @Override

    public int insertUser(String cardno , String psname){

        log.info("UserInterFace insertUser info log start");

        return ud.insertUser(cardno,psname);

    }

    @Override

    public List<UserInfo> getAllUser(){

        log.info("UserInterFace getAllUser info log start");

        return ud.getAllUser();

    }

    @Override

    public int deleteById(int id){

        log.info("UserInterFace deleteById info log start");

        return ud.deleteById(id);

    }

    @Override

    public int updateById(int id , String cardno , String psname){

        log.info("UserInterFace updateById info log start");

        return ud.updateByid(id,cardno,psname);

    }

}
注意: 接口实现类, 调用了DAO层的方法, 在dao包下新建UserDao类 , 实现与数据库的交互, 代码如下 :
package com.example.dao;

import com.example.bo.UserInfo;

import org.apache.ibatis.annotations.*;

import java.util.List;

@Mapper

public interface UserDao {

    /**

     * 通过主键id号码查询人员信息

     */

    @Select("select * from person where id = #{id}")

    UserInfo getUserById(@Param("id") int id);

    /**

     * 通过身份证号码查询人员信息

     */

    @Select("select * from person where cardno = #{cardno}")

    UserInfo getUserByCardno(@Param("cardno") String cardno);

    /**

     * 新增人员信息

     */

    @Insert("insert into person(cardno,psname) values(#{cardno},#{psname})")

    int insertUser(@Param("cardno") String cardno, @Param("psname") String psname);

    /**

     * 查询所有人员信息

     */

    @Select("select * from person")

    List<UserInfo> getAllUser();

    /**

     * 通过id删除人员信息

     */

    @Delete("delete from person where id = #{id}")

    int deleteById(@Param("id") int id);

    @Update("update person set cardno=#{cardno},psname=#{psname} where id=#{id}")

    int updateByid(@Param("id") int id , @Param("cardno") String cardno,@Param("psname") String psname);

}
在controller包中, 新建测试类去调用接口, 测试能不能查到数据. 测试类代码如下:
package com.example.controller;

import com.example.service.IUserInterFace;
import com.example.bo.UserInfo;
import org.slf4j.Logger;
import org.slf4j.LoggerFactory;
import org.springframework.beans.factory.annotation.Autowired;
import org.springframework.stereotype.Controller;
import org.springframework.web.bind.annotation.RequestMapping;
import org.springframework.web.bind.annotation.ResponseBody;

import java.util.List;

@Controller
@RequestMapping(value = "/test")
public class TestUserController {

    private final Logger log = LoggerFactory.getLogger(TestUserController.class);

    @Autowired
    private IUserInterFace iuser;

    @RequestMapping("/num")
    @ResponseBody
    int home(){
        int i = iuser.getIntUser();
        return i;
    }

    @RequestMapping("/getUser")
    @ResponseBody
    List<UserInfo> getUser(){
        //打印日志
        log.info("TestUserController getUser info");
        return iuser.getAllUser();
    }
}
修改 , 新建项目时生成的DemoApplication类,启动项目,修改代码如下:
package com.example;

import org.springframework.boot.SpringApplication;

import org.springframework.boot.autoconfigure.EnableAutoConfiguration;

import org.springframework.context.annotation.ComponentScan;

@EnableAutoConfiguration

@ComponentScan(basePackages={"com.example"})

public class DemoApplication {

    public static void main(String[] args) {

        SpringApplication.run(DemoApplication.class, args);

    }

}
项目启动完成, 我们在网页输入 http://localhost:8080/test/getUser , 既可以查到数据如下 :

至此, 项目已经可以从数据库查询数据返回到页面, 但是返回的是一串字符. 我们如何让返回的数据在页面以列表形式展示, 而且在页面可以直接进行增删改查操作呢? 这就是我们接下来要说的了.
首先在配置文件引入如下包, 最上面的配置文件里面已经引入 .
<dependency>
   <groupId>org.springframework.boot</groupId>
   <artifactId>spring-boot-starter-thymeleaf</artifactId>
</dependency>
然后在/resources/templates文件夹下面新建我们需要的页面. 新建common文件夹,存放公共的页面, 新建user文件夹, 存放人员相关页面. 新建公共页面success.html做为操作成功提示页面.
新建form.html提交页面, userlist.html列表展示页面, userview.html详细信息展示页面. 新建完目录如下 :
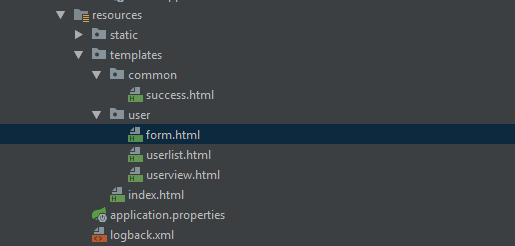
页面代码如下 :
form.html
<!DOCTYPE html>

<html xmlns:th="http://www.thymeleaf.org"

      xmlns:layout= "http://www.ultraq.net.nz/thymeleaf/layout">

<head>

    <meta charset="UTF-8">

    <title>Title</title>

</head>

<body>

    <form action="/user" th:action="@{/user}" method="post" th:object="${user}">

        <input type="hidden" name="id" th:value="*{id}">

        名字<br/>

        <input type="text" name="psname" th:value="*{psname}">

        <br/>

        <input type="text" name="cardno" th:value="*{cardno}">

        <br/>

        <input type="submit" value="提交">

    </form>

</body>

</html>
userlist.html
<!DOCTYPE html>

<html xmlns:th="http://www.thymeleaf.org">

<head>

    <meta content="text/html;charset=UTF-8"/>

    <title>Content</title>

</head>

<body>

<div>

    <a href="/user/form" th:href="@{/user/form}">

        新建用户

    </a>

</div>

<table border="2">

    <thead>

        <tr>

            <td>id</td>

            <td>名字</td>

            <td>证件号码</td>

            <td>管理</td>

        </tr>

        <tr th:each="user:${contents}">

            <td th:text="${user.id}"></td>

            <td th:text="${user.psname}"></td>

            <td><a th:href="@{'/user/'+${user.id}}" th:text="${user.cardno}"></a></td>

            <td><a th:href="@{'/user/delete/'+${user.id}}">删除</a></td>

        </tr>

    </thead>

</table>

</body>

</html>
userview.html
<!DOCTYPE html>

<html xmlns:th="http://www.thymeleaf.org">

<head>

    <meta charset="UTF-8">

    <title>Title</title>

</head>

<body>

    <div>

        <p><strong>ID:</strong><span th:text="${user.id}"></span></p>

        <p><strong>名字:</strong><span th:text="${user.cardno}"></span></p>

        <p><strong>年龄:</strong><span th:text="${user.psname}"></span></p>

    </div>

    <div>

        <a th:href="@{'/user/delete/'+${user.id}}">删除</a>

        <a th:href="@{'/user/edit/'+${user.id}}">修改</a>

    </div>

</body>

</html>
至此, 页面新增完成 , 我们需要新增ThymeleafUserController类, 来与页面实现交互
package com.example.controller;

import com.example.bo.UserInfo;

import com.example.service.IUserInterFace;

import org.slf4j.LoggerFactory;

import org.slf4j.Logger;

import org.springframework.beans.factory.annotation.Autowired;

import org.springframework.stereotype.Controller;

import org.springframework.ui.Model;

import org.springframework.web.bind.annotation.GetMapping;

import org.springframework.web.bind.annotation.PathVariable;

import org.springframework.web.bind.annotation.PostMapping;

import org.springframework.web.bind.annotation.RequestMapping;

@Controller

@RequestMapping(value = "/user")

public class ThymeleafUserController {

    private final Logger log = LoggerFactory.getLogger(ThymeleafUserController.class);

    @Autowired

    private IUserInterFace iuser;

    @GetMapping("/userlist")

    public String userList(Model model){

        //打印日志

        log.info("ThymeleafUserController userList info log start");

        model.addAttribute("contents",iuser.getAllUser());

        return "/user/userlist";

    }

    @GetMapping("/form")

    public String form(Model model){

        log.info("ThymeleafUserController form info log start");

        model.addAttribute("user" , new UserInfo());

        return "/user/form";

    }

    @GetMapping("{id}")

    public String userview(@PathVariable("id") int id , Model model){

        UserInfo user = iuser.getUserById(id);

        model.addAttribute("user",user);

        return "/user/userview";

    }

    @PostMapping

    public String saveUser(UserInfo user){

        log.info("ThymeleafUserController saveUser info log start");

        if(user.getId()==0){

            iuser.insertUser(user.getCardno(),user.getPsname());

        }else{

            int a = iuser.updateById(user.getId(),user.getCardno(),user.getPsname());

        }

        return "/common/success";

    }

    @GetMapping(value = "edit/{id}")

    public String editForm(@PathVariable("id") int id , Model model){

        log.info("ThymeleafUserController editForm info log start");

        UserInfo user = iuser.getUserById(id);

        model.addAttribute("user" , user);

        return "/user/form";

    }

    @GetMapping(value = "delete/{id}")

    public String delete(@PathVariable("id") int id){

        iuser.deleteById(id);

        return "/common/success";

    }

}
启动项目, 输入网址 http://localhost:8080/user/userlist 查询数据, 显示列表 :
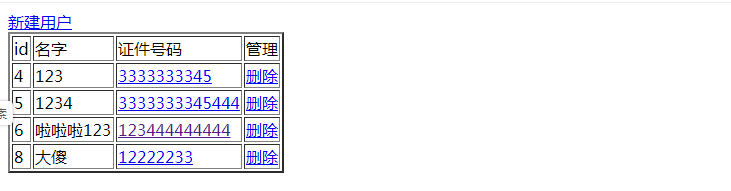
到此, 整个项目的搭建和代码已经完成.
总结
这是博主博客生涯的第一篇博客, 博客内容有参考一些资料, 但代码都是博主自己一行一行实现 . 博文写的不对或不好的地方可以提出意见, 大家一起进步, 谢谢阅读.
springboot+mybatis+thymeleaf项目搭建及前后端交互的更多相关文章
- Vue-CLI项目-axios模块前后端交互(类似ajax提交)
08.31自我总结 Vue-CLI项目-axios前后端交互 一.模块的安装 npm install axios --save #--save可以不用写 二.配置main.js import axio ...
- Spirng+SpringMVC+Maven+Mybatis+MySQL项目搭建(转)
这篇文章主要讲解使用eclipse对Spirng+SpringMVC+Maven+Mybatis+MySQL项目搭建过程,包括里面步骤和里面的配置文件如何配置等等都会详细说明. 如果还没有搭建好环境( ...
- eclipse下SpringMVC+Maven+Mybatis+MySQL项目搭建
这篇文章主要讲解使用eclipse对Spirng+SpringMVC+Maven+Mybatis+MySQL项目搭建过程,包括里面步骤和里面的配置文件如何配置等等都会详细说明. 接下来马上进入项目搭建 ...
- springboot + mybatis 的项目,实现简单的CRUD
以前都是用Springboot+jdbcTemplate实现CRUD 但是趋势是用mybatis,今天稍微修改,创建springboot + mybatis 的项目,实现简单的CRUD 上图是项目的 ...
- springboot(一).初识springboot以及基本项目搭建
初识springboot 以及基本项目搭建 由于新的项目需要搭建后台框架,之前的springmvc架构也使用多次,在我印象中springboot的微服务架构更轻量级更容易搭建,所以想去试试spring ...
- 微信小程序 + thinkjs + mongoDB 实现简单的前后端交互
说明:这段时间跟老师学习了一下mongodb数据库,这次也是第一次搭建后台服务,出了不少差错,特此来复盘一下,非常感谢对我提供帮助的同学~ 一.使用 thinkjs + mongodb 创建后台服务 ...
- 三、vue前后端交互(轻松入门vue)
轻松入门vue系列 Vue前后端交互 六.Vue前后端交互 1. 前后端交互模式 2. Promise的相关概念和用法 Promise基本用法 then参数中的函数返回值 基于Promise处理多个A ...
- 前后端交互实现(nginx,json,以及datatable的问题相关)
1.同源问题解决 首先,在同一个域下搭建网络域名访问,需要nginx软件,下载之后修改部分配置 然后再终端下cmd nginx.exe命令,或者打开nginx.exe文件,会运行nginx一闪而过, ...
- Servlet实现前后端交互的原理及过程解析
在日常调试项目时,总是利用tomcat去启动项目,并进行前后端联调,但对于前后端的请求响应的交互原理及过程并不是特别清晰. 为什么在前端发出相应请求,就能跳转到后端通过程序得到结果再响应到前端页面呢? ...
随机推荐
- scrapy 爬虫的暂停与重启
暂停爬虫项目 首先在项目目录下创建一个文件夹用来存放暂停爬虫时的待处理请求url以及其他的信息.(文件夹名称:job_info) 在启动爬虫项目时候用pycharm自带的终端启动输入下面的命令: sc ...
- FJOI2019 划水记
Day0 月考的余温尚未褪去,一周后期中考也将来临.一群被哄来打FJOI的水军,在期中大考必过前一百的死命令之下,仍然不怕死的花三天时间水同步赛.试机的路上乖乖排成两排,居然还有那么一丝春游的悠闲之感 ...
- mysql学习(一)
mysql学习,这篇博文是关于目前市面上火热的关系型数据库mysql的学习记录. 1,关于mysql的安装,自行百度. 2,sql:structure query language 结构化查询语言. ...
- yii 动态增加路由规则
使用 UrlManager类的addRules方法. 如 $url->addRules([ 'zzz/<id:\d+>' => '/test/hi', ]); 这个规则必须在开 ...
- krpano 常用标签
<krpano></krpano>根标签 相当于 <body> <scene></scene>一个全景图场景 <image> 图 ...
- 项目中使用的artTemplate笔记
1.注意数据格式为 var results = { data:[ {name:'xiaoming',age:'18'},{name:'xiaohong',age:'18'},{name:'xiaogo ...
- Linux服务器,服务管理--systemctl命令详解,设置开机自启动
Linux服务器,服务管理--systemctl命令详解,设置开机自启动 syetemclt就是service和chkconfig这两个命令的整合,在CentOS 7就开始被使用了. 摘要: syst ...
- C语言的三目运算符
语法: 表达式1 ? 表达式2 : 表达式3; 等价于 if(表达式1) { 表达式2 } else { 表达式3 }
- particular.js
参数 键值 参数选项/ 说明 实例 particles.number.value number 数量 40 particles.number.density.enable boolean t ...
- es6开发环境搭建,babel 将es6转化成es5
工欲善其事,必先利其器.所以我们第1节就是搭建一个基本的ES6开发环境.现在的Chrome浏览器已经支持ES6了,但是有些低版本的浏览器还是不支持ES6的语法,这就需要我们把ES6的语法自动的转变成E ...