PopupWindow 使用
昨天马失前蹄,为了做一个小键盘,耽误了两个小时,记录一下心路历程
1.关于需求与选择
需求:
点击一个按钮,弹出一个小键盘(类似于输入法键盘)
选择:
(1)方案一:KeyboardView
这是百度之后选的第一个方案,试用之后发现,点击每个按键都会闪现一个小空白框(可能是提示按键字符之类的,具体没有验证),后来试着把KeyboardView放在一个PopupWindow里面后,点击KeyboardView,应用崩溃,错误提示(addWindow Error)。大意是说,PopupWindow是subWindow,不能在subWindow里面再继续addWindow。
(2)方案二:Button + PopupWindow
放弃KeyboardView之后,乖乖在xml里面放了N个Button,问题点就在PopupWindow的弹出,下面记录一下使用的Tips。
2.PopupWindow的创建
(1)页面设计
 <?xml version="1.0" encoding="utf-8"?>

 <LinearLayout xmlns:android="http://schemas.android.com/apk/res/android"

     android:id="@+id/keypad_dialog"

     android:layout_width="match_parent"

     android:orientation="vertical"

     android:layout_height="wrap_content">

     <LinearLayout

         android:layout_width="match_parent"

         android:layout_height="wrap_content"

         android:weightSum="3">

         <Button

             android:layout_width="match_parent"

             android:layout_height="wrap_content"

             android:text="1"

             android:id="@+id/btn1"

             android:layout_weight="1"

             android:soundEffectsEnabled="true"/>

         <Button

             android:layout_width="match_parent"

             android:layout_height="wrap_content"

             android:text="2"

             android:id="@+id/btn2"

             android:layout_weight="1"

             android:soundEffectsEnabled="true"/>

         <Button

             android:layout_width="match_parent"

             android:layout_height="wrap_content"

             android:text="3"

             android:id="@+id/btn3"

             android:layout_weight="1"

             android:soundEffectsEnabled="true"/>

     </LinearLayout>

     <LinearLayout

         android:layout_width="match_parent"

         android:layout_height="wrap_content"

         android:weightSum="3">

         <Button

             android:layout_width="match_parent"

             android:layout_height="wrap_content"

             android:text="4"

             android:id="@+id/btn4"

             android:layout_weight="1"

             android:soundEffectsEnabled="true"/>

         <Button

             android:layout_width="match_parent"

             android:layout_height="wrap_content"

             android:text="5"

             android:id="@+id/btn5"

             android:layout_weight="1"

             android:soundEffectsEnabled="true"/>

         <Button

             android:layout_width="match_parent"

             android:layout_height="wrap_content"

             android:text="6"

             android:id="@+id/btn6"

             android:layout_weight="1"

             android:soundEffectsEnabled="true"/>

     </LinearLayout>

     <LinearLayout

         android:layout_width="match_parent"

         android:layout_height="wrap_content"

         android:weightSum="3">

         <Button

             android:layout_width="match_parent"

             android:layout_height="wrap_content"

             android:text="7"

             android:id="@+id/btn7"

             android:layout_weight="1"

             android:soundEffectsEnabled="true"/>

         <Button

             android:layout_width="match_parent"

             android:layout_height="wrap_content"

             android:text="8"

             android:id="@+id/btn8"

             android:layout_weight="1"

             android:soundEffectsEnabled="true"/>

         <Button

             android:layout_width="match_parent"

             android:layout_height="wrap_content"

             android:text="9"

             android:id="@+id/btn9"

             android:layout_weight="1"

             android:soundEffectsEnabled="true"/>

     </LinearLayout>

     <LinearLayout

         android:layout_width="match_parent"

         android:layout_height="wrap_content"

         android:orientation="horizontal"

         android:weightSum="3">

         <Button

             android:layout_width="match_parent"

             android:layout_height="match_parent"

             android:layout_margin="3dp"

             android:text="Cancel"

             android:textAllCaps="false"

             android:background="#FF0000"

             android:id="@+id/btnCancel"

             android:layout_weight="1"

             android:soundEffectsEnabled="true"/>

         <LinearLayout

             android:layout_width="match_parent"

             android:layout_height="wrap_content"

             android:orientation="vertical"

             android:layout_weight="1"

             android:weightSum="2">

             <Button

                 android:layout_width="match_parent"

                 android:layout_height="wrap_content"

                 android:text="0"

                 android:id="@+id/btn0"

                 android:layout_weight="1"

                 android:soundEffectsEnabled="true"/>

             <Button

                 android:layout_width="match_parent"

                 android:layout_height="wrap_content"

                 android:text="Clear"

                 android:layout_margin="3dp"

                 android:textAllCaps="false"

                 android:background="#FFFF00"

                 android:id="@+id/btnClear"

                 android:layout_weight="1"

                 android:soundEffectsEnabled="true"/>

         </LinearLayout>

         <Button

             android:layout_width="match_parent"

             android:layout_height="match_parent"

             android:text="Enter"

             android:layout_margin="3dp"

             android:textAllCaps="false"

             android:id="@+id/btnEnter"

             android:layout_weight="1"

             android:background="#00FF00"

             android:soundEffectsEnabled="true"/>

     </LinearLayout>

 </LinearLayout>
(2)逻辑设置
 package com.pax.dialogtest;

 import android.content.Context;

 import android.graphics.drawable.BitmapDrawable;

 import android.util.Log;

 import android.view.Gravity;

 import android.view.LayoutInflater;

 import android.view.MotionEvent;

 import android.view.View;

 import android.view.ViewGroup;

 import android.widget.Button;

 import android.widget.PopupWindow;

 /**

  * Created by yanina on 12/12/2016.

  */

 public class KeyPadDialog extends PopupWindow implements View.OnClickListener{

     private View parent;

     public KeyPadDialog(Context context, View parent){

         super(context);

         this.parent = parent;

         //set content view

         LayoutInflater layoutInflater = (LayoutInflater) context.getSystemService(Context.LAYOUT_INFLATER_SERVICE);

         View contentView = layoutInflater.inflate(R.layout.keypad_dialog, null);

         setContentView(contentView);

         //set width and height

         setWidth(ViewGroup.LayoutParams.MATCH_PARENT);

         setHeight(ViewGroup.LayoutParams.WRAP_CONTENT);

         //

         setOutsideTouchable(false); //

         setFocusable(false); // Not allow to dismiss PopupWindow by touching outside

         setTouchable(true);

         setTouchInterceptor(new View.OnTouchListener() {

             @Override

             public boolean onTouch(View v, MotionEvent event) {

                 return false;

             }

         });

 //        this.setBackgroundDrawable(new BitmapDrawable());

         contentView.findViewById(R.id.btn0).setOnClickListener(this);

         contentView.findViewById(R.id.btn1).setOnClickListener(this);

         contentView.findViewById(R.id.btn2).setOnClickListener(this);

         contentView.findViewById(R.id.btn3).setOnClickListener(this);

         contentView.findViewById(R.id.btn4).setOnClickListener(this);

         contentView.findViewById(R.id.btn5).setOnClickListener(this);

         contentView.findViewById(R.id.btn6).setOnClickListener(this);

         contentView.findViewById(R.id.btn7).setOnClickListener(this);

         contentView.findViewById(R.id.btn8).setOnClickListener(this);

         contentView.findViewById(R.id.btn9).setOnClickListener(this);

         contentView.findViewById(R.id.btnCancel).setOnClickListener(this);

         contentView.findViewById(R.id.btnClear).setOnClickListener(this);

         contentView.findViewById(R.id.btnEnter).setOnClickListener(this);

     }

     public void show(){

         // Show at bottom of parent

         this.showAtLocation(parent, Gravity.BOTTOM,0,0);

         Log.d("DialogTest","ShowDialog");

     }

     @Override

     public void onClick(View view) {

         Log.d("DialogTest","key: "+((Button)view).getText());

         switch (view.getId()){

             case R.id.btn0:

             case R.id.btn1:

             case R.id.btn2:

             case R.id.btn3:

             case R.id.btn4:

             case R.id.btn5:

             case R.id.btn6:

             case R.id.btn7:

             case R.id.btn8:

             case R.id.btn9:

                 break;

             case R.id.btnCancel:

                 break;

             case R.id.btnClear:

                 break;

             case R.id.btnEnter:

                 break;

             default:

                 break;

         }

     }

 }
注意点:
PopupWindow通过设置一些属性,可以控制是否通过点击外部区域来使窗口消失。
 // Not allow to dismiss PopupWindow by touching outside

 setFocusable(false);

 setTouchable(true);

 setOutsideTouchable(false);
三个属性这样设置就可以达到一定的效果。
这样PopupWindow在触摸到外部区域后也不会消失。当然外部区域还是可以接收touch事件的,比如外部区域中的Button还是可以被点击。
3.MainActivity
package com.pax.dialogtest;

import android.content.Context;

import android.support.v7.app.AppCompatActivity;

import android.os.Bundle;

import android.view.LayoutInflater;

import android.view.View;

import android.widget.Button;

public class MainActivity extends AppCompatActivity {

    private View mView;

    KeyPadDialog dialog;

    @Override

    protected void onCreate(Bundle savedInstanceState) {

        super.onCreate(savedInstanceState);

        LayoutInflater layoutInflater = (LayoutInflater) getSystemService(Context.LAYOUT_INFLATER_SERVICE);

        mView = layoutInflater.inflate(

                R.layout.activity_main, null);

        setContentView(mView);

        Button button = (Button)findViewById(R.id.buttonPanel);

        button.setOnClickListener(new View.OnClickListener() {

            @Override

            public void onClick(View view) {

                dialog = new KeyPadDialog(MainActivity.this,mView);

                dialog.show();

            }

        });

    }

    @Override

    protected void onResume() {

        super.onResume();

    }

}
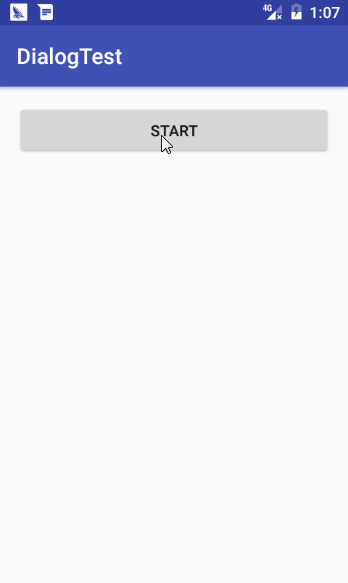
4.效果图
PopupWindow 使用的更多相关文章
- Android PopupWindow Dialog 关于 is your activity running 崩溃详解
Android PopupWindow Dialog 关于 is your activity running 崩溃详解 [TOC] 起因 对于 PopupWindow Dialog 需要 Activi ...
- Android popupwindow使用心得(一)
最近项目中好多地方用到popupwindow,感觉这个控件还是非常重要的.所以把使用心得总结下,废话不多说,直接上代码. public class MainActivity extends Activ ...
- 不得不吐槽的Android PopupWindow的几个痛点(实现带箭头的上下文菜单遇到的坑)
说到PopupWindow,我个人感觉是又爱又恨,没有深入使用之前总觉得这个东西应该很简单,很好用,但是真正使用PopupWindow实现一些效果的时候总会遇到一些问题,但是即便是人家的api有问题, ...
- 仿QQ空间根据位置弹出PopupWindow显示更多操作效果
我们打开QQ空间的时候有个箭头按钮点击之后弹出PopupWindow会根据位置的变化显示在箭头的上方还是下方,比普通的PopupWindow弹在屏幕中间显示好看的多. 先看QQ空间效果图: ...
- 自定义PopupWindow
PopupWindow,一个弹出窗口控件,可以用来显示任意View,而且会浮动在当前activity的顶部 自定义PopupWindow. 1.extends PopupWindow 2.构造方法中可 ...
- popupwindow的基本使用以及基本动画效果
1.创建一个popupwindow view的布局文件自己写一个就好了,这里就不说了 View view= LayoutInflater.from(context).inflate(R.layout. ...
- Android -- PopupWindow(其中嵌套ListView 可以被点击)
1. 效果图
- Android开发学习之路-PopupWindow和仿QQ左滑删除
这周作业,要做一个类似QQ的左滑删除效果的ListView,因为不想给每个item都放一个按钮,所以决定用PopupWindow,这里记录一下 先放一下效果图: 先说明一下这里面的问题: ①没有做到像 ...
- android标题栏上面弹出提示框(二) PopupWindow实现,带动画效果
需求:上次用TextView写了一个从标题栏下面弹出的提示框.android标题栏下面弹出提示框(一) TextView实现,带动画效果, 总在找事情做的产品经理又提出了奇葩的需求.之前在通知栏显示 ...
随机推荐
- google protobuf安装与使用
google protobuf是一个灵活的.高效的用于序列化数据的协议.相比较XML和JSON格式,protobuf更小.更快.更便捷.google protobuf是跨语言的,并且自带了一个编译器( ...
- python的函数
函数一词起源于数学,但是在编程中的函数和数学中的有很大不同.编程中的函数式组织好的,可重复使用的,用于实现单一功能或相关联功能的代码块. 我们在学习过程中已经使用过一些python内建的函数,如pri ...
- 初识NodeJS
1.JavaScript 模块化规范 浏览器环境 AMD Asynchronous Module Definition RequireJS CMD Common Module Definition S ...
- hihocoder -1121-二分图的判定
hihocoder -1121-二分图的判定 1121 : 二分图一•二分图判定 时间限制:10000ms 单点时限:1000ms 内存限制:256MB 描述 大家好,我是小Hi和小Ho的小伙伴Net ...
- C#笔记
关键字: 1.internal 被 internal 修饰的东西只能在本程序集(当前项目)内被使用. 注意事项: 1.解决c#代码引用c/c++代码出现的unsafe code错误警告提示 Unsaf ...
- Azure AD Connect 手动同步
我们目前采用工具Azure AD Connect 目录同步工具将本地域控制器的用户信息同步至office365和Azure 在之前目录同步工具中使用Windows 任务计划程序或单独的 Windows ...
- react native 图片样式导致的坑
最近项目中遇到一个问题,代码如下,点击进入另一个页面时需要显示的图片会黑屏,另外退回到该页面的时候下面代码中的第一个图片会全黑几秒才渲染,从另一个路径进入该页面时并没有此问题,就找了半天是不是数据的问 ...
- Android Studio中的CmakeList NDK配置
Android Studio2.2之后直接可以在创建工程时添加NDK支持了,添加之后,main文件夹下会多出一个native-lib.cpp这个文件,如果只为了一个简单的NDK接口,貌似这就结束了.直 ...
- ngrok反向隧道--获取内网IP
ngrok反向隧道 前情提要:小明与小白各有一台主机,两台主机在同一内网,小明想直接通过内网ssh到小白的主机上.但是小白的ip地址会不断的变化,而小明不想每次都要麻烦小白查看ip.于是小明催生了一个 ...
- Linux and symmetric multiprocessing
没空看,暂时留着 http://www.ibm.com/developerworks/library/l-linux-smp/