极客DIY:如何用Siri与树莓派“交互”
苹果在2014年推出的HomeKit智能家居平台的确给人眼前一亮的感觉。随着时间的推移,国外的黑客对HomeKit该逆向的逆向,结果也都汇总到了git。本着折腾到死的极客心态,从网上淘了一块树莓派进行测试。
0×01 基本工具
硬件在某宝上都有卖的,加起来不到300块
| 硬件: |
|---|
| 32G SD卡 |
| 2.5V电源线 |
| Raspberry pi3 |
| 两根杜邦线 |
| LED灯 |
| 保护壳 |
联动HomeKit的工程在git上找到两个,都是基于nodejs的,这边先测试的是HAP-NodeJS
| 软件 |
|---|
| raspbian |
| https://github.com/nfarina/homebridge |
| https://github.com/KhaosT/HAP-NodeJS |
0×02 安装
先解决依赖
# apt-get install avahi-daemon avahi-discover libnss-mdns libavahi-compat-libdnssd-dev  build-essential -y

# service avahi-daemon start
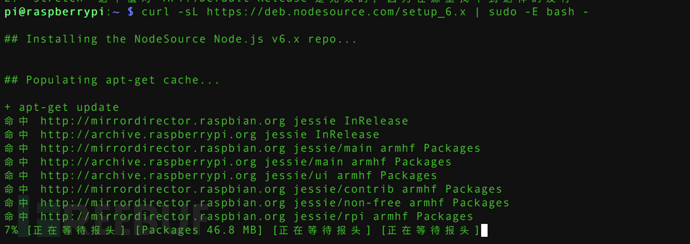
增加nodejs源
curl -sL https://deb.nodesource.com/setup_6.x | sudo -E bash -
# apt-get install nodejs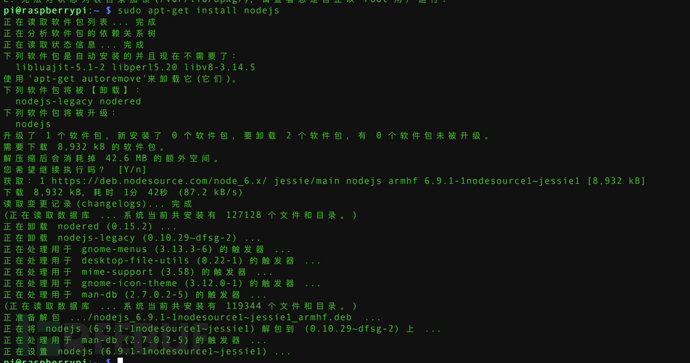
克隆源代码
git clone https://github.com/KhaosT/HAP-NodeJS.git
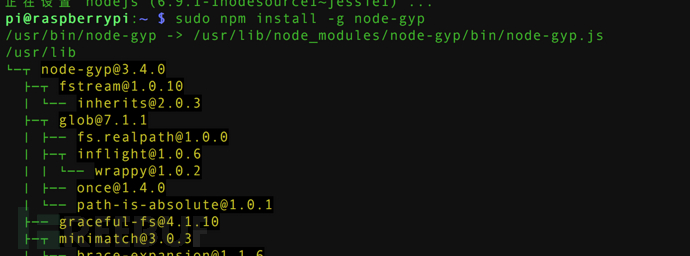
安装node-gyp
$ sudo npm install -g node-gyp
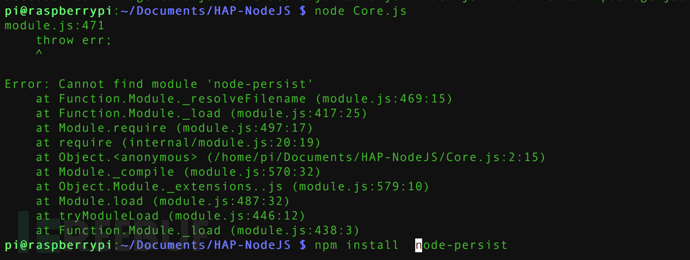
然后切换到HAP-NodeJS文件夹下,运行
node Core,js缺哪个库安装哪个库
最后安装
npm install python-shell
打开iPhone手机的HomeKit就能看到伪造的智能设备了
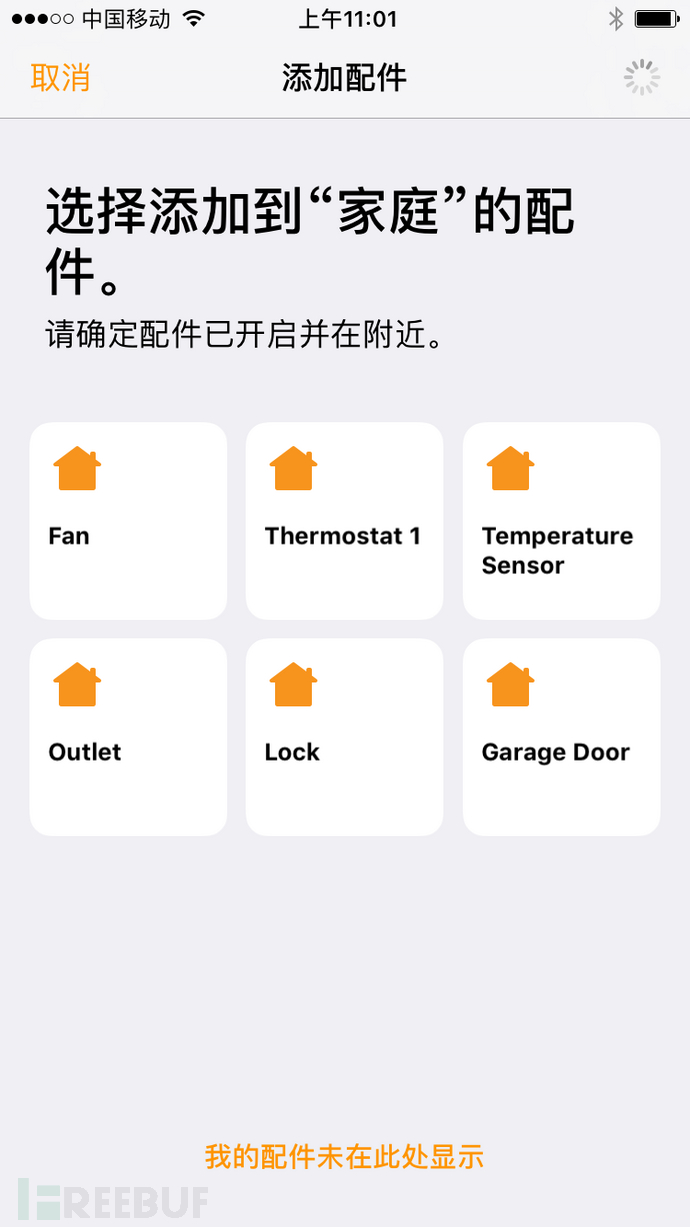
在accessories的目录下新建一个LivingLight_accessory.js,代码如下
//Light_accessory.js

var PythonShell = require('python-shell');

// HomeKit types required

var types = require("./types.js")

var exports = module.exports = {};

var execute = function(accessory,characteristic,value){ console.log("executed accessory: " + accessory + ", and characteristic: " + characteristic + ", with value: " +  value + "."); }

exports.accessory = {

  displayName: "Living Light",

  username: "1A:5B:3C:4A:5E:FF",

  pincode: "031-45-154",

  services: [{

    sType: types.ACCESSORY_INFORMATION_STYPE,

    characteristics: [{

        cType: types.NAME_CTYPE,

        onUpdate: null,

        perms: ["pr"],

        format: "string",

        initialValue: "Living Light",

        supportEvents: false,

        supportBonjour: false,

        manfDescription: "Bla",

        designedMaxLength: 255

    },{

        cType: types.MANUFACTURER_CTYPE,

        onUpdate: null,

        perms: ["pr"],

        format: "string",

        initialValue: "Oltica",

        supportEvents: false,

        supportBonjour: false,

        manfDescription: "Bla",

        designedMaxLength: 255

    },{

        cType: types.MODEL_CTYPE,

        onUpdate: null,

        perms: ["pr"],

        format: "string",

        initialValue: "Rev-1",

        supportEvents: false,

        supportBonjour: false,

        manfDescription: "Bla",

        designedMaxLength: 255

    },{

        cType: types.SERIAL_NUMBER_CTYPE,

        onUpdate: null,

        perms: ["pr"],

        format: "string",

        initialValue: "A1S2NASF88EW",

        supportEvents: false,

        supportBonjour: false,

        manfDescription: "Bla",

        designedMaxLength: 255

    },{

        cType: types.IDENTIFY_CTYPE,

        onUpdate: null,

        perms: ["pw"],

        format: "bool",

        initialValue: false,

        supportEvents: false,

        supportBonjour: false,

        manfDescription: "Identify Accessory",

        designedMaxLength: 1

    }]

  },{

    sType: types.LIGHTBULB_STYPE,

    characteristics: [{

        cType: types.NAME_CTYPE,

        onUpdate: null,

        perms: ["pr"],

        format: "string",

        initialValue: "Light 1 Light Service",

        supportEvents: false,

        supportBonjour: false,

        manfDescription: "Bla",

        designedMaxLength: 255

    },{

        cType: types.POWER_STATE_CTYPE,

        onUpdate: function(value)

    {

            console.log("Change:",value);

            if (value) {

            PythonShell.run('/python/light1.py', function (err) {

                   console.log('Light1 On Success');

            });

            } else {

                PythonShell.run('/python/light0.py', function (err) {

                    console.log("Off Success");

                });

            }

        },

        perms: ["pw","pr","ev"],

        format: "bool",

        initialValue: false,

        supportEvents: false,

        supportBonjour: false,

        manfDescription: "Turn On the Light",

        designedMaxLength: 1

    },{

        cType: types.HUE_CTYPE,

        onUpdate: function(value) { console.log("Change:",value); execute("Test Accessory 1", "Light - Hue", value); },

        perms: ["pw","pr","ev"],

        format: "int",

        initialValue: 0,

        supportEvents: false,

        supportBonjour: false,

        manfDescription: "Doesn’t actually adjust Hue of Light",

        designedMinValue: 0,

        designedMaxValue: 360,

        designedMinStep: 1,

        unit: "arcdegrees"

    },{

        cType: types.BRIGHTNESS_CTYPE,

        onUpdate: function(value) { console.log("Change:",value); execute("Test Accessory 1", "Light - Brightness", value); },

        perms: ["pw","pr","ev"],

        format: "int",

        initialValue: 0,

        supportEvents: false,

        supportBonjour: false,

        manfDescription: "Doesn’t actually adjust Brightness of Light",

        designedMinValue: 0,

        designedMaxValue: 100,

        designedMinStep: 1,

        unit: "%"

    },{

        cType: types.SATURATION_CTYPE,

        onUpdate: function(value) { console.log("Change:",value); execute("Test Accessory 1", "Light - Saturation", value); },

        perms: ["pw","pr","ev"],

        format: "int",

        initialValue: 0,

        supportEvents: false,

        supportBonjour: false,

        manfDescription: "Doesn’t actually adjust Saturation of Light",

        designedMinValue: 0,

        designedMaxValue: 100,

        designedMinStep: 1,

        unit: "%"

    }]

  }]

}
然后在HAP-NodeJS下新建python文件夹,新建light1.py,用来开启灯
import RPi.GPIO as GPIO

GPIO.setwarnings(False)

GPIO.setmode(GPIO.BOARD)

GPIO.setup(16, GPIO.OUT)

GPIO.output(16, 1)

#GPIO.cleanup()
light0.py用来关闭灯
import RPi.GPIO as GPIO

GPIO.setwarnings(False)

GPIO.setmode(GPIO.BOARD)

GPIO.setup(16, GPIO.OUT)

GPIO.output(16, 0)

#GPIO.cleanup()
重新运行node Core.js即可在HomeKit看到新建的Living Light
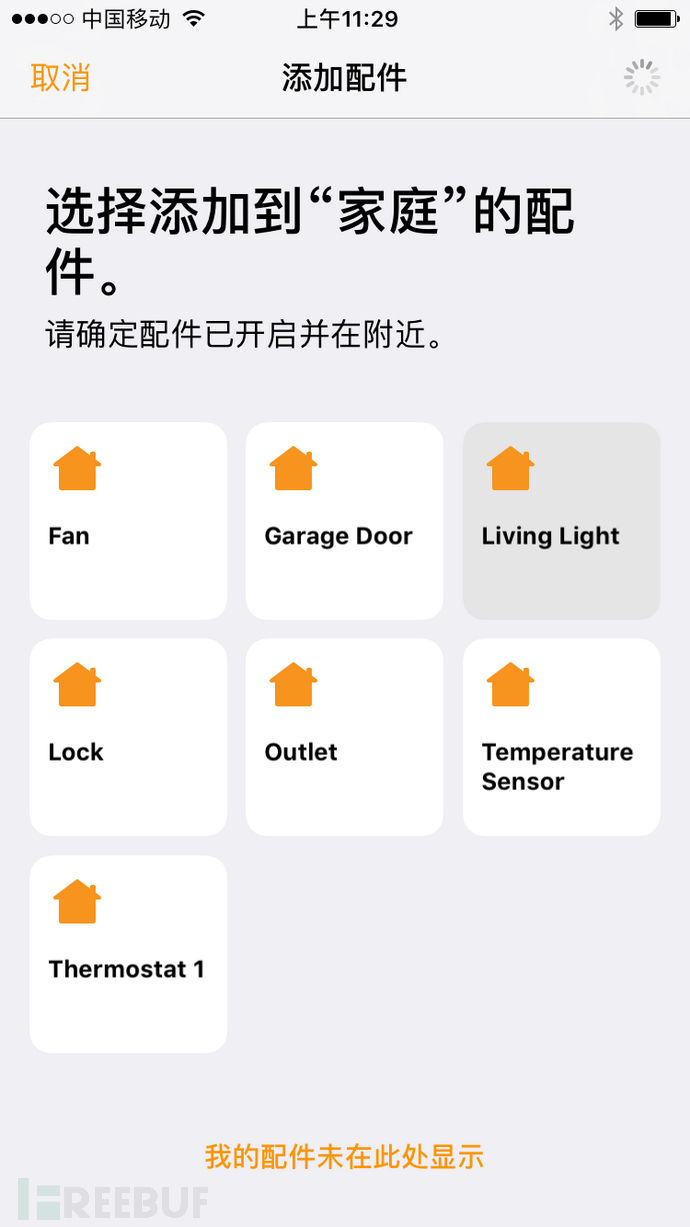
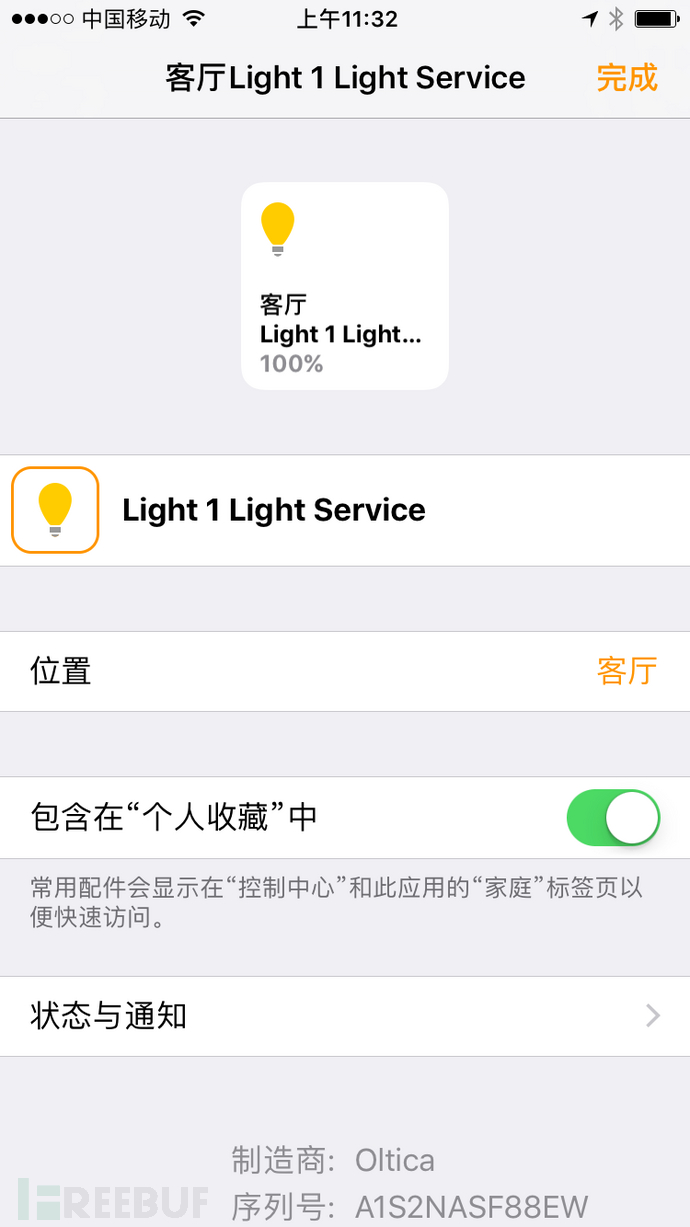
把这个添加,pincode就是031-45-154
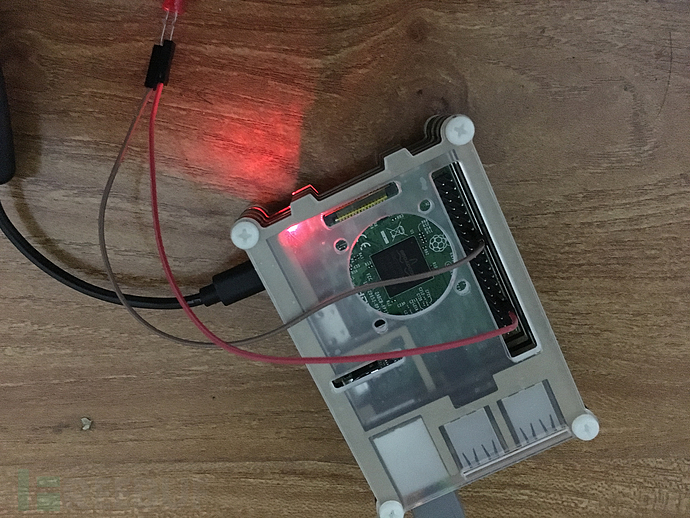
硬件连接

我这边用的是物理接口的16口和34口
0×03 测试
后记
这里有个前提条件是树莓派和iPhone在同一个子网上,如果想从外网控制就得需要映射公网WEB服务器或者是第三方物联网WEB的形式。而如果想将树莓派作为智能家庭网络的中心,后期还有很多工作要做,比如服务开机启动,连接继电器,线路改造,车库门,温度感应器,电视,摄像头等,有机会再继续聊吧
Reference:
http://www.instructables.com/id/Raspberry-Pi-2-Homekit-from-zero-to-Hey-Siri/?ALLSTEPS
https://github.com/KhaosT/HAP-NodeJS
极客DIY:如何用Siri与树莓派“交互”的更多相关文章
- 极客DIY:使用树莓派制作一套“NAS+私有云盘+下载机”
原创作者:HackLiu 0×00 前言 如果你家里有多台设备需要联网需要娱乐,你一定会或多或少遇到设备碎片化带来的烦恼.当然,已经有很多厂商包括新晋的小米.360在内的互联网公司做了这个事情 ...
- 极客DIY:使用树莓派制作一架四轴无人机
如果你想DIY一台属于自己的无人机,那么接下来可以阅读这篇文章,阅读完毕之后也许对你会有启发. 这个项目主要用到的零件主要来自Erle Robotics(一个使用Linux系统的开源四轴飞行器项目). ...
- 极客DIY:廉价电视棒玩转GNSS-SDR,实现GPS实时定位
0×00 前言 GNSS是Global Navigation Satellite System的缩写.中文称作:全球卫星导航系统.全球导航卫星系统. GNSS泛指所有的卫星导航系统,包括全球的.区域的 ...
- 极客DIY:制作一个可以面部、自主规划路径及语音识别的无人机
引言 现在大部分无人机厂商都会为第三方开发者提供无人机API接口,让他们更容易地开发无人机飞行控制应用程序,让无人机想怎么玩就怎么玩.有的API接口可以帮助开发者开发基于Web版的APP.手机APP甚 ...
- 极客DIY:如何构建一台属于自己的基站
写在前面(原文作者) 上周我去特拉维夫(Tel Aviv)探望我的朋友结果有了一些收获,一块崭新的BladeRF(x40),即一个支持USB3.0的SDR平台,这就意味着可以同时发送和接收信息了.而H ...
- 极客DIY:打造属于自己的无线移动渗透测试箱
本文中介绍的工具.技术带有一定的攻击性,请合理合法使用. 你想不想拥有一款属于自己的移动无线渗透测试箱,如果你感兴趣,下面介绍的设备将会对你很有帮助.这个箱子被称为“MiTM(中间人攻击)WiFi箱” ...
- 极客DIY:打造你的专属黑客U盘
简介 由于“Bad USB漏洞”的存在,USB闪存驱动器也成了常见的攻击目标.Bad-USB让黑客可以重新编程微控器作为一个“人机界面装置”(HID)或键盘,然后在目标机器上执行自定义键盘敲击.这种情 ...
- 极客DIY:开源WiFi智能手表制作
如果你喜欢拥有一款属于自己的无线手表,那么请不要错过,相信阅读完这篇文章对你会很有帮助. 硬件规格 ESP8266(32Mbit闪存) MPU-9250(陀螺仪传感器)以及 AK8963(内置磁力计) ...
- 极客DIY:RFID飞贼打造一款远距离渗透利器
本文使用最新的渗透工具RFID飞贼(Tastic RFID Thief)和RFID感应破解技术来获取一些拥有安防的建筑物的访问权限. Tastic RFID Thief是一个无声远距离RFID读卡器, ...
随机推荐
- CentOS/RHEL安装oracle 11G
系统:RHEL6.5 + oracle11G x86_64 (CentOS上安装与此大同小异) 使用本地yum源(提前下载pdksh包),具体过程参考(适用于RHEL/CentOS):http://w ...
- nginx配置图片防盗链
location ~ .*\.(gif|jpg|jpeg|png|bmp|swf)${ expires 30d; access_log off; valid_referers none blocked ...
- Nginx + FastCGI 程序(C/C++) 搭建高性能web service的Demo及部署发布
FastCGI编程包括四部分:初始化编码.接收请求循环.响应内容.响应结束循环. FCGX_Request request; FCGX_Init(); ); FCGX_InitRequest(& ...
- (HBase) Error: JAVA_HOME is not set and Java could not be found
请查看Linux系统环境变量 JAVA_HOME 是否设置.. 两种方法 env //查看全部系统变量 或者 echo $JAVA_HOME //查看JAVA_HOME变量值 如果没有设置则输出空 没 ...
- 关于MySQL的SLEEP(N)函数
都知道通过在MySQL中执行select sleep(N)可以让此语句运行N秒钟: ? 1 2 3 4 5 6 7 mysql> select sleep(1); +----------+ | ...
- 不解压直接查看tar包内容
. file.tar.gz gzip -dc file.tar.gz | tar tvf - . file.tar.bz2 bzip2 -dc file.tar.bz2 |tar tvf - . fi ...
- hdu4939 Stupid Tower Defense (DP)
2014多校7 第二水的题 4939 Stupid Tower Defense Time Limit: 12000/6000 MS (Java/Others) Memory Limit: 131 ...
- web.xml配置解释
web.xml中配置的加载优先级:首先可以肯定的是,加载顺序与它们在 web.xml 文件中的先后顺序无关.即不会因为 filter 写在 listener 的前面而会先加载 filter.最终得出的 ...
- .NET中的工作目录一览!
定义: 当前工作目录——进行某项操作的目的目录,会随着OpenFileDialog.SaveFileDialog等对象所确定的目录而改变. 当前执行目录——该进程从中启动的目录,即文件自身 ...
- 扁平化设计五大原则(转自CSDN翻译)
Cousins表示他虽然对扁平化设计的感觉非常强烈,但并没有特别热爱或者特别讨厌扁平化设计.他认为好的设计不应当局限于某种设计风格,而需要更注重可用性.有用性.如果因为时尚的缘故,那就顺其自然吧.但该 ...
