Tomcat 的 server.xml 文件详解
文件内容解读
- <?xml version="1.0" encoding="UTF-8"?>
- <!--
- Licensed to the Apache Software Foundation (ASF) under one or more
- contributor license agreements. See the NOTICE file distributed with
- this work for additional information regarding copyright ownership.
- The ASF licenses this file to You under the Apache License, Version 2.0
- (the "License"); you may not use this file except in compliance with
- the License. You may obtain a copy of the License at
- http://www.apache.org/licenses/LICENSE-2.0
- Unless required by applicable law or agreed to in writing, software
- distributed under the License is distributed on an "AS IS" BASIS,
- WITHOUT WARRANTIES OR CONDITIONS OF ANY KIND, either express or implied.
- See the License for the specific language governing permissions and
- limitations under the License.
- -->
- <!-- Note: A "Server" is not itself a "Container", so you may not
- define subcomponents such as "Valves" at this level.
- Documentation at /docs/config/server.html
- -->
- <Server port="8005" shutdown="SHUTDOWN">
- <Listener className="org.apache.catalina.startup.VersionLoggerListener" />
- <!-- Security listener. Documentation at /docs/config/listeners.html
- <Listener className="org.apache.catalina.security.SecurityListener" />
- -->
- <!--APR library loader. Documentation at /docs/apr.html -->
- <Listener className="org.apache.catalina.core.AprLifecycleListener" SSLEngine="on" />
- <!-- Prevent memory leaks due to use of particular java/javax APIs-->
- <Listener className="org.apache.catalina.core.JreMemoryLeakPreventionListener" />
- <Listener className="org.apache.catalina.mbeans.GlobalResourcesLifecycleListener" />
- <Listener className="org.apache.catalina.core.ThreadLocalLeakPreventionListener" />
- <!-- Global JNDI resources
- Documentation at /docs/jndi-resources-howto.html
- -->
- <GlobalNamingResources>
- <!-- Editable user database that can also be used by
- UserDatabaseRealm to authenticate users
- -->
- <Resource name="UserDatabase" auth="Container"
- type="org.apache.catalina.UserDatabase"
- description="User database that can be updated and saved"
- factory="org.apache.catalina.users.MemoryUserDatabaseFactory"
- pathname="conf/tomcat-users.xml" />
- </GlobalNamingResources>
- <!-- A "Service" is a collection of one or more "Connectors" that share
- a single "Container" Note: A "Service" is not itself a "Container",
- so you may not define subcomponents such as "Valves" at this level.
- Documentation at /docs/config/service.html
- -->
- <!-- 代表一个服务,这个Service可以有多个,后面的name是服务名 -->
- <Service name="Catalina">
- <!--The connectors can use a shared executor, you can define one or more named thread pools-->
- <!--
- <Executor name="tomcatThreadPool" namePrefix="catalina-exec-"
- maxThreads="150" minSpareThreads="4"/>
- -->
- <!-- A "Connector" represents an endpoint by which requests are received
- and responses are returned. Documentation at :
- Java HTTP Connector: /docs/config/http.html
- Java AJP Connector: /docs/config/ajp.html
- APR (HTTP/AJP) Connector: /docs/apr.html
- Define a non-SSL/TLS HTTP/1.1 Connector on port 8080
- -->
- <!--
- 代表一个连接器,后边指定了这个连接器使用的协议和端口号,还有超时时间,平时修改Tomcat端口号就是修改这个端口号,
- 当然,还有其他连接器,下面就有一个使用AJP1.3协议的连接器,不过平时不使用
- -->
- <Connector port="8080" protocol="HTTP/1.1"
- connectionTimeout="20000"
- redirectPort="8443" />
- <!-- A "Connector" using the shared thread pool-->
- <!--
- <Connector executor="tomcatThreadPool"
- port="8080" protocol="HTTP/1.1"
- connectionTimeout="20000"
- redirectPort="8443" />
- -->
- <!-- Define a SSL/TLS HTTP/1.1 Connector on port 8443
- This connector uses the NIO implementation. The default
- SSLImplementation will depend on the presence of the APR/native
- library and the useOpenSSL attribute of the
- AprLifecycleListener.
- Either JSSE or OpenSSL style configuration may be used regardless of
- the SSLImplementation selected. JSSE style configuration is used below.
- -->
- <!--
- <Connector port="8443" protocol="org.apache.coyote.http11.Http11NioProtocol"
- maxThreads="150" SSLEnabled="true">
- <SSLHostConfig>
- <Certificate certificateKeystoreFile="conf/localhost-rsa.jks"
- type="RSA" />
- </SSLHostConfig>
- </Connector>
- -->
- <!-- Define a SSL/TLS HTTP/1.1 Connector on port 8443 with HTTP/2
- This connector uses the APR/native implementation which always uses
- OpenSSL for TLS.
- Either JSSE or OpenSSL style configuration may be used. OpenSSL style
- configuration is used below.
- -->
- <!--
- <Connector port="8443" protocol="org.apache.coyote.http11.Http11AprProtocol"
- maxThreads="150" SSLEnabled="true" >
- <UpgradeProtocol className="org.apache.coyote.http2.Http2Protocol" />
- <SSLHostConfig>
- <Certificate certificateKeyFile="conf/localhost-rsa-key.pem"
- certificateFile="conf/localhost-rsa-cert.pem"
- certificateChainFile="conf/localhost-rsa-chain.pem"
- type="RSA" />
- </SSLHostConfig>
- </Connector>
- -->
- <!-- Define an AJP 1.3 Connector on port 8009 -->
- <Connector port="8009" protocol="AJP/1.3" redirectPort="8443" />
- <!-- An Engine represents the entry point (within Catalina) that processes
- every request. The Engine implementation for Tomcat stand alone
- analyzes the HTTP headers included with the request, and passes them
- on to the appropriate Host (virtual host).
- Documentation at /docs/config/engine.html -->
- <!-- You should set jvmRoute to support load-balancing via AJP ie :
- <Engine name="Catalina" defaultHost="localhost" jvmRoute="jvm1">
- -->
- <!-- 服务引擎 defaulltHost用来指定默认的主机-->
- <Engine name="Catalina" defaultHost="localhost">
- <!--For clustering, please take a look at documentation at:
- /docs/cluster-howto.html (simple how to)
- /docs/config/cluster.html (reference documentation) -->
- <!--
- <Cluster className="org.apache.catalina.ha.tcp.SimpleTcpCluster"/>
- -->
- <!-- Use the LockOutRealm to prevent attempts to guess user passwords
- via a brute-force attack -->
- <!-- 安全策略 -->
- <Realm className="org.apache.catalina.realm.LockOutRealm">
- <!-- This Realm uses the UserDatabase configured in the global JNDI
- resources under the key "UserDatabase". Any edits
- that are performed against this UserDatabase are immediately
- available for use by the Realm. -->
- <Realm className="org.apache.catalina.realm.UserDatabaseRealm"
- resourceName="UserDatabase"/>
- </Realm>
- <!-- 主机:name代表主机名,appBase代表根目录,unpackWARs代表是否自动解压WAR包,autoDeploy代表自动发布,就是启动状态下能直接部署项目 -->
- <Host name="localhost" appBase="webapps"
- unpackWARs="true" autoDeploy="true">
- <!-- SingleSignOn valve, share authentication between web applications
- Documentation at: /docs/config/valve.html -->
- <!--
- <Valve className="org.apache.catalina.authenticator.SingleSignOn" />
- -->
- <!-- Access log processes all example.
- Documentation at: /docs/config/valve.html
- Note: The pattern used is equivalent to using pattern="common" -->
- <Valve className="org.apache.catalina.valves.AccessLogValve" directory="logs"
- prefix="localhost_access_log" suffix=".txt"
- pattern="%h %l %u %t "%r" %s %b" />
- </Host>
- </Engine>
- </Service>
- </Server>
创建虚拟目录
1、直接在server.xml文件的Host标签内添加Context标签用于指定虚拟目录,path表示访问路径,docBase表示项目路径,也就是虚拟目录,下面指定了项目地址,就不会访问webapps目录下的项目了,这种方式有个缺点是修改后必须重启服务器。
直接访问http://localhost:8080/myweb
- <Context path="/myweb" docBase="D:\Programmer\myweb" />
2、虚拟目录的修改还有另外一种方式,就是把这个Context标签放到Tomcat的\conf\Catalina\localhost目录下,新建一个xxx.xml,里面添加上xml文件的头部和Context标签,这样也能指定虚拟目录,并且不用重启服务器。
- <?xml version="1.0" encoding="UTF-8"?>
- <Context docBase="D:\Programmer\myweb" />
直接访问http://localhost:8080/xxx/

创建虚拟主机
1、复制一个Host标签出来,然后修改name为www.wangbo.com,appBase目录也可以修改为D:\Programmer\web(将web项目复制一份放到这个目录下)
- <Host name="localhost" appBase="webapps"
- unpackWARs="true" autoDeploy="true">
- <!-- SingleSignOn valve, share authentication between web applications
- Documentation at: /docs/config/valve.html -->
- <!--
- <Valve className="org.apache.catalina.authenticator.SingleSignOn" />
- -->
- <!-- Access log processes all example.
- Documentation at: /docs/config/valve.html
- Note: The pattern used is equivalent to using pattern="common" -->
- <Valve className="org.apache.catalina.valves.AccessLogValve" directory="logs"
- prefix="localhost_access_log" suffix=".txt"
- pattern="%h %l %u %t "%r" %s %b" />
- </Host>
- <Host name="www.wangbo.com" appBase="D:\Programmer\web"
- unpackWARs="true" autoDeploy="true">
- </Host>
当启动Tomcat后可以看到有两个虚拟主机了

2、修改host文件,将这个域名添加进去,地址:C:\Windows\System32\drivers\etc(如果无法修改,可以复制一份出来,然后修改完之后去覆盖原文件)

3、访问项目
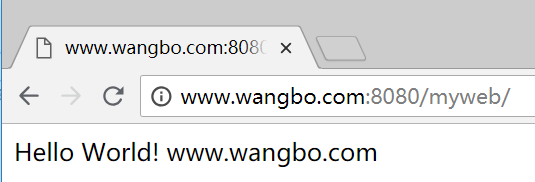
访问http://www.wangbo.com:8080/myweb/
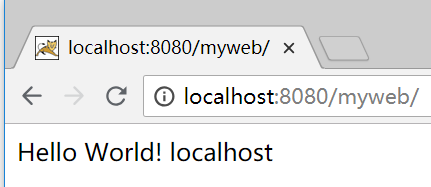
访问http://localhost:8080/myweb/
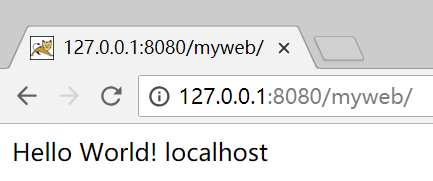
那么如果直接访问127.0.0.1会访问谁呢,因为这个IP在我的本地电脑上映射了两个地址,一个是localhost,另一个是www.wangbo.com。
因为<Engine name="Catalina" defaultHost="localhost">中的defaultHost里配置的是localhost,所以会访问localhost。
Tomcat 的 server.xml 文件详解的更多相关文章
- tomcat中server.xml配置详解(转载)(一)
转载自:https://www.cnblogs.com/starhu/p/5599773.html tomcat中server.xml配置详解 Tomcat Server的结构图如下:(该文件描述了如 ...
- server.xml文件详解
一.server.xml文件介绍 1.server.xml作用 Server.xml配置文件用于对整个容器进行相关的配置. 2.server.xml文件的配置元素列表 <Server&g ...
- Tomcat中server.xml配置详解(2)
Tomcat中配置文件详解 Server.xml配置文件说明,以及Tomcat组件的说明 Tomcat服务器是由一系列可以配置的组件构成,其中核心组件是Catalina Servlet,它是最顶层组件 ...
- tomcat中server.xml配置详解
Tomcat Server的结构图如下: 该文件描述了如何启动Tomcat Server <Server> <Listener /> <GlobaNami ...
- 【Tomcat】tomcat中server.xml配置详解
Tomcat Server的结构图如下: 该文件描述了如何启动Tomcat Server <Server> <Listener /> <GlobaNaming ...
- tomcat中server.xml配置详解(转载)(三)
转载自:https://www.cnblogs.com/starhu/p/5599773.html 一. <Engine>元素 每个Service元素只能有一个Engine元素.处理在同 ...
- Tomcat conf/server.xml 配置项详解
本文参考来源:https://blog.csdn.net/a314368439/article/details/60132783# <Server port="8005" s ...
- tomcat中server.xml配置详解(转载)(二)
转载自:https://www.cnblogs.com/starhu/p/5599773.html 一:<Connector>元素 由Connector接口定义.<Connector ...
- Tomcat中的Server.xml配置详解
Tomcat中的Server.xml配置详解 Tomcat Server的结构图如下: 该文件描述了如何启动Tomcat Server <Server> <Listener /> ...
随机推荐
- AnjularJS 学习
一个不错的学习AnjularJS的网站,可以在线实践:http://www.runoob.com/angularjs/angularjs-tutorial.html
- openstack系列文章(1)devstack安装测试Queens
1.在OpenStack 圈子中,有这么一句名言:”不要让朋友在生产环境中运行DevStack.但是初学者在没有掌握OpenStack CLI的情况下用devstack安装测试环境还是不错的.本系列文 ...
- VNF网络性能提升解决方案及实践
VNF网络性能提升解决方案及实践 2016年7月 作者: 王智民 贡献者: 创建时间: 2016-7-20 稳定程度: 初稿 修改历史 版本 日期 修订人 说明 1.0 20 ...
- MongoDB的Replica Set以及Auth的配置
http://blog.0x01.site/2017/01/13/MongoDB%E7%9A%84Replica-Set%E4%BB%A5%E5%8F%8AAuth%E7%9A%84%E9%85%8D ...
- ubuntu 18.04配置静态ip,解决无法上网问题,解决resolv.conf配置文件被覆盖
Netplan 是 Ubuntu 17.10 中引入的一种新的命令行网络配置实用程序,用于在 Ubuntu 系统中轻松管理和配置网络设置. 它允许您使用 YAML 格式的描述文件来抽像化定义网络接口的 ...
- graph_base_pic_segmentation里面的细节和代码
https://github.com/zhangbo2008/graph_base_pic_segmentation_analyzing/blob/master/README.md
- PLSQL账号密码
Product Code:4t46t6vydkvsxekkvf3fjnpzy5wbuhphqzserial Number:601769 password:xs374ca
- docker启动异常driver not supported
使用阿里云机器重启docker服务出现错误提示信息 [root@iz2ze5ivwiz2bnwddc20k4z ~]# systemctl restart docker Job for docker. ...
- 启动tomcat报错com.sun.faces.config.ConfigureListener
小白一个,最近想着上网看看自己搭建个用maven+spring+springmvc+mybaties的框架 然后......就出来这个么东东 java.lang.ClassNotFoundExcept ...
- HDU 6397 Character Encoding (组合数学 + 容斥)
题意: 析:首先很容易可以看出来使用FFT是能够做的,但是时间上一定会TLE的,可以使用公式化简,最后能够化简到最简单的模式. 其实考虑使用组合数学,如果这个 xi 没有限制,那么就是求 x1 + x ...