Linux安装Elasticsearch7.x
Elasticsearch下载地址:
https://artifacts.elastic.co/downloads/elasticsearch/elasticsearch-7.1.1-linux-x86_64.tar.gz
解压elasticsearch-7.1.1-linux-x86_64.tar.gz到/usr/local/目录:
tar -avxf elasticsearch-7.1.1-linux-x86_64.tar.gz -C /usr/local/
进入解压后的elasticsearch目录:
(1)新建data目录:
mkdir data
(2)修改config/elasticsearch.yml:
vim config/elasticsearch.yml
取消下列项注释并修改:
cluster.name: my-application #集群名称

node.name: node-1 #节点名称

#数据和日志的存储目录

path.data: /usr/local/elasticsearch-7.1.1/data

path.logs: /usr/local/elasticsearch-7.1.1/logs

#设置绑定的ip,设置为0.0.0.0以后就可以让任何计算机节点访问到了

network.host: 0.0.0.0

http.port: 9200 #端口

#设置在集群中的所有节点名称,这个节点名称就是之前所修改的,当然你也可以采用默认的也行,目前是单机,放入一个节点即可

cluster.initial_master_nodes: ["node-1"]
修改完毕后,:wq 保存退出vim
准备启动es
进入/bin目录执行命令:
./elasticsearch
我这里出现如下错误:
Java HotSpot(TM) 64-Bit Server VM warning: INFO: os::commit_memory(0x00000000c5330000, 986513408, 0) failed; error='Cannot allocate memory' (errno=12)

#

# There is insufficient memory for the Java Runtime Environment to continue.

# Native memory allocation (mmap) failed to map 986513408 bytes for committing reserved memory.

# An error report file with more information is saved as:

# logs/hs_err_pid22863.log
[root@VM_0_2_centos bin]#
看来是我这1G的内存太小了啊,elasticsearch使用java的jvm默认是使用1G的内存的,这里我们修改一下内存,直接把内存改到200m
cd 到es目录修改 ./config/jvm.options:
vim ./config/jvm.options
修改该内容:
-Xms200m

-Xmx200m
:wq 保存并退出vim,再次启动es
再次启动出现如下错误:
[2019-06-21T16:20:03,039][WARN ][o.e.b.ElasticsearchUncaughtExceptionHandler] [node-1] uncaught exception in thread [main]

org.elasticsearch.bootstrap.StartupException: java.lang.RuntimeException: can not run elasticsearch as root

at org.elasticsearch.bootstrap.Elasticsearch.init(Elasticsearch.java:163) ~[elasticsearch-7.1.1.jar:7.1.1]

at org.elasticsearch.bootstrap.Elasticsearch.execute(Elasticsearch.java:150) ~[elasticsearch-7.1.1.jar:7.1.1]

at org.elasticsearch.cli.EnvironmentAwareCommand.execute(EnvironmentAwareCommand.java:86) ~[elasticsearch-7.1.1.jar:7.1.1]

at org.elasticsearch.cli.Command.mainWithoutErrorHandling(Command.java:124) ~[elasticsearch-cli-7.1.1.jar:7.1.1]

at org.elasticsearch.cli.Command.main(Command.java:90) ~[elasticsearch-cli-7.1.1.jar:7.1.1]

at org.elasticsearch.bootstrap.Elasticsearch.main(Elasticsearch.java:115) ~[elasticsearch-7.1.1.jar:7.1.1]

at org.elasticsearch.bootstrap.Elasticsearch.main(Elasticsearch.java:92) ~[elasticsearch-7.1.1.jar:7.1.1]

Caused by: java.lang.RuntimeException: can not run elasticsearch as root

at org.elasticsearch.bootstrap.Bootstrap.initializeNatives(Bootstrap.java:102) ~[elasticsearch-7.1.1.jar:7.1.1]

at org.elasticsearch.bootstrap.Bootstrap.setup(Bootstrap.java:169) ~[elasticsearch-7.1.1.jar:7.1.1]

at org.elasticsearch.bootstrap.Bootstrap.init(Bootstrap.java:325) ~[elasticsearch-7.1.1.jar:7.1.1]

at org.elasticsearch.bootstrap.Elasticsearch.init(Elasticsearch.java:159) ~[elasticsearch-7.1.1.jar:7.1.1]

... 6 more
[root@VM_0_2_centos elasticsearch-7.1.1]#
这是不能使用root用户操作,添加一个其他的用户再试试:
[root@VM_0_2_centos elasticsearch-7.1.1]# adduser es
[root@VM_0_2_centos elasticsearch-7.1.1]# passwd es
Changing password for user es.

New password:

Retype new password:
passwd: all authentication tokens updated successfully.
改一下es目录所属用户:
[root@VM_0_2_centos elasticsearch-7.1.1]# chown es /usr/local/elasticsearch-7.1.1/ -R
vim 编辑 /etc/security/limits.conf,在末尾加上:
es soft nofile 65536

es hard nofile 65536

es soft nproc 4096

es hard nproc 4096
vim 编辑 vim /etc/security/limits.d/20-nproc.conf,将* 改为用户名(es):
# Default limit for number of user's processes to prevent

# accidental fork bombs.

# See rhbz #432903 for reasoning.

es soft nproc 4096

root soft nproc unlimited
vim 编辑 /etc/sysctl.conf,在末尾加上:
vm.max_map_count = 655360
执行:
[root@VM_0_2_centos ~]# sysctl -p
kernel.printk = 5

vm.max_map_count = 655360
[root@VM_0_2_centos ~]#
登录刚才新建的es用户,并启动elasticsearch,OK
[root@VM_0_2_centos elasticsearch-7.1.1]# su es
[es@VM_0_2_centos elasticsearch-7.1.1]$ ./bin/elasticsearch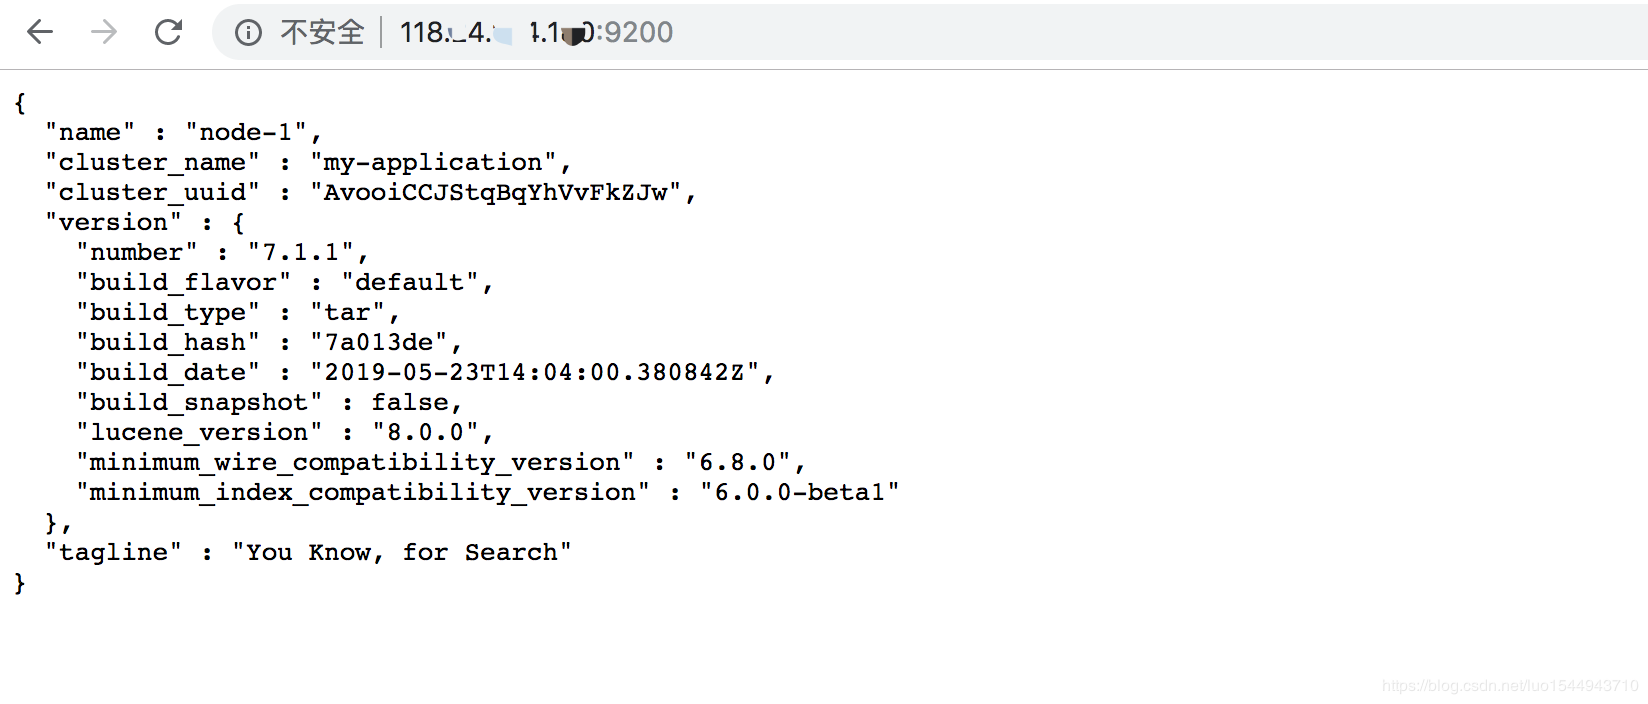
后台启动:
[es@VM_0_2_centos elasticsearch-7.1.1]$ ./bin/elasticsearch -d
[es@VM_0_2_centos elasticsearch-7.1.1]$
查看进程:
[es@VM_0_2_centos elasticsearch-7.1.1]$ ./bin/elasticsearch -d
[es@VM_0_2_centos elasticsearch-7.1.1]$ ps -ef|grep elasticsearch
es 18652 1 19 17:48 pts/2 00:00:00 /usr/local/java/jdk1.8.0_211/bin/java -Xms200m -Xmx200m -XX:+UseConcMarkSweepGC -XX:CMSInitiatingOccupancyFraction=75 -XX:+UseCMSInitiatingOccupancyOnly -Des.networkaddress.cache.ttl=60 -Des.networkaddress.cache.negative.ttl=10 -XX:+AlwaysPreTouch -Xss1m -Djava.awt.headless=true -Dfile.encoding=UTF-8 -Djna.nosys=true -XX:-OmitStackTraceInFastThrow -Dio.netty.noUnsafe=true -Dio.netty.noKeySetOptimization=true -Dio.netty.recycler.maxCapacityPerThread=0 -Dlog4j.shutdownHookEnabled=false -Dlog4j2.disable.jmx=true -Djava.io.tmpdir=/tmp/elasticsearch-182563007296674551 -XX:+HeapDumpOnOutOfMemoryError -XX:HeapDumpPath=data -XX:ErrorFile=logs/hs_err_pid%p.log -XX:+PrintGCDetails -XX:+PrintGCDateStamps -XX:+PrintTenuringDistribution -XX:+PrintGCApplicationStoppedTime -Xloggc:logs/gc.log -XX:+UseGCLogFileRotation -XX:NumberOfGCLogFiles=32 -XX:GCLogFileSize=64m -Dio.netty.allocator.type=unpooled -Des.path.home=/usr/local/elasticsearch-7.1.1 -Des.path.conf=/usr/local/elasticsearch-7.1.1/config -Des.distribution.flavor=default -Des.distribution.type=tar -Des.bundled_jdk=true -cp /usr/local/elasticsearch-7.1.1/lib/* org.elasticsearch.bootstrap.Elasticsearch -d

es 18728 8399 0 17:48 pts/2 00:00:00 grep --color=auto elasticsearch
[es@VM_0_2_centos elasticsearch-7.1.1]$
转自:https://blog.csdn.net/luo1544943710/article/details/93196147
Linux安装Elasticsearch7.x的更多相关文章
- Linux安装ElasticSearch7.X & IK分词器
前言 安装ES之前,请先检查JDK版本,es使用java编写,强依赖java环境.JDK安装过程略. 安装步骤 1.下载地址 点击这里下载7.2.0 2.解压elasticsearch-7.2.0-l ...
- 使用脚本安装elasticsearch7.3的记录
使用脚本安装elasticsearch7.3的记录 #!/bin/sh # https://www.elastic.co/guide/en/elasticsearch/reference/curren ...
- docker安装Elasticsearch7.6集群并设置密码
docker安装Elasticsearch7.6集群并设置密码 Elasticsearch从6.8开始, 允许免费用户使用X-Pack的安全功能, 以前安装es都是裸奔.接下来记录配置安全认证的方法. ...
- 在windows上安装elasticsearch7.6
在windows上安装elasticsearch7.6 安装Java1.8 下载Java1.8 提取码:yi0c 链接:https://pan.baidu.com/s/1mNd2Yg-k6ob91bO ...
- 搜狗输入法linux安装 以及 12个依赖包下载链接分享
搜狗输入法linux安装版,先安装各种依赖包,大概12个依赖,可能中途还需要其他依赖,可以效仿解决依赖问题.如图这12个文件要是手动点击下载,那也太笨点了,我们要用shell命令批量下载.命令如下:w ...
- linux安装php
接上篇:linux安装apache 一.安装php 先安装libxml2库 [root@ctxsdhy package]# yum -y install libxml2-devel 最新地址在:htt ...
- linux安装oracle11g
准备oracle安装文件 Oracle11gR2包含两个文件linux_11gR2_database_1of2.zip和linux_11gR2_database_2of2.zip,将这两个文件通过SS ...
- TODO:Linux安装PHP MongoDB驱动
TODO:Linux安装PHP MongoDB驱动 PHP利于学习,使用广泛,主要适用于Web开发领域. MongoDB的主要目标是在键/值存储方式(提供了高性能和高度伸缩性)以及传统的RDBMS系统 ...
- Symantec Backup Exec 2010 Agent For Linux安装
以前写过一篇文章介绍过Symantec Backup Exec 2012 Agent For Linux安装安装,今天介绍一下Symantec Backup Exec 2010 Agent For L ...
随机推荐
- react项目中引入了redux后js控制路由跳转方案
如果你的项目中并没有用到redux,那本文你可以忽略 问题引入 纯粹的单页面react应用中,通过this.props.history.push('/list')就可以进行路由跳转,但是加上了redu ...
- 二评北科团委:“斩首计划”进行时,其用心也毒
近日,在同学们和热心群众的共同努力下,各高校相继悬崖勒马,北大马会.北语新新青年.人大新光等进步社团均顺利注册.而北科团委倒行逆施,可谓一枝独秀,对于齐民学社的同学们的诉求,不仅不予以回应,反而采取表 ...
- javaweb_forQuery
http://how2j.cn/k/tmall_ssm/tmall_ssm-1516/1516.html 总体思路 使用springMVC+spring+mybatis的方式打通表现层/业务层/持久层 ...
- RNA sequence单分子直测技术
生命组学 按照功能分类遗传物质,可能的分类有系统流.操作流.平衡流等等.下面是使用该理论解释DNA与RNA的关系: DNA和RNA有很大不同,DNA存储遗传信息,作为生命活动的最内核物质,如同操作系统 ...
- Warning: $HADOOP_HOME is deprecated. hadoop解决方法补充版
下面的解决方案我亲自试了没有问题:可行,但是对于初学者来说肯定会有一个疑问:这个.bash_profile文件到底在哪呢:其实很简单: 当前用户的.bash_profile在/home/用户/下,系统 ...
- 基于Jquery的textarea滚动条插件(原创)
之前项目中自己写的滚动条插件.先前太忙没有好好整理.现在项目间歇期拿出来整理后贴出来 Demo Here css 我是把mCustomScrollbar 的UI 扣下来的. 这里我要介绍下这个插件不错 ...
- [转]cookie 和 session
原文:https://github.com/alsotang/node-lessons/tree/master/lesson16 读别人源码教程的时候,看到了这个,觉得写的很透彻,转. 众所周知,HT ...
- Linux搭建nginx+php/php-fpm+mysql环境
百度内部php框架odp有单独的nginx+php/php-fpm环境,但为了更好的实践,自己搭建一套单独的. 1.首先安装nginx 两种方式: 1)yum源安装(使用root权限)yum inst ...
- python 常用模块介绍
1.定义 模块:用来从逻辑上组织python代码(变量.函数.类,逻辑),本质就是.py结尾的python文件(文件名:test.py,对应的模块名:test). 包:用来从逻辑上组织模块的,本质就是 ...
- 2020 将至,Tester 你过得还好么?
"昏天黑地地执行用例.跟踪 bug.与开发和产品争吵.工作被压在产品发布的最后阶段,因而要背负整个团队的压力,在 retro meeting 时承受着疯狂 diss......" ...