(六)SpringBoot2.0基础篇- Redis整合(JedisCluster集群连接)
一、环境
Redis:4.0.9
SpringBoot:2.0.1
Redis安装:Linux(Redhat)安装Redis
二、SpringBoot整合Redis
1、项目基本搭建:
我们基于(五)SpringBoot2.0基础篇- Mybatis与插件生成代码 该项目来做Redis整合;
2、添加maven相关依赖和Redis的连接信息:
Pom.xml
    <!-- Redis的依赖库 -->

    <dependency>

      <groupId>org.springframework.boot</groupId>

      <artifactId>spring-boot-starter-redis</artifactId>

      <version>1.4.7.RELEASE</version>

    </dependency>

    <!-- fastJson 依赖库 -->

    <dependency>

      <groupId>com.alibaba</groupId>

      <artifactId>fastjson</artifactId>

      <version>1.2.28</version>

    </dependency>

    <!-- aop依赖库-->

    <dependency>

      <groupId>org.springframework.boot</groupId>

      <artifactId>spring-boot-starter-aop</artifactId>

    </dependency>
application.properties:
spring.redis.cluster.nodes=192.168.1.124:7001
3、创建RedisProperties属性类和RedisConfig配置类,将JedisCluster放入Spring容器中:
RedisConfigurationProperties:
package com.cn.common.redis;

import java.util.ArrayList;

import java.util.List;

import org.springframework.boot.context.properties.ConfigurationProperties;

import org.springframework.context.annotation.Configuration;

/**

 * @program: spring-boot-example

 * @description:

 * @author:

 * @create: 2018-05-16 15:15

 **/

@Configuration

@ConfigurationProperties(prefix = "spring.redis.cluster")

public class RedisConfigurationProperties {

    private List<String> nodes = new ArrayList<>();

    public List<String> getNodes() {

        return nodes;

    }

    public void setNodes(List<String> nodes) {

        this.nodes = nodes;

    }

}
RedisConfig:
package com.cn.common.redis;

import java.util.HashSet;

import java.util.Set;

import org.springframework.beans.factory.annotation.Autowired;

import org.springframework.context.annotation.Bean;

import org.springframework.context.annotation.Configuration;

import redis.clients.jedis.HostAndPort;

import redis.clients.jedis.JedisCluster;

/**

 * @program: spring-boot-example

 * @description: Redis的配置文件

 * @author:

 * @create: 2018-05-16 15:01

 **/

@Configuration

public class RedisConfig {

    @Autowired

    private RedisConfigurationProperties redisConfigurationProperties;

    @Bean

    public JedisCluster jedisCluster() {

        Set<HostAndPort> nodeSet = new HashSet<>();

        for(String node :redisConfigurationProperties.getNodes()) {

            String[] split = node.split(":");

            nodeSet.add(new HostAndPort(split[0],Integer.valueOf(split[1])));

        }

        return new JedisCluster(nodeSet);

    }

}
4、创建封装Redis的增删改查(JedisService,JedisServiceImpl):
package com.cn.common.service;

import java.util.List;

import java.util.Map;

import redis.clients.jedis.GeoRadiusResponse;

/**

 * @program: spring-boot-example

 * @description:

 * @author:

 * @create: 2018-05-16 15:27

 **/

public interface JedisService {

    /**

     * @Description: 是否存在

     * @Param:

     * @return:

     * @Author:

     * @Date: 2018/5/16

     */

    boolean exists(String key);

    /**

     * @Description:缓存set值

     * @Param:  seconds:缓存时间,不设置则为0

     * @return:

     * @Author:

     * @Date: 2018/5/16

     */

    String set(String key,String value,int seconds);

    /**

     * @Description:  重新缓存getSet值

     * @Param:

     * @return:

     * @Author:

     * @Date: 2018/5/16

     */

    String getSet(String key,String value, int seconds);

    /**

     * @Description: 获取set值

     * @Param:

     * @return:

     * @Author:

     * @Date: 2018/5/16

     */

    String get(String key);

    /**

     * @Description: 添加地理位置

     * @Param:

     * @return:

     * @Author:

     * @Date: 2018/5/16

     */

    Long geoadd(String key,double longitude,double latitude,byte[] obj);

    /**

     * @Description: 地理位置查询

     * @Param:

     * @return:

     * @Author:

     * @Date: 2018/5/16

     */

    List<GeoRadiusResponse> georadius(String key,double longitude,double latitude);

    /**

     * @Description: 删除key

     * @Param:

     * @return:

     * @Author:

     * @Date: 2018/5/16

     */

    void delKey(String key);

    /**

     * @Description: 删除native key

     * @Param:

     * @return:

     * @Author:

     * @Date: 2018/5/16

     */

    void delNativeKey(String key);

    /**

     * @Description: 获取map格式的数据

     * @Param:

     * @return:

     * @Author:

     * @Date: 2018/5/16

     */

    Map<String ,Object> getMapData(String key);

    /**

     * @Description: 加锁,避免重复提交

     * @Param:

     * @return:

     * @Author:

     * @Date: 2018/5/16

     */

    boolean lock(String key,int seconds);

    /**

     * @Description: 解锁

     * @Param:

     * @return:

     * @Author:

     * @Date: 2018/5/16

     */

    void unlock(String key);

    /**

     * @Description: 统计锁定次数

     * @Param:

     * @return:

     * @Author:

     * @Date: 2018/5/16

     */

    String getLocakValue(String key);

}
JedisService.java
package com.cn.common.service;

import com.alibaba.fastjson.JSON;

import java.util.List;

import java.util.Map;

import org.springframework.beans.factory.annotation.Autowired;

import org.springframework.stereotype.Service;

import redis.clients.jedis.GeoRadiusResponse;

import redis.clients.jedis.JedisCluster;

/**

 * @program: spring-boot-example

 * @description:

 * @author:

 * @create: 2018-05-16 15:45

 **/

@Service

public class JedisServiceImpl implements JedisService {

    @Autowired

    private JedisCluster jedisCluster;

    @Override

    public boolean exists(String key) {

        boolean flag = false;

        flag = jedisCluster.exists(key);

        return flag;

    }

    @Override

    public String set(String key, String value, int seconds) {

        String responseResult = jedisCluster.set(key,value);

        if(seconds!=0)

            jedisCluster.expire(key,seconds);

        return responseResult;

    }

    @Override

    public String getSet(String key, String value, int seconds) {

        String jedisClusterSet = jedisCluster.getSet(key, value);

        jedisCluster.expire(key,seconds);

        return jedisClusterSet;

    }

    @Override

    public String get(String key) {

        String str = jedisCluster.get(key);

        return str;

    }

    @Override

    public Long geoadd(String key, double longitude, double latitude, byte[] obj) {

        return null;

    }

    @Override

    public List<GeoRadiusResponse> georadius(String key, double longitude, double latitude) {

        return null;

    }

    @Override

    public void delKey(String key) {

        jedisCluster.del(key);

    }

    @Override

    public void delNativeKey(String key) {

        jedisCluster.del(key);

    }

    @Override

    public Map<String, Object> getMapData(String key) {

        String str = jedisCluster.get(key);

        Map<String,Object> map = JSON.parseObject(str, Map.class);

        return map;

    }

    /**

     * @Description: 如为第一次,则加上锁,每次调用值会自动加1

     * @Param:

     * @return:

     * @Author:

     * @Date: 2018/5/16

     */

    @Override

    public boolean lock(String key, int seconds) {

        if(jedisCluster.incr(key)==1) {

            jedisCluster.expire(key,seconds);

            return false;

        }

        return true;

    }

    @Override

    public void unlock(String key) {

        jedisCluster.del(key);

    }

    @Override

    public String getLocakValue(String key) {

        return jedisCluster.get(key);

    }

}
JedisServiceImpl.java
5、创建注解类和切面类(我使用注解来实现缓存的set和get):
RedisCache:
package com.cn.common.redis;

import java.lang.annotation.Documented;

import java.lang.annotation.ElementType;

import java.lang.annotation.Retention;

import java.lang.annotation.RetentionPolicy;

import java.lang.annotation.Target;

/**

 * @Description: 加上该注解,代理service命中缓存则从缓存中读取数据,否则从service业务逻辑获得,并存入缓存

 * @Param:

 * @return:

 * @Author:

 * @Date: 2018/5/16

 */

@Retention(RetentionPolicy.RUNTIME)

@Target({ElementType.METHOD,ElementType.TYPE})

@Documented

public @interface RedisCache {

    /**

     * @Description: 数据返回类型

     * @Param:

     * @return:

     * @Author:

     * @Date: 2018/5/16

     */

    Class type();

    /**

     * @Description: 数据缓存时间单位s秒

     * @Param:  默认10分钟

     * @return:

     * @Author:

     * @Date: 2018/5/16

     */

    int cacheTime() default 600;

}
RedisCacheAspect:
package com.cn.common.redis;

import com.alibaba.fastjson.JSON;

import com.cn.common.service.JedisService;

import java.lang.reflect.Method;

import org.aspectj.lang.ProceedingJoinPoint;

import org.aspectj.lang.Signature;

import org.aspectj.lang.annotation.Around;

import org.aspectj.lang.annotation.Aspect;

import org.aspectj.lang.annotation.Pointcut;

import org.aspectj.lang.reflect.MethodSignature;

import org.slf4j.Logger;

import org.slf4j.LoggerFactory;

import org.springframework.beans.factory.annotation.Autowired;

import org.springframework.stereotype.Component;

/**

 * @program: spring-boot-example

 * @description:

 * @author:

 * @create: 2018-05-16 16:29

 **/

@Aspect

@Component

public class RedisCacheAspect {

    private Logger logger = LoggerFactory.getLogger(this.getClass());

    @Autowired

    private JedisService jedisService;

    @Pointcut("execution(public * com.cn.service..*.*(..))")

    public void webAspect(){}

    @Around("webAspect()")

    public Object redisCache(ProceedingJoinPoint pjp) throws Throwable {

        //得到类名、方法名和参数

        String redisResult = "";

        String className = pjp.getTarget().getClass().getName();

        String methodName = pjp.getSignature().getName();

        Object[] args = pjp.getArgs();

        //根据类名,方法名和参数生成key

        String key = genKey(className,methodName,args);

        logger.info("生成的key[{}]",key);

        //得到被代理的方法

        Signature signature = pjp.getSignature();

        if(!(signature instanceof MethodSignature)){

            throw  new IllegalArgumentException();

        }

        MethodSignature methodSignature = (MethodSignature) signature;

        Method method = pjp.getTarget().getClass().getMethod(methodSignature.getName(),methodSignature.getParameterTypes());

        //得到被代理的方法上的注解

        Class modelType = method.getAnnotation(RedisCache.class).type();

        int cacheTime = method.getAnnotation(RedisCache.class).cacheTime();

        Object result = null;

        if(!jedisService.exists(key)) {

            logger.info("缓存未命中");

            //缓存不存在,则调用原方法,并将结果放入缓存中

            result = pjp.proceed(args);

            redisResult = JSON.toJSONString(result);

            jedisService.set(key,redisResult,cacheTime);

        } else{

            //缓存命中

            logger.info("缓存命中");

            redisResult = jedisService.get(key);

            //得到被代理方法的返回值类型

            Class returnType = method.getReturnType();

            result = JSON.parseObject(redisResult,returnType);

        }

        return result;

    }

    /**

     * @Description: 生成key

     * @Param:

     * @return:

     * @Author:

     * @Date: 2018/5/16

     */

    private String genKey(String className, String methodName, Object[] args) {

        StringBuilder sb = new StringBuilder("SpringBoot:");

        sb.append(className);

        sb.append("_");

        sb.append(methodName);

        sb.append("_");

        for (Object object: args) {

            logger.info("obj:"+object);

            if(object!=null) {

                sb.append(object+"");

                sb.append("_");

            }

        }

        return sb.toString();

    }

}
6、在StudentServiceImpl中加入缓存注释:
StudentServiceImpl:
package com.cn.service;

import com.cn.common.redis.RedisCache;

import com.cn.entity.Student;

import com.cn.mapper.StudentMapper;

import org.springframework.beans.factory.annotation.Autowired;

import org.springframework.stereotype.Service;

/**

 * @program: spring-boot-example

 * @description:

 * @author:

 * @create: 2018-05-11 10:55

 **/

@Service

public class StudentServiceImpl implements StudentService{

    @Autowired

    private StudentMapper studentMapper;

    @Override

    @RedisCache(type = Student.class)

    public Student getStudentByPrimaryKey(int id) {

        return studentMapper.selectByPrimaryKey(id);

    }

}
7、启动测试:
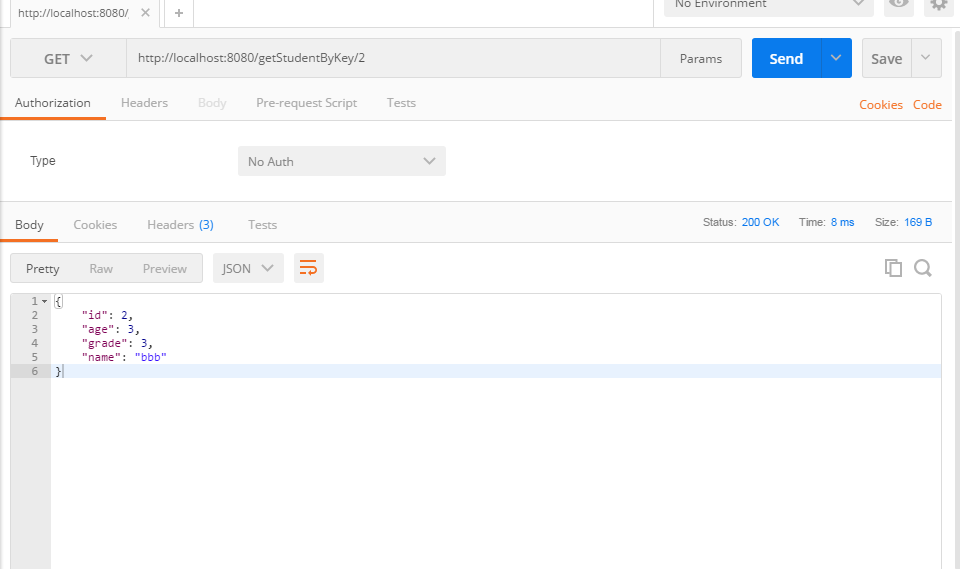
第一次调用:

查看控制台:


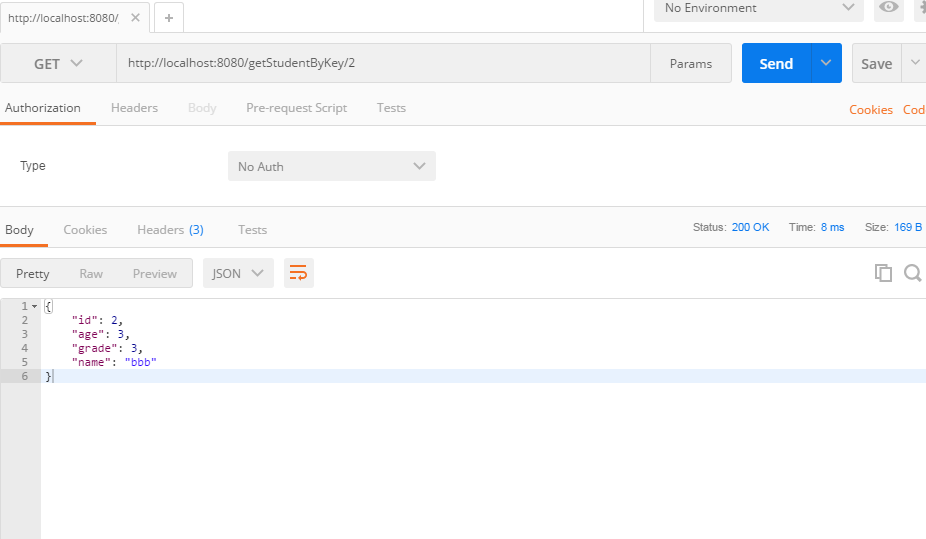
第二次调用:

查看控制台:

发现第二次未打印出MyBatis的查询日志,并且显示缓存命中,通过RedisDeskManager工具查看Redis缓存:

实例代码:https://gitee.com/lfalex/spring-boot-example/tree/dev/spring-boot-mybatis-redis
(六)SpringBoot2.0基础篇- Redis整合(JedisCluster集群连接)的更多相关文章
- redis整合Spring集群搭建及业务中的使用
1.redis安装 Redis是c语言开发的. 安装redis需要c语言的编译环境.如果没有gcc需要在线安装.yum install gcc-c++ 安装步骤: 第一步:redis的源码包上传到li ...
- (二)SpringBoot2.0基础篇- 静态资源的访问及Thymeleaf模板引擎的使用
一.描述 在应用系统开发的过程中,不可避免的需要使用静态资源(浏览器看的懂,他可以有变量,例:HTML页面,css样式文件,文本,属性文件,图片等): 并且SpringBoot内置了Thymeleaf ...
- 0基础搭建Hadoop大数据处理-集群安装
经过一系列的前期环境准备,现在可以开始Hadoop的安装了,在这里去apache官网下载2.7.3的版本 http://www.apache.org/dyn/closer.cgi/hadoop/com ...
- (一)SpringBoot2.0基础篇- 介绍及HelloWorld初体验
1.SpringBoot介绍: 根据官方SpringBoot文档描述,BUILD ANYTHING WITH SPRING BOOT (用SPRING BOOT构建任何东西,很牛X呀!),下面是官方文 ...
- (四)SpringBoot2.0基础篇- 多数据源,JdbcTemplate和JpaRepository
在日常开发中,经常会遇到多个数据源的问题,而SpringBoot也有相关API:Configure Two DataSources:https://docs.spring.io/spring-boot ...
- (五)SpringBoot2.0基础篇- Mybatis与插件生成代码
SpringBoot与Mybatis合并 一.创建SpringBoot项目,引入相关依赖包: <?xml version="1.0" encoding="UTF-8 ...
- (七)SpringBoot2.0基础篇- application.properties属性文件的解析及获取
默认访问的属性文件为application.properties文件,可在启动项目参数中指定spring.config.location的参数: java -jar myproject.jar --s ...
- (三)SpringBoot2.0基础篇- 持久层,jdbcTemplate和JpaRespository
一.介绍 SpringBoot框架为使用SQL数据库提供了广泛的支持,从使用JdbcTemplate的直接JDBC访问到完整的“对象关系映射”技术(如Hibernate).Spring-data-jp ...
- 超详细的 Redis Cluster 官方集群搭建指南
今天从 0 开始搭建 Redis Cluster 官方集群,解决搭建过程中遇到的问题,超详细. 安装ruby环境 因为官方提供的创建集群的工具是用ruby写的,需要ruby2.2.2+版本支持,rub ...
随机推荐
- log4xx/log4j异步日志配置示例
<?xml version="1.0" encoding="UTF-8" ?> <!DOCTYPE log4j:configuration S ...
- Darwin Streaming Server 安装流程
Darwin StreamingServer 安装流程 Darwin StreamingServer 支持开放源代码和基于标准的实时传输协议/实时流协议(RTP/ RTSP).MPEG-4 和MP3 ...
- 《高效能程序员的修炼》读后感 By Yong Zhang
想不到我工作中经常GOOGLE搜寻技术问题的stack overflow网站的创办人竟然是<高效能程序员的修炼>一书的作者!看了一遍全书,果然名不虚传. 本书更多的从人文角度而非技术角度去 ...
- Linux 删除目录与文件
Linux 删除目录与文件 在当前目录下查找所有.svn的目录 $ find . -type d -name ".svn" 删除当前目录下所有.svn的目录 $ find . -t ...
- 总账追朔各模块SQL
SELECT gjh.set_of_books_id, gjl.je_line_num, mta.organization_id, ood.organization_code, ood.organiz ...
- 【Android 应用开发】Android应用的自动更新模块
. 作者 :万境绝尘 转载请注明出处 : http://blog.csdn.net/shulianghan/article/details/18964835 . 软件的自动更新一般都与Splash界 ...
- "《算法导论》之‘线性表’":基于指针实现的单链表
对于单链表的介绍部分参考自博文数组.单链表和双链表介绍 以及 双向链表的C/C++/Java实现. 1. 单链表介绍 单向链表(单链表)是链表的一种,它由节点组成,每个节点都包含下一个节点的指针. ...
- Media Player Classic - HC 源代码分析 1:整体结构
===================================================== Media Player Classic - HC 源代码分析系列文章列表: Media P ...
- How tomcat works 读书笔记十五 Digester库 上
Digester库 在前面的几个章节里,我们对tomcat里各个组件的配置完全是使用写硬编码的形式完成的. 如 Context context = new StandardContext(); Loa ...
- HTMLConverter使用实例(转)
---- 本来,Applet的概念相当简单——只要在Web页面中加入一个< APPLET >标记就可以了.浏览器一遇到这个标记,就会下载对应的 Applet类文件,并启动自己的解释器运行这 ...
