Linux下部署SSH登录时的二次身份验证环境记录(利用Google Authenticator)
一般来说,使用ssh远程登录服务器,只需要输入账号和密码,显然这种方式不是很安全。为了安全着想,可以使用GoogleAuthenticator(谷歌身份验证器),以便在账号和密码之间再增加一个验证码,只有输入正确的验证码之后,再输入密码才能登录。这样就增强了ssh登录的安全性。账号、验证码、密码三者缺一个都不能登录,即使账号和密码正确,验证码错误,同样登录失败。其中,验证码是动态验证码,并且是通过手机客户端自动获取(默认每隔30秒失效一次)。好了,废话不多说了,下面记录下GoogleAuthenticator部署过程(Centos6系统下):
一、关闭SELINUX
[root@test ~]# vim /etc/selinux/config      #永久关闭。需要reboot重启后生效

SELINUX=disabled

[root@test ~]# setenforce 0   #临时性关闭。不需要reboot重启
二、安装编辑工具包
[root@test ~]# yum install wget gcc make

[root@test ~]# yum install pam-devel libpng-devel

下载repoforge第三方yum源及libpam-google-authenticator-1.0-source.tar.bz2、qrencode-3.4.4.tar.gz(后两个软件需要在翻墙条件下才能下载。这里我提前下载了)

下载地址:https://pan.baidu.com/s/1i4WDbyX

提取密码:anxd

下载到/data/software目录下

[root@test ~]# cd /data/software/

[root@test software]# ls

libpam-google-authenticator-1.0-source.tar.bz2  qrencode-3.4.4.tar.gz  rpmforge-release-0.5.3-1.el6.rf.x86_64.rpm

[root@test software]# rpm -ivh rpmforge-release-0.5.3-1.el6.rf.x86_64.rpm

[root@test software]# yum install mercurial

安装google authenticator PAM插件

[root@test ~]# cd /data/software/

[root@test software]# tar -jxvf libpam-google-authenticator-1.0-source.tar.bz2

[root@test software]# cd libpam-google-authenticator-1.0

[root@test libpam-google-authenticator-1.0]# make && make install

安装QrenCode,此工具可以在Linux命令行下生成二维码

[root@test ~]# cd /data/software/

[root@test software]# tar -zvxf qrencode-3.4.4.tar.gz

[root@test software]# cd qrencode-3.4.4

[root@test qrencode-3.4.4]# ./configure --prefix=/usr

[root@test qrencode-3.4.4]# make && make install
三、配置ssh服务调用google authenticator PAM插件
[root@test ~]# vim /etc/pam.d/sshd       #在第一行(即auth       required pam_sepermit.so的下一行)增加以下代码

auth required pam_google_authenticator.so

[root@test ~]# vim /etc/ssh/sshd_config

......

ChallengeResponseAuthentication yes          #修改no为yes

[root@test ~]# service sshd restart
四、使用google authenticator PAM插件为ssh登录账号生成动态验证码
注意:哪个账号需要动态验证码,请切换到该账号下操作。(可以在不同用户下执行这个命令以生成各自的二次验证码)
[root@test ~]# google-authenticator
Do you want authentication tokens to be time-based (y/n) y
https://www.google.com/chart?chs=200x200&chld=M|0&cht=qr&chl=otpauth://totp/root@BJLX_NET_TEST-01%3Fsecret%3DCGB5NWP6SABN3TM7 #这个链接只能在翻墙条件下才能打开

Your new secret key is: CGB5NWP6SABN3TM7 #如果在手机的谷歌身份验证器上不想通过"扫描条形码"的方式添加,就输入这个key,通过"手动输入验证码的方式"。账号就是服务器主机名。
Your verification code is 730249
Your emergency scratch codes are: #下面会生成5个紧急验证码(当无法获取动态验证码或验证码不能使用使用可以使用这5个)
66151894 #需要注意的是:这5个验证码用一个就会少一个!请保存好!
91475582
37383236
70667696
70522112
Do you want me to update your "/root/.google_authenticator" file (y/n) y #提示是否要更新验证文件,选择y
Do you want to disallow multiple uses of the same authentication
token? This restricts you to one login about every 30s, but it increases
your chances to notice or even prevent man-in-the-middle attacks (y/n) y #禁止使用相同口令
By default, tokens are good for 30 seconds and in order to compensate for
possible time-skew between the client and the server, we allow an extra
token before and after the current time. If you experience problems with poor
time synchronization, you can increase the window from its default
size of 1:30min to about 4min. Do you want to do so (y/n) n #默认动态验证码在30秒内有效,由于客户端和服务器可能会存在时间差,可将时间增加到最长4分钟,是否要这么做:这里选择是n,继续默认30秒
If the computer that you are logging into isn't hardened against brute-force
login attempts, you can enable rate-limiting for the authentication module.
By default, this limits attackers to no more than 3 login attempts every 30s.
Do you want to enable rate-limiting (y/n) y #是否限制尝试次数,每30秒只能尝试最多3次,这里选择y进行限制
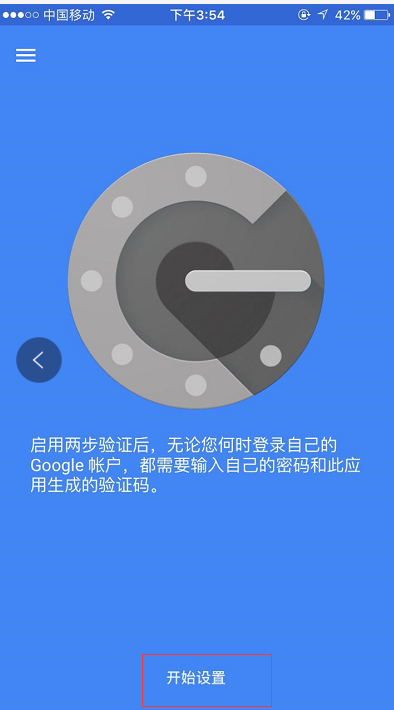
五、手机安装Google身份验证器,通过此工具扫描上一步生成的二维码图形,获取动态验证码。
在App Store里直接可以下载Authenticator

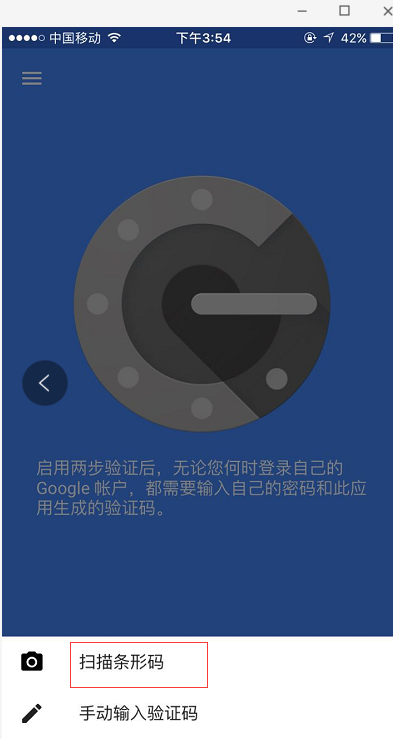
然后扫描上面在服务器上生成的二维码,每个用户都会有一个单独的二维码

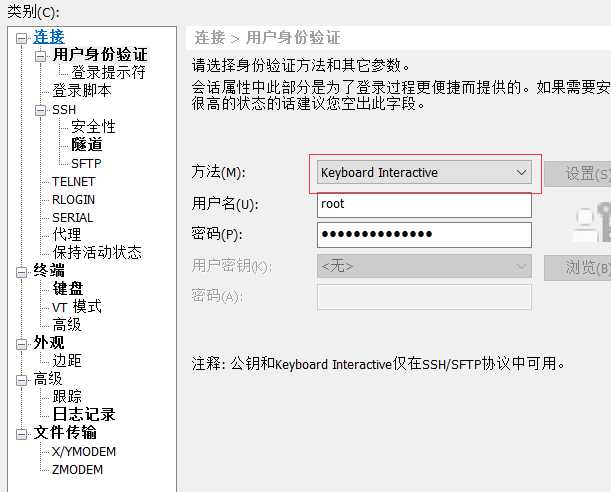
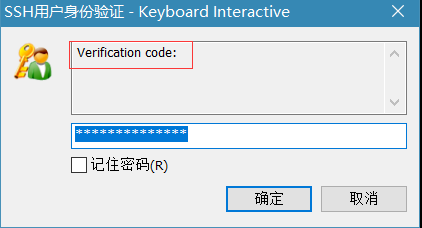
接着在ssh的客户端里设置,如下,设置"Keyboard Interactive"方式登录
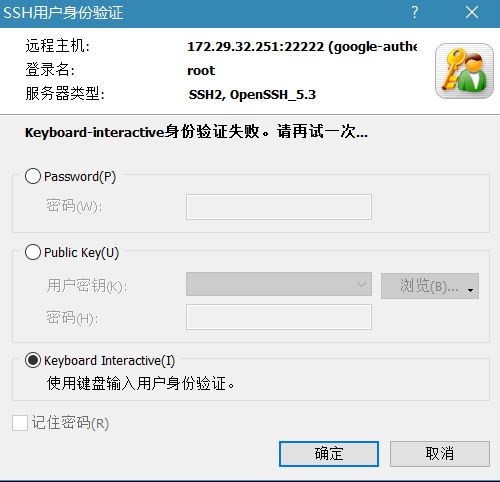
然后再次连接的时候,就会提示先输入二次身份验证码,再输入用户密码。

在linux客户机上远程登录,效果一样:
[wangshibo@BJLX_NET_TEST-01 ~]$ ssh root@172.29.32.251

The authenticity of host '[172.29.32.251]:22 ([172.29.32.251]:22)' can't be established.

RSA key fingerprint is 5c:e7:1a:05:8b:2e:66:99:20:90:1f:47:56:bf:b9:41.

Are you sure you want to continue connecting (yes/no)? yes

Warning: Permanently added '[172.29.32.251]:22' (RSA) to the list of known hosts.

Verification:

Password:

[root@test ~]#
Linux下部署SSH登录时的二次身份验证环境记录(利用Google Authenticator)的更多相关文章
- Linux 下使用 ssh 登录局域网其他电脑的方法
Linux 下使用 ssh 登录局域网其他电脑的方法 首先查看电脑是否安装 ssh 客户端,如果没有执行下面命令安装客户端. sudo apt-get install openssh-client s ...
- linux下更改ssh登录前的banner信息
默认情况下,telnet ip 22端口会显示 openssh的版本信息 whereis sshd 如 cp /usr/sbin/sshd /usr/sbin/sshd2016.bak sed -i ...
- LINUX下的ssh登录之后的文件远程copy:scp命令(接前文ssh登录)
先记录参考: 1:http://www.cnblogs.com/peida/archive/2013/03/15/2960802.html 2:http://www.vpser.net/manage/ ...
- linux下MySQL安装登录及操作
linux下MySQL安装登录及操作 二.安装Mysql 1.下载MySQL的安装文件 安装MySQL需要下面两个文件: MySQL-server-4.0.16-0.i386.rpm MySQL-cl ...
- Linux 下部署Django项目
Linux 下部署Django项目 说明:本文所使用的环境为CentOS 6+Python2.7+Django1.11 安装Django.Nginx和uWSGI 1.确定已经安装了2.7版本的Py ...
- linux下开启SSH,并且允许root用户远程登录,允许无密码登录
参考:http://blog.csdn.net/jia0511/article/details/8237698 1. 允许root用户远程登录 修改ssh服务配置文件 sudo vi /etc/ssh ...
- ssh-keygen+ssh-copy-id 在linux下实现ssh无密码登录访问(转)
转自:http://blog.csdn.net/pennyliang/article/details/8556662 ssh-keygen+ssh-copy-id 在linux下实现ssh无密码登录访 ...
- 【转】linux下设置ssh无密码登录
ssh配置 主机A:10.0.5.199 主机B:10.0.5.198 需要配置主机A无密码登录主机A,主机B 先确保所有主机的防火墙处于关闭状态. 在主机A上执行如下: 1. $cd ~/.ssh ...
- linux下设置SSH无密码登录
ssh配置 主机A:10.0.5.199 主机B:10.0.5.198 需要配置主机A无密码登录主机A,主机B 先确保所有主机的防火墙处于关闭状态. 在主机A上执行如下: 1. $cd ~/.ssh ...
随机推荐
- cobaltstrike3.8服务器搭建及使用
参考链接: https://www.ezreal.net/archives/166.htmlhttp://blog.cobaltstrike.com/category/cobalt-strike-2/ ...
- 建立标准编码规则(三)-CodeFixProvider 给代码分析器增加修复建议
给代码分析器增加修复建议 既然代码分析器,向代码编写者提出了错误或警告,那么有没有可能向代码编写者提交有效的改进建议? 相对于 DiagnosticAnalyzer,代码修复继承与 CodeFixPr ...
- MySql/Oracle和SQL Server的分页查
假设当前是第PageNo页,每页有PageSize条记录,现在分别用Mysql.Oracle和SQL Server分页查询student表. 1.Mysql的分页查询: 1 SELECT 2 * 3 ...
- vue-cli 打包后显示favicon.ico小图标
第一步:favicon.ico小图标放在static里面 第二步:index.html 文件中引入时需要写 ./ 相对路径 第三部:npm run build 打包 打包完成就可以看到 favicon ...
- POJ - 2151 (概率dp)
题意:有T个队伍,有M道题,要求每个队至少有一道题,并且有队伍至少过N道题的概率. 这个题解主要讲一下,后面的,至少有一道题解决和至少一道题至N-1道题解决,到底怎么算的,其实,很简单,就是母函数. ...
- nodejs-stream部分
参考: https://blog.csdn.net/eeewwwddd/article/details/81042225 http://nodejs.cn/api/stream.html#stream ...
- win7/10下Qt Creator调试提示:The selected debugger may be inappropriate for the inferior的解决办法
在win7/10下Qt Creator调试提示:The selected debugger may be inappropriate for the inferior的错误提示内容如下图所示: 一般弹 ...
- 深入浅出的webpack构建工具--webpack4+vue搭建环境 (十三)
深入浅出的webpack构建工具--webpack4+vue搭建环境 (十三) 从上面一系列的webpack配置的学习,我们现在来使用webpack来搭建vue的开发环境.首先我们来设想下我们的项目的 ...
- SQL 清理缓存 更新无效
--查询结果1 select * from Student where ID='CCB87B71-FB78-4BFE-8692-24DD2D8F8460' --查询结果2 where ID='CCB8 ...
- Linux下NTP服务器配置
简介 原理 配置ntp服务器 进行同步 一.简介 在计算时间的时候,最准确的计算应该是使用『原子震荡周期』所计算的物理时钟了( Atomic Clock, 也被称为原子钟 ),这也被定义为标准时间(I ...