写一个Android输入法01——最简步骤
本文演示用Android Studio写一个最简单的输入法。界面和交互都很简陋,只为剔肉留骨,彰显写一个Android输入法的要点。
- 1、打开Android Studio创建项目,该项目和普通APP的不同之处在于它不需要添加任何Activity:

我给该输入法命名为AndroidXXIME。
- 2、修改manifest文件
如前文《Android下创建一个输入法》中所说:输入法是一个包含IME service的安卓应用程序,首先应该在程序的manifest中声明service。我的manifest.xml文件如下:
<manifest xmlns:android="http://schemas.android.com/apk/res/android"

    package="com.binglen.androidxxime">

    <application

        android:allowBackup="true"

        android:icon="@mipmap/ic_launcher"

        android:label="@string/app_name"

        android:supportsRtl="true"

        android:theme="@style/AppTheme">

        <service android:name=".AndroidXXIME"

            android:label="@string/xxime"

            android:permission="android.permission.BIND_INPUT_METHOD"

            >

            <intent-filter>

                <action android:name="android.view.InputMethod" />

            </intent-filter>

            <meta-data android:name="android.view.im" android:resource="@xml/method"/>

        </service>

    </application>

</manifest>
在Android Studio生成application块的尾部添加IME service的声明。第一行粗体字声明需要BIND_INPUT_METHOD权限,第二行粗体字创建了一个能够匹配android.view.InputMethod的intent filter,第三行粗体字定义了输入法的metadata。
需要注意:service android:name必须与后面java文件中的类名保持一致。
接下来创建该service中声明的资源。
- 3、method.xml
meta-data里用到了资源xml/method文件,该文件中包含了输入法的subtype属性,输入法通过该属性定义它所支持的输入模式和语言,一个输入法可以包含多个subtype属性。在工程中res下创建xml文件夹,把method.xml添加到该文件夹下。method.xml内容如下:
<?xml version="1.0" encoding="utf-8"?>

<input-method xmlns:android="http://schemas.android.com/apk/res/android">

    <subtype

        android:label="@string/subtype_en_US"

        android:imeSubtypeLocale="en_US"

        android:imeSubtypeMode="keyboard" />

</input-method>
关于subtype的属性,可以参见InputMethodSubtype:
label是该subtype的名字
imeSubtypeLocale是该subtype支持的语言类型
imeSubtypeMode是它所支持的模式,可以是keyboard或者voice,当输入法被调起是,系统会把用户选择的mode值传给输入法。
- 4、stings.xml
在这里补上前文引用到的字符串定义:
<string name="xxime">XXIME</string>

<string name="subtype_en_US">English (US)</string>
xxime在manifest中定义service的android:label时被引用到,该字串用来显示系统“语言和输入法”中本输入法的名字:
- 5、定义键盘布局
在res/layout/中添加文件keyboard.xml,定义键盘布局,内容如下:
<?xml version="1.0" encoding="UTF-8"?>

<android.inputmethodservice.KeyboardView

    xmlns:android="http://schemas.android.com/apk/res/android"

    android:id="@+id/keyboard"

    android:layout_width="match_parent"

    android:layout_height="wrap_content"

    android:layout_alignParentBottom="true"

    android:keyPreviewLayout ="@layout/preview"

/>
点击android.inputmethodservice.KeyboardView查看关于它的XML属性,其中keyPreviewLayout表示键盘被按下时的布局资源。在res/layout中添加preview.xml如下:
<?xml version="1.0" encoding="utf-8"?>

<TextView xmlns:android="http://schemas.android.com/apk/res/android"

    android:layout_width="match_parent"

    android:layout_height="match_parent"

    android:gravity="center"

    android:background="#ffff00"

    android:textStyle="bold"

    android:textSize="30sp"

    >

</TextView>
里面仅有一个TextView。
前面资源引用的源头都来自manifest文件,却不见哪里引用keyboard.xml。答案在后面,AndroidXXIME.java文件中onCreateInputView()函数中创建键盘视图和键盘布局时会用到,包括下面的qwerty.xml。
- 6、定义按键信息
按键信息定义在Keyboard中,其格式形式如下:
 <Keyboard

         android:keyWidth="%10p"

         android:keyHeight="50px"

         android:horizontalGap="2px"

         android:verticalGap="2px" >

     <Row android:keyWidth="32px" >

         <Key android:keyLabel="A" />

         ...

     </Row>

     ...

 </Keyboard>
这是一个嵌套结构,其下包含了Row表示一行,内部又包含Key表示一个按键,每个按键有两个必填属性:
· keyLabel:按键上显示的文字
· codes:该按键代表的Unicode码
我们的按键信息文件在res/xml/qwerty.xml中,定义如下:
<Keyboard xmlns:android="http://schemas.android.com/apk/res/android"

    android:keyWidth="10%p"

    android:horizontalGap="0px"

    android:verticalGap="0px"

    android:keyHeight="60dp"

    >

    <Row>

        <Key android:codes="113" android:keyLabel="q" android:keyEdgeFlags="left"/>

        <Key android:codes="119" android:keyLabel="w"/>

        <Key android:codes="101" android:keyLabel="e"/>

        <Key android:codes="114" android:keyLabel="r"/>

        <Key android:codes="116" android:keyLabel="t"/>

        <Key android:codes="121" android:keyLabel="y"/>

        <Key android:codes="117" android:keyLabel="u"/>

        <Key android:codes="105" android:keyLabel="i"/>

        <Key android:codes="111" android:keyLabel="o"/>

        <Key android:codes="112" android:keyLabel="p" android:keyEdgeFlags="right"/>

    </Row>

    <Row android:layout_centerHorizontal="true">

        <Key android:codes="97" android:keyLabel="a" android:horizontalGap="5%p" android:keyEdgeFlags="left"/>

        <Key android:codes="115" android:keyLabel="s"/>

        <Key android:codes="100" android:keyLabel="d"/>

        <Key android:codes="102" android:keyLabel="f"/>

        <Key android:codes="103" android:keyLabel="g"/>

        <Key android:codes="104" android:keyLabel="h"/>

        <Key android:codes="106" android:keyLabel="j"/>

        <Key android:codes="107" android:keyLabel="k"/>

        <Key android:codes="108" android:keyLabel="l" android:keyEdgeFlags="right"/>

    </Row>

    <Row>

        <Key android:codes="39" android:keyLabel="'" android:keyEdgeFlags="left"/>

        <Key android:codes="122" android:keyLabel="z"/>

        <Key android:codes="120" android:keyLabel="x"/>

        <Key android:codes="99" android:keyLabel="c"/>

        <Key android:codes="118" android:keyLabel="v"/>

        <Key android:codes="98" android:keyLabel="b"/>

        <Key android:codes="110" android:keyLabel="n"/>

        <Key android:codes="109" android:keyLabel="m"/>

        <Key android:codes="44" android:keyLabel=","/>

        <Key android:codes="46" android:keyLabel="." android:keyEdgeFlags="right"/>

    </Row>

    <Row android:rowEdgeFlags="bottom">

        <Key android:codes="63" android:keyLabel="\?" android:keyWidth="10%p"  android:keyEdgeFlags="left"/>

        <Key android:codes="47" android:keyLabel="/" android:keyWidth="10%p" />

        <Key android:codes="32" android:keyLabel=" " android:keyWidth="40%p" android:isRepeatable="true"/>

        <Key android:codes="-5" android:keyLabel="DEL" android:keyWidth="20%p" android:isRepeatable="true"/>

        <Key android:codes="-4" android:keyLabel="DONE" android:keyWidth="20%p" android:keyEdgeFlags="right"/>

    </Row>

</Keyboard>
其中有一些负值是定义在Keyboard类中的常量。
在字母a键的定义中有:android:horizontalGap="5%p",官方文档解释android:horizontalGap用来定义按键之间的间距,其实是与上一个按键之间的距离,如果是左边打头的的按键,则是与左边缘之间的距离。%p表示在父组件中的尺寸占比。
- 6、创建服务
接下来就需要为输入法创建service和listener了。可以在一个类里完成这两个角色,AndroidXXIME类扩展了InputMethodService,并实现了KeyboardView.OnKeyboardActionListener接口。该类的定义如下:
public class AndroidXXIME extends InputMethodService

        implements KeyboardView.OnKeyboardActionListener {

    private KeyboardView keyboardView; // 对应keyboard.xml中定义的KeyboardView

    private Keyboard keyboard;         // 对应qwerty.xml中定义的Keyboard

    @Override

    public void onPress(int primaryCode) {

    }

    @Override

    public void onRelease(int primaryCode) {

    }

    @Override

    public void onText(CharSequence text) {

    }

    @Override

    public void swipeDown() {

    }

    @Override

    public void swipeLeft() {

    }

    @Override

    public void swipeRight() {

    }

    @Override

    public void swipeUp() {

    }

    @Override

    public View onCreateInputView() {

        // keyboard被创建后,将调用onCreateInputView函数

        keyboardView = (KeyboardView)getLayoutInflater().inflate(R.layout.keyboard, null);  // 此处使用了keyboard.xml

        keyboard = new Keyboard(this, R.xml.qwerty);  // 此处使用了qwerty.xml

        keyboardView.setKeyboard(keyboard);

        keyboardView.setOnKeyboardActionListener(this);

        return keyboardView;

    }

    private void playClick(int keyCode){

        // 点击按键时播放声音,在onKey函数中被调用

        AudioManager am = (AudioManager)getSystemService(AUDIO_SERVICE);

        switch(keyCode){

            case 32:

                am.playSoundEffect(AudioManager.FX_KEYPRESS_SPACEBAR);

                break;

            case Keyboard.KEYCODE_DONE:

            case 10:

                am.playSoundEffect(AudioManager.FX_KEYPRESS_RETURN);

                break;

            case Keyboard.KEYCODE_DELETE:

                am.playSoundEffect(AudioManager.FX_KEYPRESS_DELETE);

                break;

            default: am.playSoundEffect(AudioManager.FX_KEYPRESS_STANDARD);

        }

    }

    @Override

    public void onKey(int primaryCode, int[] keyCodes) {

        InputConnection ic = getCurrentInputConnection();

        playClick(primaryCode);

        switch(primaryCode){

            case Keyboard.KEYCODE_DELETE :

                ic.deleteSurroundingText(1, 0);

                break;

            case Keyboard.KEYCODE_DONE:

                ic.sendKeyEvent(new KeyEvent(KeyEvent.ACTION_DOWN, KeyEvent.KEYCODE_ENTER));

                break;

            default:

                char code = (char)primaryCode;

                ic.commitText(String.valueOf(code), 1);

        }

    }

}
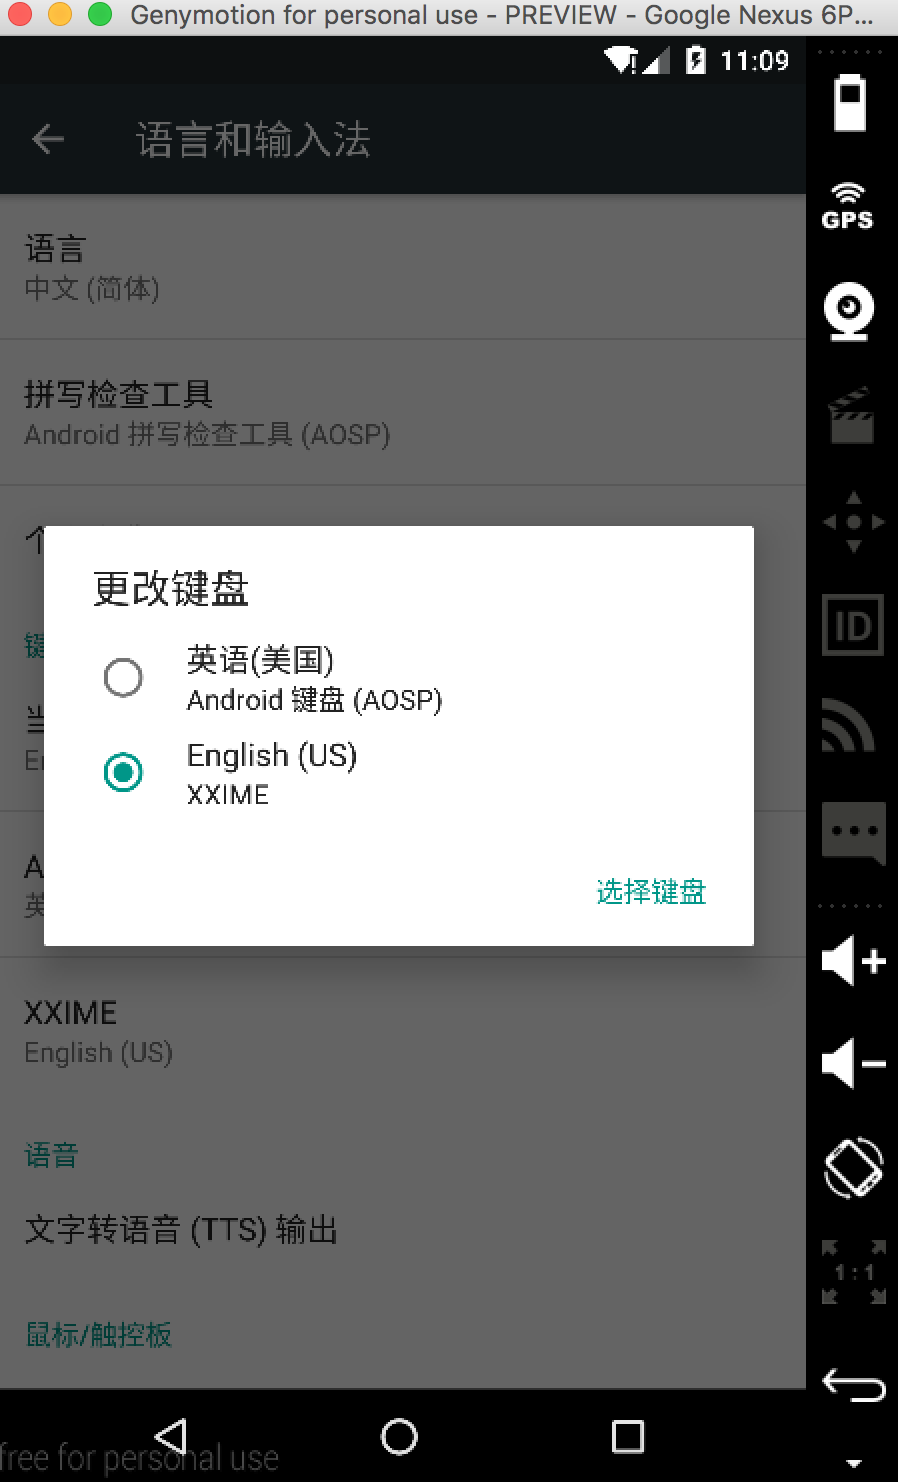
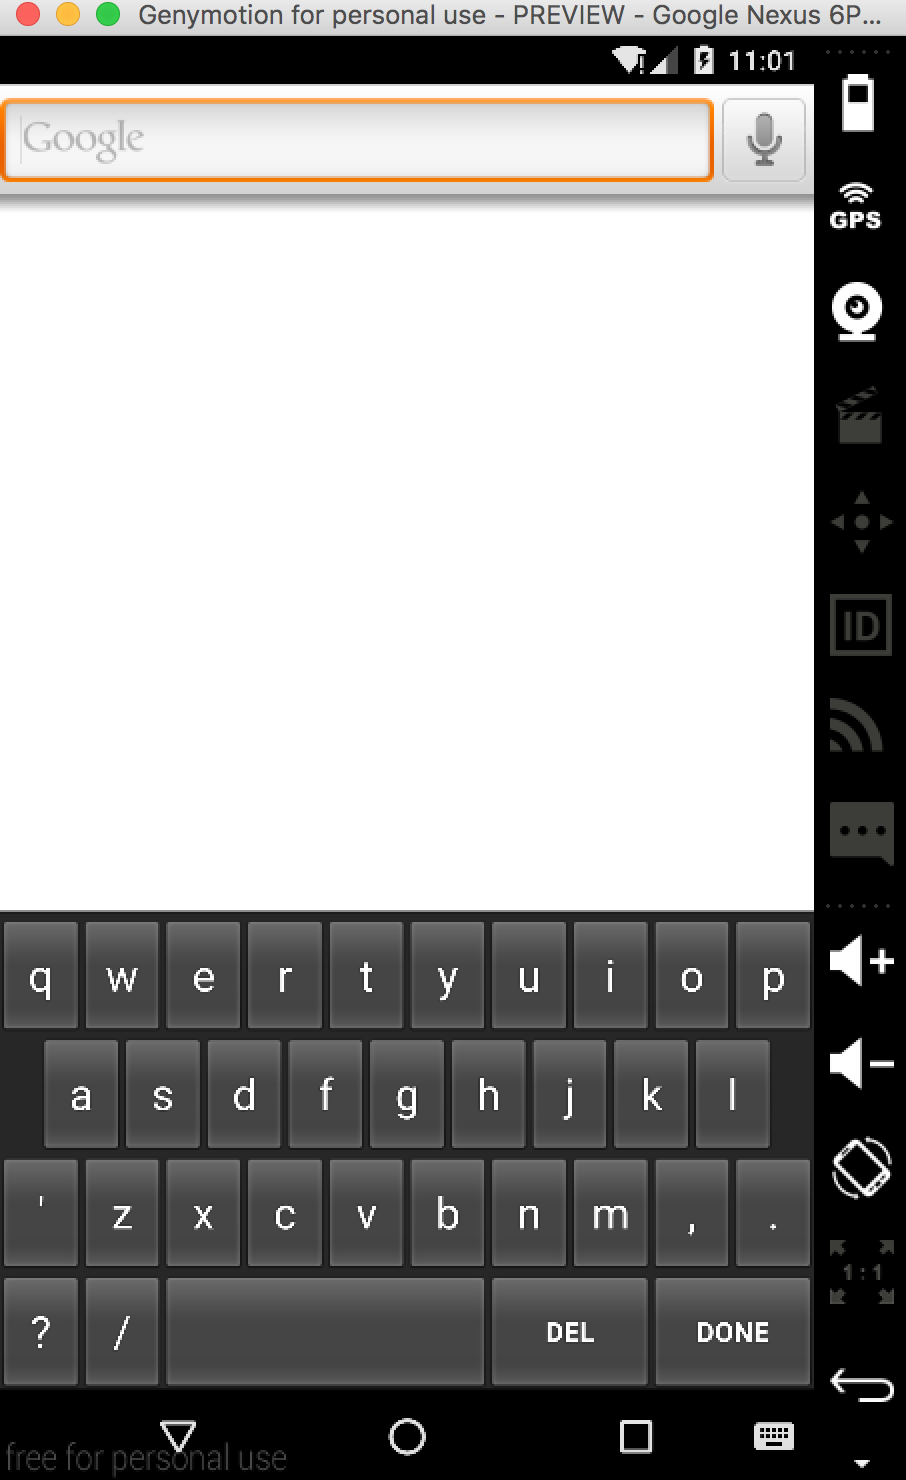
- 7、运行。具体方法参见《SoftKeyboard在AndroidStudio下的配置和运行》,界面如下:
该例程代码可参见https://github.com/palanceli/AndroidXXIME/tree/v1
写一个Android输入法01——最简步骤的更多相关文章
- 写一个Android输入法02——候选窗、转换
上一篇介绍了完成Android输入法的最小化步骤,它只能将按键对应的字符上屏.一般的东亚语言都有一个转换的过程,比如汉语输入拼音,需要由拼音转成汉字再上屏.本文将在前文基础上加入完成转换过程所必需的候 ...
- 为PhoneGap写一个android插件
为PhoneGap写一个android插件,要怎么做? 其实这句话应该反过来说,为android写一个PhoneGap插件,要怎么做? 这里以最简单的Hello World!为例,做个说明: 1.第一 ...
- 教你写一个Android可快速复用的小键盘输入控件
引子 在Android项目开发中特别是一些稍大型的项目,面对需求文档的时候你经常会发现很多地方用到了同样的组件,但是又略有不同.比如这个: 右边是一个小键盘输入板,左边当焦点不同的时候分别用右边的小键 ...
- 手写一个Web服务器,极简版Tomcat
网络传输是通过遵守HTTP协议的数据格式来传输的. HTTP协议是由标准化组织W3C(World Wide Web Consortium,万维网联盟)和IETF(Internet Engineerin ...
- 一起写一个Android图片加载框架
本文会从内部原理到具体实现来详细介绍如何开发一个简洁而实用的Android图片加载缓存框架,并在内存占用与加载图片所需时间这两个方面与主流图片加载框架之一Universal Image Loader做 ...
- 【Android开发经验】来,咱们自己写一个Android的IOC框架!
到眼下位置.afinal开发框架也是用了好几个月了,还记得第一次使用凝视完毕控件的初始化和事件绑定的时候,当时的心情是多么的兴奋- -代码居然能够这样写!然后随着不断的学习,也慢慢的对IOC框架和注解 ...
- 假设写一个android桌面滑动切换屏幕的控件(一)
首先这个控件应该是继承ViewGroup: 初始化: public class MyGroup extends ViewGroup{ private Scroller mScroller; priva ...
- 一起写一个Android图片轮播控件
注:本文提到的Android轮播控件Demo地址: Android图片轮播控件 1. 轮播控件的组成部分 我们以知乎日报Android客户端的轮播控件为例,分析一下轮播控件的主要组成: 首先我们要有用 ...
- 写一个android内置android程序
当我们编译完毕android源代码之后,就须要对他做点什么事情,我如今正在看老罗的"Android源代码情景分析"一书.在这里主要是记录一些书中没有说清楚的地方. 相同.我们创建一 ...
随机推荐
- redis client API-----------python
想知道redis针对各种编程语言推荐的接口API实现,请参考http://redis.io/clients/ 选择python语言,则使用https://github.com/andymccurdy/ ...
- 记录启用HTTPS的全过程
因为 https 采用 ssl 加密,所以部署 https 时需要申请证书,证书的作用就是对浏览器和Web服务器双方的身份验证. 步骤1:申请证书 我们采用Let's Encrypt签发的免费证书,虽 ...
- 获得Oracke中刚插入的ID ---> GetInsertedID()
(1)首先 需要创建序列: CREATE SEQUENCE SE_TD_POWER MINVALUE 1 NOMAXVALUE START WITH 1 INCREMENT BY 1 NOCYCLE ...
- Cortex-M0(+)内核的处理器架构简介
Cortex-M0(+)内核的处理器架构简介 2015年03月02日 16:51:12 阅读数:3158 系统架构 Cortex-M0处理器具有32位系统总线接口,以及32位地址线,即有4GB的地址空 ...
- java添加背景图片
总结:我们通常实现添加背景图片很容易,但是再添加按钮组件就会覆盖图片.原因是: 有先后啊.setlayout();与布局有很大关系 请调试代码的时候,仔细揣摩.我晕了 还可以添加文本框,密码框 fra ...
- type命令
用途说明 type命令用来显示指定命令的类型.一个命令的类型可以是如下几种: alias 别名 keyword 关键字,Shell保留字 function 函数,Shell函数 builtin 内建命 ...
- ZOJ 4016 Mergeable Stack(栈的数组实现)
Mergeable Stack Time Limit: 2 Seconds Memory Limit: 65536 KB Given initially empty stacks, the ...
- OpenGL渲染流水线
其实OpenGL的流水线,对我学习来说只能算是一个概念性的东西.毕竟OpenGL也在发展,流水线也不会是一成不变的. 不过理解流水线的过程,重点在于理解每一步的作用,进而可以如何衔接起来,完成整个绘制 ...
- java 多线程系列基础篇(七)之线程休眠
1. sleep()介绍 sleep() 定义在Thread.java中.sleep() 的作用是让当前线程休眠,即当前线程会从“运行状态”进入到“休眠(阻塞)状态”.sleep()会指定休眠时间,线 ...
- byte[] 的toString() 和 new String(byte[]) 的区别
今天在Android上测试压缩和解压缩. 获得压缩后的byte[]数组后,直接用 byte[].toString()方法取得字符串. 然后用这个字符串再反向来解压缩,还原数据.却发现还原回来的字符串有 ...